


Looking for ways to add WooCommerce custom checkout field without coding?
Well, you have landed on just the right blog. In this blog, you will learn how to add WooCommerce extra checkout fields in the easiest way possible.
WooCommerce default checkout page’s form fields may at times feel inadequate to provide a smooth eCommerce checkout experience. As a result, it’s very common to see people looking for ways to add WooCommerce custom checkout field.
While doing raw code is an option, it’s not the most efficient way to add WooCommerce checkout fields.
Well, then what’s the efficient way you must be asking, right?
The answer is using an easy-to-use yet lightweight WooCommerce plugin. And how you can use an awesome WordPress plugin to add WooCommerce custom checkout field is all this blog is about.
So, let’s jump to the main part …
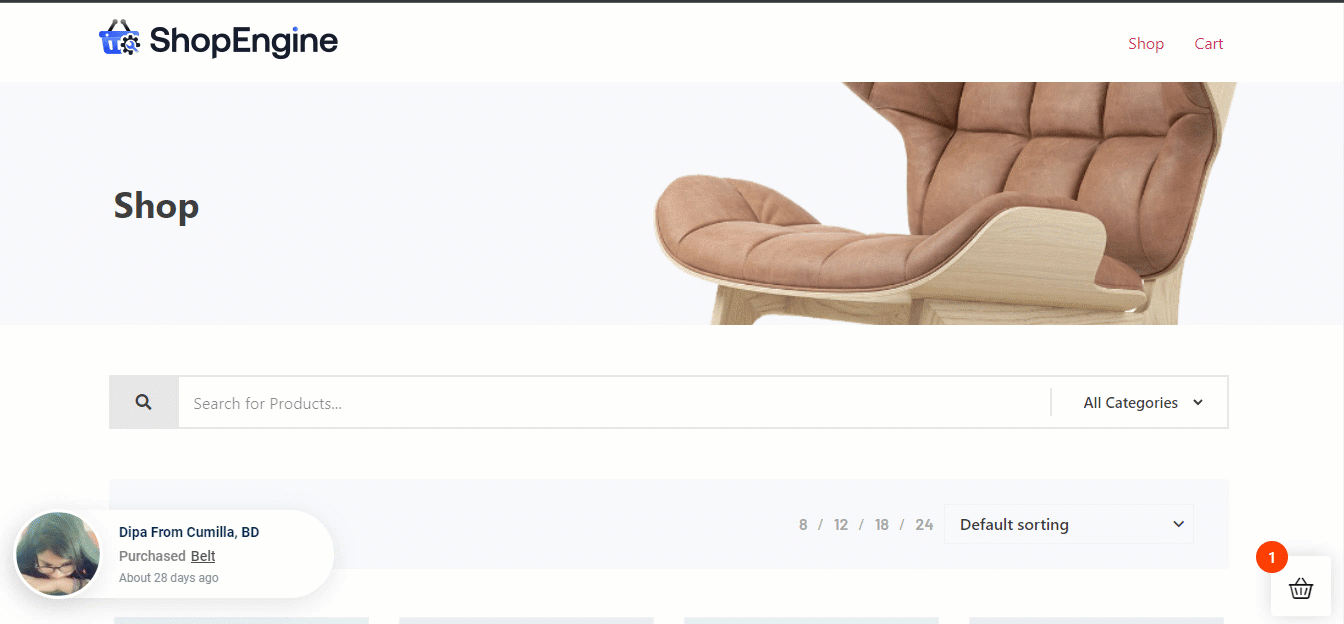
What is a Checkout Page In eCommerce?
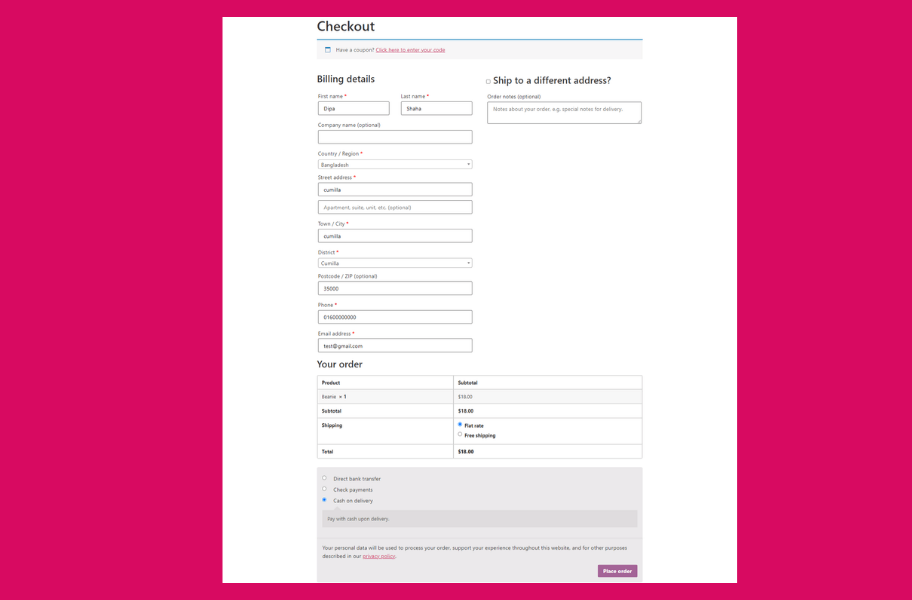
In an eCommerce website, the checkout page basically refers to the page that handles the payment/shipping information to conclude a transaction. It usually has different form fields to collect user information such as billing address, shipping address, payment method, etc.

Why do you need to add a custom field to the WooCommerce checkout page?
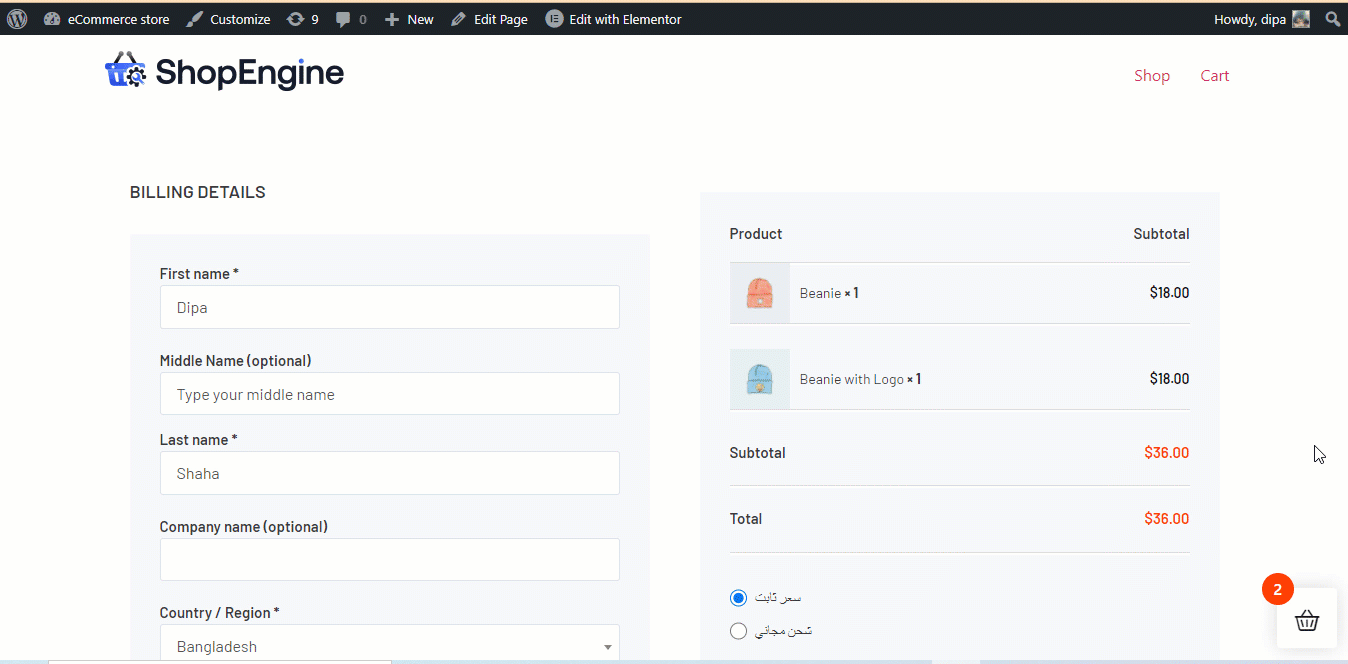
The default WooCommerce checkout template has two form fields, one related to billing and another related to shipping and payment information. All these are basic information that one needs to proceed with delivery.
However, if your customer wants some personalization in their order for example, maybe they want to send the order to a different person as a gift and they want some note written on it. How do they do that?
For this typically they need to call your helpline and it can be a long tiresome checkout process resulting in a bad user experience. But you can change that if you add a WooCommerce custom checkout field.
Another example would be adding a middle name field. Of course, one can always write the middle name in the first name field but having a middle name form field will provide a better user experience with people who have middle names (We all know, there are many!).
Another example could be, that the person giving the delivery wants the product to be delivered at a certain hour of the day. For that also, you can provide a custom field. I am just talking about the options that came to my mind.
But I am sure, being a online store owner, you have had many ideas or needs that a WooCommerce custom checkout field can solve easily. So, making orders more personalized for the consumers as well as making the process of manufacturing and delivery both can be highly beneficial by adding a custom field to your WooCommerce checkout page.
You can also checkout our blog How to Add Currency Switcher to WooCommerce Website in 5 Steps
Required WooCommerce checkout field editor plugins
To add an extra custom field to your WooCommerce checkout page, you need to install and activate the following plugins:
If you need help with the activation of WooCommerce checkout field editor – ShopEngine Pro, you can check out the documentation.
ShopEngine is the ultimate WooCommerce checkout field editor that comes with 13+ modules and 60+ widgets to give you all the control to build your own personalized Woo store. It’s an addon for Elementor page builder, so you need to install Elementor before installing ShopEngine plugins.
Out of the 20+ modules, I am going to use one in this tutorial named “Checkout Additional Field Module ” to add an extra custom field to the WooCommerce checkout page. And here comes the main process…
How to Add WooCommerce custom checkout field : 3 Steps Tutorial
Yes! Adding an extra custom checkout field in WooCommerce is just a 3 steps task if you use ShopEngine. Because this plugin is the best checkout field editor for WooCommerce available. Let’s check the steps in detail so you can follow along easily…
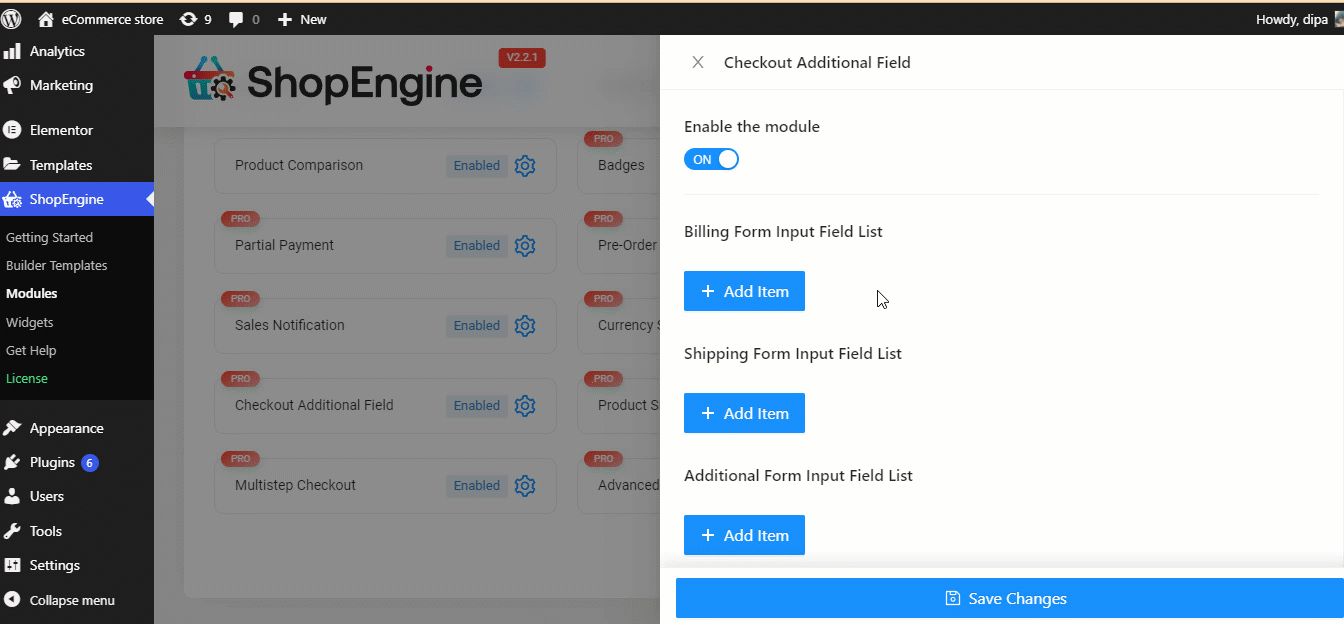
Step 1: Enable Checkout Additional Field Module of ShopEngine
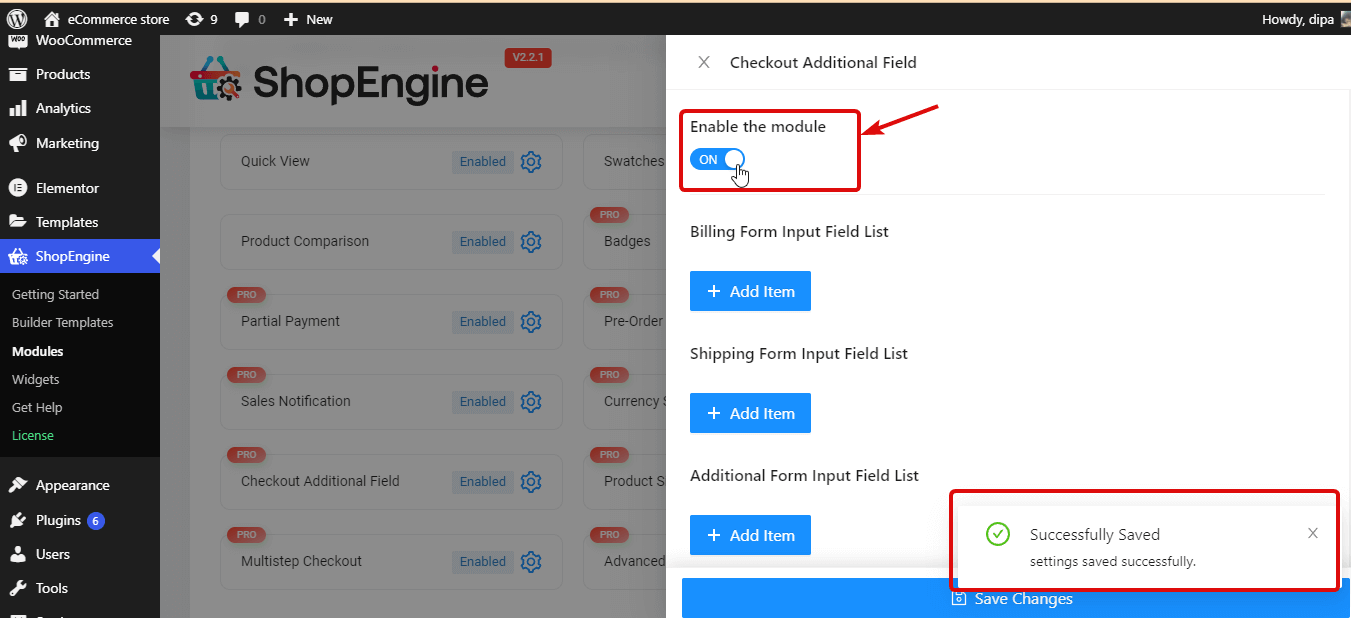
The first step is to enable the Additional Field Module. To enable or activate the module, you need to
- Navigate to ShopEngine ⇒ Modules ⇒ Checkout Additional Field and click on the Settings Icon
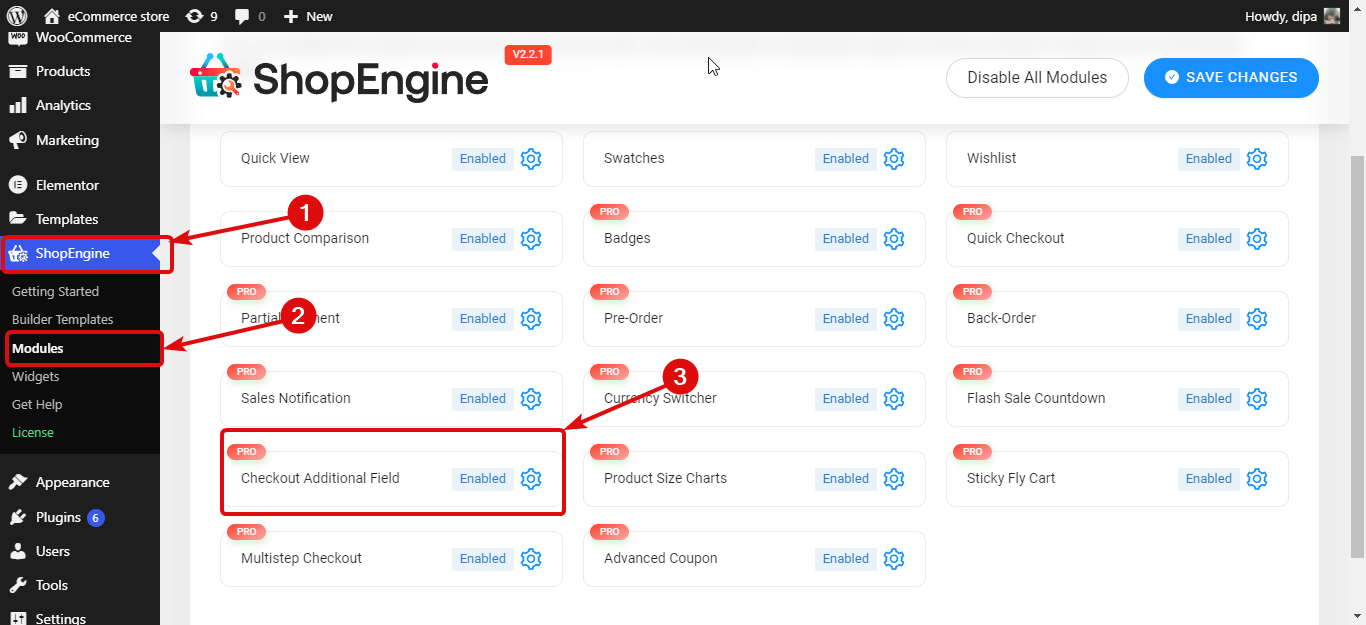
- Turn on the Enable the module option, then click Save changes to update.
👉👉 You can also checkout How To Customize WooCommerce Checkout Page With ShopEngine
Step 2: Add a new custom field to the WooCommerce checkout page
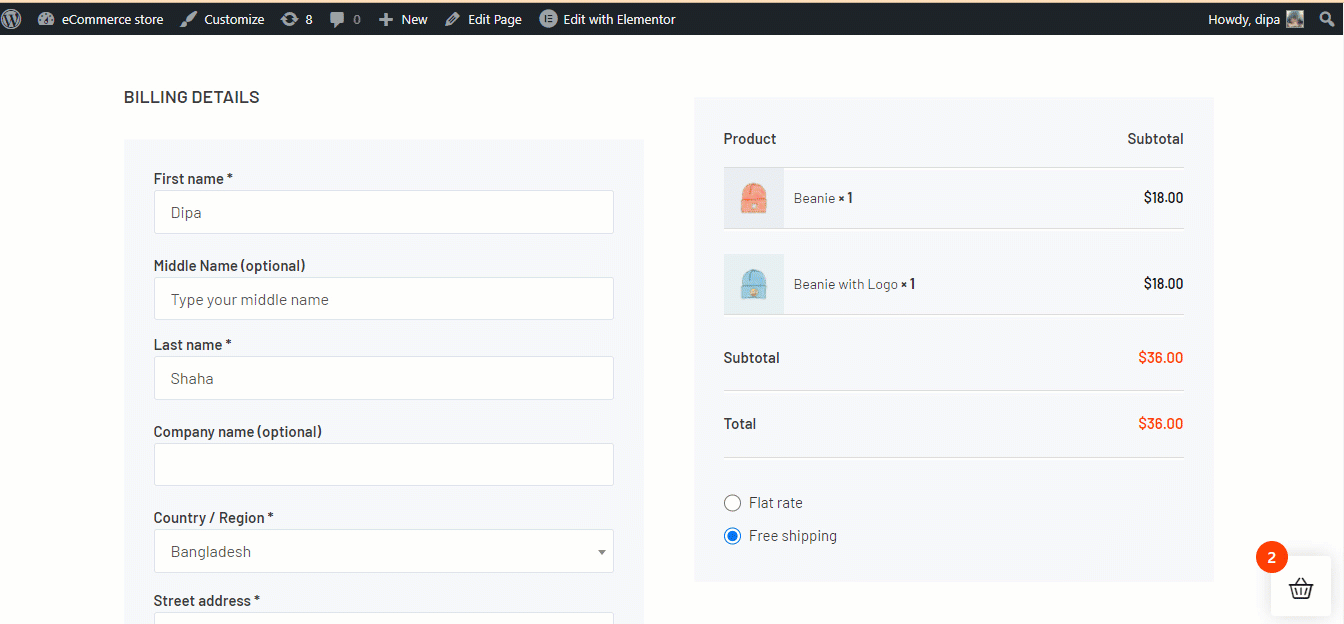
With ShopEngine, you can add a custom field to the following checkout related forms:
- Billing Form Input Field List
- Shipping Form Input Field List
- and Additional Form Input Field List
Checkout Form-Additional is a widget of ShopEnigine that by default adds a text input field where users can add additional personal notes related to the product they are buying or regarding the shipping or any personal note.
The process of adding a custom field to any of the form field lists is the same. You can follow the same process to add custom fields to all the forms and as many fields as you want.
Note: You must use the form in your checkout page template for which you want to add a custom field.
Here are the steps you need to take to add a single custom field to your WooCommerce checkout page. To add any form field click on the + Add Item below that form name and add the following field:
- Label: Provide a suitable title
- Type: Choose the type of field you want. You can choose types like Text, Number, Email, Text Area, Date, Time, URL, check box, etc.
- Name (Unique Key): Give a unique name as it will be considered a unique key. Make sure there is no space between and no special character. And always make sure you give a unique name for each field you create.
- Placeholder: Write the text for the placeholder.
- Options (Only For Radio Type): This option is only required if you choose a field type Radio. You need to add all the radio button values in the “value= option” pattern separated by “,”. For example; 0=Yes,1=No or M= Male, F= Female.
- Required: Choose if you want to make this field required or not.
- Position (After): Select the position of the field.
- Custom CSS Class: You can add any custom CSS class here if you want to.
You can see the process below, repeat the same process to add multiple extra fields to your WooCommerce checkout page.
Step 3: Save and See the preview
Now click on save changes and update the checkout page with the extra custom checkout fields. You can place a test order to see the updated checkout page in action.
Note: I have added another extra field to the Shipping Form Input Field List. If you do the same, you must ensure you use the Shipping form widget in your WooCommerce checkout template.
👉👉 You can also check out How To Customize WooCommerce Cart Page With ShopEngine
How to edit/delete extra checkout fields in WooCommerce
Now, what if you add an extra custom field but you want to update some information or maybe delete a custom field forever. How do you do that?
Well, just like creating a new field, editing, and deleting extra checkout fields in WooCommerce is also super easy with ShopEngine. Let’s check out how:
Steps you need to follow to edit WooCommerce custom checkout field:
To edit an existing WooCommerce custom checkout field:
- Navigate to ShopEngine ⇒ Modules ⇒ Checkout Additional Field and click on the Settings Icon
- Click on the field to expand
- Now update any information you want (I am making the Middle Name required just to show you the process)
- Finally, click on Save changes to update
Steps to Delete extra checkout fields in WooCommerce:
To edit an existing WooCommerce custom checkout field:
- Navigate to ShopEngine ⇒ Modules ⇒ Checkout Additional Field and click on the Settings Icon
- Click on the field to expand
- Now update any information you want
- Finally, click on Save changes to update
👉👉 You can also check out How To Customize WooCommerce Category Page With Coding
Why Choose ShopEngine as your Checkout Field Editor for WooCommerce?
Some reasons why you should pick ShopEngine over other plugins as your checkout field editor for WooCommerce include:
- As this is an all-in-one WooCommerce solution, you won’t need multiple plugins
- An extremely easy-to-use plugin to add extra WooCommerce checkout fields
- This WooCommerce builder is compatible with both Elementor page builder and Gutenberg
- The team provides top-class support so you won’t have to struggle with technical difficulty
- Comes with other essential eCommerce features like a Preorder, Backorder, Partial payment, Flash sale, etc.
Final Words About Extra Checkout Fields in WooCommerce
I hope you got what I had promised at the beginning of this blog, which is to provide you with the easiest way to add WooCommerce custom checkout field.
I have shown you how to add new field along with the steps to edit and delete existing fields on your WooCommerce checkout page. Do feel free to replicate the same process to add the custom fields you need for your specific eCommerce site.
ShopEngine is the Ultimate checkout field editor plugin for WooCommerce that lets you do many things besides adding a custom field to the checkout page. You can custom build all the WooCommerce pages such as Shop page, Account page, Cart page, Thank You page, etc.
So, don’t waste your time and energy on any substandard plugins, rather grab your piece of ShopEngine today and build your WooCommerce store with the utmost flexibility.
Leave a Reply