EmailKit integrates with MetForm to customize the form confirmation email.
When you create a WordPress form with MetForm, it can send an automated confirmation email to the user on each form submission. With the integration, you can now customize this email with EmailKit.
Plugins requis :
- Kit de courrier électronique : Télécharger le plug-in [To customize email for one single form]
- EmailKit Pro: Obtenez le plugin [To customize email for plusieurs formulaires]
Since this is an integration with MetForm, you will also need to have the Plugin MetForm installed and activated sur votre site Internet.
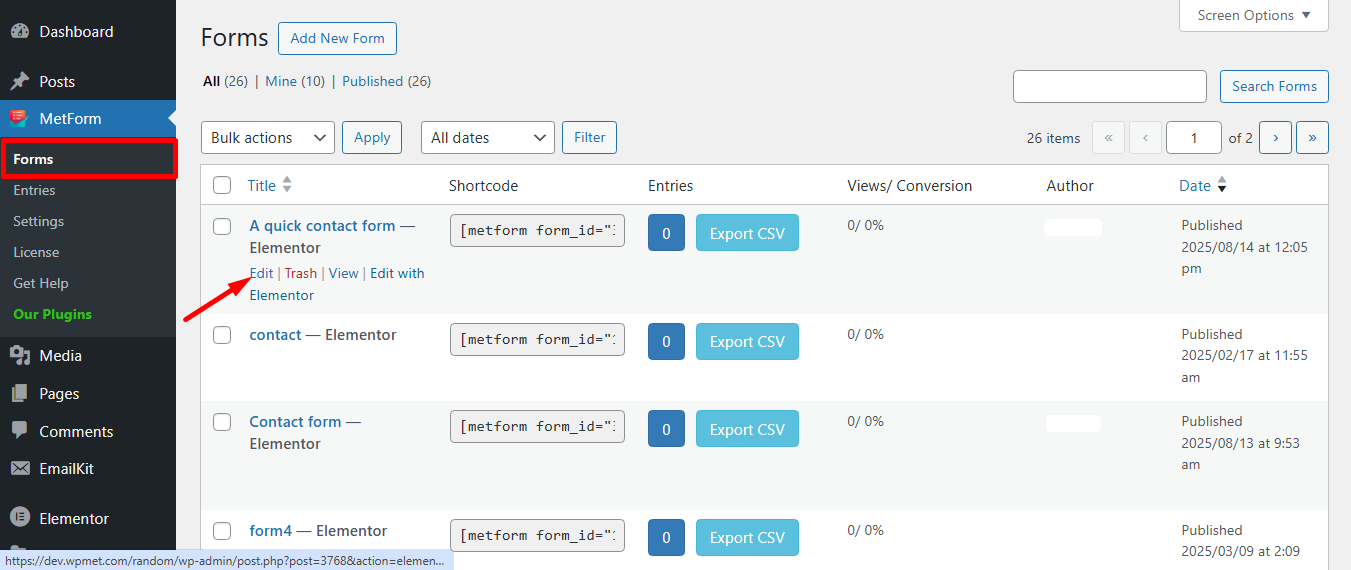
Step 1: Create a form with MetForm #
First of all, create a form using MetForm and publish it. To create a new form check out this: documentation for creating forms with MetForm. Then you have to edit the form.
Or, you can also edit any existing form.
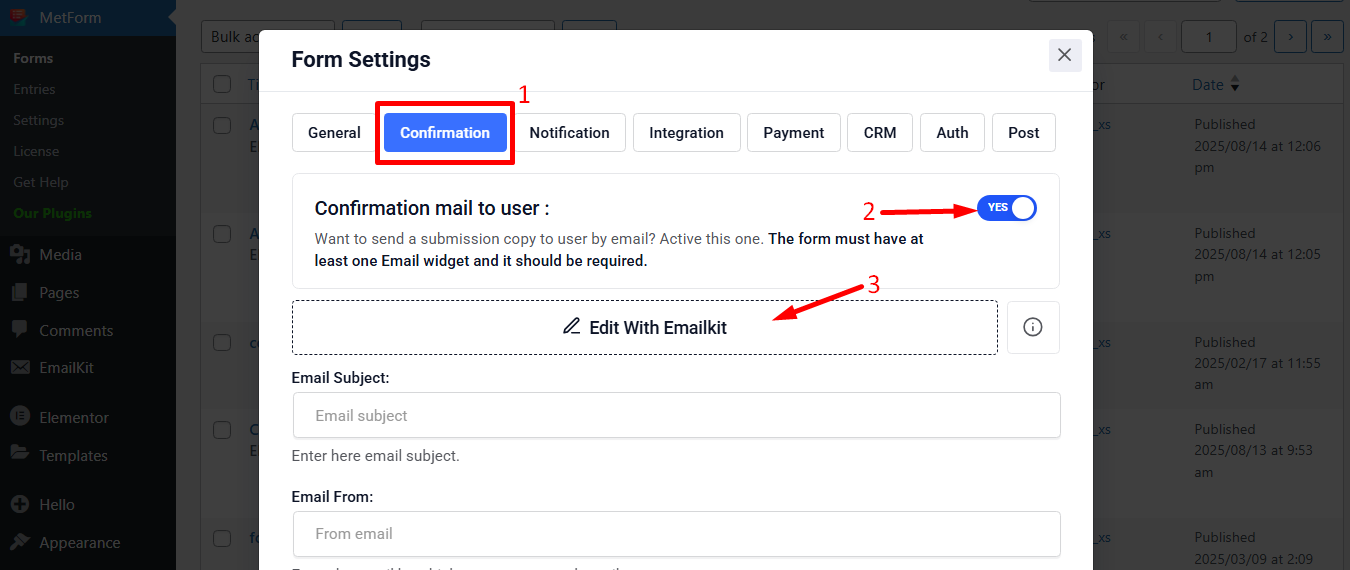
Après avoir cliqué sur le Edit option, Form Settings window will be appeared:
- Déplacer vers le Confirmation tab
- Activer E-mail de confirmation à l'utilisateur
- Clique sur le Edit With EmailKit
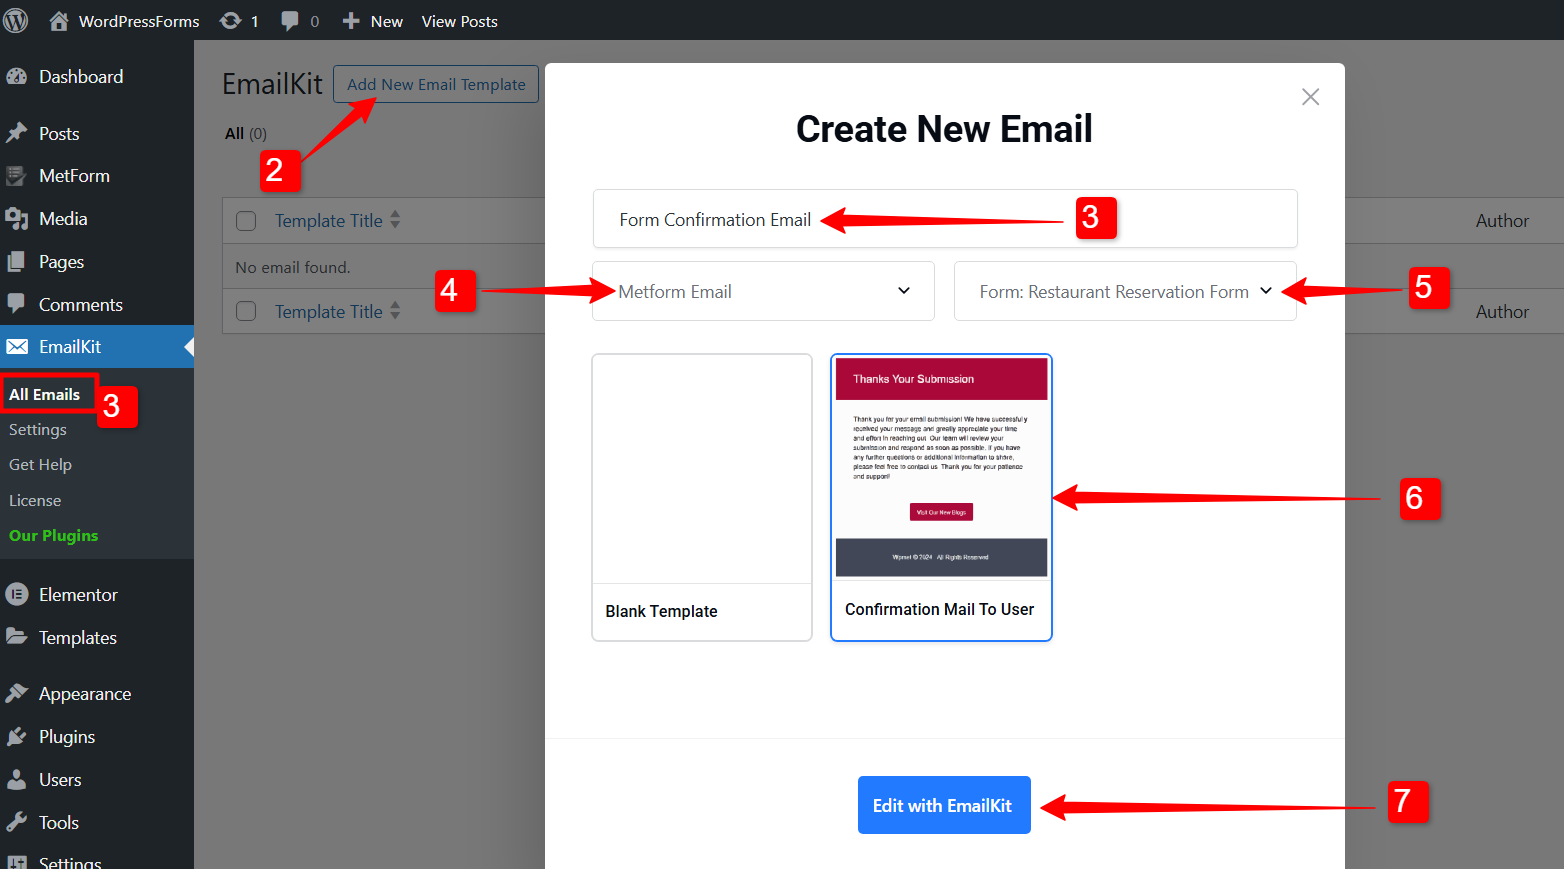
Step 2: Add a new email template for form confirmation #
Now you have to add a new email template for the form confirmation email. For that,
- Aller vers EmailKit → All Emails depuis le tableau de bord WordPress.
- Clique sur le Add New Email Template button there. A pop-up window will appear.
- In that window, enter Nom du modèle.
- Met le email type à “Metform Email”.
- Alors, select a form created by MetForm
- Choisis un modèle for the email. You can either choose a pre-designed one or start from scratch with a blank template.
- Enfin, cliquez sur le Modifier avec EmailKit button to start customizing the email template.
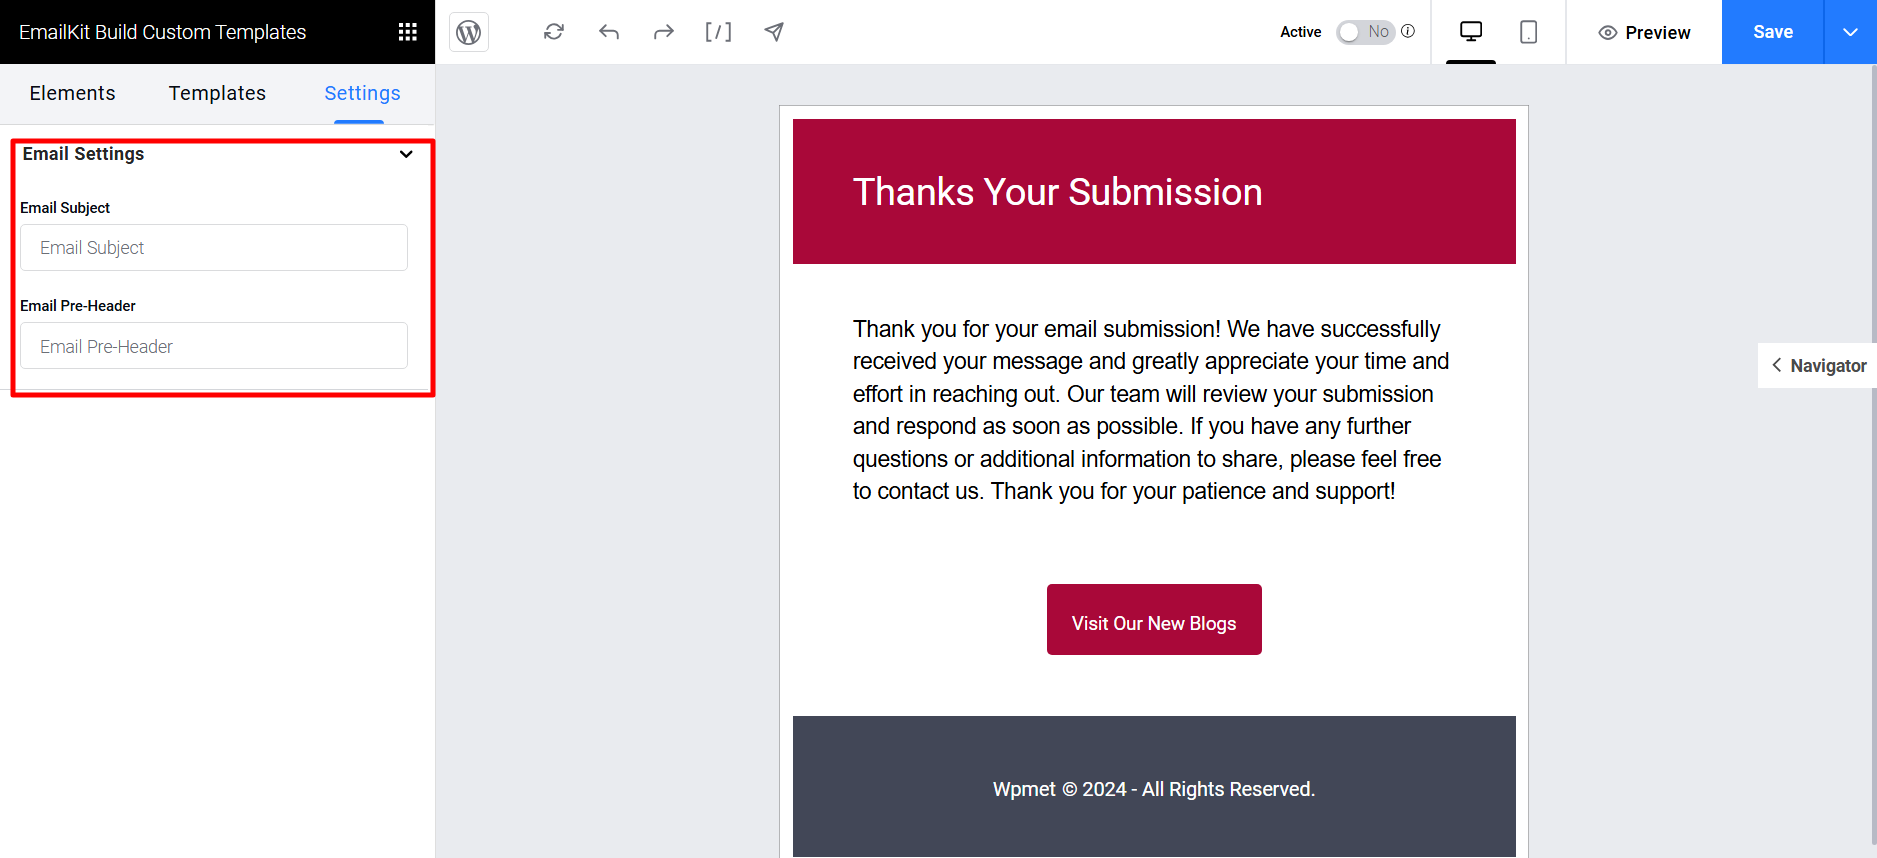
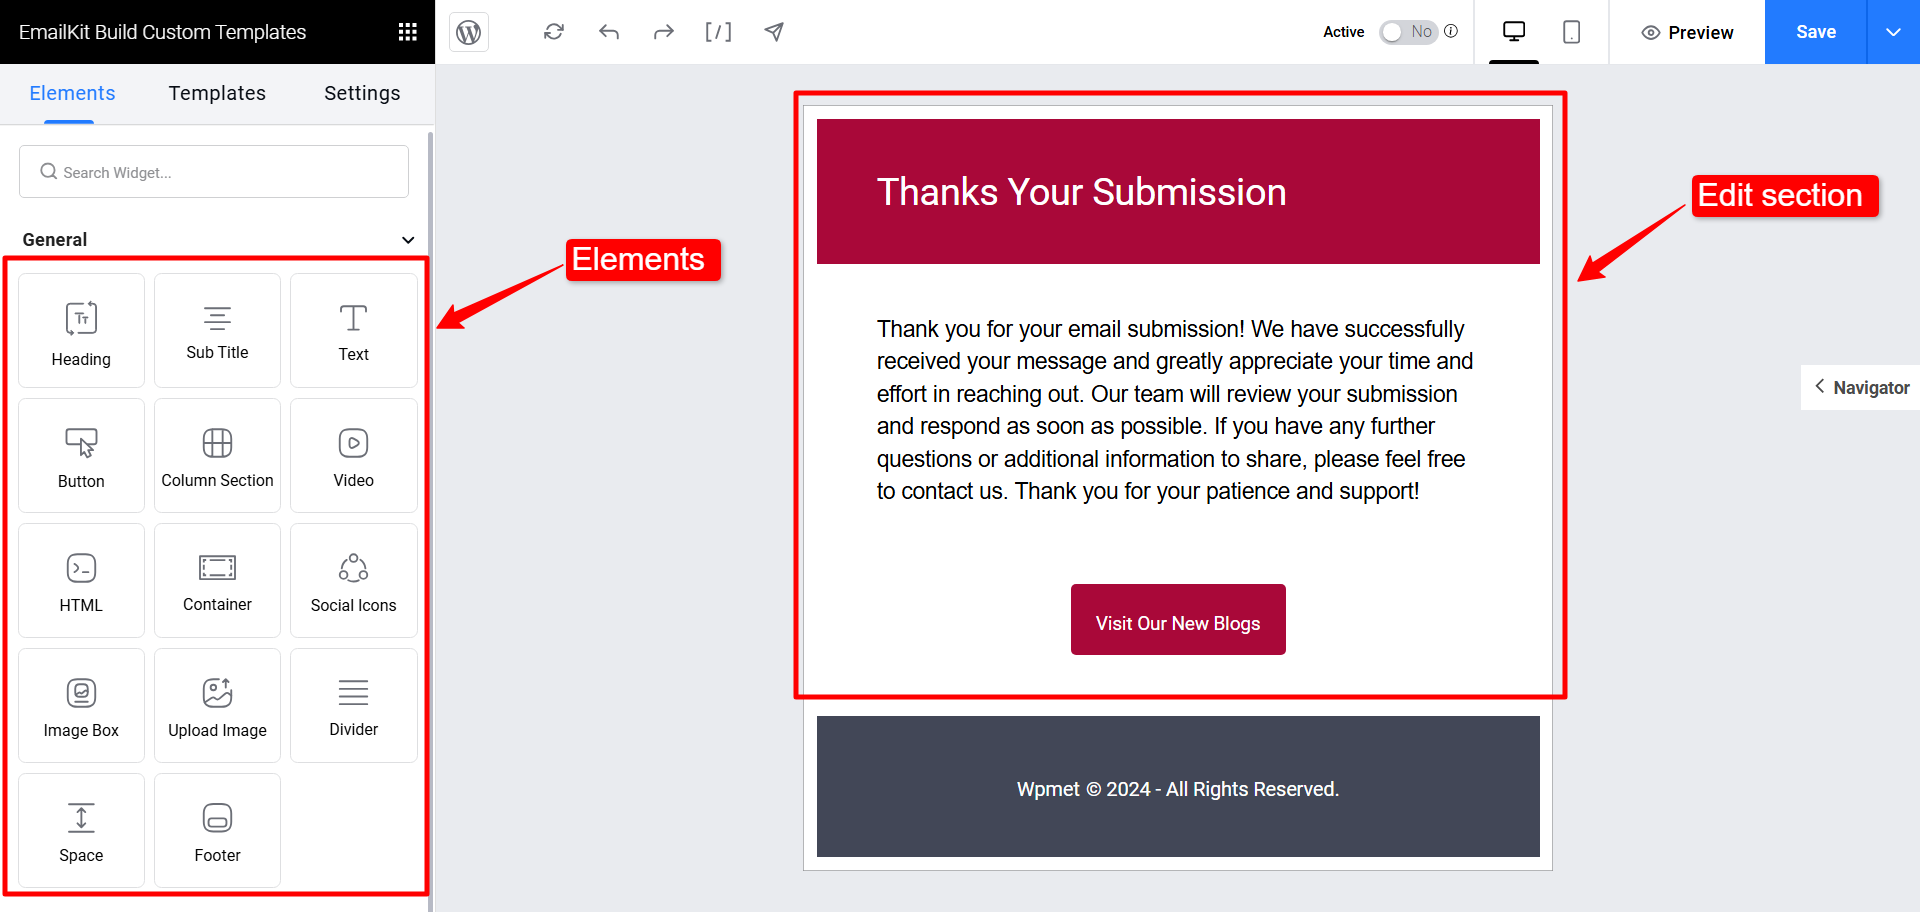
Step 3: Customize the form confirmation email template #
In the editor, you can design the form template. On the left side bar, it has the elements that you can use to build the form template. Drag and drop the elements into the edit section, where you can add and change the content of your emails.
Learn the detailed process of creating an email template in the EmailKit interface from ce document.
Dans le paramètres tab, you can enter the Email Subject and Email Pre-Header for your form confirmation email.