

Images and videos always make websites more engaging. But, a hotspot image in your WordPress website can break all previous records of using normal images. Hotspot images contain clickable areas that will offer your site visitors more information. Before creating an image hotspot was not that easy.
Luckily, now with the help of awesome WordPress addons, creating an image hotspot has become super easy. It has become even the easiest because of the ElementsKit addon.
Here in this article, we will disclose how easily you can create hotspot images with the ElementsKit. You will also learn how to create interactive image maps. Not only image maps but also you can create any hotspot image after reading this article.
What is an interactive image hotspot in your WordPress website?

Hotspot images are interactive images that contain hotspot icons on the image. These hotspot icons contain popup windows or tooltips that contain texts, images, links, etc.
Creating interactive images will help you to provide more info through clickable areas. When you will Simply add a hotspot icon on a WordPress hotspot image, it will draw the attention of your visitors.
Besides, your users or visitors will want to spend more time on your site because of eye-catching and informative photos. As a result, you will see an impressive improvement in your bounce rate and conversion rate because of WordPress hotspot images.
Why should you create interactive hotspot images?
Interactive hotspot images in your WordPress site will draw the attention of your visitors and reduce the bounce rate. Even these images can be more effective than videos. You will also find many examples of high-performance hotspot images.
But, you must want to know exactly what benefits you will get from these images. Why should you put extra effort into creating these images?
If you are having these questions then you are certainly not alone. I have faced these questions as well while creating an Elementor hotspot image. Here are the answers to your questions about why you should put extra effort into creating image hotspots:
- Hotspot interactive images will help you to interact with your users more. Using an image on your website is always beneficial. But, it will be more when you use a hotspot image.
- It will help you to provide more info to your visitor. As hotspot images contain clickable areas that contain tooltips or windows. These windows contain photos, texts, links, etc to provide additional information.
- Hotspot images are mobile responsive.
In 2021 Statista has found from one research that,” more than 47 percent website visitors use mobile devices to visit sites in the United States”.
So, you can’t ignore the necessity of a mobile responsive image.
- When you can interact more with your users, you can also hold them on your WordPress site. As a result, the bounce rate of your site will also decrease.
- If you add hotspots to create interactive images, it will increase the user experience and conversion rate of your site. You will see visible improvement for adding hotspot images.
Now after knowing all these benefits, you may have questions.
How to create Hotspot images? What’s the easiest way to create an image hotspot for your site?
Right?
Keep reading to get your solution.
Create interactive hotspot images in your WordPress website with ElementsKit
Adding hotspot images to your website will help you to engage with your visitors more than before. Besides, your customers never get bored engaging with your website content.
Luckily, now you can create interactive images for your WordPress website with ElementsKit without wasting much time. Besides the Image hotspot, you can create Elementor off-canvas menu, image swap effect in WordPress, etc without coding.
Overall, ElementsKit is an all-in-one addon for Elementor that offers 90+ widgets, 791+ blocks, 98+ ready-made homepages, and many more. Moreover, it offers free widgets, pro widgets, and advanced modules that will take your site customization to a level that you can’t imagine. You can even make interactive hotspot images in a few minutes.
Wishing to learn more about ElementsKit?
Then read ElementsKit: The best add-on for Elementor article.
By using the ElementsKit widget, you can create interactive image hotspots in eight easy steps. Feeling excited about how you can do this?
Let’s dive in.
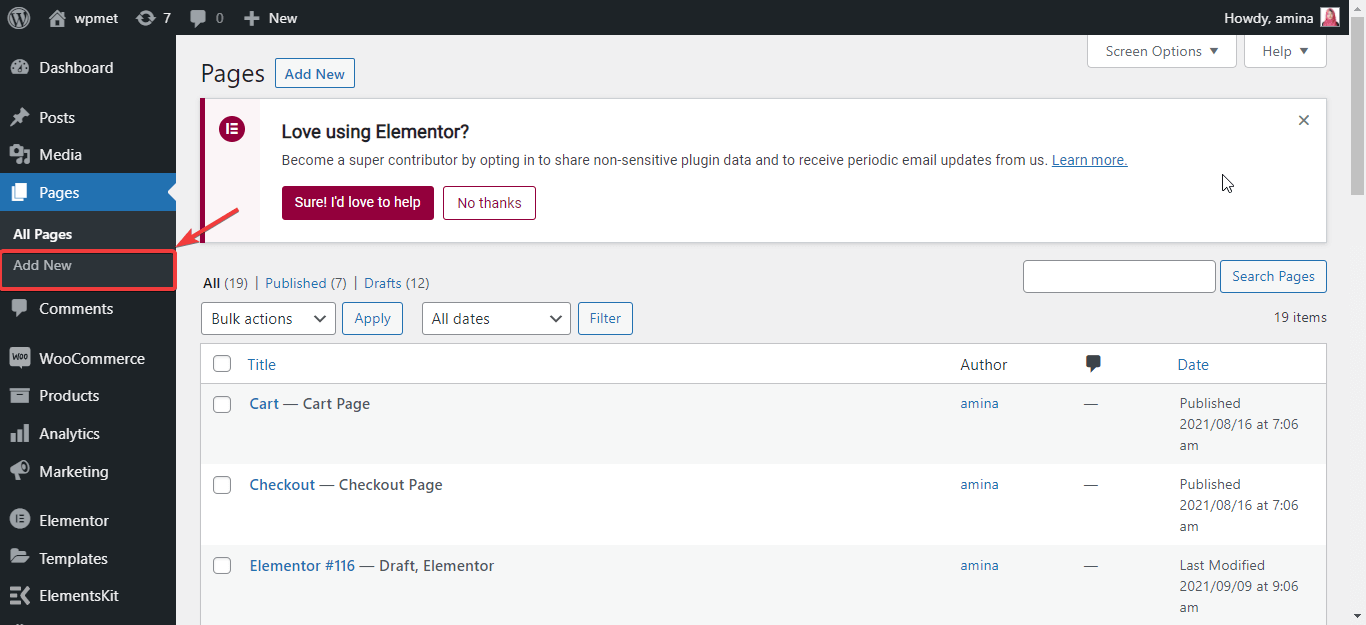
Step 1: Edit a new page with Elementor for creating interactive images.
First, you need to install and activate ElementsKit. Then, go to your WordPress dashboard and visit pages>> add new to create an interactive image hotspot.
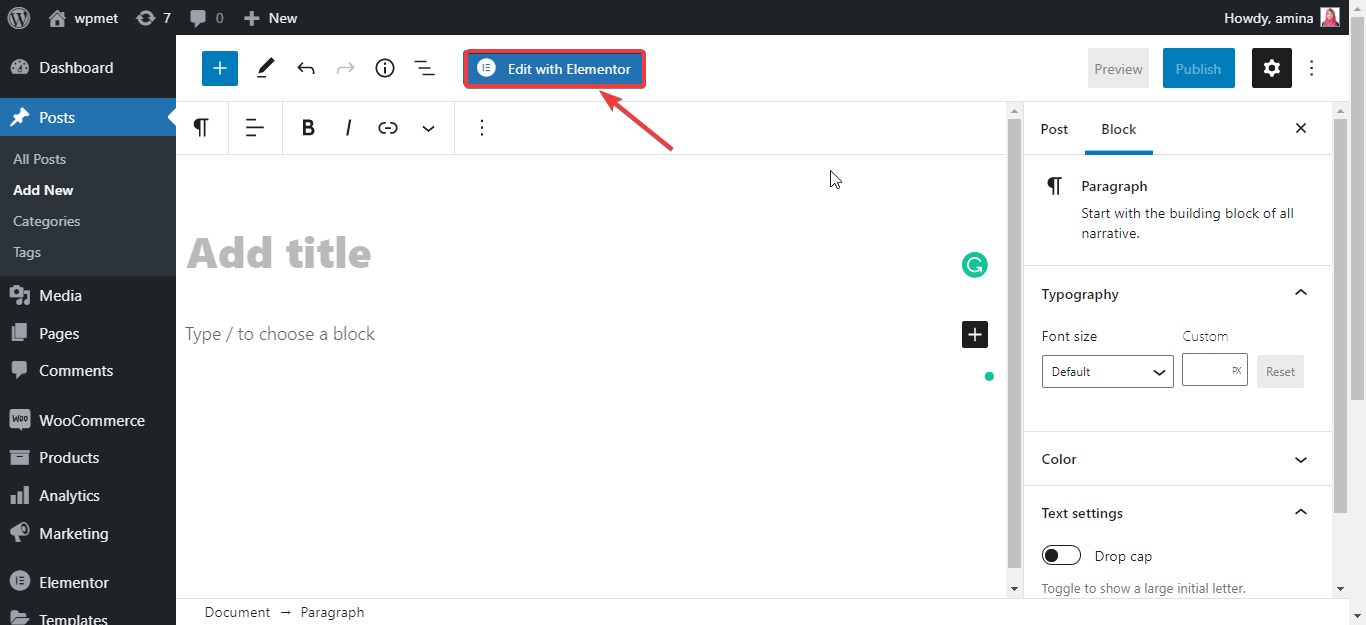
After that, click the edit with Elementor button to create a new hotspot image.
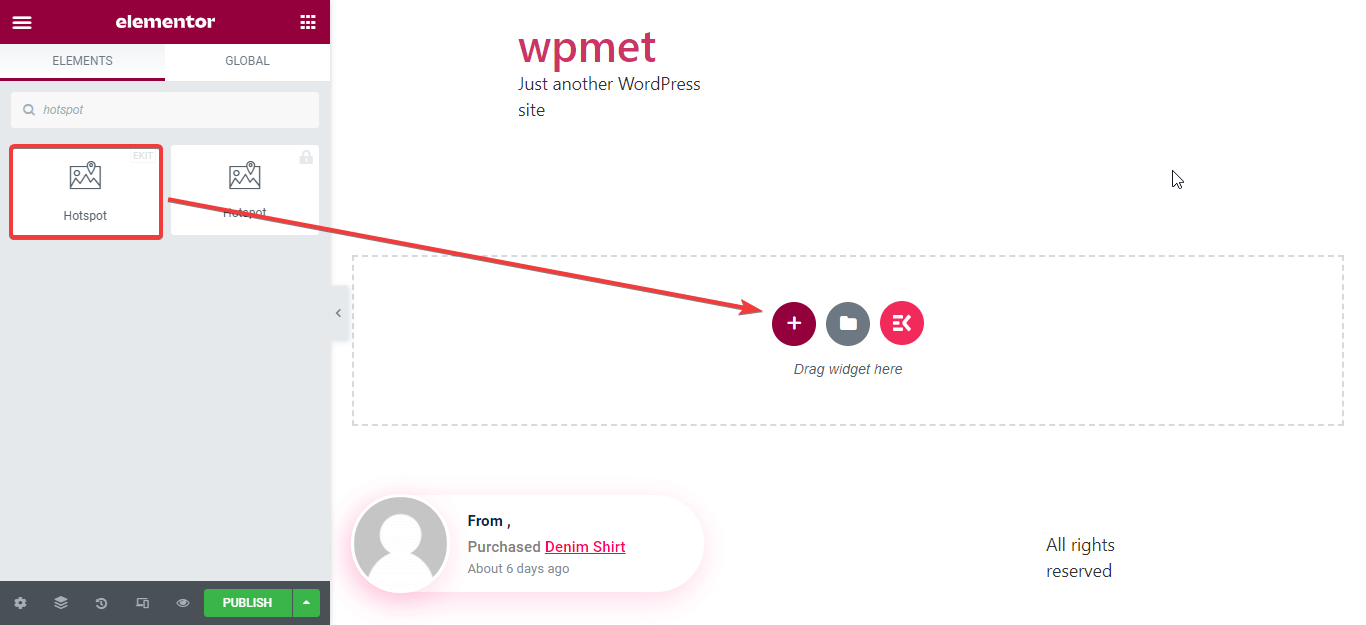
Step 2: Search and select the hotspot widget.
In this step, you need to search for a hotspot widget in the widget search box.
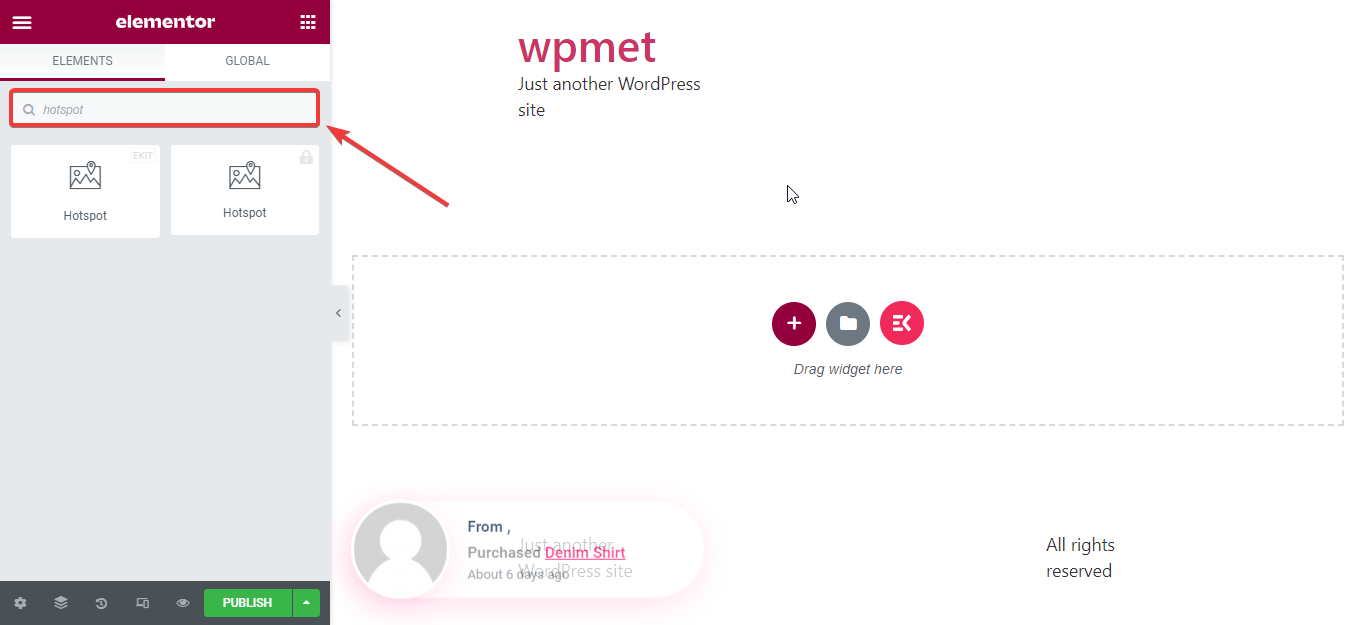
Now, drag the hotspot widget and add it to the new section like the picture.
Step 3: Edit the Content of Your Image Hotspots.
After adding the hotspot widget now it is time to edit the content of the widget. For it, choose the style and background image from your WordPress media library or computer. I am using google maps image here. Now upload it.
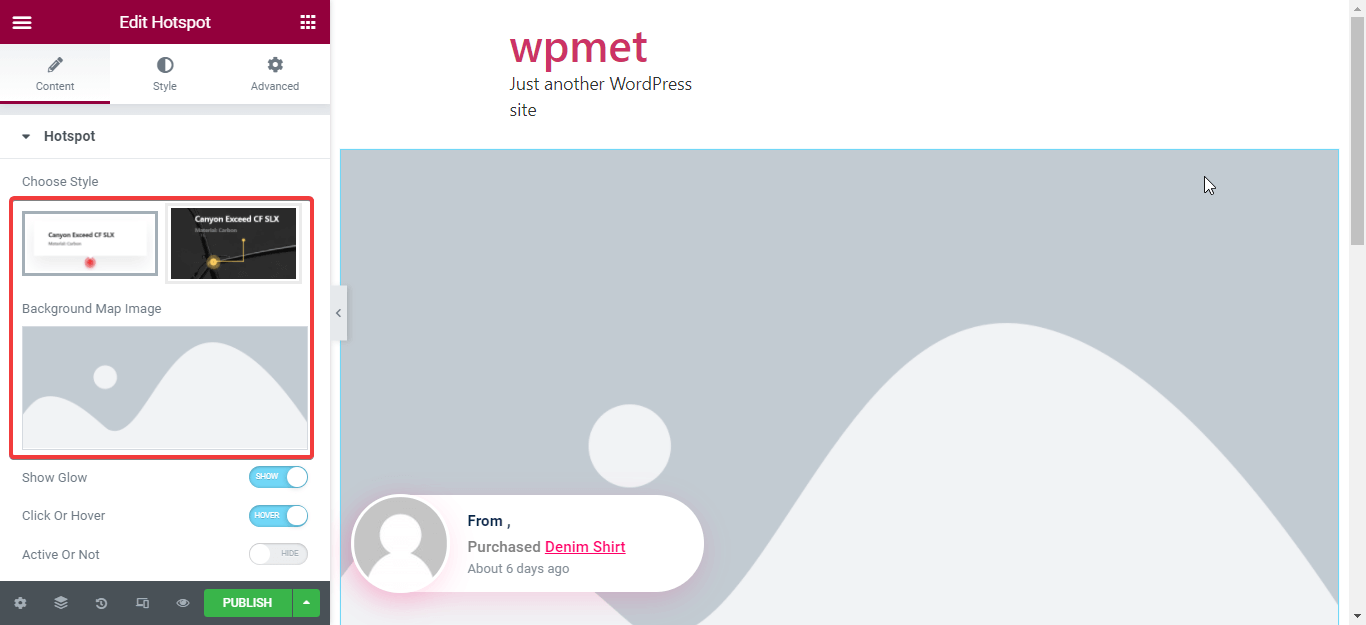
You can also edit the following stuff with the ElementsKit hotspot widget:
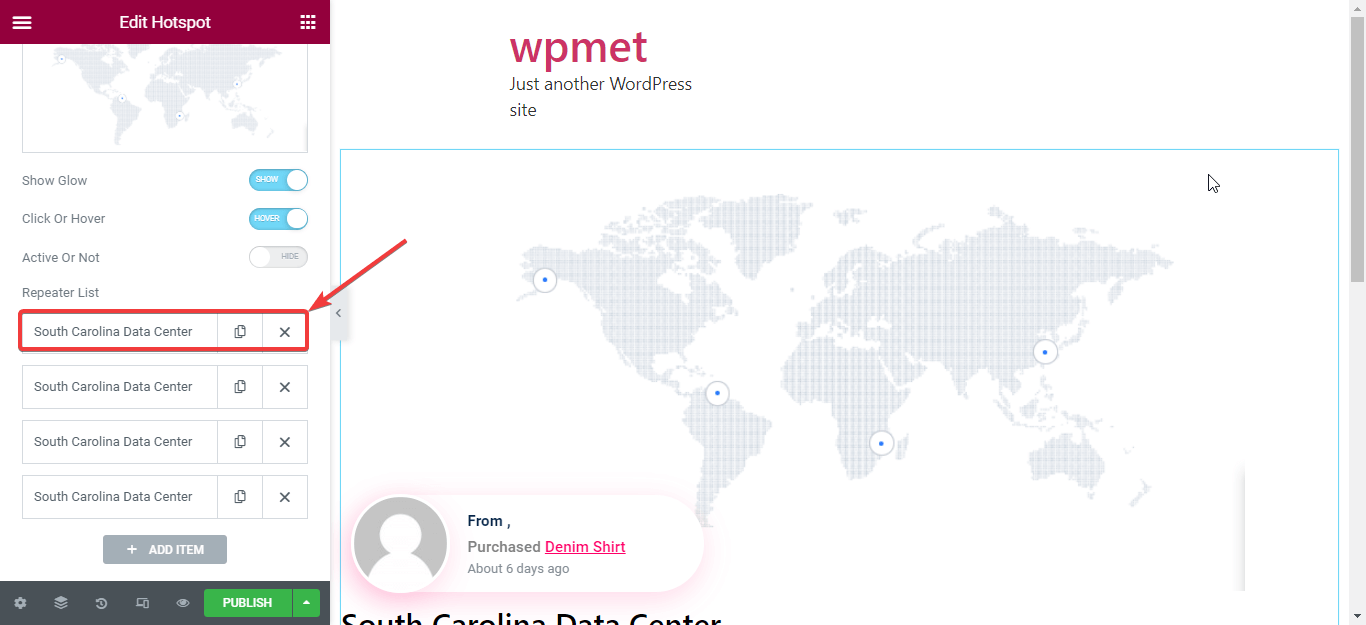
- Show glow: You can show and hide the glow that is appearing around the pointer.
- Click or hover: This option will help you to decide, you want your tooltips to appear on click or hover. If you choose hover then your tooltips will display on hover or it will display on click when a user clicks on the hotspots.
- Active or not: You can also show or hide all tooltips with this option.
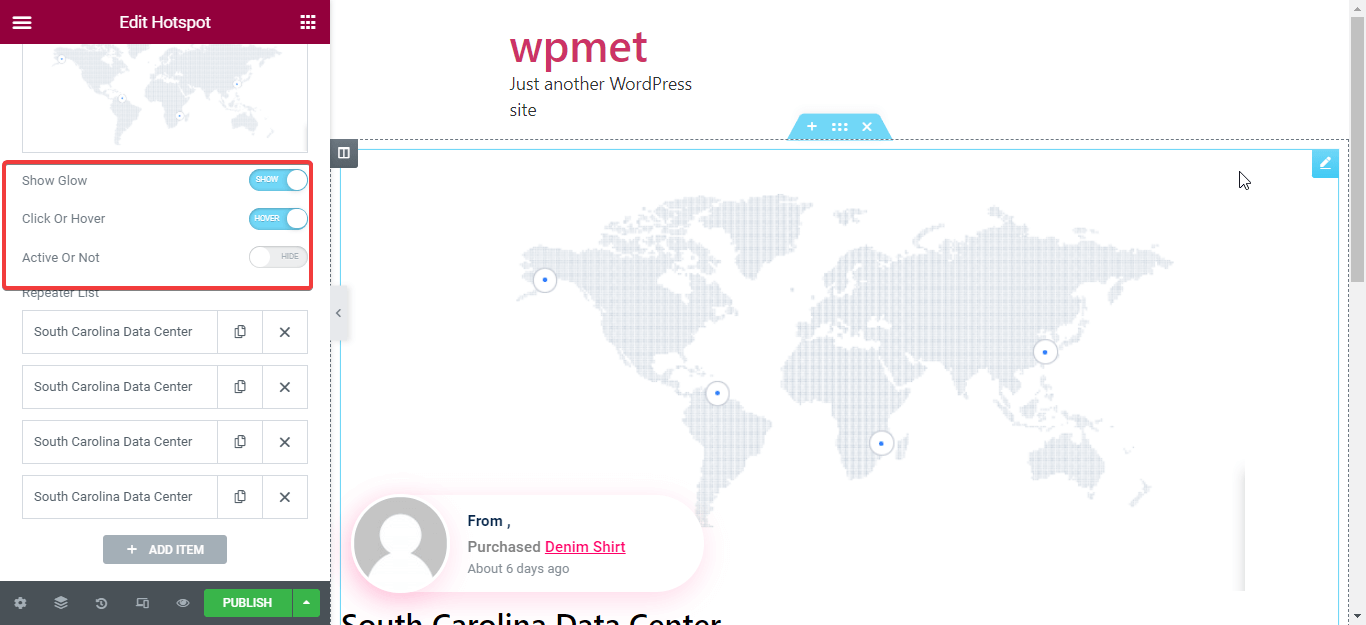
After editing the above stuff, add a tooltip for your hotspot image map. To do it, click the box that is marked in the picture.
Now you have to add a title and description for your tooltip. For doing it, insert a title and description for your tooltip.
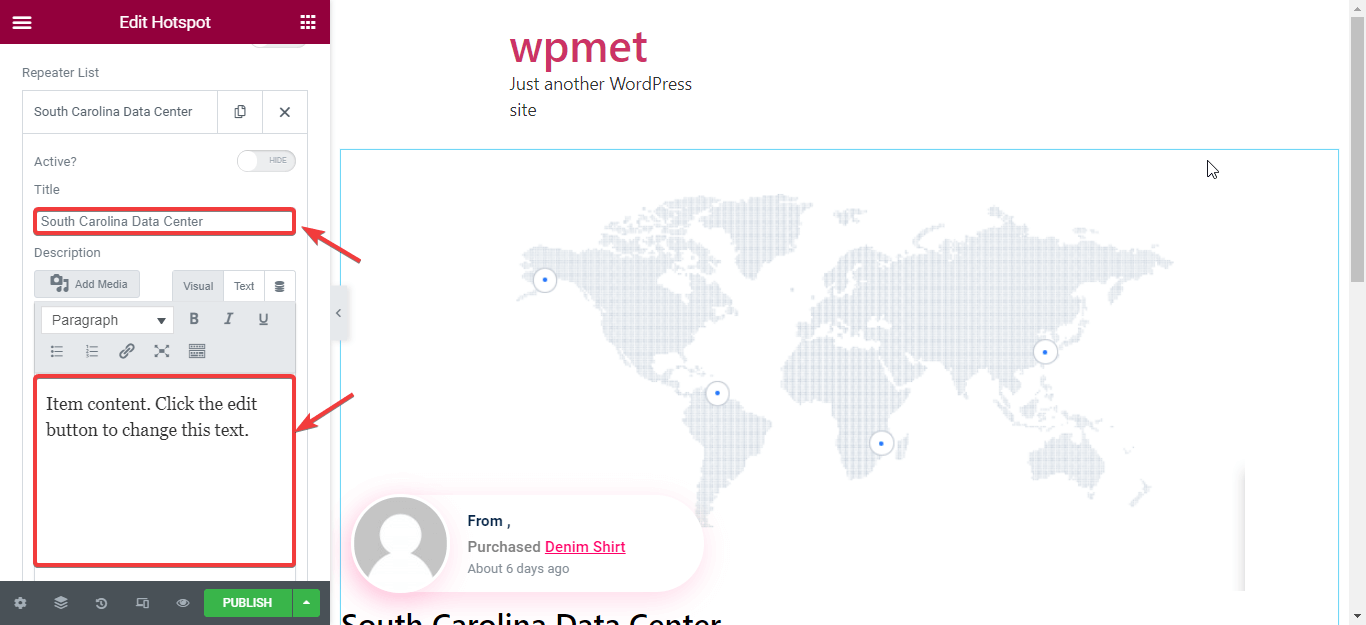
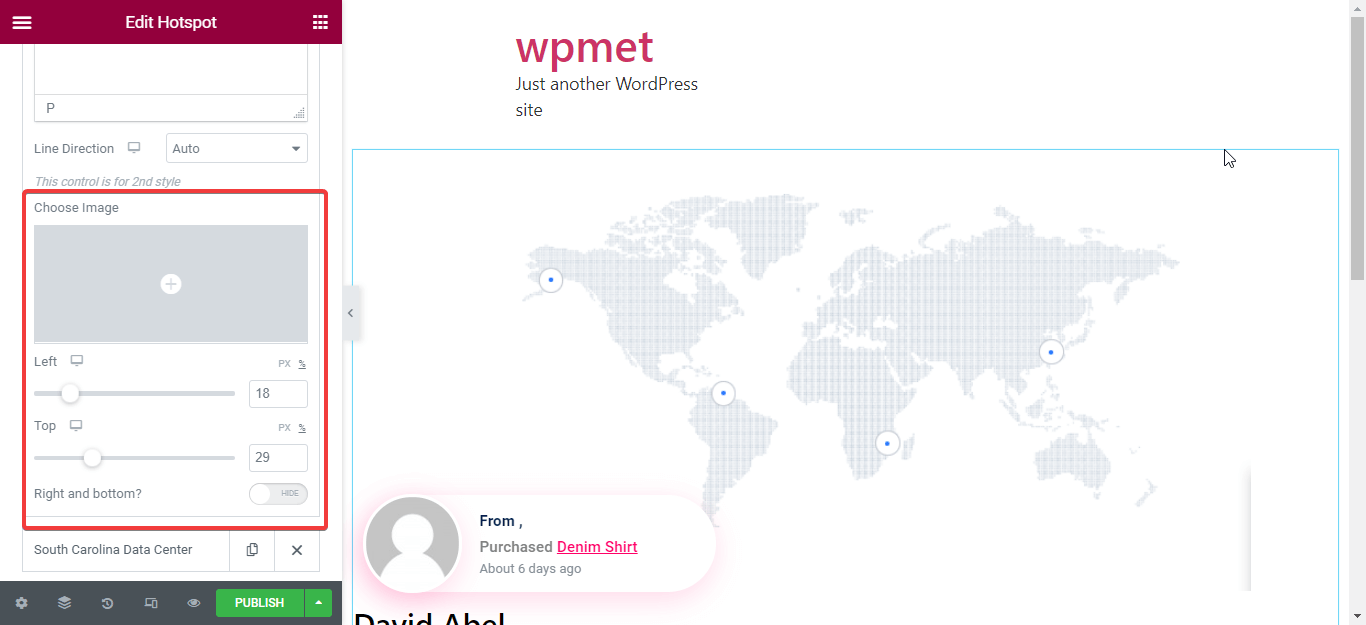
After that, add a suitable image for your tooltip. It can be any image.
Now you need to adjust the tooltip position. You can move your pointer from left to right or top to bottom using the following option. Set the pointer. You can also add more hotspots by clicking the add item button.
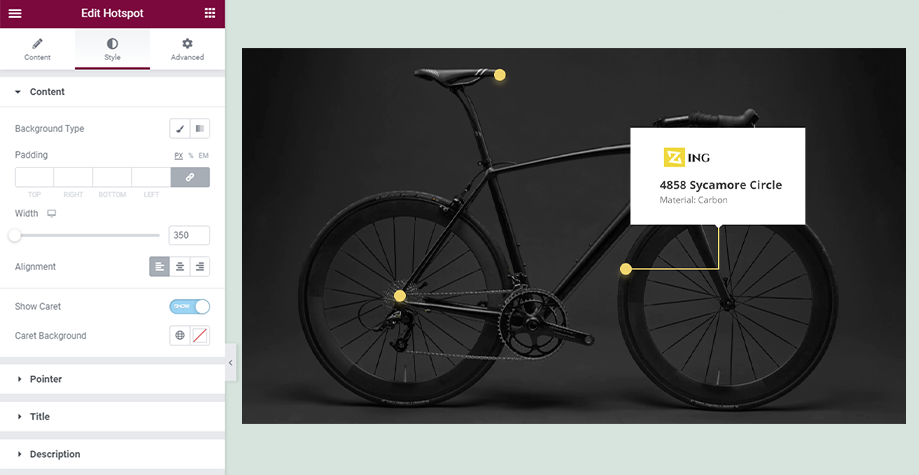
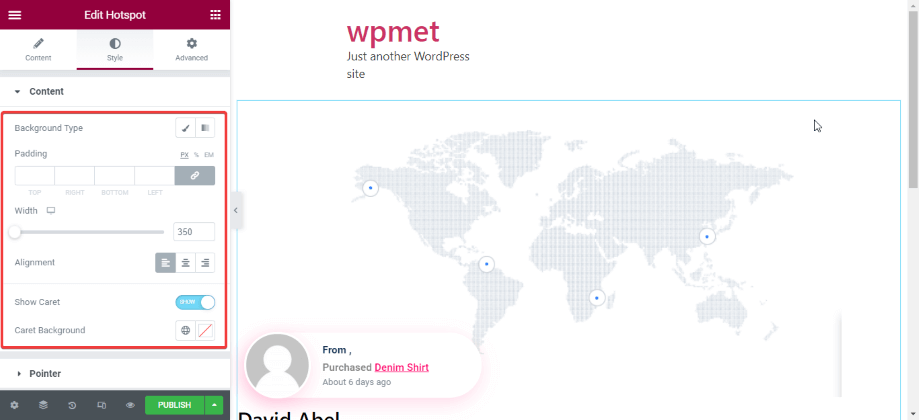
Step 4: Customize the style of the content of the image hotspot WordPress.
In this step, you have to edit the style of your hotspot content. Choose appropriate background color, and image to change the default content style of your Elementor hotspot image. Now, set padding, width, and alignment for your default content.
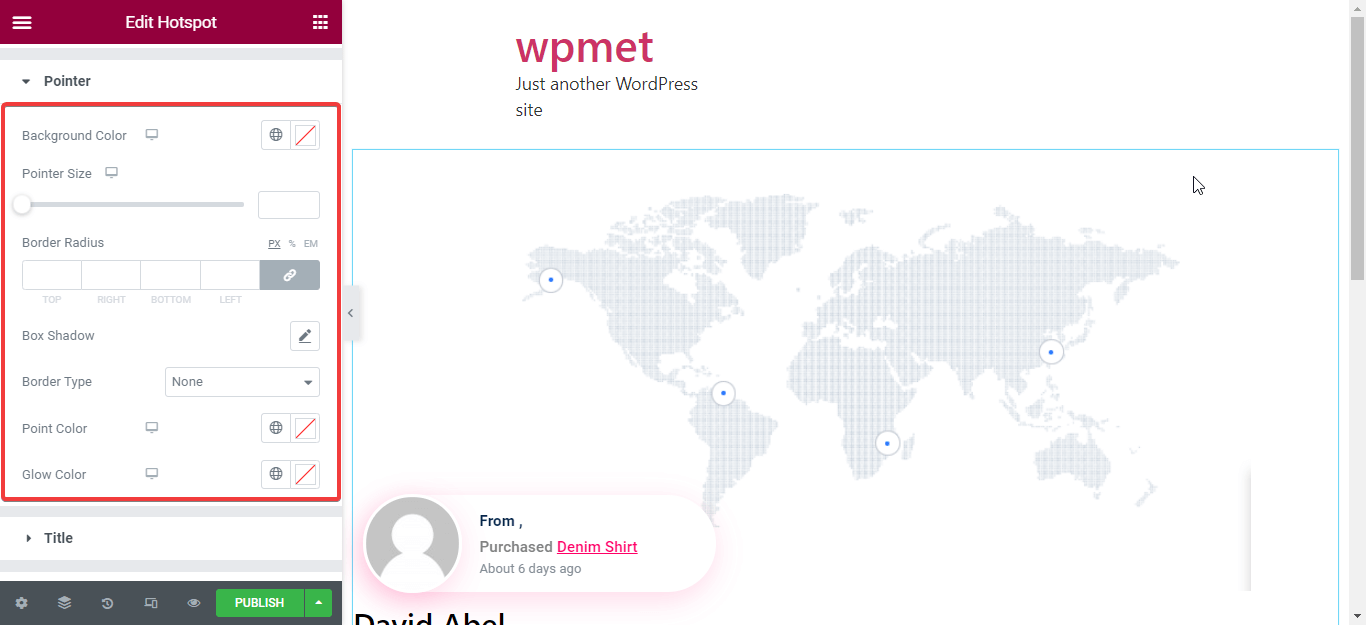
Step 5: Customize the style of the pointer to create interactive images.
In this step, you need to customize the pointer. Here you can customize the following areas:
- Background color: Choose the background color for your pointer.
- Pointer size: Set the size of your pointer. You can make it bigger by dragging the circle to the right.
- Border radius: This option will let you change the radius of your pointer if you want to.
- Box shadow: You can add shadow with the pointer with this option.
- Border type: Select the type of border you want for your pointer.
- Point color: Customize the color of the point that is located in the pointer.
- Glow color: Change the default glow color that is appearing around the pointer if you feel necessary.
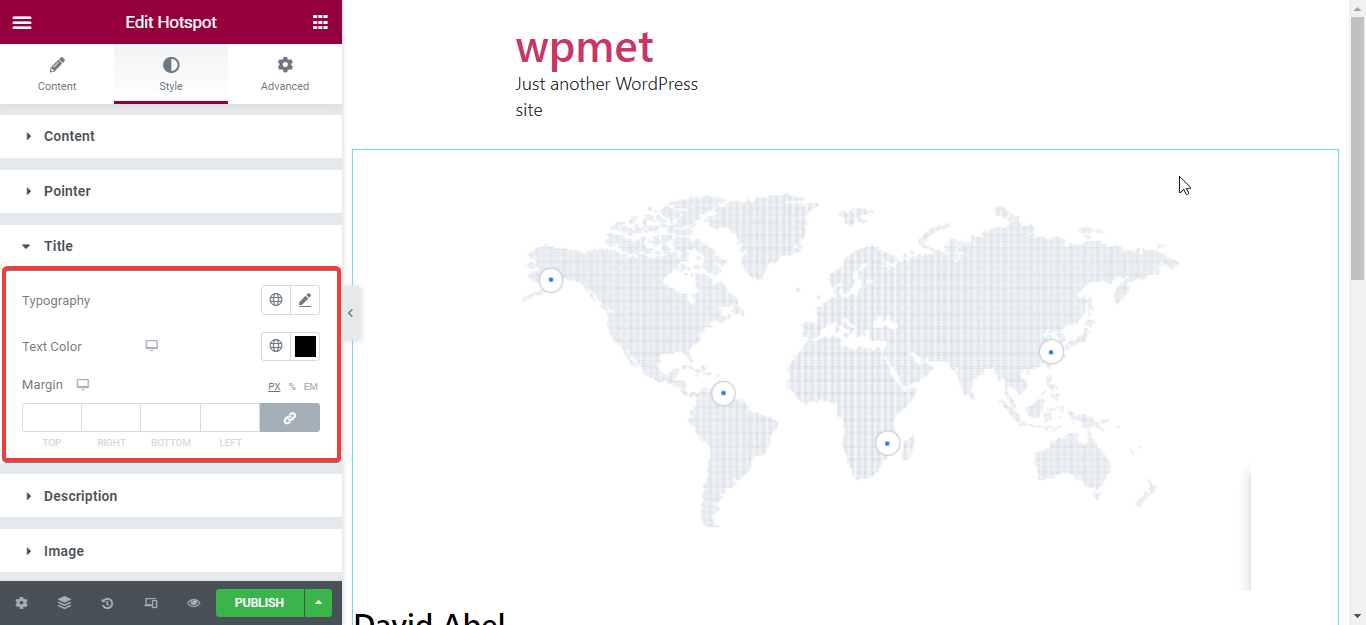
Step 6: Change the style of the title of your hotspot image.
For the styling of the title, you need to choose the right typography for your title. In the typography section, you can change the following areas:
- Family.
- Size.
- Weight.
- Transform.
- Style.
- Decoration.
- Line height.
- Letter spacing.
You also need to select text color and set the required margin for your title.
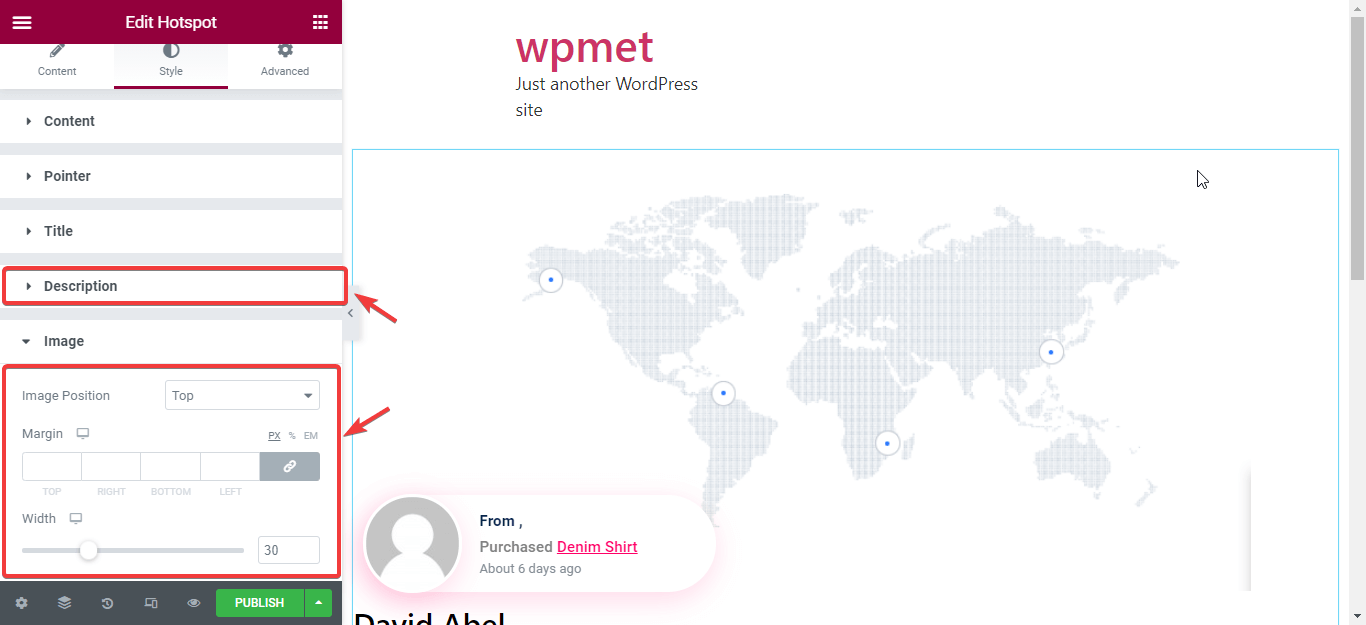
Step 7: Customize the style of the description & image.
Here, you need to edit the description of the tooltip content. This will be the same as the title customization. Now, set the image position where you want it to appear on your tooltip.
At last, change the margin and width of your image according to your desire.
Step 8: Publish the changes you have made to your hotspot image
Finally after making all the changes, now it is time to publish. Click the publish button and you will be all set for your hotspot image.

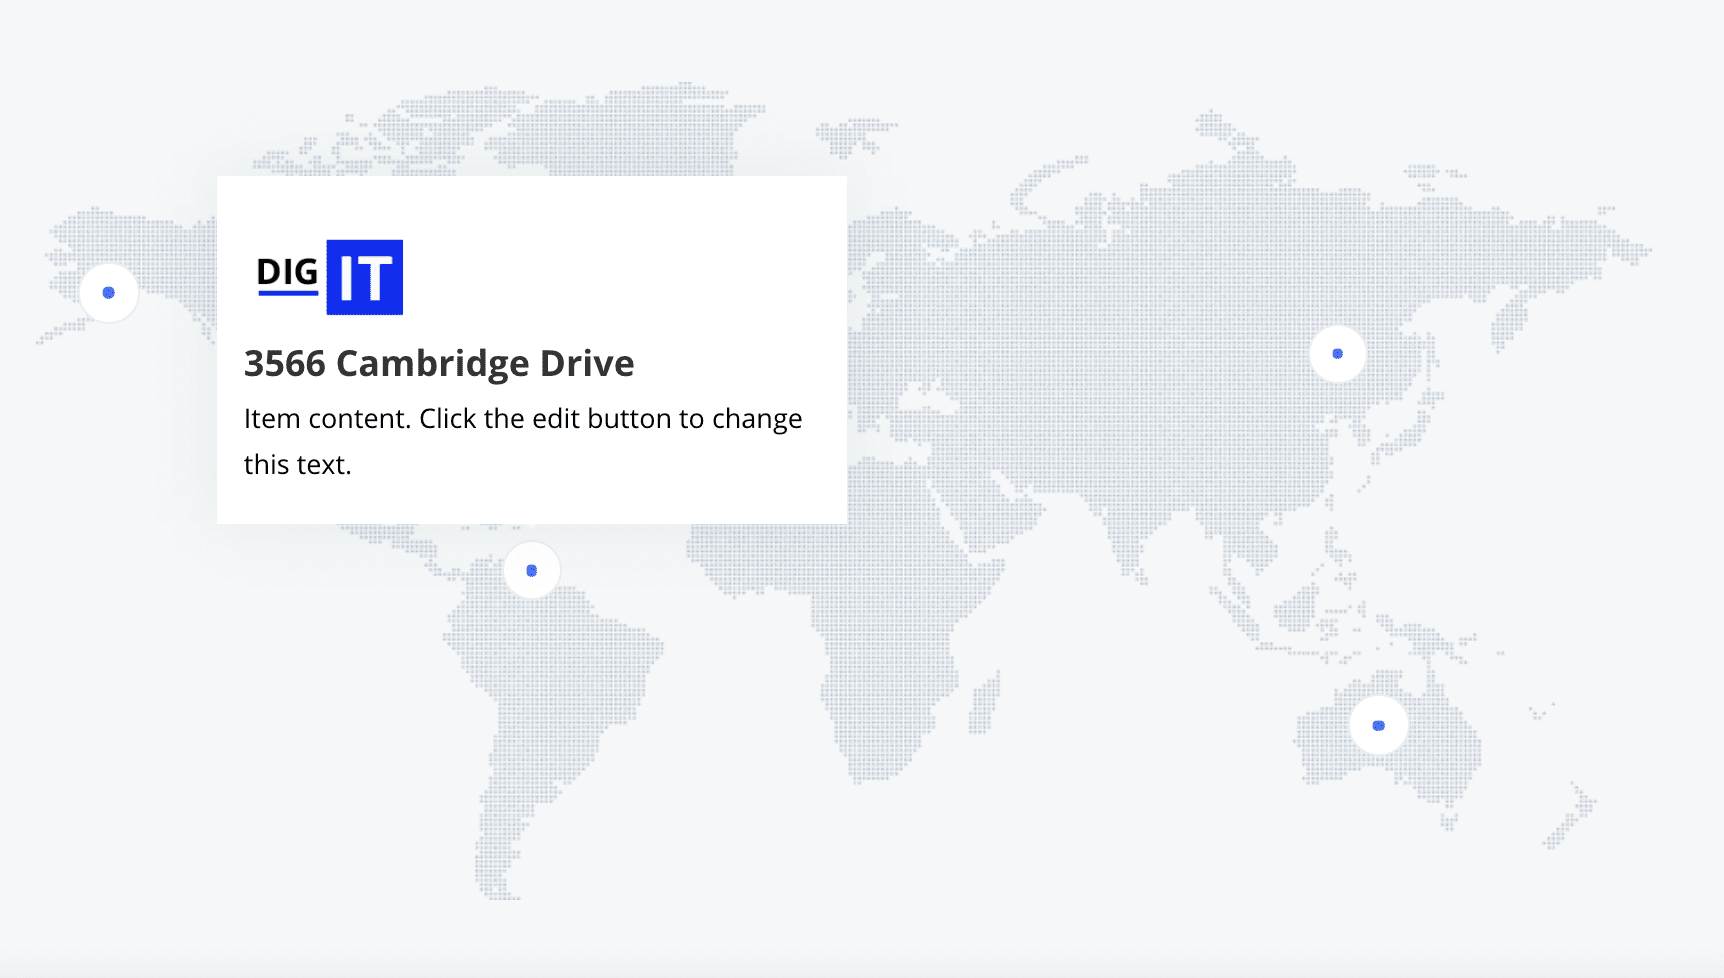
Here is the output of my hotspot interactive image map:
Note:
You can also do advanced customization to your hotspot image. For example, you can make some parts sticky of your hotspot image. You can also set conditions, effects for your images. Moreover, adding an advanced tooltip is open for you. You can also monitor changes by clicking the responsive button. Your edit will display on a new tab when you click the responsive button.
Still, confused?
Check out the demo video about how to use the hotspot widget:
To learn more about the creating image hotspot on Elementor, read the documentation of ElemenetsKit Hotspot widget.
Why choose ElementsKit to create interactive hotspot images?
There are many addons in WordPress that offer a hotspot widget to create hotspot images.
But why should you avoid all other addons? Why do you need to choose only ElementsKit for creating high-quality interactive Hotspot images?
Why is it considered a great tool for Elementor?
The ElementsKit pro version offers a hotspot widget. So, it is normal for you to have these questions. People don’t care much when they use a free version of a plugin. But, they do when they use a paid version. Because people want to buy the best product when they are paying for it. You are not different.
Here are the reasons why you should go for ElementsKit instead of other addons:
- ElementsKit will offer you excellent support. The support team is always up to give solutions for any problem you will face during using this addon. Besides, you will get the fastest response to any of your queries. You will hardly get this support from other addons.
- Because of its user-friendly features, even beginners don’t face problems operating it.
- You can create hotspot images as you want. Advanced customization is also open for you. Not only hotspot images but also you can create a customized header, footer, dropdown menu, etc with ElementsKit.
- ElementsKit didn’t stop by offering an excellent user experience. It is continuously updating to meet your requirements. Moreover, it is fully compatible with Elementor. But, you won’t get this user experience when you install or use other addons and plugins.
- Whether you are an owner of a large or small site, you can use this addon without facing any issues. But, Some addons will fail to meet your requirements.
- Some add-ons can break your site. You will not face this problem when you become a user of ElementsKit.
These are the most vital reasons that will push you to install and use the ElementsKit addon. Because of the above benefits, lots of users leave other addons and choose ElementsKit. At the time of writing this blog, ElementsKit’s download per week is 117,238+. That proves users love ElementsKit.
Want to know more about the journey of ElementsKit? Then read the journey of ElementsKit: All-in-one add-on for Elementor.

Get started with your hotspot image
Using images in your WordPress site can be the most effective way to connect with your visitors emotionally. But, hotspot images in your WordPress site can take it to another level. Luckily, now you know how to create hotspot images in a few minutes with ElementsKit.
If you are still confused about creating hotspot images, do let us know in the comment section or post your queries on Wpmet Community. We will try to solve your problem. Also, let us know if this content is helpful.
Leave a Reply