
Images play a vital role in capturing your visitor’s attention and conveying your messages to them. Luckily, with WordPress, the world’s most popular content management system, you have the power to enhance your website’s appearance and visibility in countless ways. Here image swap is one of the effective strategies among the limitless features and customization of WordPress.
However, due to the versatile opportunities of the WordPress, it is overwhelming for a single person to explore all of them.
So, this tutorial is all about how to create image swap effect in WordPress. Besides, this step-by-step guide will provide you with the necessary knowledge and tools to create a stunning image swap effect. So, let’s dive into a stunning way of showcasing images to elevate your website visibility.
What is the image swap effect in WordPress?
An image swap effect refers to a visual technique where an image changes whenever a certain action (click, hover, etc) performs on the image. It’s an attractive way to boost engagement and interaction with your audience.
Why add image swap in WordPress?
WordPress image swaps are mainly used to showcase before and after comparison. It allows you to create interactive and engaging images for your site. Apart from these, there are more benefits of adding image swap in WordPress:
- Image swap helps you to clearly demonstrate product features. Customers or visitors can easily understand the information that you’re trying to convey.
- It optimizes conversion as visitors or clients get a clear overview of products or services which helps to make fast buying decisions.
- Image Swaps can be a great storyteller and demonstrate product progress over time.
- The image swap effect can boost the overall UX and UI of your website and make your site more friendly to your audience.
- You can beat your competitors by adding this image swap effect as it creates unique and interactive images for your site.
These are the major benefits of adding image swap effects in WordPress. Now, are you looking for ways to add it? If yes, keep reading till the end.
Steps to create an Image swap effect in WordPress
There are two ways to add an Image Swap effect in WordPress. One is through coding and the other is by utilizing the Image Swap plugin. Using an image swap plugin is the best and easiest way to add a swap effect to images. But, before that first, you have to select an appropriate Image Swap plugin.
ElementsKit is one of the most suitable image swap plugins that comes with numerous features other than this such as image masking, coupon code, content ticker, etc. Besides, it has great compatibility with all the popular plugins and themes.
That’s why, we will use ElementsKit to add image swap effect in WordPress. So, check out the step-by-step guide on how to create image swap effect in WordPress:
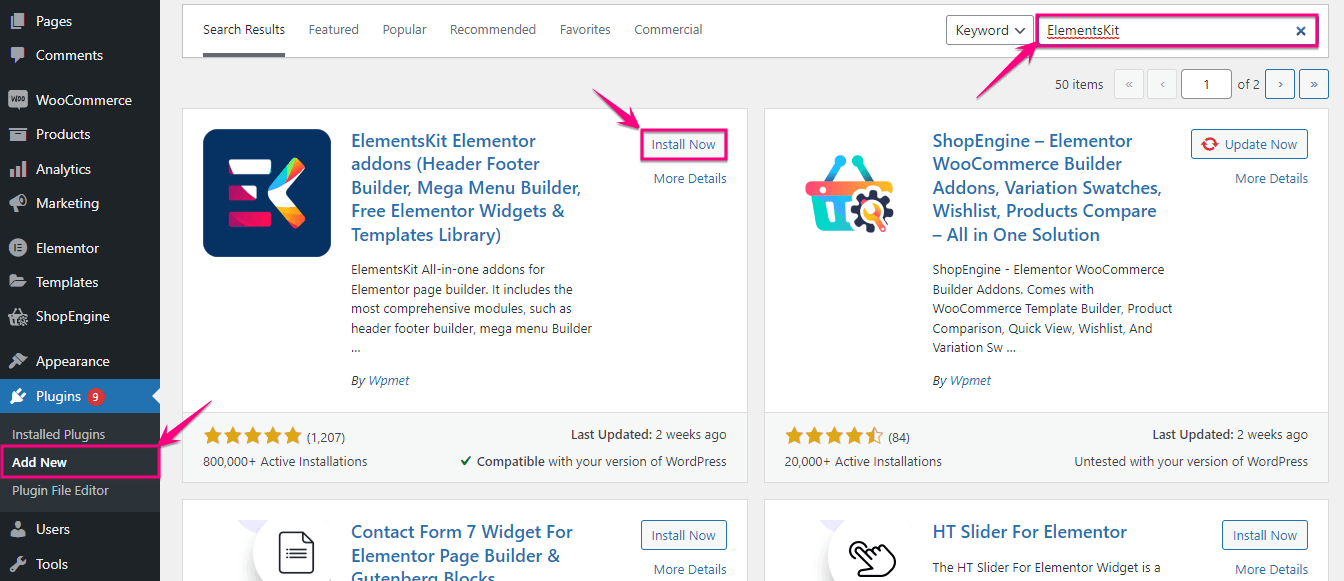
Step 1: Download an image swap plugin.
First, download an image swap plugin, ElementsKit on your WordPress website. Also, you must download Elementor to enjoy the excellent Image Swap feature of ElementsKit. After the installation of Elementor, Search for ElementsKit in the search box to download it and hit the “Install Now” button. Then, click the “Active Now” button to activate ElementsKit.
Step 2: Add image swap in WordPress.
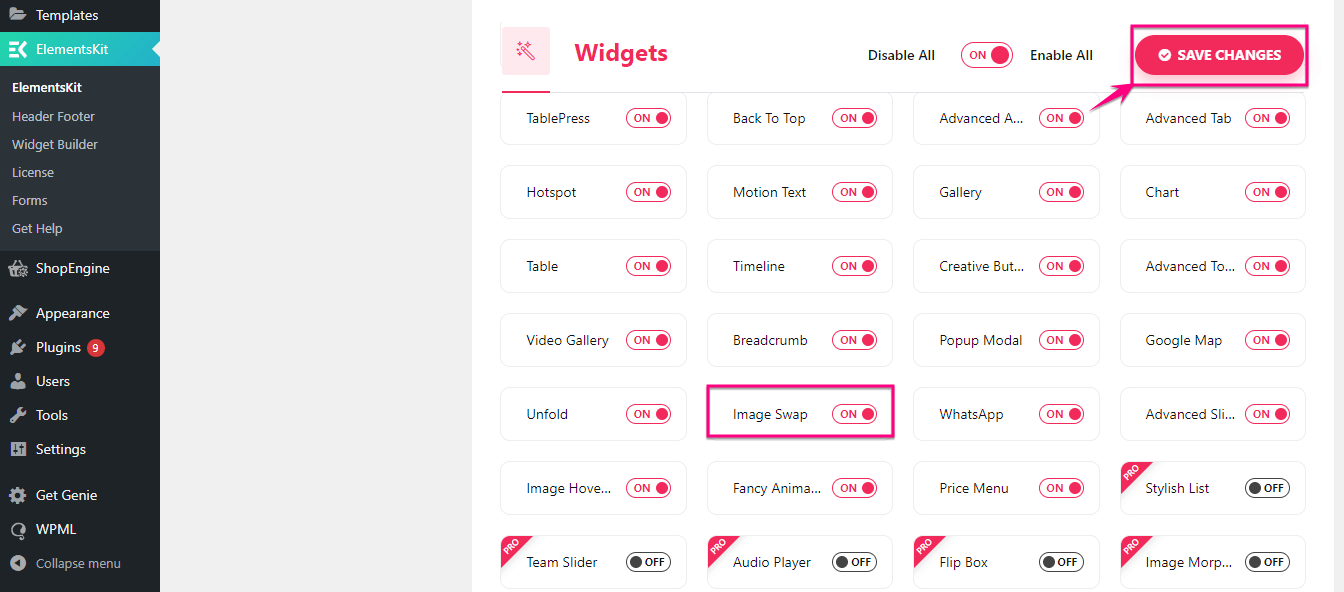
In the second step, you have to enable the image swap widget by visiting ElementsKit>> ElementsKit. Now, click the “Widgets” tab and enable Image Swap. After that, click the “Save Changes” button.
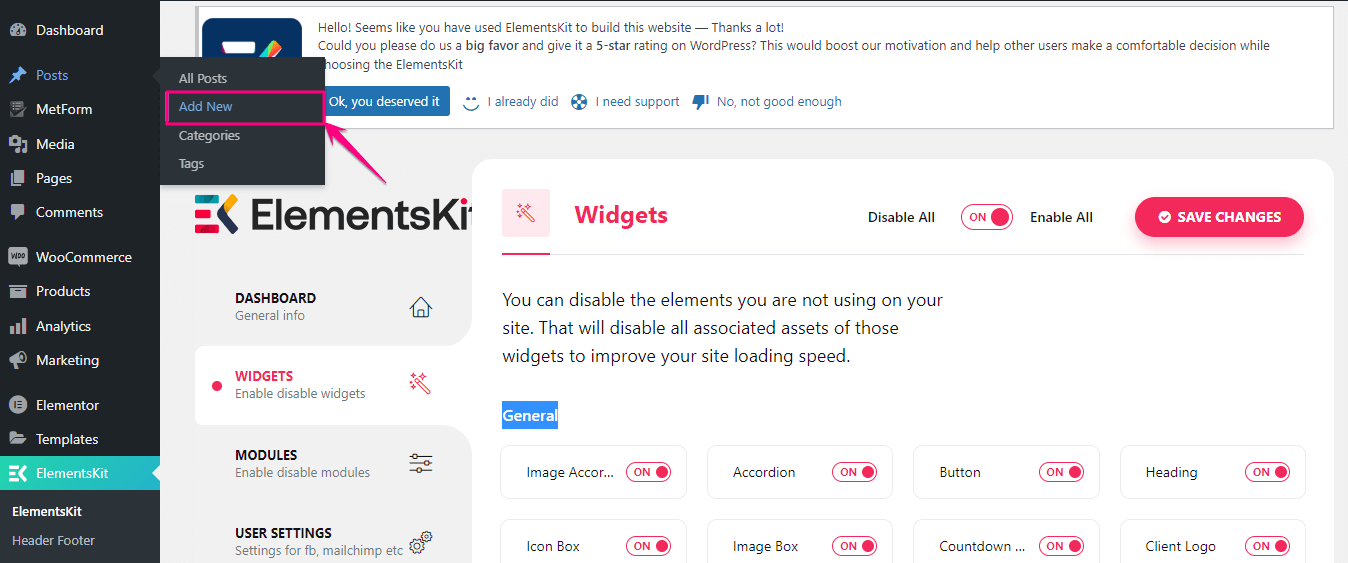
After enabling Image Swap, go to a new post by clicking “Add New” under the post tab.
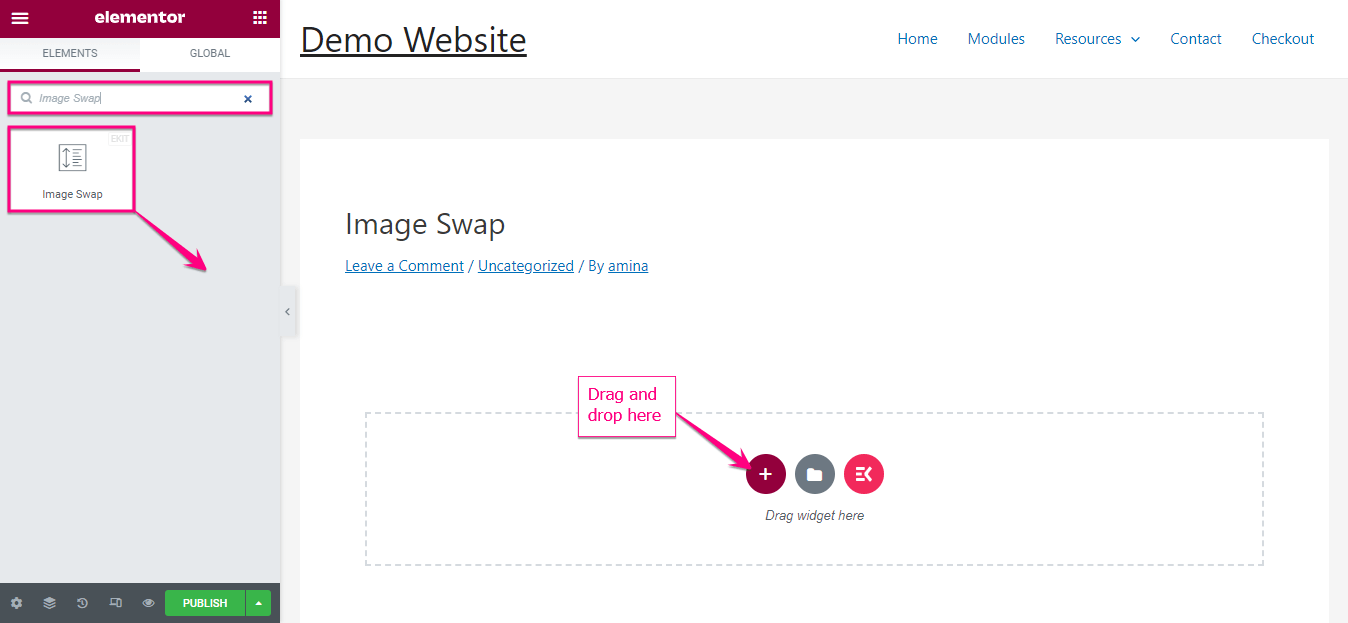
This will take you to a new page where you need to add a Title and click the “Edit with Elementor” button. Then, search for the Image Swap widget and add it to the plus icon after dragging and dropping.
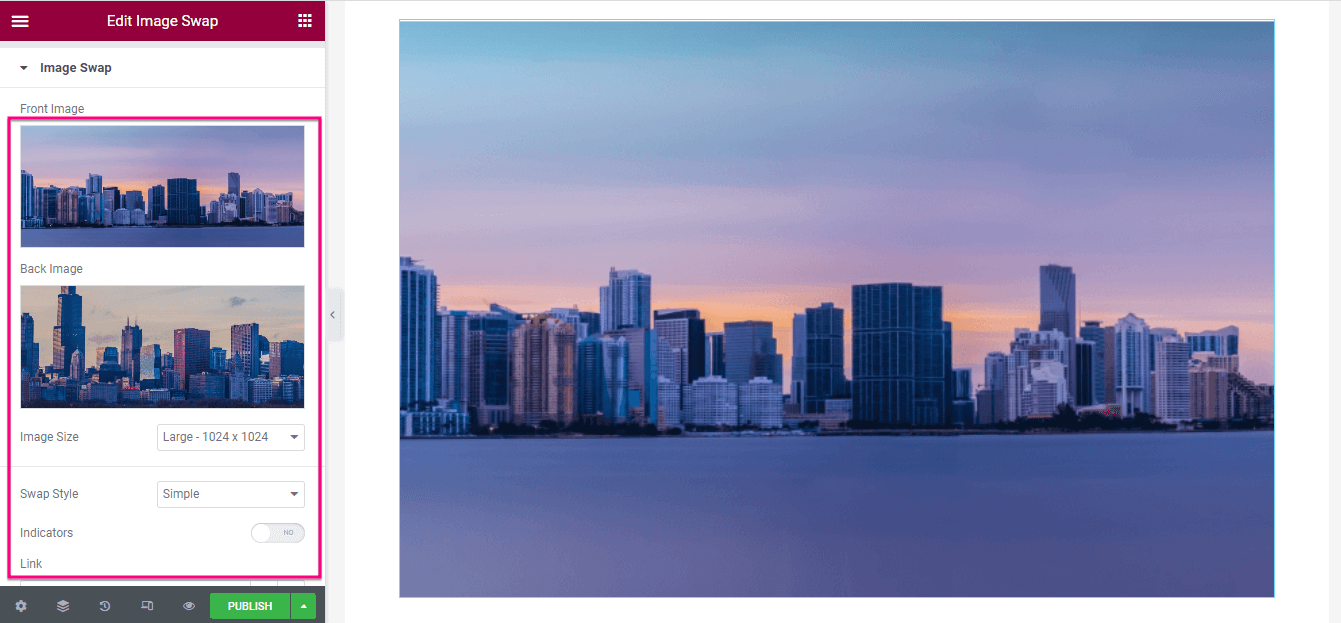
After adding an image swap, you will find the settings option on the left side. Here, you have to adjust the following things from there:
- Front Image: Add a front image for Image Swap.
- Back Image: Enter a back image here.
- Image Size: You can adjust the image height and width from here.
- Swap Style: Adjust the swap style for your image.
- Indicators: Add an indicator to indicate an active image and a back image.
- Link: Insert URL if you want to add links with your image.
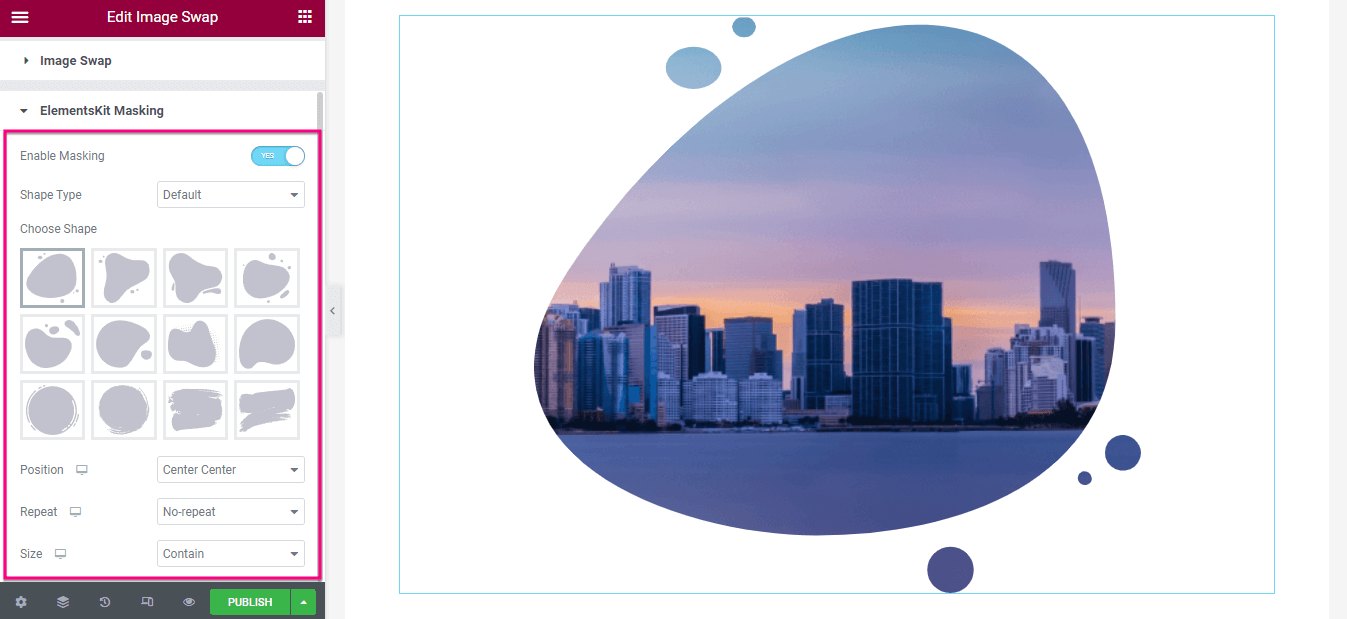
Besides, you can enable Image Masking for your image swap. After enabling it, you will find options to edit the Shape Type, Shape selection, Position, Repeat, and Size. Adjust everything to add an attractive WordPress Image Swap effect.
Step 3: Publish WordPress image swap.
After completing the content configuration, visit the Style tab and adjust the Height and Transition Duration of the image.
Finally, click the publish button after completing the edit of the Image Swap effect.


Get started with an image swap in WordPress
Adding an image swap effect in WordPress is possible through several methods. However, using a WordPress plugin is the most convenient method that we’ve shown above. So, follow the three easy steps to enhance the visual experience of your images using ElementsKit.
Leave a Reply