
For a well-planned event, registration of the attendees is a must. An easy-to-fill-out online event registration form can help you increase the sign-ups as well as organize the event better. You can easily create an event registration form in WordPress with Elementor.
This article will help you create an online event registration form even if you are new to the WordPress ecosystem or Elementor.
Here I am going to show the detailed process of creating an online WordPress event registration form without coding.
Quick Overview
This tutorial includes the process of creating an WordPress Event Registration Form.
Tools Used: Elementor, MetForm, and MetForm Pro.
Here is the process, Install plugins > Create a new form > Use MetForm Template > Customize the form.
Event Registration Form may include:
✅ Name Fields
✅ Contact Info (email and phone number)
✅ Organization name (if applicable)
✅ Dietary Requirements (if food is provided)
✅ Special Assistance
✅ Comment or message
✅ Submit button
✅Send a confirmation email
How does an event registration form work?
Event registration can be done in two ways – offline and online. In offline registration, attendees sign up on-site—often on the day of the event. This approach requires organizers to make arrangements based on assumptions, which can lead to uncertainty in planning.
The online registration, however, is done days before the event date. The organizer creates an online form where the audience can fill out their details and confirm his/her attendance.
It helps the organizer to understand how many people are coming to the event. The number of attendees will help you to estimate the venue size and other relevant information.
The event registration form may also have a payment option. It is common for paid events.
How to create a WordPress event registration form
To create an event sign-up form with WordPress, you will have to use any form builder. It is, however, difficult to do without the right plugin. Here we will show you how to create the form with the most flexible & design-friendly WordPress event form builder plugin MetForm.
Step 1: Install the necessary plugins
You will have to install the following plugins –
- Elementor: Download plugin.
- MetForm: Download plugin.
- MetForm Pro: Get the plugin.
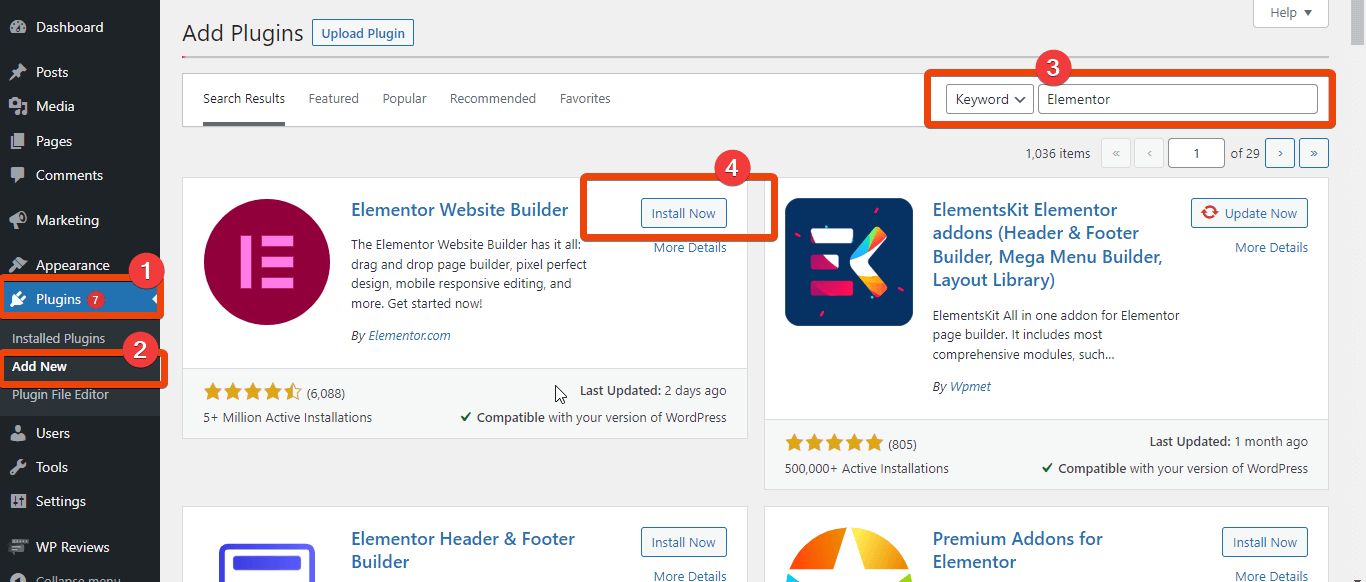
Go to your WordPress dashboard and select plugins. Now choose ‘Add new’ and on the top right search box, search for Elementor. Install the plugin and activate it.
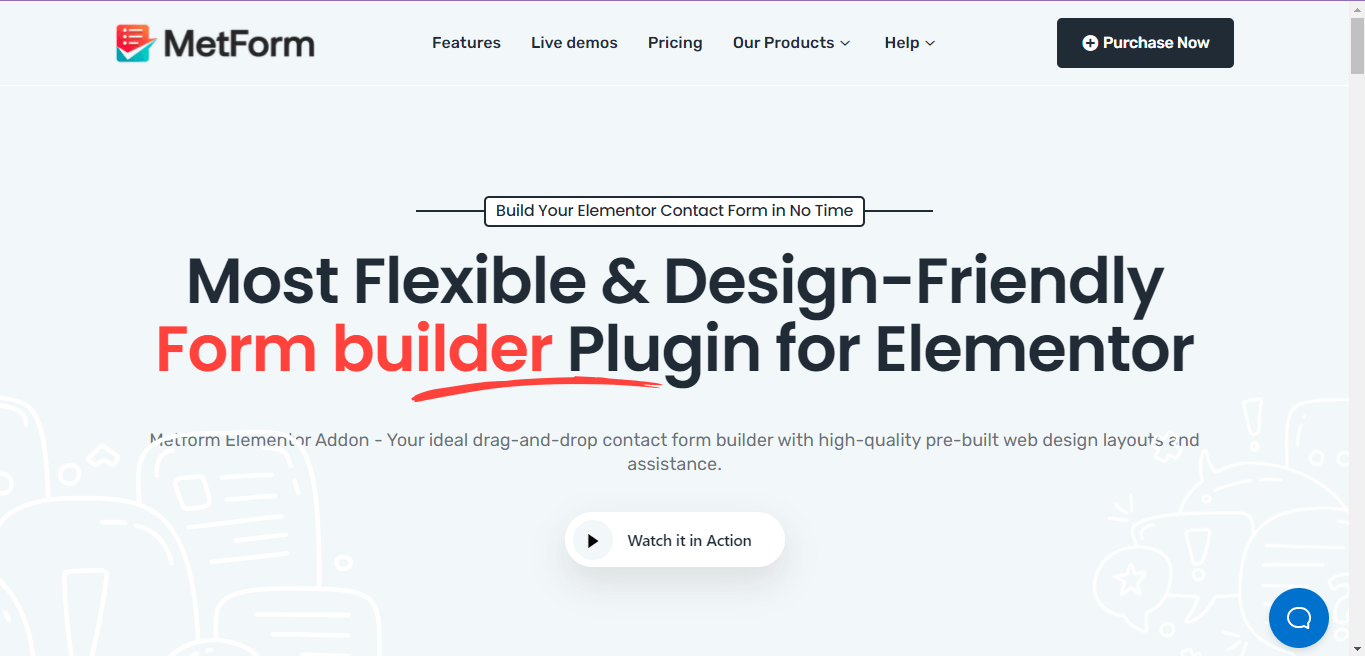
Now download MetForm. Go to the landing page of MetForm and choose the plan that suits your plan. Then Install the plugin and activate it to enjoy the most advanced features for WordPress forms.
Now you can start to create and design an event registration form in Elmenetor using MetForm.

Step 2: Create a new page
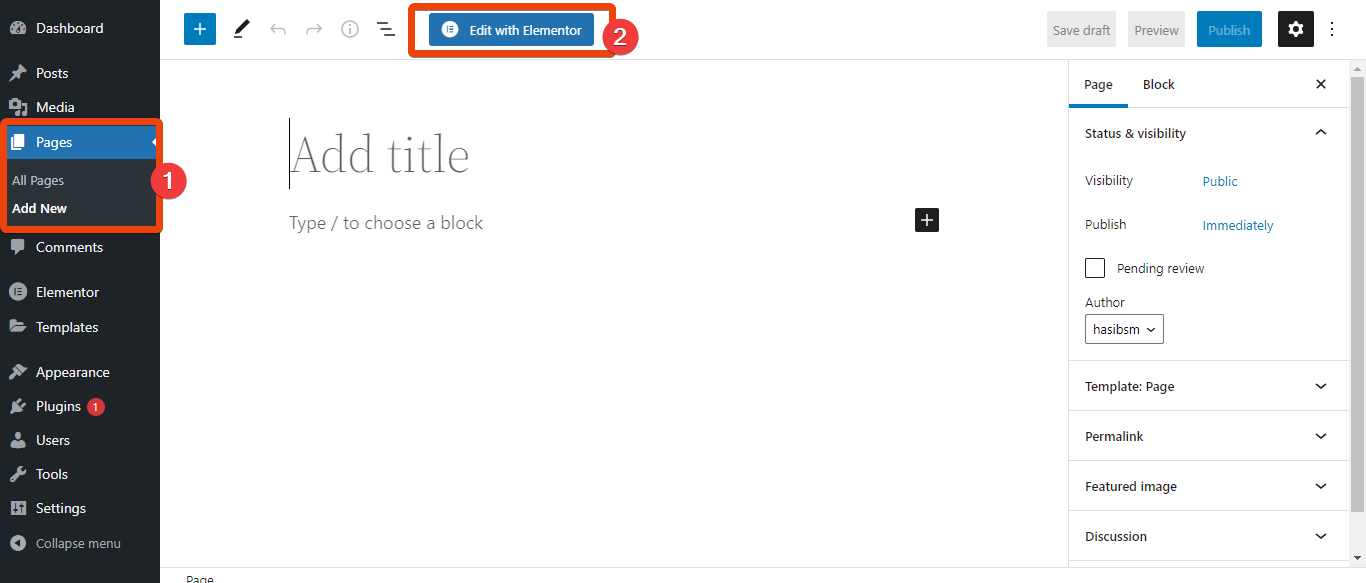
Go to the WordPress dashboard and hover to pages. Select ‘Add New’ and you will land on a new page. Now choose ‘Edit with Elementor’.
You will have to do the rest of the task of creating the WordPress event registration form on the Elementor editor.
Step 3: Add MetForm and Select the Template
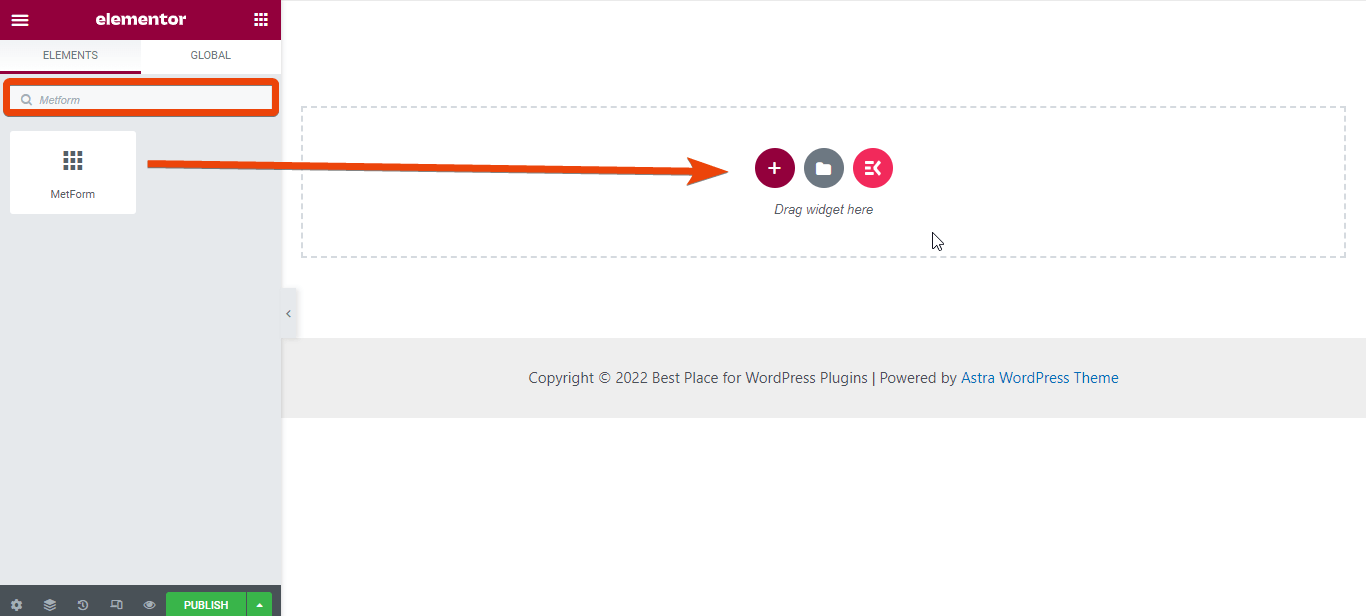
On the Elementor widget library, search for MetForm. Drag and drop the widget on the page.
Now click on the ‘Edit Form’ > Choose New. You will see all the available templates for forms.
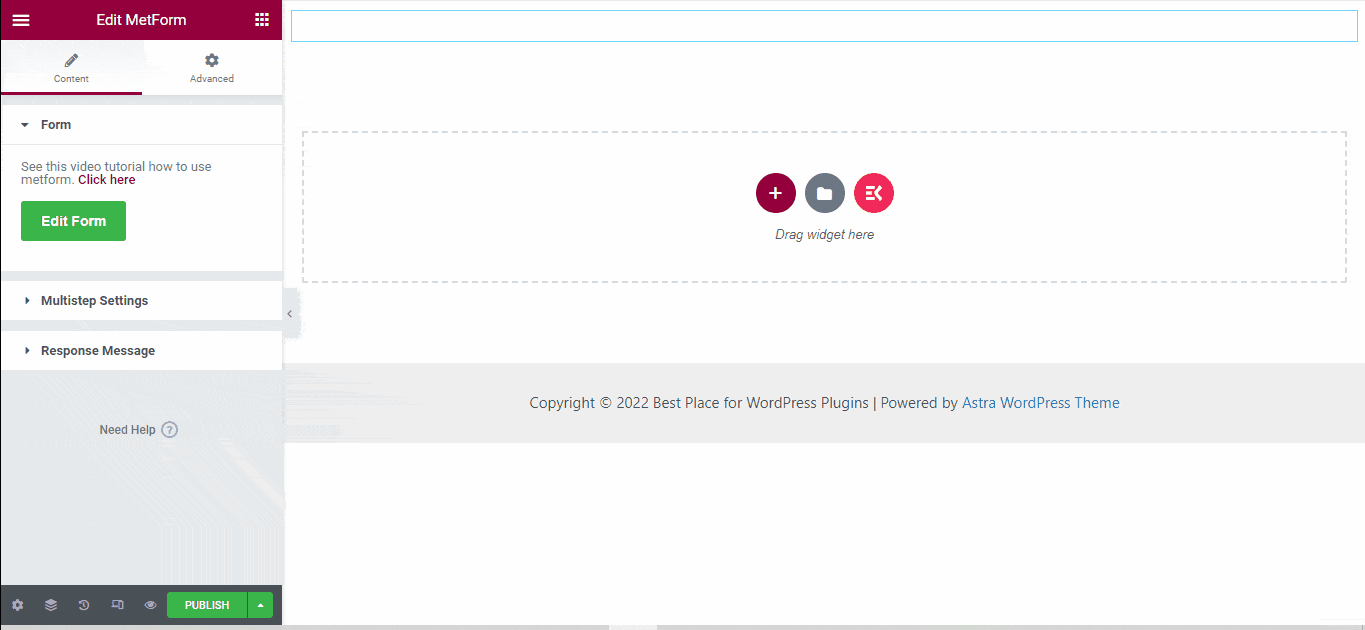
From the template list, choose ‘Event Form’ and hit the ‘Edit form’ button. You will see the form layout. Click on the ‘UPDATE & CLOSE’ button.
Step 4: Customize the form
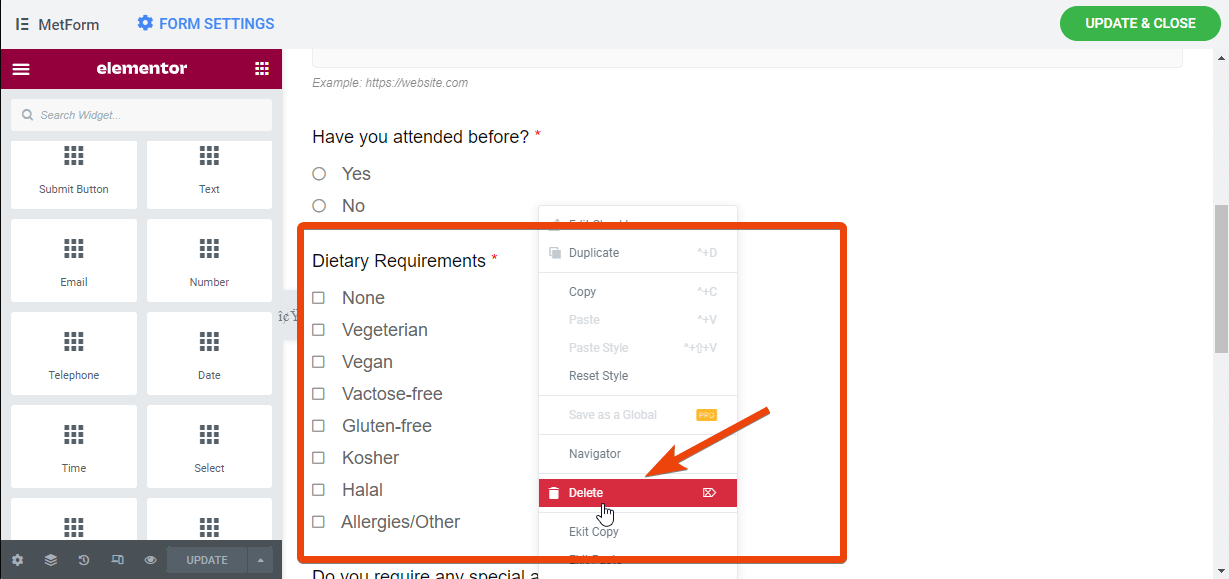
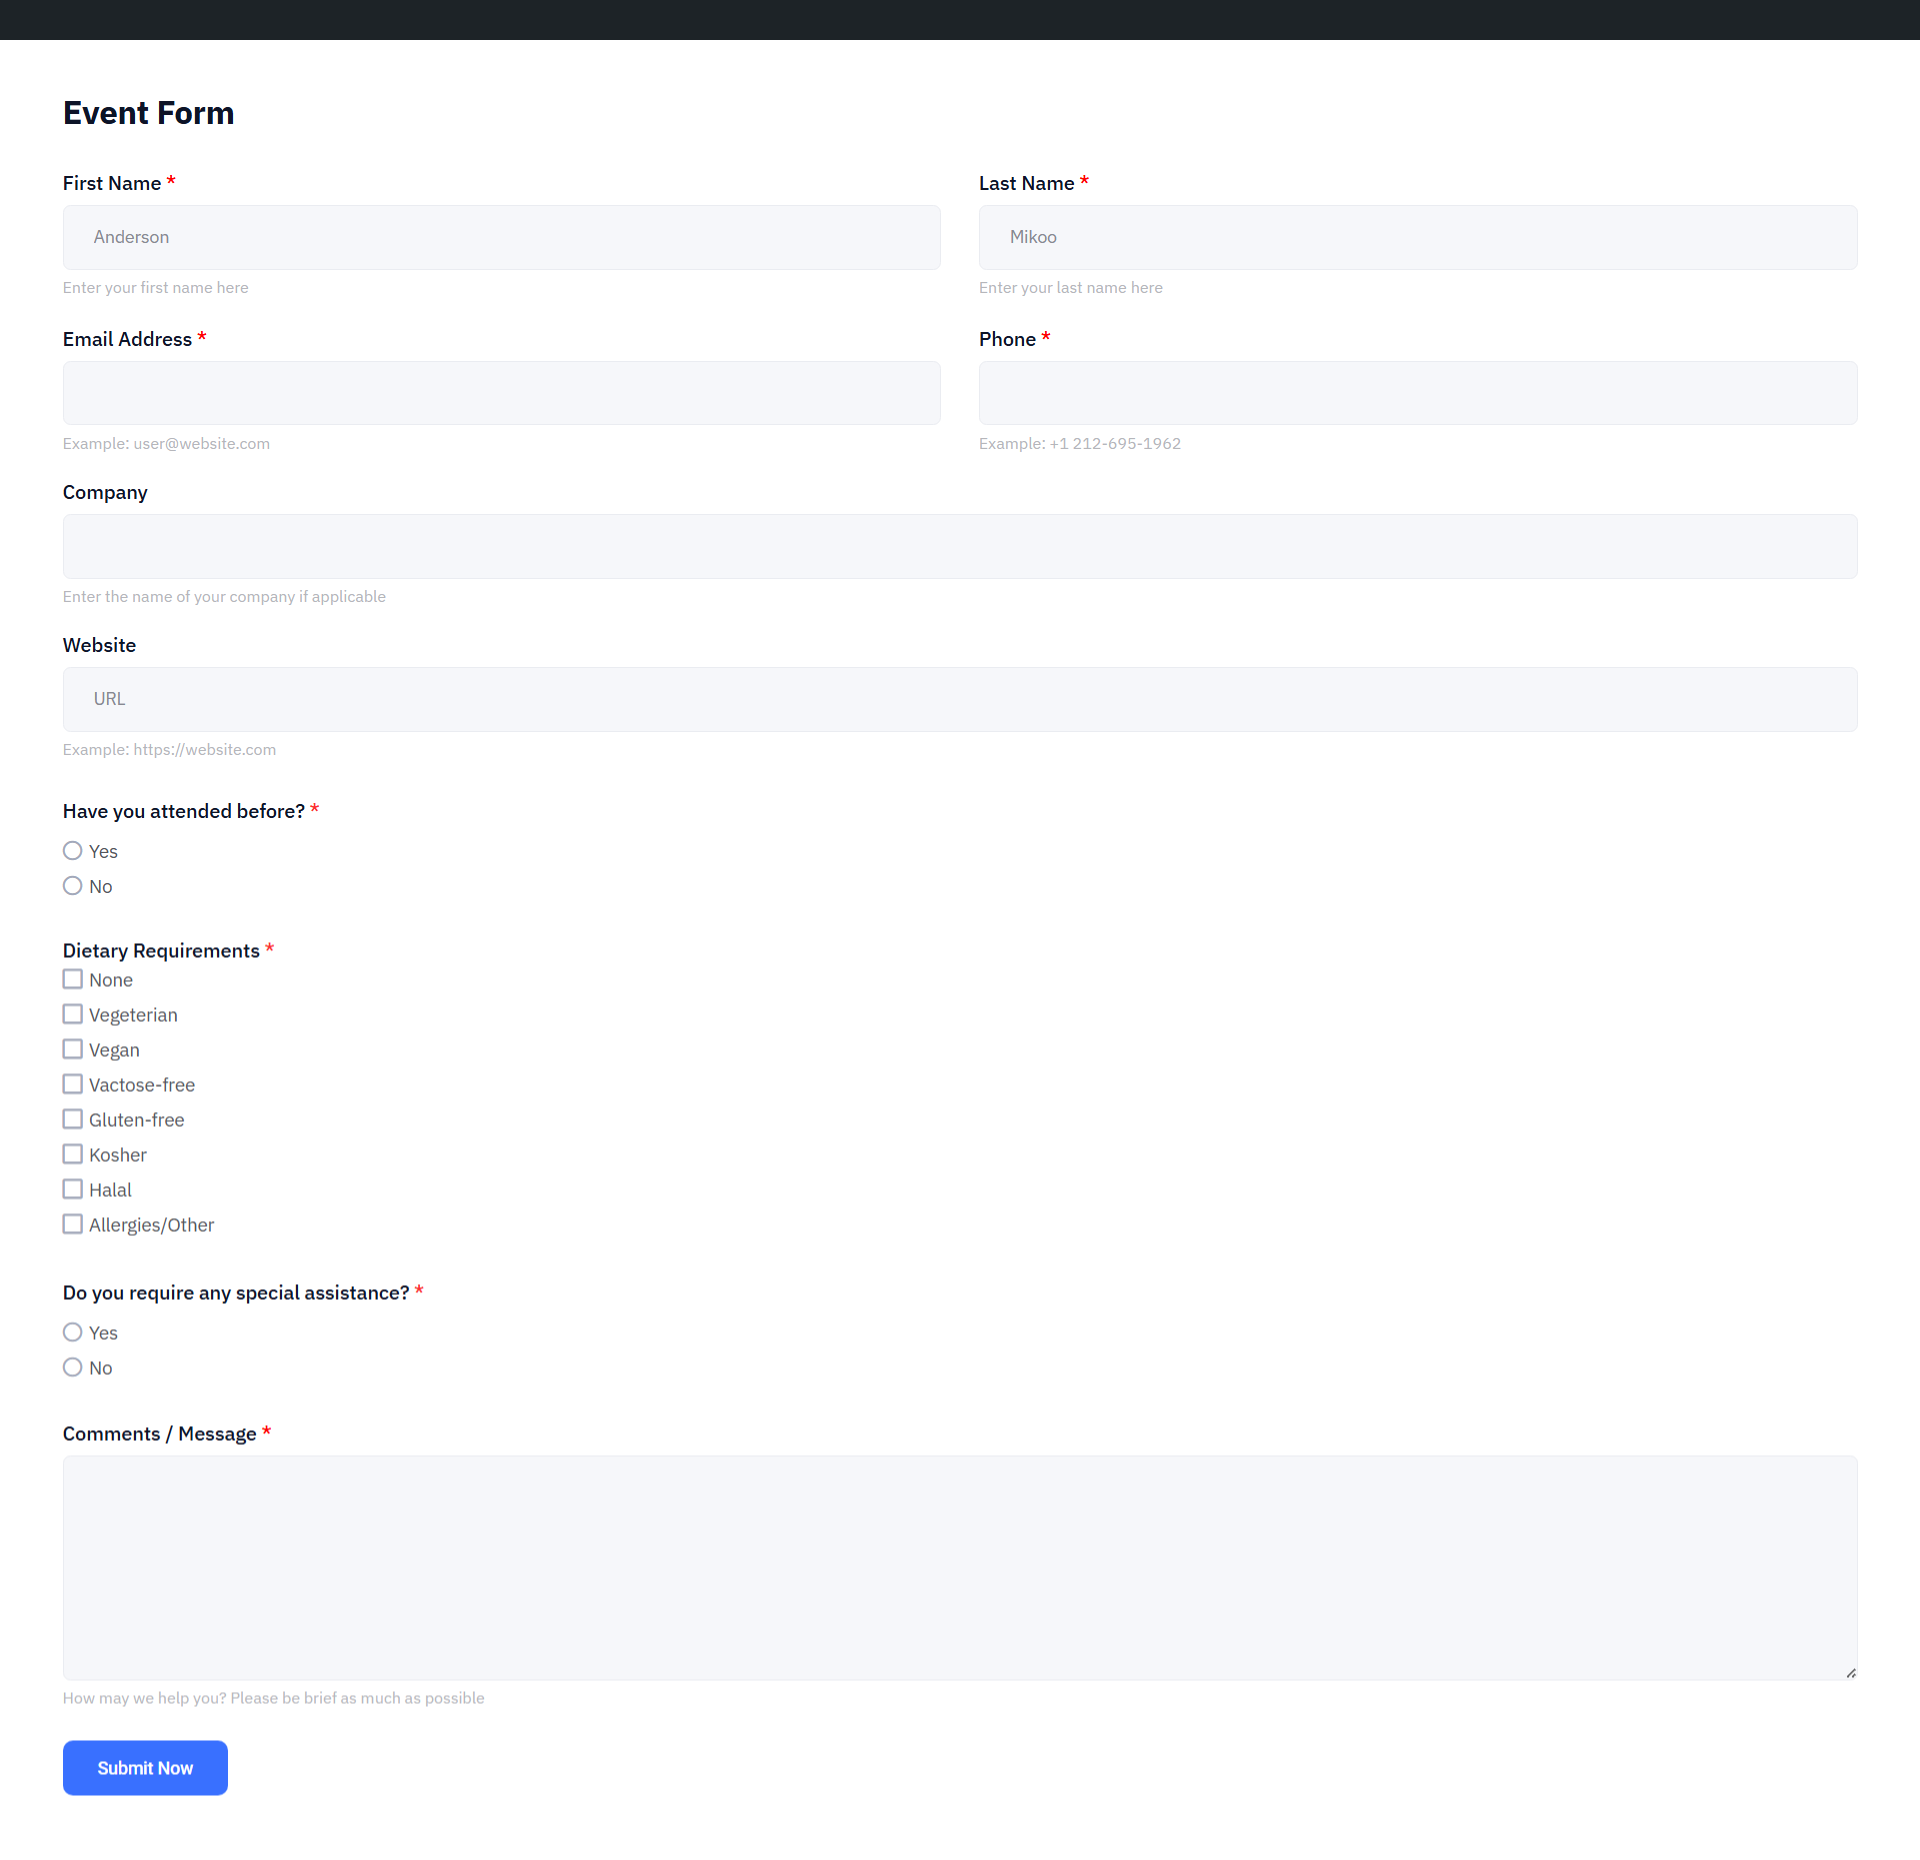
The default event registration form template will have several fields.
Here are fileds that MetForm’s Event Registration form template:
- Name Fields
- Contact Info (email and phone number)
- Organization name (if applicable)
- Website URL
- Dietary Requirements
- Special Assistance
- Comment or message
- Submit button.
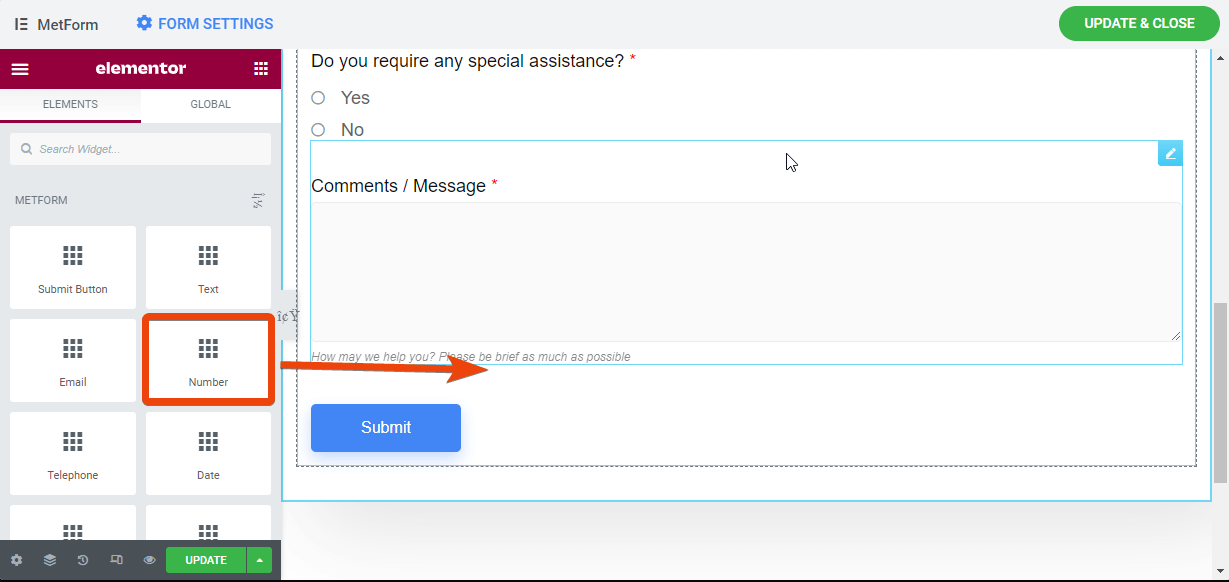
You can keep the default fields or delete some and add new fields from the elements library.
To delete a field from the template, right-click on it and you will get the delete option. Hit that and delete that.
For instance, here you will see a field named ‘Dietary Requirements’. Maybe you don’t need this field. So, right-click on this field and delete this.
If you want to add a new field in the form, browse the elements on the left side. Drag and drop the particular field on the form. For instance, if you want to add a number field where attendees can select a group of people for the event, simply drag and drop the number field on the page.
Step 5: Customize Form Settings
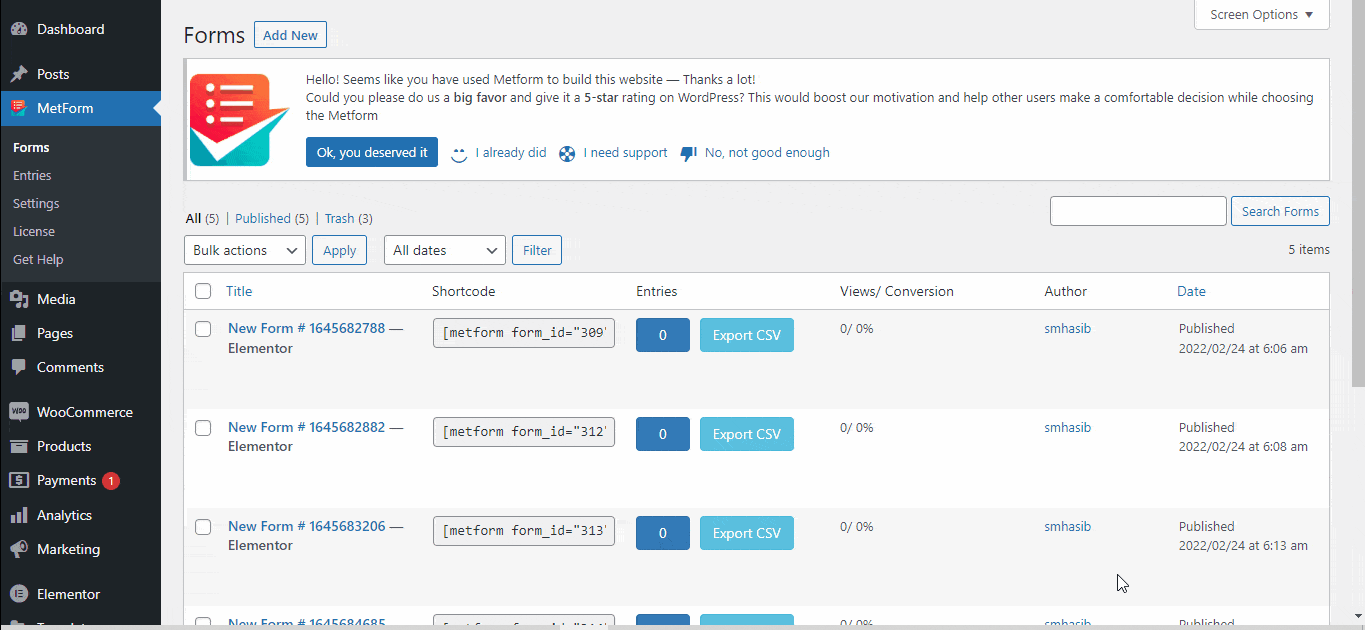
Now the event registration form is created and you can change the settings for the form. To change any setting of the form, go to your WordPress dashboard > MetForm > Forms. Here you will see all the forms that you created with MetForm.
Select the form you have created for the event and you will see all the settings for the form. From there, choose the Notification setting.
You will see 8 different settings there. Here are the settings you will find –
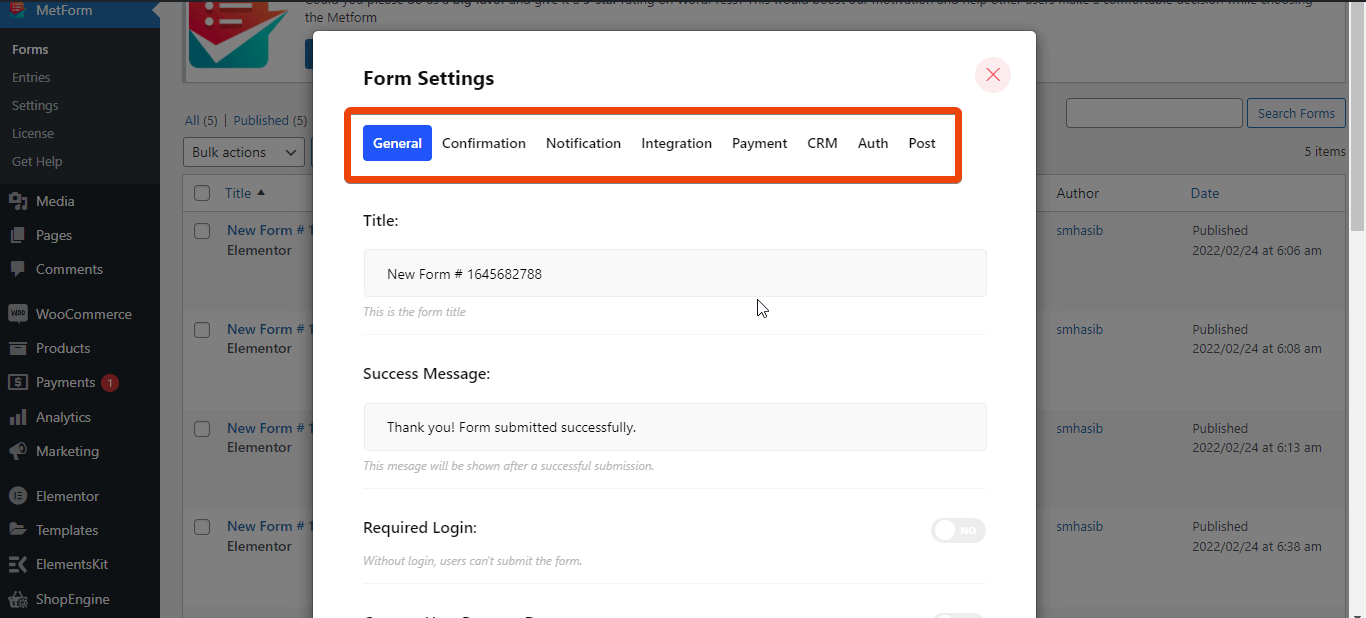
- General: In the general settings, you can give a title for the form, set a success message, limit the number of entries, hide the form after submitting, and many more.
- Confirmation: Here you can set email confirmation with a custom message for the audience.
- Notification: If you want to get notified, set a notification for the admin here.
- Integration: Here you can integrate third-party tools like Mailchimp, Aweber, GetResponse, Google sheet, and many more.
- Payment: Suppose you are organizing a paid event, you can integrate payment options in the form.
- CRM: MetForm allows the integration of popular CRM HubSpot Contact, HubSpot Forms, Zoho Contact, Helpscout.
- Author: Here you can set login credentials for the event registration.
- Post: Create the form as a post.
Step 6: Set notifications and confirmation
Suppose you want to get notified when someone fills the registration form. In that case, you can simply set a notification from the MetForm settings.
Go to the form you have created and go to the settings. Now you will see the options I have mentioned earlier. Select Notification from the top. This will send a notification to the admin.
Select the email subject, email to, and email from for the notification. Here you can select the email addresses according to your preferences.
Similarly, you can send a confirmation email to the people who have registered for the event. For this, go to the form, select confirmation from the top.
Now select the subject line and email address from where you want to send the confirmation. Then select the registered email and thank you for the message.
Step 7: Integrate third-party tools
If you want, you can integrate third-party tools like HubSpot, Zoho, Helpscout, Mailchimp, Google sheet, and more. You will get all these options at the top of the form.
Step 8: Preview and launch the form
Finally, check the entire event registration form that you created with MetForm. If it looks good, you can share it with your audience. The best part is, you can generate a shortcode for the form to integrate it anywhere on your website.
FAQs
Why should I use a online event registration form?
What fields should I include in an event registration form?
Can I set a registration limit or deadline?
Wrap Up
Now that you have the complete guideline on how to create WordPress event registration forms, it shouldn’t be a big challenge anymore. Follow the steps I have shared here and the form will be ready. You can even design a multi-step form with Metform.
While creating the form, check all the settings and features of the form to explore new options.
Leave a Reply