
“Are you hiring?”.
If you are an employer or HR executive, your answer might be either “yes, actively hiring now” or “not right now, but planning to hire some in the near future”.
No matter whether you reply with the first one or the next, you must make sure that you’ve got a vacancy application form ready.
A vacancy application form helps you to collect a list of primary applicants for the vacant positions.
From this blog, you’re going to learn about how to create an engaging vacancy application form with Elementor and MetForm within a few minutes.
So, are you ready? Let’s hop in.
Step-1: Install Elementor and MetForm Plugins
To make a job vacancy application form, you’ll need:
Check the installation process of Elementor and MetForm below. Note that, you can skip this step if you already have both the plugins installed on your WordPress website.
| Elementor Installation Process | MetForm Installation Process |
|---|---|
| 1. From your WordPress Dashboard, go to Plugins > Add New 2. Search “Elementor” in the search box. 3. From the search result page, install and activate Elementor. | 1. From your WordPress Dashboard, go to Plugins > Add New 2. Search “MetForm” in the search box 3. From the search result page, install and activate MetForm. |
If you want to know why we chose MetForm over other form builders, here’s what you need to know.
Now that you’ve got everything you need, let me walk you through the process of making an awesome job vacancy application form.
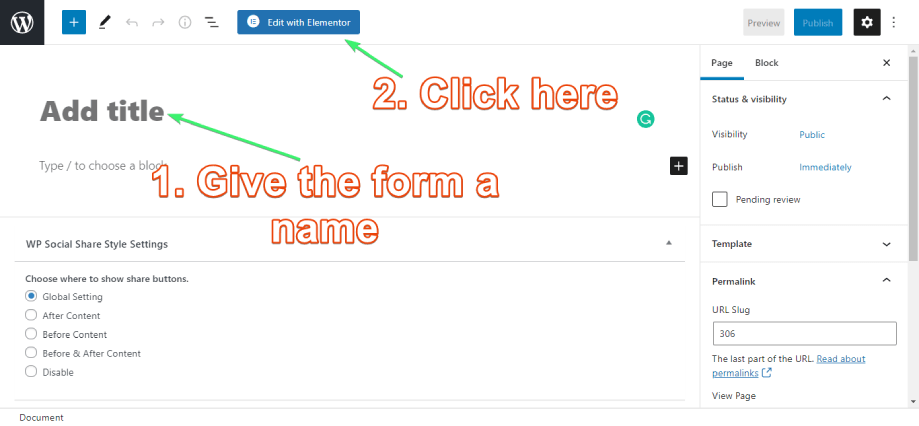
Step-2: Create a New Page on WordPress
- Create a new page by going to Pages > Add New
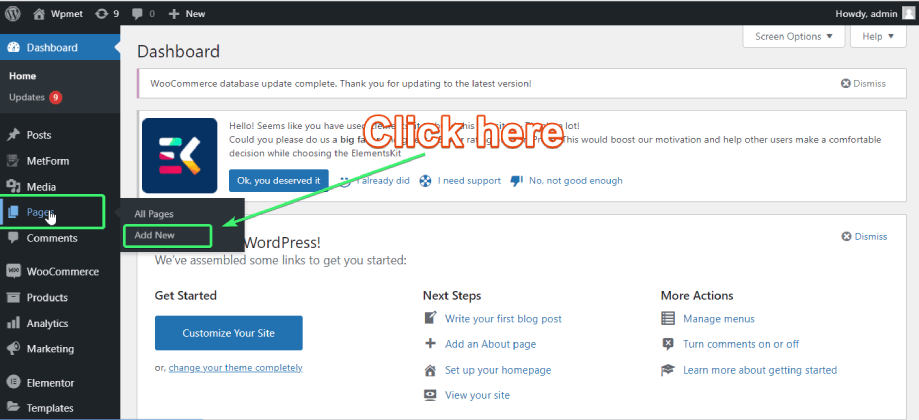
- Give the page a name and click “Edit with Elementor”.
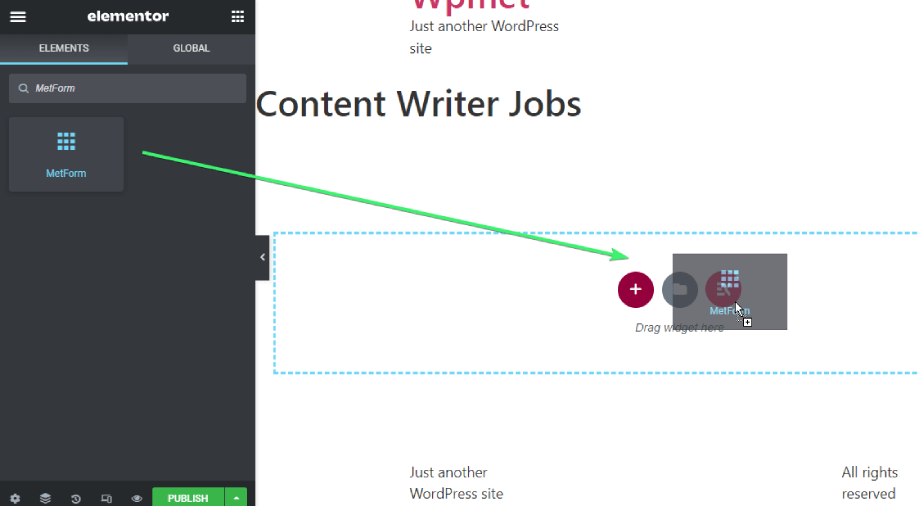
Step-3: Customize the Job Vacancy Form
Your page is now ready to be edited on Elemetnor. In this step, you’ll learn to create and customize a vacancy application form.
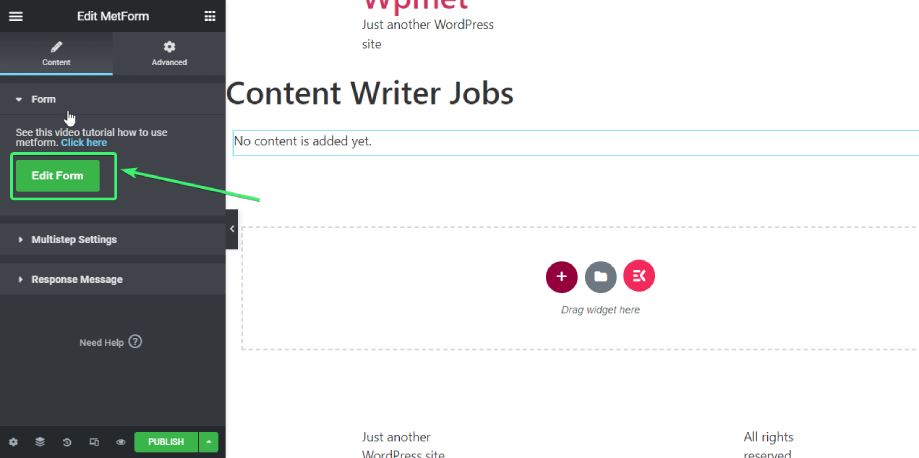
- From the Elemetor’s Element search box, type “MetForm”.
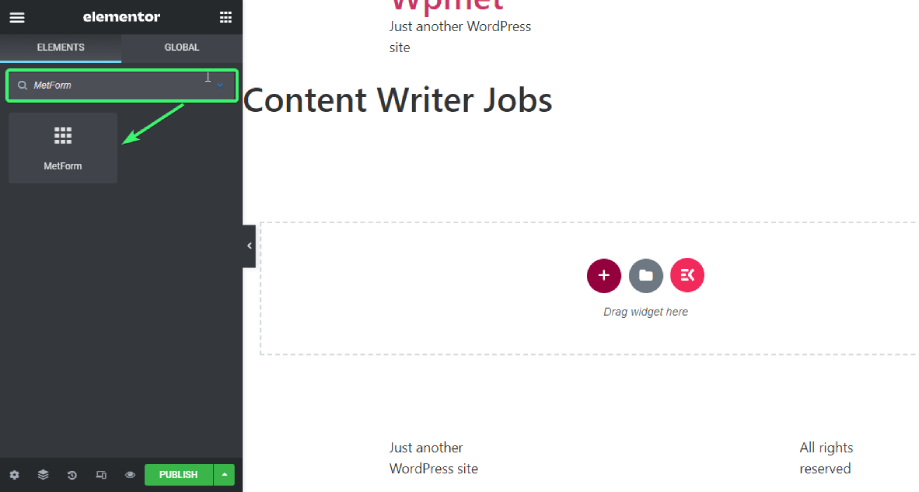
- Drag and drop the widget on the Elementor’s content area.
- From the left sidebar, click on ‘Edit Form‘.
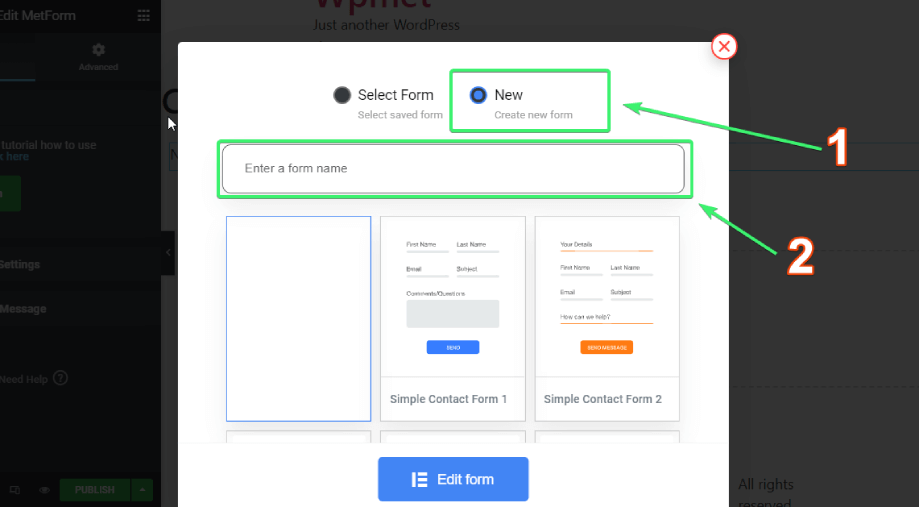
- Choose “New” and enter a form name.
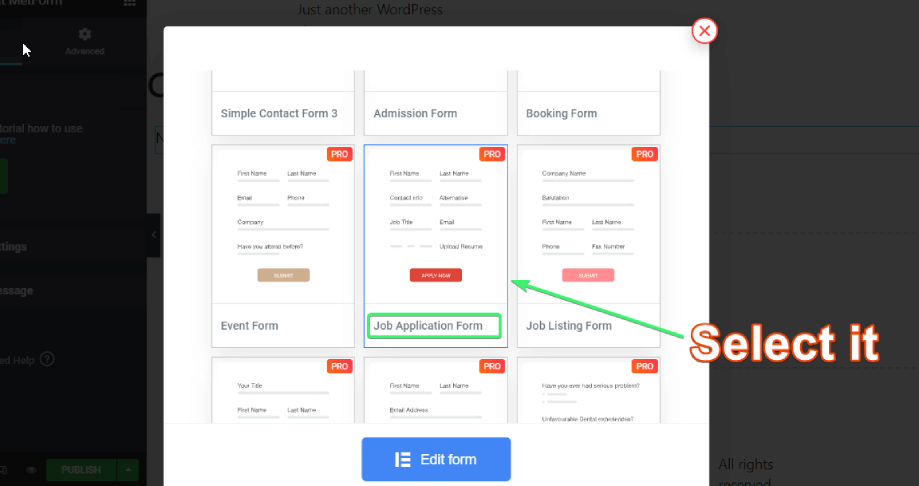
- From the list of available templates, choose “Job Application Form”.
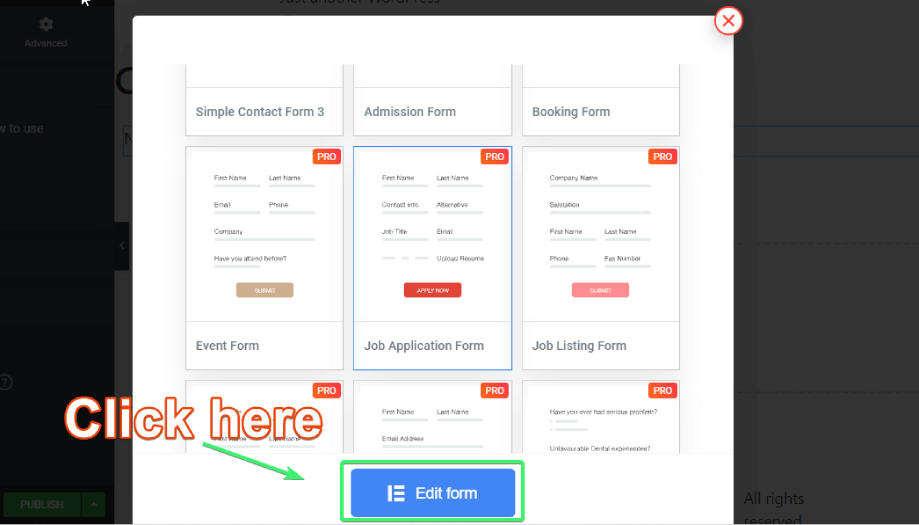
- Click on ‘Edit Form’ at the bottom of the page.
- Now, a new window will pop up. This window will feature all the Elementor’s elements on the left, “FORM SETTINGS” on the top-left, and “UPDATE & CLOSE” on the top-right.
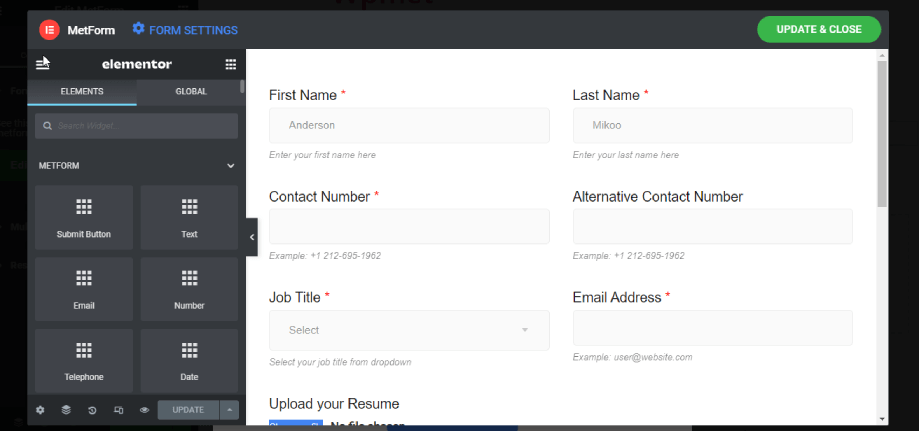
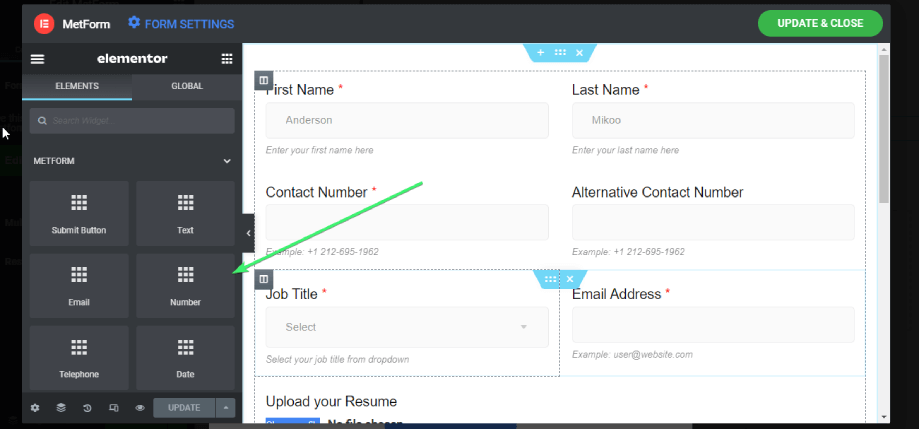
- From the job application template, you can change any content or style by clicking on the respective element of the form content area. On top of that, you can also drag and drop any Metform fields (more on this later) that you need along with Elementor elements from the ‘ELEMENTS‘ tab.
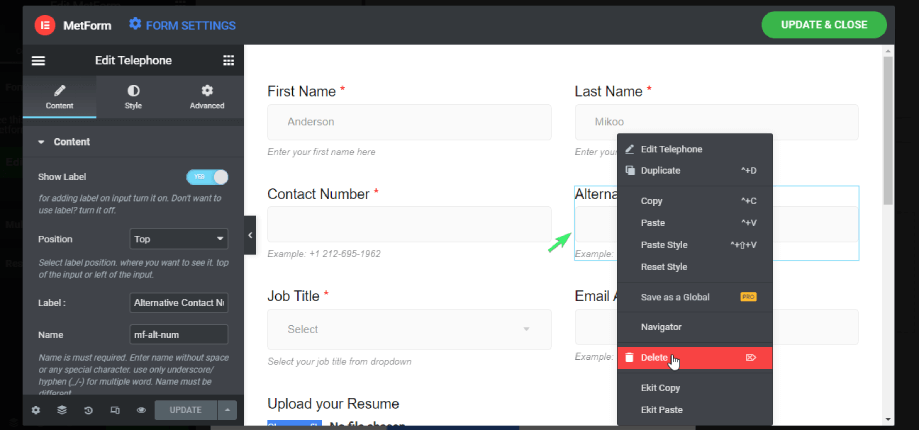
- Note that, if you want to delete any field, just hover over the form field you want to delete and then right-click on your mouse. There you will find an option to delete the form field.
Step-4: Configure the Job Vacancy Form
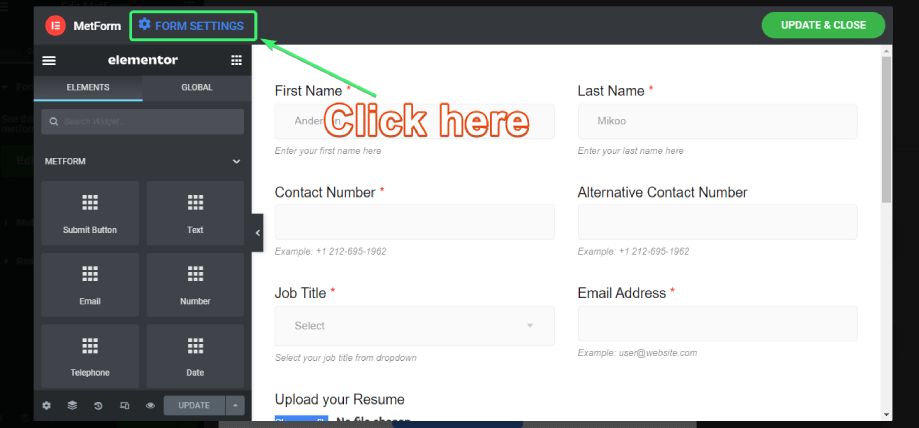
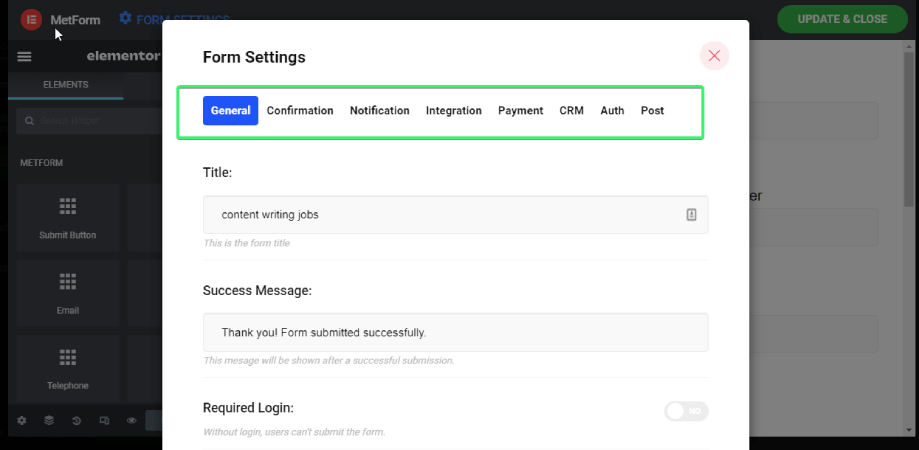
- When you’re done styling the form, click on the FORM SETTINGS
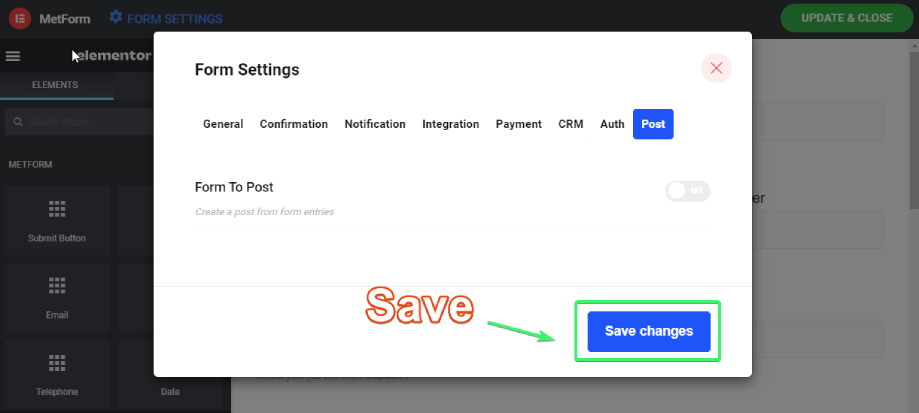
- Here you’ll find General, Confirmation, Notification, Integration, Payment, CRM, Auth, and Post tabs. However, for the job vacancy forms, General, Confirmation, and Notification settings should be enough for you (more on this later).
- After you make any changes to these, make sure you save the changes by clicking on the Save changes button at the bottom.
- When you’re all done, click on “UPDATE & CLOSE”.
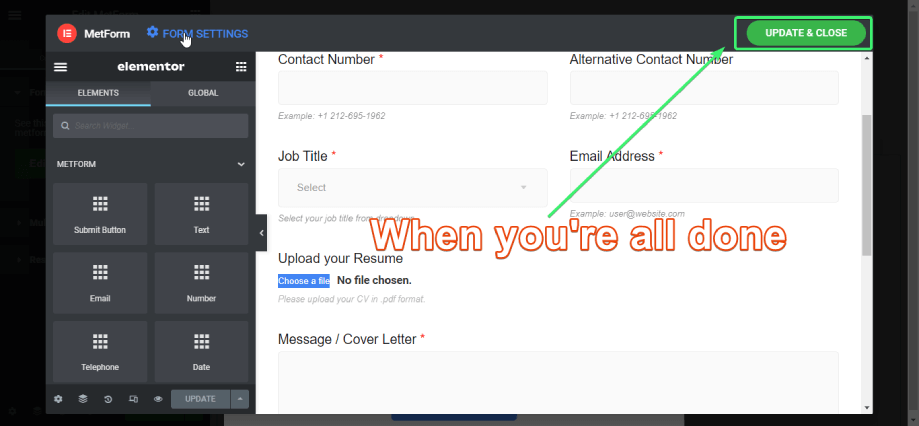
That’s it. Your job application form is done and ready to use.
Form Fields You Should Use for your Vacancy Application Form
While creating an engaging vacancy application form, you must make sure that the form contains all the basic elements of a vacancy application. MetForm offers the following form fields to add to your form.
- Text
- Number
- Textarea
- Telephone Number
- Mobile Number
- URL
- Password
- Data
- Time
- Select
- Multi-Select
- Checkbox
- Radio
- Switch
- Range
- Opt-in
- GDPR Consent
- Google reCAPTCHA
- Simple Captcha
- Rating
- File Upload
- Calculation
- Image Select
- Simple Repeater
- Google Map Location
- Color Picker
- Payment Method
- Signature
- Toggle Select
- Like Dislike, and more.
What form fields will be required for your vacancy application form depends largely on what you want to receive from the job applicants.
Usually, you will need a text widget to collect the applicant’s name, cover letter, and other information that can be collected with a text box.
Use the Email and Mobile Number widget to collect applicants’ contact info to communicate with them later on.
File Upload feature will help them add their CV, resume, or picture.
Adding a signature field is not mandatory, but you can add it if you want.
Make sure to use Google reCAPTCHA so that you can protect the form from spammers and bots. You can use any other form fields you want as per your requirement.
Note that, if you need a heap of information from the applicants, you might need more form fields to include in your vacancy application form.
On the other hand, if you need some basic information with a cover letter from your applicants, you will need a comparatively simple form with a few form fields.
Customize the Entire Contact Form with General Settings
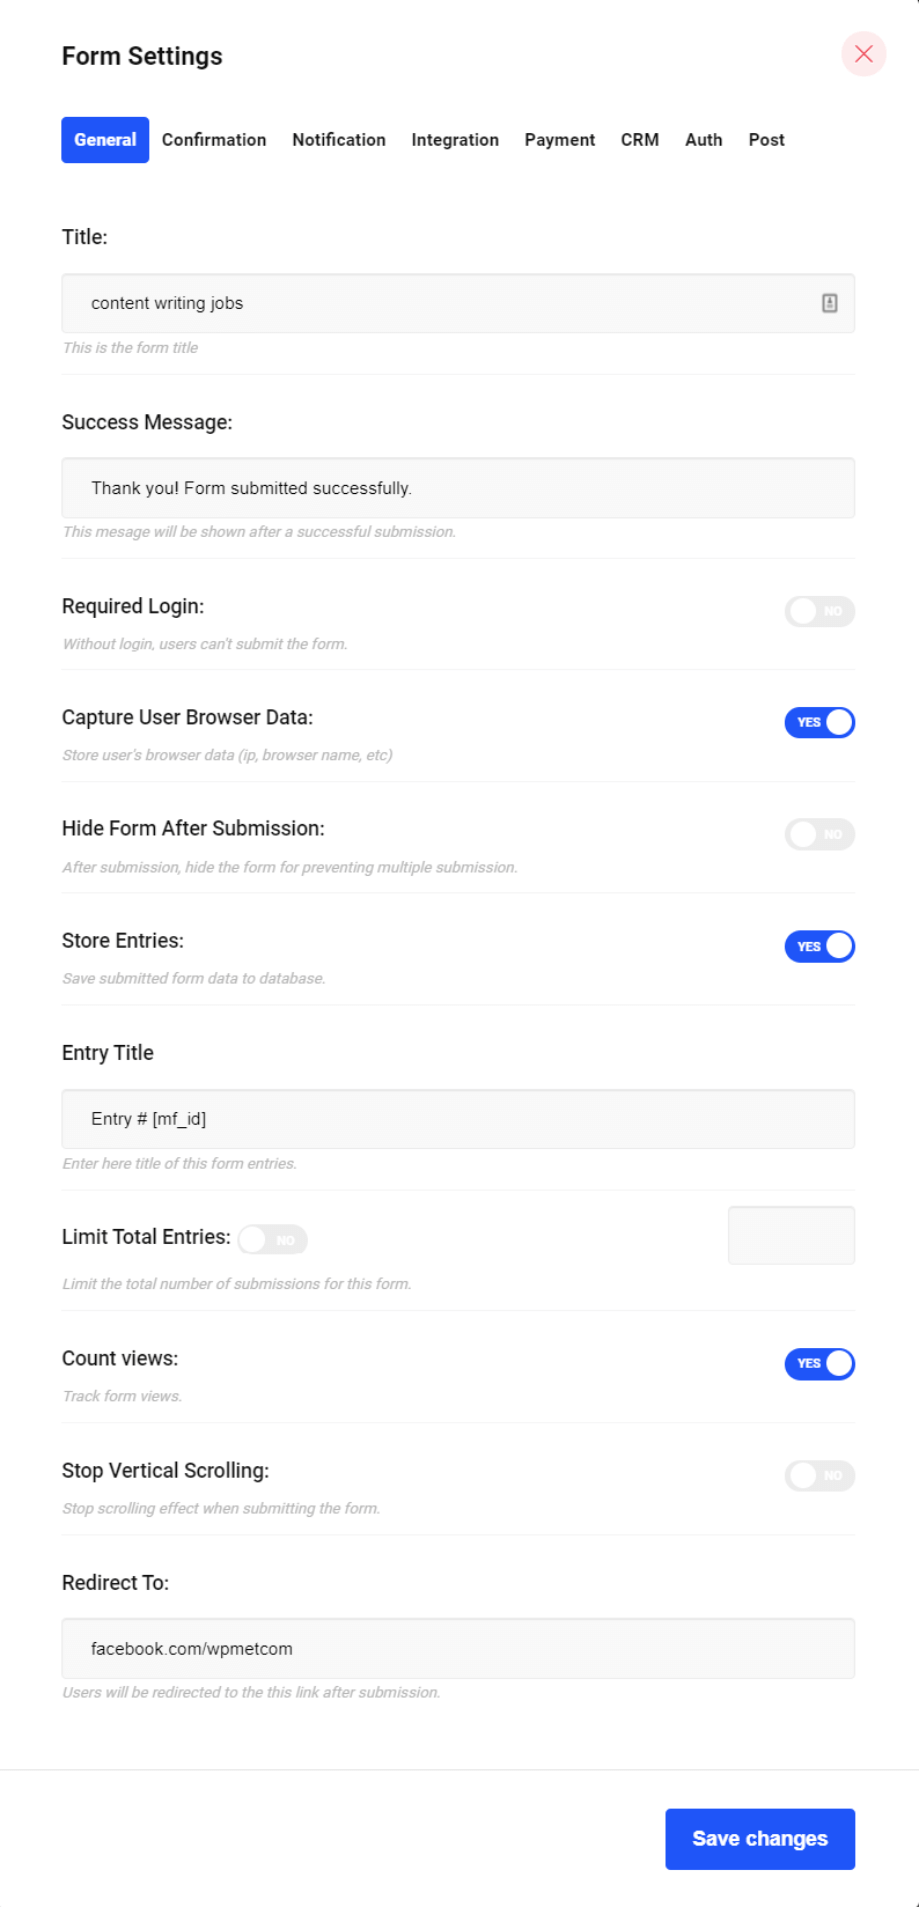
General Settings of MetForm comes with almost all the basic settings for your job vacancy form. Let’s check them out.
Title: If you haven’t given the form a title yet, you can do so here.
Success Message: Create/customize the message a candidate will receive after successfully filling the form up.
Required Login: Will the candidates require to log in to fill the form or they can fill up the form without logging in? You can define that with this setting.
Capture Users’ Browser Data: Choose Yes/No as per your requirement.
Hide Form After Submission: If you want to hide the form after submission to prevent multiple submissions, turn the toggle to ‘Yes’.
Store Entries: Do you want to store the entries from the candidates in the database? If yes, enable that from here.
Entry Title: In case you want to store the entries in the database, choose the way how the entries will be titled.
Limit Total Entries: Do you just want to receive a certain number of entries for a job position? If yes, enable this option and specify the number of total entries you would like to accommodate.
Count Views: Do you want to count the form views from the dashboard? If yes, enable it.
Stop Vertical Scrolling: You are at full liberty to stop or keep the scrolling effect at the time of submitting the form.
Redirect To: Where do you want to redirect the candidates after they submit the form? Make sure you place a working URL here.
When you’re all done, click on “Save changes”.
If you want to customize a contact form with MetForm, here are the steps to follow.
Enable Mailing a Confirmation Copy to the User
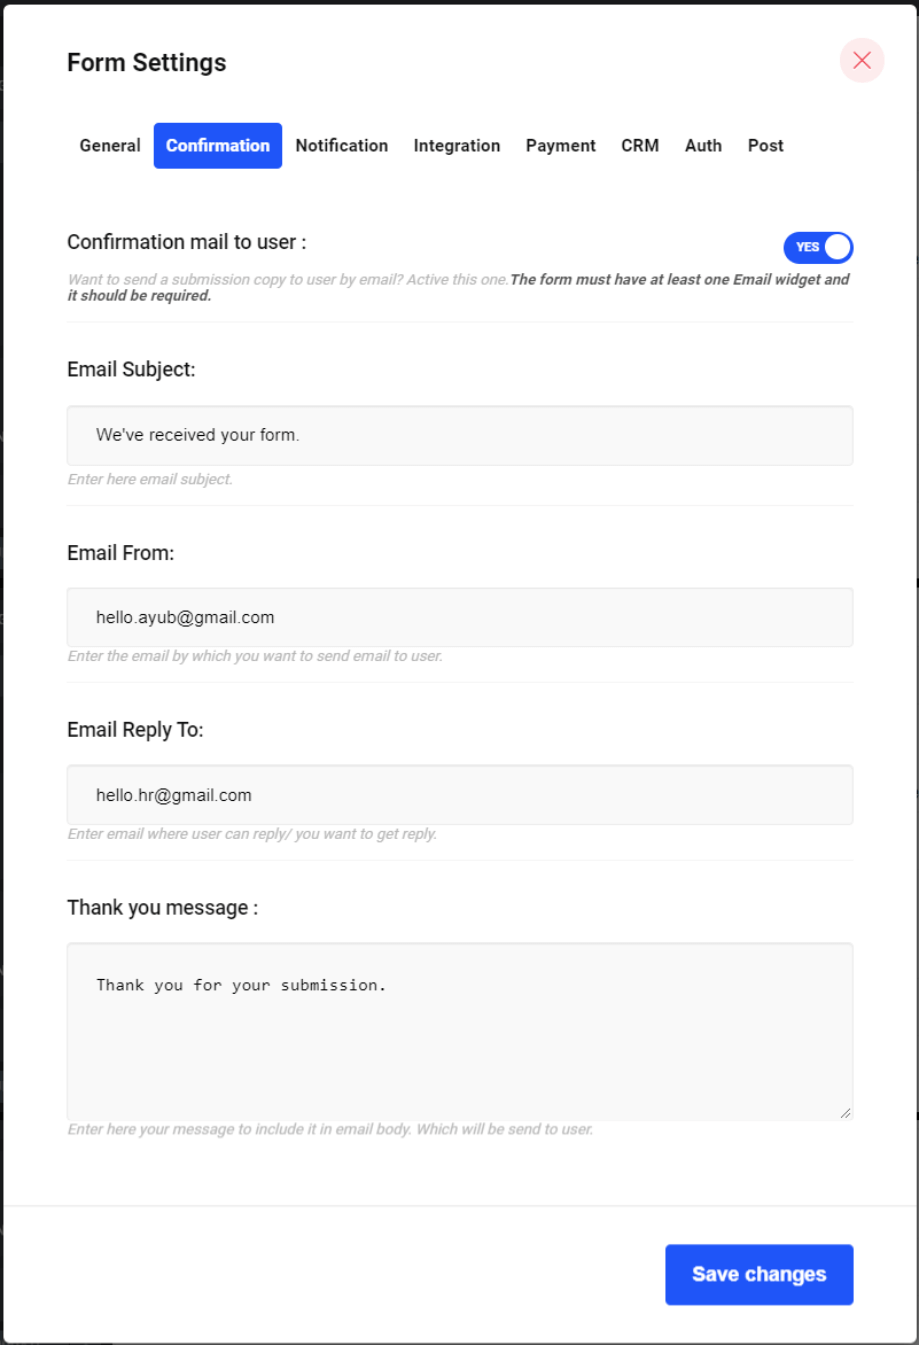
There is a “Confirmation” tab on the Form Settings that you can use to send a confirmation copy to the job vacancy candidates once they complete their submissions.
Toggle the Confirmation mail to user option “YES” and you’ll see that everything you need to set it.
Email Subject: Set the email subject for the email.
Email From: Enter the email by which you want to send email to the candidates
Email Reply To: Enter email where the candidates can reply to you/ you want to get replied.
Thank-you message: This is the final email body for you to customize. Before sending it to the candidates, tailor it as per your job vacancy positions.
Get Notified About a New Form Submission
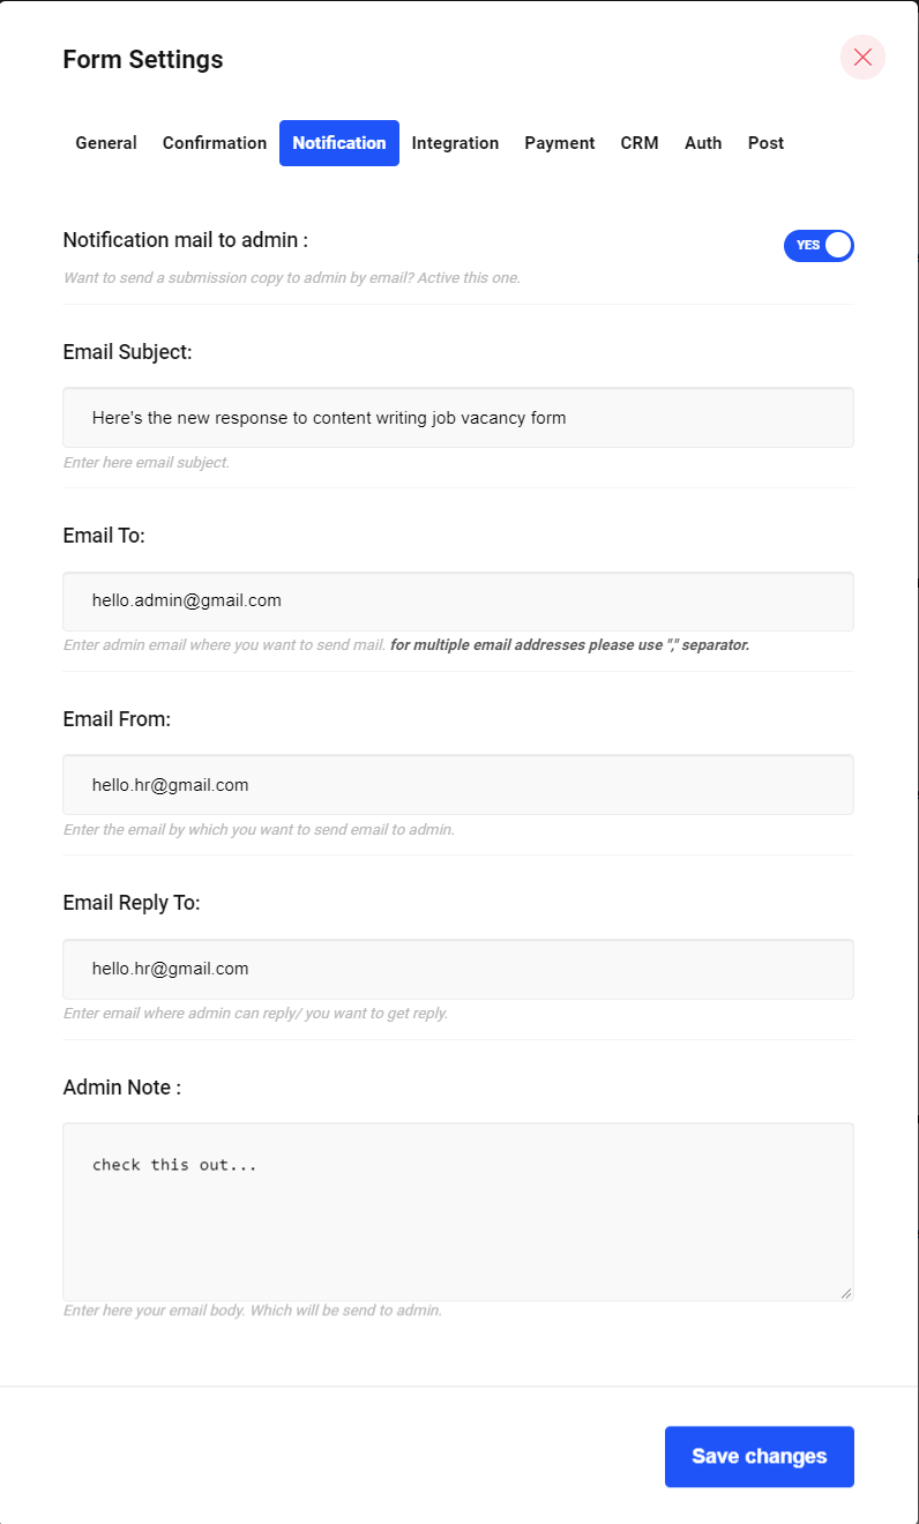
If you are an admin/HR, you might want to get a submission copy of the job candidates who have filled up the form. Just set the Confirmation mail to user option to “YES” and edit the following settings:
Email Subject: This is where you have to put your email subject.
Email To: Enter the admin’s email address where you want to send the emails.
Email From: Enter an email address where the admin can reply.
Email Reply To: Enter the email by which you want to send the email to the admin.
Admin Note: Enter here your email body that will be sent to admin.
Embed the Job Vacancy Application Form to Any Page
Do you want to embed your job vacancy application form into any other pages or posts on your website? No worries. You can easily do that if you’ve made the form with MetForm.
MetForm creates a unique shortcode for all the forms you create with it.
To find the shortcode of your job vacancy application form that you’ve created, go to WordPress Admin Dashboard ➜ MetForm ➜ Forms.

You will find the shortcodes of any form on there. Just copy the shortcode of your form and embed the shortcode on any page or post where you want to show the job vacancy application form.
Final Thoughts
Creating an engaging vacancy form requires time and effort. Invest your time in creating a form that attracts the best candidates to apply.
Though you should make sure that all the necessary fields of the form such as name, email, cover letter writing, and CV/image upload feature are present, don’t make the form too long, boring, and tedious.
Taking the help of MetForm can help to make your vacancy application time within minutes. However, it’s not about a job application form only. You can create almost any kind of form you can imagine from scratch or using the readymade form templates. You can also create multi step form, conditional form, calculator form and many more with this form builder.
Leave a Reply