Why add Zoom meeting to your WordPress site? Well, since the last couple of years, virtual meetings have been on the rise in the professional arena. For virtual communication, companies are taking advantage of different web and video conferencing tools. Among these tools, the one that stood out is the Zoom meeting.
Zoom is leveraged for a wide variety of activities like remote work, distance education, online social relations, and even for regular communication. But this piece of software came in vogue predominantly for virtual official meetings after the pandemic.
As per the stats of Business of Apps, Zoom generated a revenue of $2.6 billion in 2020 which is a 317% increase year-on-year.
According to the disclosure of Zoom reported by Backlinko, Zoom has 504,900 business customers as of July, 2021.
These pieces of data clearly demonstrate Zoom’s hold in the market worldwide. The tool is user-friendly and provides all the sought after features including HD audio and video, audio-only conferencing, cross-platform messaging, meeting recording, end-to-end encryption, meeting scheduling, etc.
And the good news for you is that you can do WordPress Zoom integration to your site. Can’t believe it? But it’s true that you can add Zoom meeting to your WordPress site. Wondering how? Well, that’s exactly what I will walk you through in this write-up. I will show the step-by-step process of how to add Zoom meeting to your WordPress site using ElementsKit.
In case you are wondering what ElementsKit is, it’s basically a page builder for Elementor. It has some mind-blowing features that aren’t just handy for page building but are likely to double your sales and conversions. Along with all these features, it also comes with built-in Zoom feature through which you can integrate Zoom meeting to your WordPress site.
So, let’s take a look how to add Zoom meeting to your WordPress site with the help of ElementsKit.
Interested to know about the method of adding a search bar to your WordPress site? Visit the link below then-
How to add a search bar to your WordPress Site?
Open your Site’s Dashboard:
First up, log into your website’s admin panel and instantly after that, your site’s dashboard will appear on the screen.
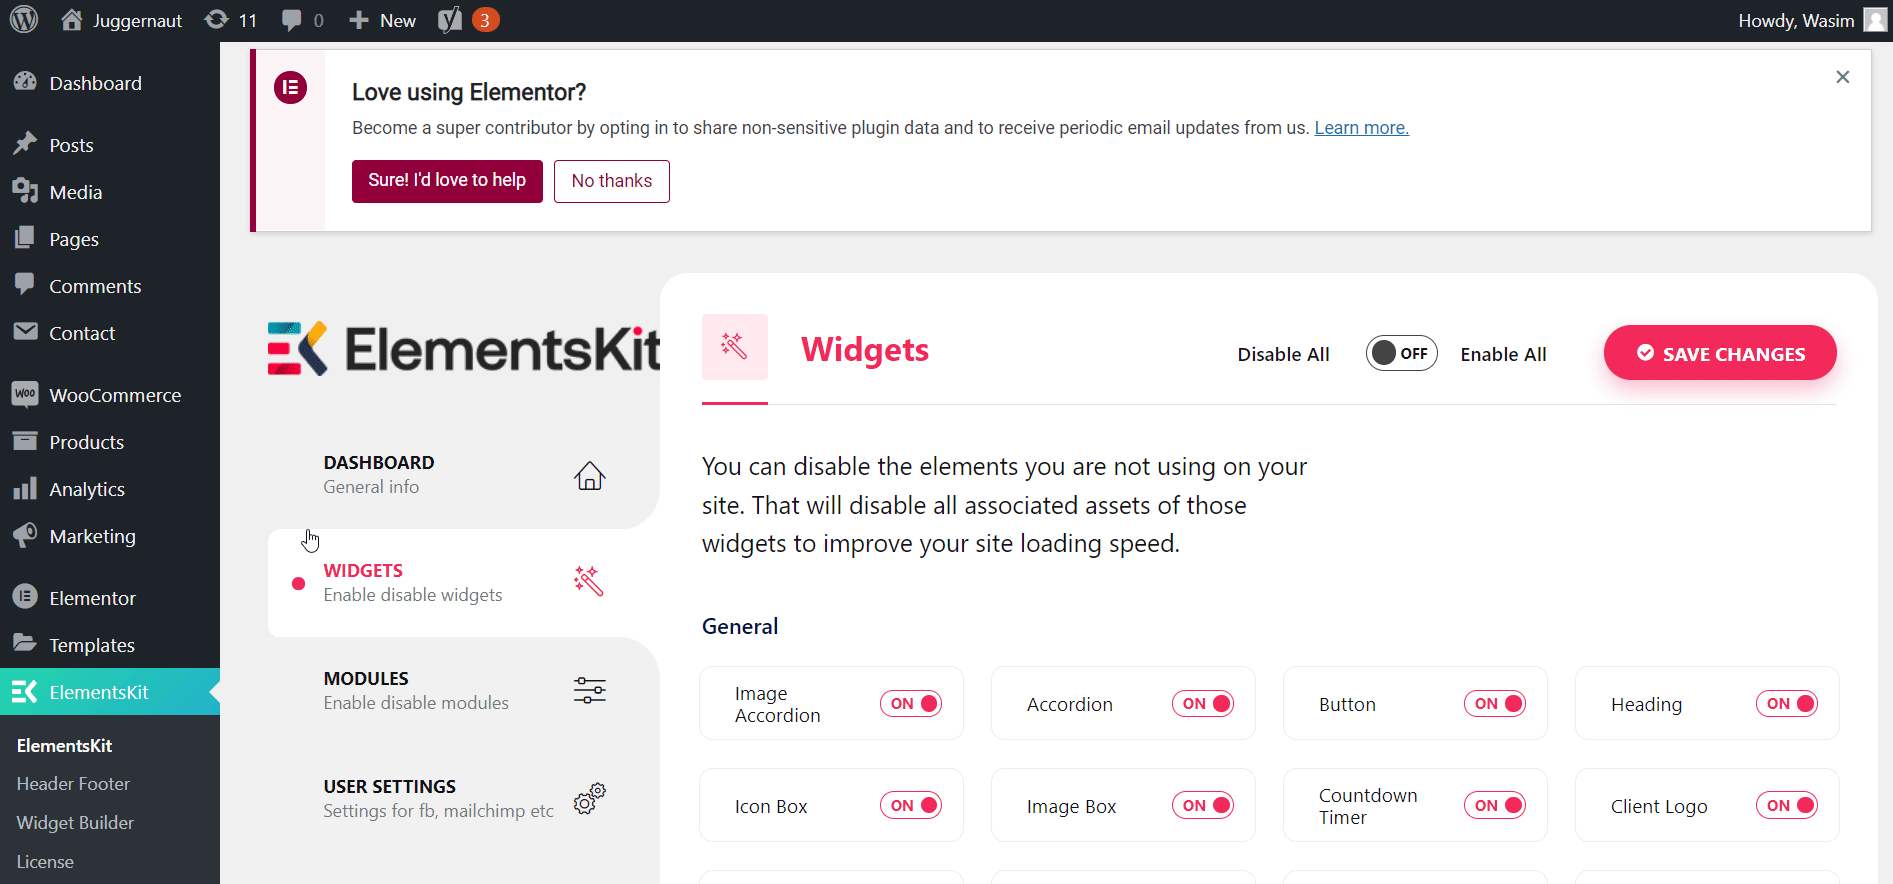
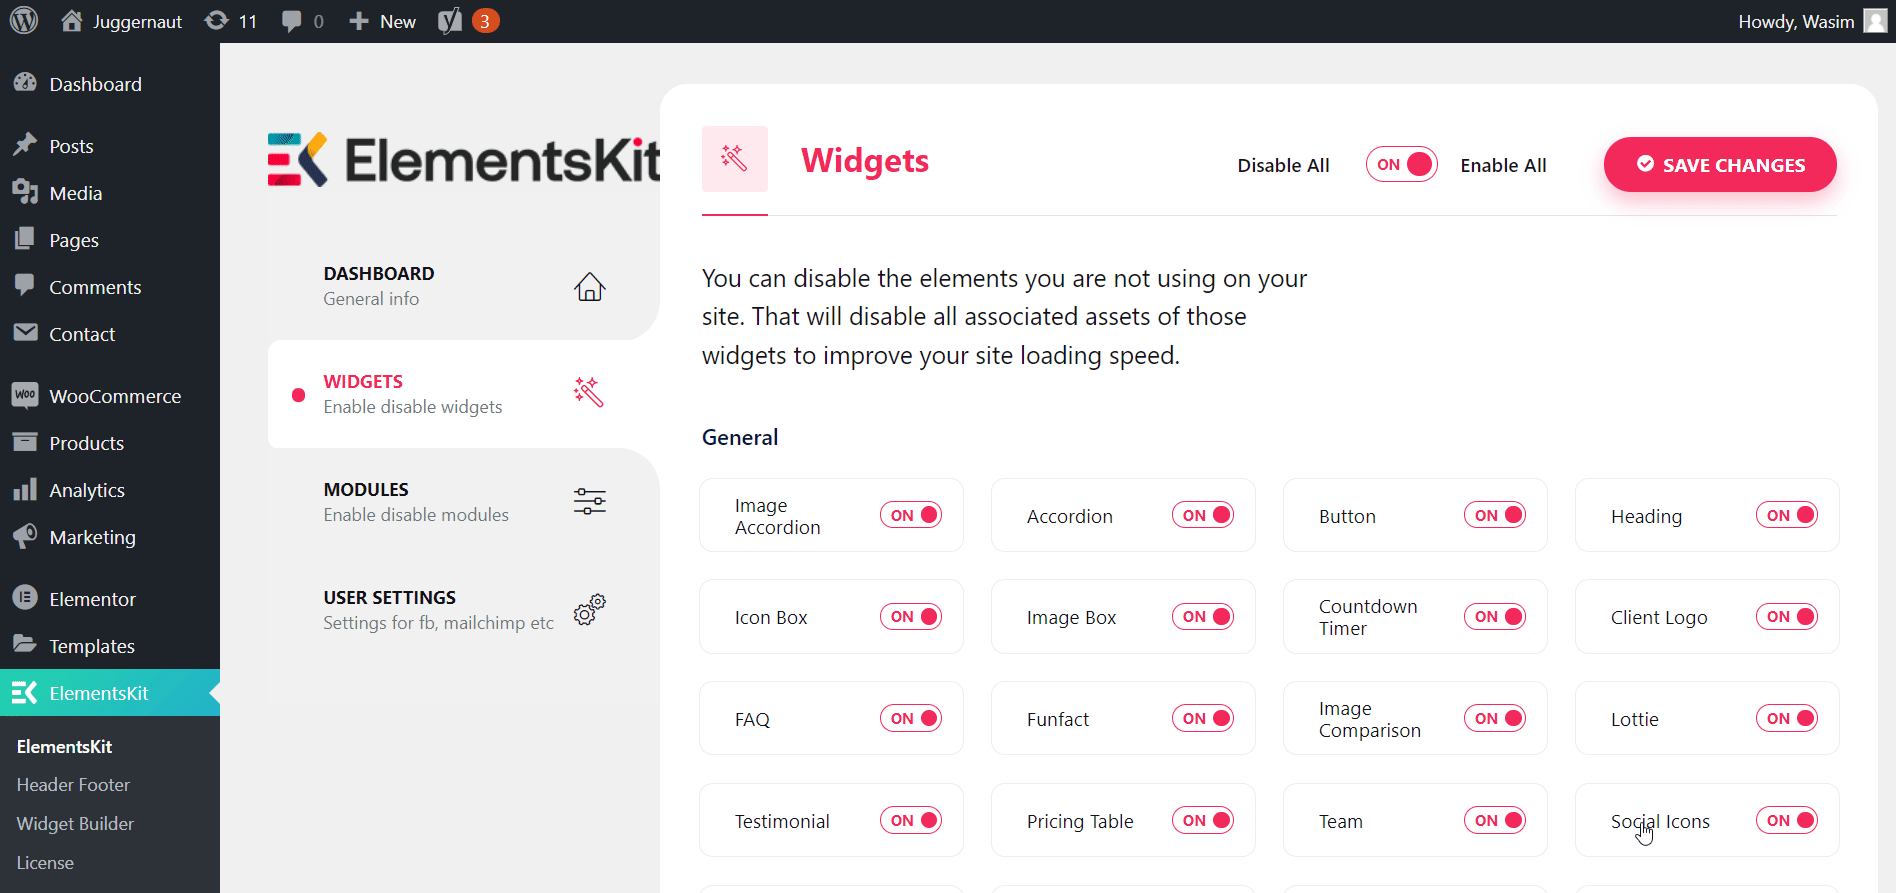
Enable Zoom from the Specified Area:
Navigate and then click the ElementsKit on the sidebar. Next, click the ElementsKit tab on the left sidebar. With that, a list of items will show up on the screen.
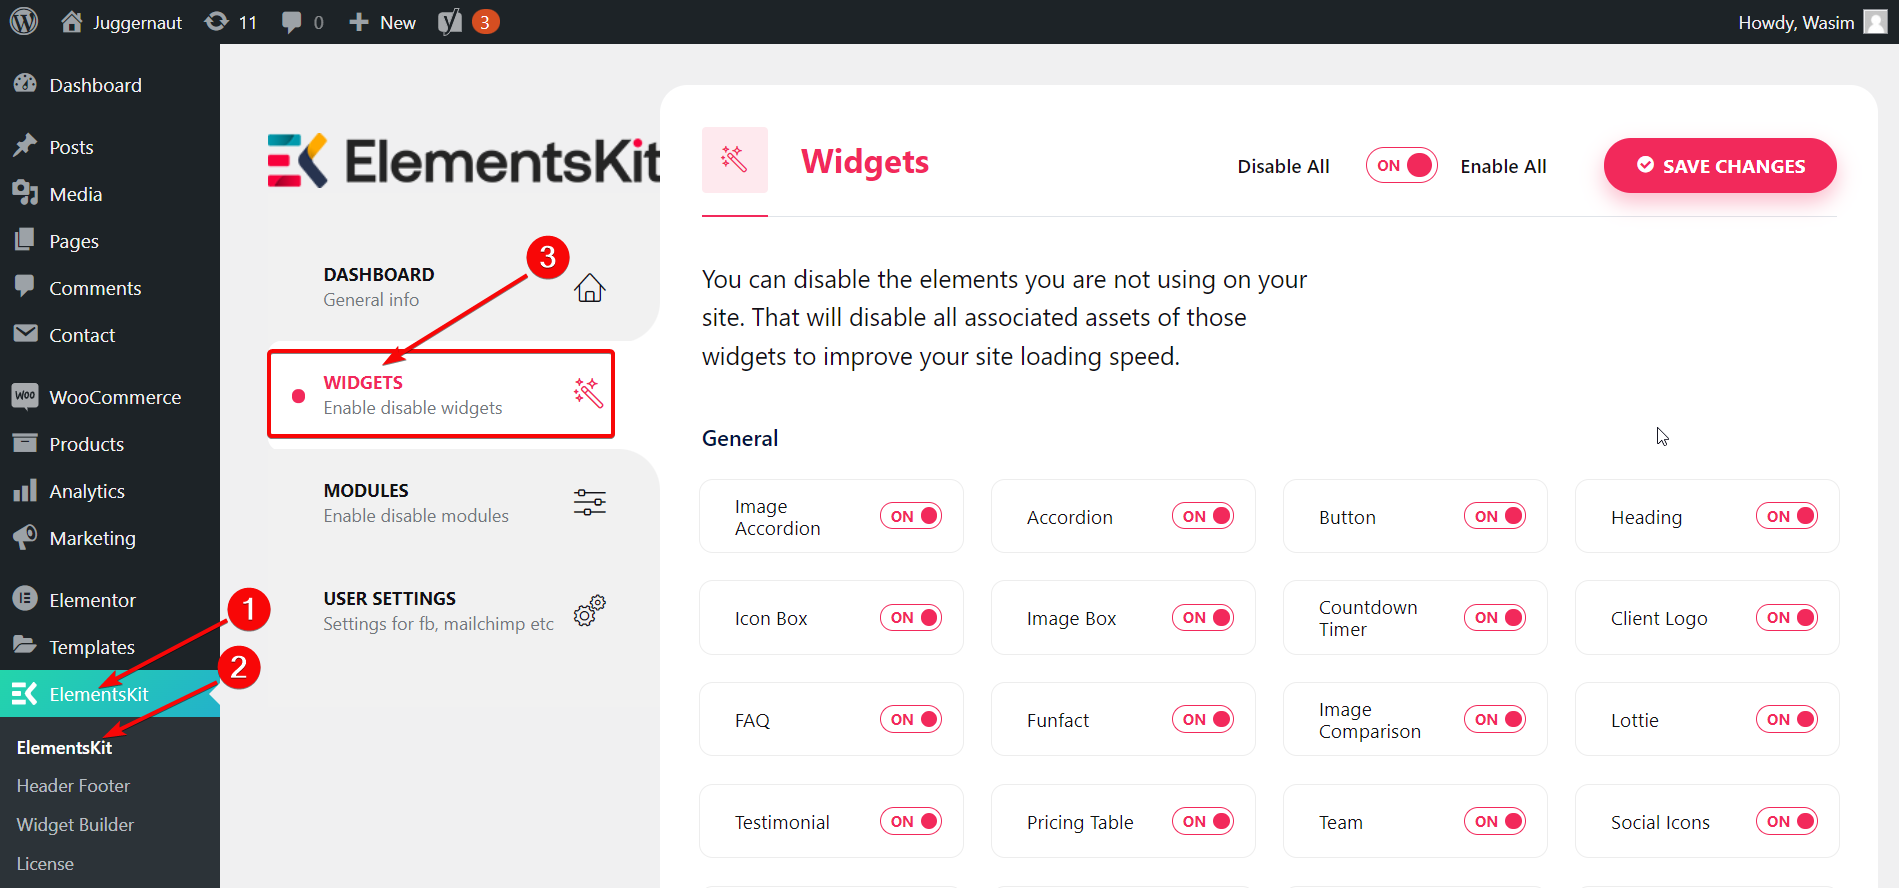
Now, scroll down the page and find “Zoom”. In order to enable Zoom, turn on the toggle.
Source the Fields for Putting API and Security Keys:
Then, click the “USER SETTINGS” placed at the bottom of the same left sidebar. This will bring up a list of menu titles on the window. Find and click the “ZOOM DATA” which will show a drop-down menu containing API and Security Keys.
Collect your API and Security Keys:
Now, it’s time to collect your API Key and Security Key. How to do that? Follow the steps below-
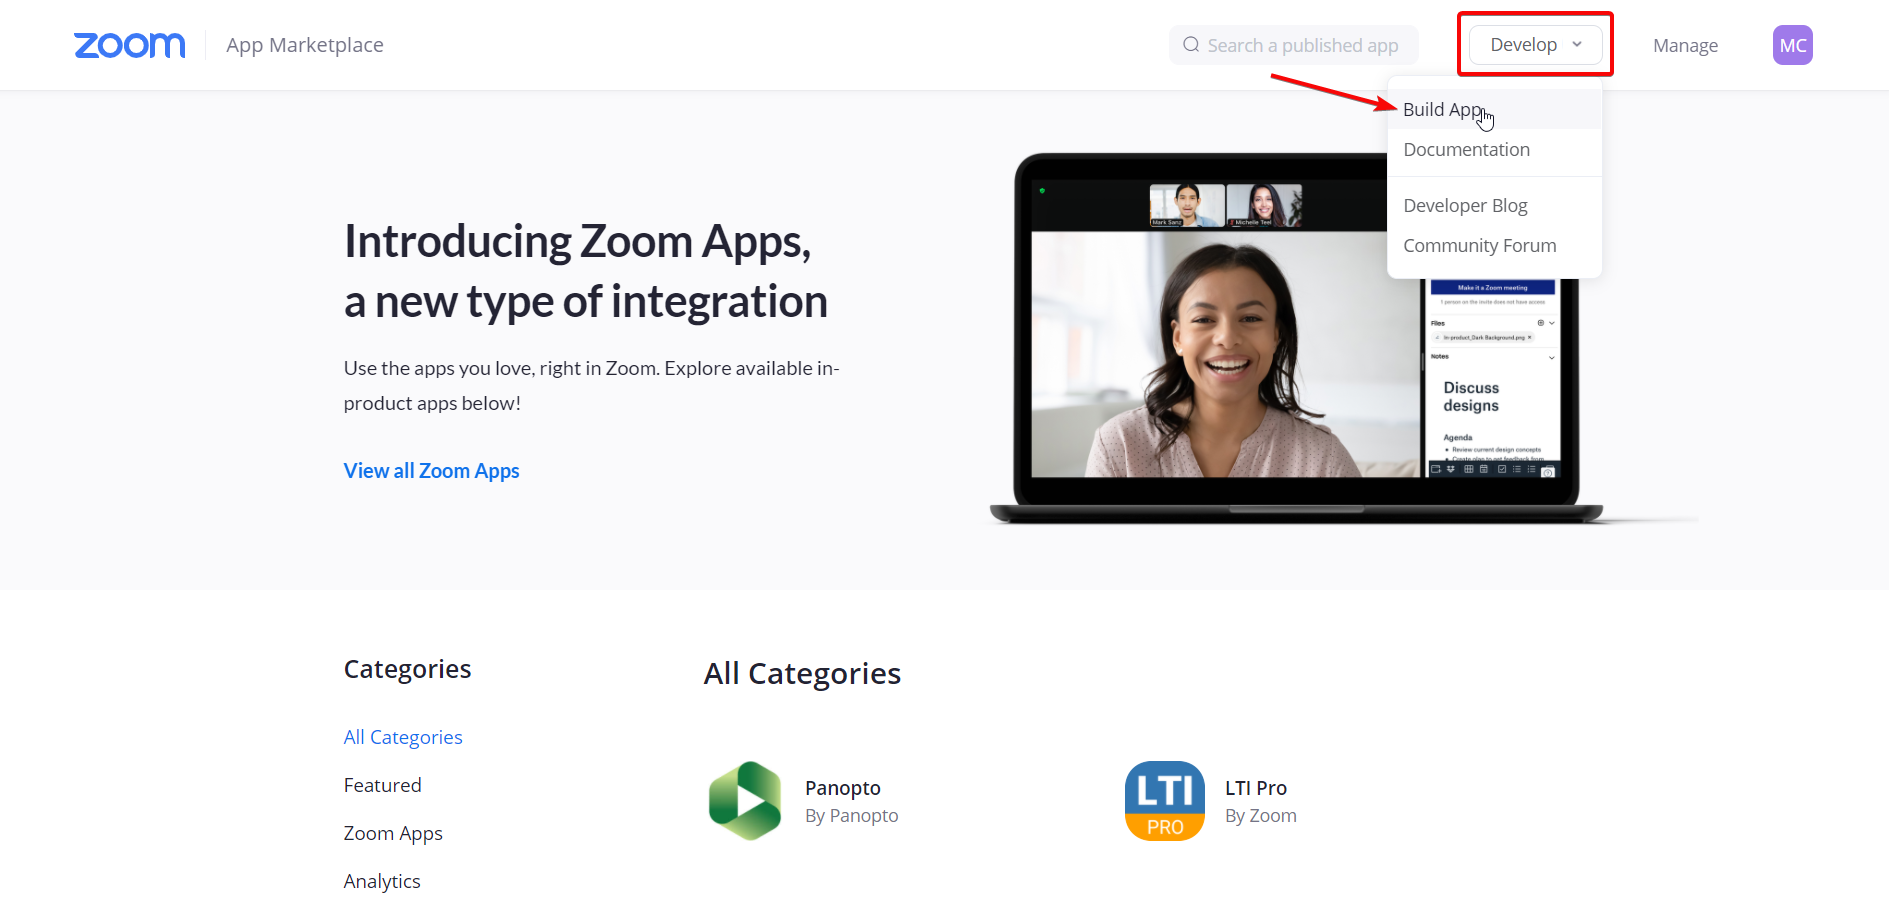
Visit Zoom’s Marketplace Site:
First up, go to marketplace.zoom.us and sign in. Once you are signed in, click the drop-down title “Develop” and select “Build App” from the menu.
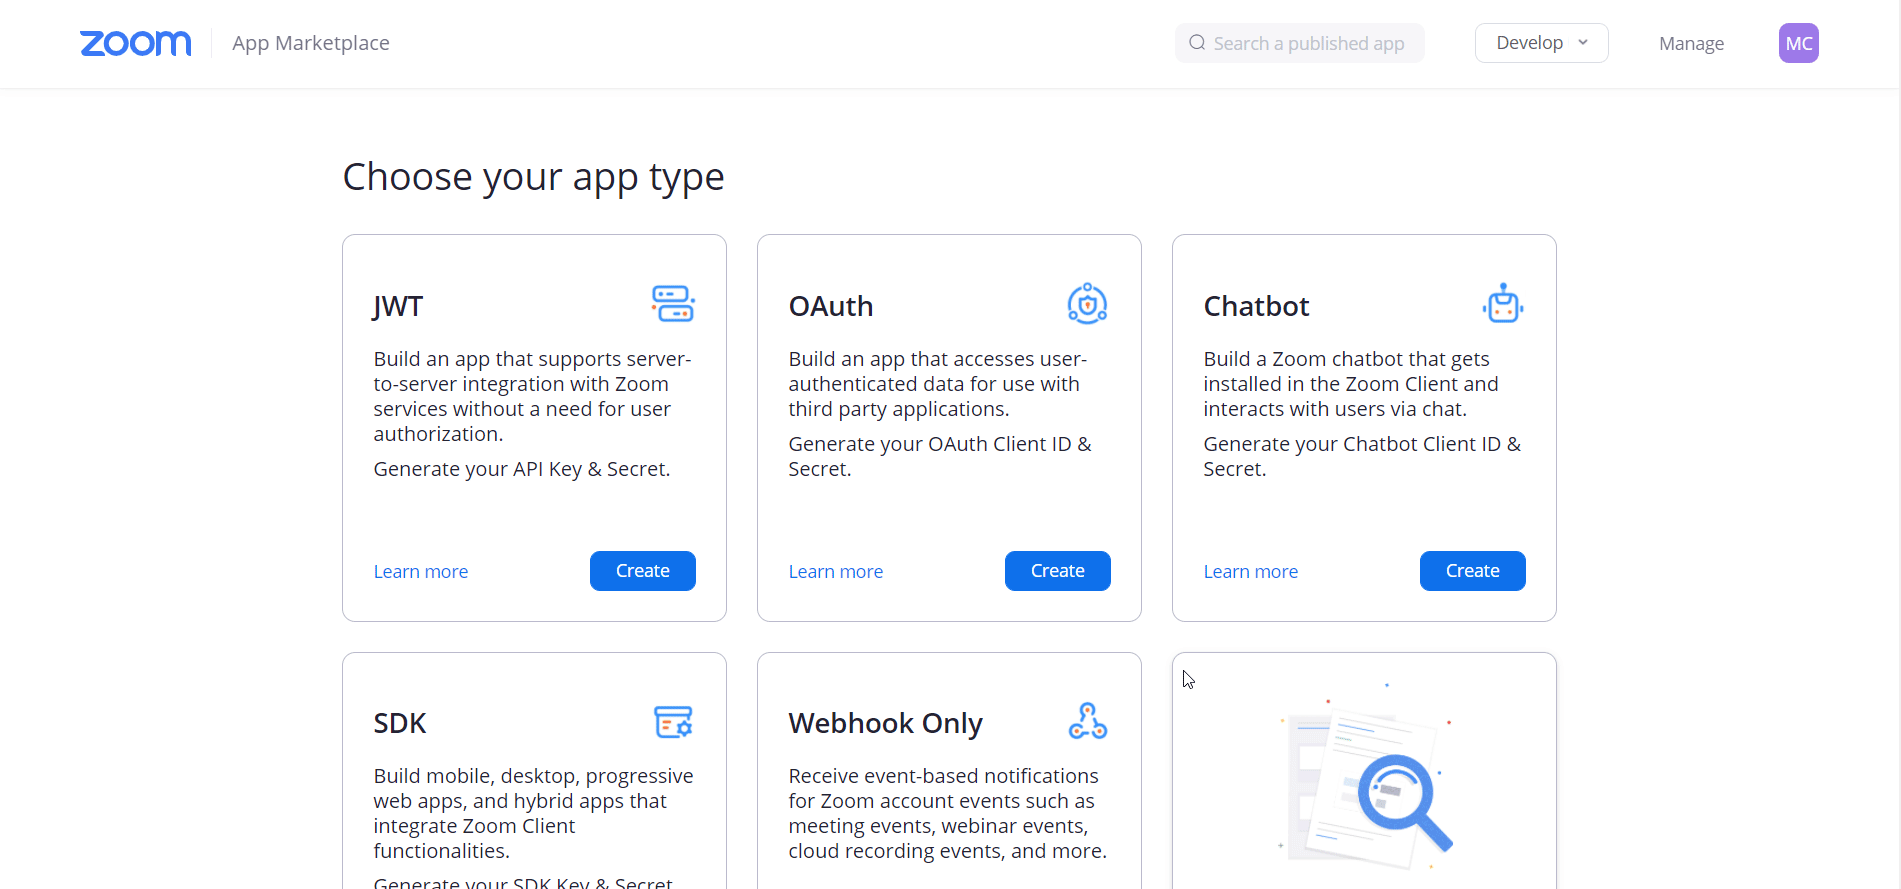
Create an App with JWT Type:
Next, you will see a number of app types on the screen through which you can create an app. But you have to create an app with JWT type. Under JWT type, you will notice a “Create” button and click the button to proceed.
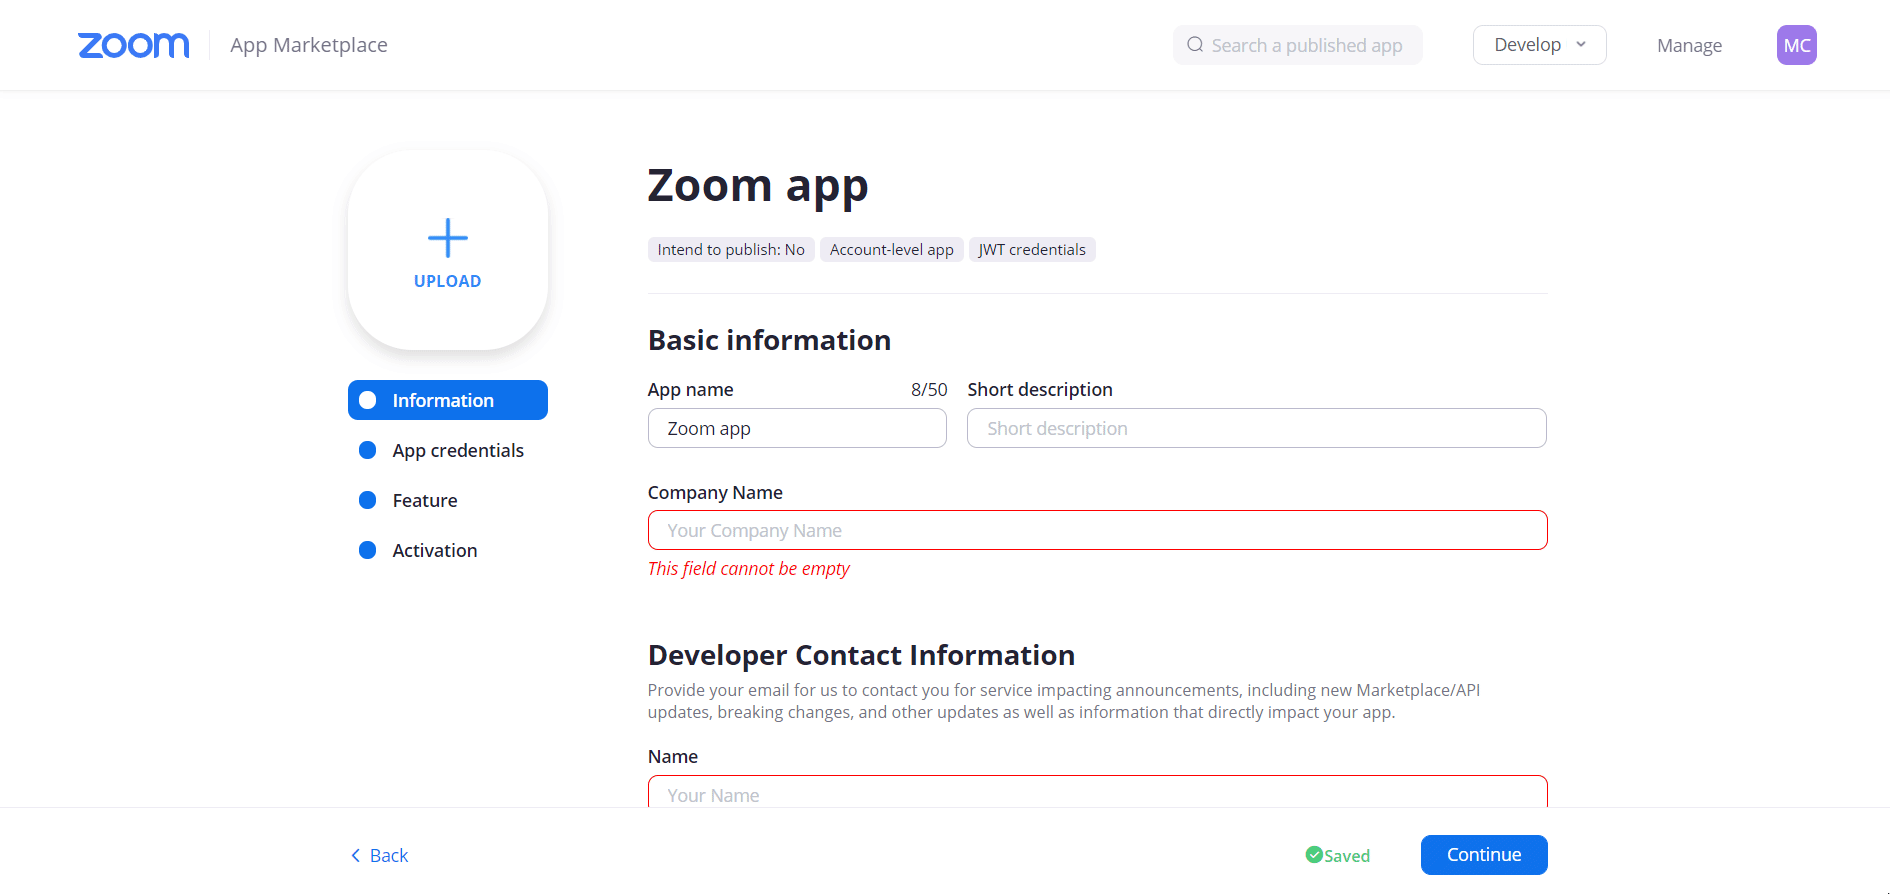
Provide your Basic Information:
Then, a form-type layout will show up on the screen with different fields. Here, you have to provide your basic information including app name, company name, developer name, and e-mail address. Some additional fields are also there but they are optional to fill. Then, click the “Continue” button.
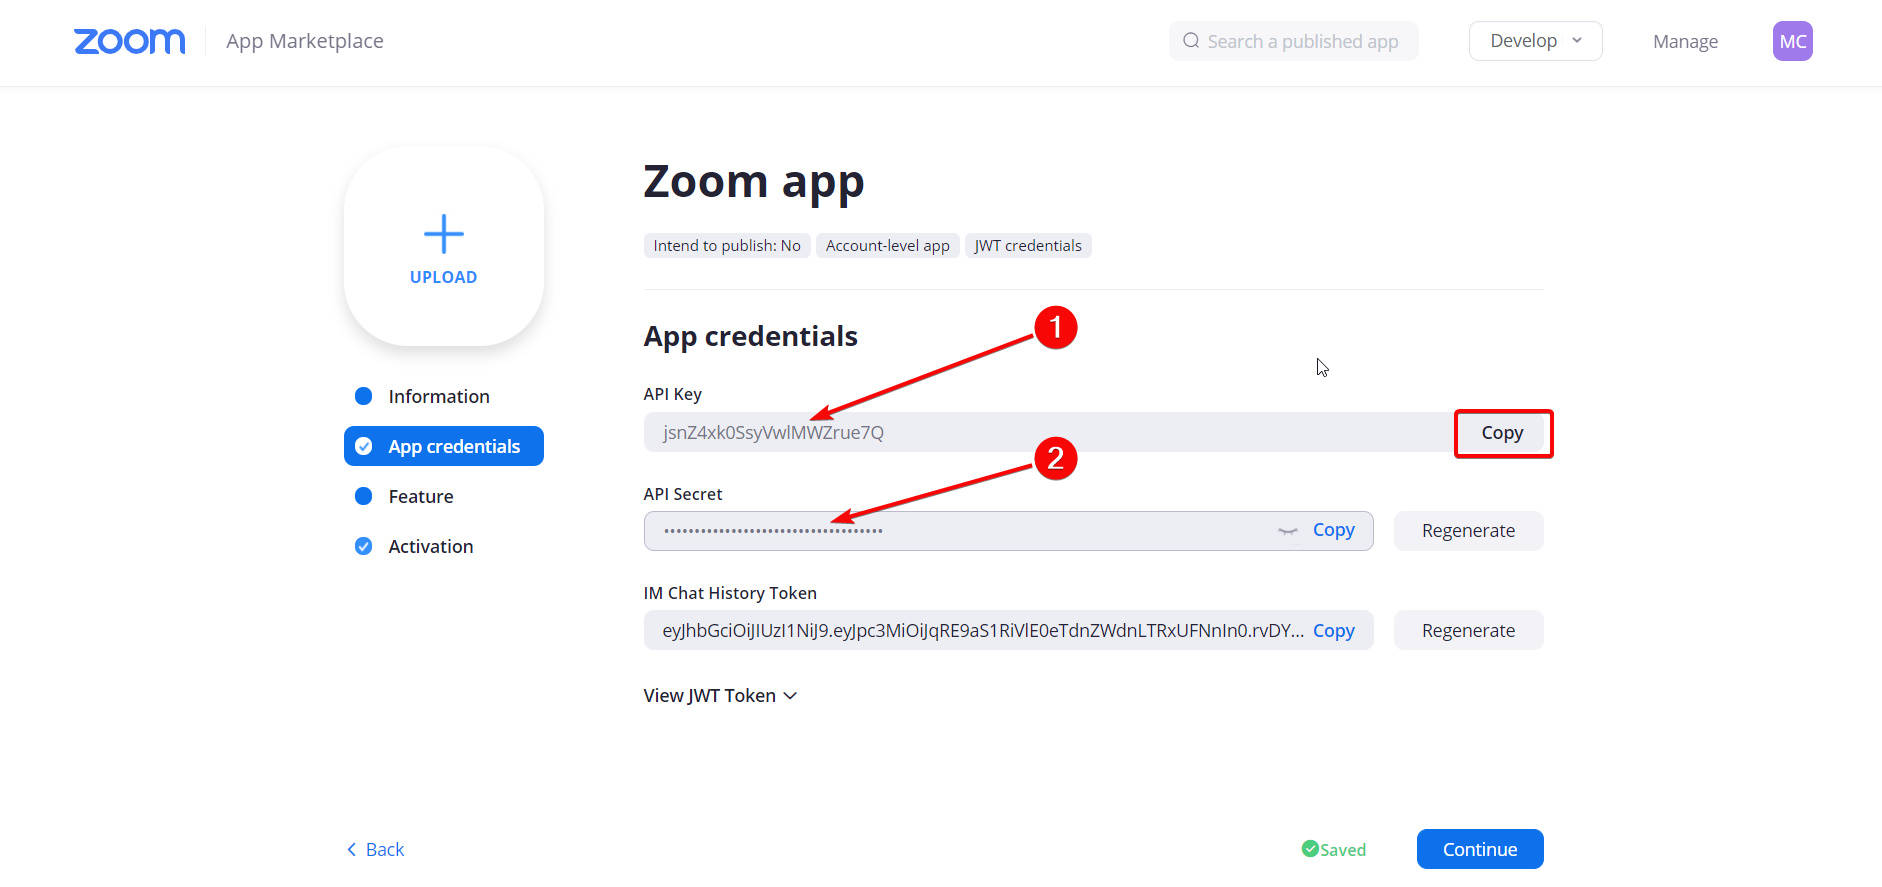
Copy the API and Secret Key Credentials:
With that you will move to the next segment and that is “App Credentials”. Under the App Credentials, you can view API key and Secret key on the relevant fields. All you have to do is copy the keys from there.
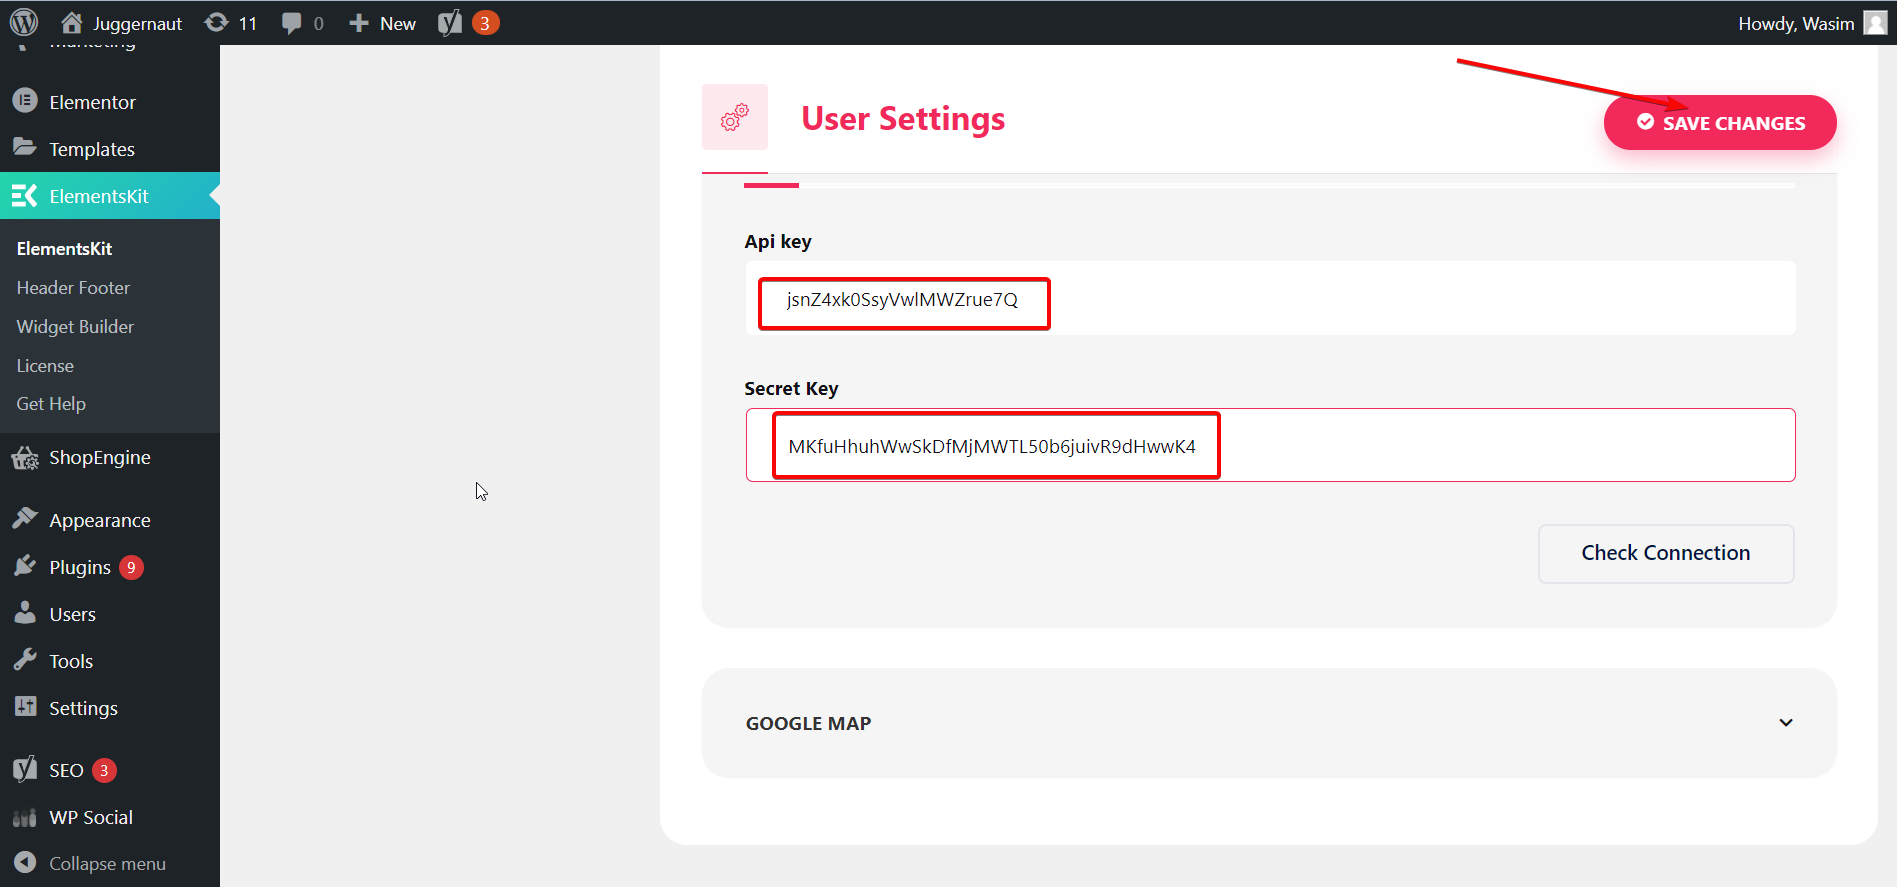
Paste the Copied Keys to Zoom Data Fields:
Now, go back to the ElementsKit’s Zoom Data segment and paste the copied keys into your Zoom Data fields. Finally, click the “Save Changes” button.
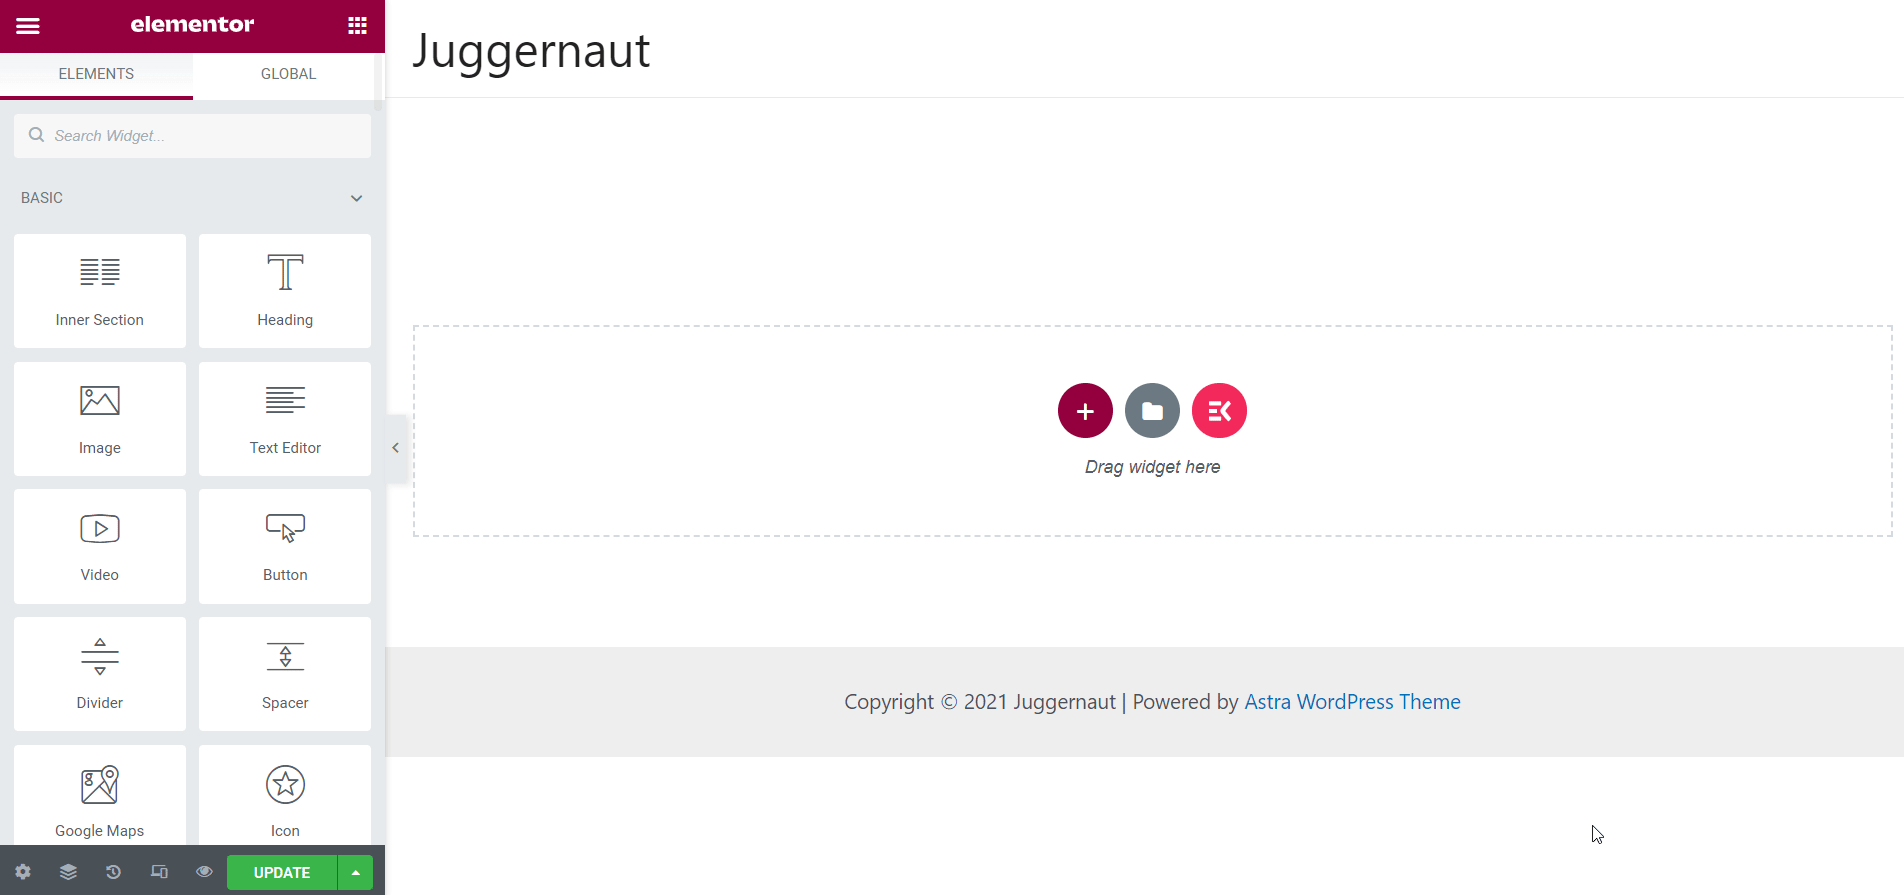
Open any Page and Switch to the Elementor Window:
Now, open any page of your website and switch to the Elementor window to open your Zoom meeting.
Drag and drop the Zoom Widget:
Then type “zoom” on the search field in the sidebar. The Zoom widget will show up immediately. Just drag and drop the widget on the designated area and that’s it. Your Zoom meeting is active now on your website.
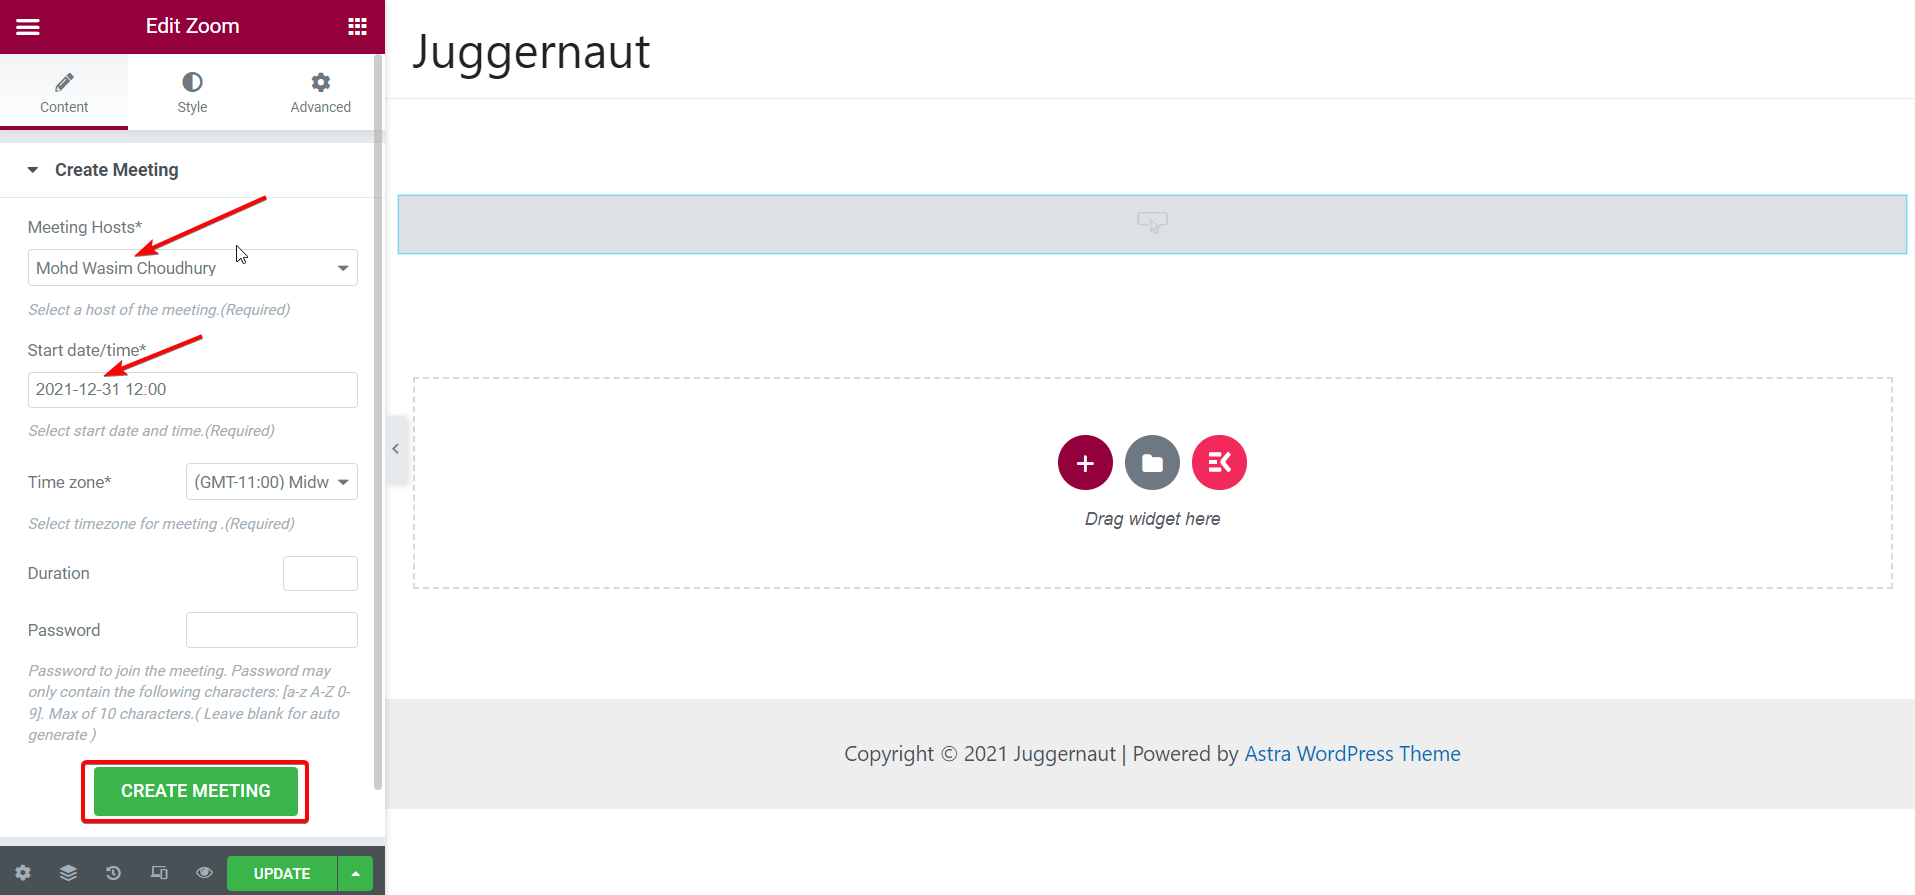
Create a Meeting:
But to view the meeting details, you have to create a meeting. Before that, provide your meeting host name, start date/time, etc. Then, you are good to go for creating a meeting. For that, click the “Create Meeting” button.
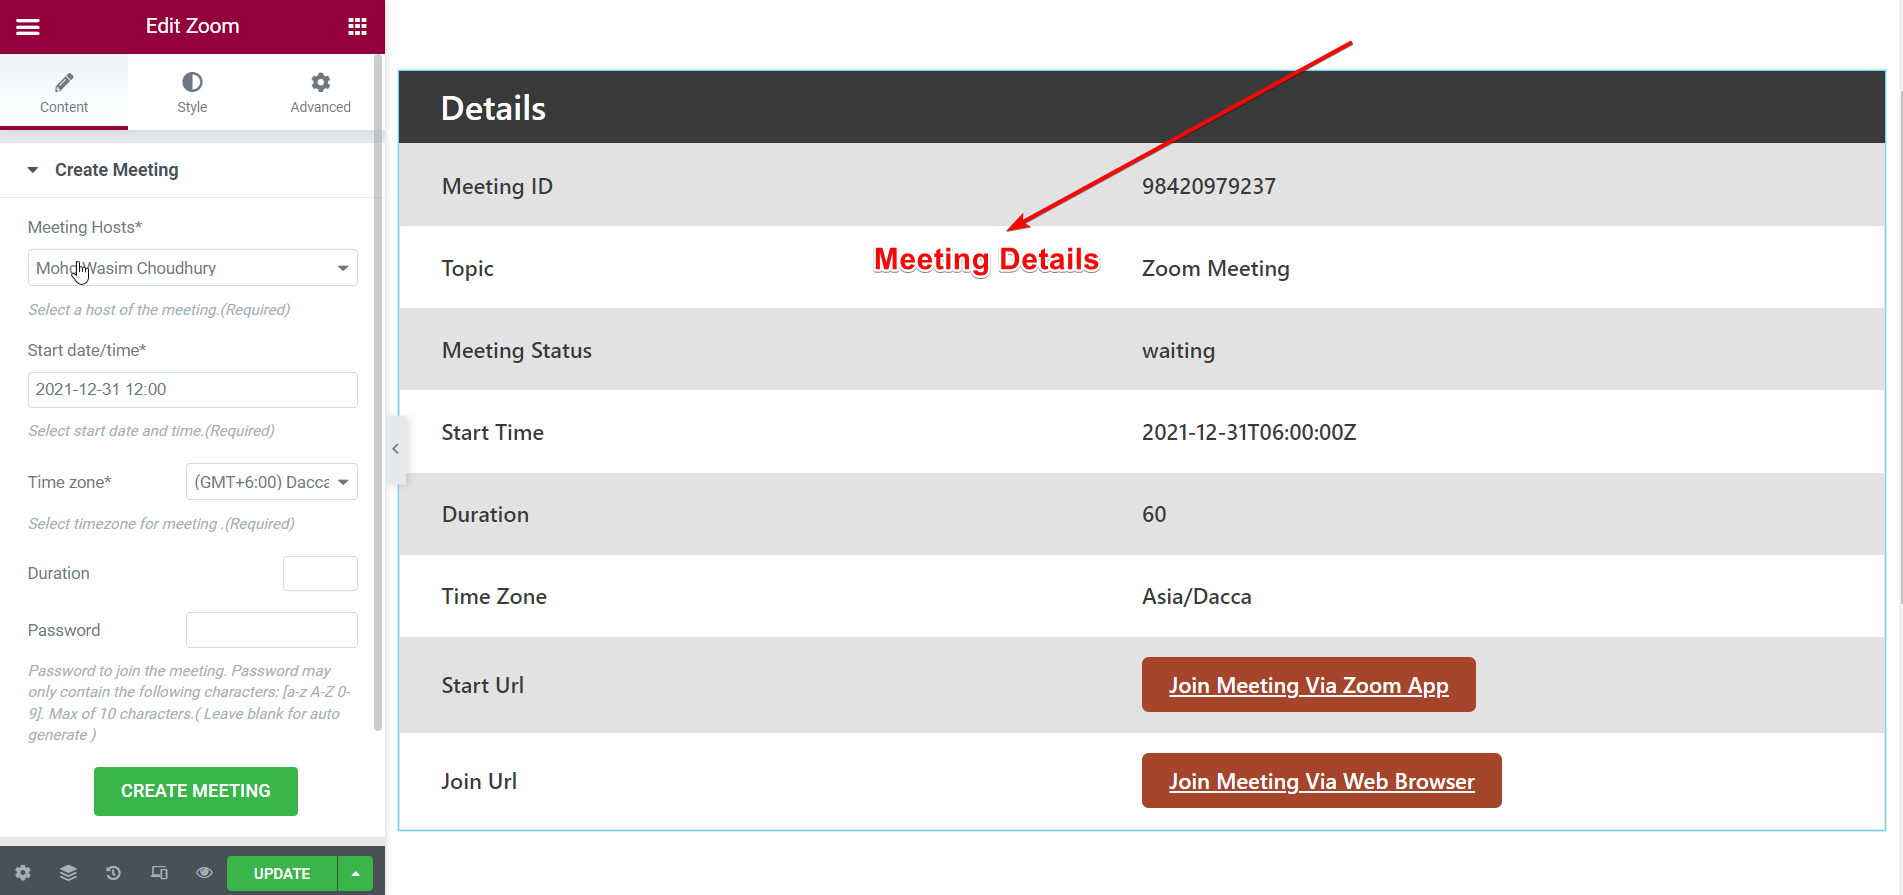
Meeting Details on Display:
With that, the meeting details will show up on the website including URL fields. You can join the meeting through the Zoom app and web browser both. You can also view the sections like Meeting ID, Meeting Status, Topic, etc.
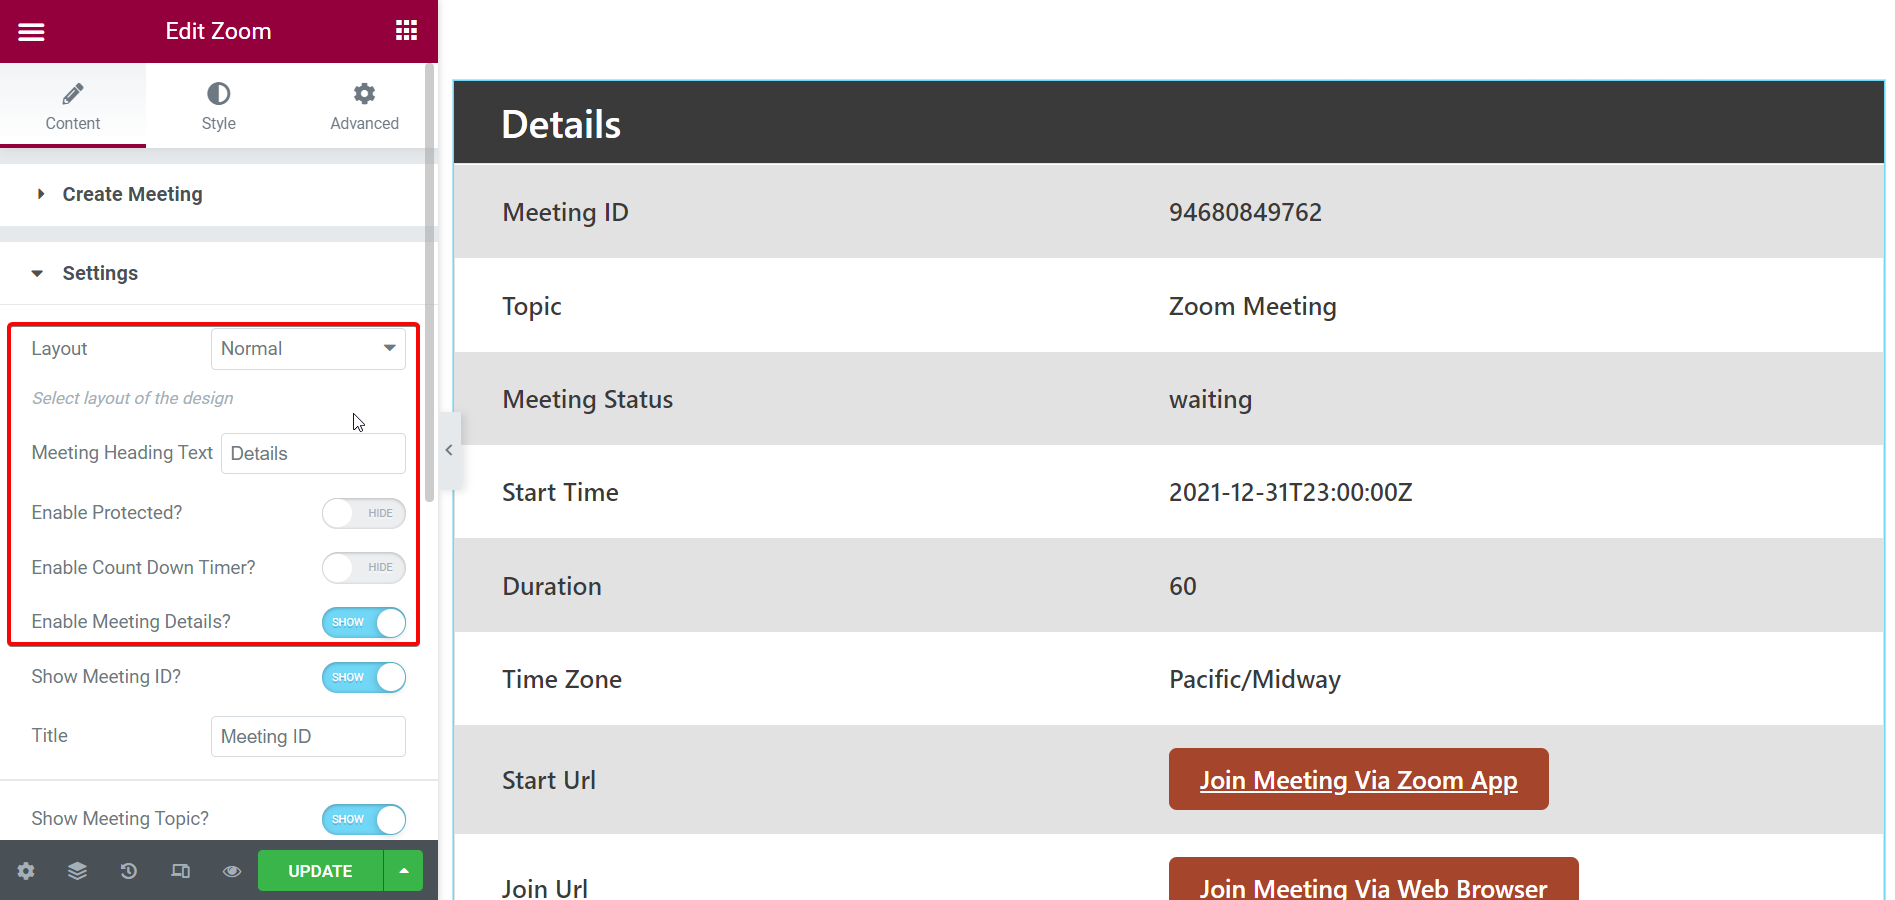
Make Necessary Changes from the Settings Menu:
You can also control all the meeting options from the “Settings” menu. If you click the Settings, all the options will show up on the menu. You can tweak the layout, set the meeting heading text, enable countdown timer and meeting ID.
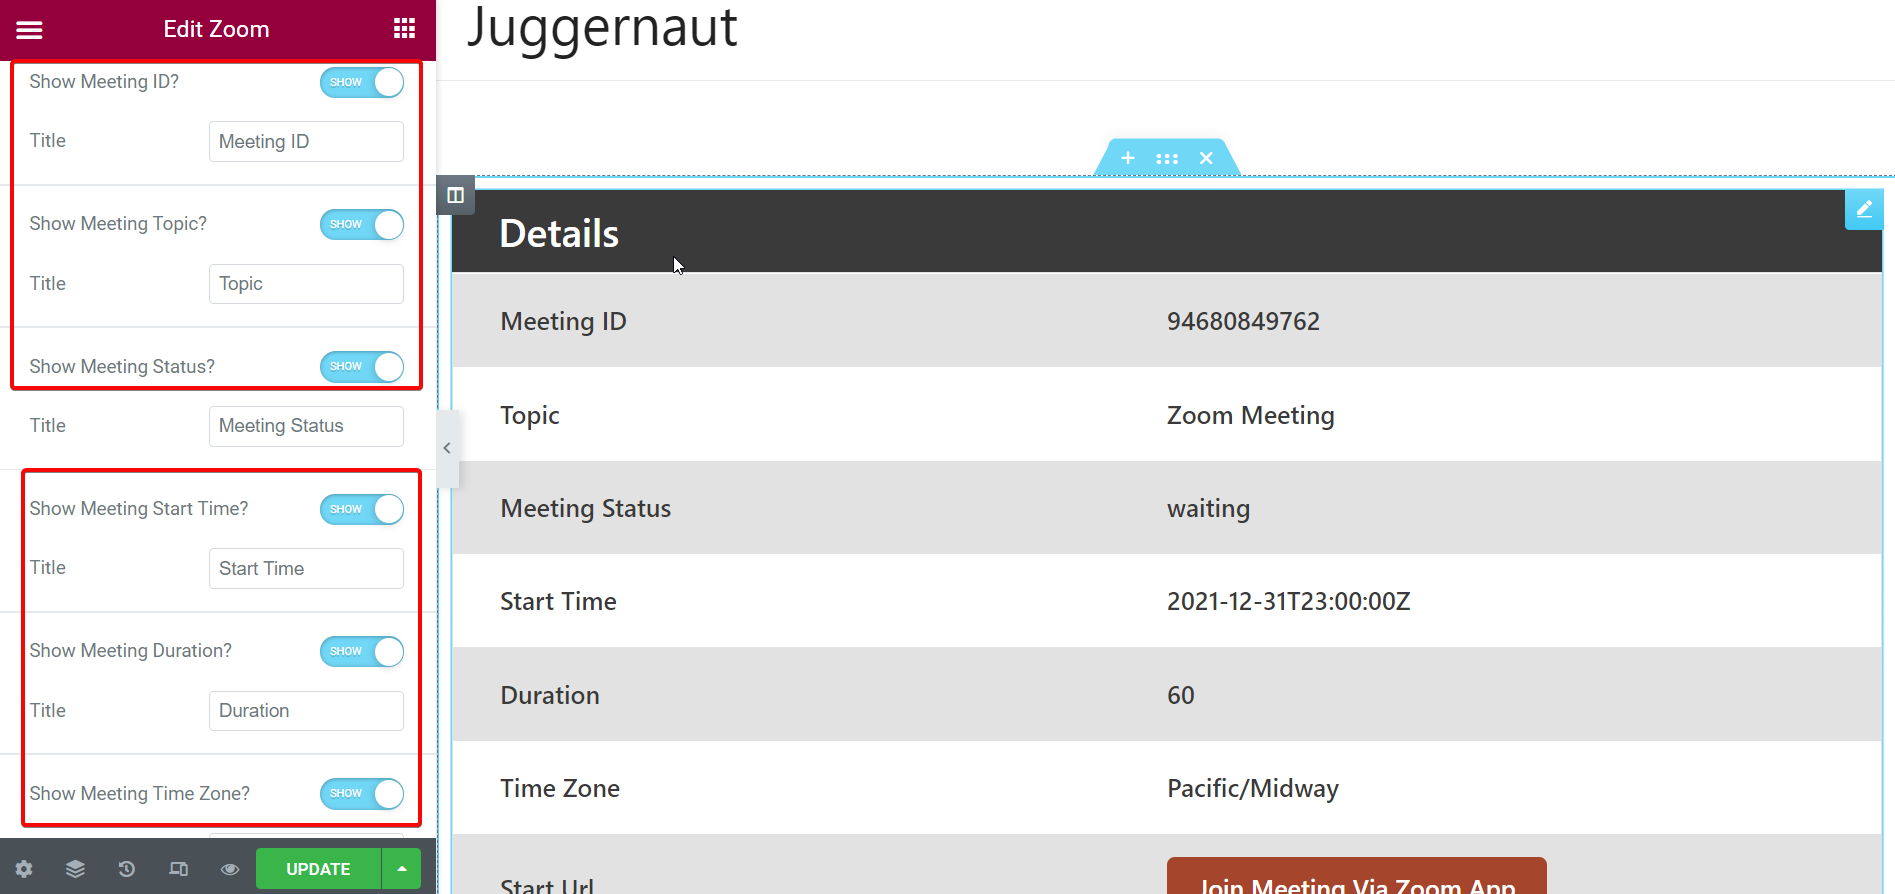
Show or Hide the Meeting Details:
You will even have the control to show or hide the meeting details, topic, status, start time, duration, and time zone with the ElementsKit’s Zoom widget.
This is how you can add Zoom meeting to your WordPress site in a hassle-free manner. All these features of ElementsKit’s Zoom widget are marvelous, right?
Winding up:
Having a Zoom meeting integrated with your WordPress site is very useful. You can join the meeting right from your website straightaway. You don’t have to face unnecessary complexity with the links. Thanks to ElementsKit for having this amazing feature and easing the effort to add Zoom meeting and join the all-important meetings.
Without further ado, integrate Zoom meeting to your WordPress site and enjoy pleasant virtual meeting experience with your clients.
You will be glad to hear that ElementsKit recently has hit a milestone of 500K downloads and still ticking up!!!
Leave a Reply