

While creating a WordPress site, you need to make use of every aspect to build a magnificent website. Elementor image masking is one of the handiest features to add uniqueness and aesthetics to your WordPress site. Because this allows you to change the overall image looks in a few seconds.
Unfortunately, you won’t find any default settings to add image masking in Elementor. But, you can avail this opportunity by employing other Elementor addons, such as ElementsKit, that offer an image masking feature.
Still, you might get confused while adding image masks on Elementor without following proper guidelines.
On that account, we have shown the best process of masking photos in Elementor in this blog post by using the best Elementor addon —ElementsKit!
What is image masking in Elementor?
Image masking is an excellent technique to beautify your WordPress images. It can give unique shapes to your Elementor images and make them more engaging. In WordPress, you will get a separate Element for image masking. Using that, you can mask images without any technical knowledge or skill. On top of that, you can edit WordPress images within a few seconds.
Aside from making your WordPress images attractive, Elementor image masking has other benefits to offer. Wondering what they are? Keep digging to explore all the benefits of the image masking module.
Why should you use image masking in WordPress?
Elementor Image masking is not only good for making unique images but also fixes some issues related to your images. For example, you don’t want to show the full image on your site, or, displaying the full image doesn’t go with your brand. In such cases, you can hide some sections of your image and show the exact portion that you are planning to share.
Apart from this, image masking is also helpful for the following reasons:
- It can convert your common and boring website into an engaging site that is capable of keeping your competitors behind.
- Because of the increased engagement, sales will also enhance.
- An image masking feature can bring a huge difference in quality. This can increase the overall quality of your WordPress images.
- You can promote products beautifully on your site.
Now, if you are eager to utilize this excellent feature, you can keep going till the end. This will help you to mask photos online without any technical expertise. So, keep going to learn the whole process of masking WordPress images.

Steps of adding image masking in WordPress

You will find numerous WordPress plugins that come with an image masking feature. Such as ElementsKit, an all-in-one Elementor addon, has an image masking feature along with 84+ other elements. Since ElementsKit is an Elementor-compatible plugin, you can utilize any features by dragging and dropping including image masking.
Therefore, if you are a beginner, you don’t have to worry much. All you need to do is follow the mentioned steps below and an Elementor custom mask will be added to your images:
Step 1: Install Elementor and ElementsKit.
In the first step, you need to install and activate two plugins on your site. One is Elementor and the other is ElementsKit. Besides, as it is a pro feature of ElementsKit, you need to get its pro version. Now, after installing and activating the plugins, go to the second step.
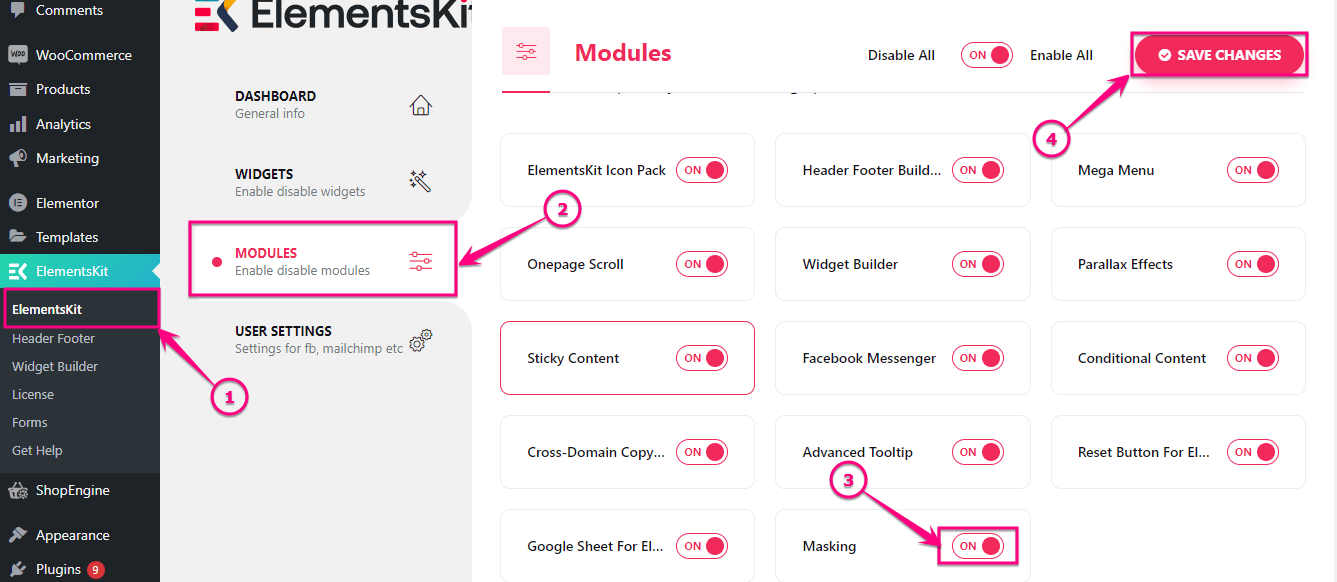
Step 2: Enable the Image masking module.
It is time to enable the masking module of ElementsKit. First, visit your admin panel and click (1.) ElementsKit. Then go to the (2.) Modules tab and enable the (3.) Masking module. Finally, click the (4.) Save Changes button.
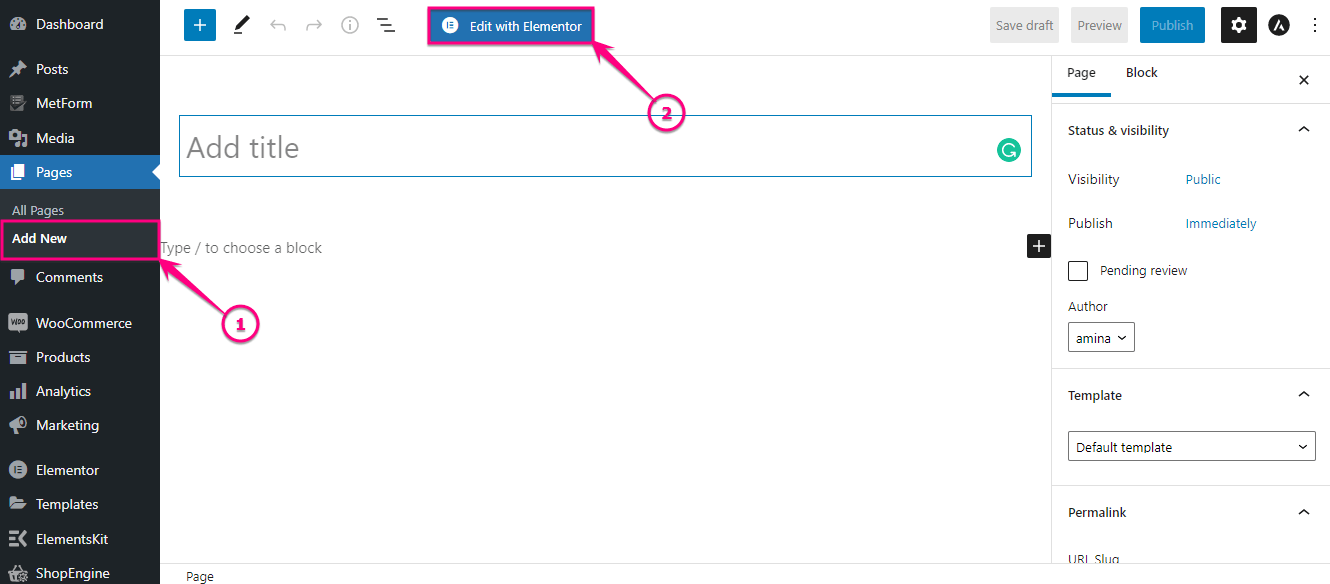
Step 3: Add Elementor masking.
After enabling the masking module, add a new page by clicking (1.) Add New option under the Pages tab. Then press the (2.) Edit with Elementor button to add a custom mask.
Now search for the Image widget in the search box and after finding the widget, drag and drop it on the plus icon.
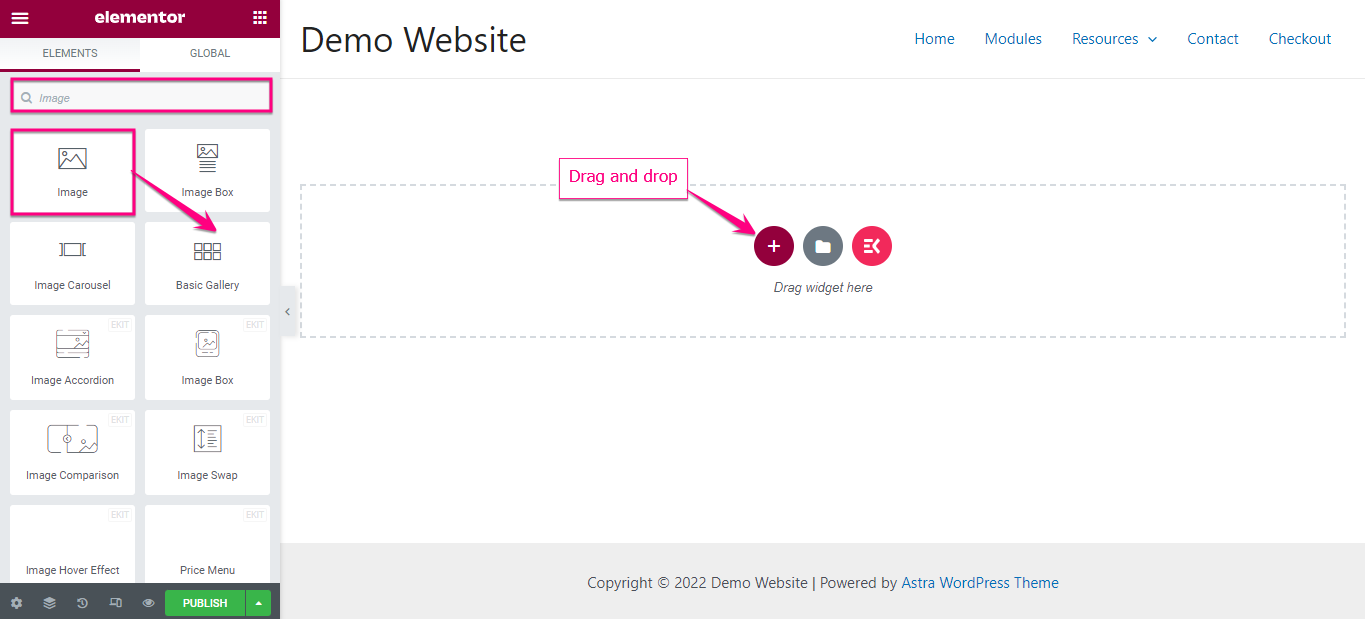
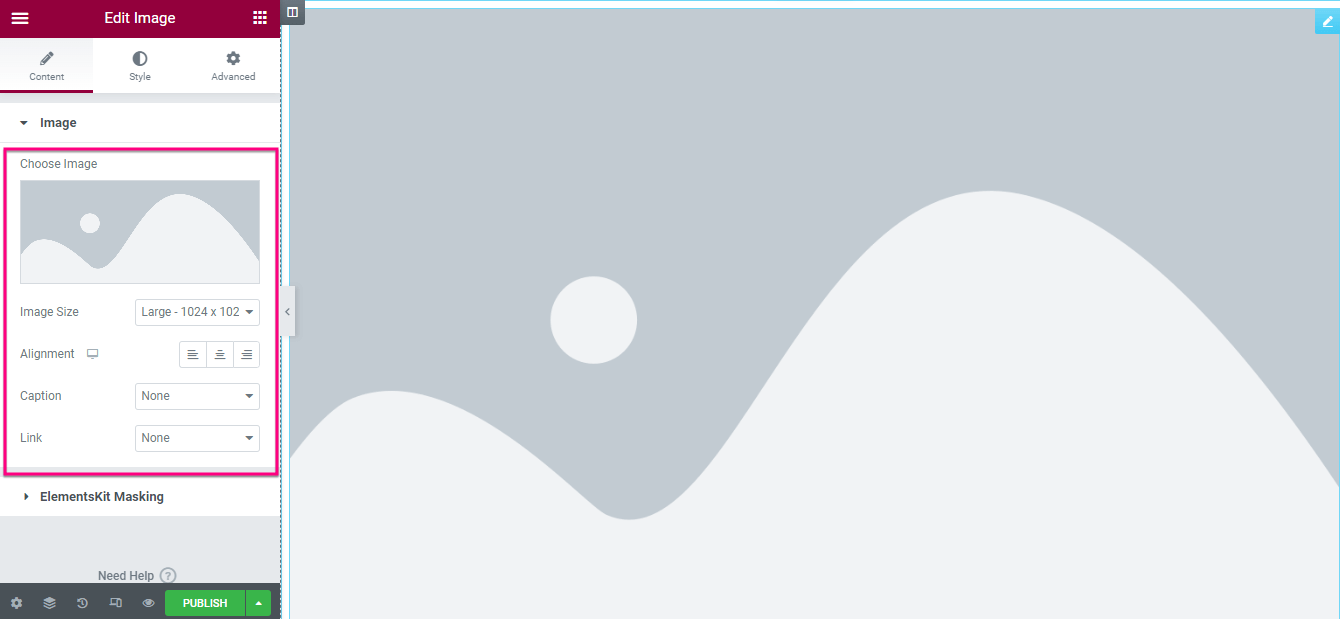
Here you have to add a custom image by adjusting the following areas:
- Choose Image: Select an image from your media library or upload files from here.
- Image Size: Choose an appropriate size for your image.
- Alignment: Select the alignment of your image.
- Caption: You can add a caption for your image from here.
- Link: You can add a link to the image from here.
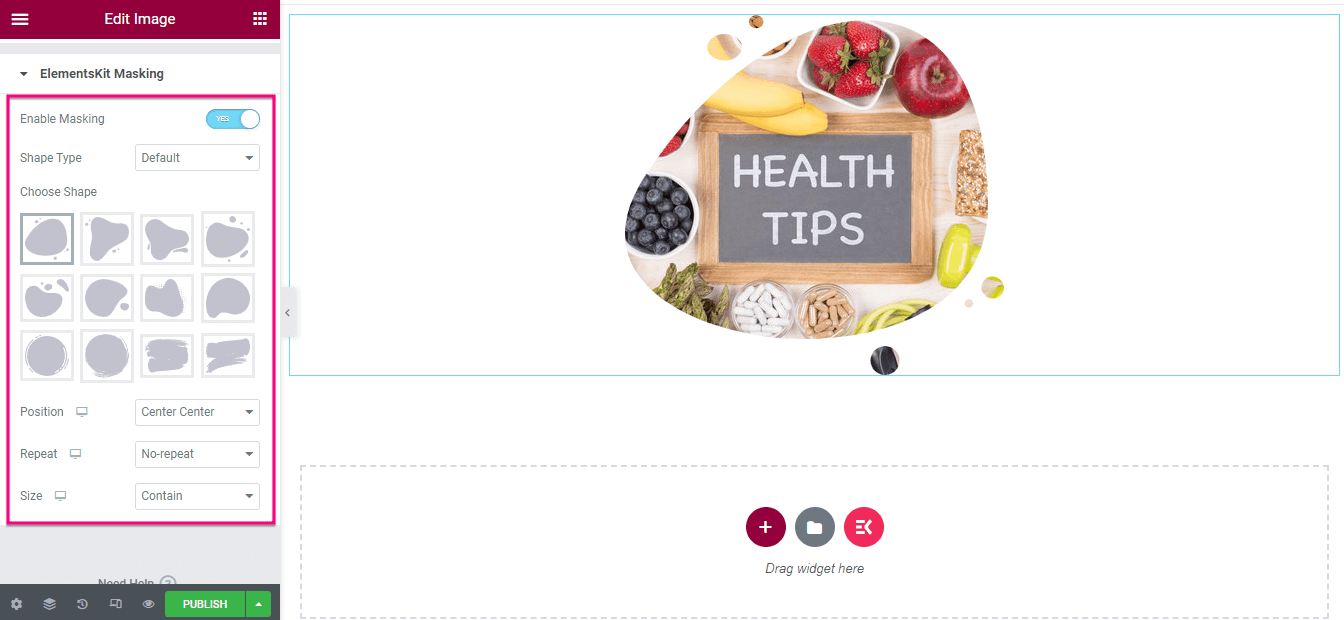
After inserting and editing the image, click the ElementsKit Masking tab and enable the “Masking” option. Then edit the following areas:
- Shape Type: Select the shape type for your image.
- Choose Shape: Here you will find different shapes for your uploaded image. Click on the shape in which you want to see your WordPress image.
- Position: Select the position from here.
- Repeat: This option allows you to add repeat to your created Elementor image mask.
- Size: Select a size for your image from this option.
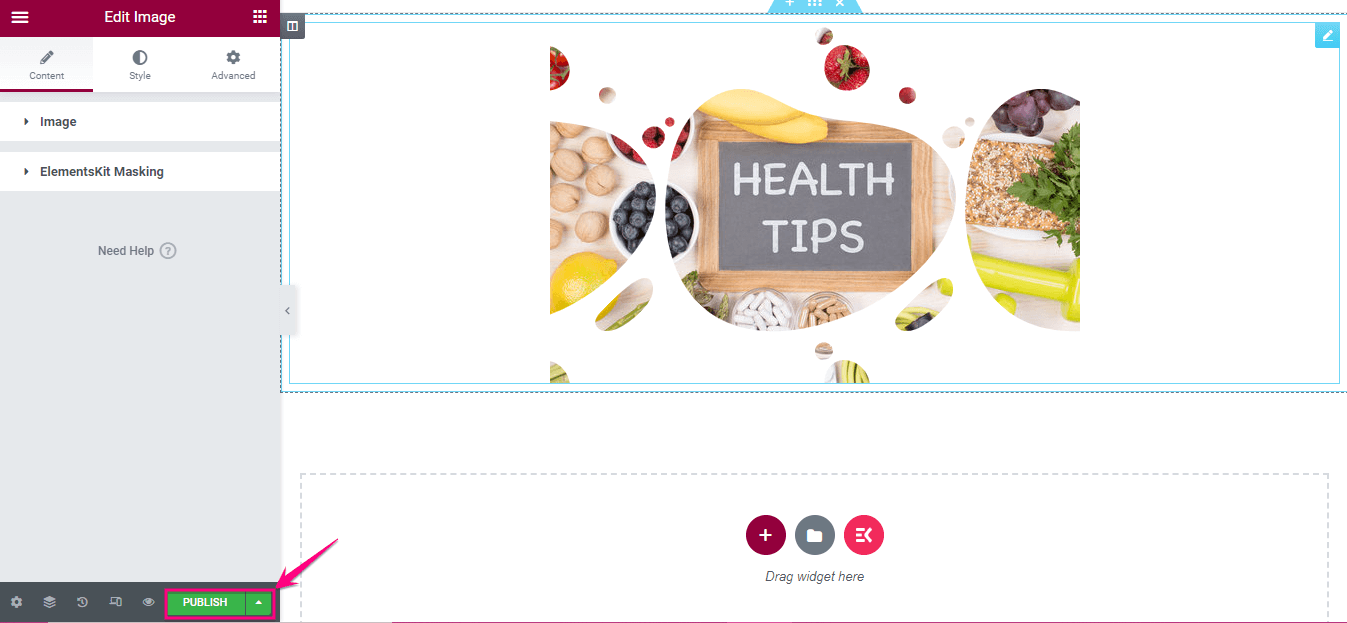
Step 4: Publish the masking image.
Here comes the final step — press the “Publish” button to make your Elementor image masking come to life!
Now, preview the masked WordPress image. Here is the final appearance of your masking image:
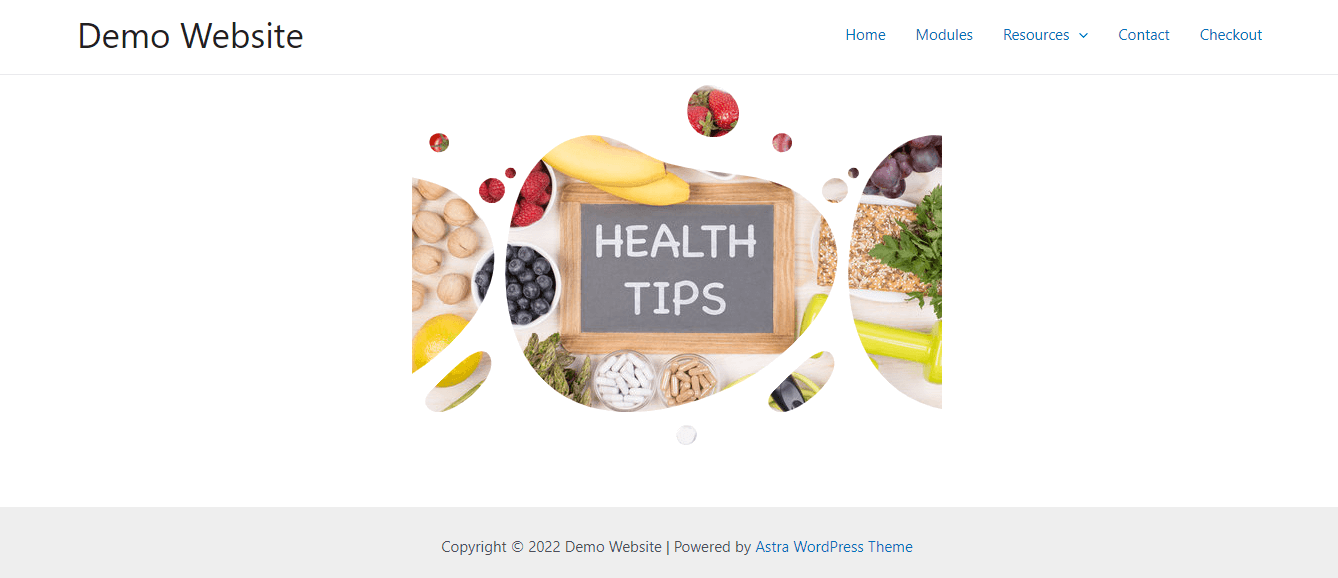
So, this is how you can customize the shapes of WordPress images by using the image masking feature of ElementsKit. This whole process won’t take more than a few minutes. You can also check the following tutorial video to add image masking in Elementor:
Mask your WordPress images
Be it for business purposes or personal use, everyone has websites nowadays. So, there remain higher possibilities to create a general website that is incapable of grabbing attention. But, now things are changing because of the increasing opportunities. Image masking is one of the unique features that can be used to make your WordPress images more beautiful and tempting.
You have already learned how to utilize this excellent feature in the easiest and shortest way possible. Just follow the mentioned steps one by one and create an elegant masked image for your site. ElementsKit also offers other excellent features like image hotspot, WPML compatibility, Zoom meeting, countdown timer, modal popup, flipbox overlays and hover, etc. Through these features, you can build a competitive and converting site without any technical knowledge.
Leave a Reply