
Statistics show that the average cart abandonment rate is about 70% across different industries. This means online businesses end up losing a lot of revenue. A tedious checkout process is one of the contributing factors behind this loss.
In recent times, we also looked at different methods to optimize the checkout process. And, one of these is adding one-click checkout to eCommerce stores.
In this article, we will show you how to set up WooCommerce one-click checkout with no coding hassle.
What is WooCommerce One-Click Checkout?
Implementing a one-click feature allows you to reduce the lengthy checkout process of your default WooCommerce websites. In the conventional process, your customers need to cart their desired products, visit the cart page, fill out the checkout form, and place their order.
This multi-step purchasing process can impose a negative buying experience that can result in a big loss of your prospected customers. As we mentioned before the percentage is about 70%. Whereas, WooCommerce one-click checkout ensures the completion of the entire purchase within a click action only.
Users don’t have to go through the hurdle of entering transactional information every time. A pop-up will appear when you hit the one-click button. There is no need to move any more pages.
How to Set Up WooCommerce One-Click Checkout? (Step-by-Step Process)
The easiest way to set up a one-click checkout option on your WooCommerce website is by using a plugin. We recommend the ShopEngine Quick Checkout module for its intuitive interface and advanced functionalities.
With this module, you can easily make the checkout process faster. For example, customers can skip the ‘add to cart’ button. Visitors will go through a simple popup checkout page in no time.
To use this feature of ShopEngine, you need to have the Elementor page builder installed on your WordPress website.
Step 1: Install the Plugins
Here are the required plugins to install and activate:
- Elementor: Download the plugin
- WooCommerce: Install the Plugin
- ShopEngine: Install the Plugin
To install a plugin, from your WordPress dashboard, navigate to Plugins > Add New > Enter the desired plugin name in the search box. And, when the plugin appears, install & activate it.
Note that, the quick Checkout module is a premium feature of the ShopEngine WooCommerce plugin. So, you need to activate the license key as well. Here is a detailed guide to get started with the ShopEngine Pro version.
Once, you are done with ShopEngine license key verification, the next thing we will focus on is the one-click button activation. Hitting this button will allow users to skip the add-to-cart page and finish the checkout process immediately.
Step 2: Enable the One-Click Checkout Button
Once, you are done with ShopEngine license key verification, the next thing we will focus on is the one-click button activation. Hitting this button will allow users to skip the add-to-cart page and finish the checkout process immediately.
By default, the Quick Checkout module is disabled. You need to access the ShopEngine settings to activate it. For this:
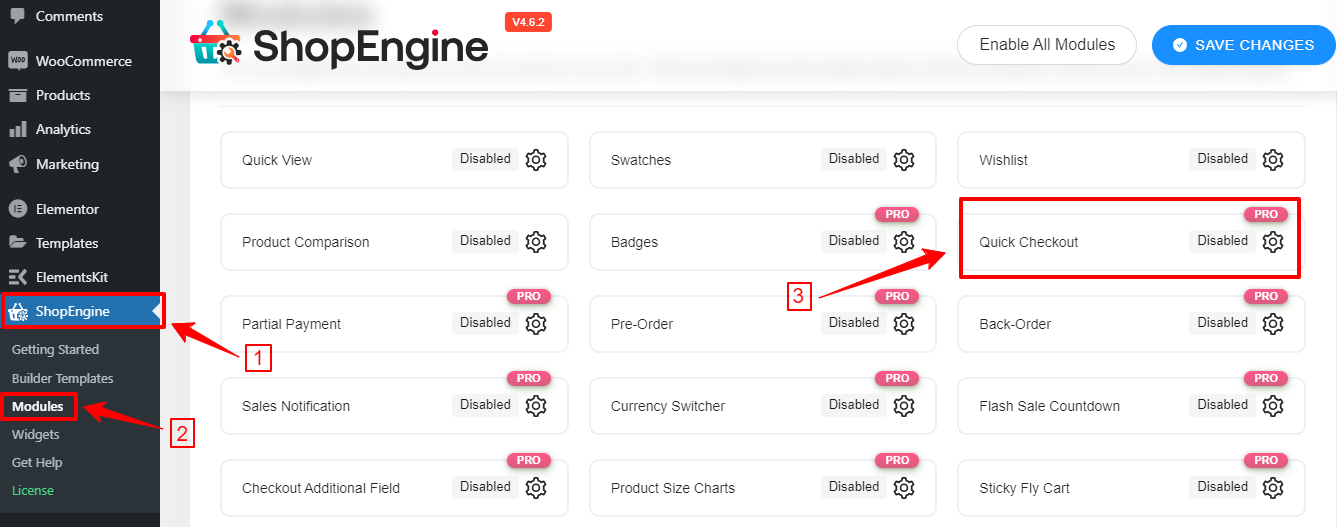
- From your WordPress dashboard, follow ShopEngine> Modules.
- Look for the Quick Checkout module and click on it.
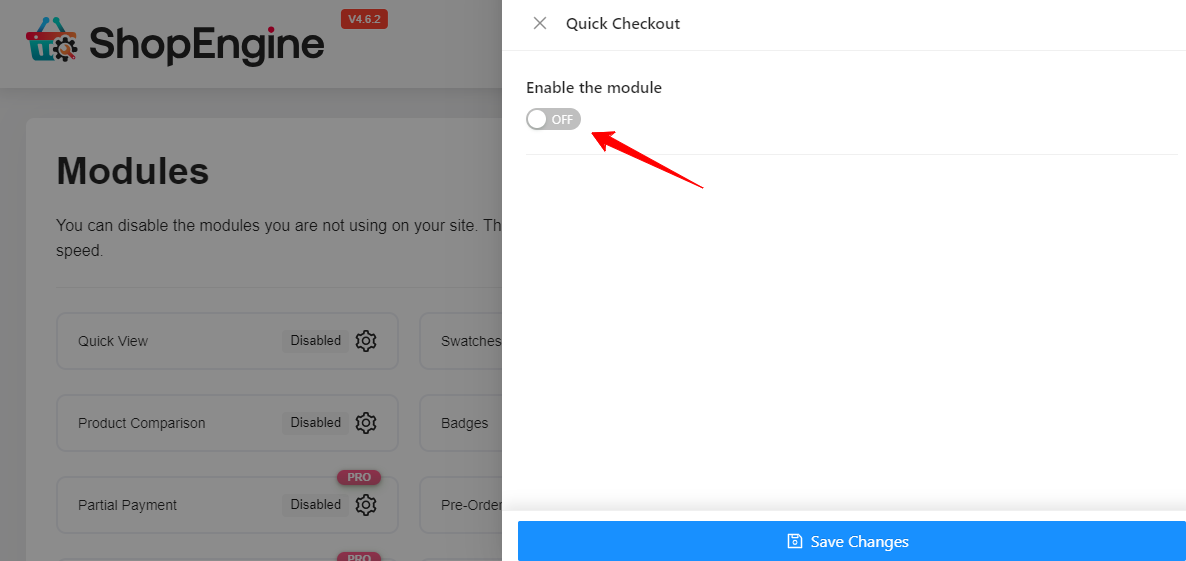
- The module settings popup will appear on the right side of the screen.
- Activate the “Enable the Module” toggle button.
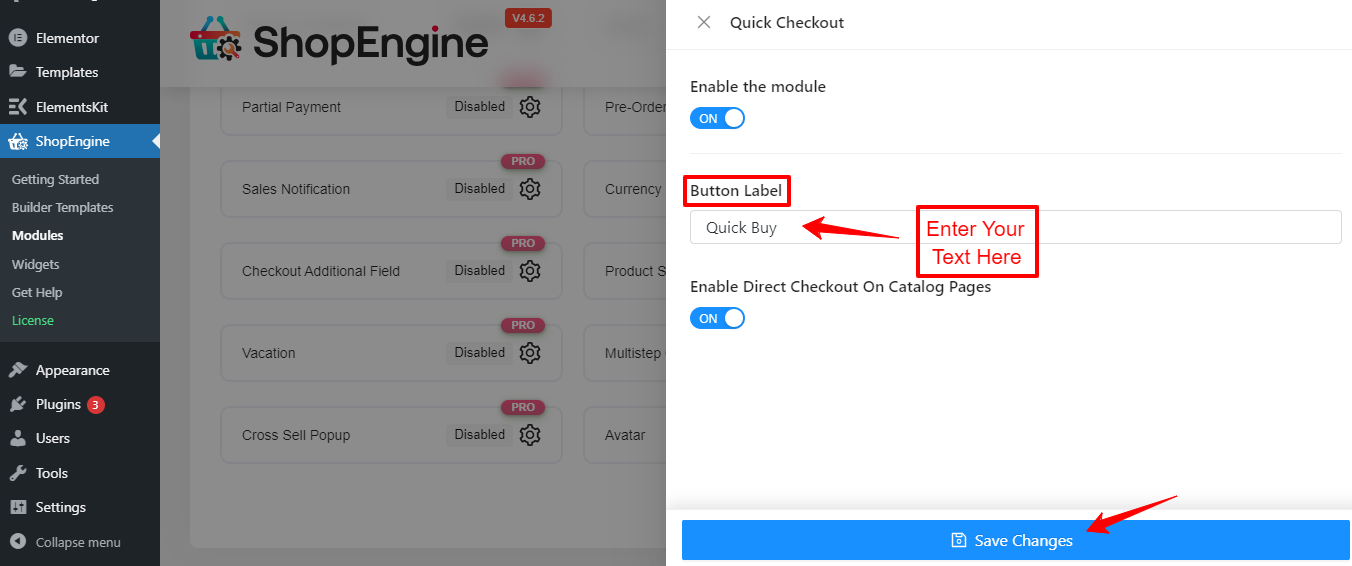
- Doing this will open up an option to enter the button text.
- Type your text and hit the Save Changes button.
Now, you should see the added button in the WooCommerce store.
But, don’t end here! To use the Quick Checkout module you must use the Quick Checkout template. This is what we’re going to show you next.
Step 3: Set Up Direct Checkout in WooCommerce
Another good thing about the ShopEngine Checkout Module is that you can enable the direct checkout feature for your WooCommerce website. Doing so will add an icon to the product in your store.
When customers will click that icon they will be directed to the checkout page, by skipping the default WooCommerce cart page. This can be another important option to speed up the checkout process.
Let’s see how to set up direct checkout in WooCommerce stores.
Go to your WordPress dashboard and follow ShopEngine > Modules > Quick Checkout.
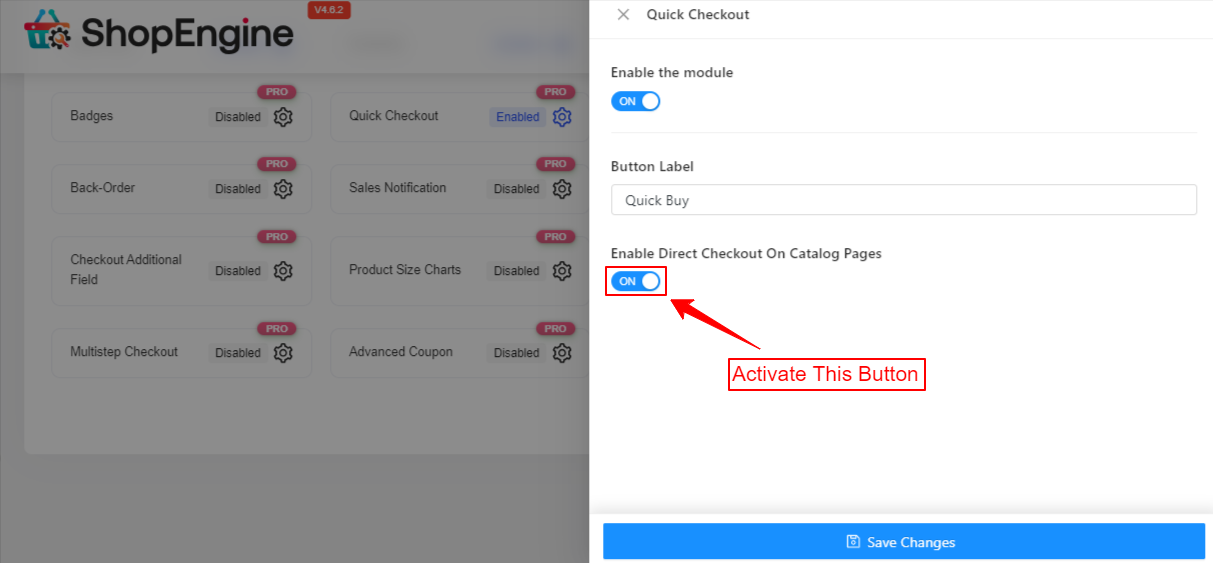
Enter the module settings and you will see an option titled “Enable Direct Checkout On Catalog Pages”. Activate the toggle button with this option. Lastly, hit the “Save Changes” button. That’s it!
Now, visit your shop page and you will see a new button is added to every product. And, clicking it will move you to the checkout page directly.
Step 4: Use Quick Checkout Template
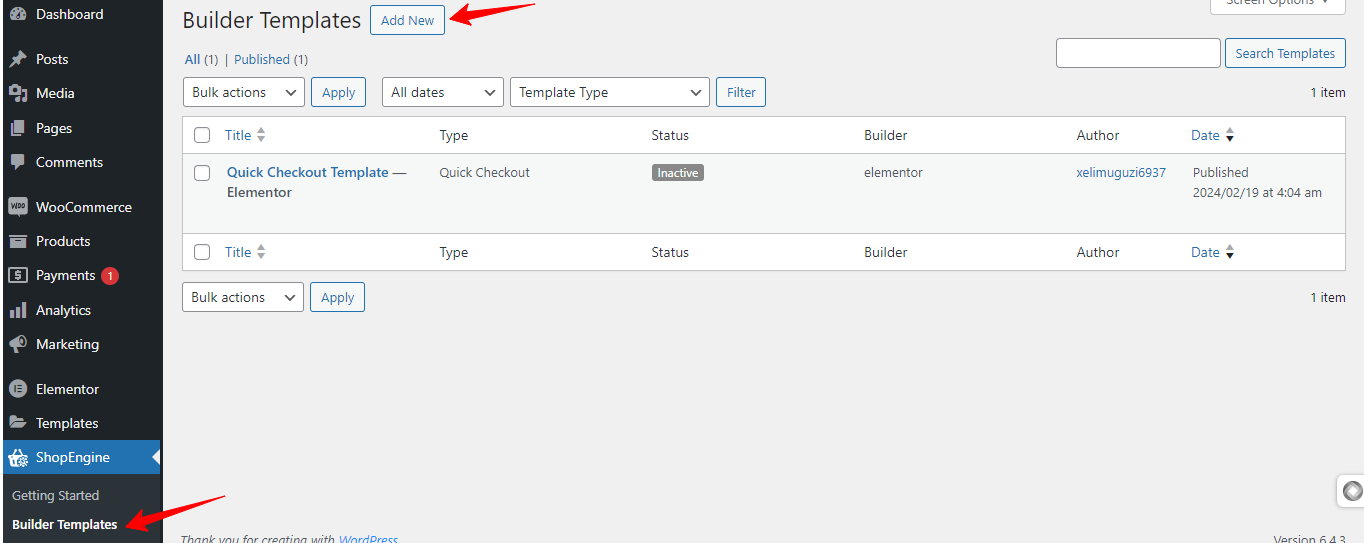
Come back to your WordPress dashboard and create a quick checkout template. To do this, visit ShopEngine > Builder Templates > Add New.
Doing this will open up a popup from the left side of your screen. Here do the following things:
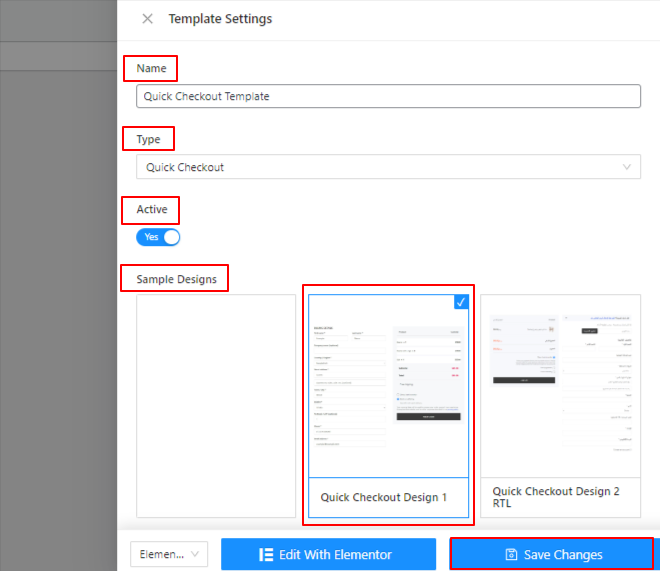
- First, provide a name for the template.
- From the dropdown of the Type box, select Quick Checkout.
- Use the toggle button to activate or inactivate the template.
- Next, you have the option to create from scratch or choose a premade template.
- Lastly, hit the “Save Changes” button.
- That’s it.
Step 5: Customize the Quick Checkout Template
ShopEninge empowers quick checkout template customization with endless possibilities. You can add different kinds of widgets and elements as per your need within a drag-and-drop dashboard.
Plus, you have versatile styling options for typography, background, border, field, container, and many more.
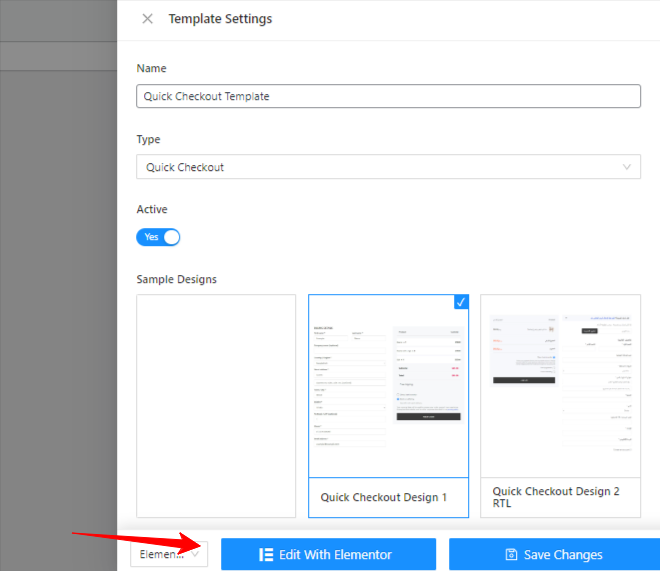
To access the ShopEngine template customization, locate the “Edit With Elementor” from the template settings and click it.
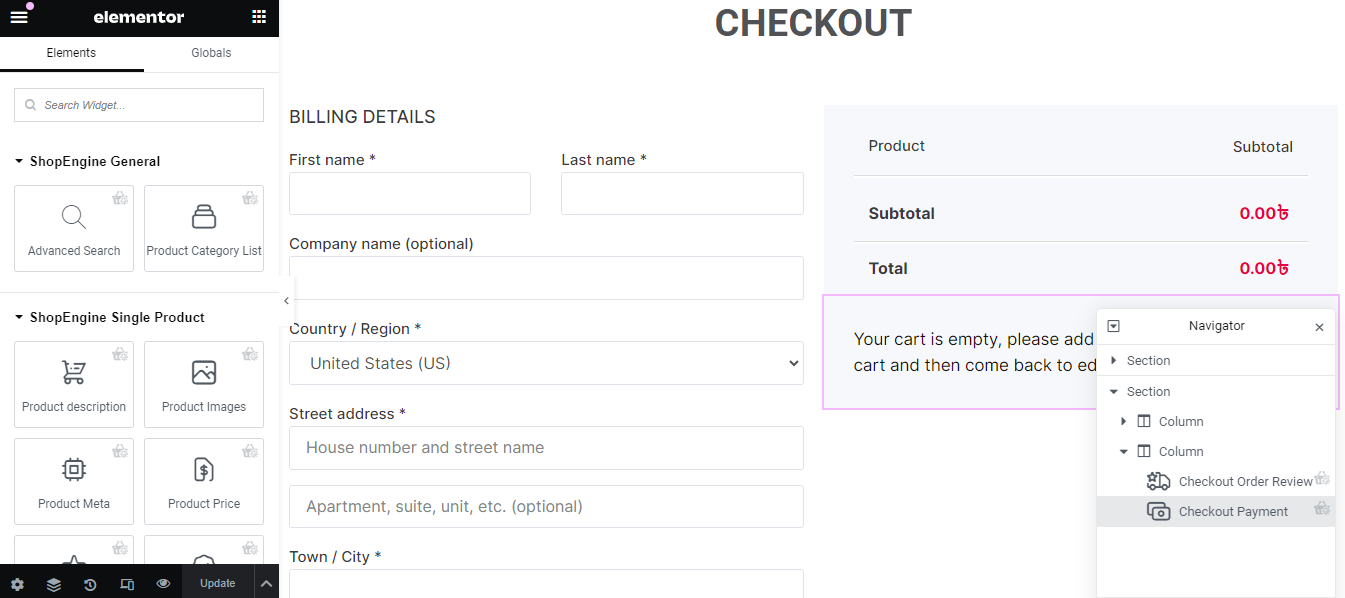
You will be moved to an editor screen like the Elementor page builder.
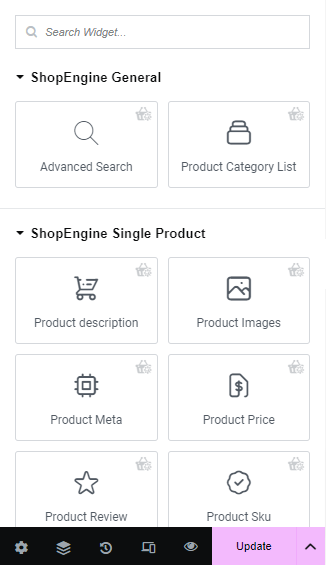
From the left sidebar of this screen, you can add different useful widgets as the field of the checkout template.

And, as you click on any item, you will see the Content, Style, and Advanced tab to configure and customize the look and feel of the checkout form.
How Does WooCommerce One-Click Checkout Impact Conversion?
Think of yourself as a customer and you have already decided on your desired product then what do you want to do next? Obviously, finish the checkout process as soon as possible! On the other hand, as an online store owner, you don’t want to miss an opportunity to earn and see your customer finish the checkout process.
Here comes the WooCommerce one-click feature to speed up the checkout process. Adding it to your e-commerce store can help in several ways. Let’s see them below:
Improve Customer Experience
A streamlined checkout process prioritizes customer user-friendliness. This can be the easiest way to buy something. Users need to do nothing more than just click a button. This feature appears with all shipping, billing, and payment information on a single screen. Thus, it ensures a clear overview of all information and minimizes the possibility of mistakes.
Boost eCommerce Conversion
One-click feature eases the tedious task of filling in transaction information for customers and helps them complete it in less time. This smooth experience creates a sense of positivity that helps reduce the number of cart abandonments.
No Unnecessarily Steps
In a WooCommerce-based online store, visitors have to browse multiple pages even though they only buy one product. These pages can be unnecessary steps of your sales funnel. Instead of just adding a single product to the cart page and viewing it separately, customers should face the billing step for a better experience.
Efficient for Returning Customers
The one-click checkout process ensures no redundant work for the returning customers. Once they enter their payment and shipping information, they never need to fill it out again. This can motivate to accelerate the buying decision.
Mobile Responsive Feature
One-click checkout works best for customers based on mobile devices. This feature takes minimal space and adapts seamlessly to mobile screens, which allows users to complete the checkout process without any complexity. And, you will enjoy higher conversion rates.
✅ Learn how to display best-selling products in WooCommerce.
Tips for Optimizing and Setting up a One-Click Checkout
Setting up a one-click checkout page is itself part of optimizing a WooCommerce store’s checkout process. However, we’re going to dive deeper to better enhance one-click checkout. Here are some tips you should consider when you’re going to create a one-click checkout page.
Design New Checkout Page
When you’re applying a one-click checkout, make sure you are going to design a new checkout page for it. Since all the checkout information will appear in a popup, you may need to redefine the entire checkout design. Although our goal is to minimize the checkout process, we can’t comprise some vital information. They must be displayed clearly.
Regularly Monitoring & Testing
The ultimate goal of adding a one-click checkout is to provide visitors with a simplified experience. However, you still need to look for regular improvements and updates. You must focus on the details for a comprehensive view. Additionally, you should periodically test that one-click checkout is working properly.
Provide Detailed Price
The one-click checkout popup should show the total breakdown of the pricing. Your checkout should show the price of each product individually. Make sure to display additional costs like shipping fees and taxes. Even, give the discount price precisely as well. Customers will abandon the cart if there is a misunderstanding.
Payment & Shipping Method
Payment and shipping methods are vital parts of a checkout process. Customers will look for their preferred way of making payments and receiving products. So, you should make sure that all the available payment and shipping methods are visible.
Show Wide Button
You can make all the buttons on your checkout page wide. It will help the visitor to easily navigate. These types of buttons can appear accurately on mobile devices.
Can I use shortcodes to set up one-click-checkout in WooCommerce?
Can customers purchase multiple products through one-click-checkout?
What is the best way to enable one-click-checkout in WooCommerce?
Boost Your Conversions Today!
We hope this article helped you find the easiest answer on how to set up WooCommerce one-click checkout. Adding a one-click checkout page through code can be a difficult task. However, using a plugin like ShopEngine can be an easy way to create and design the one-click checkout page through a drag-and-drop interface.
You won’t face any obstacles even if you are going to add a one-click checkout page for the first time on your e-commerce store.

Leave a Reply