Imagine browsing a website where your mouse isn’t just a cursor, but a playful comet leaving a cursor trail effects of sparkles, or a tiny robot following your clicks.
Sounds fun, right? Well, with custom mouse cursor effects in WordPress, you can make that a reality!
But how to do that? Well,,,, hold your horses and you’ll find out!
What is a Custom Cursor?
Custom cursors for Elementor are a creative way to enhance the visual appeal of your website. By replacing the standard browser cursor with a unique and engaging alternative, you can leave a lasting impression on your visitors. Whether it’s a simple image, an animated icon, or a complex design that reacts to user interaction, the possibilities are endless. This customization not only adds personality to your website but also elevates its overall aesthetic, making it stand out from the crowd.
Moreover, custom fancy cursors offer more than just visual appeal; they also enhance user experience. A customized cursor can guide users’ attention, provide visual feedback, and reinforce branding elements throughout the site. With a personalized touch, you create a more immersive and enjoyable browsing experience for your audience, encouraging them to stay longer and engage more deeply with your content.
Why Add Fancy Mouse Cursor Effect in WordPress?
There are several compelling reasons to consider adding a custom mouse cursor effect to your WordPress website:
💥 Increased Engagement: Interactive elements capture attention and encourage exploration, making your website more dynamic.
💥 Enhanced Branding: A unique cursor aligns with your brand identity, leaving a memorable impression on visitors.
💥 Improved User Experience: Fun and playful cursors can create a more enjoyable and immersive browsing experience.
💥 Stand Out from the Crowd: Differentiate your website from competitors with a unique and eye-catching detail.

Choosing the Best WordPress Mouse Cursor Plugin
Several plugins offer cool cursor effects and functionalities, but ElementKit stands out with its user-friendly interface and built-in mouse cursor feature. Though the mouse cursor feature is under the pro version which can be availed at $39, ElementsKit is still the best option.
Why ElementKit’s Mouse Cursor feature?
✨ Wide Variety of Presets: Select from a range of pre-designed cursor styles, including emojis, arrows, shapes, and even animated cursors.
✨ Customization Options: Personalize colors, sizes, and animations to match your brand aesthetic and desired mouse effects.
✨ Compatibility with Elementor: Seamless integration with the Elementor page builder ensures a smooth editing experience.
✨ Lightweight and User-Friendly: The plugin is lightweight and doesn’t impact website loading speed, while the interface is intuitive and easy to navigate.
How to Add Custom Mouse Cursor in WordPress Using ElementsKit
ElementsKit offers the best cursor design and just like any other plugin, ElementsKit requires installation. Just simply log in to your WordPress website and look for “Plugins.” Then, click “Add New Plugin” and search for ElementsKit in the search bar and install it. Now, to enjoy the amazing mouse cursor feature, upgrade to the pro version.
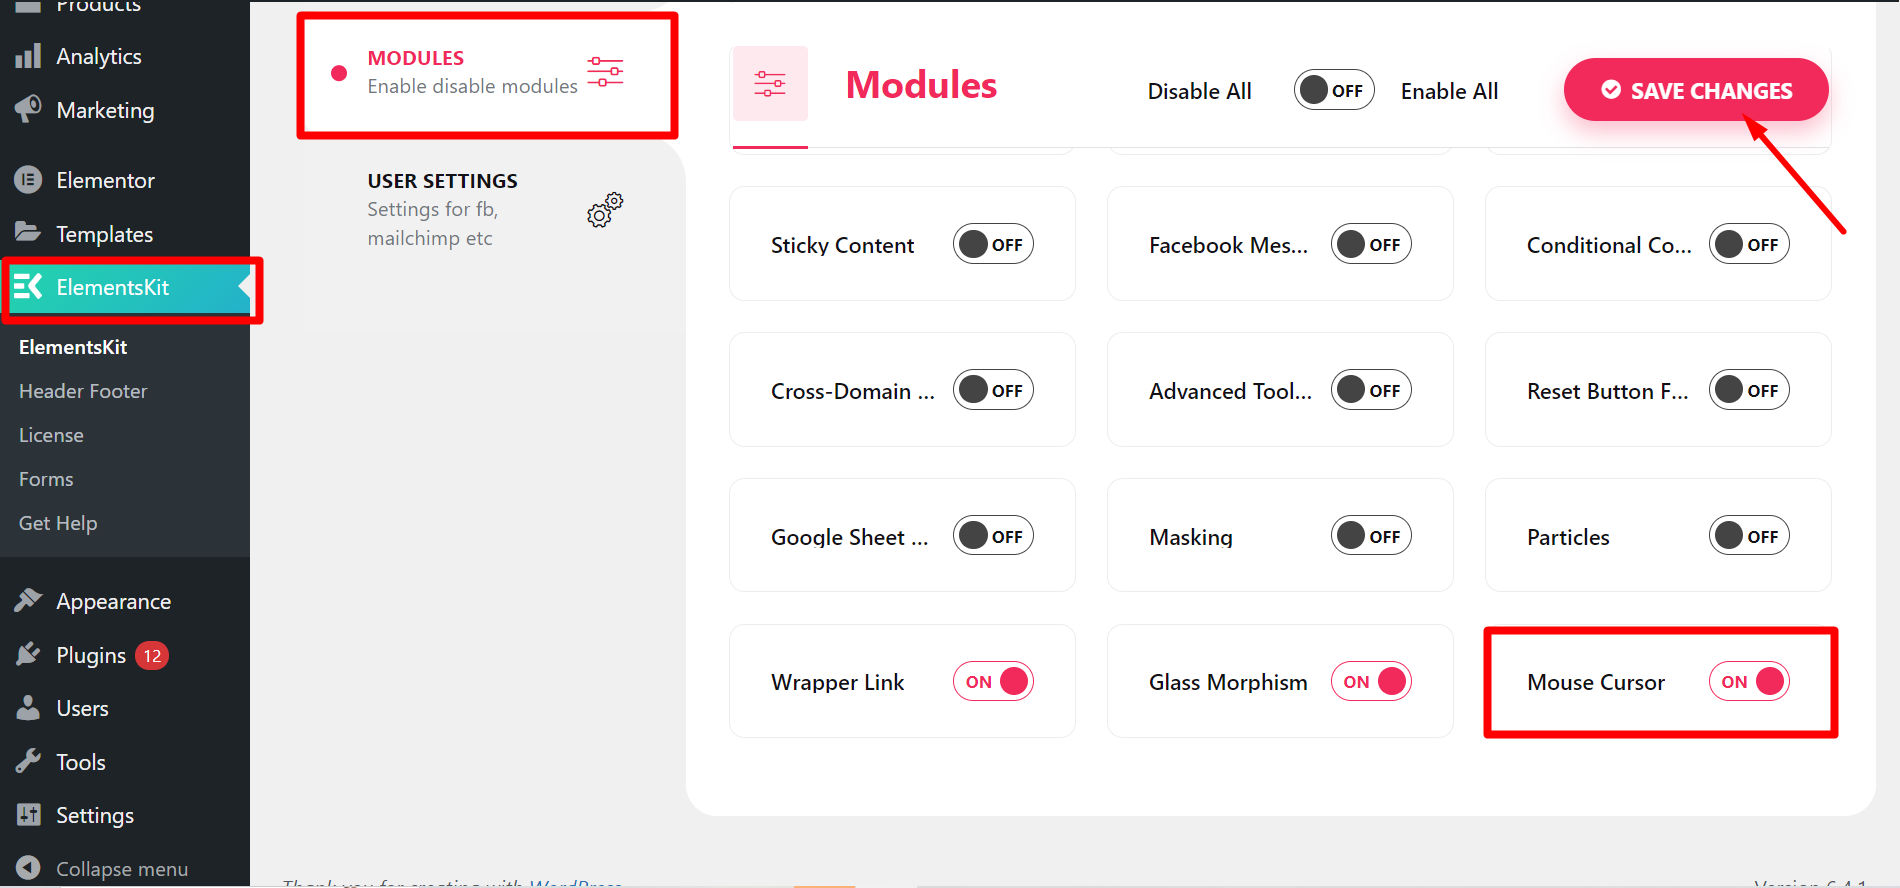
Step 1: Enable Mouse Cursor Module
Go to your WordPress dashboard and navigate to ElemetsKit. Select “Module” to have a full view of all the modules. Then, look for “Mouse Cursor” and enable it. Make sure that you save the changes.
Step 2: Start Editing with Elementor
Navigate to the desired page or post where you’d like to modify the mouse cursor, then begin editing using Elementor.
Once in the Elementor, select the section where you’d like to apply the mouse cursor. Then, go to “Advanced” and enable the “ElemenstKit Mouse Cursor”.
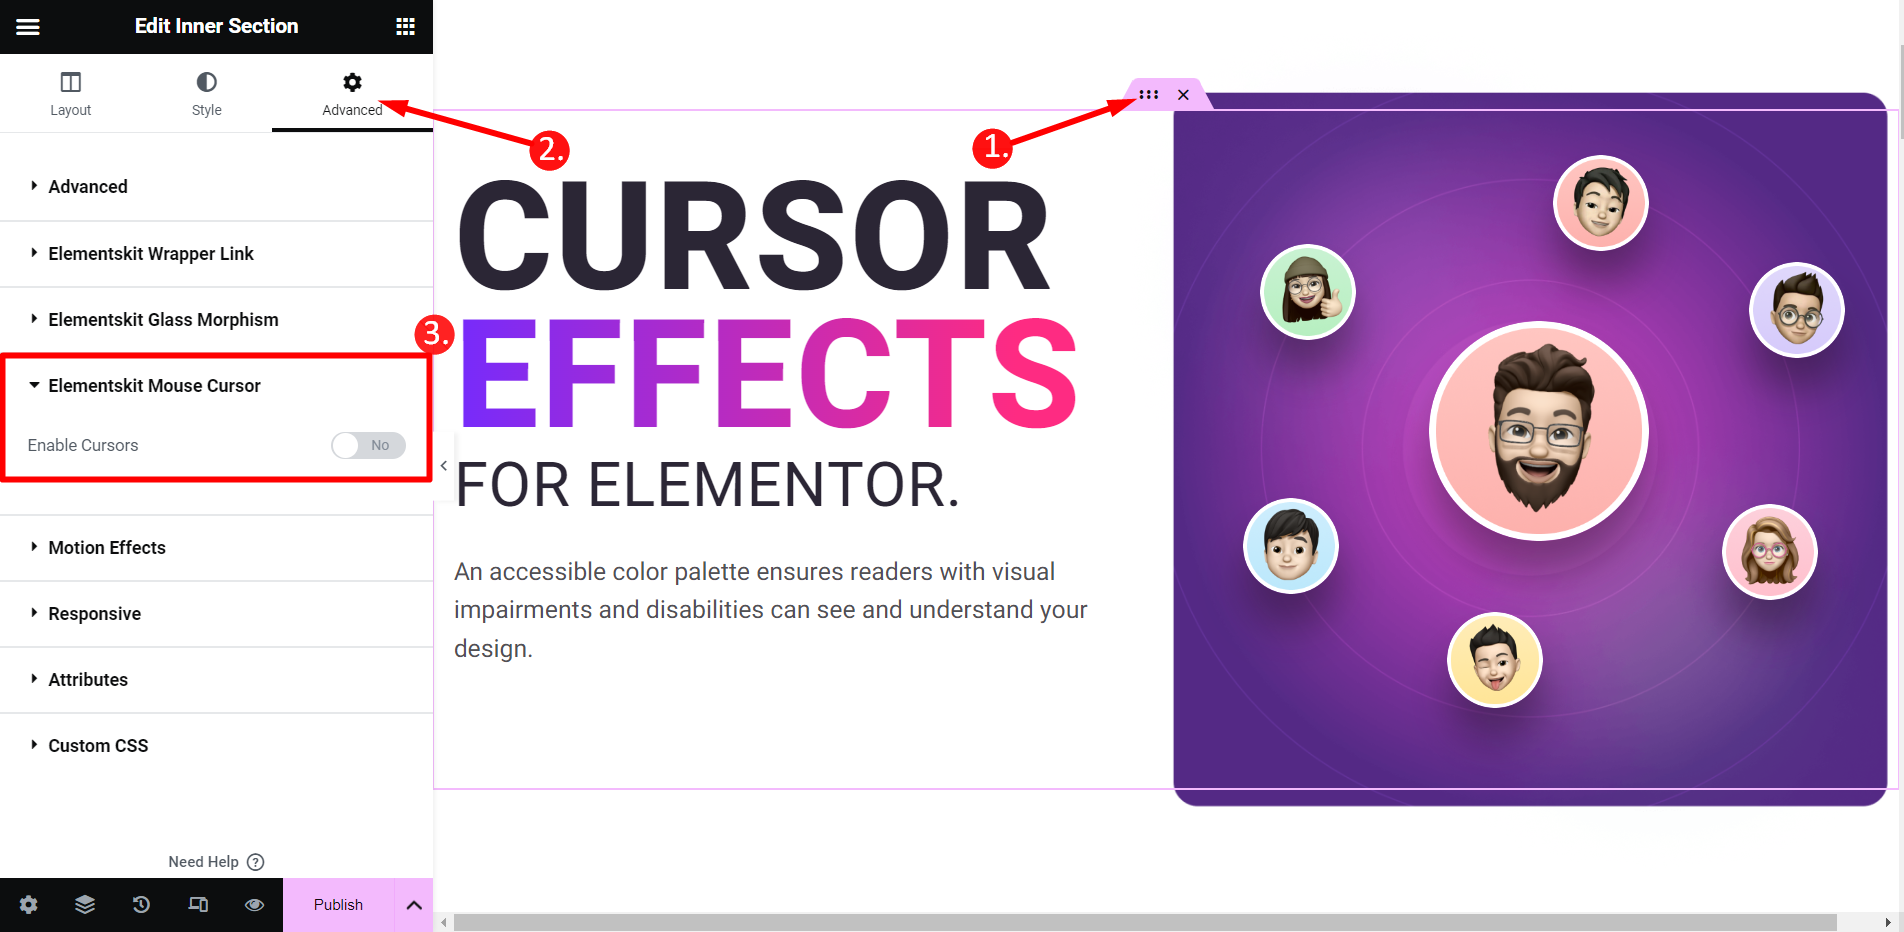
After you enable the “ElemenstKit Mouse Cursor”, additional parameters will appear to start customizing your cursor.
Under the “Content” section, you will have the freedom to choose your cursor type; Text, Image, or Icon. You can also disable the default cursor if you want to.
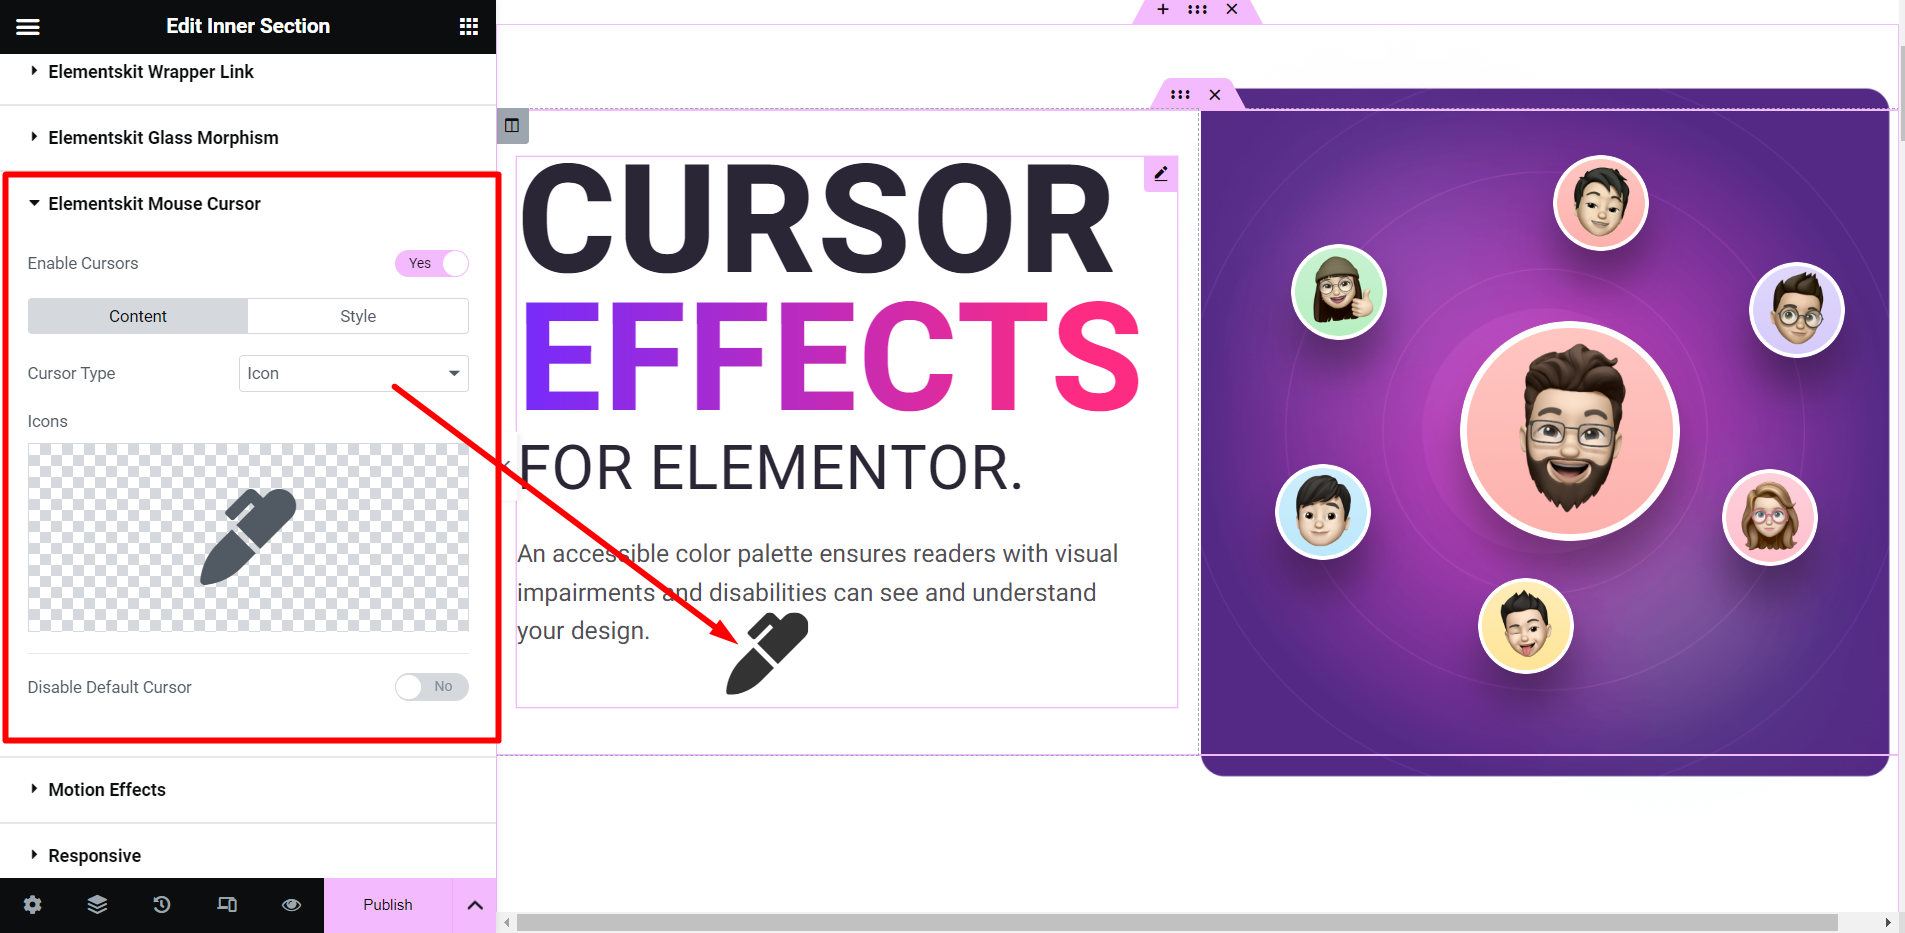
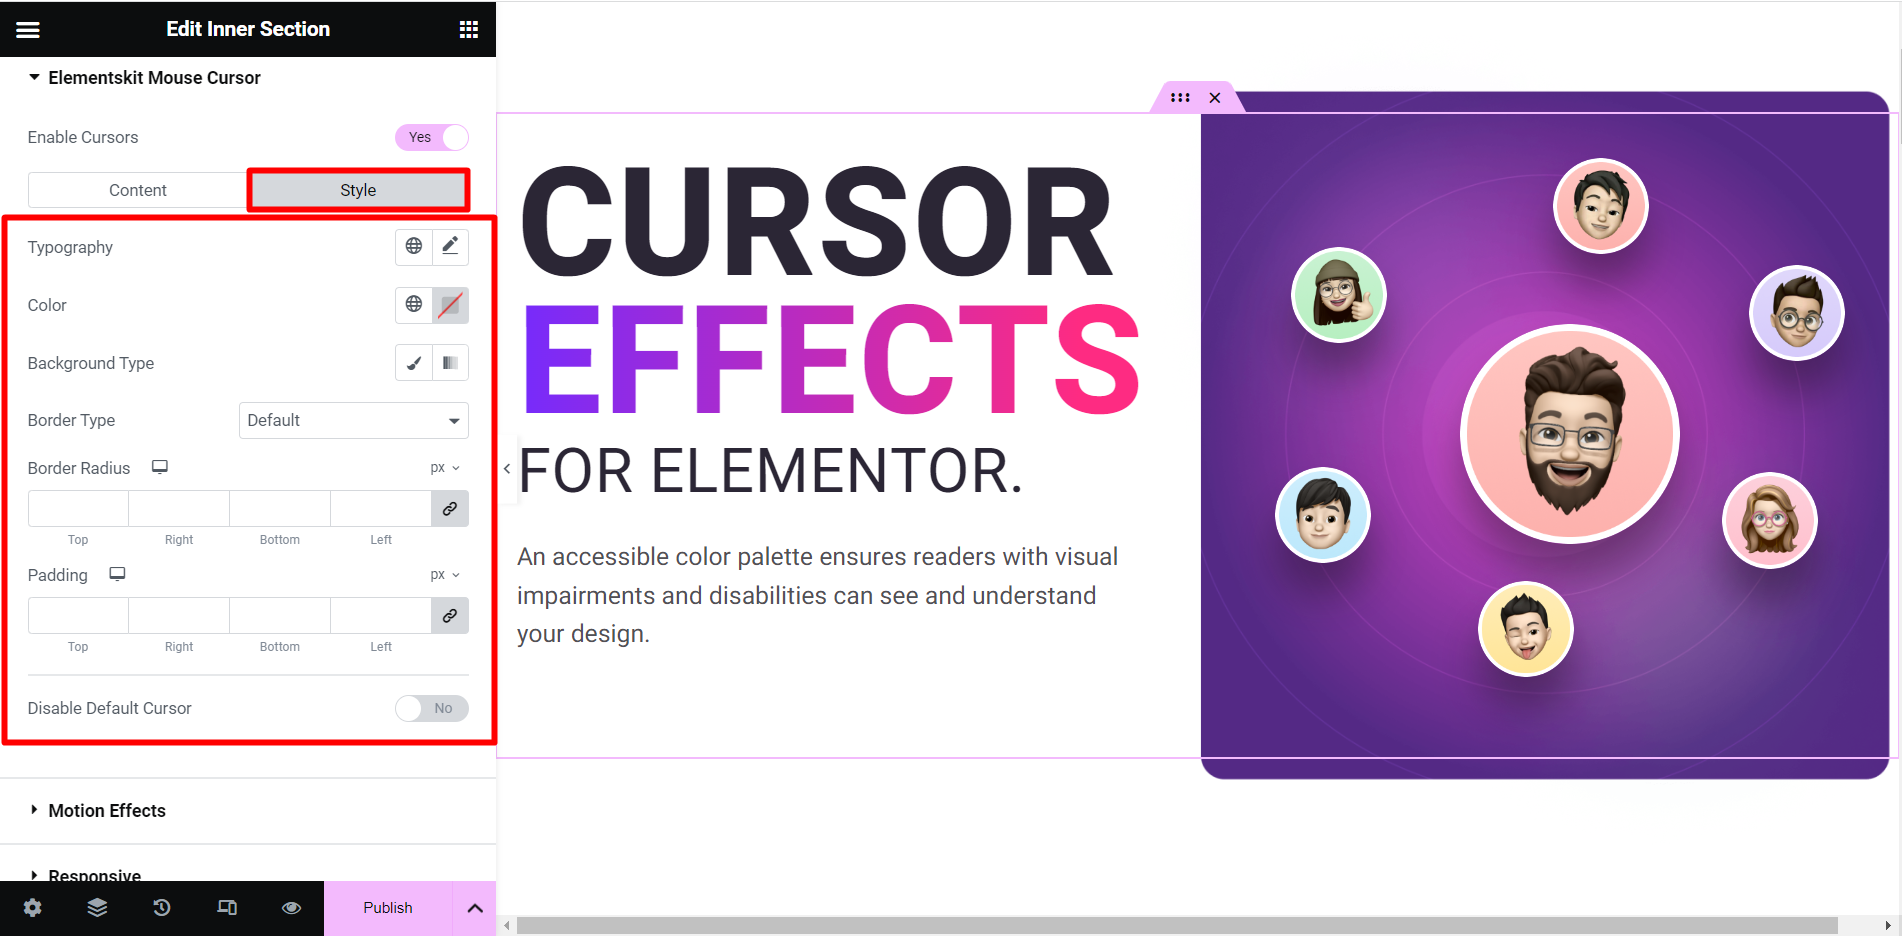
Would that be all? Not at all! The customization journey continues beyond just selecting a custom cursor. Once you’ve chosen your preferred cursor type, you can take it a step further by delving into the “Style” section. Here, you’ll find plenty of styling options tailored to the cursor type you’ve selected.
The section allows you to adjust the typography to fine-tune colors, border types, border radii, padding, and more. All help in enhancing the appearance of your custom mouse cursor in WordPress. With these detailed customization options at your fingertips, you can truly make your cursor reflect the unique style and branding of your website.
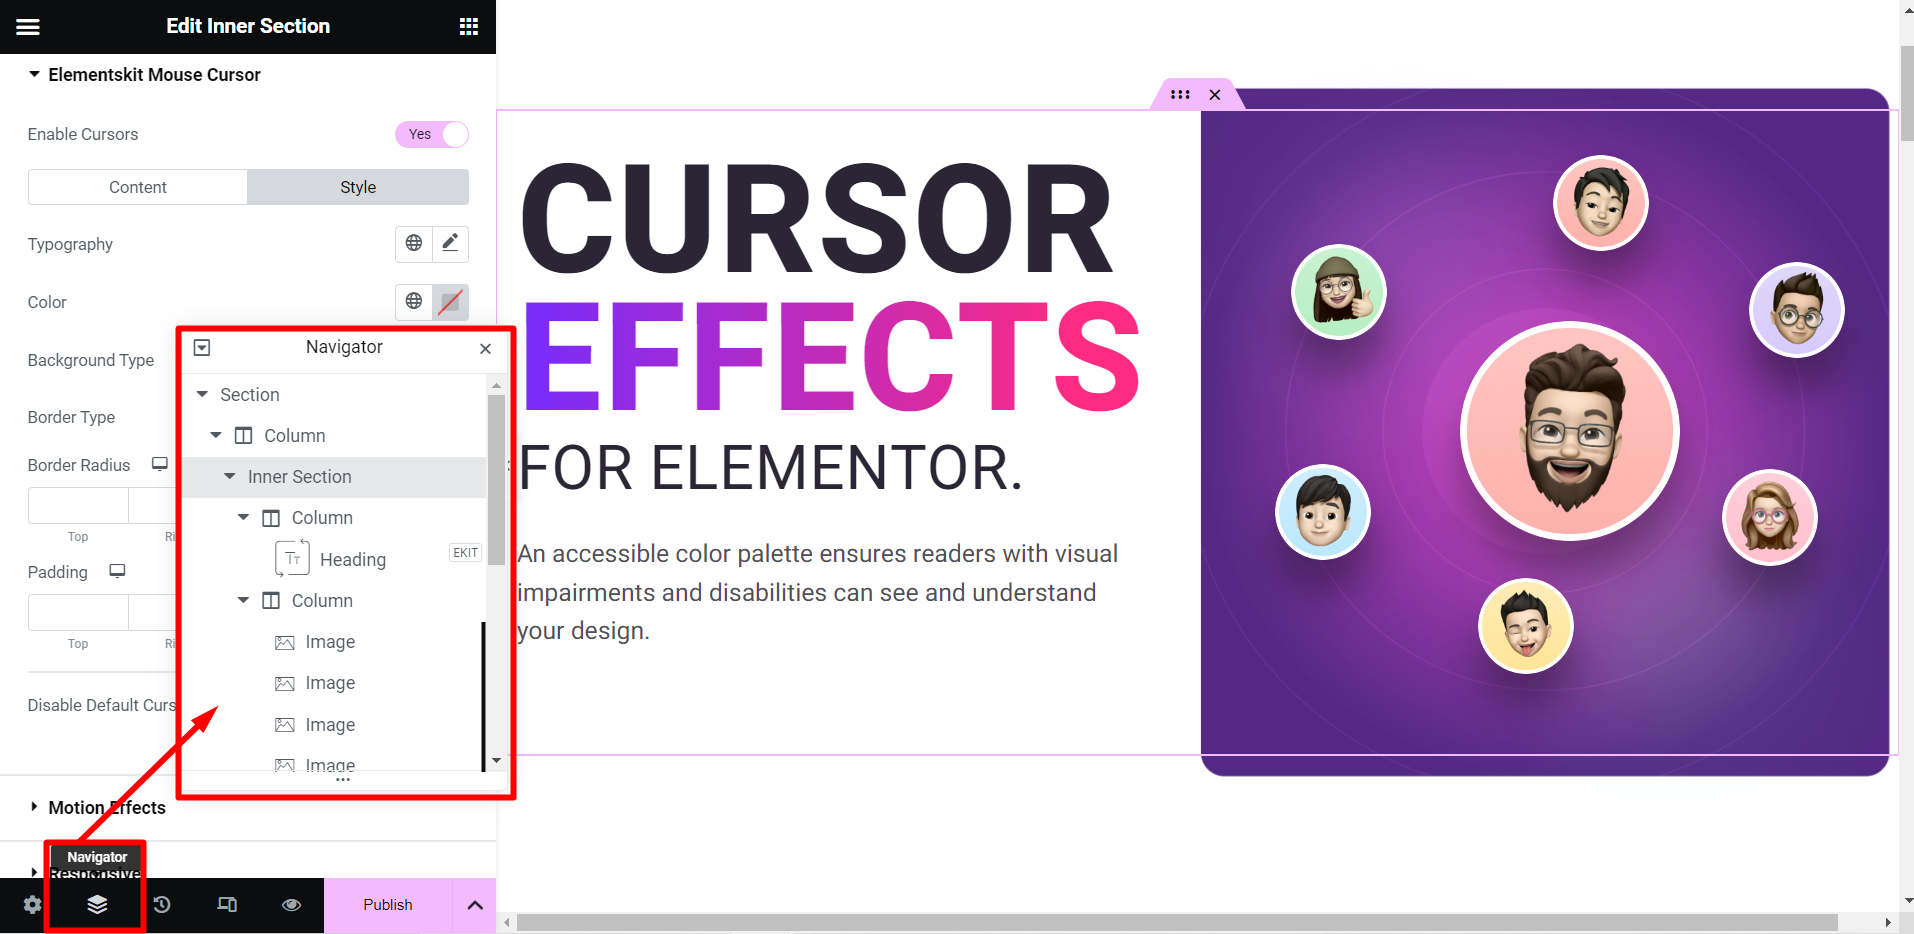
Maybe, you are thinking if you can have a different fancy WordPress custom mouse cursor design in each section, column, or image. Well, there’s still more you can do as ElementsKit allows you to do that. Hover to the “Navigator Button” and select the specific area where you desire to personalize the mouse cursor.
Step 3: Run the Output
After you are done with your custom cursor in WordPress, it’s time to test it in action. This allows you to determine if further enhancement and adjustment is needed.
FAQs: Fancy Mouse Cursor in WordPress
Does adding a custom cursor affect website performance?
Some complex cursor designs might have a slight impact. However, most options are lightweight and optimized for performance.
Can I use a custom cursor on all pages?
Yes, you can enable the Mouse Cursor module globally or add it to specific pages individually.
Is there support for different devices?
Most quality plugins, like ElementsKit, ensure their cursor effects work seamlessly across various devices.
Is it advisable to use multiple cursor effects simultaneously?
While it’s possible to use multiple cursor effects, it’s crucial to maintain consistency and avoid overwhelming users with excessive visual stimuli.
Can I revert to the default cursor if needed?
Yes, most cursor customization plugins allow you to revert to the default cursor with ease, providing flexibility and convenience.
👉 Go through the guide to create pie chart in WordPress.
Final Thought
Adding a custom mouse cursor effect is a fun and easy way to add personality and polish to your WordPress website. ElementKit is a WordPress cursor plugin that has a user-friendly interface and powerful features. Anyone can use it to create engaging and interactive experiences for their visitors.
Isn’t it simple and convenient? Now you can effortlessly customize the mouse cursor’s appearance, captivating your audience’s attention. So why not try ElementsKit and see how it transforms your website!
Leave a Reply