

Establishing transparent and consistent communication with customers should be the utmost priority of any online shop. Still, there are times when a break happens whether for holiday, maintenance, or other purposes.
In such cases, displaying a vacation notice introduces clarity and professionalism to your business, which saves you from thousands of customer queries and messages.
Luckily, this blog comes with a guide on how to enable vacation mode in WooCommerce stores using a user-friendly solution. So, without further ado, let’s jump into the tutorial for seamless customer relationship management.
Why is a Vacation Notice Important for Online Stores?
Displaying a vacation notice means giving customers a heads-up about your unavailability or delay in response which further boosts customer satisfaction and business credibility. Also, it will save you from loaded customer queries and open support tickets during the holiday season. Besides, vacation notice comes with many more objectives to foster customer relationships and support.
Here are the potential advantages of using vacation notices on your online store:
- It removes customer frustration by bringing transparency.
- Vacation notice minimizes confusion regarding why their queries are not answered or solved.
- It prevents customers from leaving negative reviews due to unmet expectations or dissatisfactory communication.
- It helps you to reflect professionalism in your business.
- A vacation notice preserves brand reputation by ensuring smooth communication.
- Vacation notices can increase repeat customers by enhancing customer loyalty.
- It allows your employees to take a break without worrying about customer queries.
Guide to Add Vacation Notices in WooCommerce
A vacation notice is paramount in notifying your audience about store vacations or sudden service disruptions due to maintenance or other reasons. Unfortunately, you won’t be able to display vacation notices using the default WooCommerce features. So, you have to use an addon to introduce this feature on your online store.
Here we’ll demonstrate the complete guide using a WooCommerce vacation mode plugin, ShopEngine. This codeless guide is 100% friendly for beginners or non-tech-savvy persons. So, let’s have a close look at how to enable vacation mode in WooCommerce using ShopEngine:
Step 1: Install WooCommerce Vacation Mode Plugin.
To add vacation notice to your eCommerce shop, install a WooCommerce vacation mode plugin. Since the vacation module is a premium feature, you will need both free and premium versions to leverage this feature.
First, install and activate ShopEngine by navigating Plugins >> Add New. Then search for ShopEngine and start installation by hitting the Install button. After installation, press the activate button and enjoy the feature of setting the Woo Store vacation message. Also, upload ShopEngine Pro and download it by going to Plugins >> Add New Plugin.
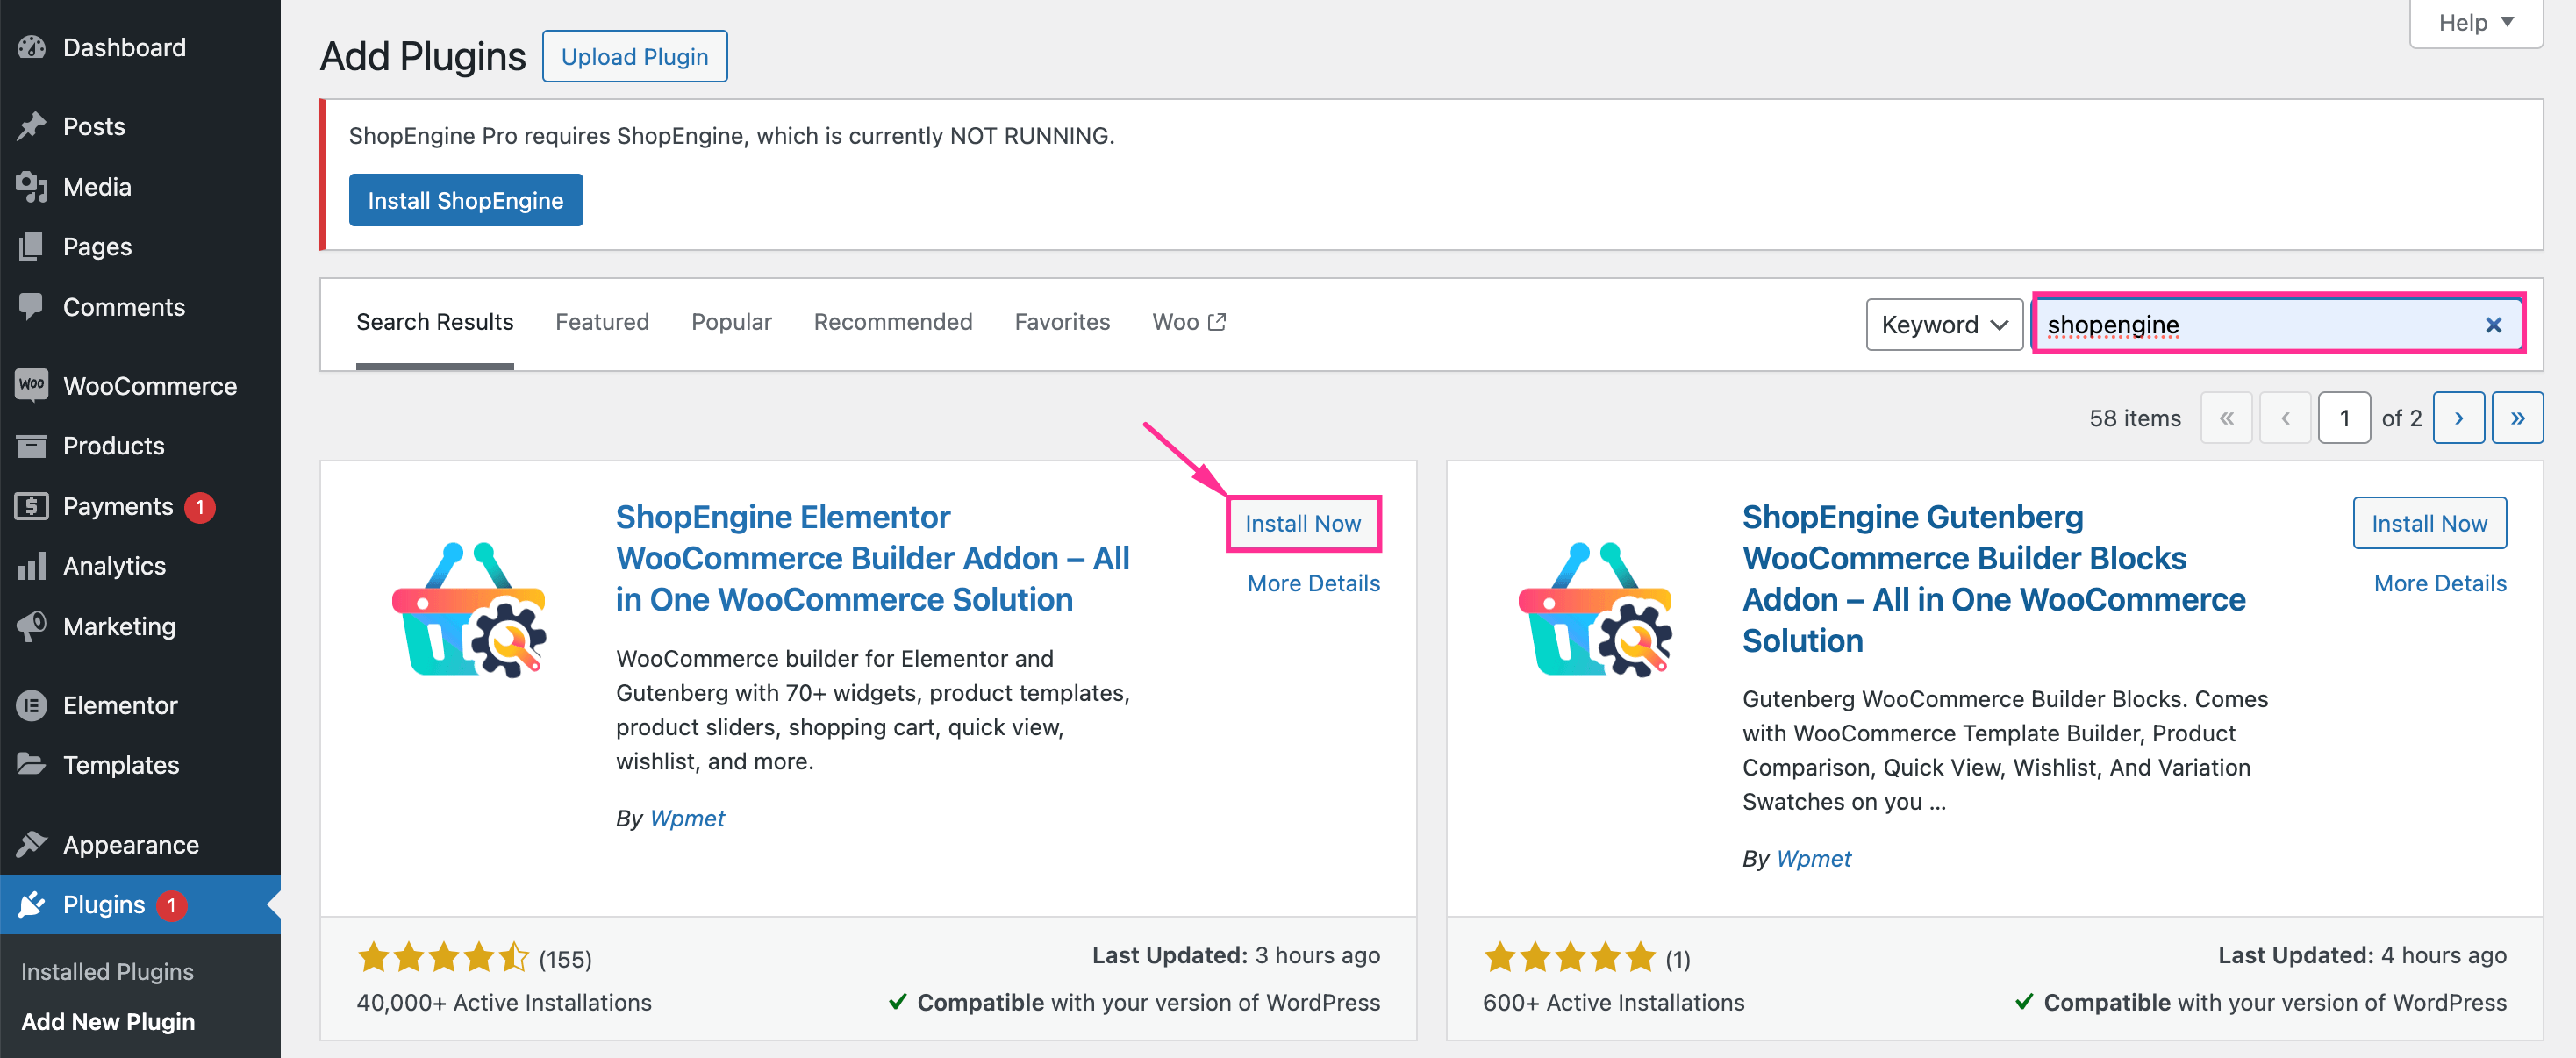
Precondition: ShopEngine won’t work without WooCommerce and Elementor as it’s an addon of these solutions. So, install and activate WooCommerce and Elementor to leverage ShopEngine’s vacation feature.
Step 2: Enable Vacation Mode to Display Holiday Announcement Message.
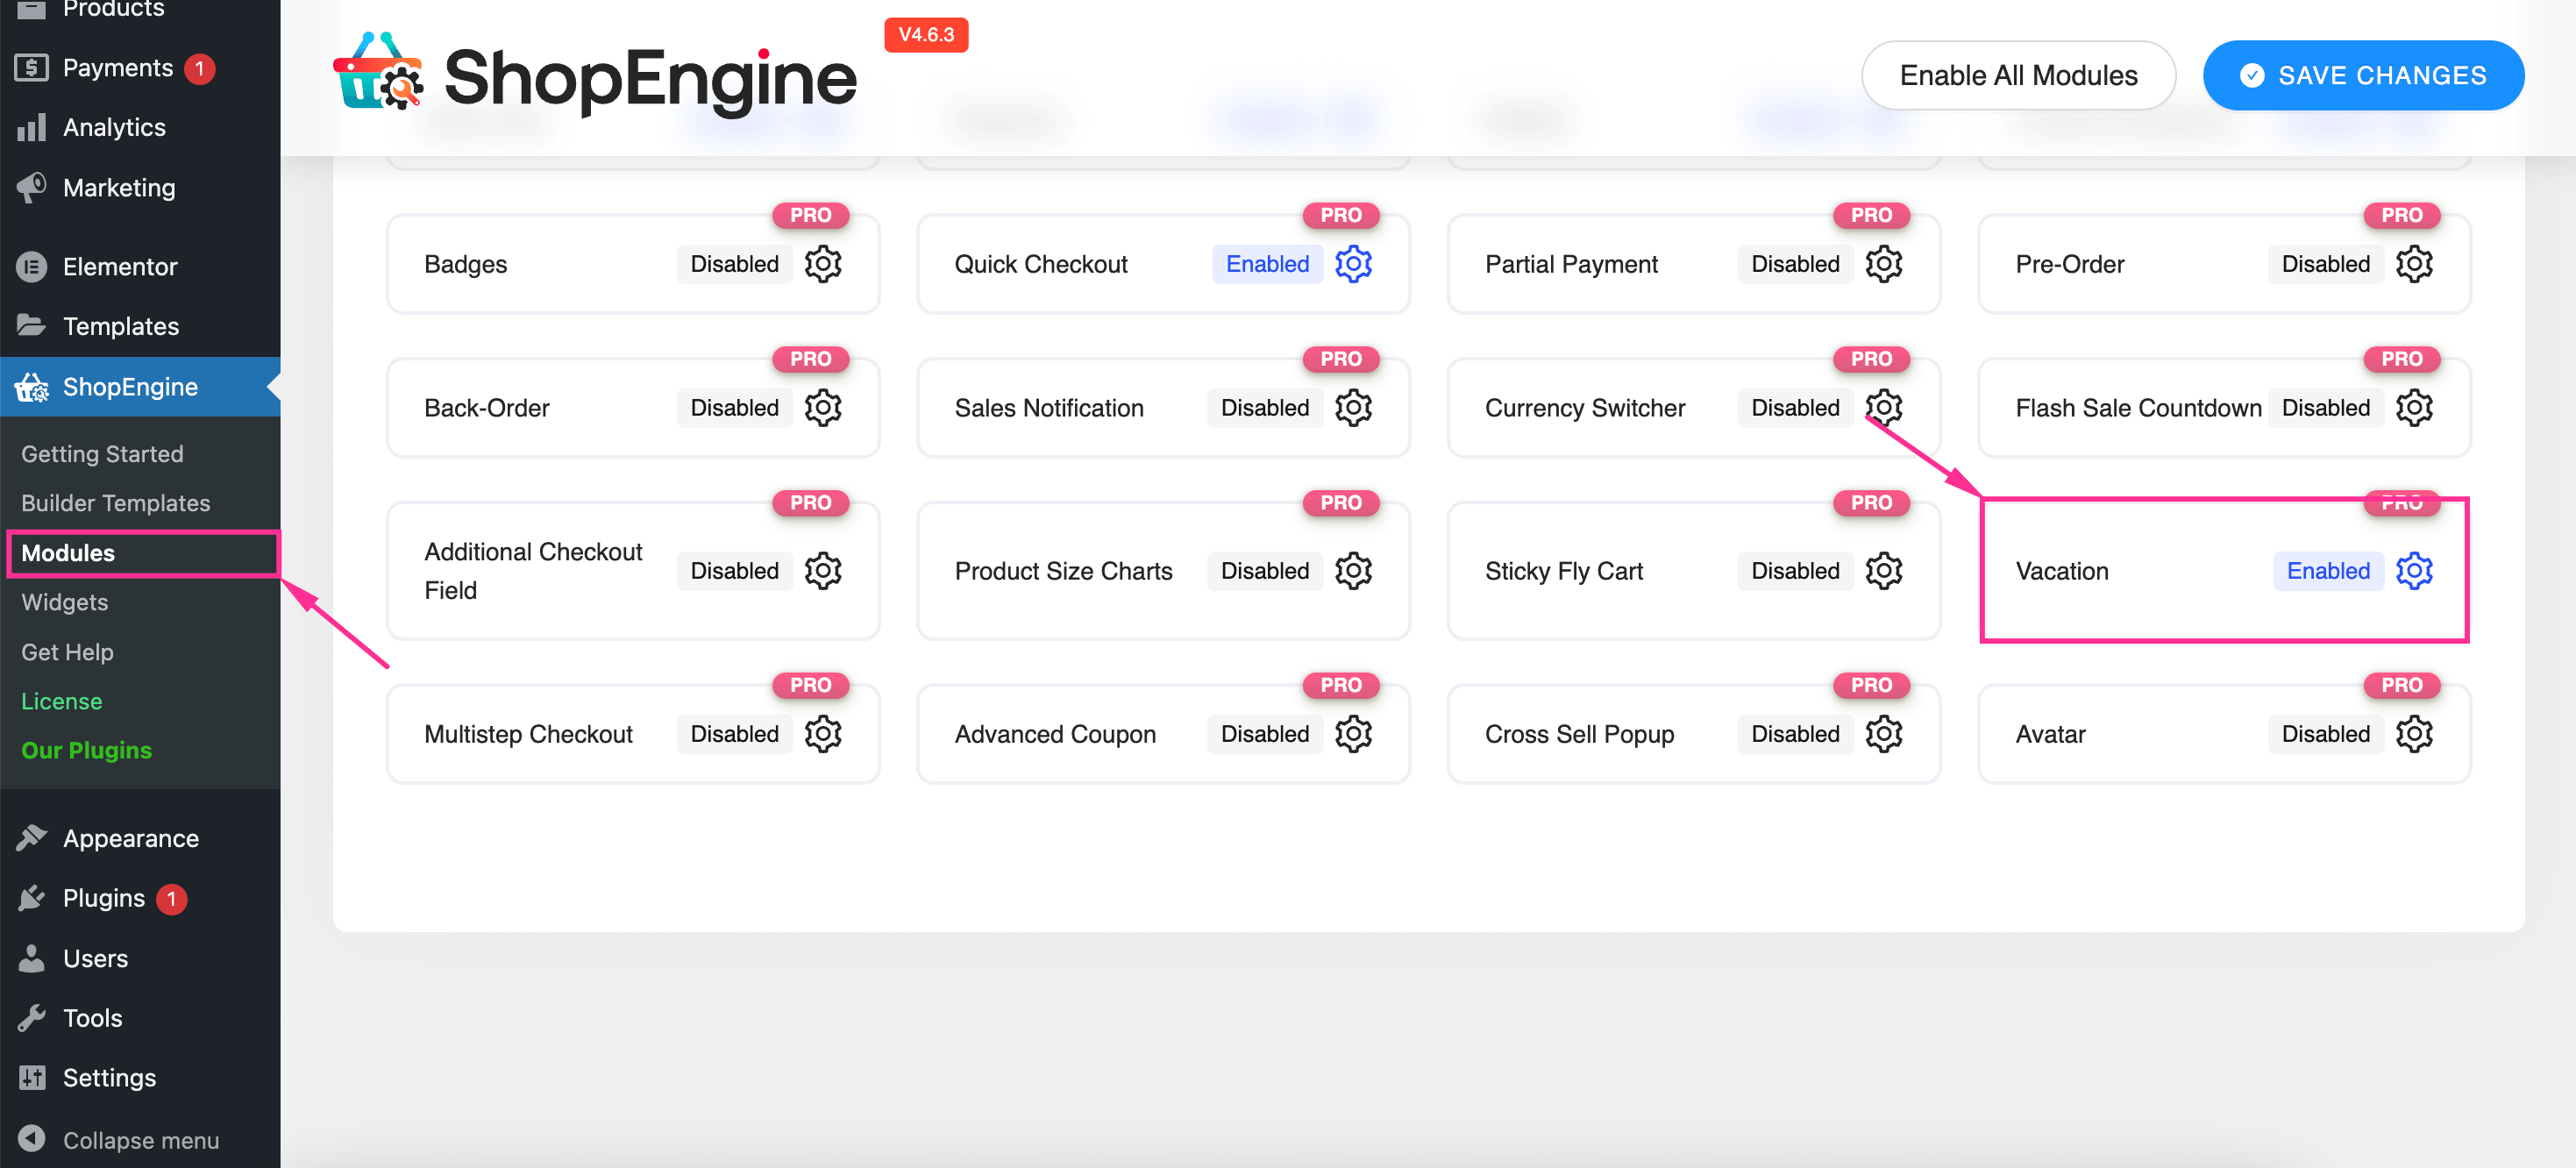
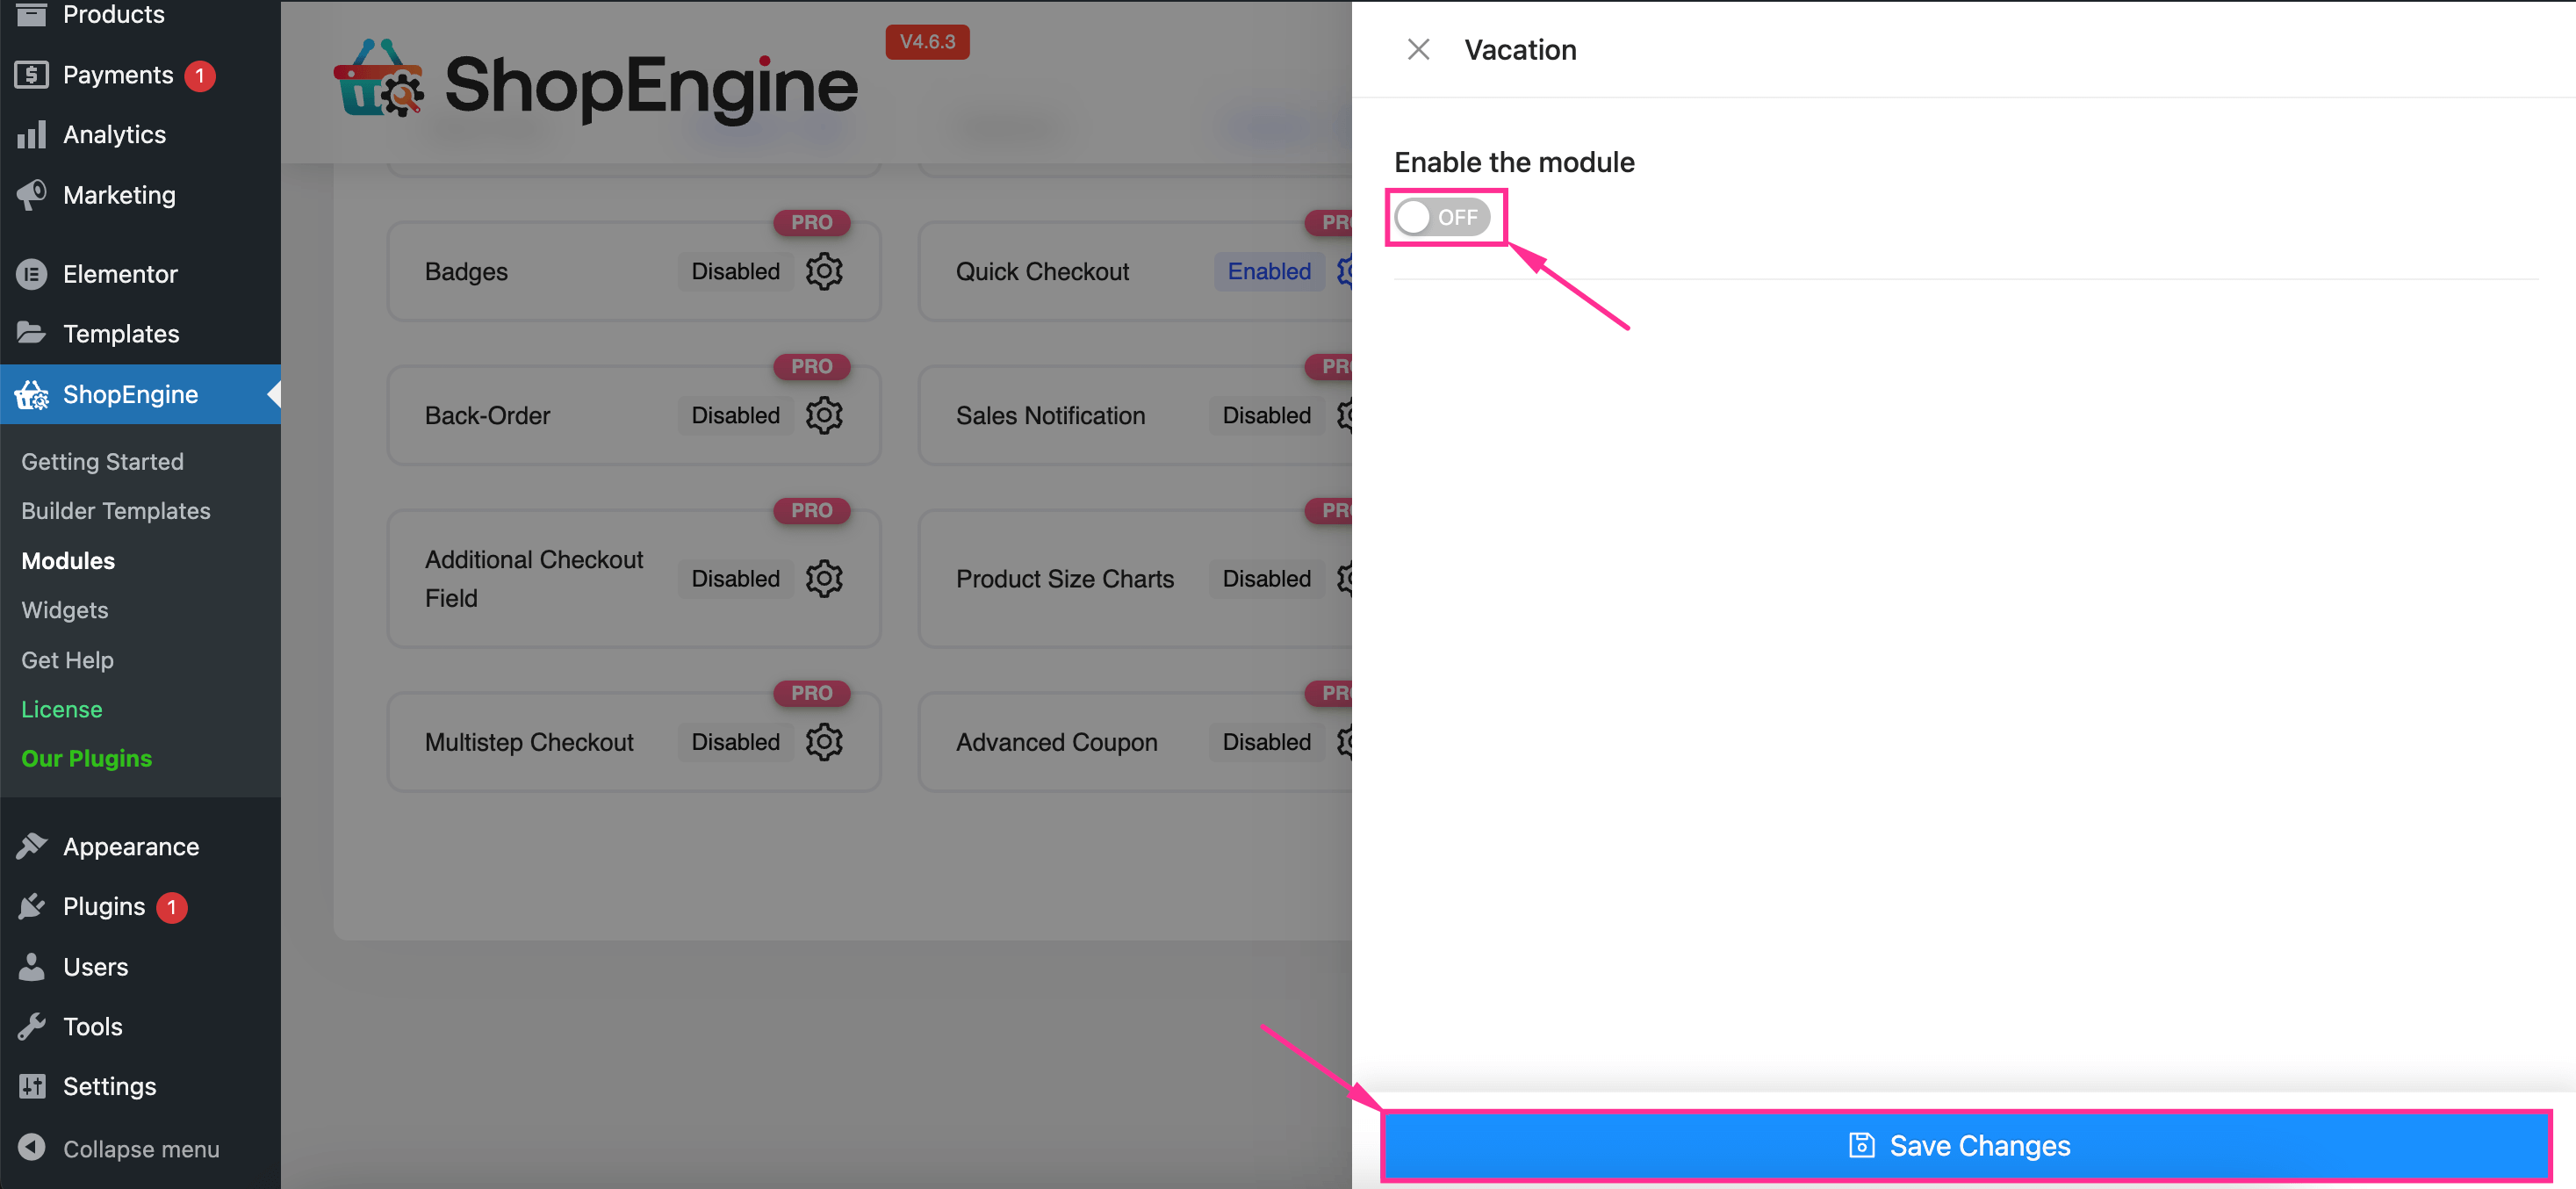
After installing all the necessary plugins, you need to enable the Vacation feature from ShopEngine’s Modules tab. Go to ShopEngine >> Modules and press the toggle button for the Vacation module.
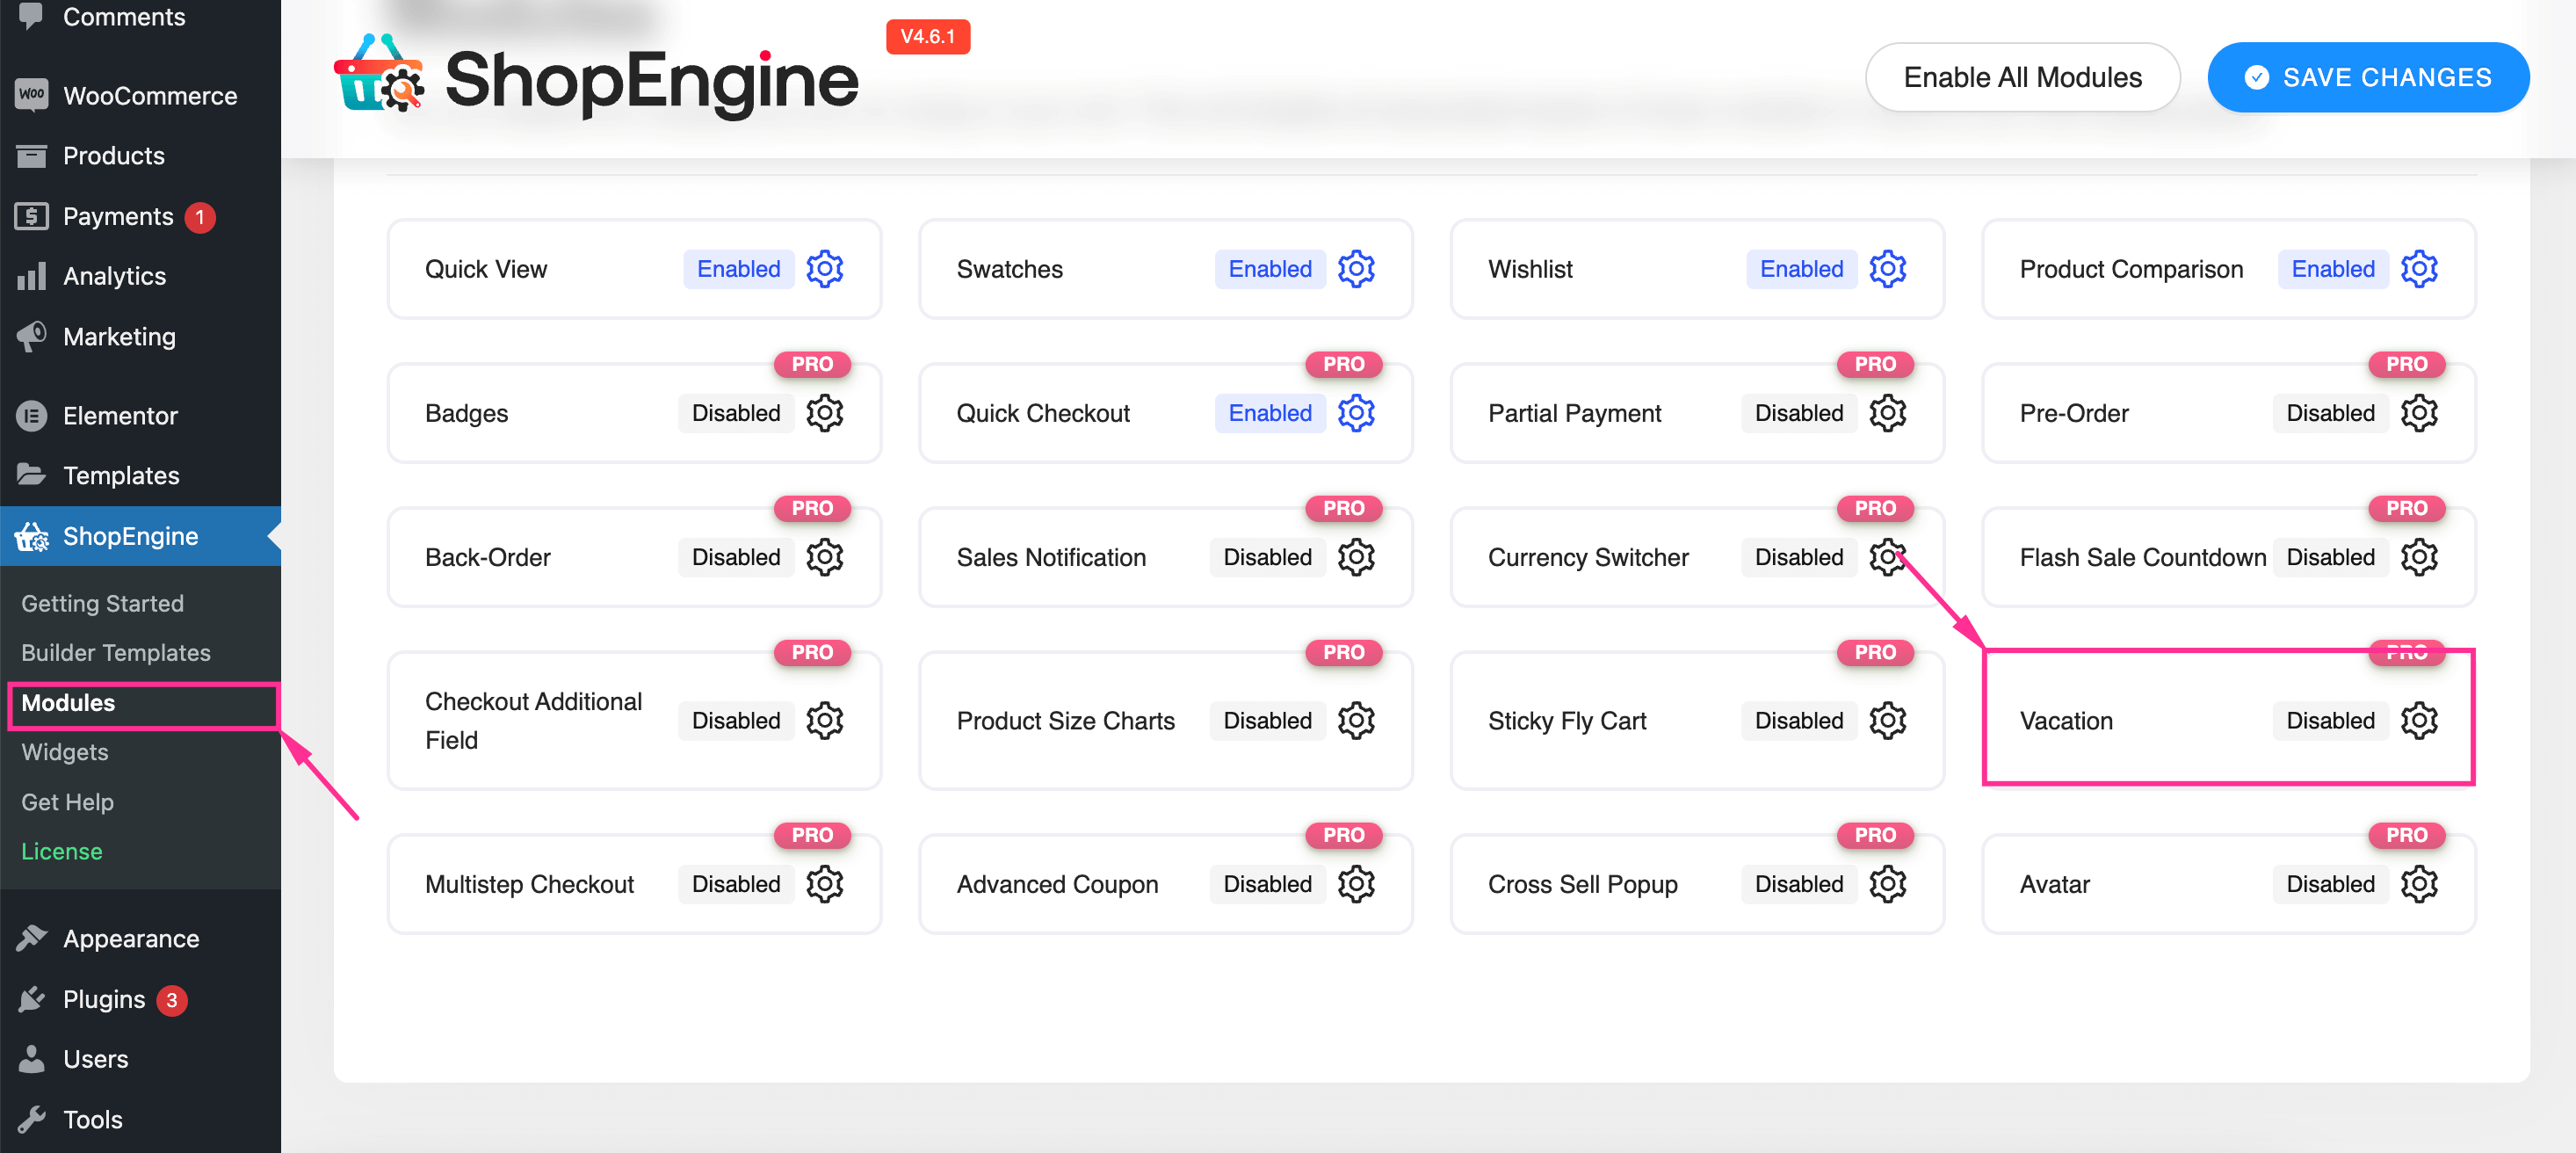
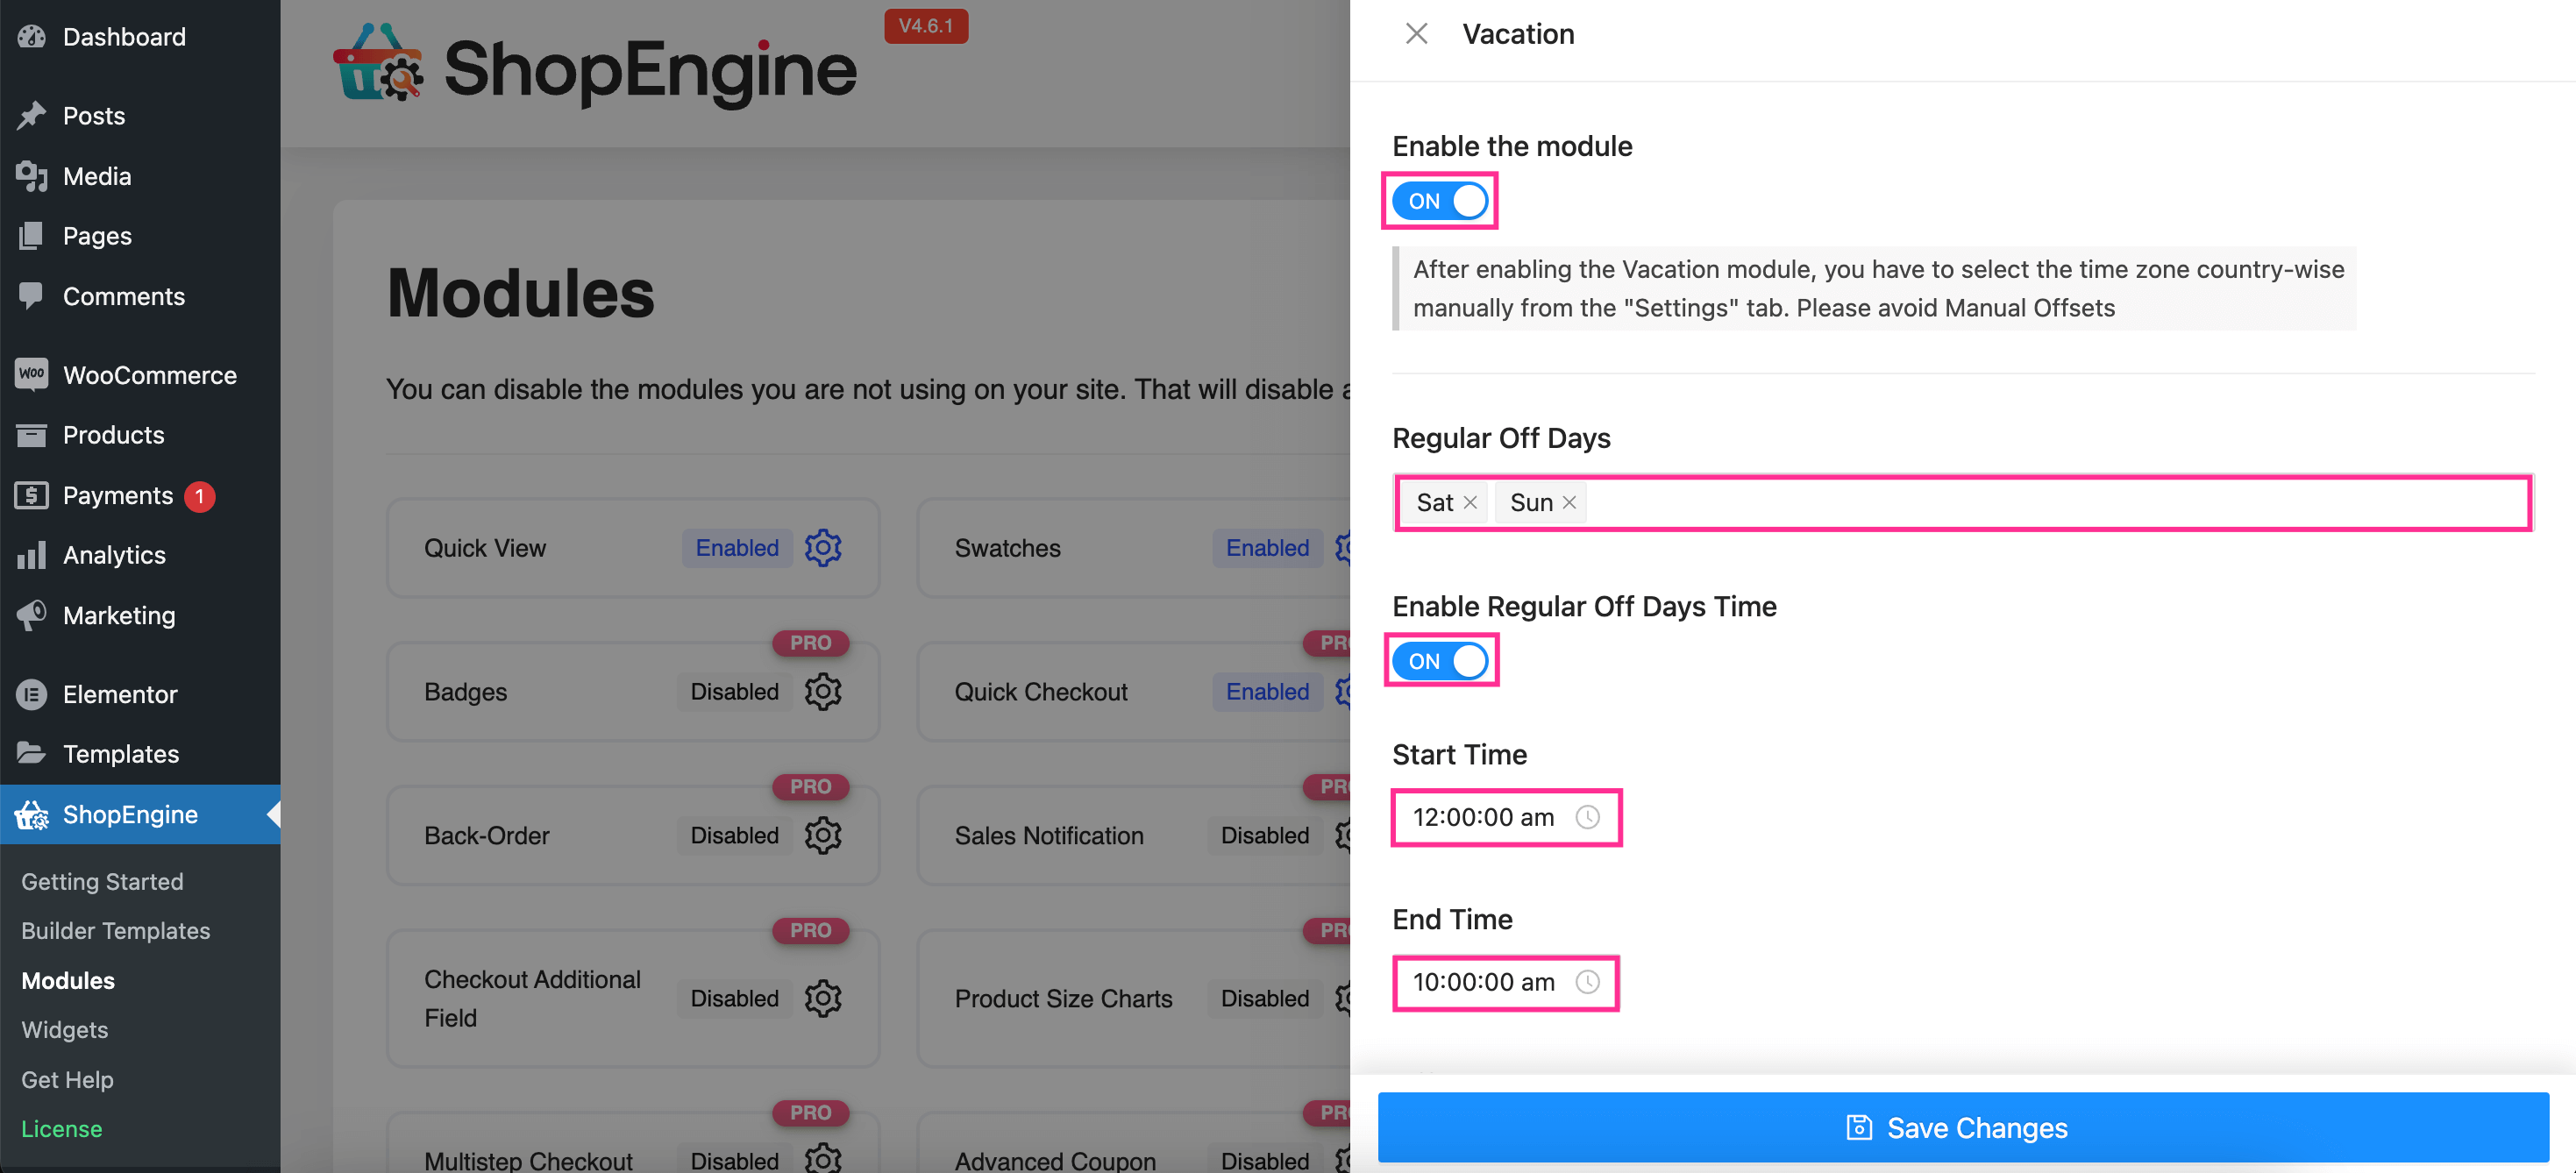
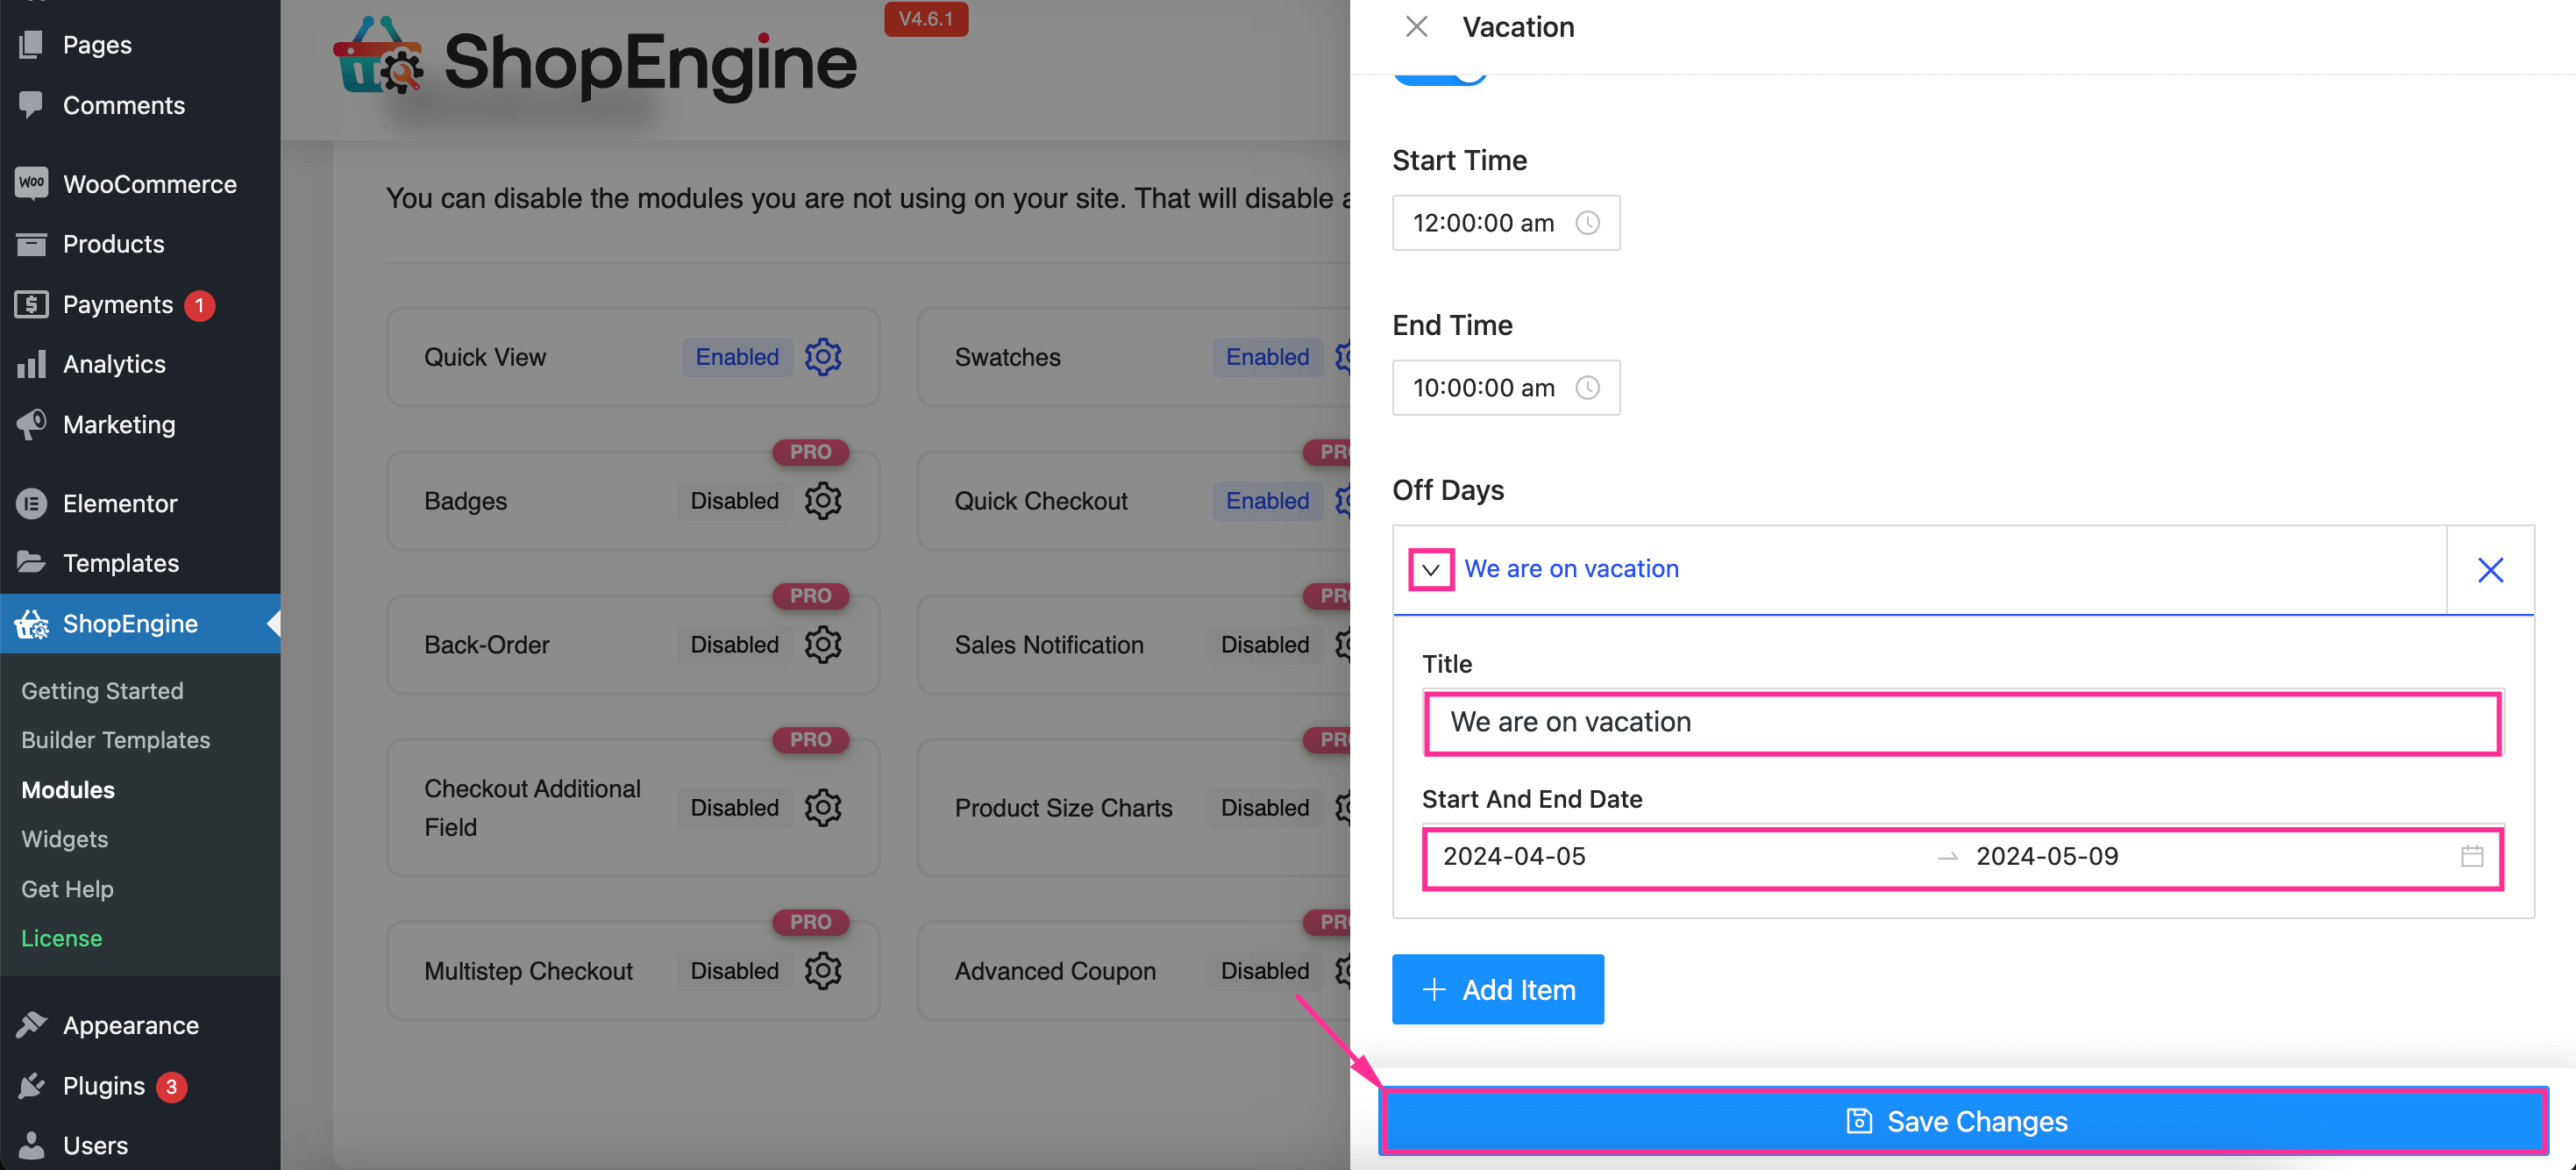
After pressing the Vacation module, a tab will be visible on the right side from where you can set Woo store vacation. Now, enable the module that will make other fields visible such as:
- Regular Off Days: Select regular off days for your online store.
- Enable Regular Off Days Time: Toggle on this option to set vacation notice.
- Start Time: Choose the start time of regular off days.
- End Time: Enter the end time of regular off days.
⚠️ Alert ⚠️: Select the country-wise time zone from the vacation “Settings” tab after activating the Vacation module. Do avoid manual offsets as the Vacation module already works with it.
Now, extend the drop-down option of Off Days. Here, you have to add a Title and Start and End Date for the store vacation announcement message. Then, press the “Save Changes” button to enable the WooCommerce vacation feature.
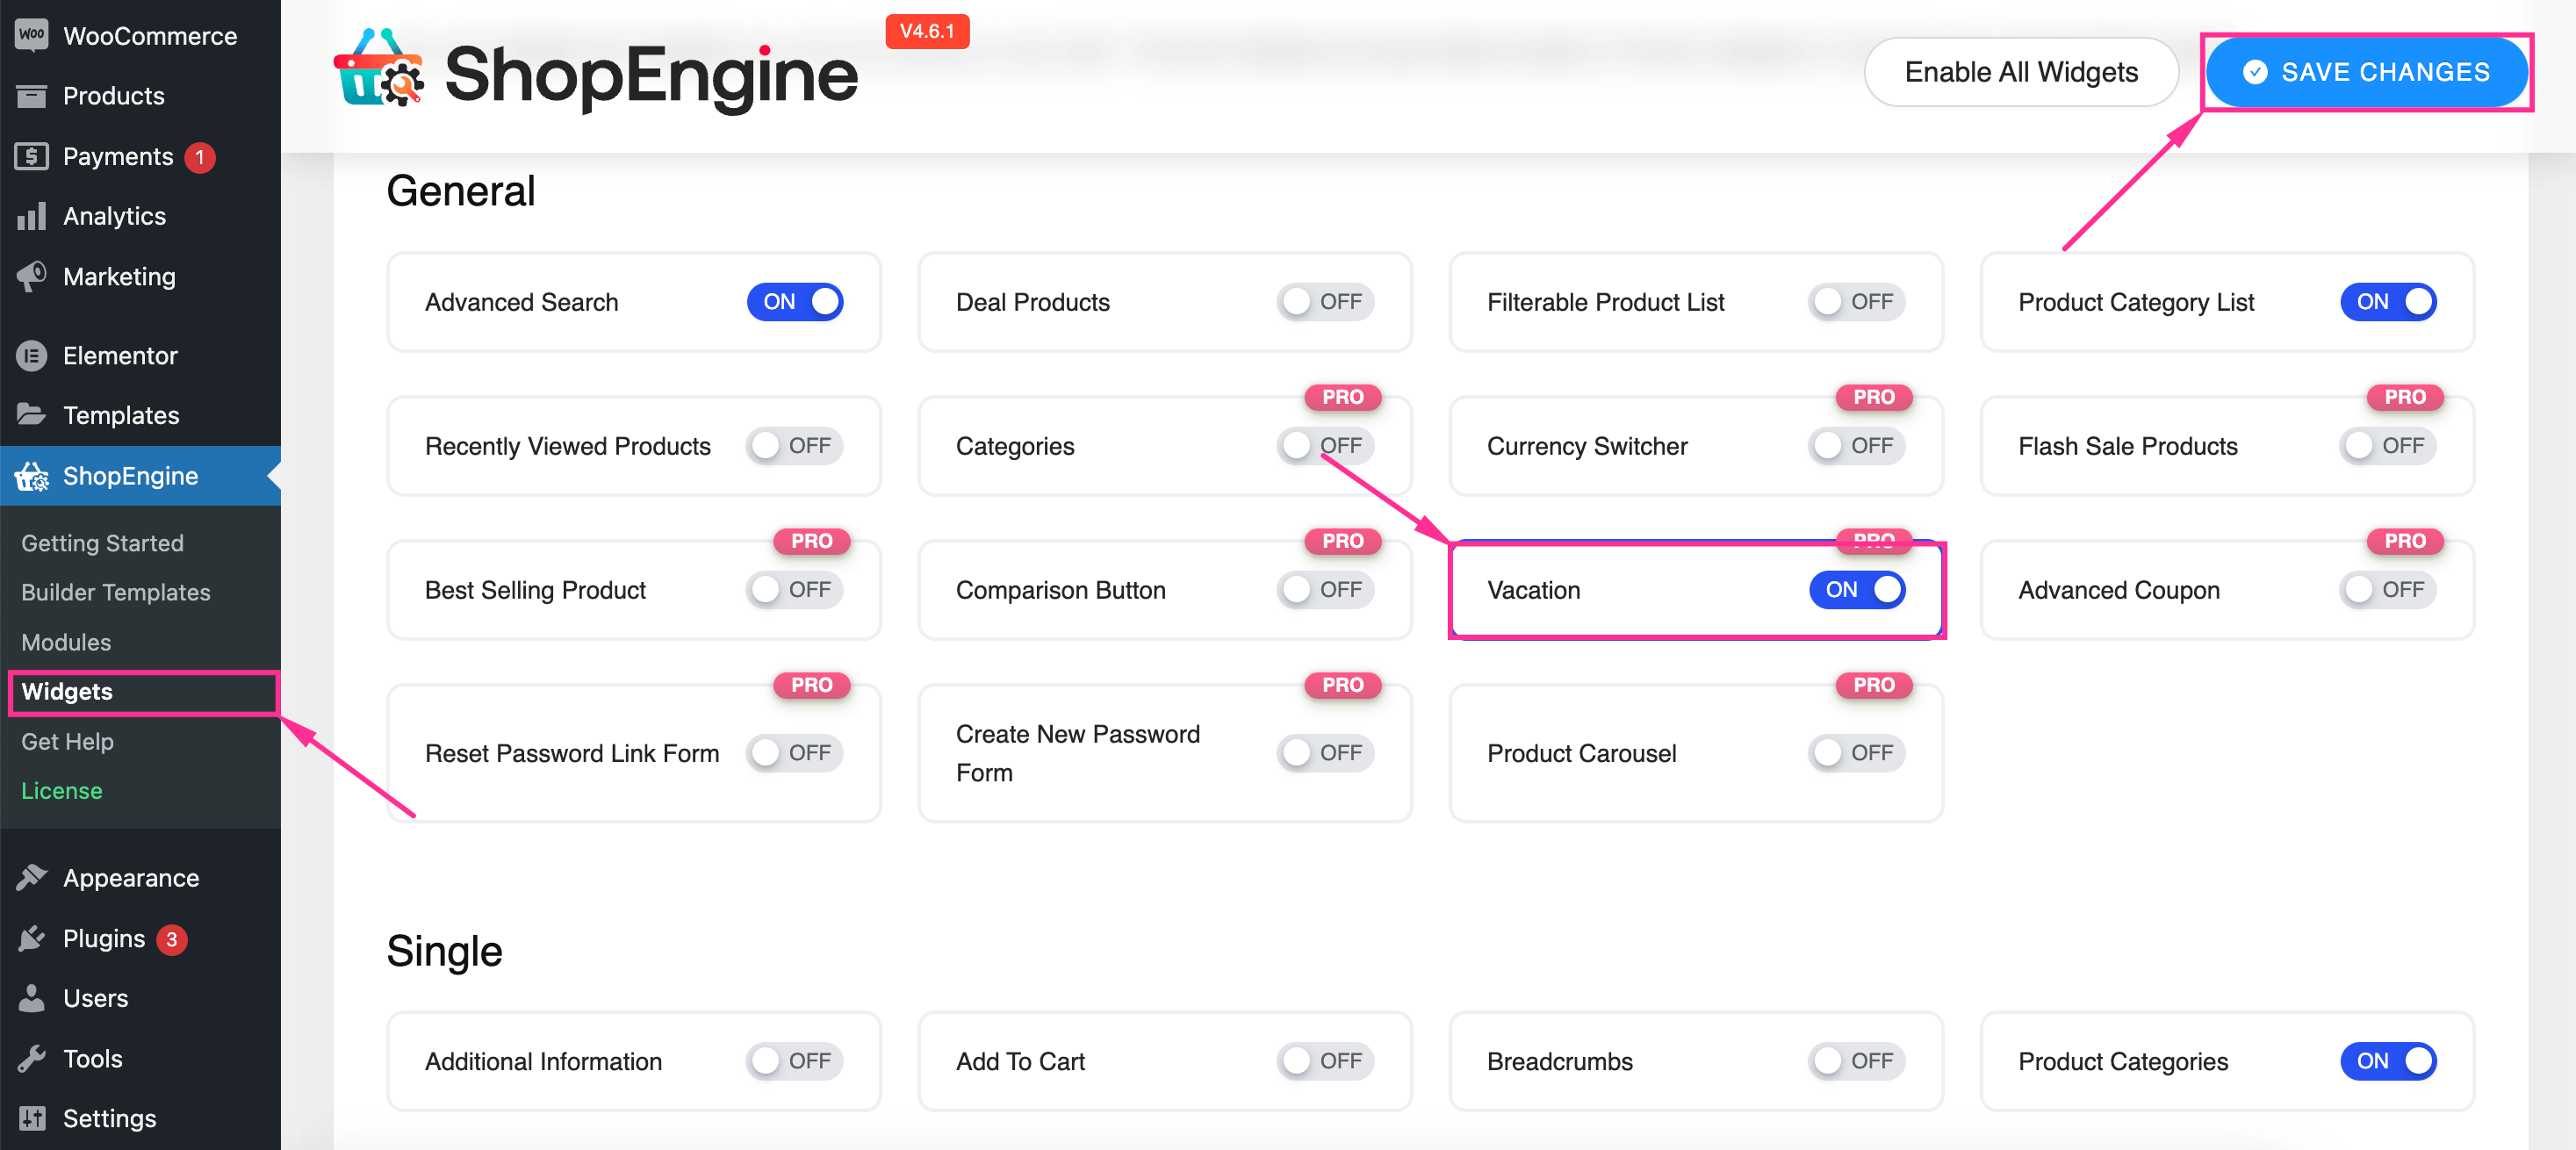
After enabling the Vacation module, follow the same process to enable the Vacation widget. Navigate to ShopEngine >> Widgets and toggle on the Vacation widget. Now, press the “Save Changes” button.
Step 3: Set up WooCommerce Store Notice.
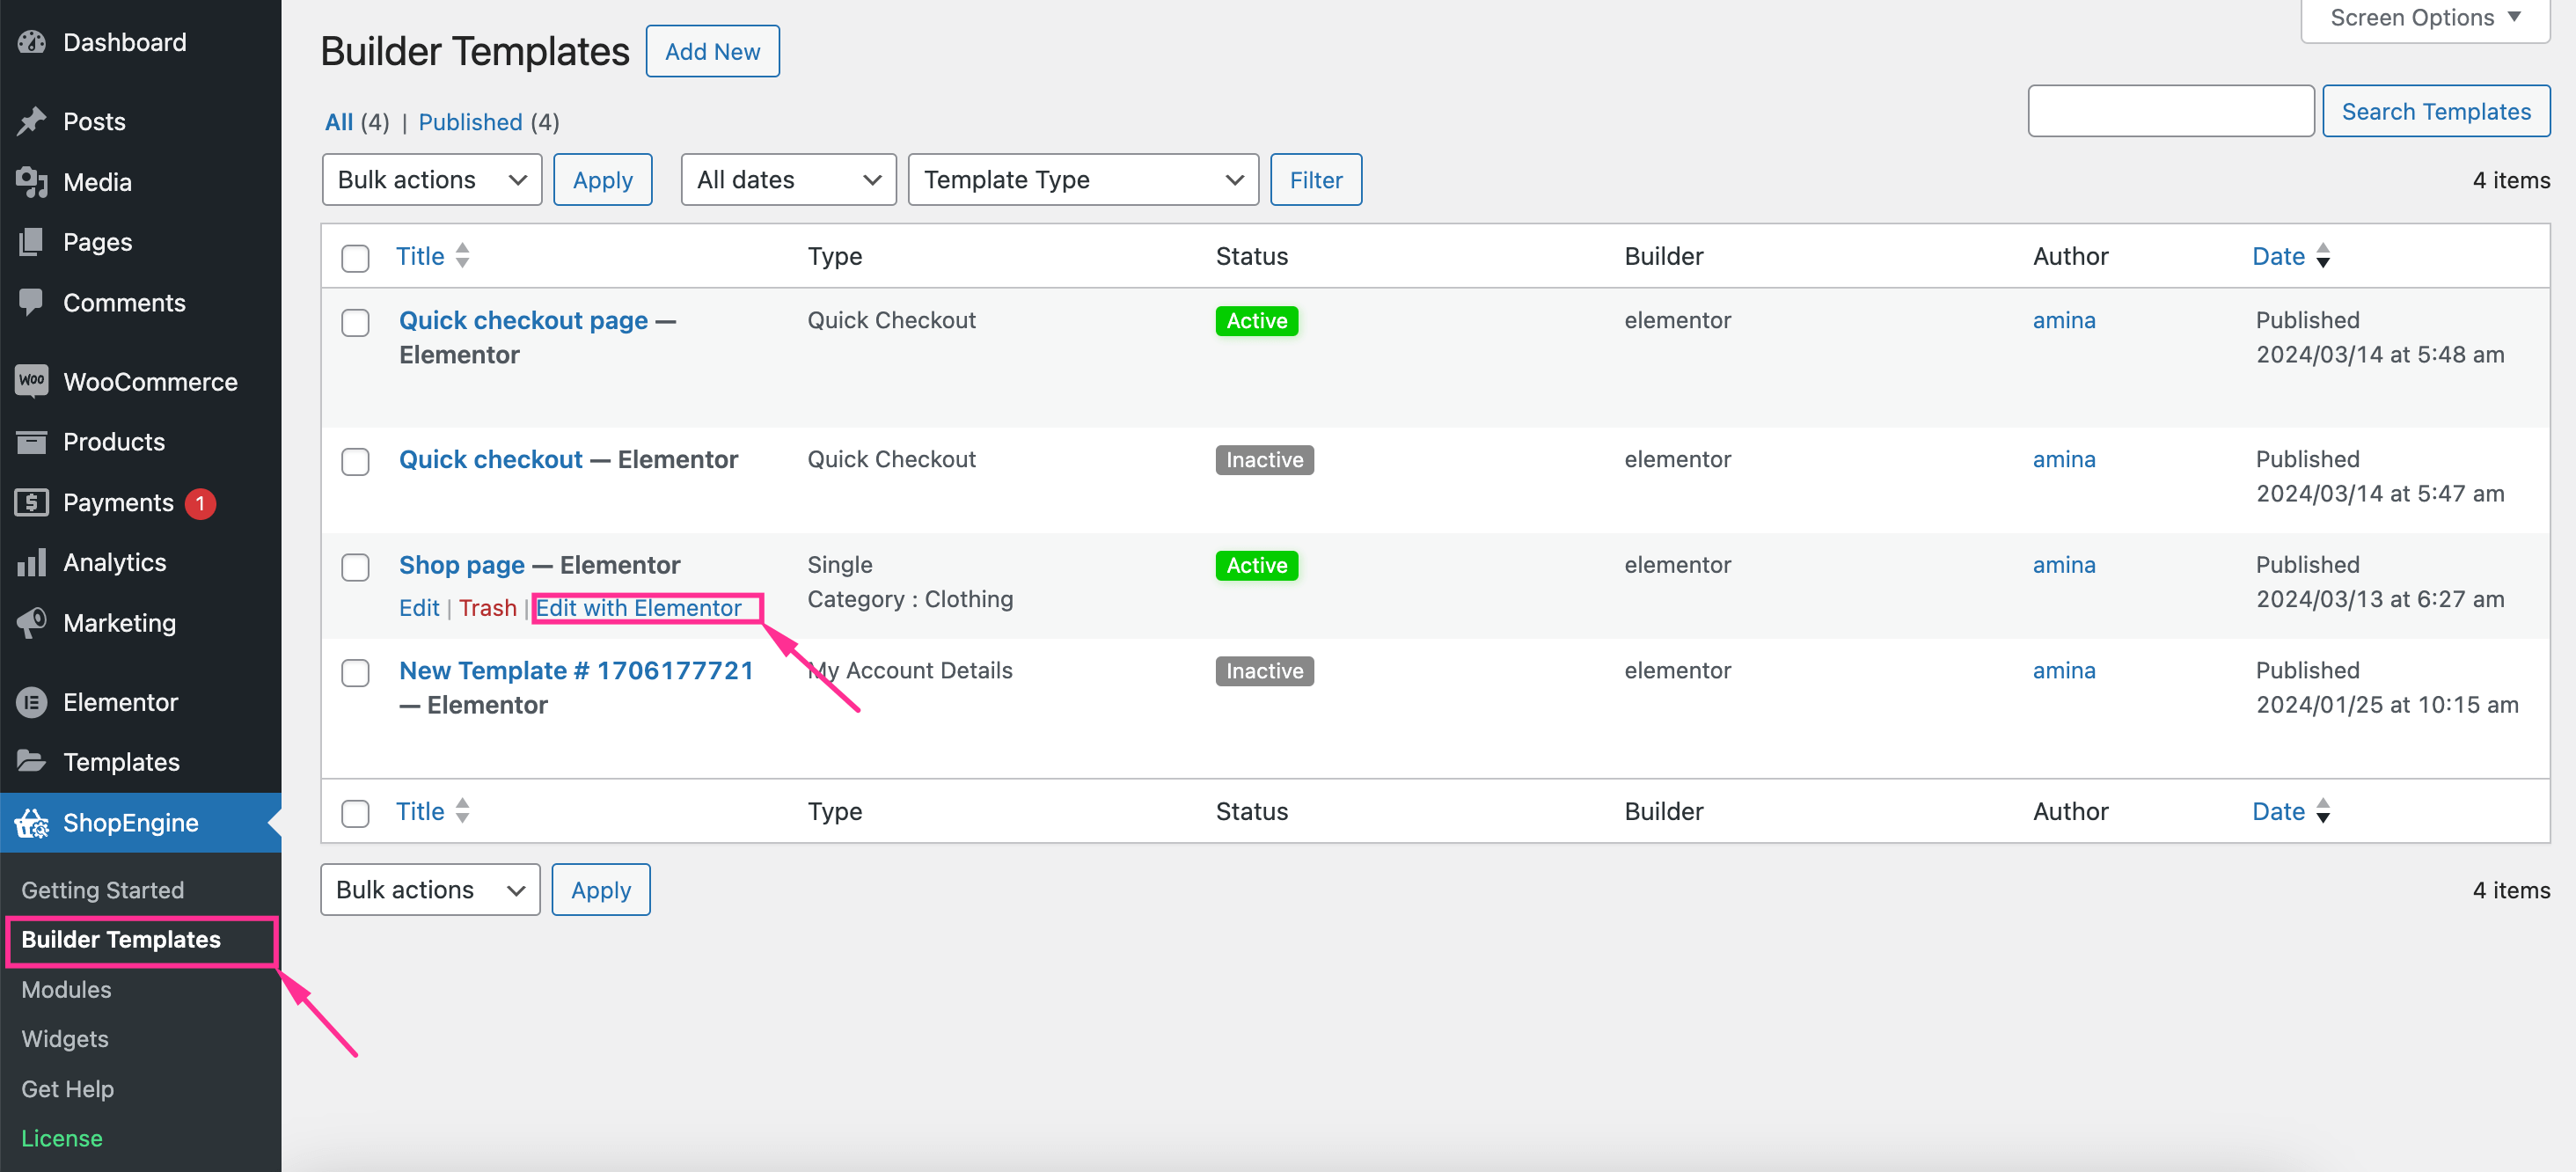
In the third step, go to the “Builder Templates” tab under ShopEngine and press the “Edit with Elementor” option of the shop page template.
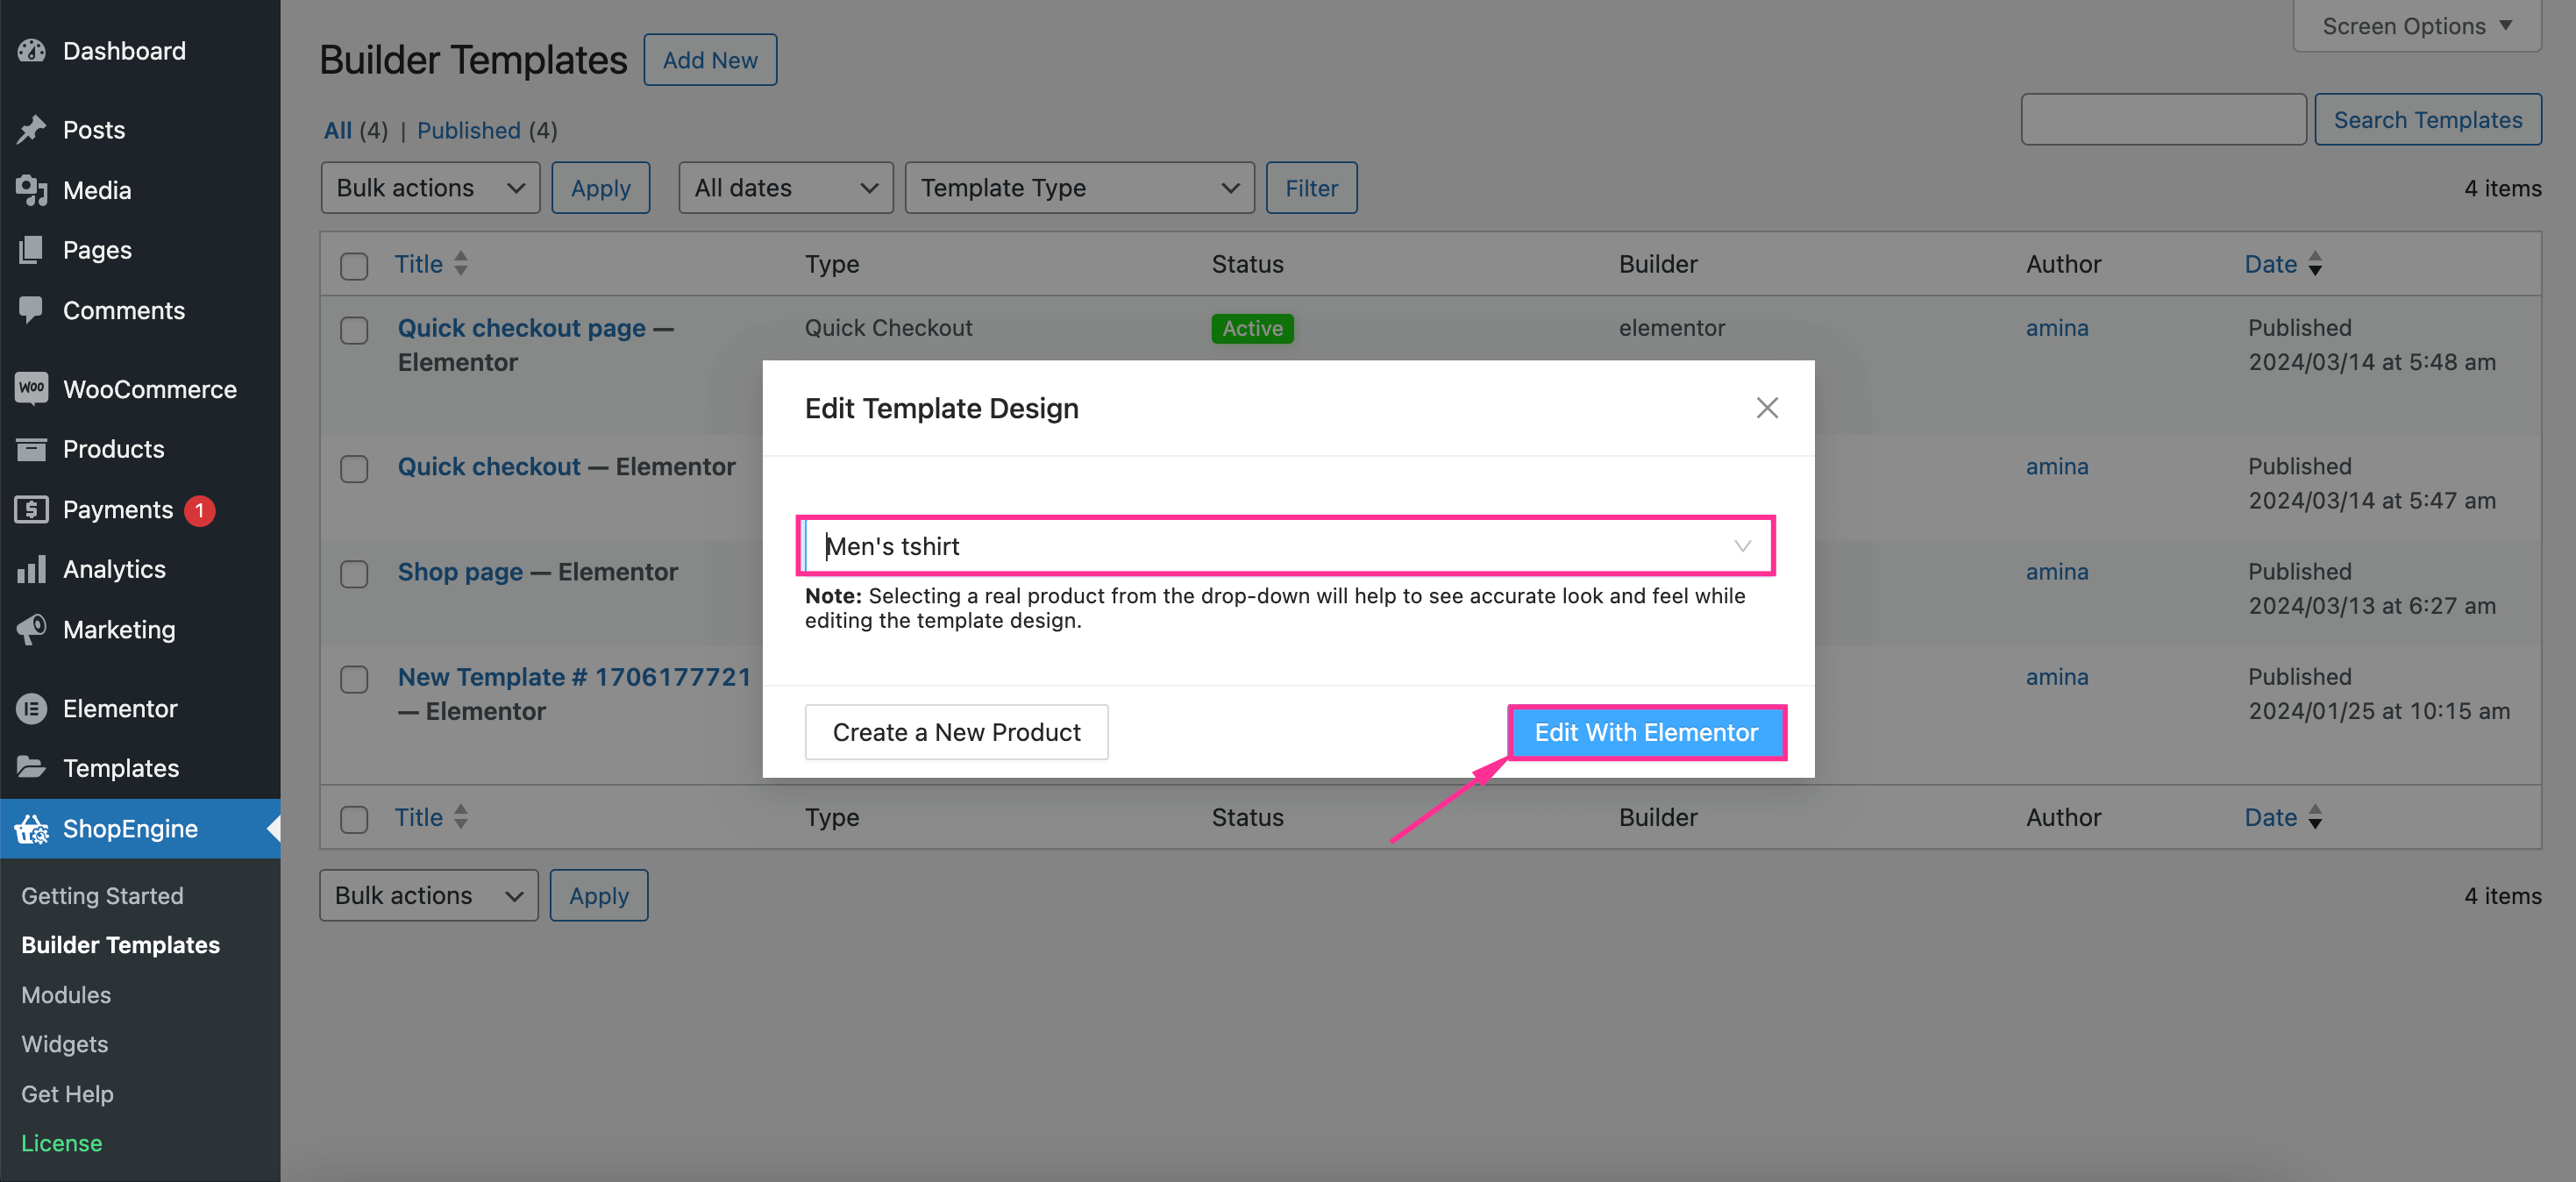
Then a tab will pop up from where you need to select a product to get an accurate experience of how it will look on the front end. After that, hit the “Edit with Elementor” button to make additional vacation settings.
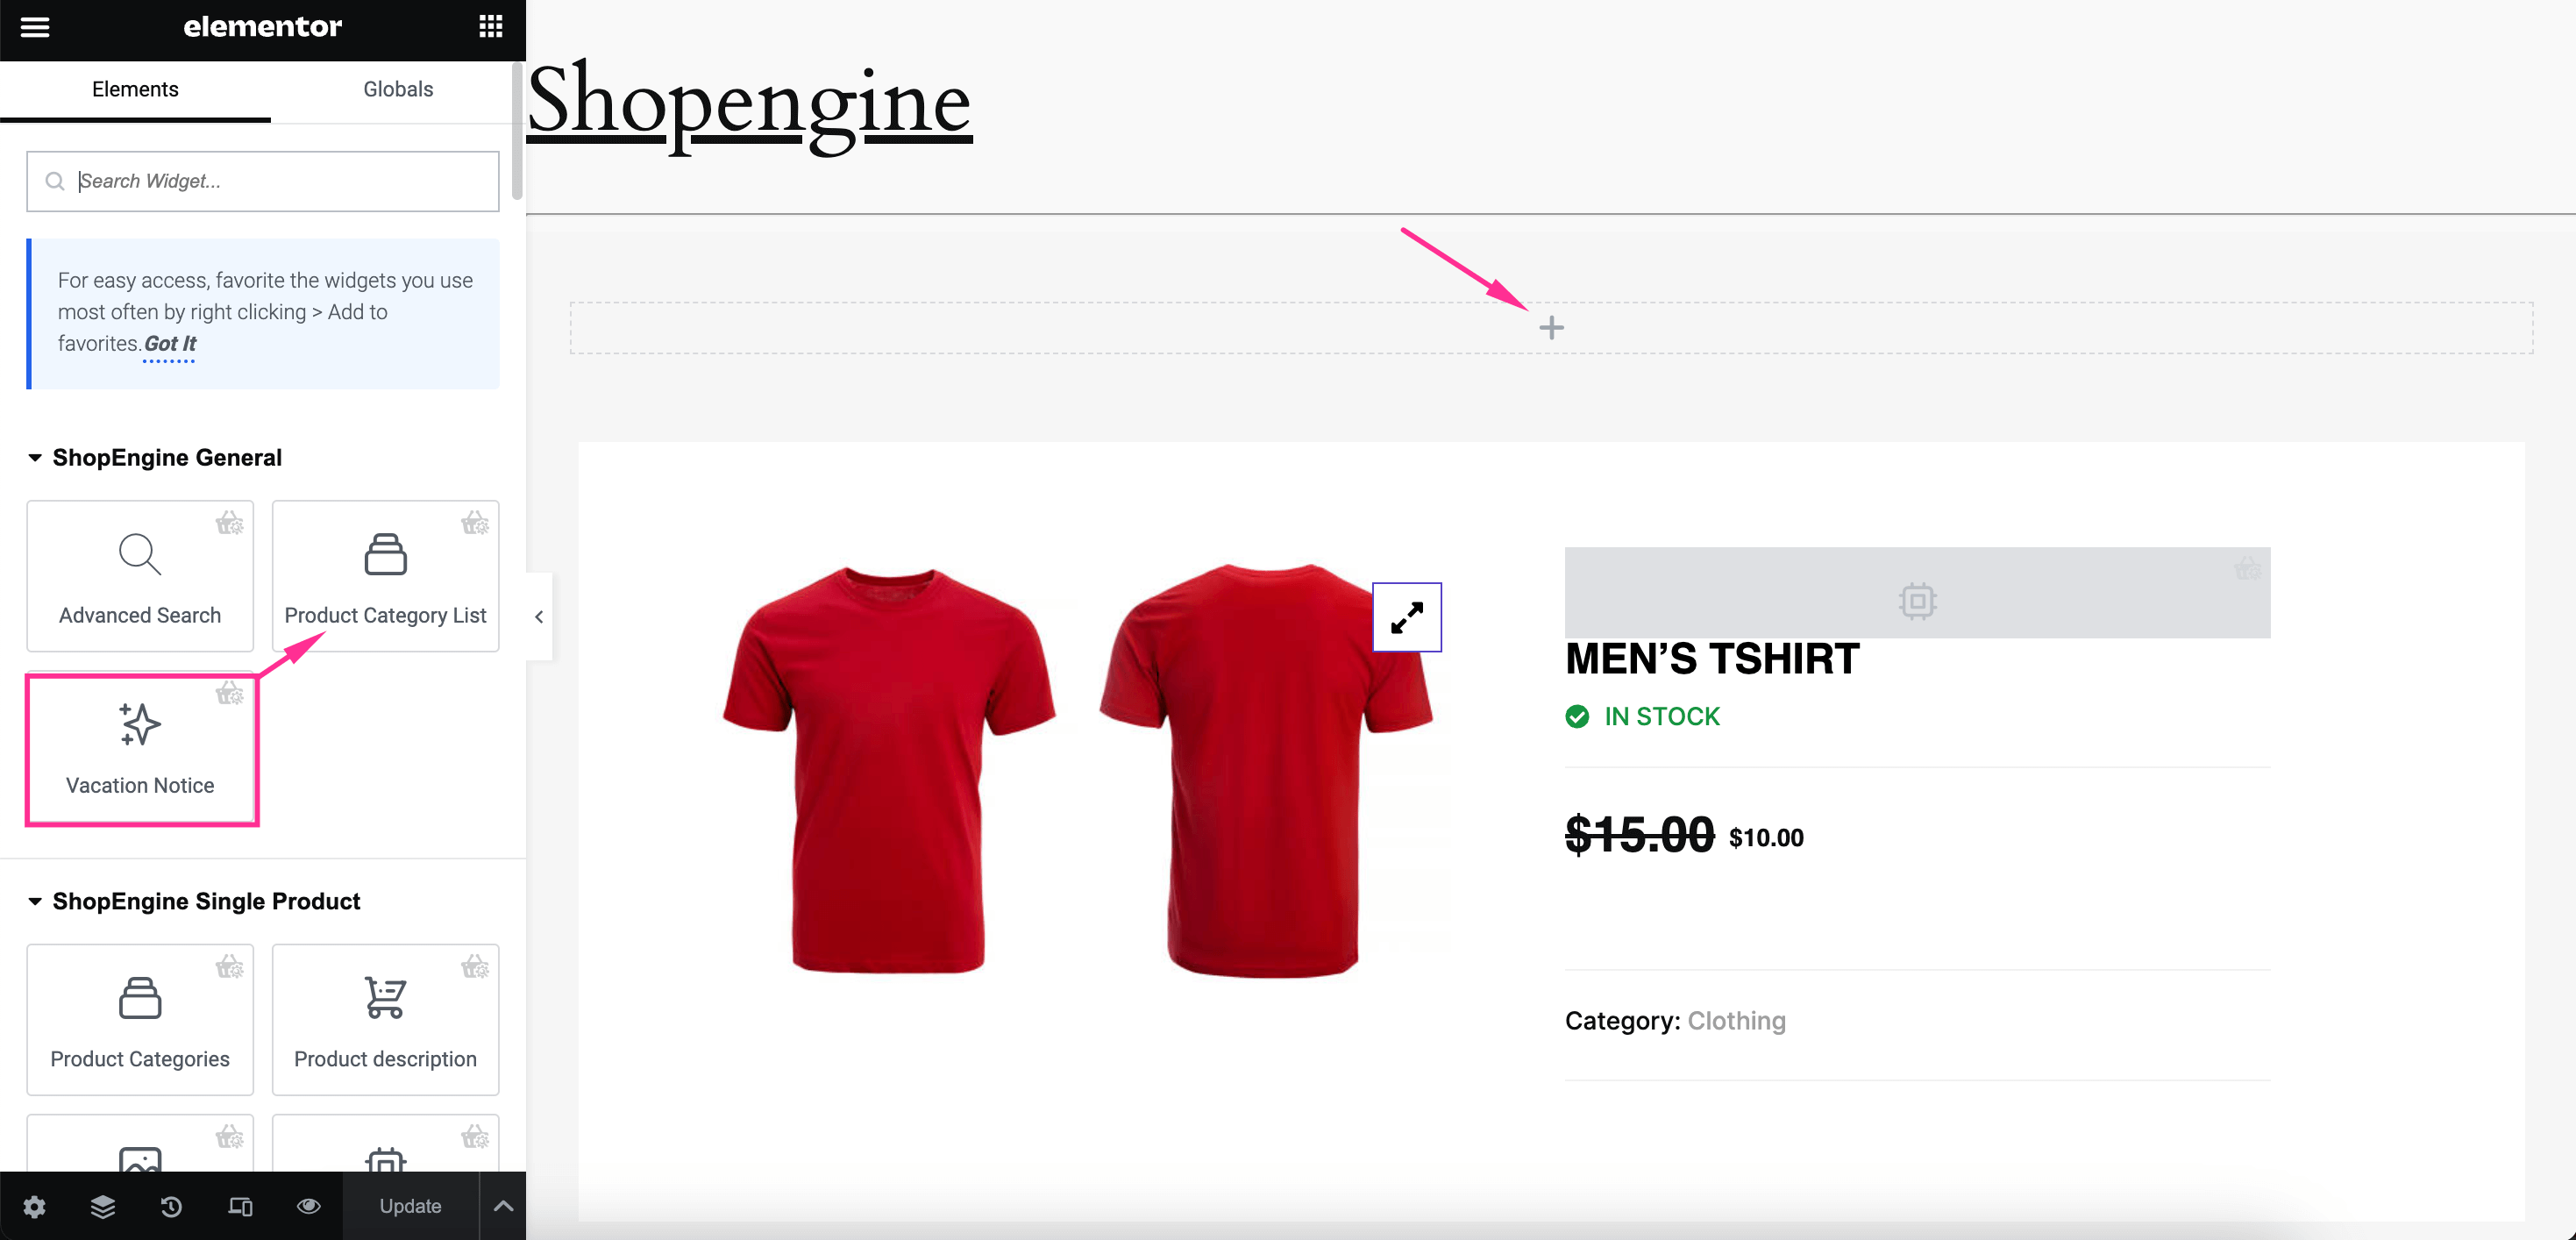
After redirecting to the Elementor editor, drag and drop the “Vacation Notice” widget on the plus icon. This will make the WooCommerce store notice visible at the top of your shop page.
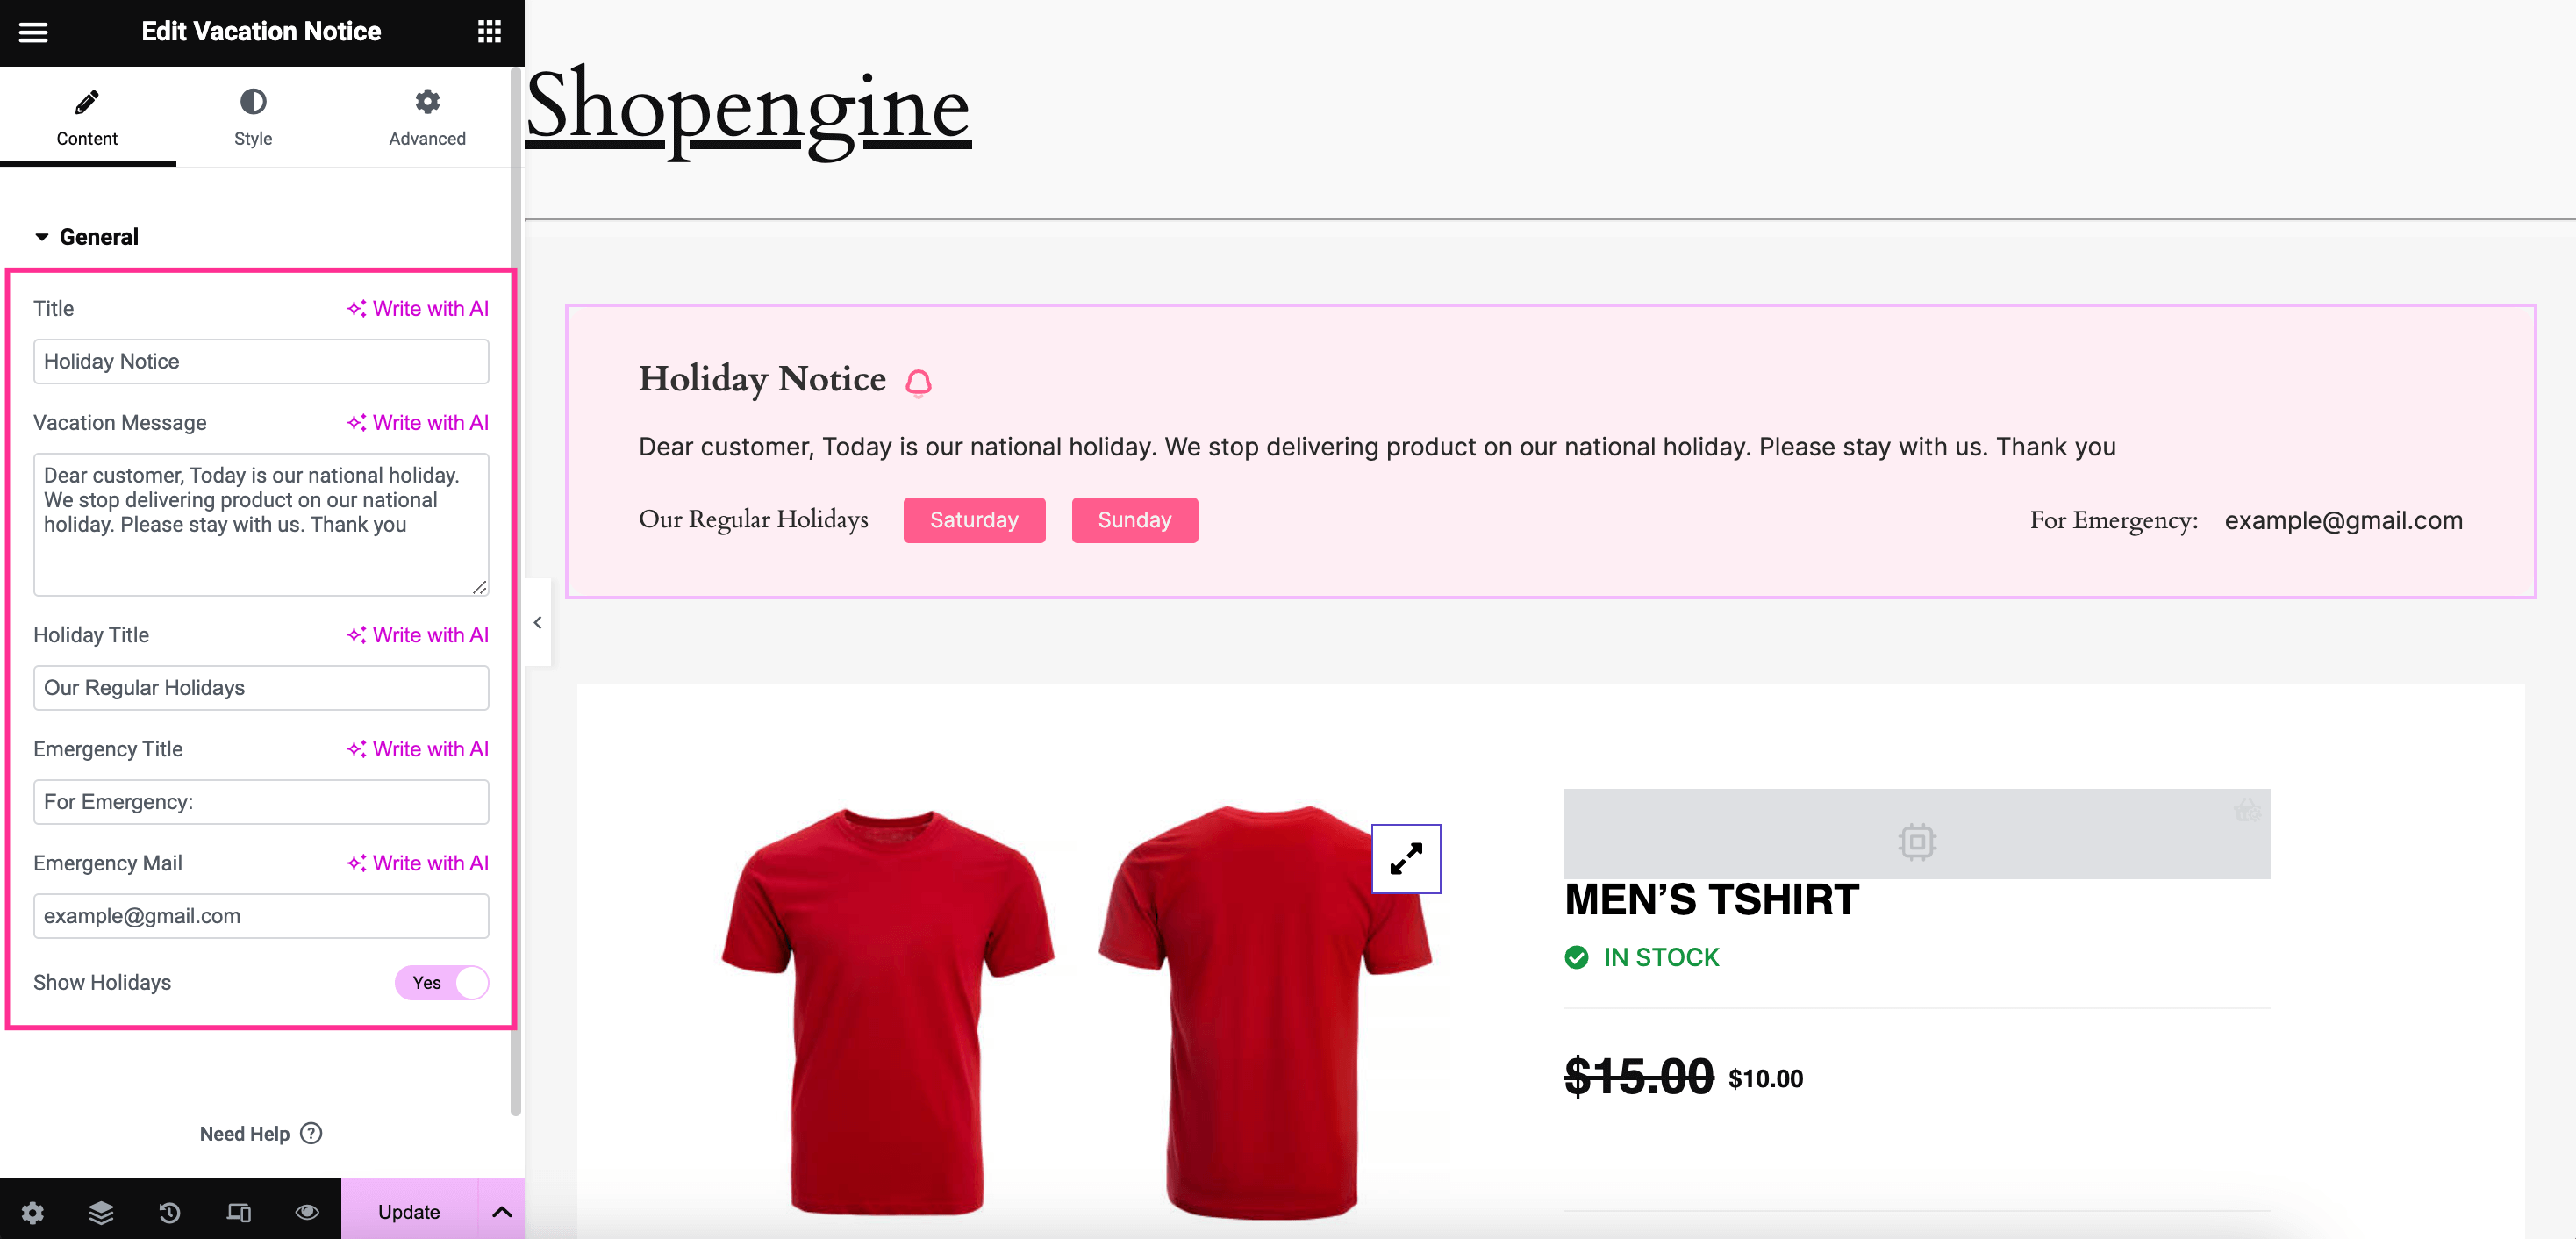
Now customize the following general settings of the WooCommerce store notice according to your preferences:
- Title: Add vacation title for your store vacation notice.
- Vacation Message: Enter the message that you want to deliver to your customers through the WooCommerce notice popup.
- Holiday Title: Add a title for regular holidays.
- Emergency Title: Give a title for emergency contact.
- Emergency Mail: Enter mail for emergency contact.
- Show Holidays: Make it enabled for showing holidays.
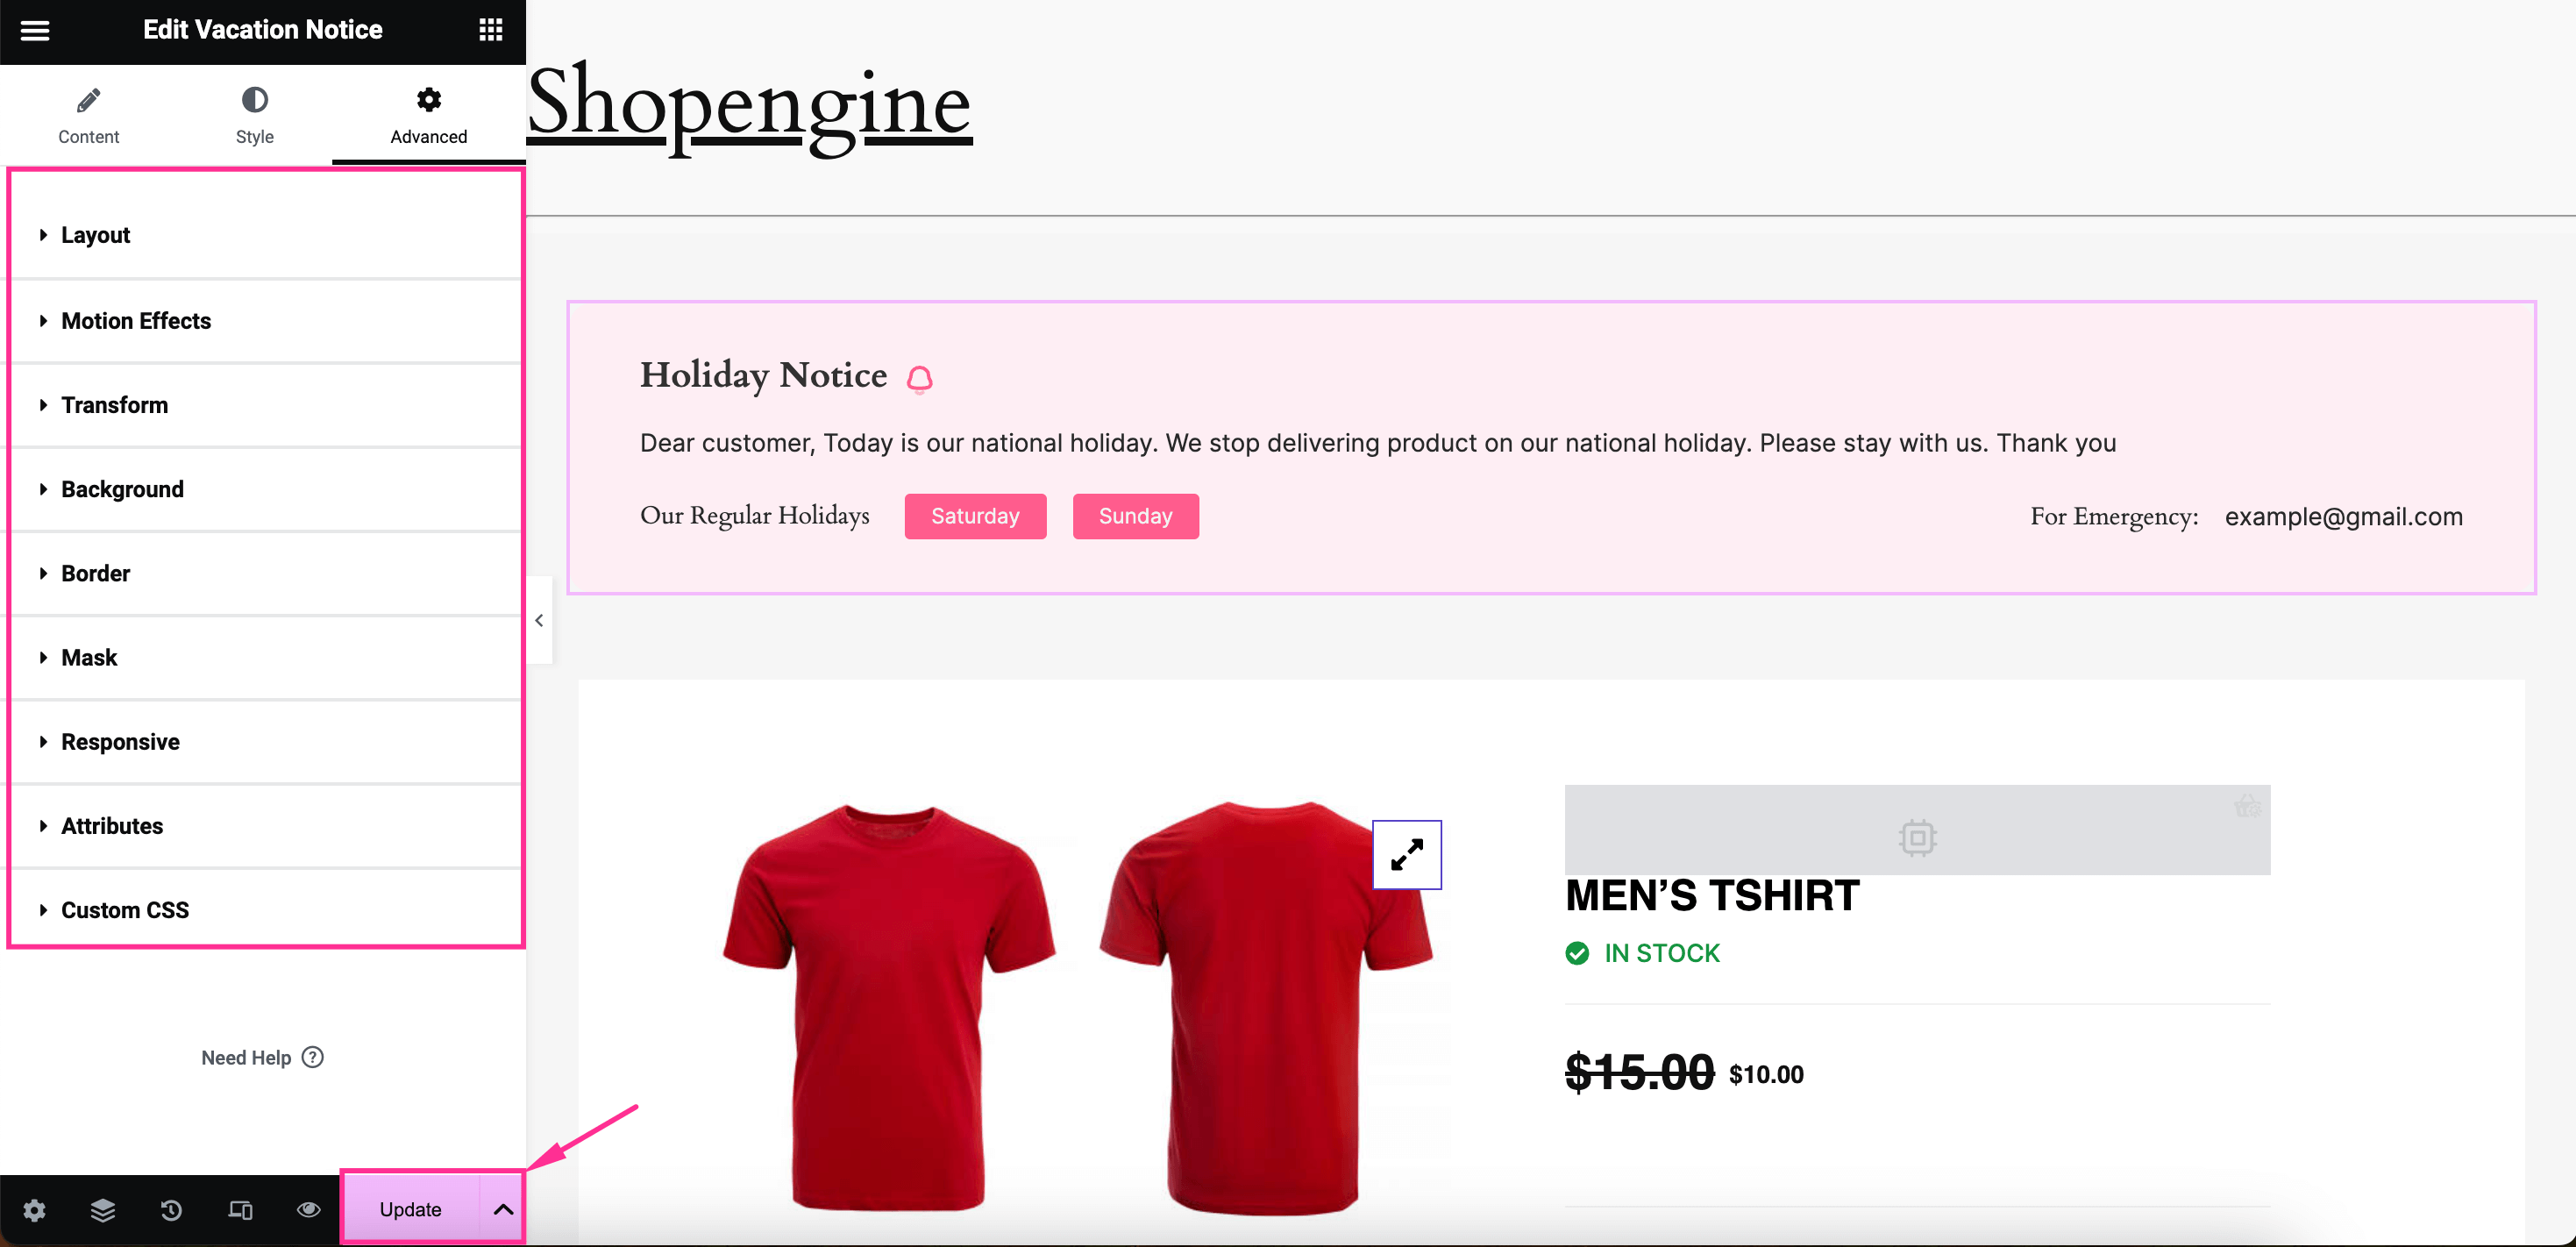
After customizing all, go to the Style tab and perform style customization for Content, Title, Message, Holidays & Emergency mail to perfectly display vacation announcement messages. Here customization should be done focusing on clear notice visibility and transparency.

Besides, you can also undergo advanced customizations for your WooCommerce vacation notice that includes editing options for layout, Motion Effects, Transform, Background, Border, Mask, Responsive, Attributes, and Custom CSS. Finally, after completing all, press the “Update” button to live your custom WooCommerce store notice.
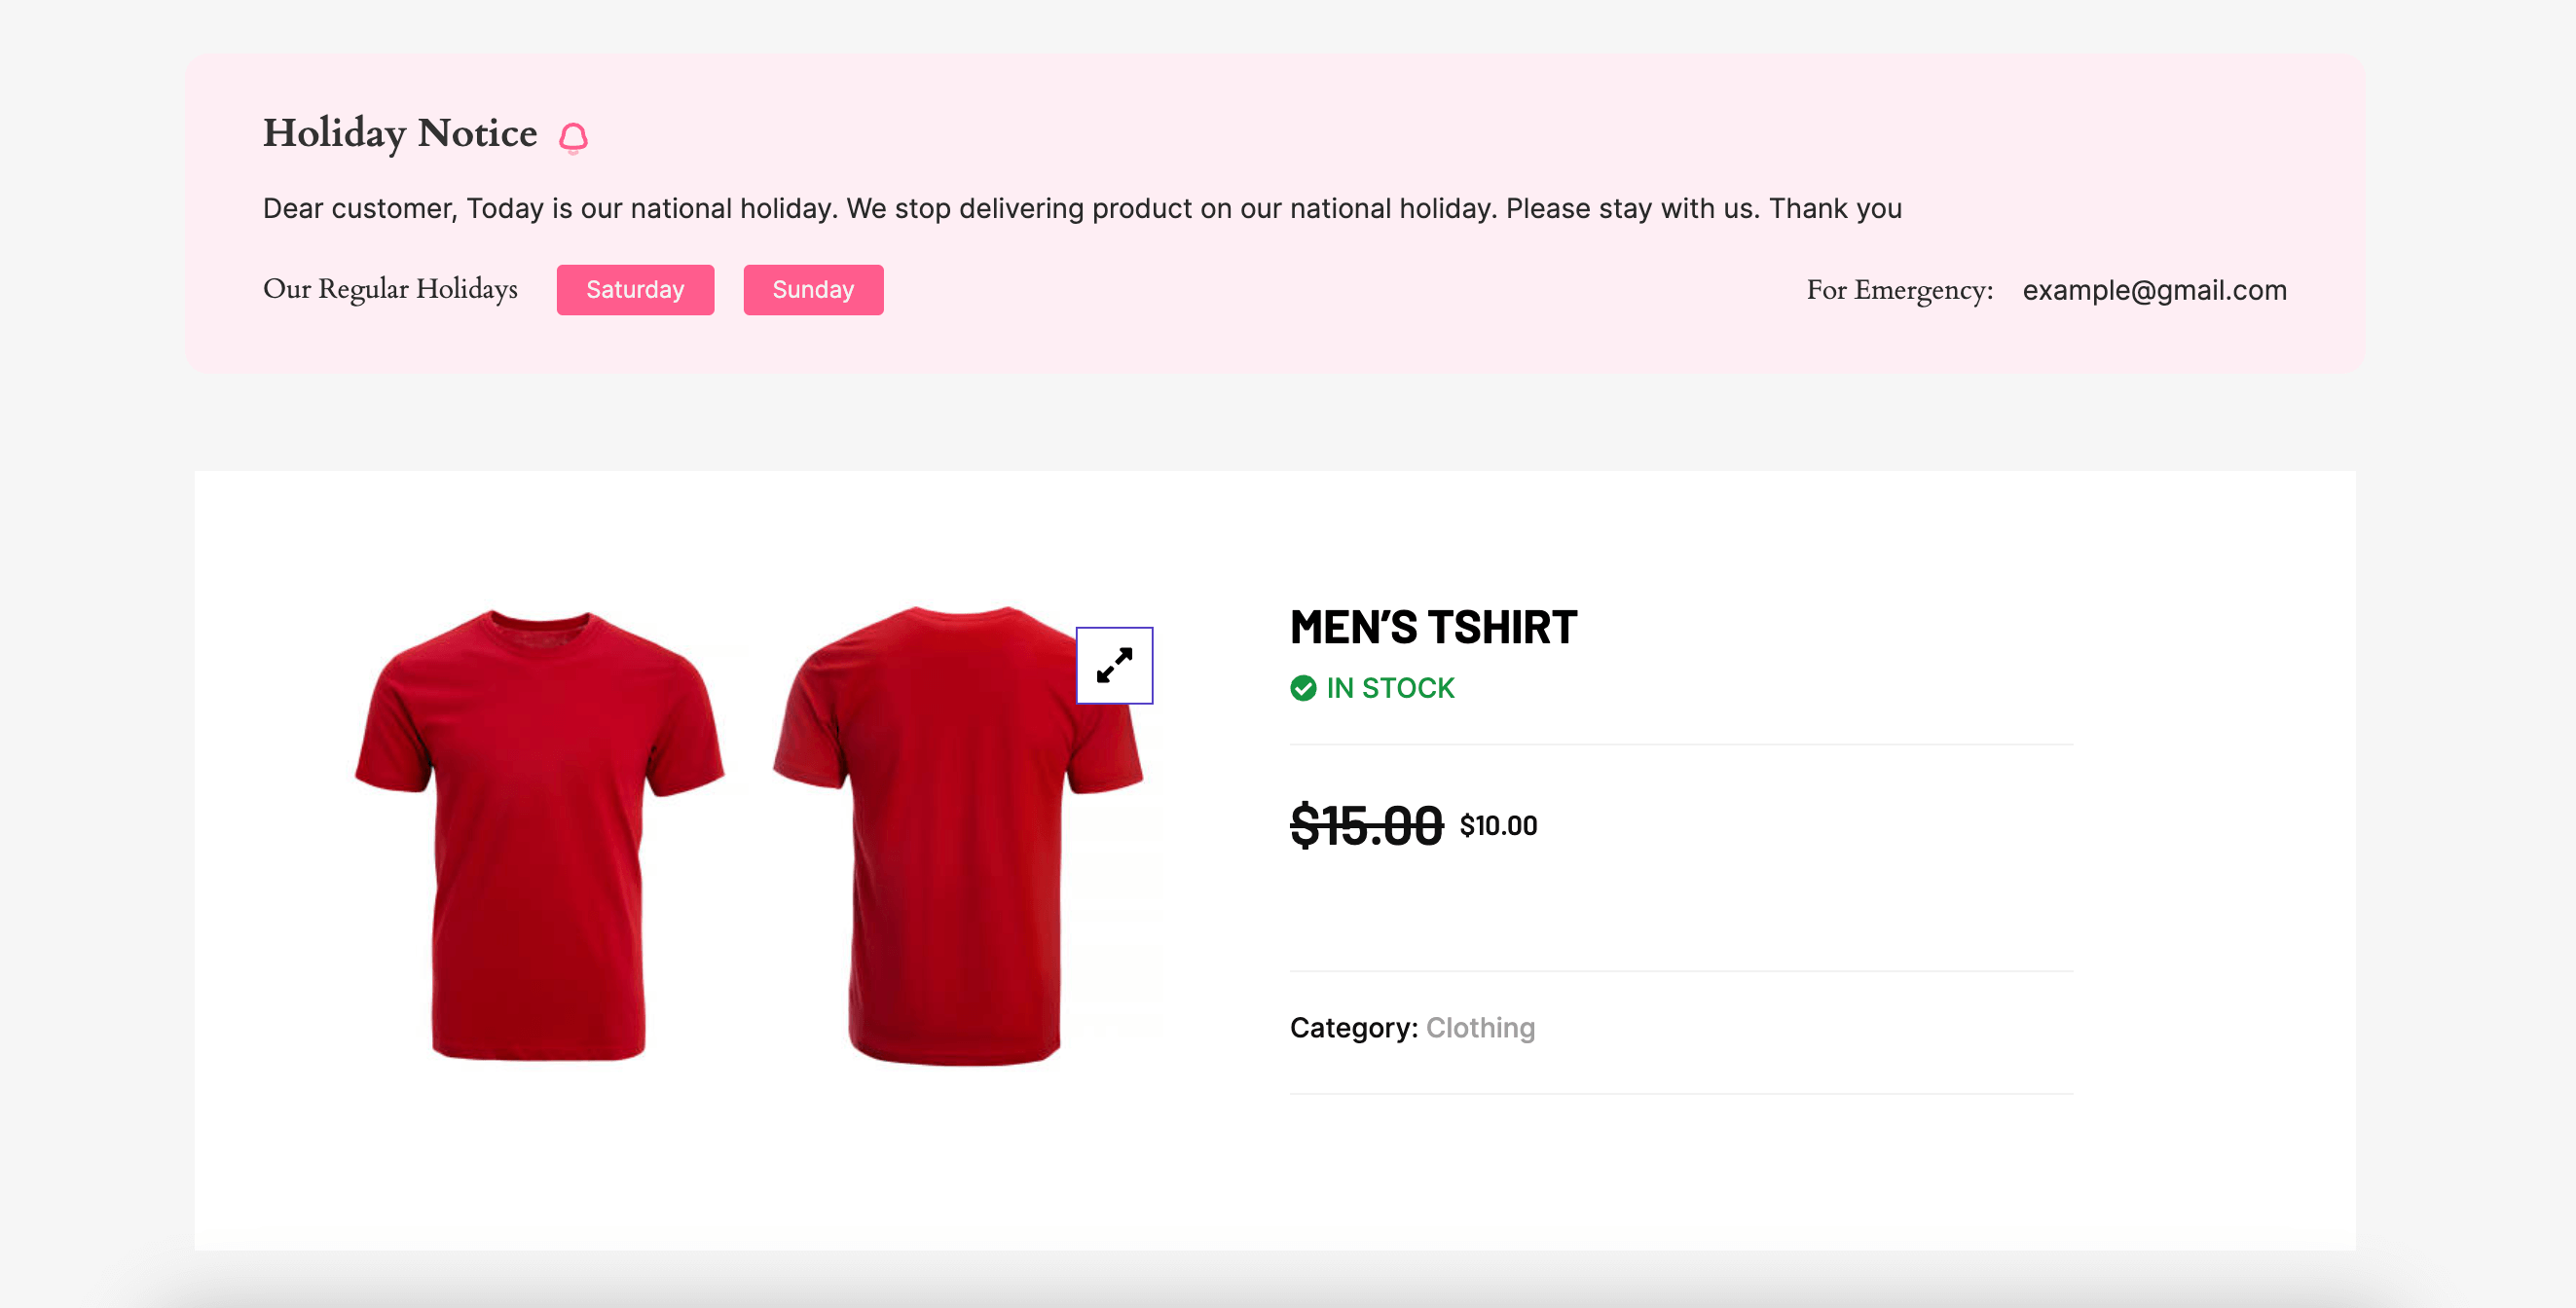
Step 4: Display Vacation Notice in WooCommerce.
Lastly, check the preview and see how your custom holiday notice looks on the front end.
How to Turn off WooCommerce Store’s Holiday Mode
Likewise enabling vacation notice, turning off WooCommerce variation mode is also important for establishing seamless communication with your customers. For that, you need to navigate ShopEngine >> Modules and press the Vacation module.
Now, disable the module and press the “Save Changes” button to temporarily disable WooCommerce shop. Thus, your added vacation notice will be removed from your site.
✔️✔️ Check this tutorial to display best-selling products in WooCommerce.
FAQ
WooCommerce allows you to pause the sales option by disabling all payment methods. By navigating to WooCommerce >> Settings >> Payments, you will find all payment methods that you have to deactivate for pausing sales.
WooCommerce inventory hiding option is needed for out-of-stock products. You can avail of this option by navigating to WooCommerce >> Settings >> Products >> Inventory. And from the catalog option, enable hide out-of-stock items.
Wrapping Up
Without any doubt, WooCommerce holiday mode plays a vital role in pausing your store’s contact system and maintaining satisfactory communication with your customers. Luckily, since you have already learned the most efficient method, adding WooCommerce vacation mode will take less than a few minutes. So. start leveraging WooCommerce vacation mode whenever you wish to put your virtual shop on vacation.

Leave a Reply