Portuguese
  English
  German
  Spanish
  Italian
  French
  Danish
  Swedish
  Polish
  Korean
  Japanese
 O módulo Pagamento Parcial permite receber pagamentos parcelados para lojas WooCommerce. Você pode receber o pagamento parcial de um produto e selecionar outro método para receber o restante do dinheiro.
Você também pode receber dinheiro para reservas de hotéis, reservas de restaurantes, etc. com o módulo de pagamento parcial integrado do ShopEngine.
Como integrar o pagamento parcial no WooCommerce #
Etapa 1: ativar o pagamento parcial #
- Vá para Painel WordPress => ShopEngine => Módulo.
Habilite o pagamento parcial Módulo e faça as alterações conforme necessário.
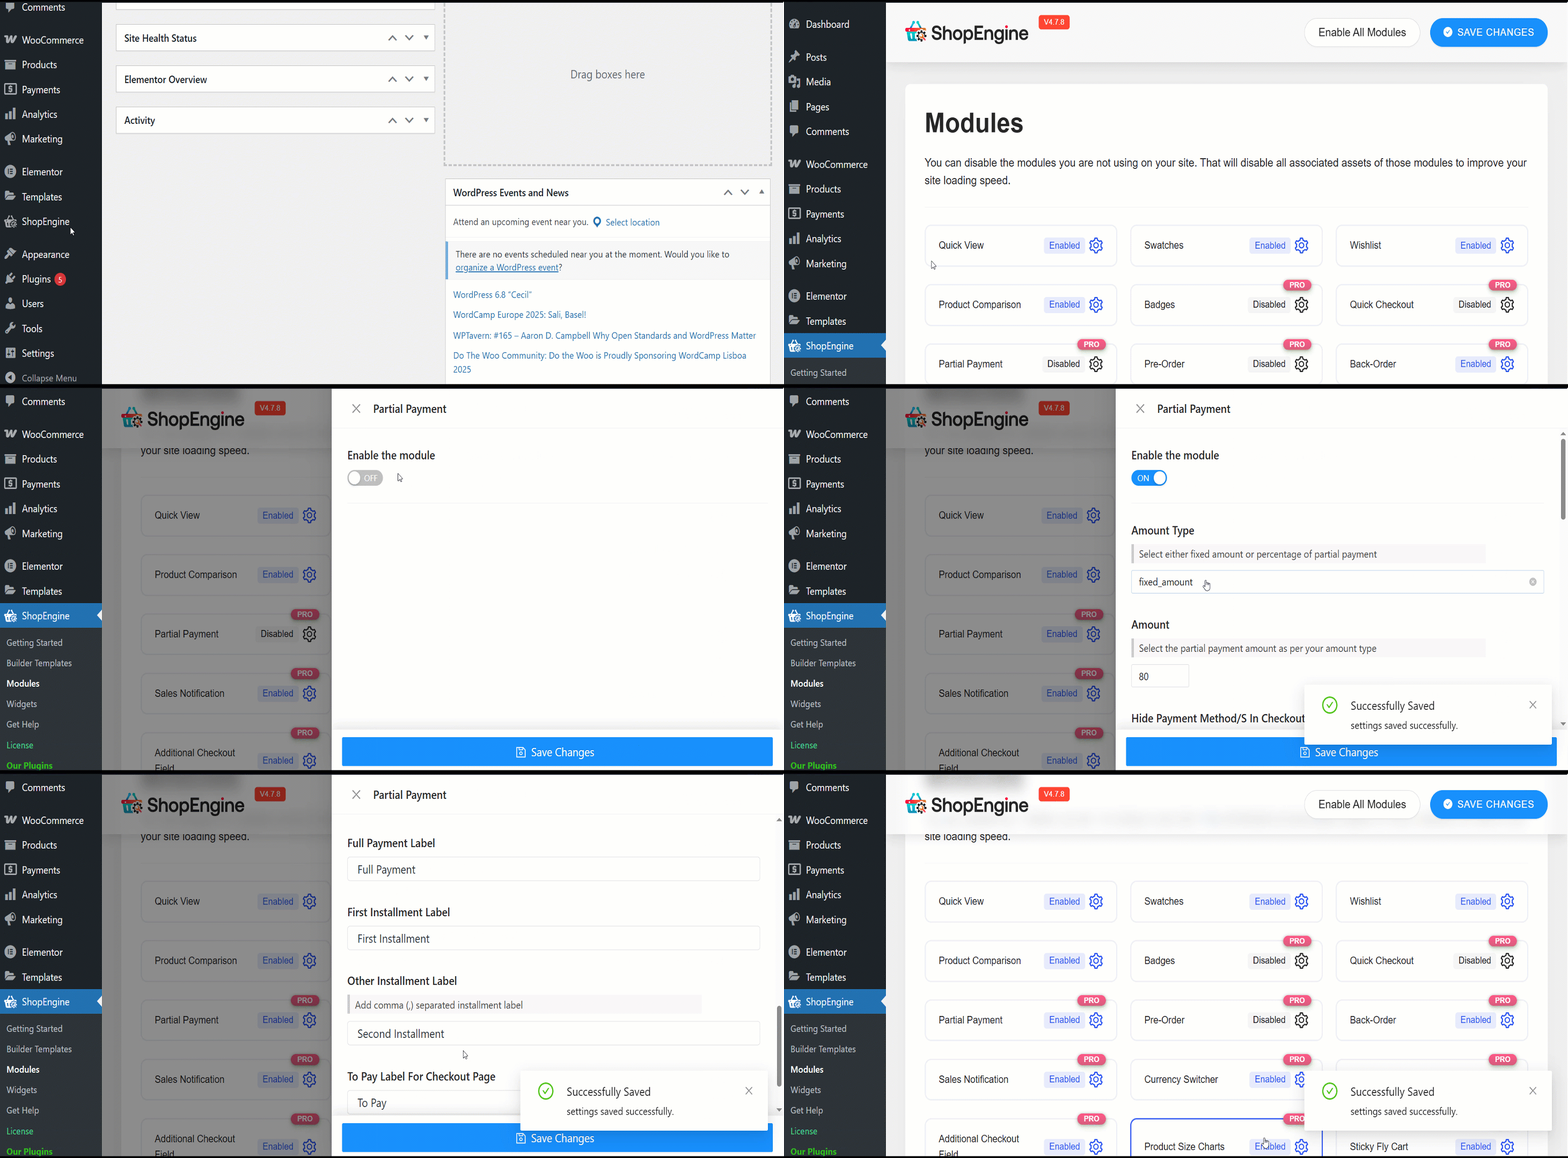
- Tipo de Quantidade: Você pode selecionar o tipo de pagamento parcial – Porcentagem ou Valor Fixo.
- Quantia: Insira o valor ou a porcentagem do pagamento parcial.
- Ocultar método de pagamento/S no checkout: Use esta opção para ocultar a seleção do método de pagamento na finalização da compra.
- Enviar e-mail após a data do pedido em dias/s: Defina o número de dias após a compra para enviar e-mails de lembrete de pagamento aos clientes.
Em seguida, você pode inserir rótulos personalizados para os cinco recursos a seguir:
- Partial Payment Loop Product Label: Display a custom label on product listings showing partial payment availability.
- Partial Payment Single Product Label: Show partial payment info directly on the individual product page.
- Etiqueta de pagamento total: Clearly indicate the option for paying the full amount upfront.
- Etiqueta da primeira parcela: Label the first payment amount in an installment plan.
- Other Installment Label: Define the text for upcoming or recurring installment payments.
- Para pagar a etiqueta da página de checkout: Highlight the amount due now at checkout for partial payments.
Etapa 2: edite a página do produto para ativar o pagamento parcial para o produto #
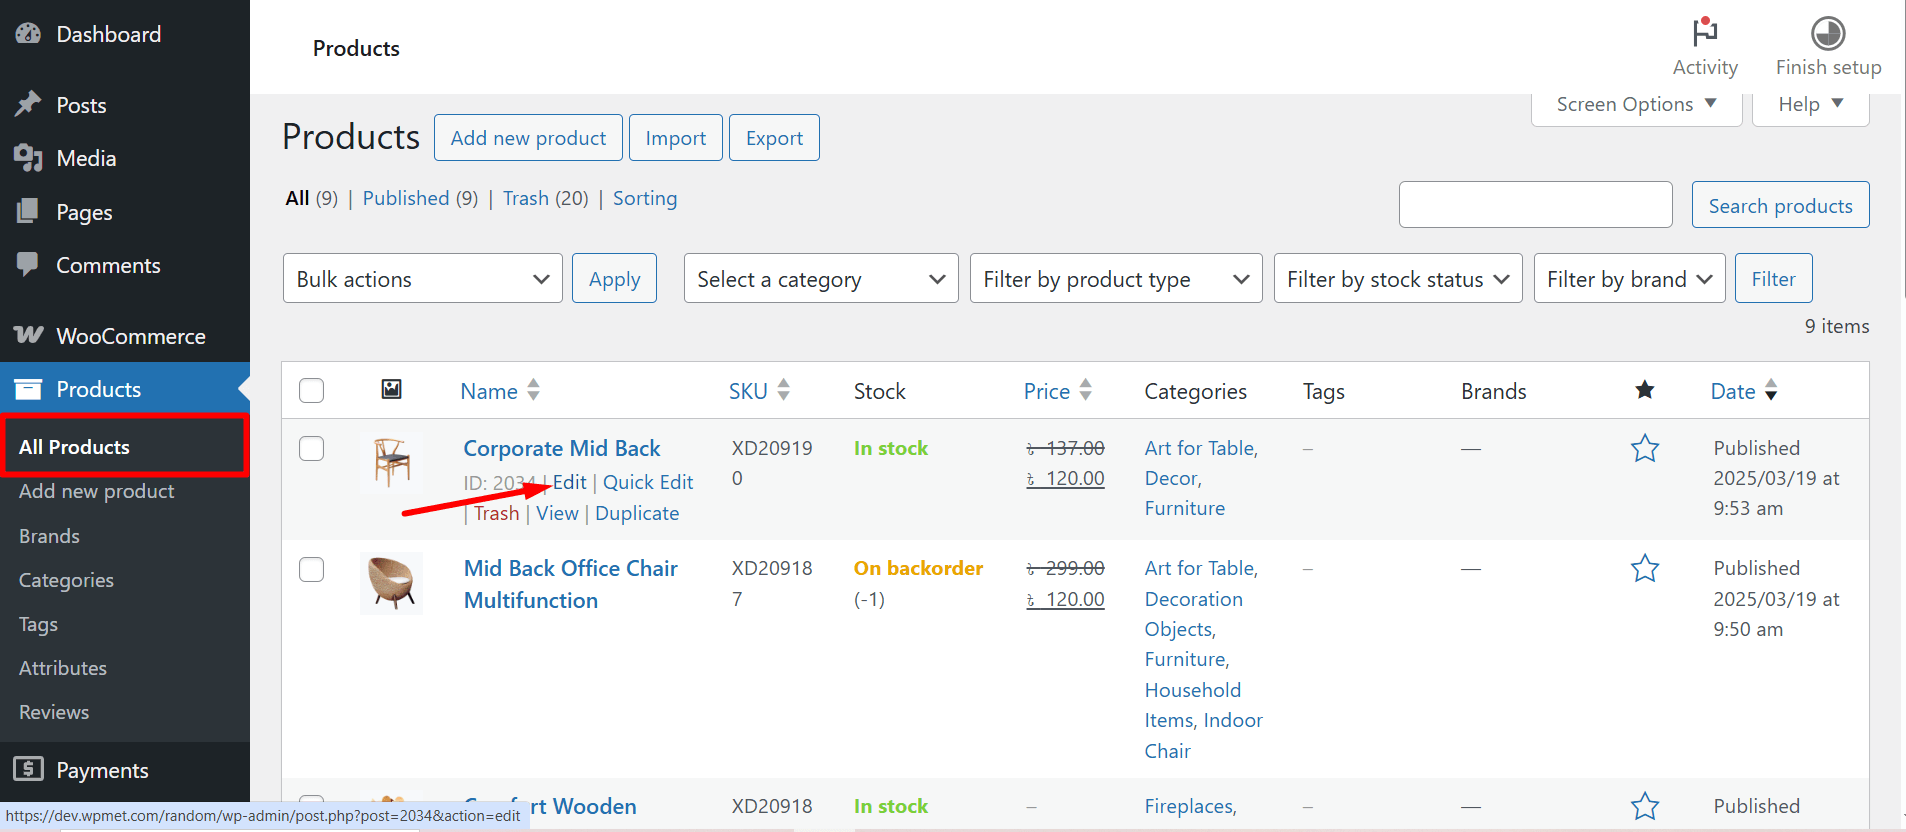
Agora vá até o produto para o qual deseja habilitar o pagamento parcial.
WooCommerce >> Products >> All Products >> Select the Product >> Edit
Depois disso, na página do produto, ativar pagamento parcial para este produto específico. Escolha a forma de pagamento parcial.
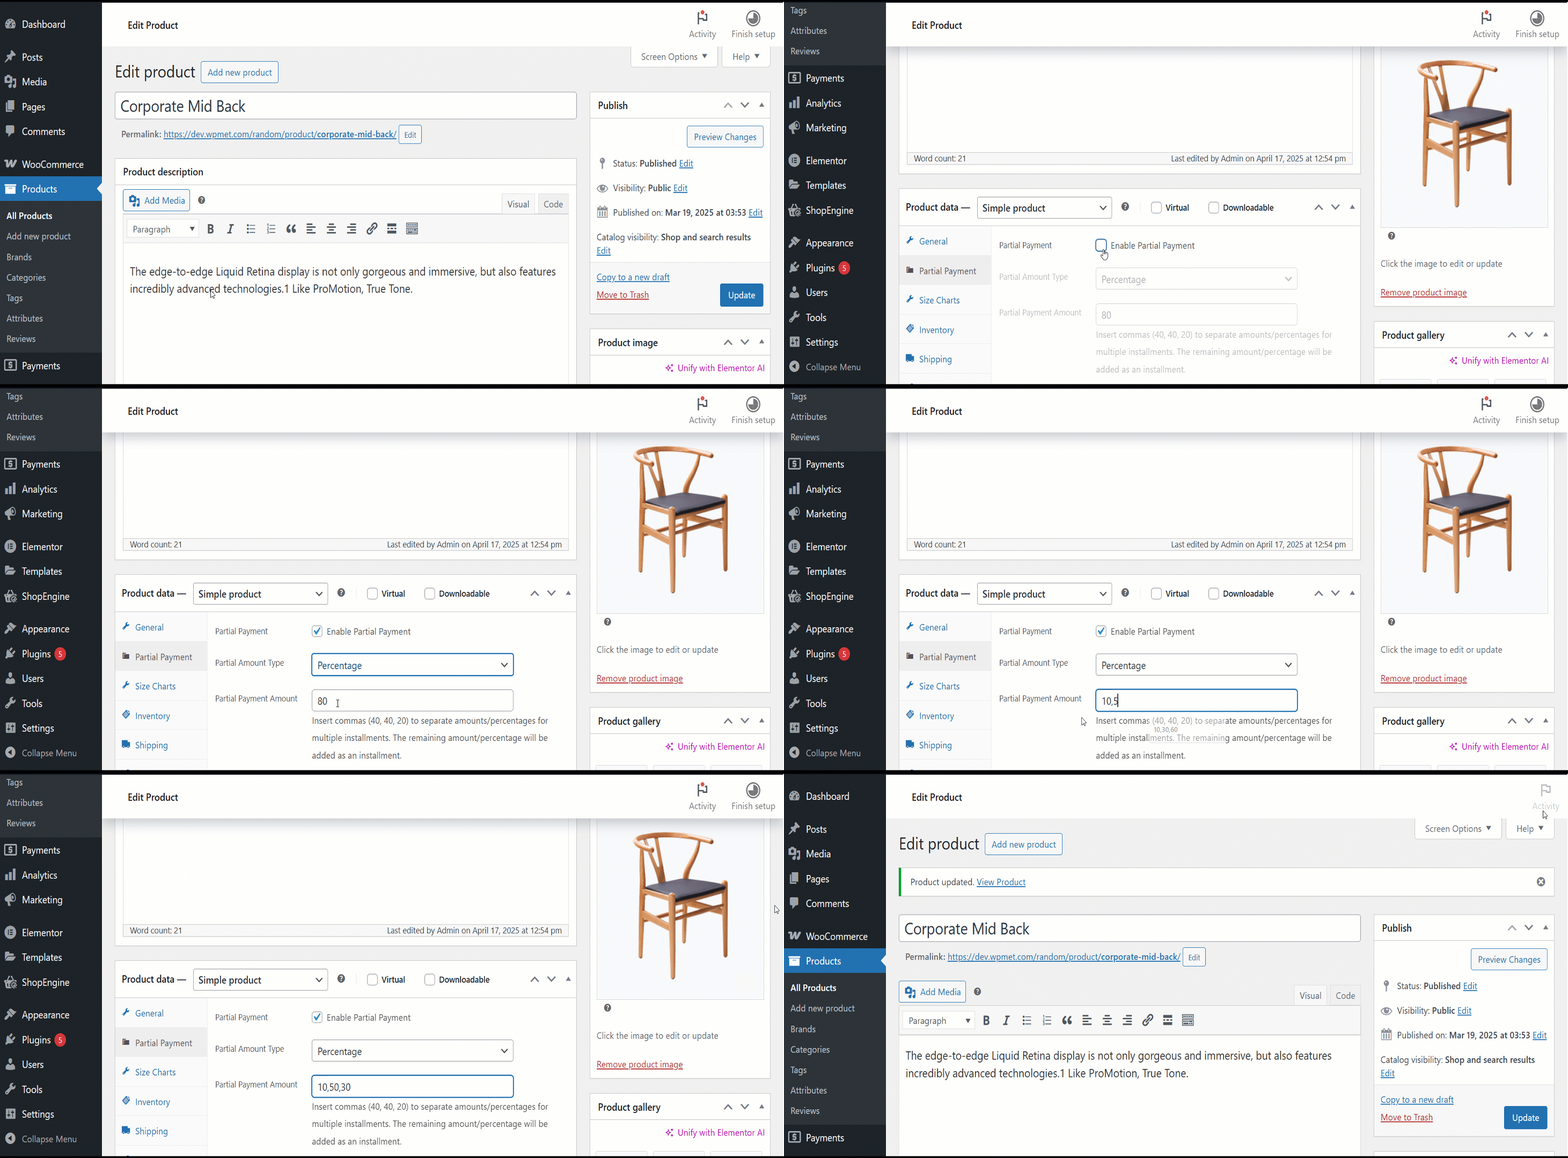
Se você estiver usando porcentagem, selecione a porcentagem. Atualize o produto. Ou você também pode escolher um valor fixo.
Etapa 3: Crie um modelo para pagamento devido #
Para criar um modelo para o pagamento devido,
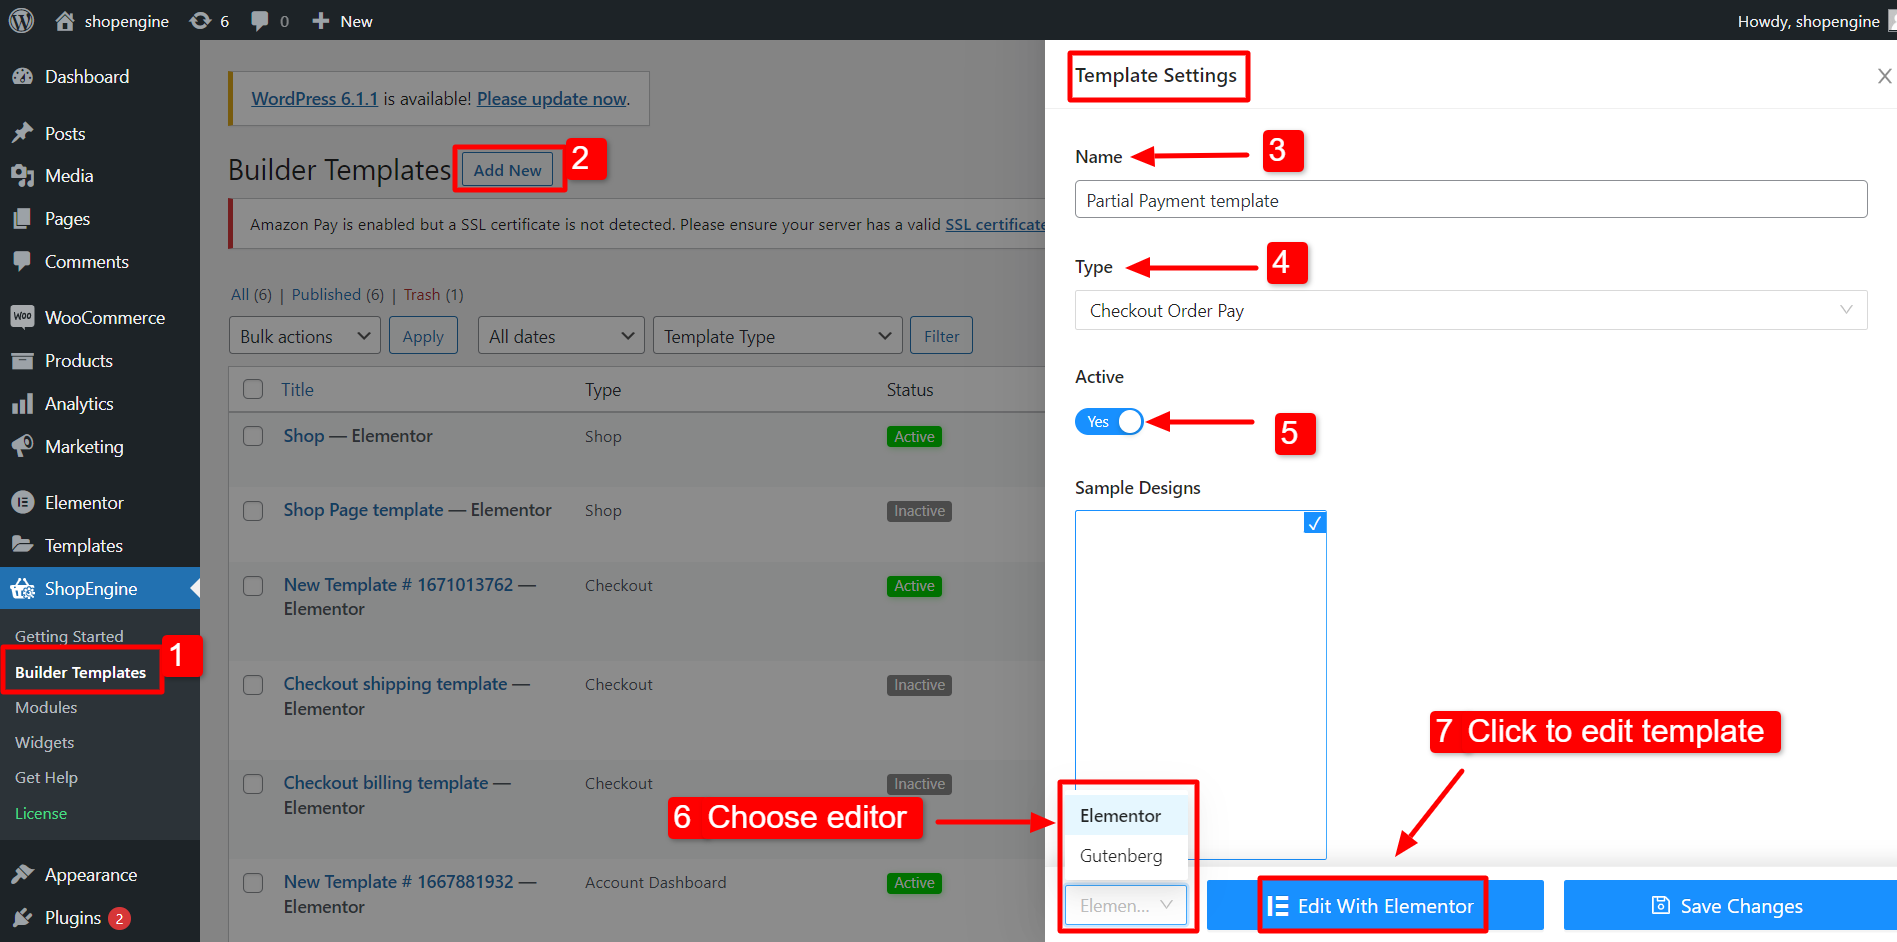
- Navegar para ShopEngine >> Modelos de construtor do painel do WordPress.
- Clique no "Adicionar novo”Botão no canto superior esquerdo.
- Na janela Configurações do modelo, insira um modelo Nome.
- Defina o modelo Tipo para: Checkout Ordem Pagar.
- Ativar o modelo.
- Selecione o editor (Elementor neste caso).
- Clique no Editar com Elementor.
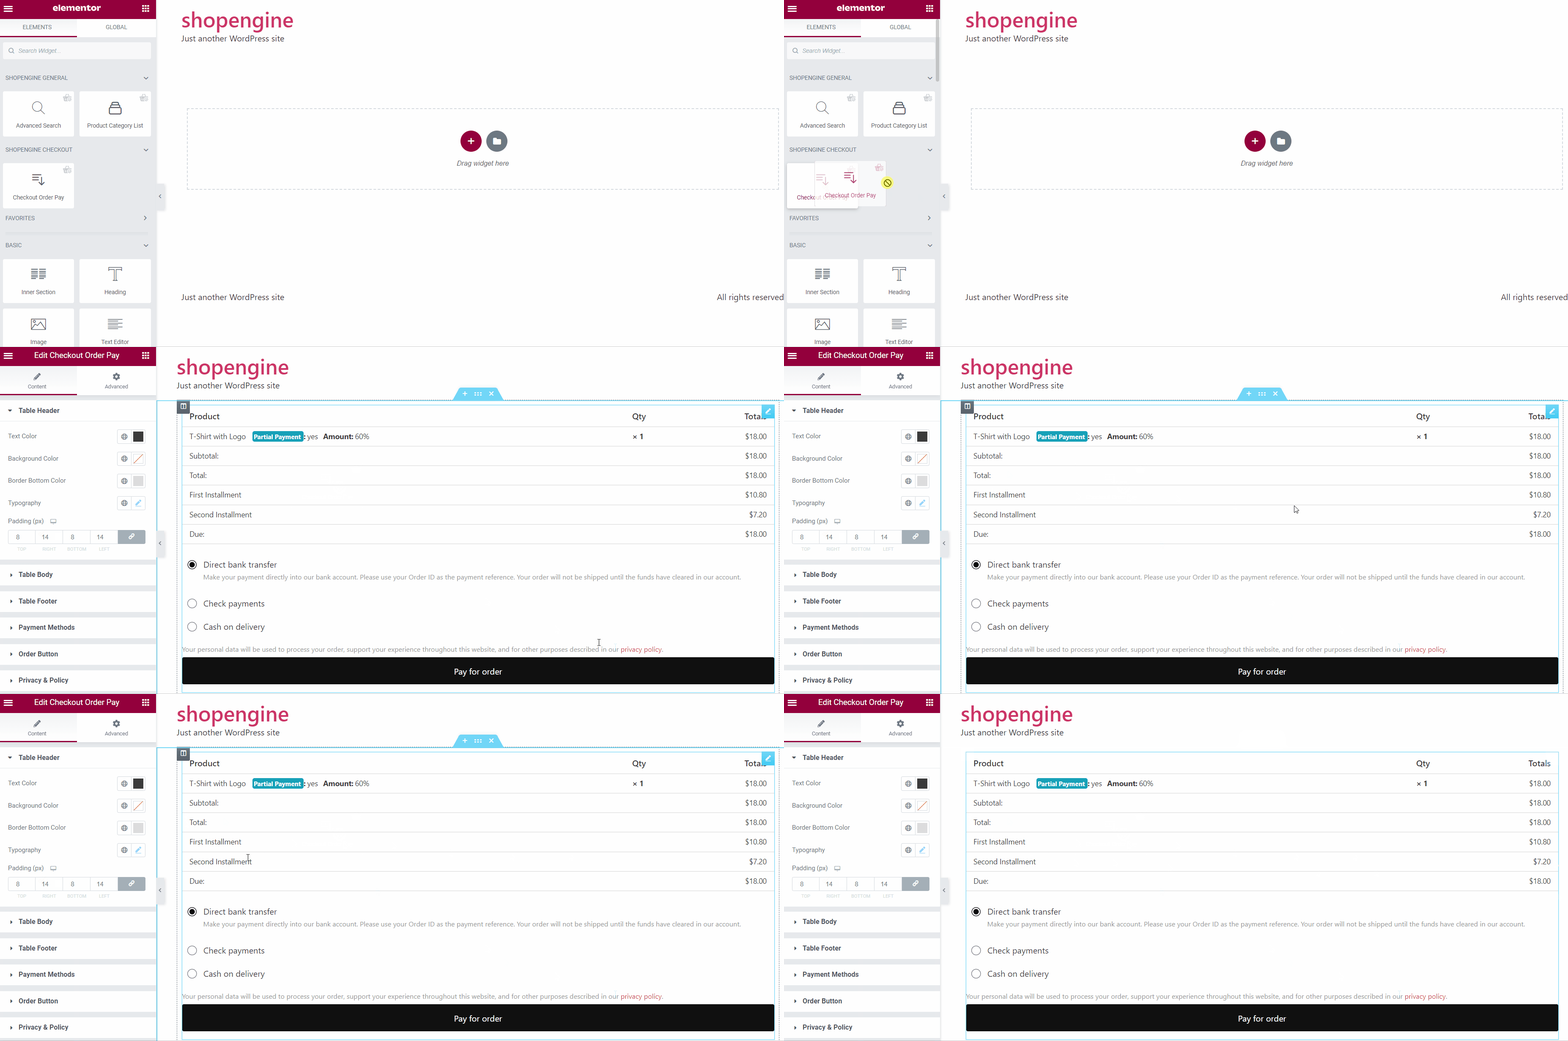
No editor Elementor, arraste e solte o widget Checkout Order Pay na área de design, agora você pode ver os detalhes de pagamento do seu pedido.
Step 4: Check how it work #
- Agora vá para a página do produto. Você verá as opções de pagamento parcial e pagamento total.
- Selecione Pagamento parcial e clique no adicionar ao carrinho botão.
- Agora de cima, clique em “Ver carrinho” e veja se o pagamento parcial está funcionando.
- Você também pode verificar a página de checkout para obter detalhes.
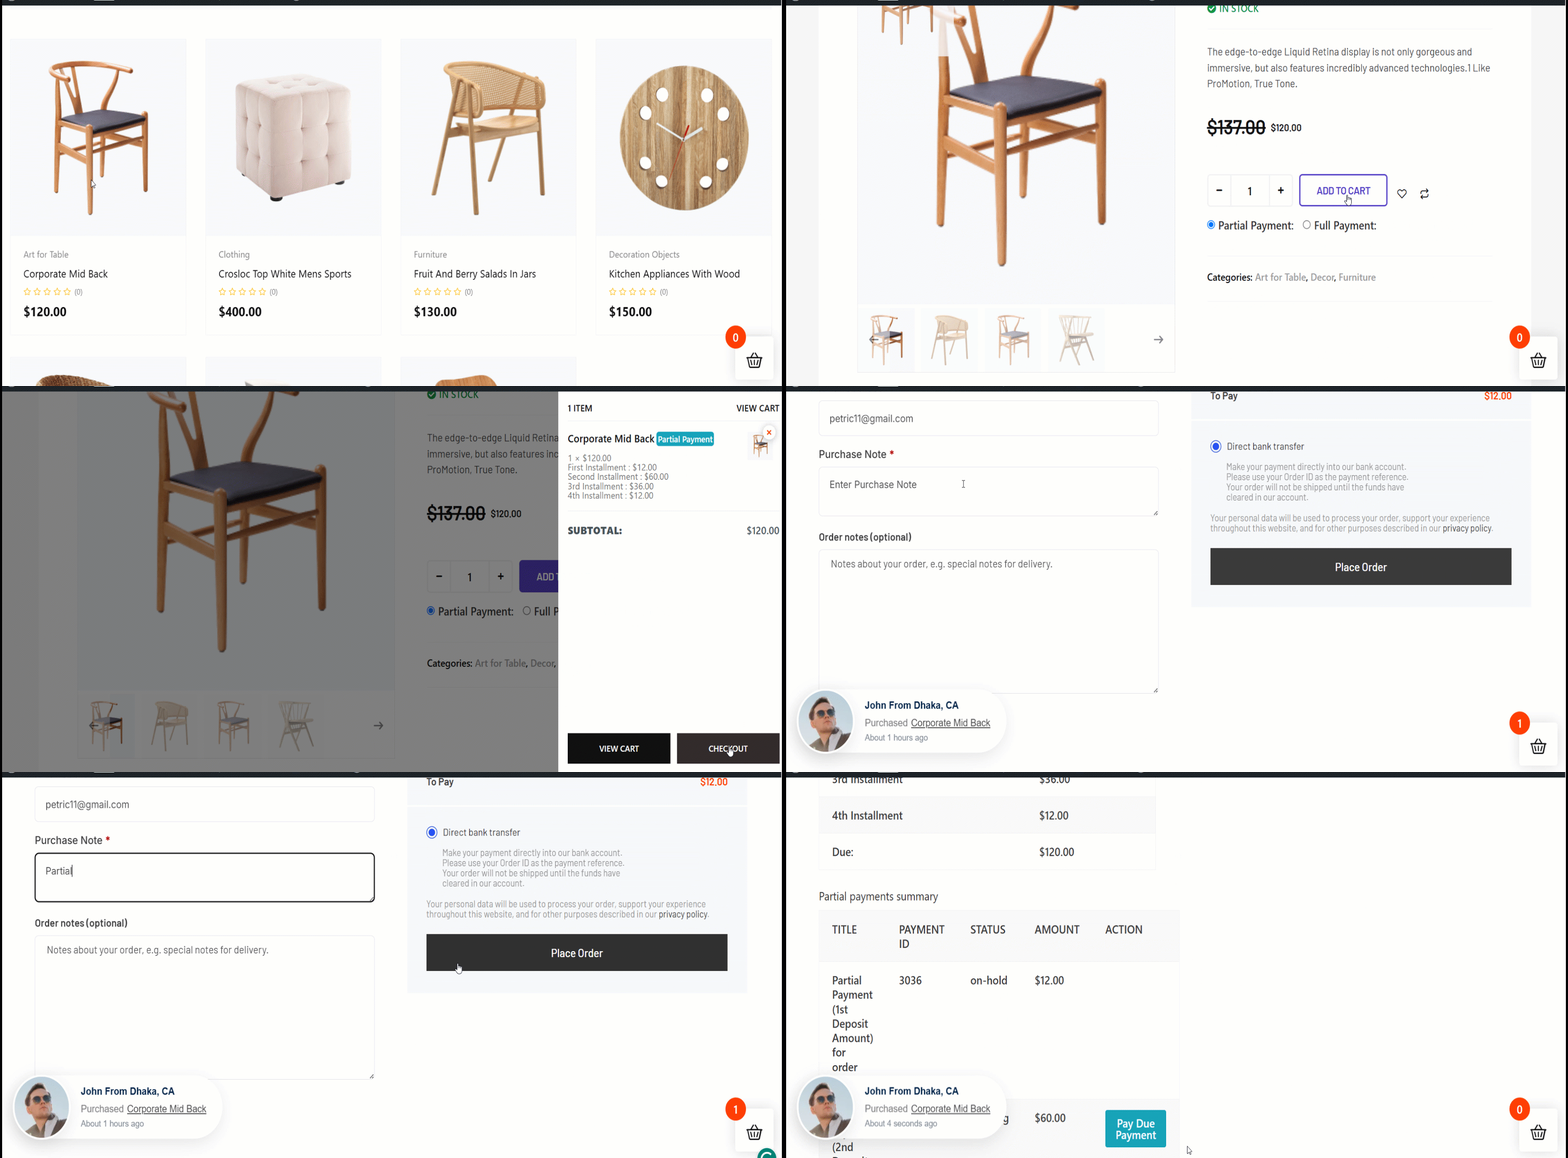
Once the user completes the first payment, he will see the due amount on the my account order details page.
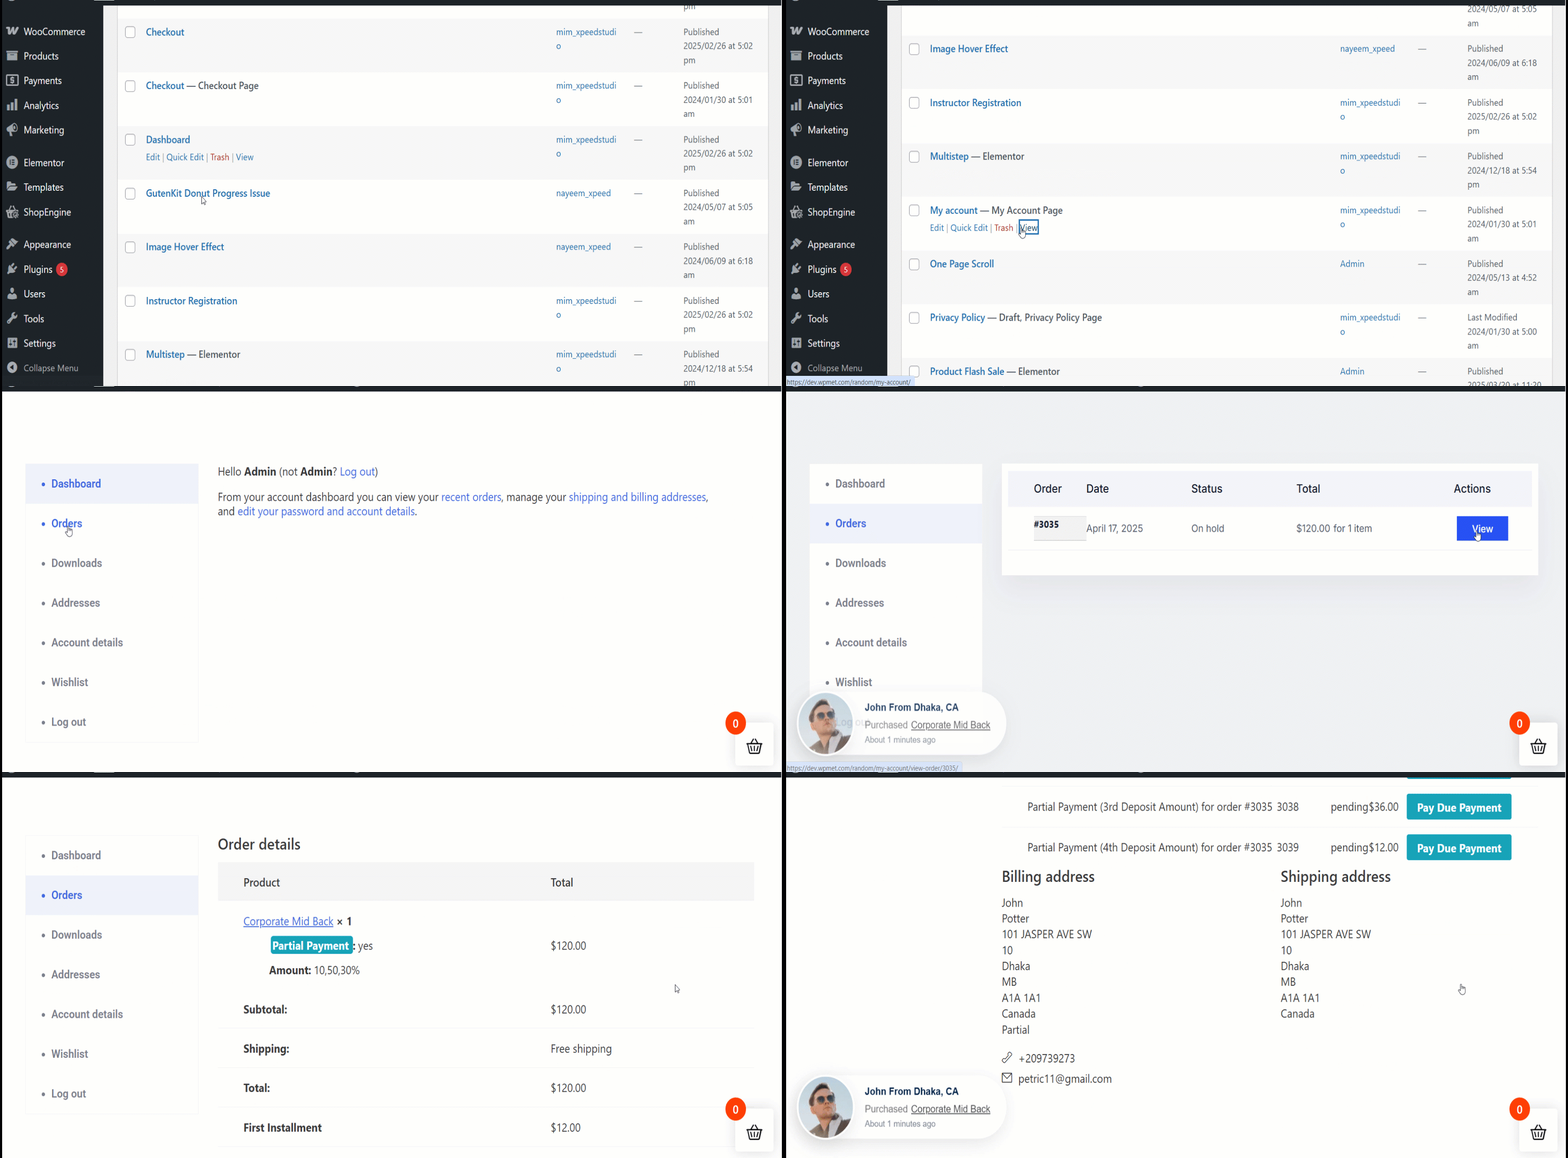
Quando os usuários navegam para Minha conta > Pedidos > Visualizar detalhes do pedido, ele verá a opção de Pagar o devido pagamento. Caso opte por efetuar o pagamento devido, verá a opção de segunda parcela conforme segue.
Os usuários podem então pagar o valor devido nesta página.