
Did you ever face trouble contacting the authorities?
The answer is affirmative, right?
To be honest, you’re not alone in this sector. Most of the consumers like us cannot get proper service from a company just because of communication gap.
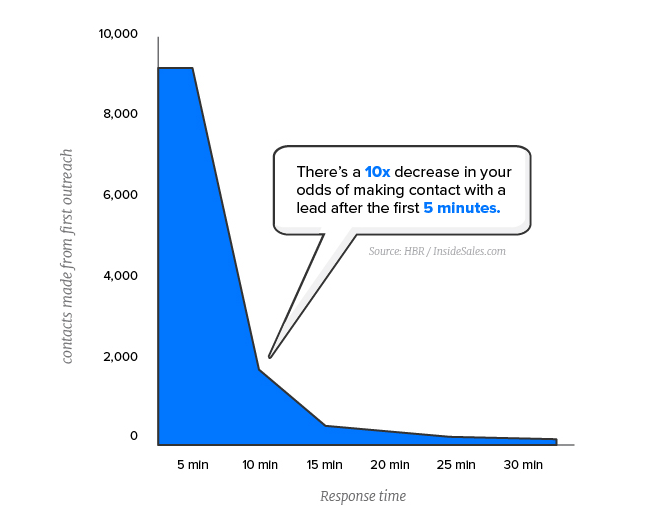
Recently Drift conducted research about the importance of contacting customers. The result shows that there’s a 10x decrease in sales just because the company didn’t respond within 5 minutes.
So, what will happen if you don’t have any contact form? You might lose more than 90% of your customers. Do you want to lose your customers?
I don’t think so!
So, how can you overcome this issue?
Well, it’s simple! Just add a contact form to your website and you are done!
In this section, I’m going to share the easiest procedure to design a contact form using Elementor contact form 7.
Let’s hit it!
How to Design a Form with Elementor Contact Form 7
Fortunately, adding a contact form on WordPress websites isn’t complicated. In fact, it becomes easier than ever with the Elementor page builder and Contact form 7.
By the way, you have to set up the environment before designing a contact form for your WordPress website. Here are the recommended tools that you have to install to design an eye-catchy contact form.
Done with installing? It’s time to start designing an Elementor contact form. Let’s get rolling.
Step #1: Get into the canvas
Login into your website admin dashboard panel. Create a blank post and Name it. After the naming, click on the ‘Edit with Elementor’ button.

Creating the canvas
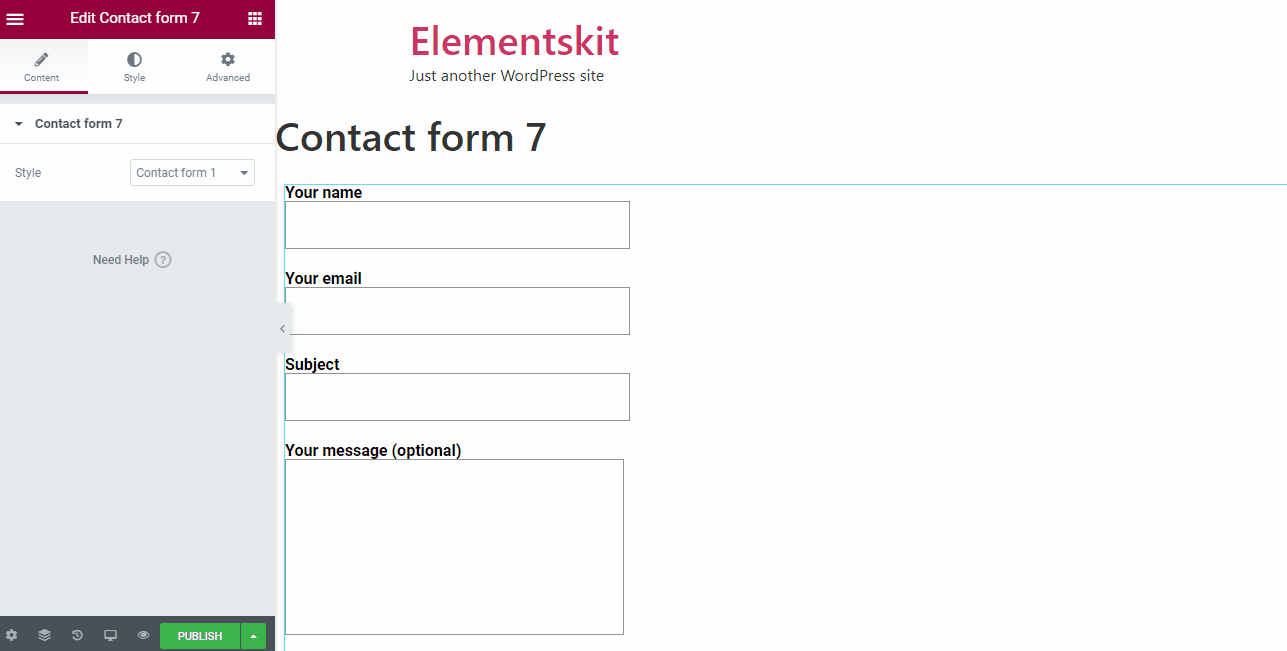
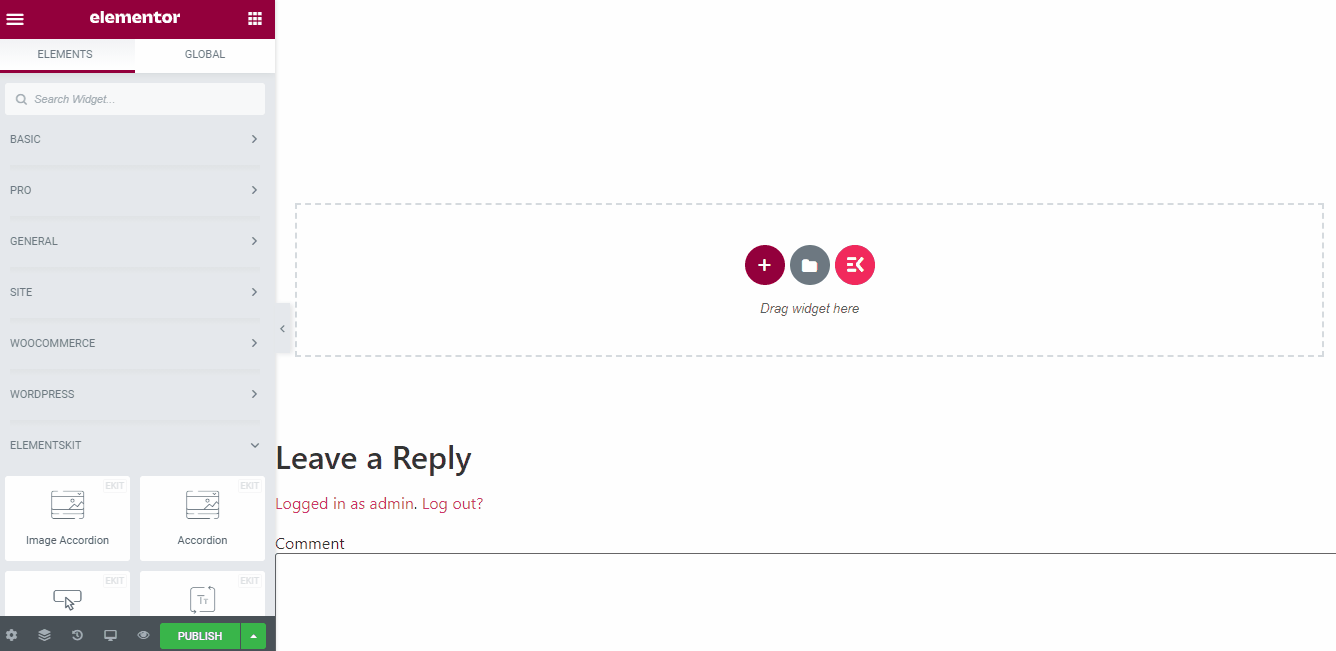
Step #2: Add a Contact Form on Your Post
Now, it’s time to add a contact form to your blog post. You can do it simply by drag and drop the “contact form 7” icon into your post. It will automatically show a contact form on your post.
However, you may get a 404 error message. Nothing to worry about that at all! It will happen if you don’t select any contact form from the drop-down menu.
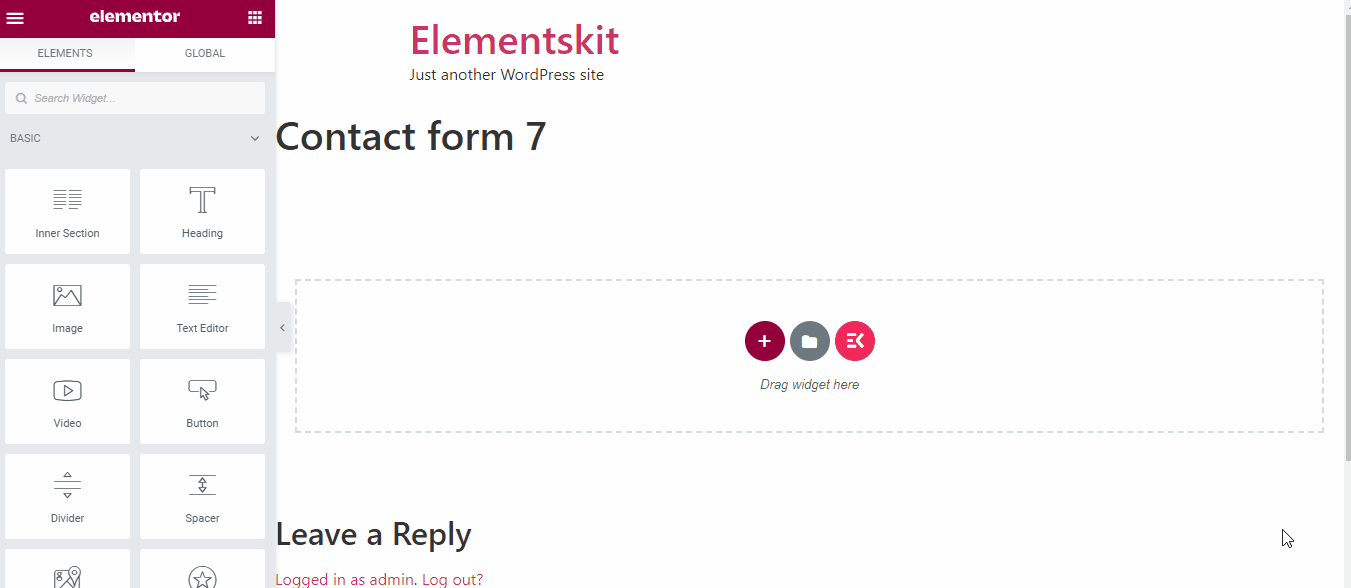
Adding a contact form
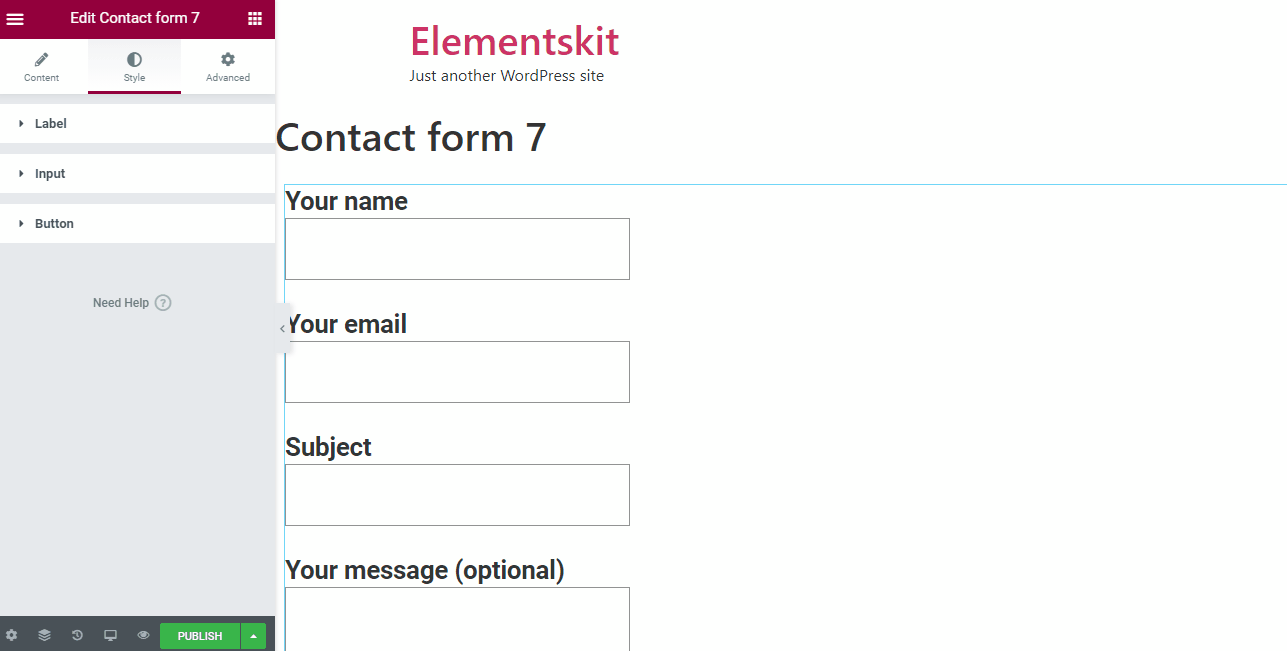
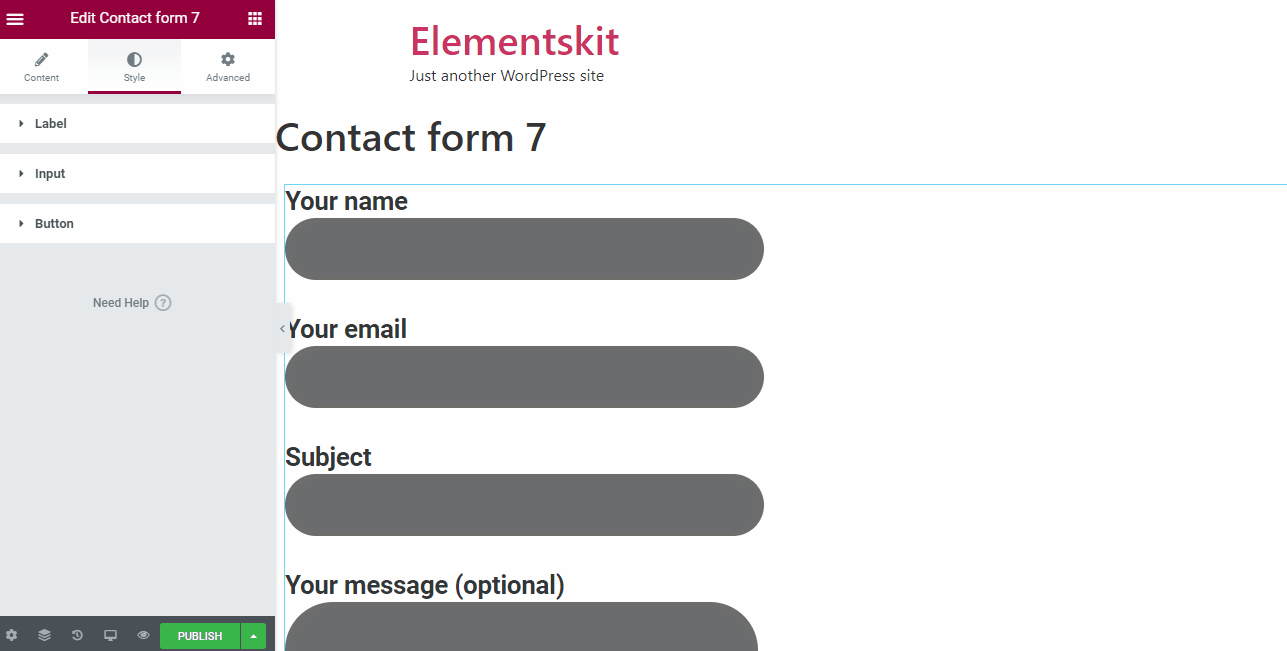
Step #3: Typography Style
In this section, we will change different sections like font family, font size, weight, transformation, font style, decoration, line height, letter spacing, etc.
Styling typography
Remember, changing these options won’t affect the responsiveness of your website.
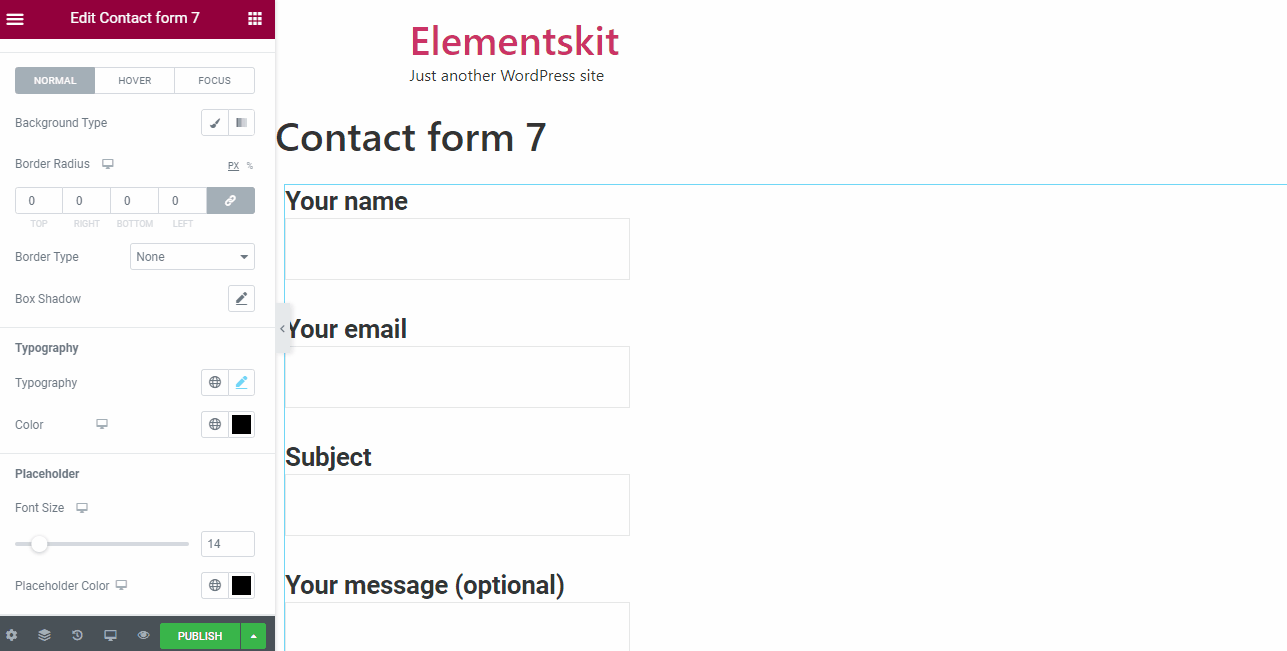
Step #4: Customizing Input Area
Besides customizing the text area, you can change the input box too. ElementsKit allows you to customize the padding, width, input box height, text height, and margin-bottom of the input box.
Customizing input box
Step #5: Customizing Input Area Background
By this time, we’ve completed designing our texts and customized texts of our Elementor contact form. Now we will change the background color, design, shadow, etc of our text area.
Customizing input area
You can also colorize the input box with multiple colors and shadows. However, I cannot resist myself to mention one of my most favorite features in this part. And that is, you can add these shadows and colors both on the internal and external sections of your contact form.
Point to be noted: you can perform all of these actions both for hover and focus options. Awesome, isn’t it?
Step #6: Modifying Submit Button
Well, we are now in the last section of designing our contact form. Yes, you’ve got it! We will modify the Submit button here.
ElementsKit allows you to change the alignment, typography, border-radius, margin, padding, color, box-shadow, text-shadow, border type, etc.
Customizing submit button
And, that’s it! We just completed designing our contact form. I hope, you have also completed the design without any problem.
Designing Elementor Contact Form with ElementsKit Layout
In this section, I’ll show you the process of adding a contact form to your post by using the ElementsKit layout.
To ease the process even more, I’ll add a video tutorial too. Hope that it will help you. Now, let’s focus on the tutorial.
Step #1: Inserting the Form
At first, choose a contact form design from the ElementsKit layout library. Head to the ElementsKit icon > Section > Contact form.
In this section, you will notice three different contact form design for your blog post. Simply choose your desired design, and add to your post by clicking the ‘Insert’ button.
Inserting contact form from layout
Step #2: Customizing the Contact Form
Your desired contact form will become visible to your blog post. Now it’s time to customize the color, margin, padding, font, text box, etc of your contact form.
Fortunately, the customization process is 100% similar to the previous one. Follow the previous procedure from step #3 and you’ll get it.
If you face any trouble to design a contact form for your WordPress website, check the video. It will get everything covered.
That’s it! I hope, you have successfully added an Elementor contact form on your webpage. Designing a form with Contact Form 7 and ElementsKit is the easiest process let alone taking the time.
Importance of Using Contact Form
A case study of Venture Harbour shows that they boost up their conversion rate by about 743% only by optimizing their web forms. You can also boost your sale just by implementing an appropriate contact form.
Let’s have a look at a few other importance of using a contact form on your website.
- Professionalism
A website looks incomplete without a contact form. Adding an appropriate contact form increases professionalism as well as works as a medium of communication between the consumers and webmasters.
You may add the form link on your transparent sticky header aka primary menu. It makes the form easily accessible as well as looks professional.
By the way, if you want to create a high-converting web form automatically, you may use the MetForm plugin. We have lots of premium predesigned form on MetForm. Simply choose one and customize it.
It won’t take more than few minutes to create a professional looking web form by using MetForm.
- User-friendliness
A simple contact form keeps your website one step ahead of being user friendly. When a user lands on your website, he might want to communicate with you for different queries.
If you don’t have any contact form, visitors can’t communicate with you. You might lose thousands of potential customers just because of this communication gap. Most importantly, these customers won’t visit your website further let alone recommend it to someone else.
And, you can also solve all of these problems and grow your business just by adding a proper contact form.
- Increase in Sales
Running a business successfully isn’t easy. You have to work hard and soul to improve the business. You may get surprised to know that you can increase your sale only by responding to the customer’s query faster.
You know, sales highly depend on the response rate. A report says that you have to face a 10x decrease in sales if you failed to respond to your customer’s query within 5 minutes.
But it is possible to keep anyone available 24×7 in person. In this case, a contact form helps you a lot. It keeps the communication bridge open among both customers and website owners.
If you design a gorgeous looking contact form on your website, consumers will definitely use it and contact the owner.
- Stay Safe from Spamming
Exposing your email address or phone number directly on the website increases the possibility of being spammed. There are thousands of bots available which are continuously crawling the internet to collect the exposed emails.
Once you expose your contact info directly on your website, those bots will capture your email and deliver it to the spammers. Soon after that, your inbox will get flooded with unnecessary spam emails.
You can get rid of this solution by adding a contact form on your website. It will work as a security layer. By using advanced contact forms like contact form 7 will increase the security even more.
Contact form 7 will automatically filter the real messages from the spam box. Further, you can also add some security checks like reCAPTCHA, bot filtering, etc.
- Organize your contacts
An appropriate contact form helps the business owner to keep the customer’s informations organized. Thus you can contact the customers effortlessly whenever needed.
- Reachability
Most of the business owners use their social media profile to communicate with the customers. Well, it might be a good platform for social media lovers. But, what about the customers who don’t active on social media sites?
You’ll definitely lose them. That’s why it is always preferable to communicate with your consumers on your own. And, a proper contact page creates the bridge between the consumers and the business owner.
Wrapping Up
We are about to leave the page. By this time, you must have good knowledge about contact forms, the importance of contact form, and the process of adding a contact form on your website. You can also check the best practices to design WordPress contact forms.
What are you waiting for? Add an Elementor contact form today and grow your business. If you have any confusion about this process, don’t hesitate to contact us via our Contact Us page.
Don’t let the communication gap create a barrier between you and your customers.
Leave a Reply