


Can you imagine running a successful business without any sort of communication?
No way!
Maintaining proper communication with the clients is always #1 priority to grow a business. No matter what you do, communication gaps will definitely collapse your business.
And, you can solve this problem only by including web forms on your website. You know, web forms create a bridge of communication among the owners and customers. A recent study of Clutch shows that 86% of people use different web forms at least once a week.
It’s huge, right?
So, it’s high time to build a high-converting web form for your website. A clear and concise web form will help you to grow your business, generate leads, and improve your conversational experience with your customers.
What are the Best Practices to Design a Web Form?
There are thousands of forms in the online world. But, all of those are definitely not good enough to convince the audiences to fill-up the form.
So, what makes a web form good for everyone? Well, there are five key components to designing a high converting form. Let’s have a look at those –
1. Include the Key Components
Every successful web form must contain a few key components in it. You must include those fields in your web form. Let’s have a look at those key components.
• Form structure
The form structure plays a vital role to improve the user experience (UX) and generates more leads. You must keep the input fields organized and interrelated. The logical connection between fields encourages the users to fill up the forms.
• Input fields
A professional web form must contain multiple input fields. The basic fields are text fields, password fields, buttons, checkboxes, sliders, etc.
• Appropriate field label
An appropriate field helps the user to input to understand what he/she should input on the box.
• Feedback message
The feedback message helps the users to understand whether they input the right or wrong information in the box. Suppose, a user inputs his phone number on the email box, then the contact form should show a message to notify the user about this mistake.
• Action button
The action button is used to submit the form data. In general, this button is located at the bottom of the web form. However, there are few other action buttons like text validation, number validation, etc.
• Validation
To err is human. It’s very normal that users will make mistakes while filling up those forms. This validation check helps the user to fix those issues.
2. Ask Only What is Necessary
Less is more!
While designing a web form, don’t flood the form with numerous input fields. Users always prefer shorter forms. Because it takes less time to fill up the form.
A report of HubSpot shows that you can increase the conversion rate up to 25% by reducing the input fields to three.
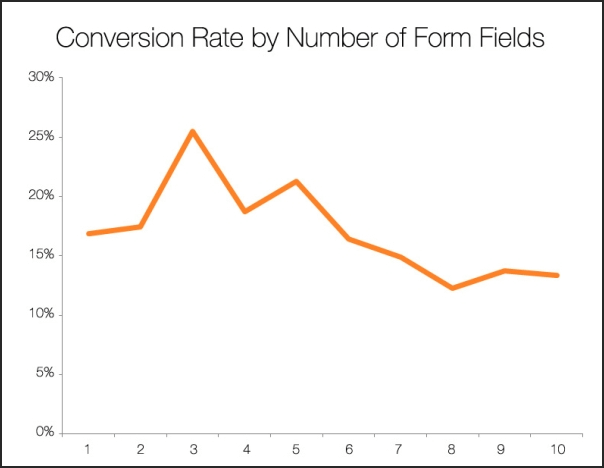
Form conversion rate by number of input fields
You may add five to seven input fields to your web form. Just keep in mind that users don’t require more than two minutes to fill up your form. Another study from Clutch shows that 44% of users don’t want to spend more than two minutes filling up a form.
So, avoid adding extra fields to your form. Keep it as simple and concise as possible. If you really want to add more fields, give a try to multi-step forms.
3. Keep the Form User-friendly
You must simplify the forms to ensure a smoother form experience to the users. Your primary goal is taking only the required information from the users. Don’t clutter the form with less important input fields.
By the way, you can simplify the web forms by maintaining the following rules.
• Be specific – Show specific instructions to the users via the placeholder. For example, don’t just write “Name” as a placeholder. Instead of that, write a specific placeholder like “first name” or “last name”.
• Give example – There are few text boxes where you should provide an example besides writing a specific placeholder. Suppose, you entered an input field that collects a specific date.
You know, there are multiple date formats around the world like mm/dd/yy, dd/mm/yy, yy/mm/dd, etc. In this case, you should include your preferred format on the placeholder.
• Use asterisks – If you want to make an input field mandatory, put an asterisk on the upper portion of the input field. A simple asterisk (*) mark sends a message to the users that he/she must fill up this field.
• Use capitalization – You must enhance the readability by using sentence case. It’s the most important fact to check while using CTA buttons on your web form.
4. Include an Effective CTA button
A Call to Action button is used to lead the users towards the next step. It plays a vital role to change the conversion rate. You must include an effective CTA button that expresses users’ intent and also guides them to the next step.
While designing a CTA button, you have to check both the button design and text. You must keep in mind a few things while designing the call to action button.
- Place the button on a noticeable location of your webpage
- Add a promising color that suits well with your background design
- Try to add a 3D style to your button
- Add a simplistic icon beside the button text
These are the common practices of designing a CTA button. However, the button text also should be optimized.
A study of Unbounce says that using the traditional CTA texts causes about a 3% deduction on the conversion rate. Few traditional button texts are ‘Submit’, ‘Register’, ‘Download’ ‘Go’ etc.
Avoid the traditional texts and try to include unique CTA button texts such as Click here, Learn more, Let’s get started, Let’s connect, etc. By the way, make sure that the button text doesn’t exceed two or three words.
5. Make the Form Visually Appealing
Most of the website owners think that web forms are solely designed for data collection. There’s no need to concentrate on the design. However, the reality is way different.
Research says that users take only 0.05 seconds to decide whether he/she wants to stay on a page. That’s why you must design a visually stunning form that can convince the user in the blink of an eye.
While designing a visually stunning form, you should consider the following facts.
- Number of input fields – Reduce the unnecessary input fields and keep the form as simple as possible. It will be better if the form contains five or fewer input fields.
- Design – Make the color contrast, input fields, and text formatting in a prominent way.
- Remove distraction – The main target of a web form is generating leads or starting a conversation. So, it’s a good practice to keep the form in minimal shape by removing unwanted distractions.
That’s how you should design the web form to build a perfect bond with your customers. Now, it’s time to learn about how to build a high-converting form with Elementor.
Let’s begin.
⭐⭐ Have a look at effective lead form conversion rate optimization tips.
How to Build a High-converting Form with Elementor
It’s time to ditch the old-fashioned web forms and replace those with elegant ones. And, the fact is building a high-converting form with Elementor is not as complex as you thought. Simply use some tools and you are good to go.
Prerequisites
Let’s proceed to the step-by-step procedure of building a high-converting form.
Step #1: Configure Your Environment
As you landed on this page, I assume that you’ve already owned a WordPress website. So, there’s nothing to add on this point. Let’s install the other plugins. I’m going to start with installing MetForm.
Login to your WordPress admin panel dashboard and proceed to Plugins > Add New. Then search for MetForm and install it.
Installing may take a little bit of time based on your server. After the installation, don’t forget to Activate the plugin.

Installing MetForm
Do you get it? Bravo!
Now, install the Elementor plugin by following this exactly similar process.
Step #2: Create A New Page
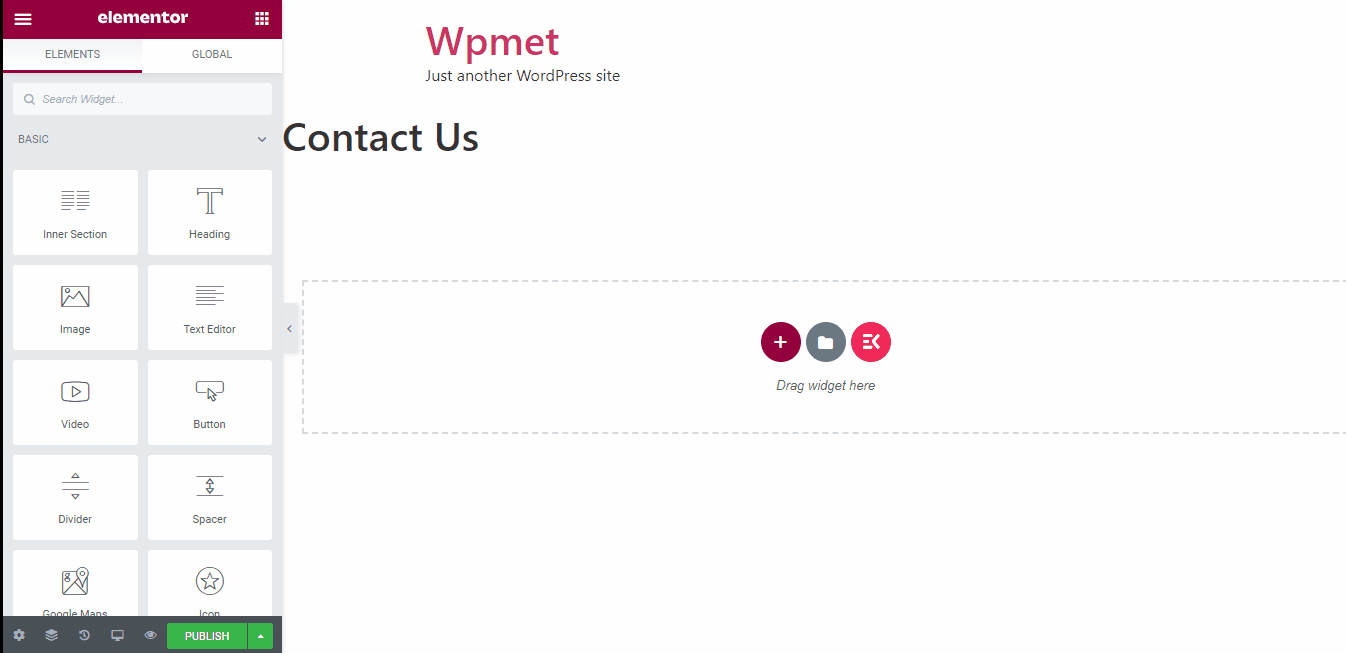
Proceed to the admin dashboard again. Now go to the Pages > Add New to create a new page for your contact form.
Now, add a name to your newly created page. For instance, I’m going to build a contact form. So, I named it “Contact Us”. You also should add a suitable name for your webpage that represents the purpose of your webpage the best.
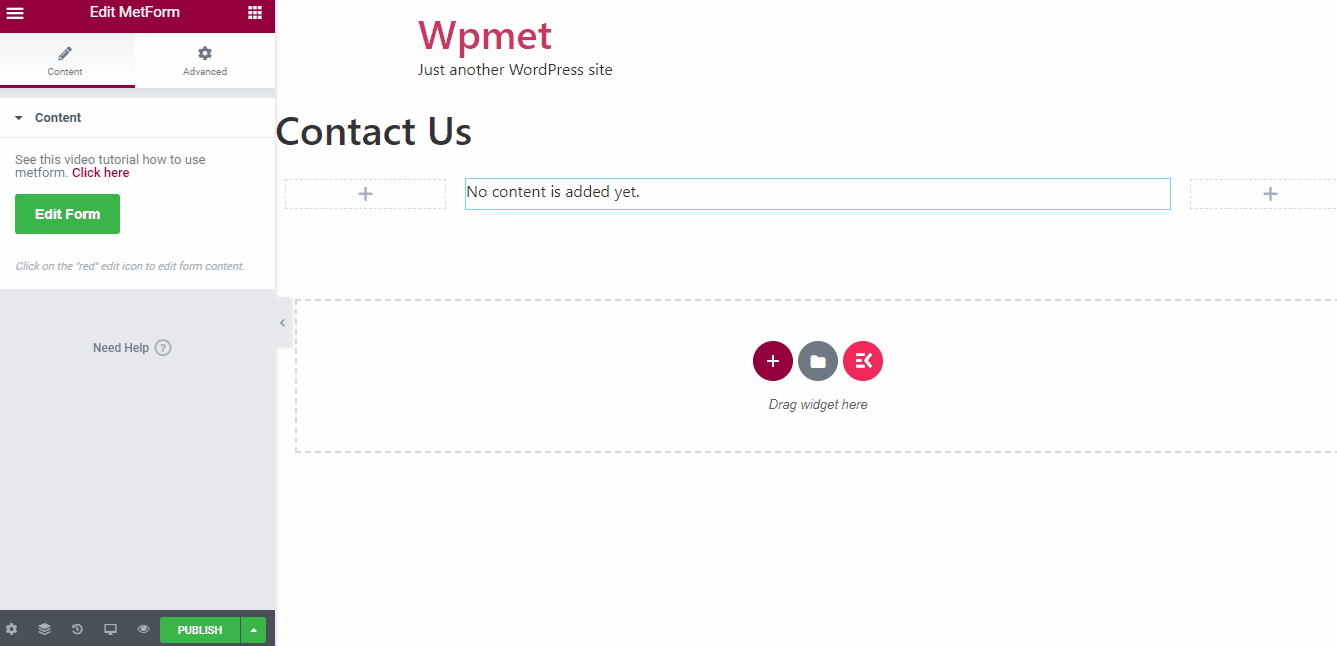
However, we won’t use the default WordPress editor aka Gutenberg to build our form. We will use Elementor to build this gorgeous theme. That’s why we have to open the page with the Elementor. To edit our page with Elementor, just click on the “Edit with Elementor” button and you’re done. By the way, it may take a few seconds to load Elementor. Be patient!
Adding a new page
By the way, you can also add a form on your existing pages too. For instance, I’m adding a form to a new page. I’ll show you the process of adding the form on an existing content later in this article.
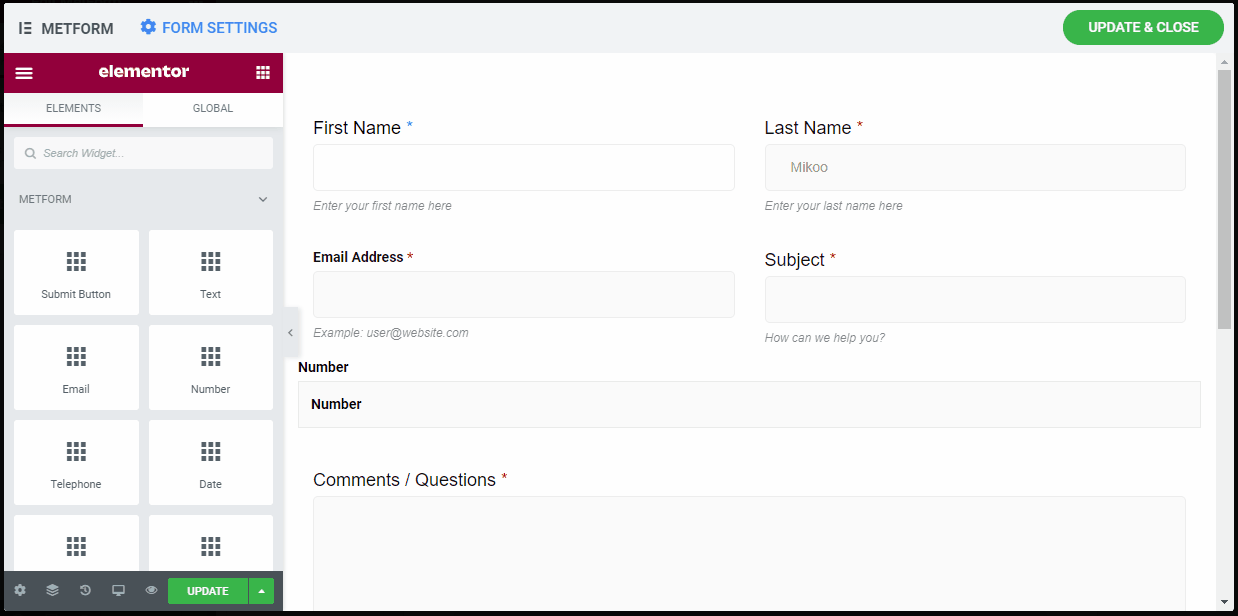
Step #3: Inserting MetForm
Find the MetForm widget from the Elementor panel located on the left side. Then drag and drop this Elementor form builder widget on your webpage.

Inserting MetForm
Step #4: Editing the Form
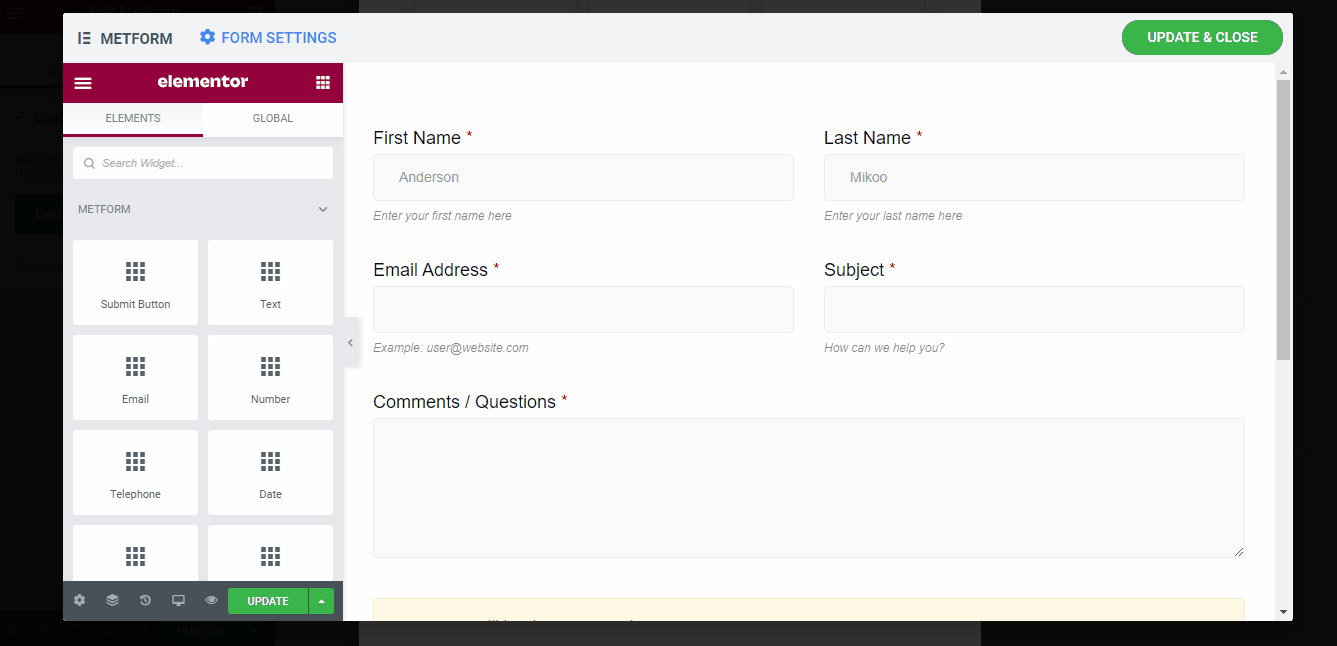
Now, click on the “Edit Form” button for further editing. If you are using the MetForm Elementor addon for the first time, you have to click on the “New” button. It will open our readymade form library. We have 30+ predefined forms in our library.
Now, click on your desired form and click on the “Edit Form” button which is located at the bottom of this page. Then, your selected form will be opened on the settings page.
Editing form
By the way, you can also build a new form from scratch if you want. Choose the blank document to design your own form from the scratch.
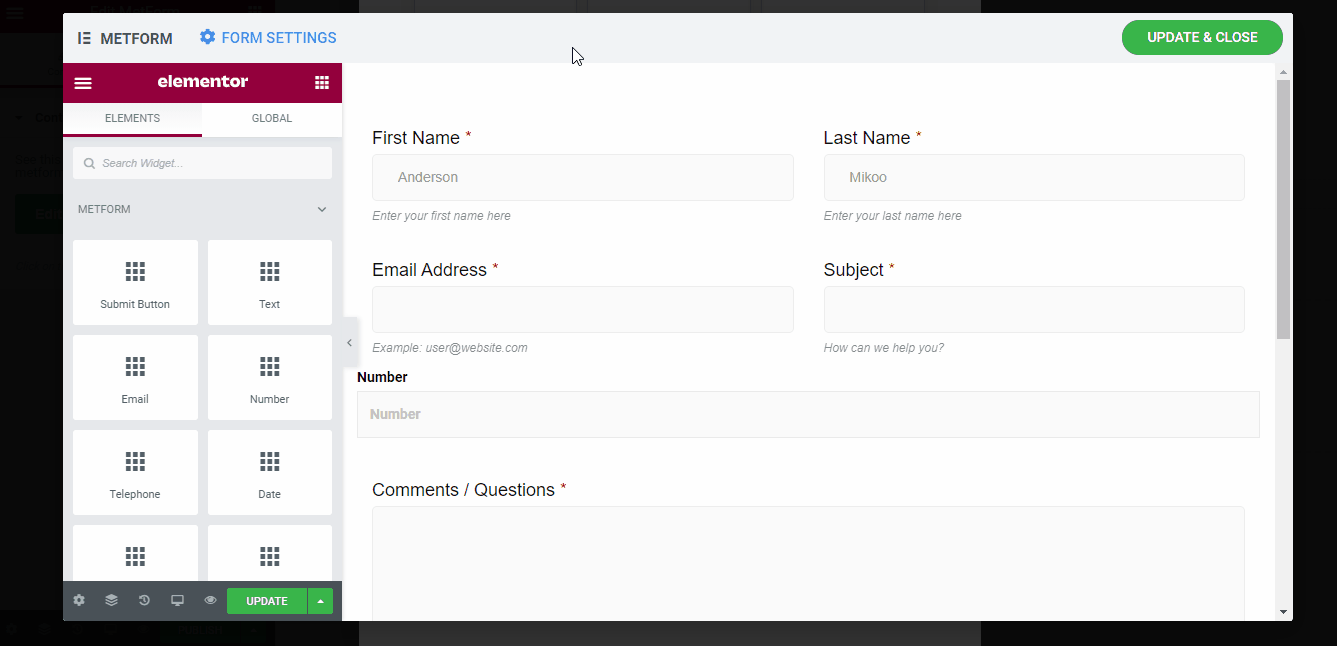
Step #5: Adding or Removing Input Fields
The selected form will be visible on the form settings page. You can add or remove any of those input fields from your form. However, MetForm allows the user to add unlimited input fields on your form. MetForm Elementor addon contains 40+ different input fields to add to your form.
Adding or removing input fields
MetForm offers lots of free and premium text input fields. Let’s have a quick look at a few of those input fields.
Here are the free input fields –
| Text | Range Slider |
| URL | |
| Number | Password |
| Telephone | First Name |
| Date | Last Name |
| Time | GDPR |
| Multi-Selection | reCAPTCHA |
| Text area | Rating |
| Checkbox | Simple Captcha |
| Switch | File Upload |
| Radio Button | Summary |
Besides those free input fields, we are also offering a few premium input fields. Those are –
| Phone no | Signature |
| Image Select | Toggle Select |
| Simple Repeater | Google Map Location |
| Color Picker Input Field | Calculation Fields List |
| Payment Method | Like-Dislike Input Field |
You can include all of those input fields by using MetForm Pro.
Step #6: Customizing Input Fields
By this time, you are probably done with including your required input fields. So, it’s time to customize those fields.
While customizing the input fields, you can customize almost every single element of those input fields. For example –
- Label text
- Label position
- Placeholder text
- Help text
- Make a field required
- Warning message etc
Here’s an overview of these actions.
Customizing input fields
Step #7: Adding Style and Typography
Once you finalize the form, now it’s time to tweak the style and typography of your input fields. From the Style tab, you can tweak the following things –
| Title | Customizable Options |
| Label | Color, Typography, Margin, Padding, and Required Indicator Color |
| Input | Margin, Padding, Background color, Input text color, border-radius, and Box Shadow |
| Placeholder | Color and Typography |
| Help Text | Color, Typography, and Padding |
Take a look at the process of adding style to the input fields. In this example, I’ve customized the ‘First Name’ field. You can similarly customize the other input fields you have added on the form.
Styling and typography
If you are done with the customization, click on the “UPDATE & CLOSE” button. Once you press the button, your customized form will be placed automatically on your webpage.
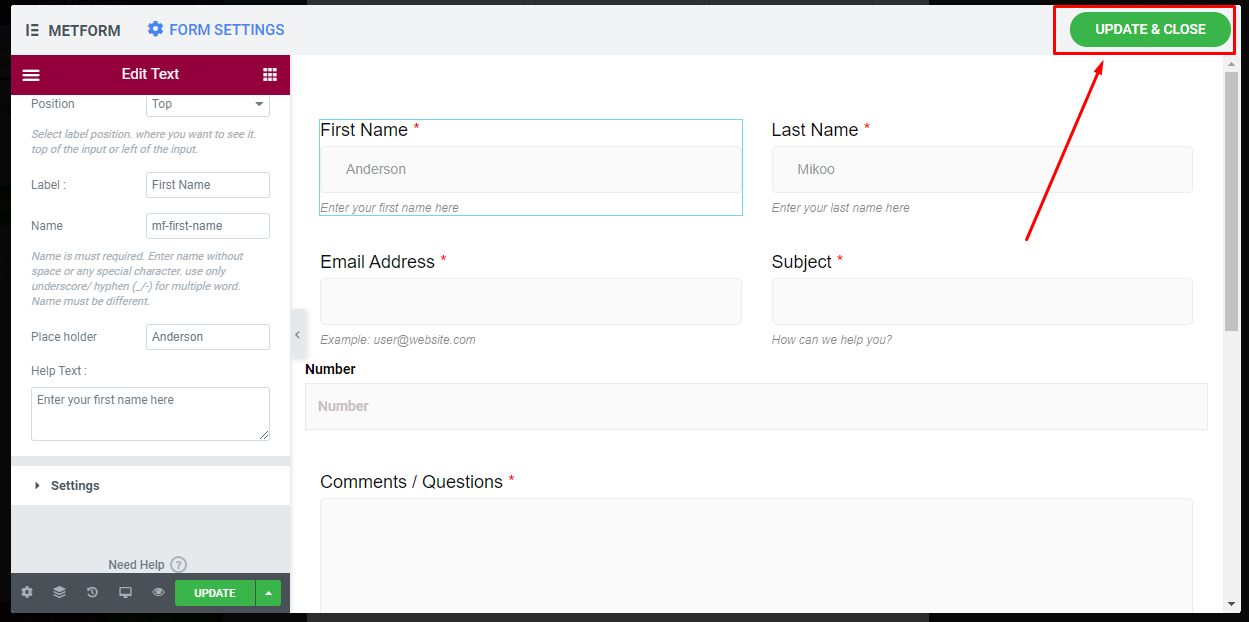
Finalizing the form
Bingo!
You just completed the process of adding a perfect-looking form by using this Elementor form addon.
How to Build a Web Form from Scratch by Using MetForm?
We have already learned about building a form by using MetForm readymade forms. However, if you want to build a form from the scratch, you can also do so by using MetForm.
To ease the process, we created a video tutorial for you. Check the video below to know the complete process of building a form from the scratch.
Hope that you can successfully build your form by following this video. If you have any questions or confusion about the process, let us know.
How to Reuse a Form Designed by MetForm Elementor Addon?
Another major advantage of using MetForm is that you can reuse the form whenever needed. Whenever you design a form. It automatically creates a shortcode. Simply collect that shortcode and post that on your desired web page. It will automatically post the form on that place.
To find out your previous forms, navigate to MetForm > Forms and you’ll find all of the forms you’ve designed on that particular domain.
MetForm forms list
Simply copy the shortcode and paste it on another page of your domain. This process is as smooth as butter. However, if you are still struggling with the process, please check the procedure below.
Reusing a form
See? You have to do almost nothing to reuse a form built with MetForm. Simply copy the shortcode and paste it wherever you want the form.
By the way, you can also copy-paste this form on another website within the same browser. But, you have to use ElementsKit Elementor addon to complete this action. This cross-domain copy paste module is truly a life savior for those people who own multiple websites.
Final Words
Building a high-converting form is a really tiresome task and kills lots of time. Thanks to the MetForm Elementor addon, the form building has become far easier and quite straightforward.
If you found this tutorial useful, do share it with your folks. In case you face any trouble while using MetForm, drop us a line. We will get to you as soon as possible.
Leave a Reply