

Do you know what’s the most important page of a website?
Yes, the pricing page!
That’s the place where your potential customers are waiting to make their final decision. They are actually looking for two questions on the pricing table page –
- Is this product or service able to fulfill their needs?
- Does it really fit the bill?
Answer these inquiries appropriately and
BOOM!!
You just got another sale!
Well, well, well, jokes apart, the real question is how to convert your visitors into paying customers?
And, the pricing table is one and only place to assist your potential customers to make decisions and prevent them from looking elsewhere for making the purchase decision.
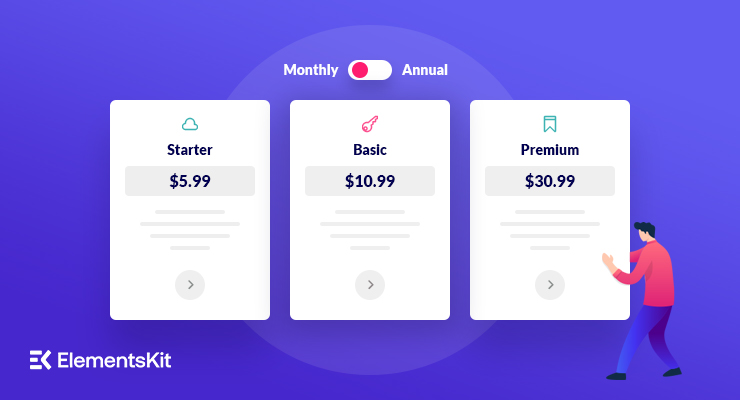
In this article, we will create a compelling Elementor pricing table which will help you to win more customers for your product or service.
But, let me inform the importance and core features of a pricing table before starting the design.
Why Is It Important Having a Pricing Table on Your Website?
There are thousands of reasons behind including a gorgeous looking pricing table on your website. Here I’ve listed a few important reasons for adding a pricing table on your website.
- Display your products or services with competitive pricing.
- Your clients can compare the features, data, usage, and pricing of your products.
- Clients can make decisions about which package can fulfill his/her requirements.
- A good pricing table contains a clear and concise ‘Call to Action’ button that leads the customer to move forward to purchase.
- Perfect pricing tables assist the consumers to make buying decisions by preventing them to browse another website
- Emphasis certain keywords, plans, or features by using eye-catchy graphics or larger fonts. It psychologically assists the users to make a purchase.
- A graphics-based pricing table attracts more consumers thus the overall sale increases.
- Using some urgency creating buttons like ‘time is running out’ or ‘deal will end within X hours’ on the pricing table generates comparatively more sales.
Including a perfect pricing table
will increase sales by 20%
How to Design A High Converting Pricing Table Using Elementor
By now, we have learned about the importance of pricing tables as well as the core features of a pricing table. Now, it’s time to design our own pricing table with Elementor.
Keep reading to know about 8 simple steps to create an attractive, trustworthy, and high converting pricing table.
Are you ready?
Oh wait, I almost forgot to inform you about the prerequisite elements. Here it is –
Prerequisites
- A WordPress powered website
- Elementor page builder and
- ElementsKit Elementor addon
Well, you can create a pricing table both on Elementor and Gutenberg editor. But, we will use Elementor in this tutorial. Elementor pricing table widget allows the user to create stunning pricing tables with ease.
Okay! Let’s proceed to the design part.
Step #1: Prepare Your Canvas
Login to your WordPress admin panel dashboard. Install and activate the Elementor and ElementsKit plugin. If you have already installed these plugins, make sure that all of these are up-to-date.
Now, open a new page/post or an existing page where you want to add the pricing table. Add an appropriate name and click on “Edit with Elmentor” to open the post on Elementor.

Creating a new page
Step #2: Choose A Pricing Table Design
ElementsKit contains 16 pre-designed pricing table layouts in it. You’ll get three of those for free and the rest of those will be available on our premium package.
You can access those pricing table designs from the ElementsKit button > Widgets Presets > Pricing. It will open up all of our pricing table templates. Choose a price table design and click the Insert button to put it on your webpage.
Inserting pricing table
Step #3: Customizing the Header
You can customize the header title text, title tag, show or hide the border, etc. However, the header will be on center alignment by default. But you can change it on the left by using the Float Left option.
This Float Left feature can be optimized for multiple screen sizes which are Desktop, Tablet, and Mobile.
Customizing the header
Step #4: Adding and Removing Columns
By default, our pricing tables contain three to four columns. But, that’s not a big deal. You can add more or remove existing columns if needed.
To remove a column, simply right click on the column and click Delete. It will remove only the column, not the section. Now, you can add a new column to that place.
However, you can also remove the entire column from the table. To do this, you have to hover on the empty section again. Then, right-click on that section and click Delete. It will delete the section along with the section content.
That’s how you can remove an entire column from your price table design. Here’s the visual description of this entire procedure.
Removing a column
That’s the process of removing a column from your pricing table. However, if you want to add a new column in your pricing table you can do it by opening a new column.
To add a column, hover on the spot where you want to add the column. Right-click and choose Add New Column. It will add this column and choose a new widget on the placeholder.
Now, you can simply copy-paste an element from one of your websites via using the ElementsKit Cross-Domain Copy-Paste module. Otherwise, you have to choose a new widget from the menu and drag and drop it to the new column space.
Adding a new column
Step #5: Adding Header Icon or Image
A picture is worth a thousand words. So, adding a simple icon on the top of your pricing table will be definitely a good choice. An appropriate icon can represent the overall package within the blink of an eye.
That’s why you should try to add an icon on the pricing table (only if it doesn’t ruin your design). You can add icons from our ElementsKit and font awesome library. However, you can also upload a manual icon too. But, it must be in SVG format.
Click on the specific pricing table and it will automatically open the header section on the left panel. Now, click on the header icon or image. Toggle the Add icon menu and set your icon.
Adding header icon
Step #6: Changing the Pricing Tags
To customize the price, click on the Price Tag section of the left Elementor panel. It allows you to customize three options. These are –
- ● Currency
- ● Price and
- ● Duration
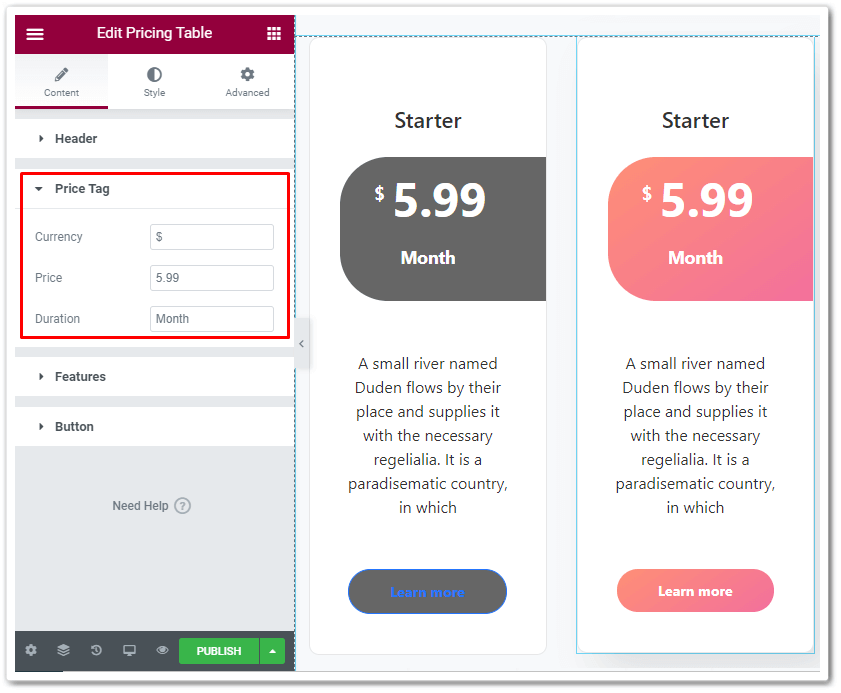
Customizing the price
The Currency box allows you to put the currency icon on your pricing table. Thus you can change the icon into your local currencies too. And the Price box allows you to put the price of your product or service on the pricing table.
The Duration box determines the pricing duration. You can choose either daily, weekly, monthly, quarterly, or annual pricing. Simply put the time on the duration table and you are done.
Step #7: Customize the Description Part
On the product table, you have to put the description of your product or service. You can choose either paragraph styled description or the list styled description. Choose the one that suits your table the most.
Customizing the description
Step #8: Customizing CTA button
We have already described the importance of the CTA button in the previous section. To design an eye-catchy CTA button for your price table design, hover on the left Elementor panel.
Now click on the Button section to open up the features to customize. You can change the following things from this submenu.
- ● Label text
- ● Link options
- ● Adding icon
- ● Icon position and spacing
- ● Class and id
Check the gif file below to get a detailed overview of the button customization.
Customizing CTA button
Try to keep the CTA buttons identical for all of
the packages within the pricing table.
Final Pricing Table
We just completed designing our Elementor pricing table. Let’s take a look at the final stage of our pricing table –

Looks impressive, isn’t it?
Check the video below to get a detailed overview of this pricing table creation process.
Things To Consider Before Designing A Pricing Table For Your Elementor Website
By now, we have learned about the importance of using a pricing table on our blog as well as created our own Elementor pricing table.
However, let me inform you about a few things that you must include on your pricing table. Lets begin.
1. Limit Your Plan to 3-4 Options
It’s really tempting to list lots of features and packages on the pricing table. But, it won’t bring any luck to you. If you provide so many choices to your prospective buyers, it might trouble the users to make a decision.
Listing too many packages in the pricing table might
cause analysis paralysis to the prospective buyers.
Try to limit your pricing table plan to 3 to 4 options. Thus the pricing table remains simple and concise. It makes the decision-making process easier and smoother for the users.
2. Keep the Table Simple
Just like reducing the package, you should take a look at the cluttering too. If you add too many options to the table, it will become messier. And, it will definitely create a bad impression towards the potential buyers.
Research of groove tools shows that they have increased their free trial sign-ups by 358% only by simplifying their pricing table. And their overall revenue was increased by 25% just by changing the interface.
By the way, you can use different color coding for different packages. It helps the users to distinguish the packages.
3. Choose Appropriate Package Names
Just like keeping the pricing table simple and concise, you must choose appropriate plan names for your products or services. Most of the product owners name their products as Bronze, Platinum, Gold, Diamond, etc. But, It’s not an up-to-the-mark plan name.
Instead of using those, you can choose some creative names. Make sure that your package name represents a clear concept about that package. For example, you may use the following names –
| Starting | Solo | Basic | Free |
| Growing | Team | Standard | Pro |
| Scaling | Agency | Advanced | Team |
| Sustaining | Custom | Pro | Ultimate |
You may choose any of those names for your pricing table. You can also choose a custom name if that suits well with your package.
4. Highlight the Best Deal
Whenever a visitor lands on your pricing table, most of those are looking for the answer to a single yet the most important question –
What’s in it for me?
That’s why you should highlight the best package. Thus the visitors instantly get the answer to his question. It provides a clear cut description of what they are getting on a particular package.
5. Create Urgency or FOMO
Creating an urgency or FOMO aka Fear Of Missing Out boosts up the sale. You can add an eye-catchy ribbon on the highlighted deal to create this urgency. Phrases like ‘Best value’, ‘Most popular’, ‘Popular choice’ are really convincing and boosts the pricing.
You can trigger the FOMO by using the numbers of users benefitted from your service, showcasing the stock amount, or offering additional rewards while making a quick purchasing decision.
To trigger urgency, you can add a countdown timer or an animation on your webpage. Using an appropriate color also creates an urgency among the potential buyers. Be aware of that.
6. Use Smart Price Anchoring
Price anchoring is basically a psychological thing. It’s a major fact to consider if you want to dive someone deeply into your product or make him take a purchasing decision.
Smart price anchoring is basically a strategy of putting a price on your product or service. When you are pricing a product, you should put the largest amount first.
Yes, the largest one! It psychologically introduces the price range to potential buyers. When the buyer notices the price is dropping on the next packages, it triggers his/her brain that the pricing is dropping.
A research conducted by Duke University shows that the ventromedial prefrontal cortex of our brain becomes more active while making purchasing decisions. This is the exact same part which also controls our emotions too.

That’s why you should play psychologically to win more customers. Most importantly, it affects the buyers even when they are well aware of this effect. I think that’s the real beauty of this project.
7. Use Visual Elements to Emphasize, Not Distract
The design and image of a pricing table are important. We have already discussed why it’s a bad thing not using appropriate visuals on a table. Hopefully, most people nowadays use graphics on the menu.
But, the problem is overusing the pricing table. Try to use those visuals in an appropriate manner instead of overusing that. Too much graphics won’t do anything rather than distracting your buyers.
8. Make Your CTA Noticeable
Once you have completed designing the pricing table content, now it’s time to add the CTA button. However, try to keep the CTA button relevant to the pricing table. CTA buttons are important not only for designing a high-converting web form but also for the pricing table too.
However, most of the peoples only care about the design of a CTA button. But, the real scenario is far different than this. Besides adding an eye-catchy color on the CTA button, you should take a look at the texts too.
Instead of adding sample texts like ‘Learn more’, ‘See more’, ‘Click here’ etc, try to add something creative. You may add ‘Try now’, ‘Claim the offer’, ‘Get started’ etc to get the higher conversion rate.
9. Look at the Currency
For online business owners, every citizen is their potential customer. But, it doesn’t mean that the customers will pay in your local currency.
Everyone loves to see the price of their local currency. Thus they got a clear idea about exactly how much they are paying for the product or service. So, if you are promoting your product or service internationally, try to add local currency to your pricing table.
That’s it! Now you know the details about designing a WordPress pricing table. Integrate all of these facts on your pricing table and boost your sale.
Wrapping Up
A great pricing table contains every information a user needs while making a purchasing decision. It includes the exact pricing, key features, CTA buttons, etc.
I know, it’s a lot to ask from a simple pricing table. But, you must do it to generate quality sales of your product or service.
If you design a decent pricing chart by using the Elementor pricing table, it will make the process completely breeze. Further, it attracts more users and definitely increases more sales for you.
Let’s create a pricing table right now and hike up your business.
Leave a Reply