Começando #
O Widget do Instagram permite que você exiba seus últimos Instagram postagens em seus sites WordPress. Aqui está um artigo abrangente para explicar cada método em detalhes. Siga o processo passo a passo para se conectar ao feed do Instagram.
Gerar Instagram ID do usuário e Token de acesso #
Veja como gerar um ID de usuário e um token de acesso do Instagram.
First browse to this link: developers.facebook.com/apps. Note that you need to be logged in here with your Facebook credential. Or, it will automatically synch with your Facebook account, if you stay logged in.
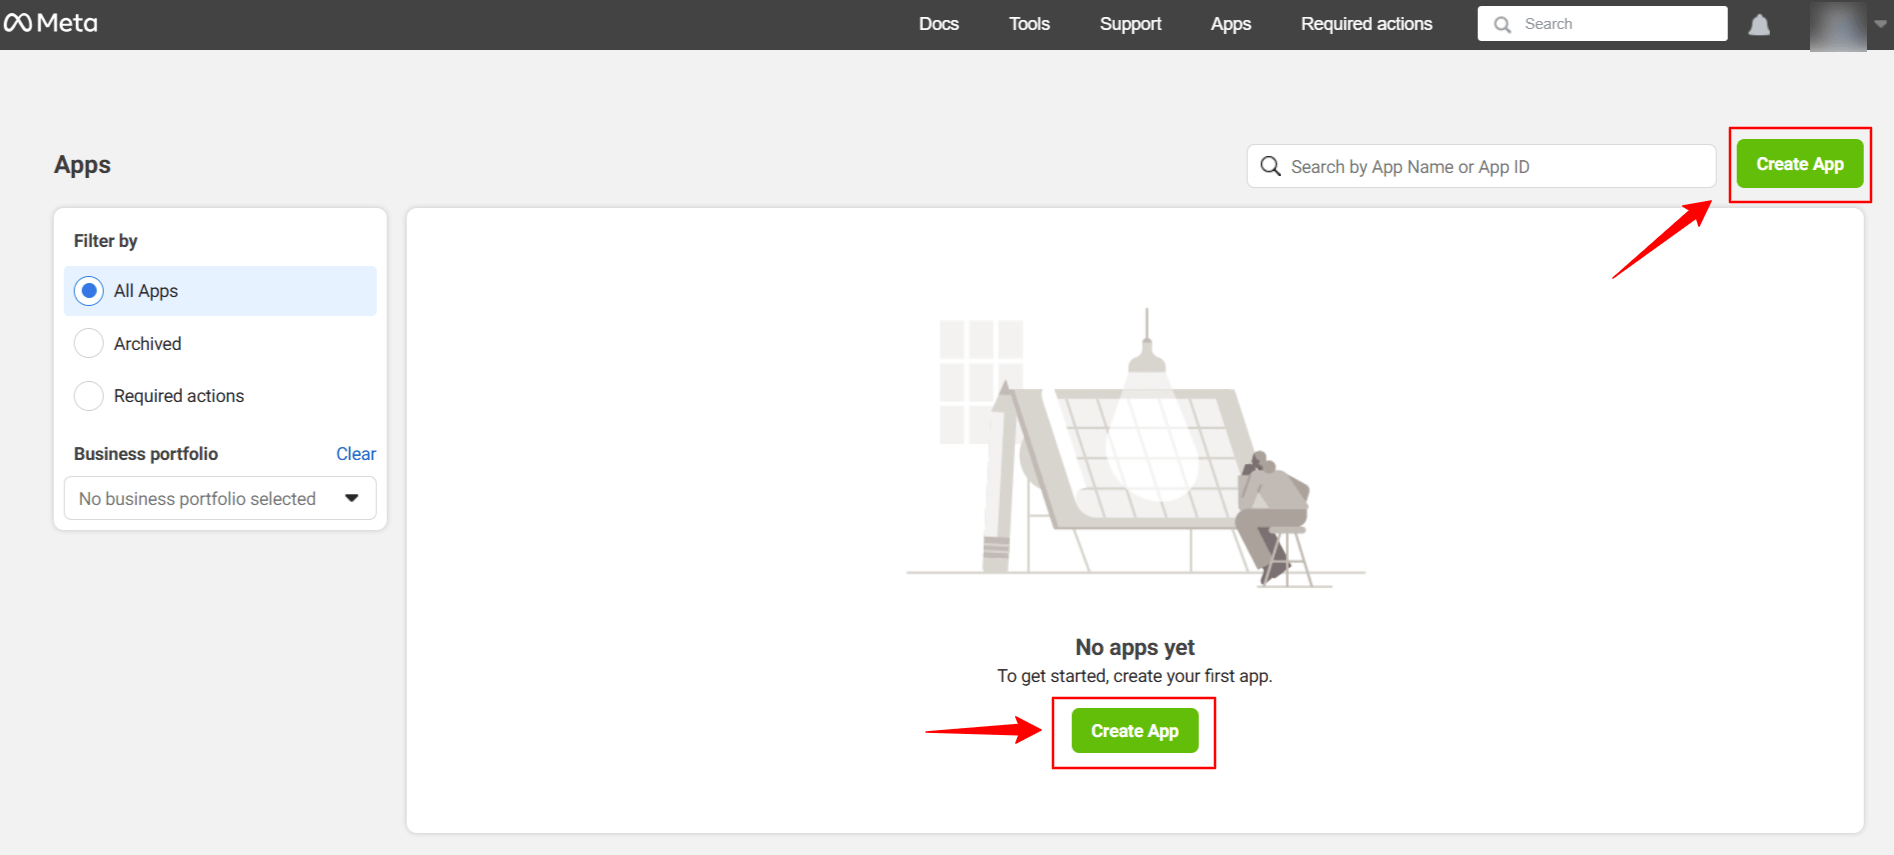
Clique em Create App. Doing this, a page will load an interface with different tabs.
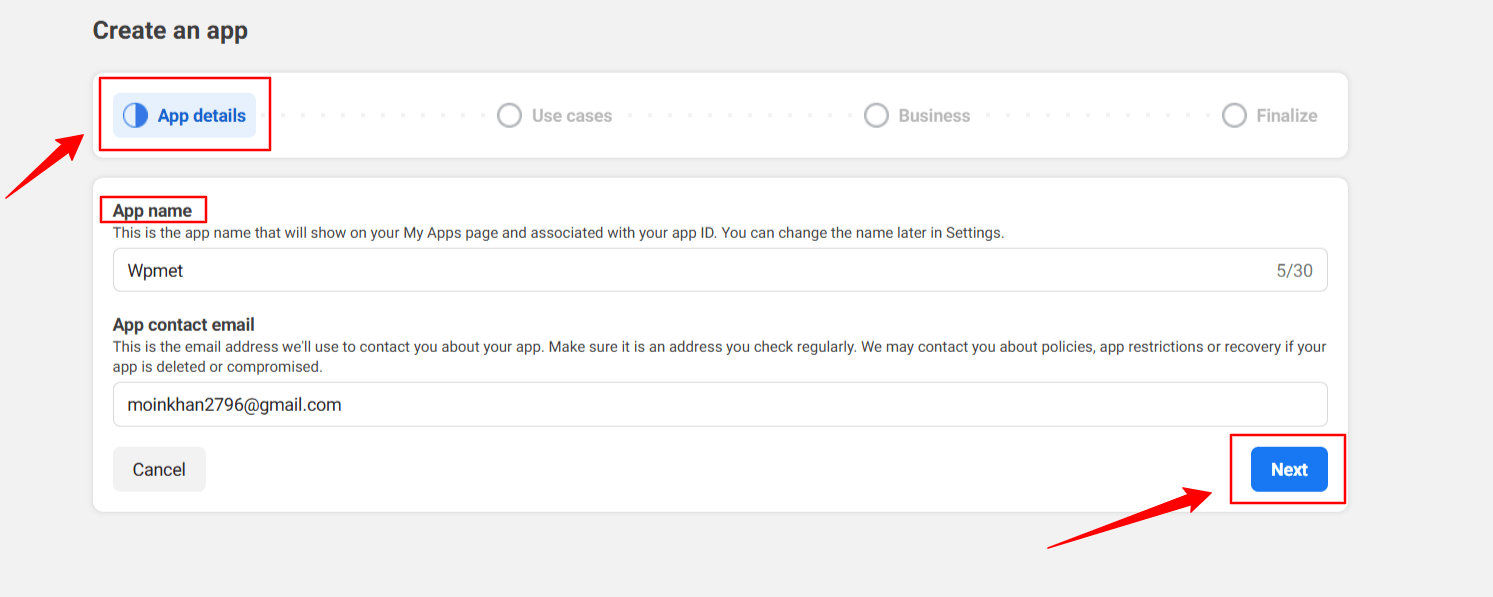
Give a name to the app, for this demo tutorial, I enter the app name as Wpmet. Então, acerte o Próximo aba.
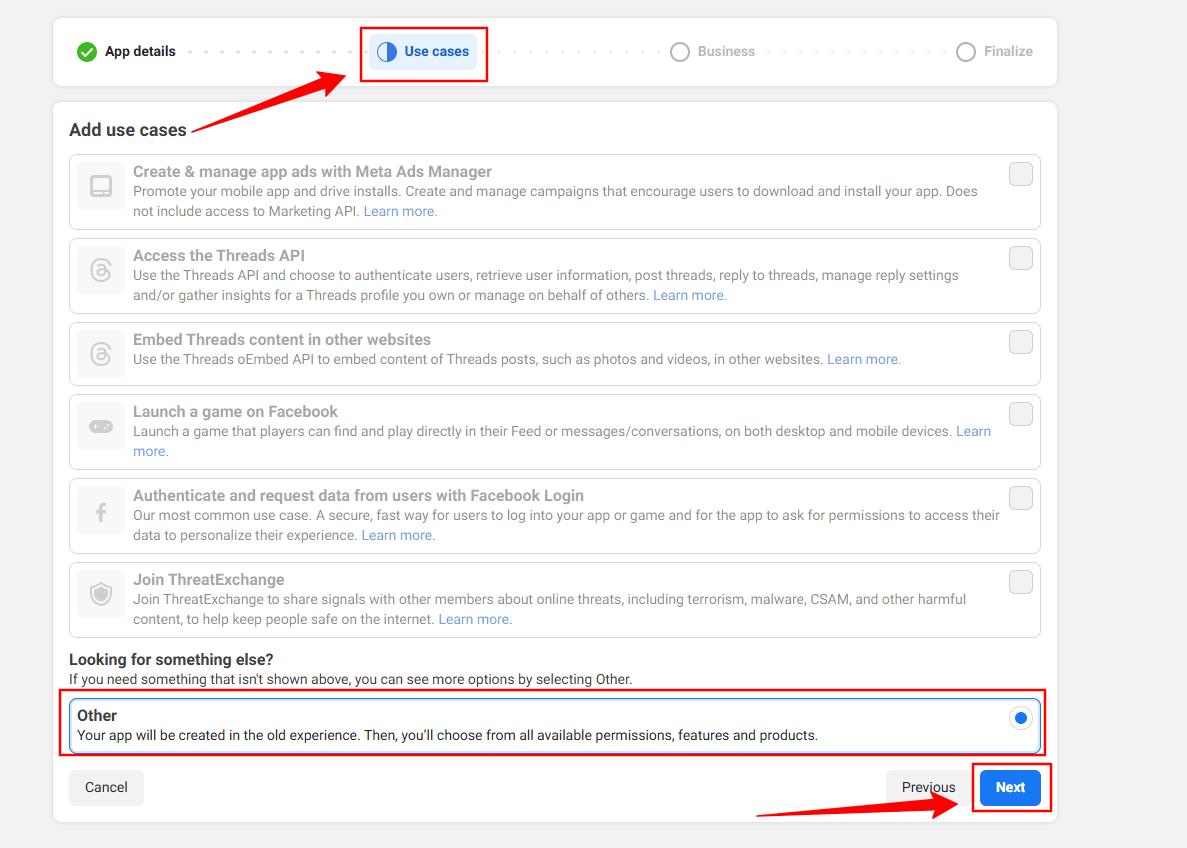
Then, select the “Other” option from the Use Cases tab. And, hit the Próximo botão.
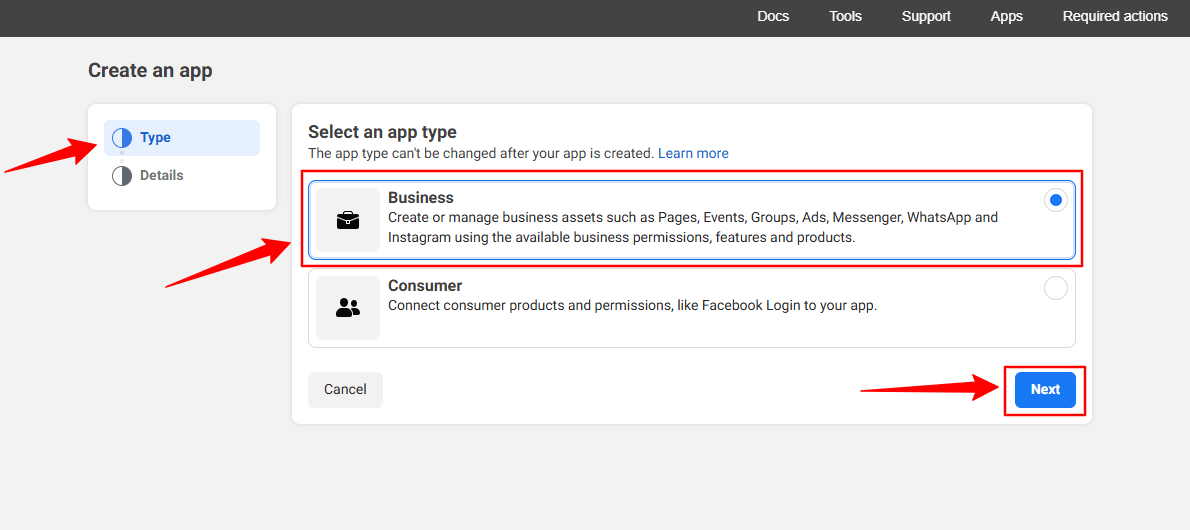
In the next screen, you’ll see two options. First, select Negócios de Tipo aba.
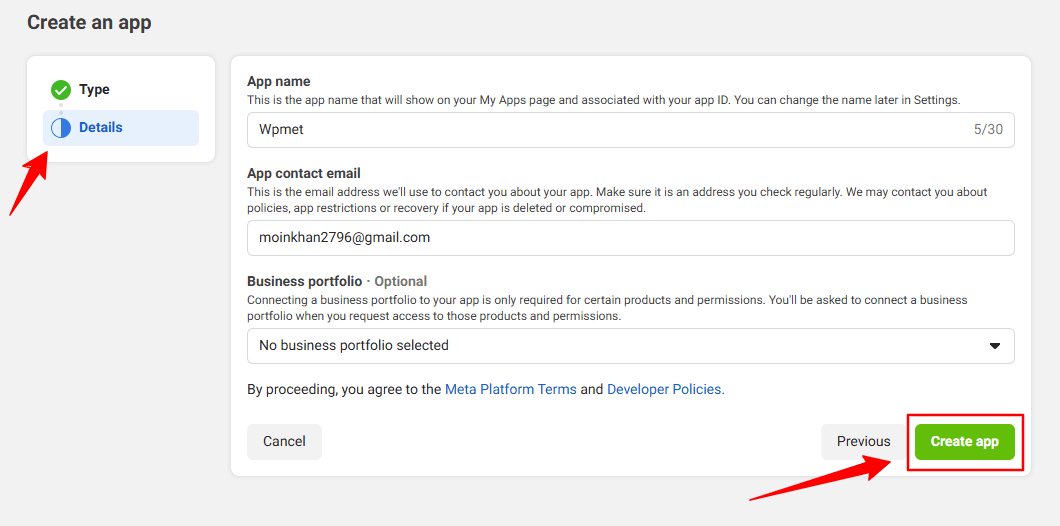
However, you don’t have to put any information in the Detalhes option, just click the Criar aplicativo botão.
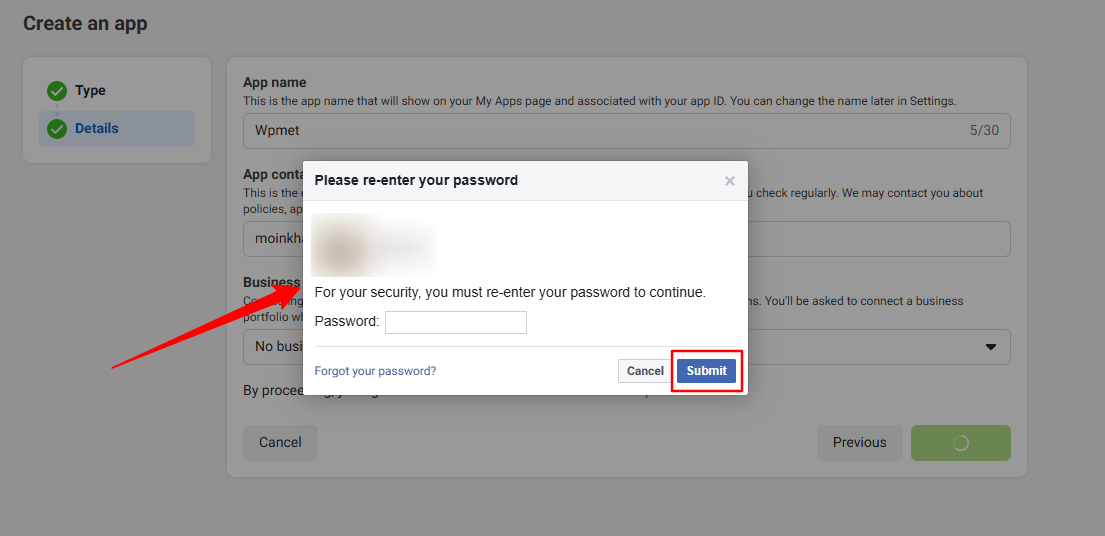
You may need to re-login with your Facebook credentials. Once, you’ve successfully login with your Facebook details, you’ll see all the apps.
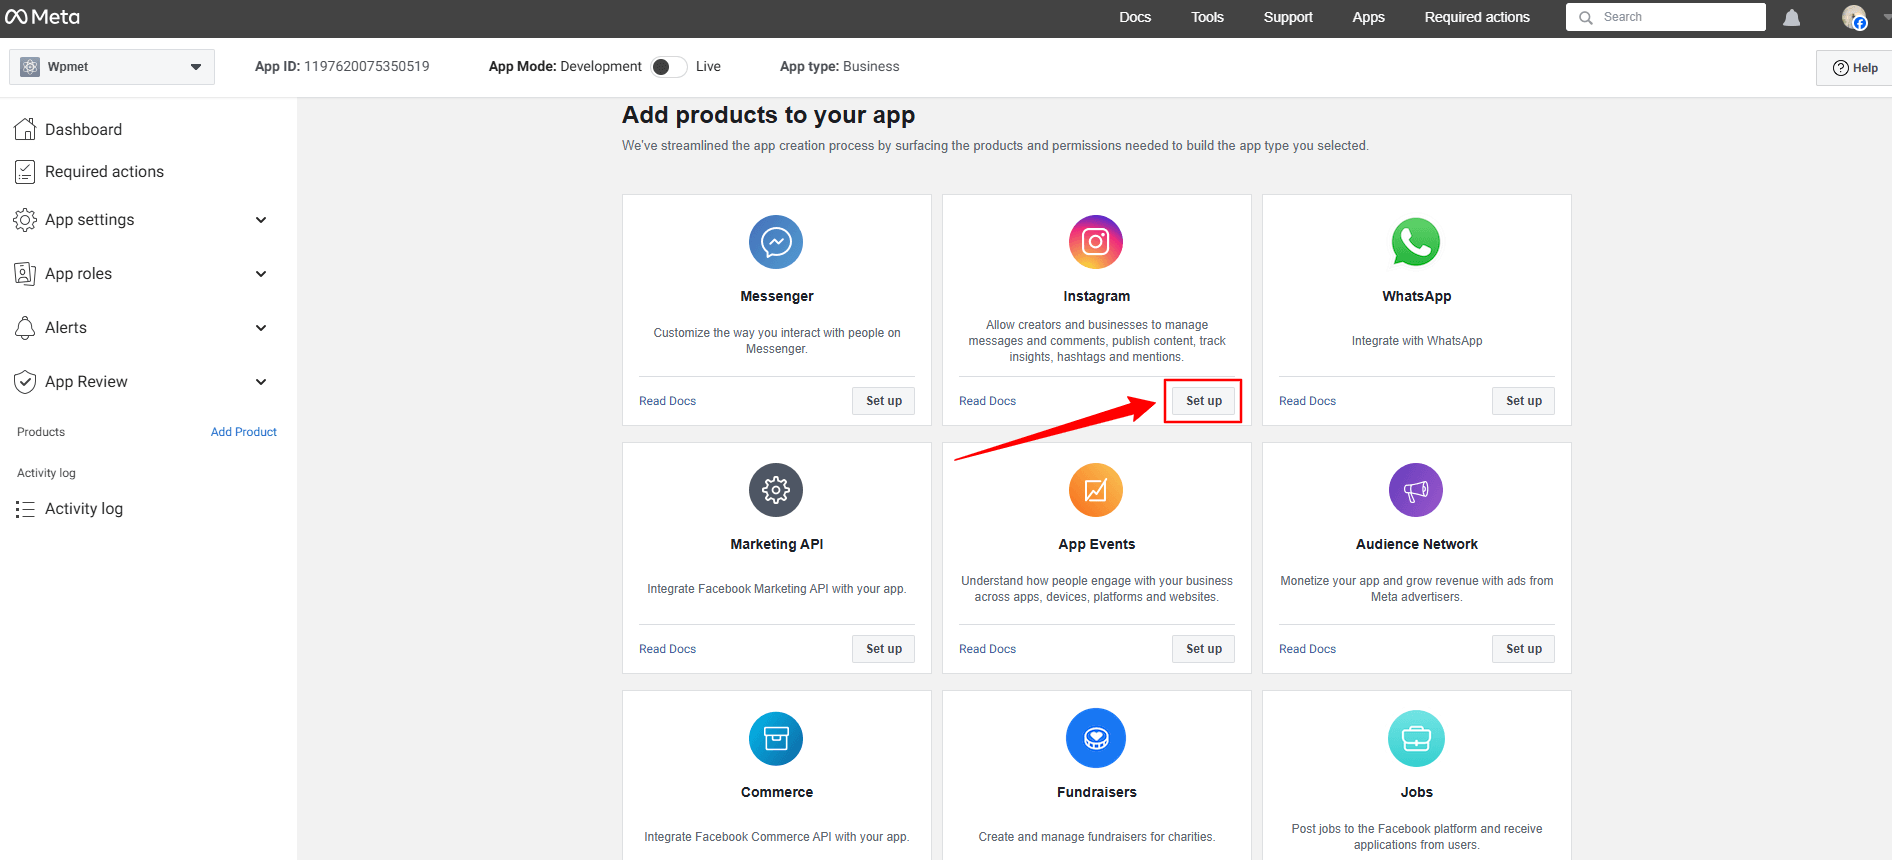
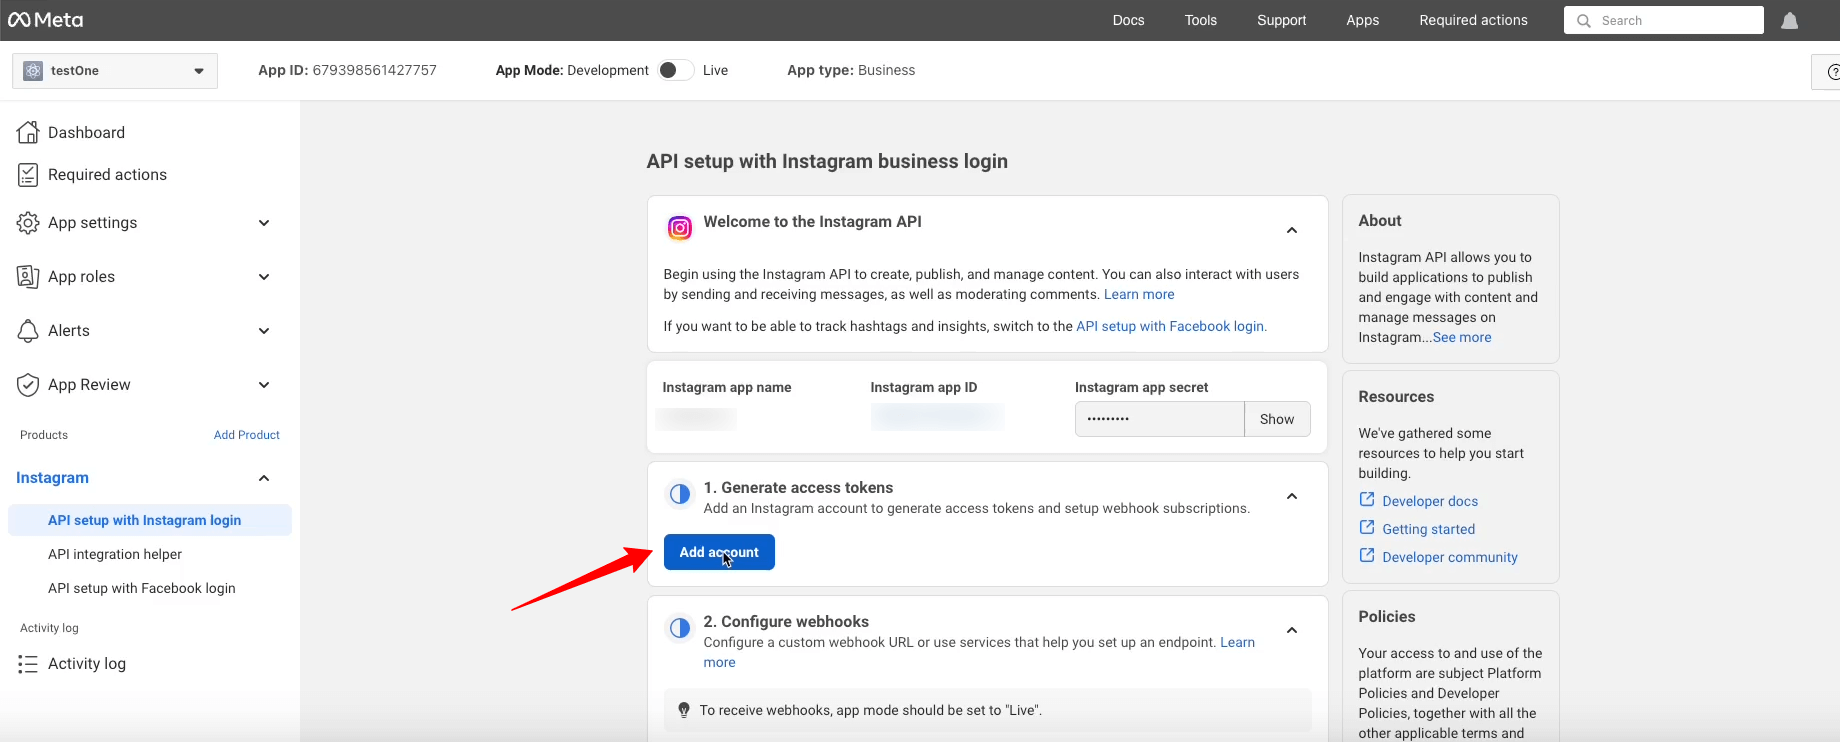
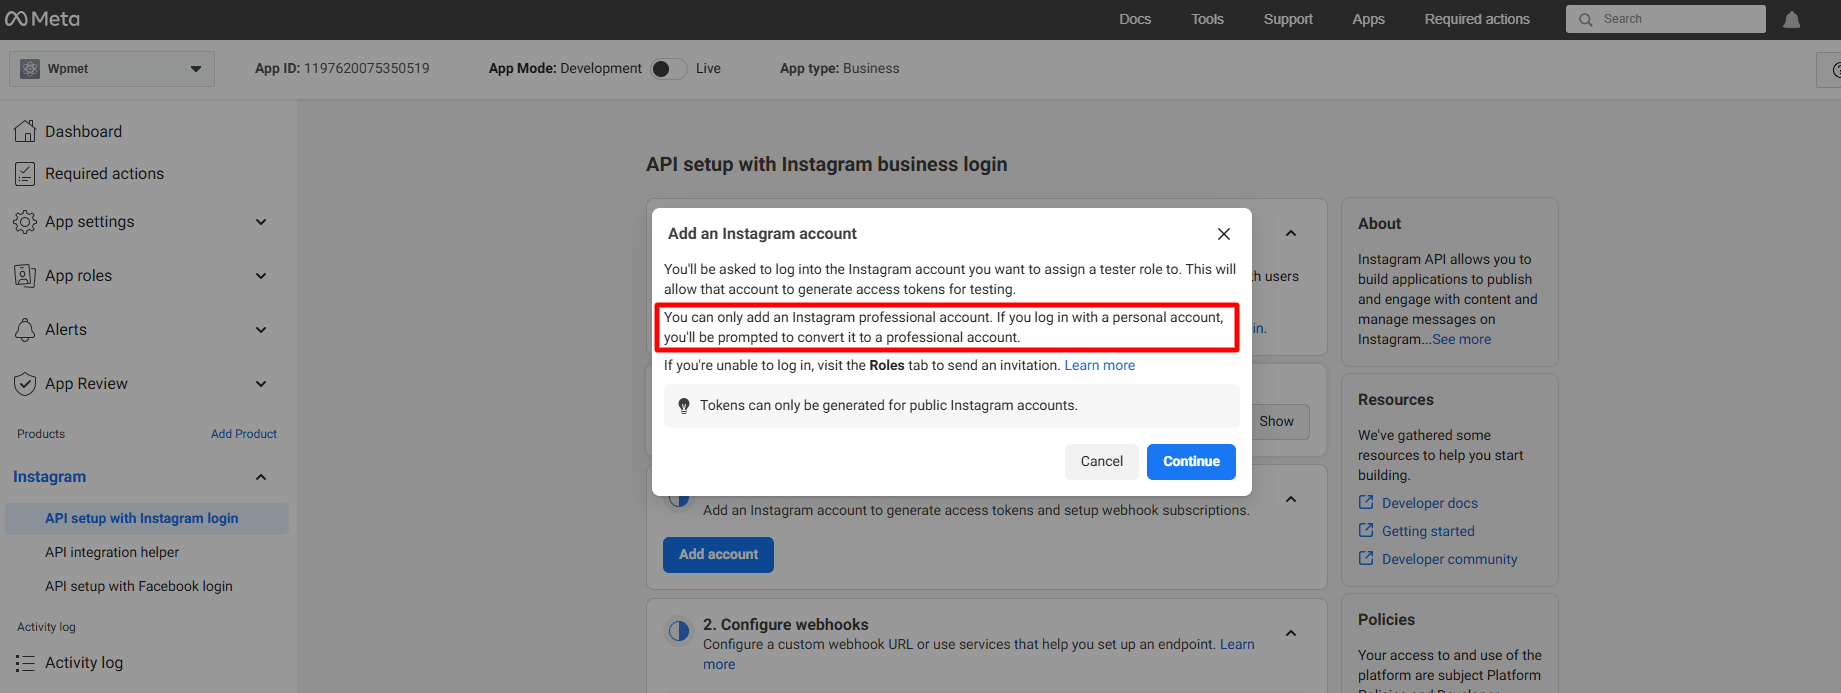
Look for the Instagram app, click the Set up option. Now, a page will load before you, where you can add Instagram account from the Generate Access Token option by clicking the Add account button. However, when you’ll click this button a popup will appear saying only a professional account can be used.
Here’s the professional account requirement popup.
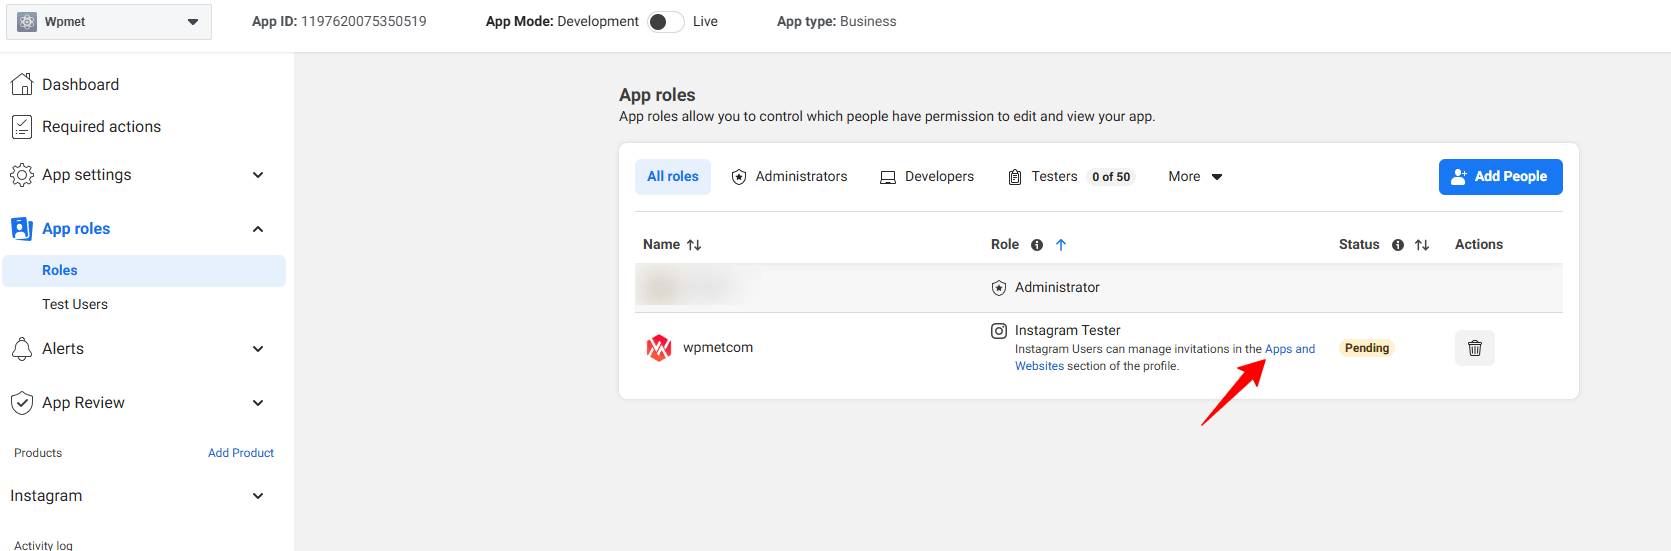
But, here we won’t proceed with this. Rather, we’ll add a regular account. To do this, go under the App Roles suspenso.
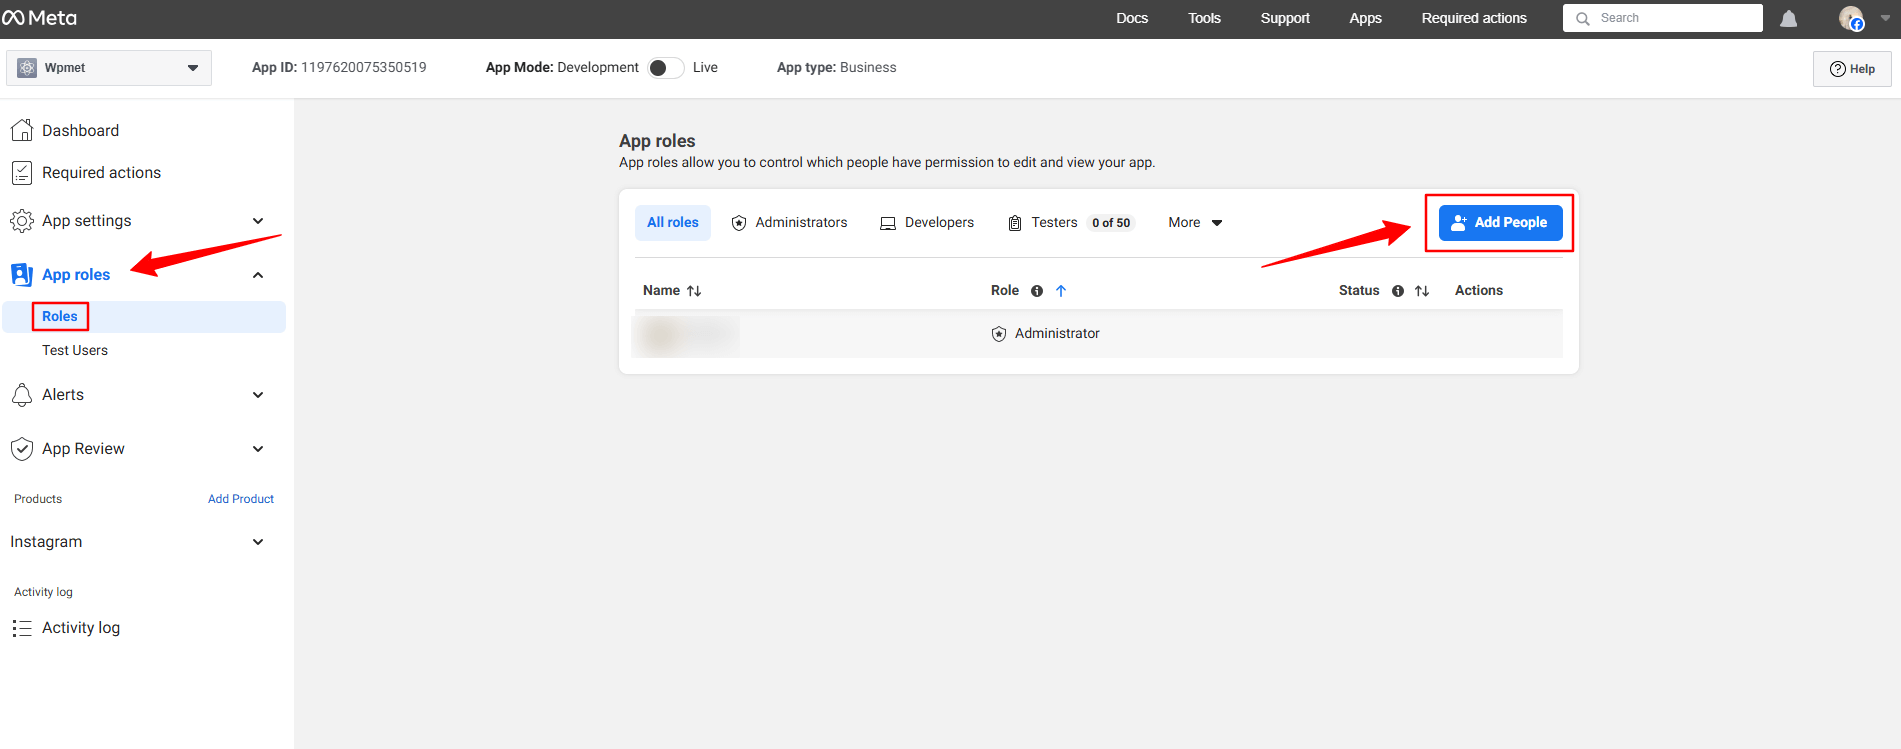
Clique no Roles opção sob o App roles dropdown. In the next page, you’ll see an Add People button. Clicking here will reveal a popup like image below.
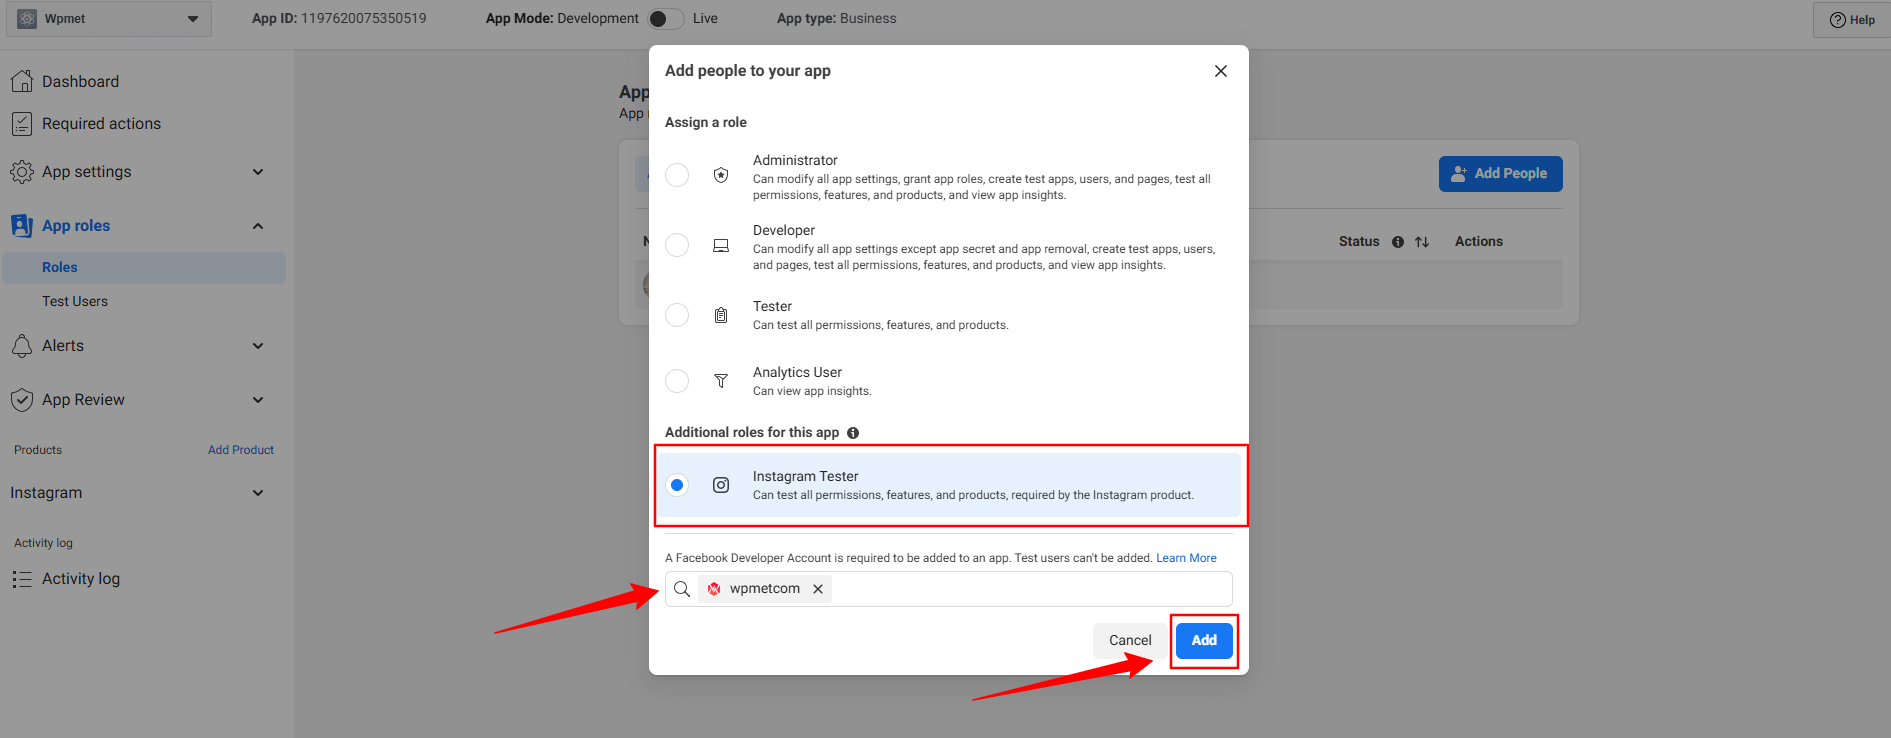
Aqui, selecione o Instagram Tester option. When you’ll check this option, a search box will reveal. Search for the Instagram account that you want to integrate with your Elementor website. For example, in our case, we’ve searched for the Wpmetcom Instagram profile and click it from the search result to add in the box.
Então, acerte o Adicionar button. You will see the pending status with the newly added profile. To resolve that, you need to verify your Instagram account.
Click in the Apps and Websites, marked in the above image. Doing this will open up the Facebook profile in a new tab.
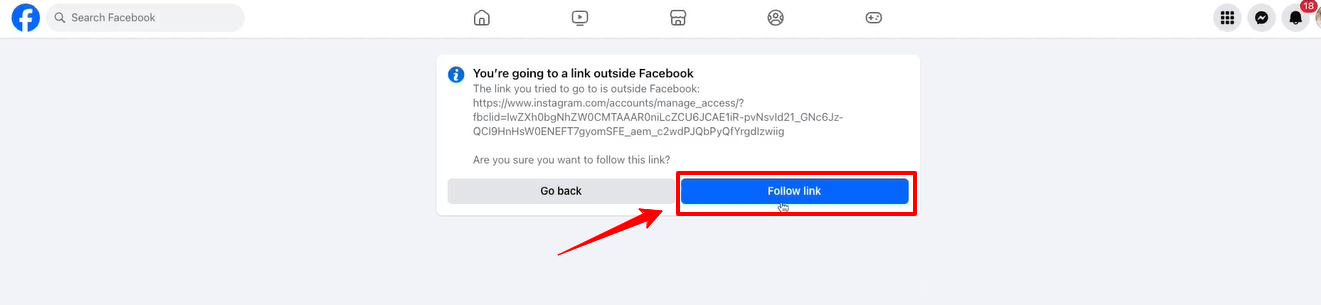
Clique no Follow link option and it will take you to your Instagram profile web page.
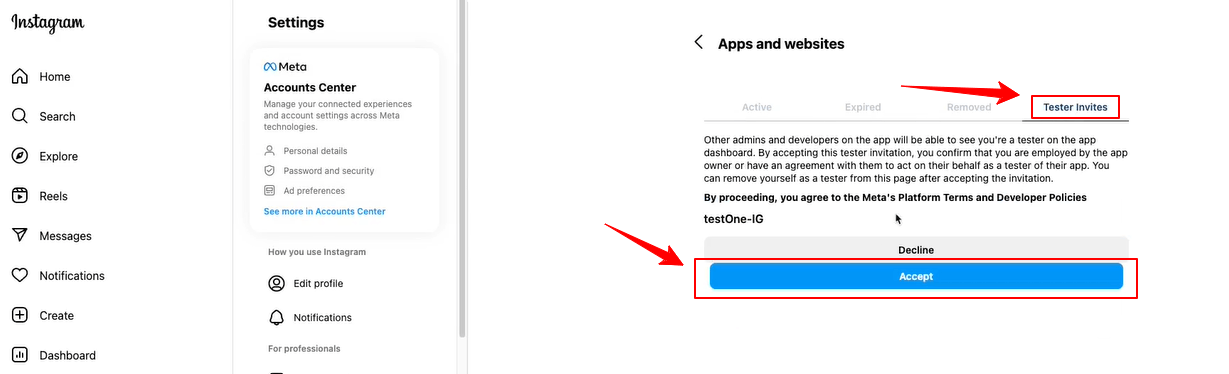
When the Instagram page will load on your screen, navigate to the Tester Invites tab and click the Accept button. Then, return to the Facebook developer dashboard and refresh the page. Now, there will be no pending status anymore with the newly added profile.

Now, you will see the green check mark with the Generate access tokens option. Click the Generate token option next to your instagram account and you’ll see a popup to re-login with your Instagram account.
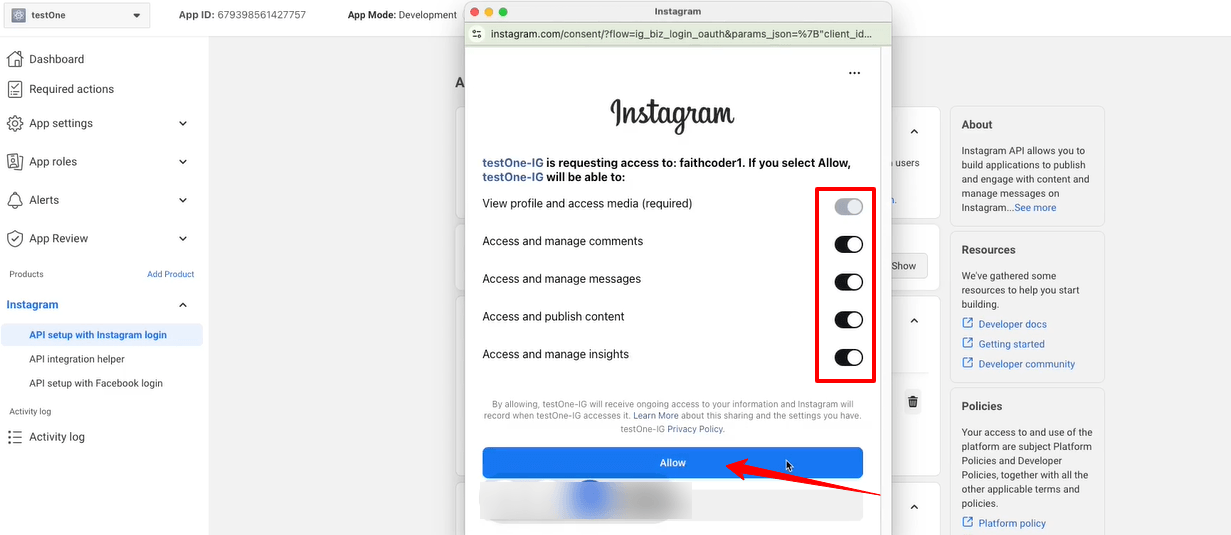
You also need to allow all the access and actions. Toggle all the options to permit like the image above and click the Permitir botão.
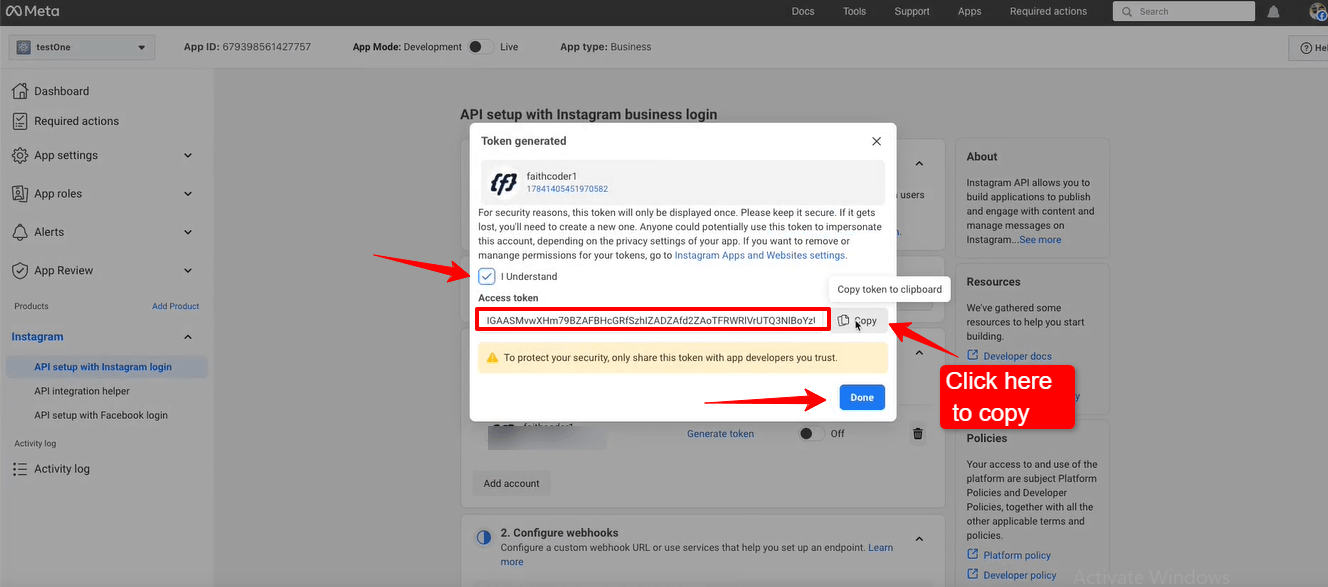
Up next, you’ll see the access token. Check the box with I Understand and select the cópia de button to copy your Instagram access token. You need to paste it within the ElementsKit settings. We’re going to show the process in the next phase.
Acerte o Feito button to clear the popup.
Adding Instagram Access Tokens to ElementsKit #
Você precisará de um ID do usuário e Token de acesso para se conectar ao seu Instagram.
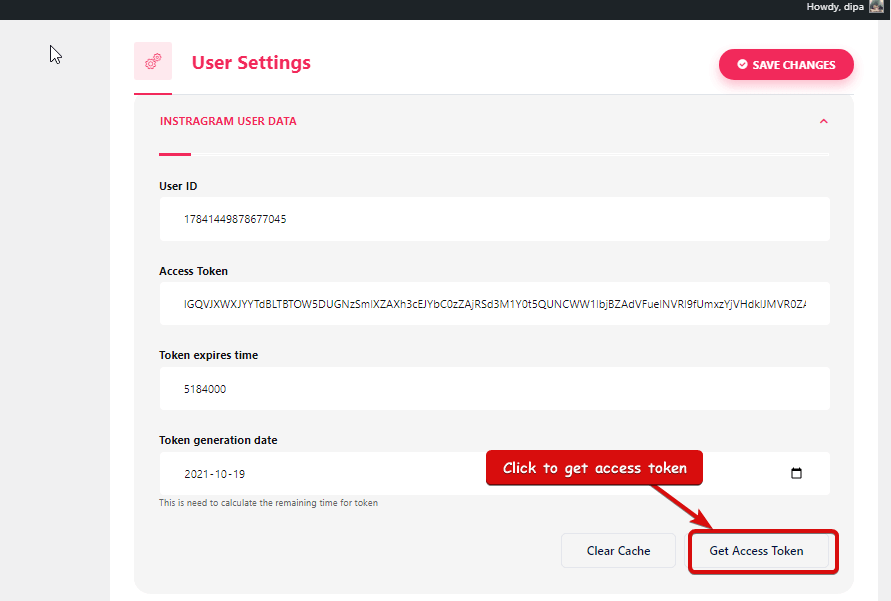
- Etapa => 1: Vá para Kit de elementos=> Dados do usuário=> Clique no Dados do usuário do Instagram para expandir-> Clique em Obtenha token de acesso.
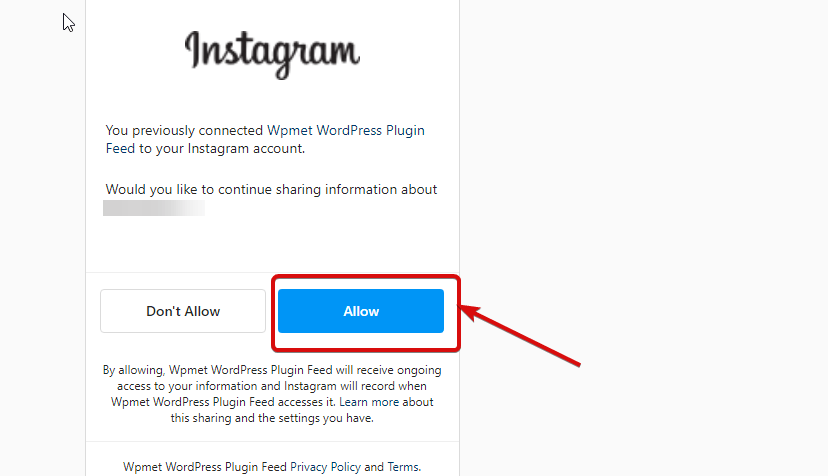
- Etapa => 2: Digite sua conta do Instagram Credenciais e clique em Conecte-se. Ou você pode fazer login com seu Conta do Facebook. Uma vez solicitada a permissão, clique em permitir.
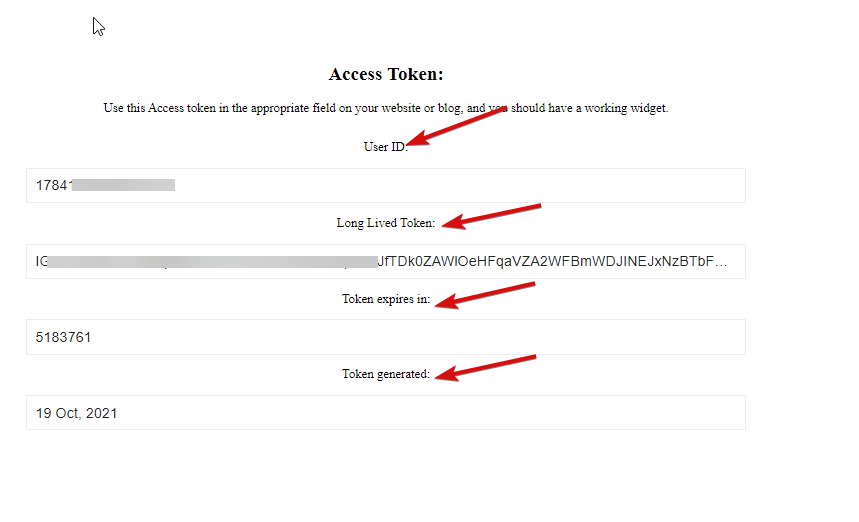
- Etapa=>3: Aqui está o seu Instagram ID do usuário, Token de longa duração, o token expira e o token é gerado. cópia de eles.
- Etapa => 4: Então vá para Dados do usuário do Instagram e colar o ID do usuário, Long Lived Token, o token expira e os valores gerados pelo token.
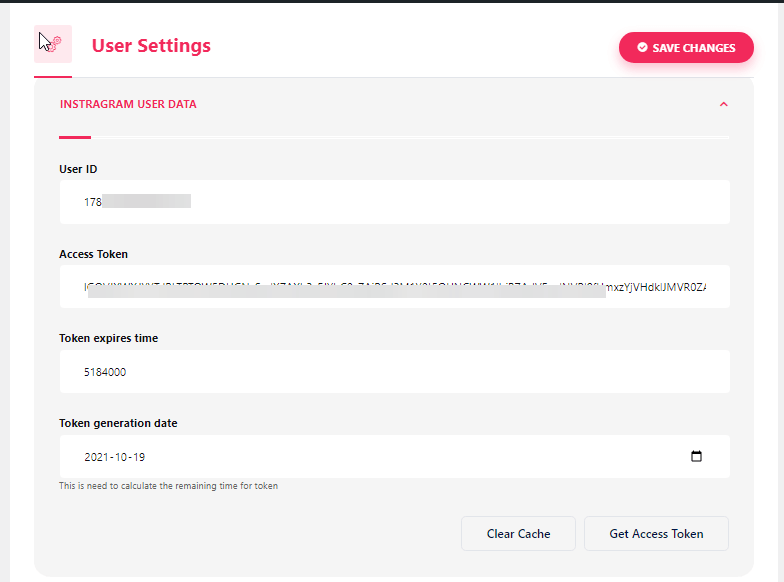
Nota: Você precisa sincronizar os dados antes que o tempo do token expire.
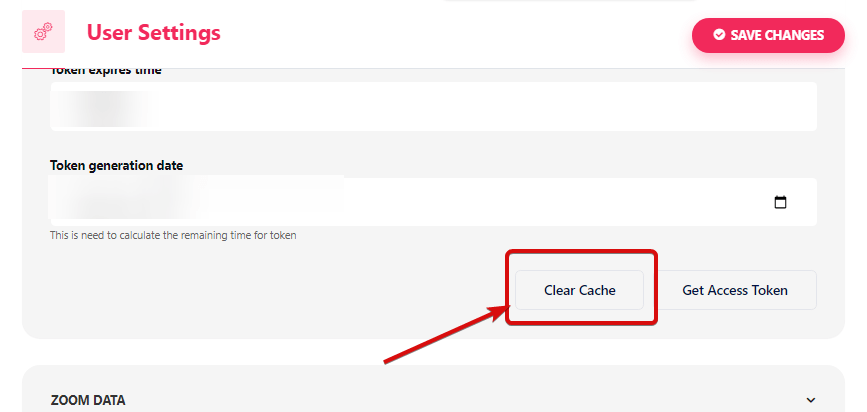
- Se você enfrentar algum problema em relação à sincronização de dados, basta clicar em limpar cache.
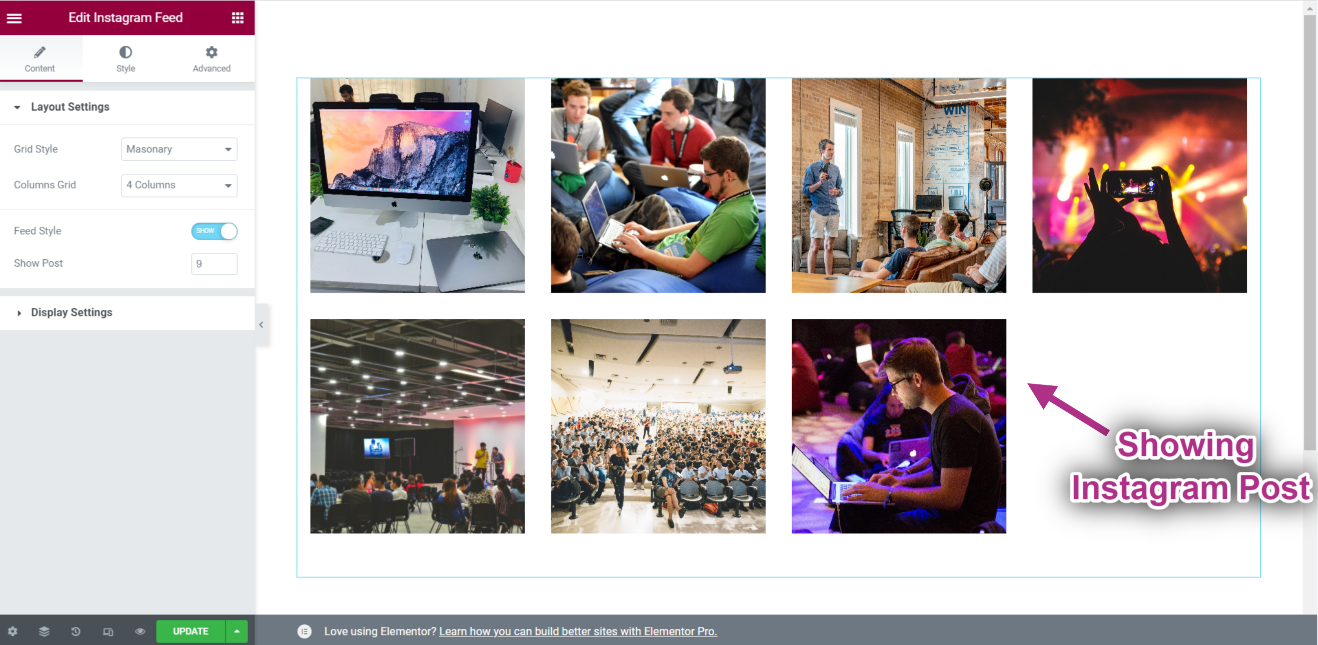
- Etapa => 5: Vá para Elementor=> Pesquisa Feed do Instagram=> Apenas Arraste e solte o campo.
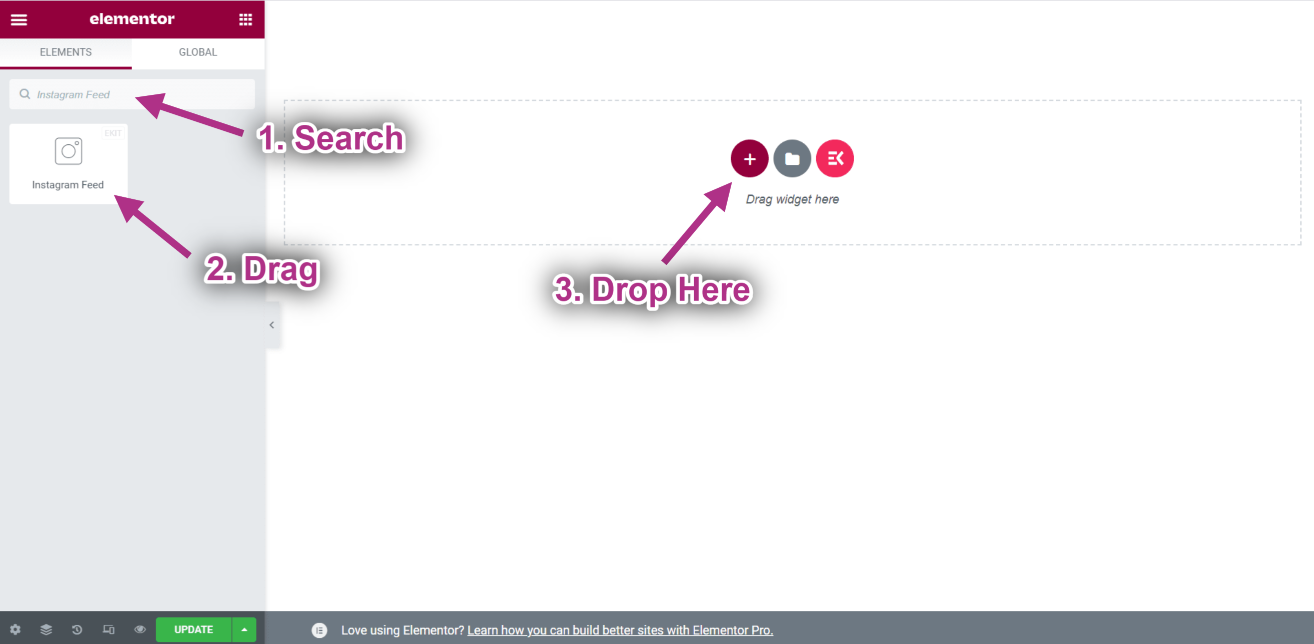
- Agora você pode ver sua postagem do Instagram no widget de feed do Instagram.