


Wishlist Module let customer save products they wish to buy later in their wishlist under their account for future reference. Users can any time add or remove items from the wishlist.
Quick Overview
This guide will let you know in-depth about the process of integrating wishlist on your WooCommerce store. ShopEngine is a WooCommerce page builder that fulfills all the requirement of your eCommerce store. It offers a dedicated Wishlist module which only needs to be enabled and set up for wishlist integration.
Besides ShopEngine, you will need WooCommerce and Elementor free version for this guide.
Tools Used: WooCommerce (free), Elementor (free), ShopEngine (free & pro)
Here are the steps to follow for adding wishlist to your WordPress site:
✅ Turn on Wishlist module.
✅ Wishlist module configuration.
Benefits of adding wishlist option to WooCommerce #
Here are the benefits that wishlist module serves to WooCommerce stores:
- Customers can easily add products to the cart from wishlist and make immediate purchase.
- It cut down the browsing hassle and shopping time.
- WooCommerce wishlist can boost overall sales and revenue.
- It can improve customers’ shopping experience by displaying all wishlisted product in one place.
- This increases recurring customers of your eCommerce store.
- It can reduce cart abandonment rate.
- This creates opportunities for future marketing campaign through account creation or registration.
Let’s check how you can use this module on your site:
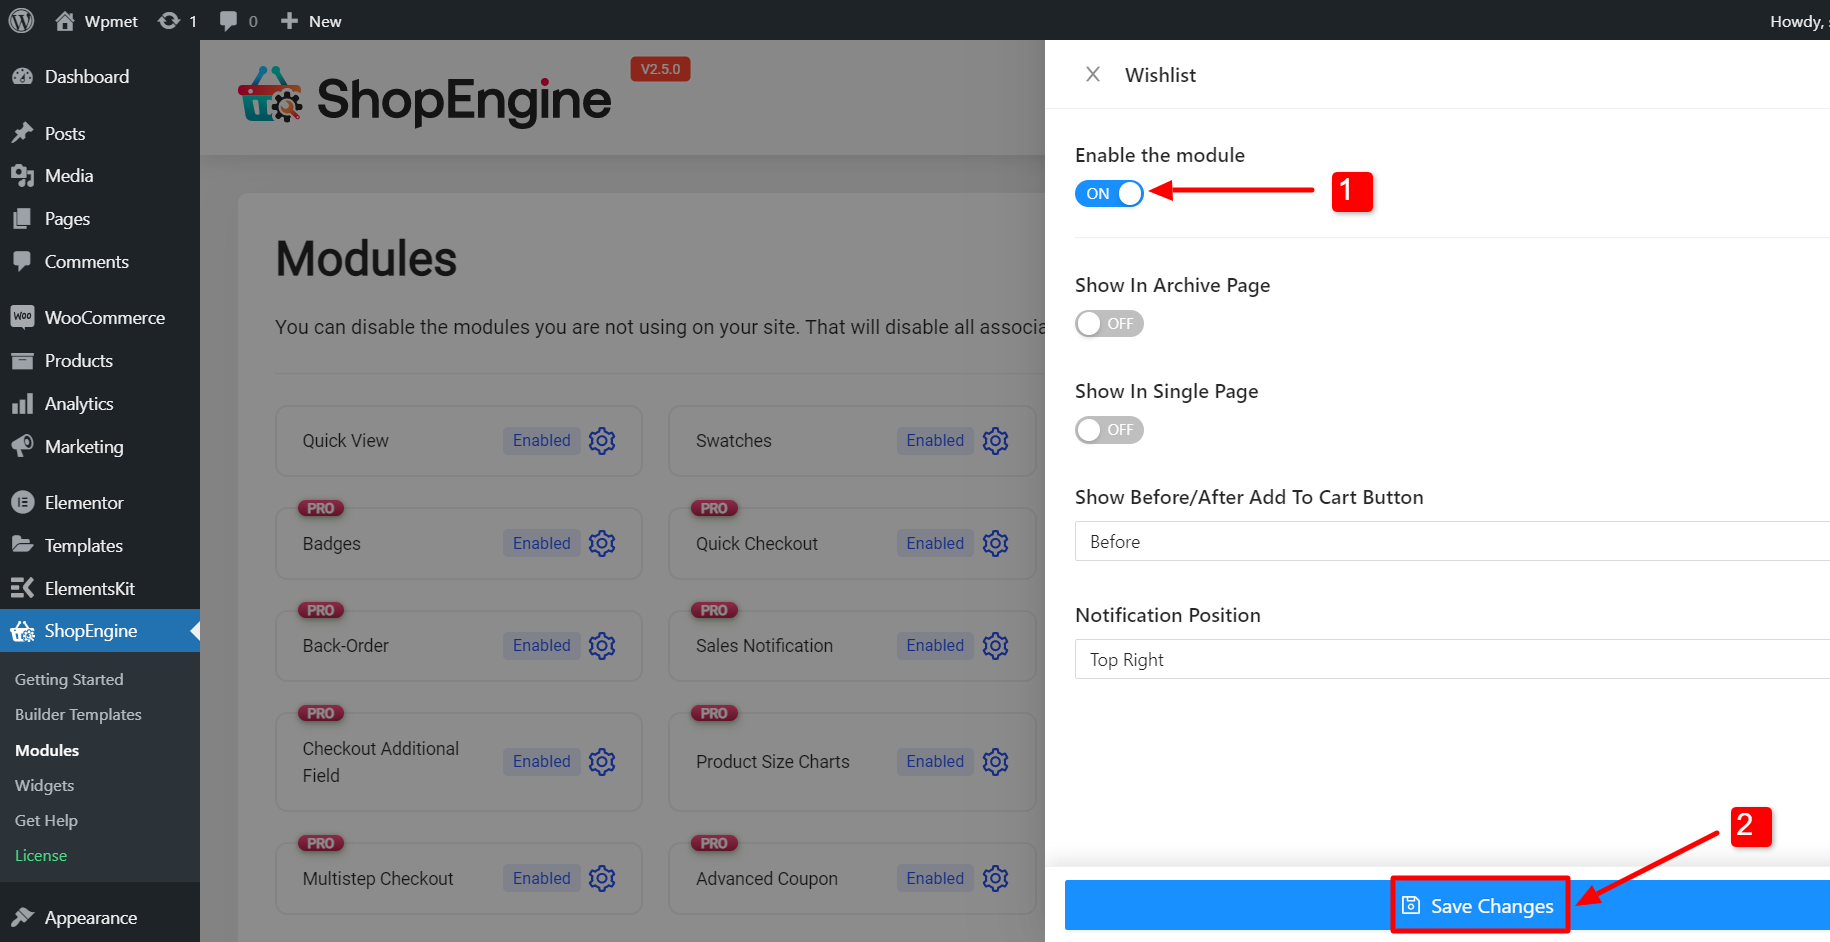
Step 1: Enable the WooCommerce Wishlist Module #
You need to first enable the WordPress Lista życzeń module. To enable the module
- Nawigować do ShopEngine > Moduły.
- Znaleźć Moduł listy życzeń z listy modułów.
- Kliknij na Ikona ustawień.
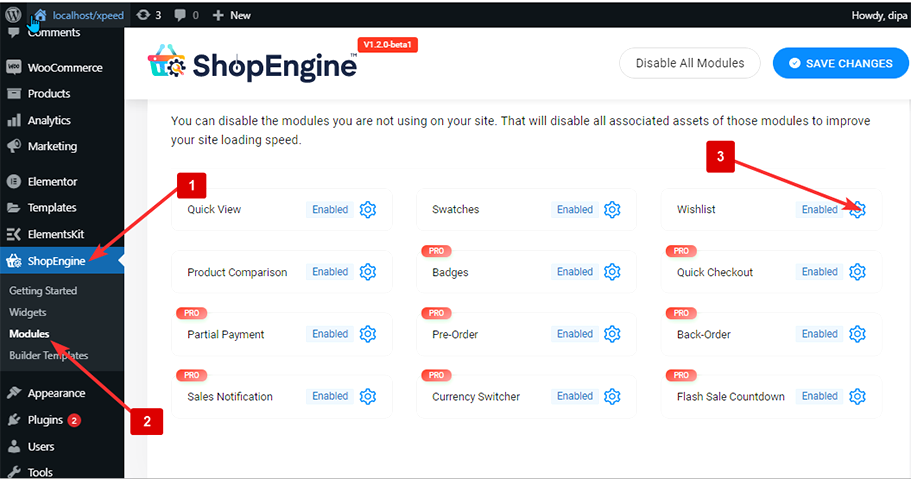
- Włącz Włącz moduł toggle.
- Press the “Save Changes” button.
Notatka: Można także włączyć wszystkie moduły jednocześnie. Sprawdź jak możesz włącz wszystkie moduły na raz.
Krok 2: Skonfiguruj ustawienia modułu listy życzeń #
You can customize the following settings to show wishlist option on certain WooCommerce pages with ShopEngine, an WooCommerce wishlist plugin:
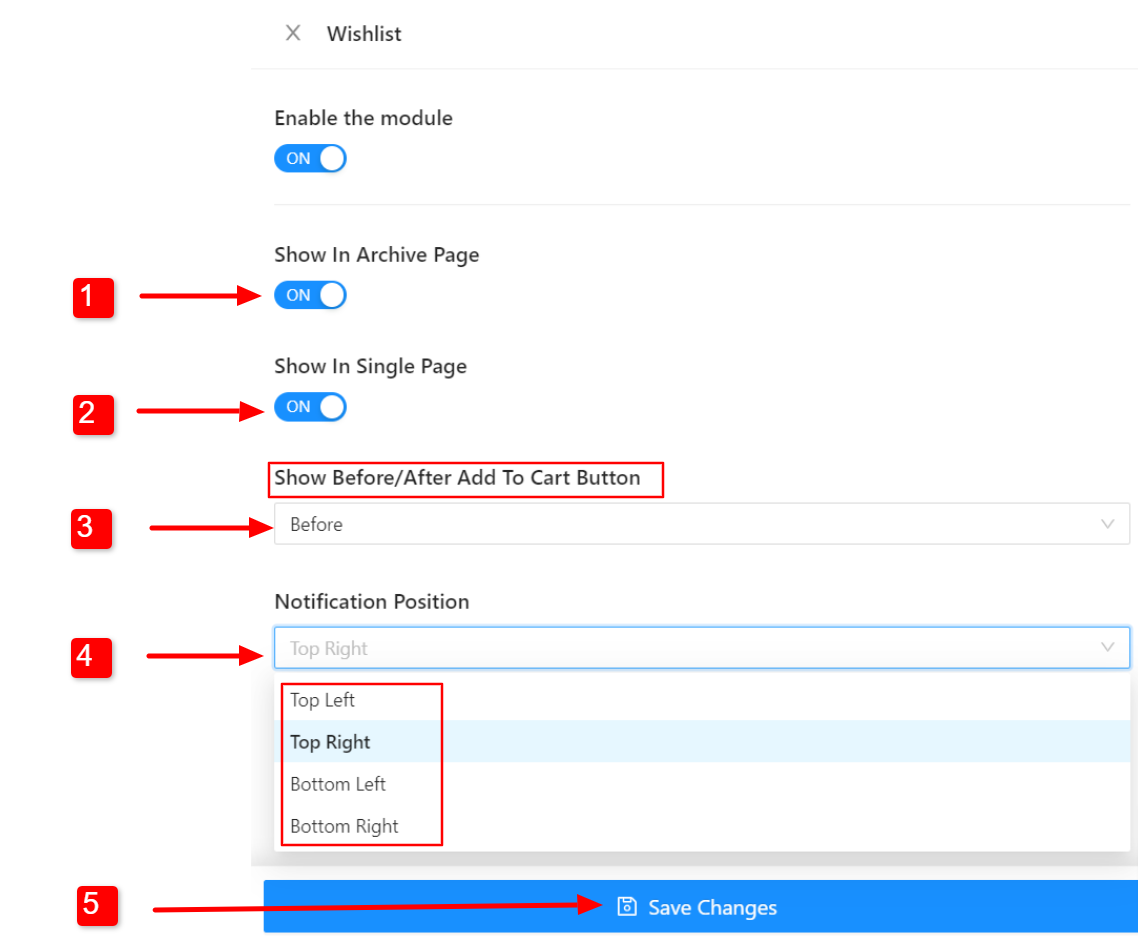
- Pokaż na stronie archiwum: Włącz tę opcję, aby wyświetlić opcję listy życzeń na stronie archiwum.
- Pokaż na jednej stronie: Aby wyświetlić listę życzeń na stronie pojedynczego produktu, włącz tę opcję.
- Pokaż przycisk „Przed/Po dodaniu do koszyka”: Możesz wybrać, czy przycisk listy życzeń ma być wyświetlany przed przyciskiem „Dodaj do koszyka” czy po nim.
- Pozycja powiadomienia: Wybierz pozycję powiadomienia, które pojawi się po dodaniu produktu do listy życzeń.
Kliknij Zapisz zmiany button to update.
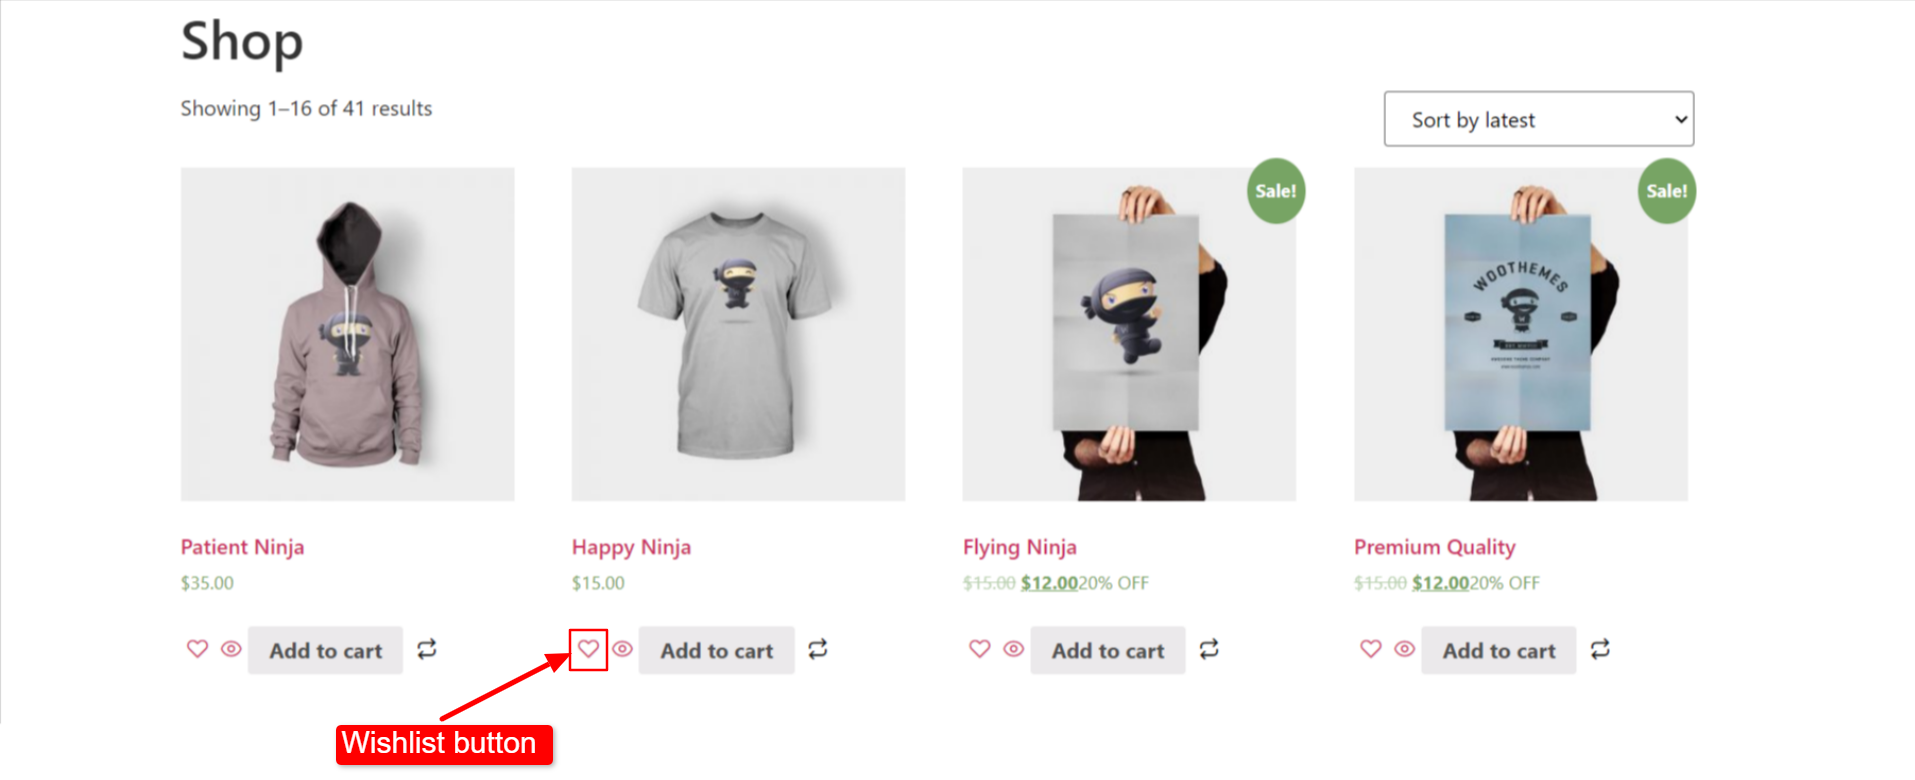
Sprawdź jak to działa od strony front-endu #
Now Wishlist module should work on the front end of the website. To check how it works,
- Otwórz stronę WooCommerce (Strona sklepu, strona pojedynczego produktu, strona archiwum itp.).
- Tam jest Przycisk listy życzeń z każdym produktem.
- Kliknij przycisk, aby dodać produkty do listy życzeń.
- Po dodaniu produktu do listy życzeń pojawi się okno dialogowe potwierdzające dodanie produktu do listy.
- You can also remove an already added product from the wishlist by clicking the same button.
- Po usunięciu produktu z listy życzeń pojawi się okno dialogowe potwierdzające usunięcie produktu.

W jaki sposób klienci mogą przeglądać swoją listę życzeń? #
Przyjrzyjmy się tej funkcji WooCommerce store:
- Klienci trzeba być zalogowanym aby dodać produkty do listy życzeń. Jeśli ktoś nie jest zalogowany, otrzyma wiadomość z prośbą o zalogowanie.
- Przejdź do: Moje konto > Lista życzeń
- Tutaj można sprawdzić zapisaną listę życzeń
- To remove any items from the wishlist you need to click on the cross button.


