ShopEngine Pro jest wyposażony w moduł awatara WooCommerce, w którym możesz skonfigurować sposób wyświetlania awatara użytkownika na panelu konta.
Quick Overview
This documentation will guide you to the process of adding Avatar with ShopEngine. This WooCommerce Avatar plugin includes a dedicated module to set up avatar to your WP site.
For this Documentation, you will need the following tools to add Avatar:
Tools Used: Elementora (free), WooCommerce (free), Kup silnik (free & pro)
After download and activation of the above plugins, navigate Modules under ShopEngine and:
✅ Activate Avatar module
✅ Configure Avatar module
Włącz moduł awatara WooCommerce #
To enable the ShopEngine WooCommerce Avatar module,
- Zaloguj się do swojej witryny WordPress.
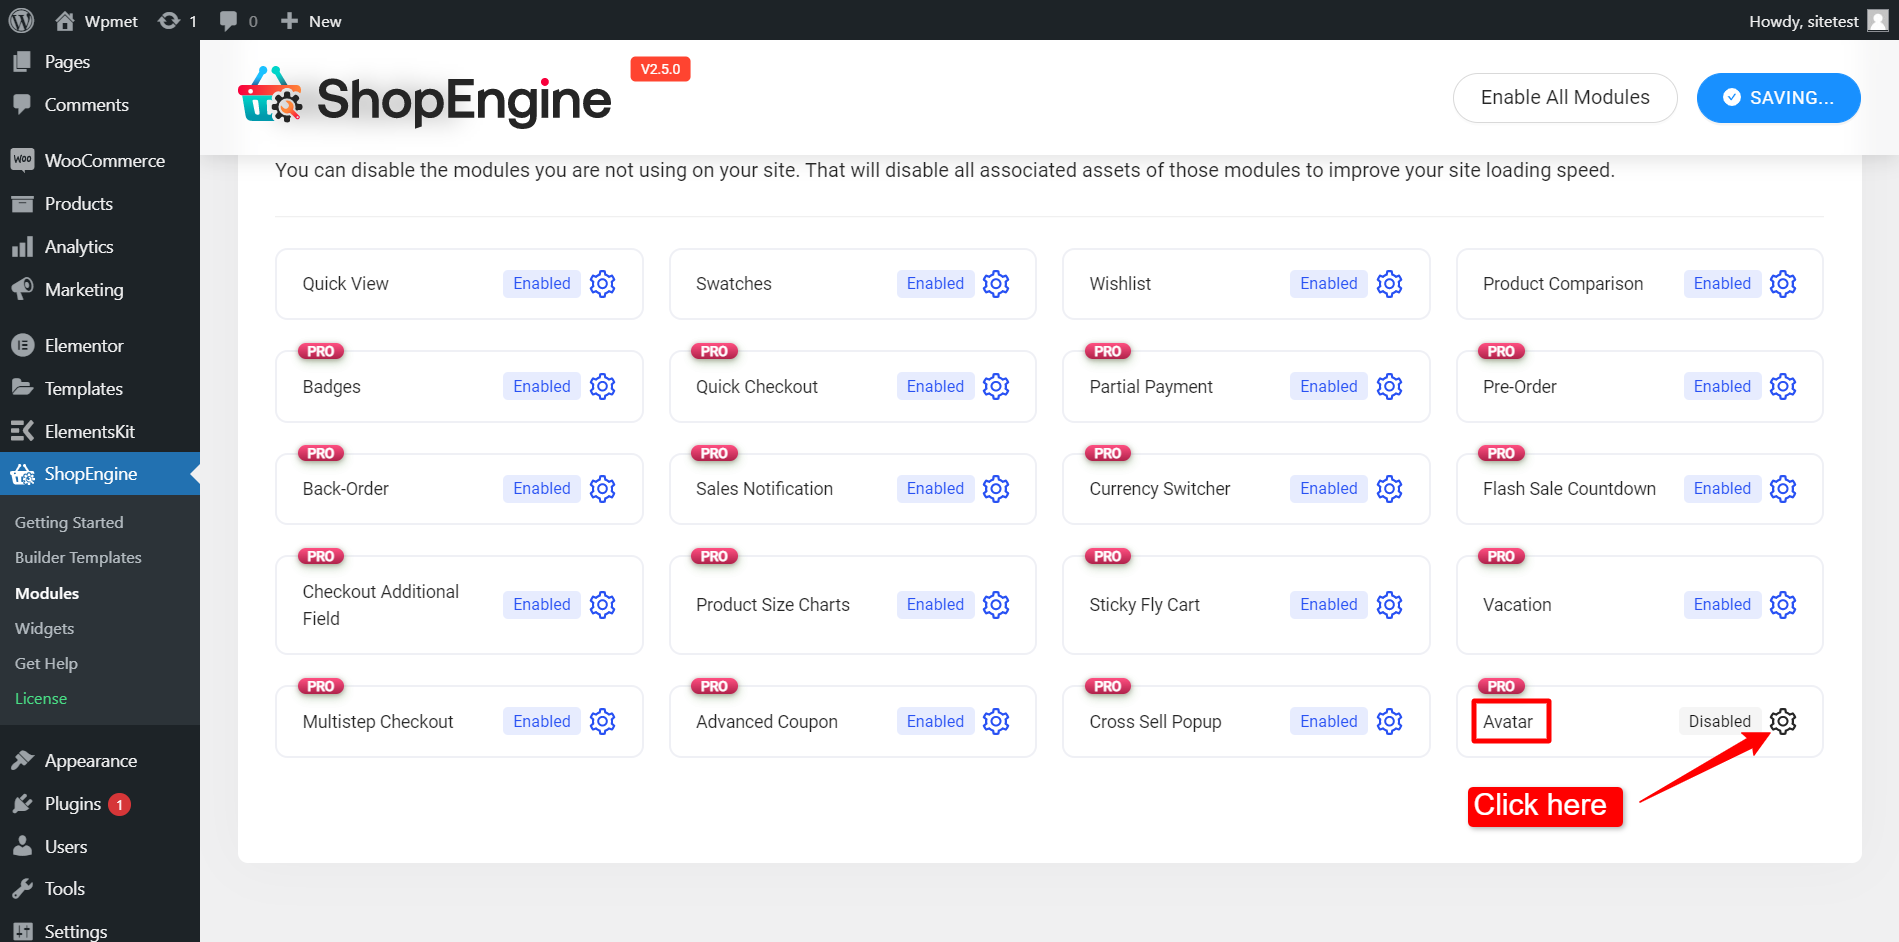
- Nawigować do ShopEngine > Moduły z panelu WordPress.
- Znaleźć Awatara moduł z listy.
- Kliknij ⚙️ (ikona ustawień).

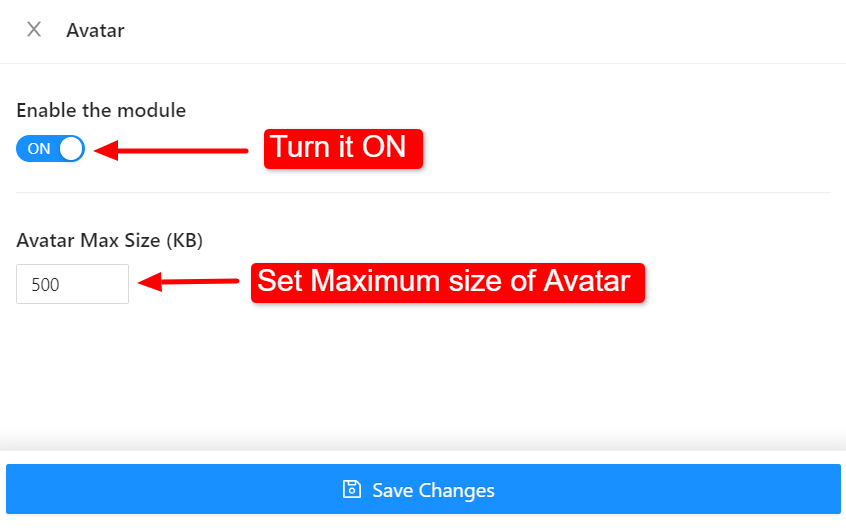
After that, an off-canvas window will show up for WooCommerce Avatar template settings. In the Template Settings,
- Pierwszy, Włącz moduł.
- Ustaw Maksymalny rozmiar awatara (KB).
- Kliknij na Zapisz zmiany przycisk u dołu ekranu.

Teraz będziesz mógł dodać awatar użytkownika na stronie Panelu Konta w swojej witrynie. Przeczytaj dokumentację dot Widżet awatara aby dowiedzieć się jak korzystać z widgetu i dodawać awatar użytkownika na stronach internetowych.


