
Every company tries its best to create the best products for consumers. But, most of them tend to overlook the fact that the users WILL have lots of questions.
It’s your duty to answer those queries via an FAQ aka Frequently Asked Questions page. If you don’t include a structured FAQ page, you are already missing out a lot of benefits that it can bring to you.
An effective FAQ page will guide your potential customers to choose the right product as well as improve your sales or generate more leads.
In this article, I’m going to demonstrate the easiest method to create an faq page using Elementor. Before that, let’s find out the importance of using an FAQ page.
Why Should You Include an FAQ Section On Your Webpage?
Before adding the FAQ section on your webpage, you must know the core reasons behind including it on your website. Here I’ve listed a few prime importance of using the FAQ section. Have a look.
1. Increases the conversion rate
While making a purchasing decision, a lot of questions arise in the customer’s mind. Especially if you are selling multiple products or services, you must guide the customers to choose their desired product.
It not only helps the customer to choose the right product but also increases your overall conversion rate.
2. Saves time
Every customer has concerns while buying something online. It’s completely natural. But, the fact is most of those inquiries are pretty similar.
So, if you don’t want to waste your time by answering a similar question again and again, it’s high time to add an FAQ section on your service or product page. You can also include a link of contact form on there to ensure effortless communication.
3. Improves user experience
No matter how you design a website, the customer will definitely make up some common questions about your product or service. And, they have to browse page after page or post after post to find answers.
But, surfing the whole website to get an answer hampers the user experience. On the contrary, if you add a well-organized FAQ page and the website loads faster, users will easily find their answers there. It’s clearly a good example of better user experience.
4. Internal linking
While answering a question for a specific product or service, you can link that landing page with the answers. It’s a great opportunity to increase the internal linking on your website.
Besides, the answers to your questions also rank better on search engines. So, it improves the ranking and drives the conversion.
5. Boosts SEO
Adding relevant keywords or keyphrases on a website significantly boosts SEO performance. You may include the long-tail keywords, FAQ structured schema, images, graphs, or detailed answers. on the FAQ page to improve your ranking faster on search engines.
Feeling convinced? Then let’s move on from whys to hows.
How to Create an Elementor FAQ Section?
The sole purpose of FAQ pages is to provide the answers to basic questions about your product along with ranking higher on search engines. And you can easily do it by using FAQ markup data.
Before heading to the FAQ data creation process, let’s have a look at the required plugins for this process.
Prerequisites
- A WordPress-powered website
- Elementor page builder
- ElementsKit Elementor addon
Let’s proceed to the step by step procedure of creating an FAQ page using Elementor.
Step #1: Installing the Required Plugins
You are already informed that you will need Elementor and ElementsKit plugin to create an FAQ page. Now it’s time to install these plugins. You have to login to your WordPress dashboard first for installing the required plugins. Then proceed to Plugins > Add New button.
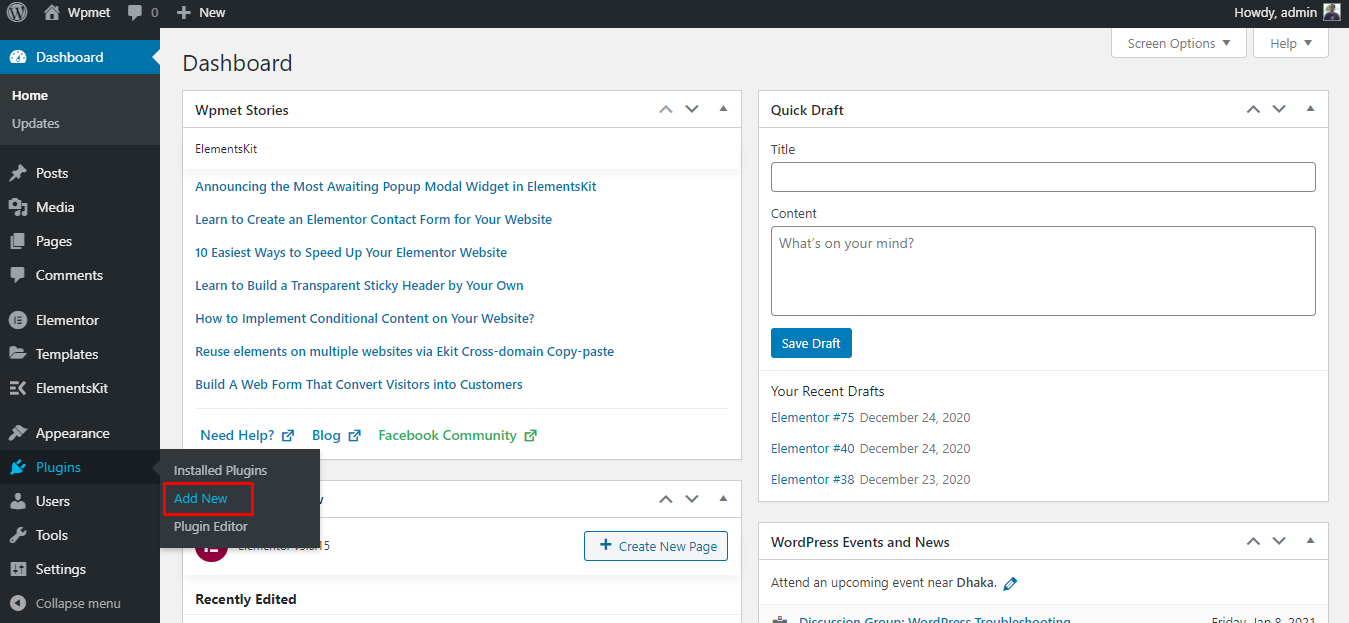
Installing a new button
Now search for Elementor and click the Install Now button. After the installation, click Activate and you are done. It may take a few seconds for installing or activating the plugin. Follow the same procedure for installing the ElementsKit too.
Step #2: Create a New Page with Elementor
To create a new page, click on the Pages > Add New. It will create a blank page with the Gutenberg editor. Now, click on the Edit with Elementor button to open this page with Elementor page builder.
Opening a new page with Elementor
Step #3: Adding FAQ Section
Adding the FAQ question has become easier than ever by using the ElementsKit FAQ Widget. To use this widget, you have to search for FAQ on the Elementor panel search box. And, then drag and drop this widget to wherever you want to add your FAQ’s.
Here’s the visual presentation of this entire process.
Adding FAQ widget
N.B: The ElementsKit FAQ widget will automatically add three demo questions and answers on the field. Check the next step to find out the process of editing questions and answers for a custom Elementor FAQ section.
Step #4: Modifying the Questions and Answers
To modify the questions and answers, click on the question title under Tab content. It will elaborate on the Title and Content of a section. You have to write the question on the Title input box and the answer on the Content input box.
Simply click on the questions and edit both the questions and answers on the Elementor panel. You can also add a new set of questions and answers by using the ‘ADD ITEM’ button.
Modifying the Questions and Answers
Every question contains two buttons for duplicating and deleting the question. The first icon duplicates the question and the cross icon will delete the question.
Step #5: Updating the Style
The ElementsKit FAQ widget allows the user to add plenty of styling to the questions and answers. The available styling options are –
- Title color
- Typography
- Background color
- Border type
- Title margin
- Title padding and
- Title border radius
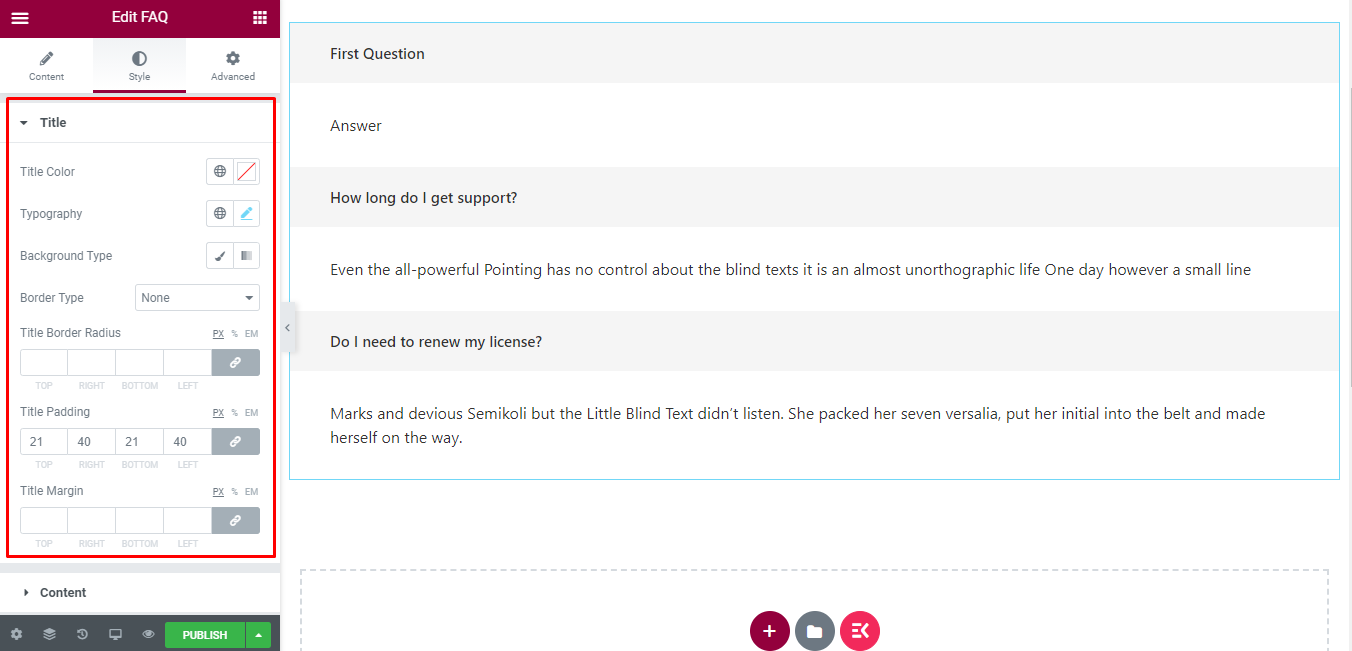
FAQ Styles
These customization features are available for both the Title and Content sections.
Step #6: Previewing the FAQ Section
After updating the required questions and answers, it’s time to preview the page. To preview the question, click on the eye icon on the bottom bar of the Elementor panel.
Previewing the FAQ section
That’s all about creating an Elementor FAQ page using the ElementsKit Elementor addon.
Testing the FAQ Section
Google supports tons of rich results type on their search result page. You can find the full collection of supported rich results on the Google Search Gallery. We will use the structured data and rich result checker to validate our FAQ page. Let’s start.
Checking for the Structured Data
We will use the Structured Data Testing Tool to validate whether the FAQ data is valid or not. This testing tool allows the user to test the section by inputting both the URL and code snippet.
For a published web page, you can validate the schema by using your live web URL. Otherwise, You can also run the test by inputting the code manually on the code snippet section. Just copy-paste your code on the code snippet section and click the ‘Run Test’ button.
Then, it will start validating your inputted data and show the result within a few seconds!. Have a look at the detailed process.
Checking structured data
Checking for Rich Results
After publishing the FAQ page, it’s time to check the rich result. You can check either the live URL or input the code directly on the Google rich result testing page. This result will be available for both Googlebot smartphone and Googlebot desktop version.
When the checking is done, you will get a green eligible notice which says “Page is eligible for rich results”. On the contrary, non-eligible markups will show a red result saying “Not all markup is eligible for rich results”.
If you use the ElementsKit FAQ widget to build your FAQ section, you will definitely get the green notice from Google! Here’s the visual presentation of the whole checking process.
Checking the rich results
That’s all! We are done with the creation along with the checking process.
Final Words
By now, you have enough knowledge about the importance of FAQ schema markup and the process of creating an FAQ page. Now you should start creating your own with valid schema markup. Start with the best Elementor addon and do it without any coding.
See you next time!
Leave a Reply