


Showing a pie chart can be handy to present different types of data in a web page. But if you are not a coder or have enough editing skill for CSS, it could be challenging.
Not with ElementsKit, by the way!
When you have ElementsKit installed on your website, you can easily add a pie chart to a web page just by dragging and dropping.
In this blog post, you will learn how to create pie charts in WordPress in a few simple steps.
What is a pie chart?
When data is presented graphically with different sections in a circle is known as a pie chart. The data, and the presentation style may vary, but the data will be in a graphical circle. Sometimes you can customize the data for the circle and come up with something unique.
How to create a pie chart in WordPress?
Create a Pie chart right inside your WordPress dashboard using a few simple steps. Follow the guideline I have shared here.
Step 1: Install the plugins
Here our goal is creating a Pie chart in WordPress without writing any code. So, we will be using the most popular plugins Elementor addon ElementsKit.
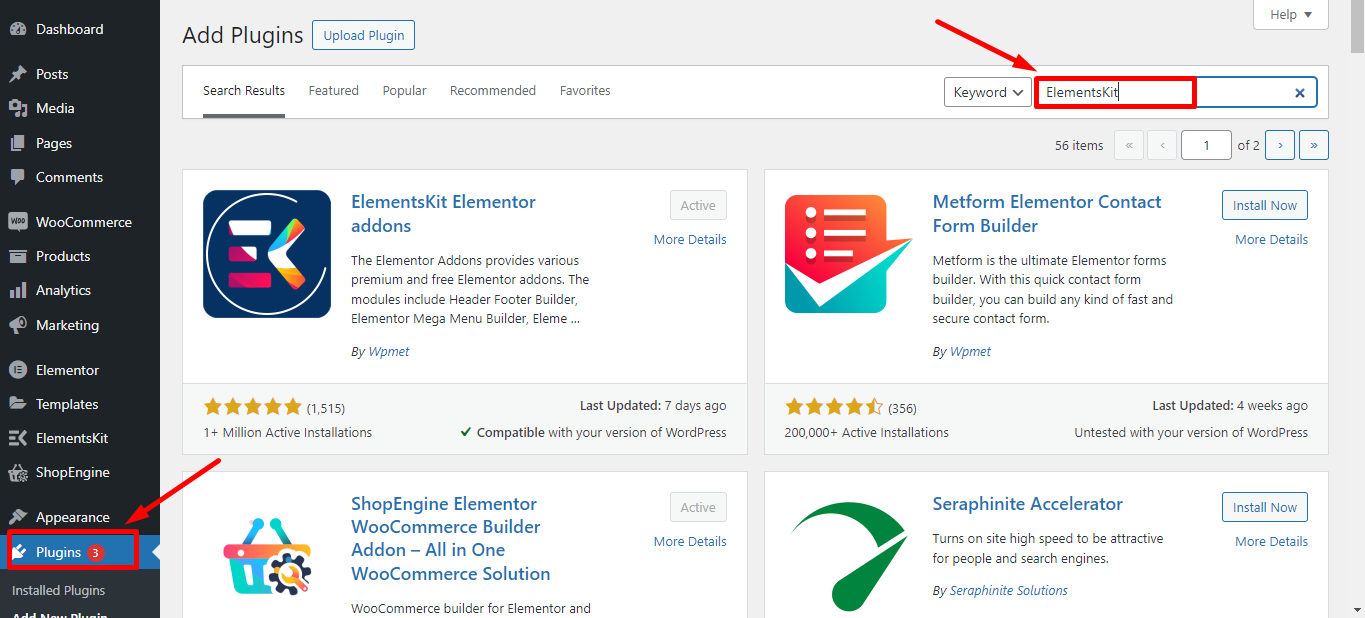
For this, go to your WordPress dashboard > Plugins > Add new. Now on the top search bar, search for Elementor. Once you find it, install and activate.
Similarly, install and activate ElementsKit.
Step 2: Choose the plugin settings
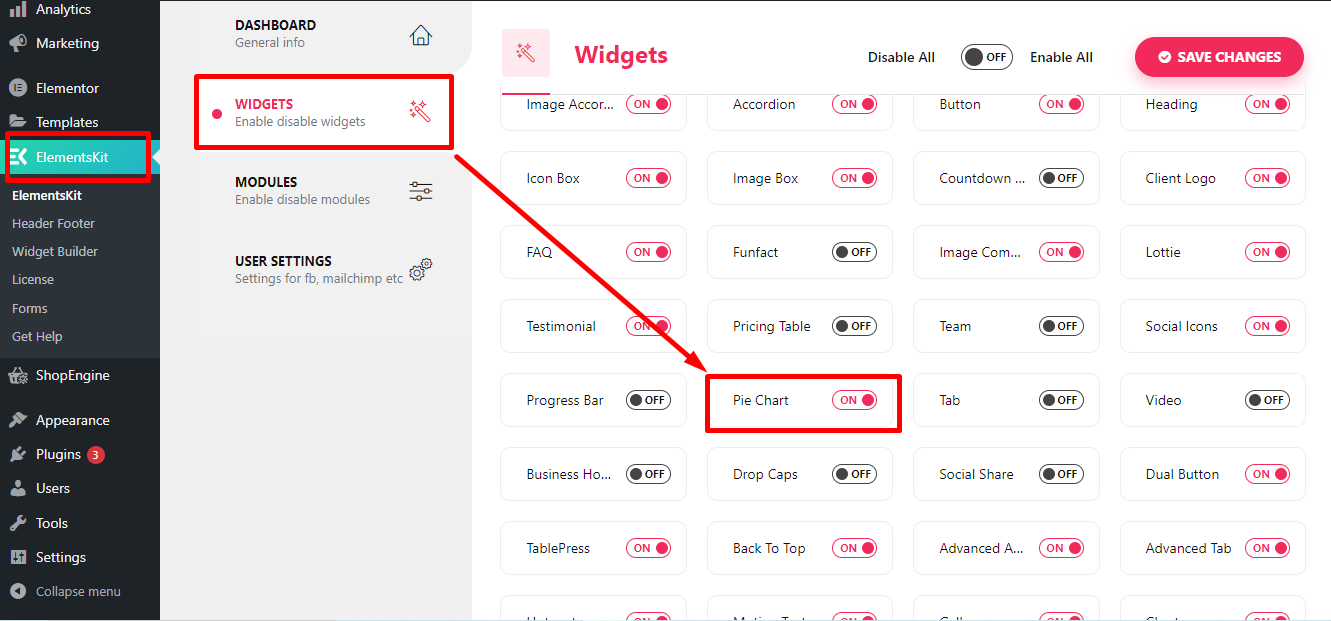
You need to set some settings in the ElementsKit plugin. For this, go to your WordPress dashboard and hover to ElementsKit. Now choose ‘Widgets’ as you will create the pie chart with Pie chart widget.
From the list of widget, turn on the ‘Pie Chart’ widget. However, I would recommend turning on all the widgets to get the best experience of building web pages.
Step 3: Create a new page
Now you are all set to create a chart on a web page. Create a page where you want to show the chart with your custom data. Or, you can select one of the existing pages.
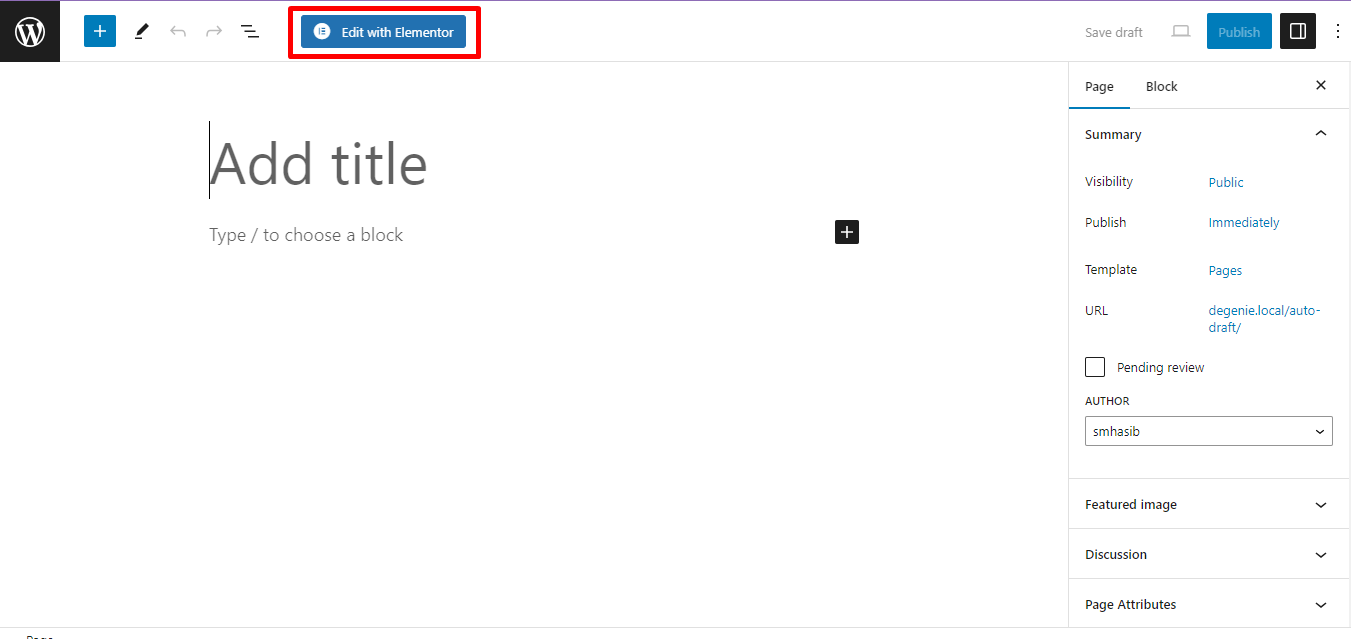
Whichever page you select for showing the Pie graph, choose ‘Edit with Elementor’ from the top right.
It will redirect you to the editor page where you can use all the features of ElementsKit.
Step 4: Add Pie Chart widget
On the left side panel, search for Pie Chart widget and drag and drop it to the page.
If you want, you can create a particular type of section before dragging and dropping the widget on the page.
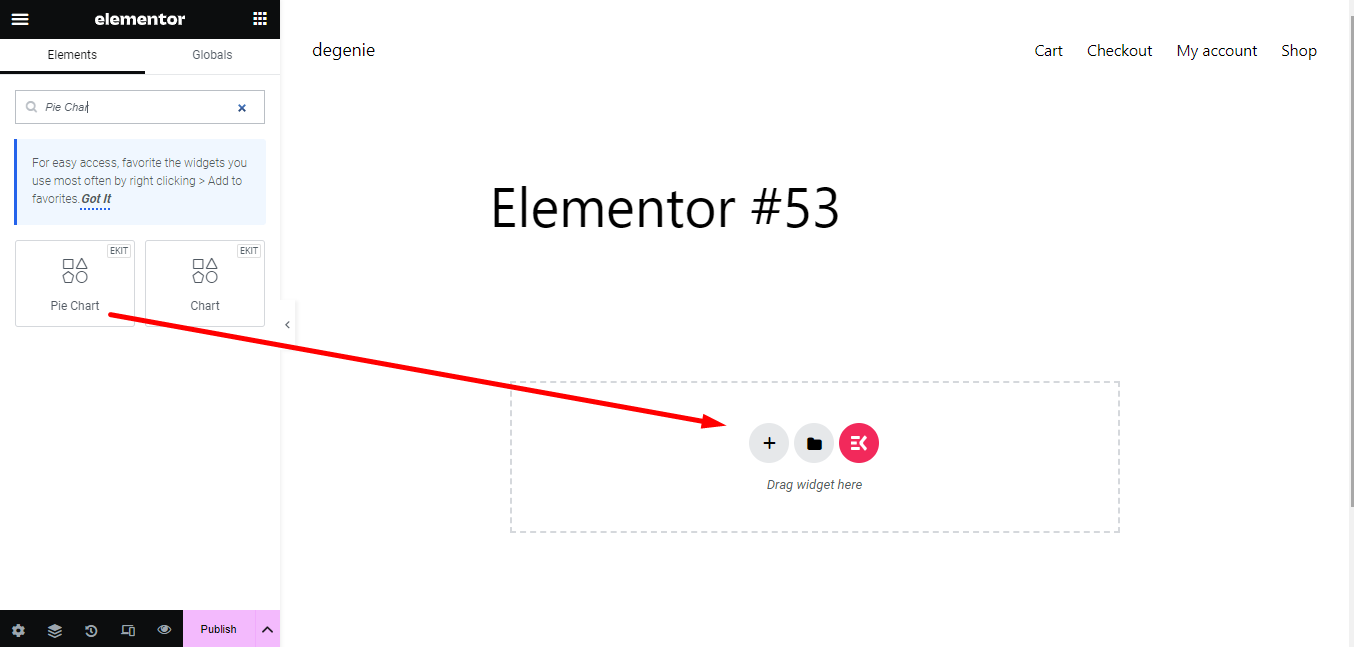
To add a section, click on the plus icon and add the section.
Step 5: Customize the pie chart
By default, there will be some pre-settings in the Pie Chart. You can customize these settings with a few clicks.
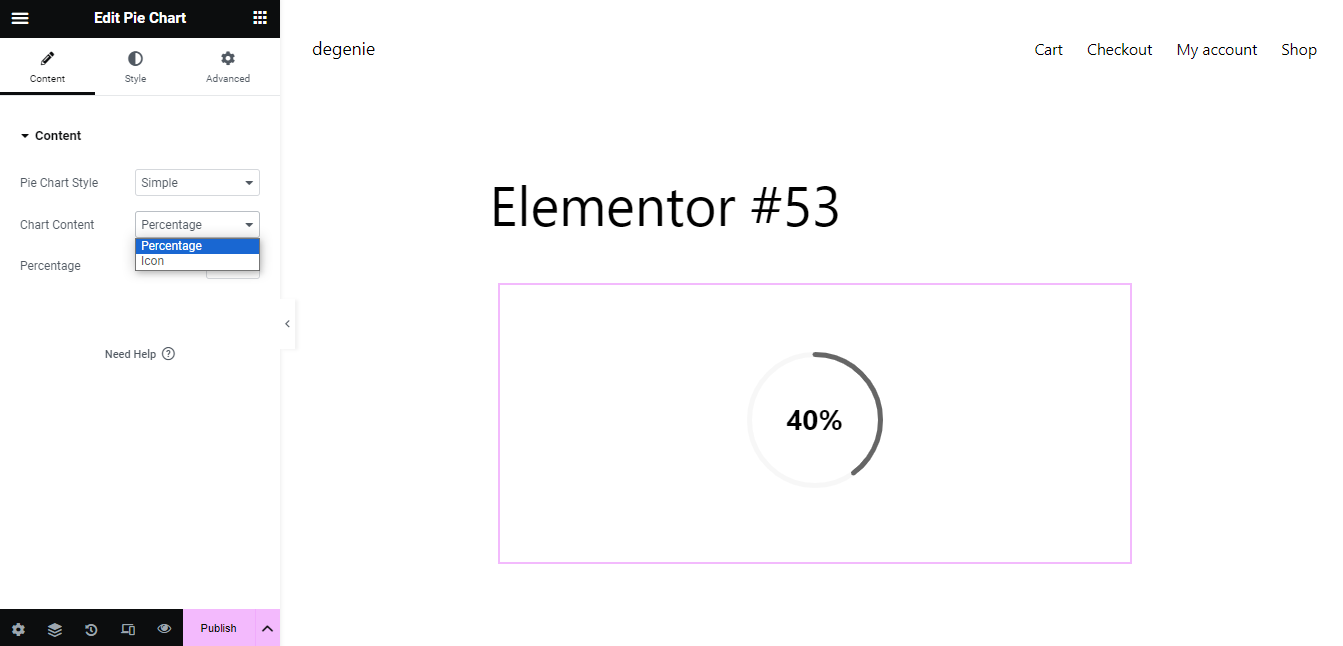
On the content tab, you can change the Pie Chart Style, Chart Content, and the Percentage for the chart.
Pie Chart Style: Here you can choose simple or With Content.
Chart Content: Under this section, you can use percentage or an icon for the chart. If you choose an icon, it will show multiple options to customize it. Upload a custom icon to show it on the chart.
Percentage: Here you can select and set the percentage for the chart.
Next, go to the style tab to do some styling to the chart.
Pie Chart Size: Adjust the Pie chart size if you want. You can write down the size or drag the bar to increase or decrease the size.
Border Size: Set the border size here with the adjustment bar.
Color Type: Choose a custom color for the chart as you want.
Bar Color: Add the bar color that fits properly to the page’s design.
Bar Background Color: Add a background color to the Pie chart so it looks better.
Icon Color: If you have added an icon for the chart, here you can choose a custom color for it.
If you want more customization, go to the advanced settings and do the necessary changes to make the chart user-friendly.
Step 6: Customize the page outlook
You can customize the page outlook as well with Elementor. For this, on the top of the section, there is a dotted button. Click on it and it will redirect you to the layout tab.
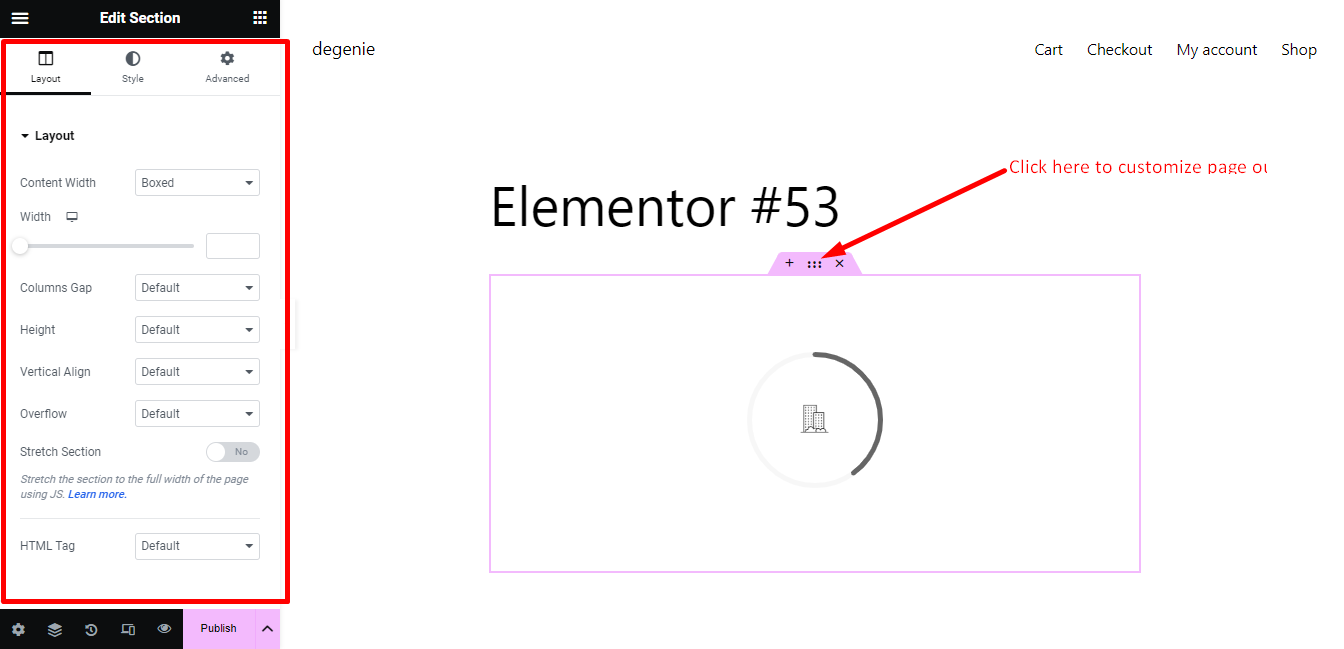
You will get all the options to customize the page’s layout.
Step 7: Preview and publish
Finally, if you have done everything properly, check the preview of the Pie chart. If it looks perfect, hit the publish button.
Some additional resources you would like to read:
How to Create a Digital Marketing Agency Website [No-Code Style]
How to Create a Cleaning Business Website in WordPress
How to Create a Career Page on your WordPress Website
How to Create Chart in WordPress for Data Visualization
Why should you use pie chart on your website?
Pie charts make information on a website easy to understand. They use colors and shapes to show percentages and comparisons, making it simple for visitors to grasp complex data. By using pie charts, you can make your website more interesting and help people understand information better.
Final Words
Creating a Pie Chart won’t be a challenging task for you. Simply use the power. of ElementsKit. Like conventional plugins, it is not for a single type of task. You can design an entire website just with ElementsKit. So, go for it and start getting the perfect shape for your website.

Leave a Reply