To set up email notifications, open your email app or access your inbox from a desktop browser and go to Indstillinger. Select your email account and enable alerts for new messages. On mobile, manage sound or vibration options from meddelelsesindstillinger, and on desktop, make sure browser notifications are allowed.
Enable Gmail Notifications (Mobile & Desktop)
- Android: Open Gmail → Menu > Settings > Account > Notifications → Select Alle eller High-priority emails.
- iPhone/iPad: Open Gmail → Menu > Settings > Email notifications → Choose your preferred notification level.
- Desktop:Open Gmail → Click Settings (gear icon) > See all settings → Scroll to Desktop notifications → Enable New mail eller Important mail alerts.
Troubleshooting Notification Issues
If notifications aren’t working properly, a few basic settings usually fix the problem. Check Gmail sync, battery optimization, and system-level notification permissions.
- Sørge for at Sync Gmail is enabled
- Turn off Battery Saver / Power Saving mode
- Allow Gmail notifications in your device’s system settings
Set Up Automated Email Notifications (Forms & Services)
Automated notifications notify you instantly when someone submits a form. Most form builders support this through built-in email settings or add-ons.
- Google Forms: Installere Email Notifications for Forms from the Marketplace to receive submission alerts
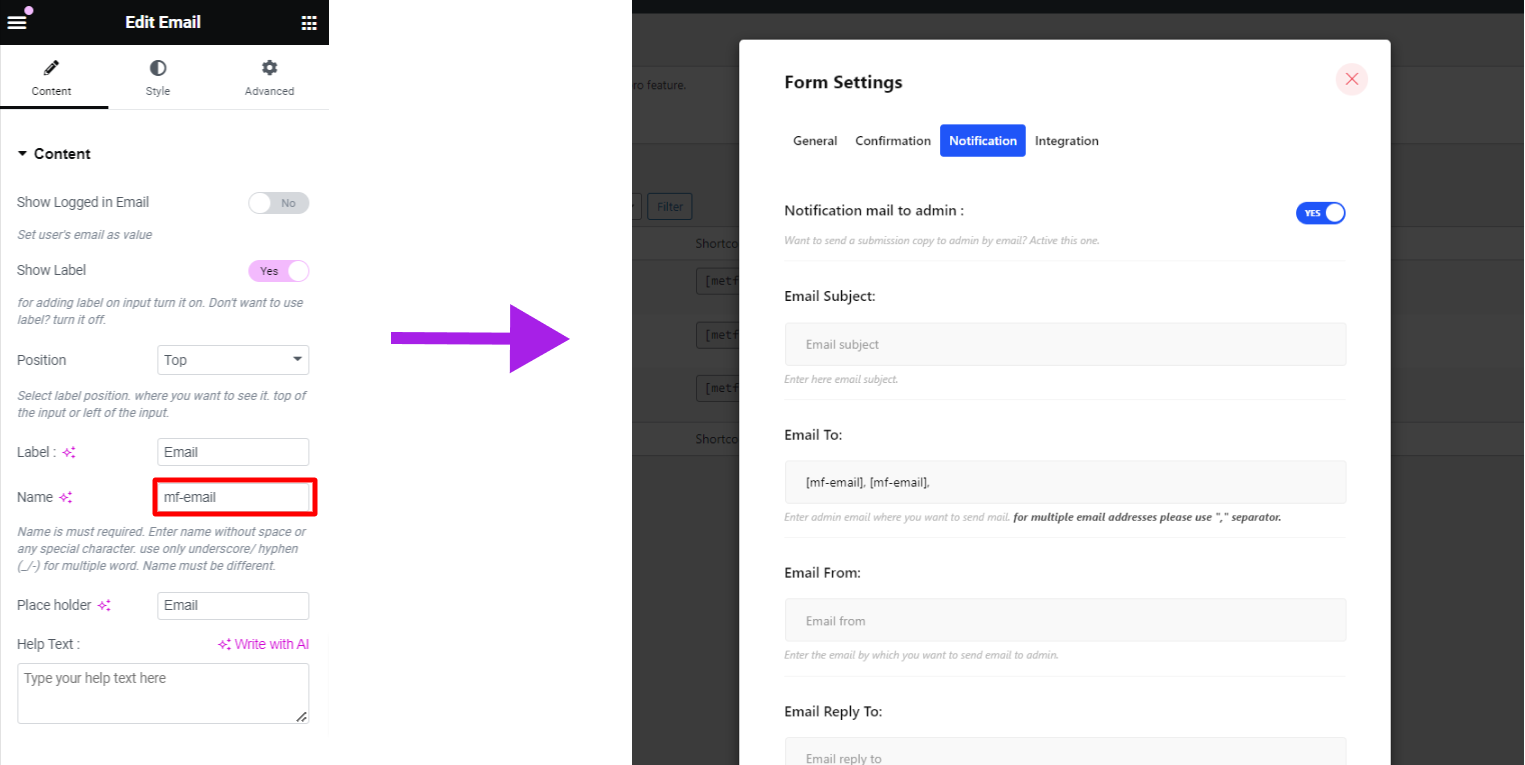
- MetForm: Gå til Form Settings > Notifications, provide the details, customize the notification content and save the changes.
Ved at bruge den bedste formularbygger MetForm kan du nemt indstille e-mailmeddelelser til WordPress-formularer. Bare følg de trin, vi har delt her.
Set up Notification Email with Metform #
Click the Edit option of the form where you want to set up notification email.
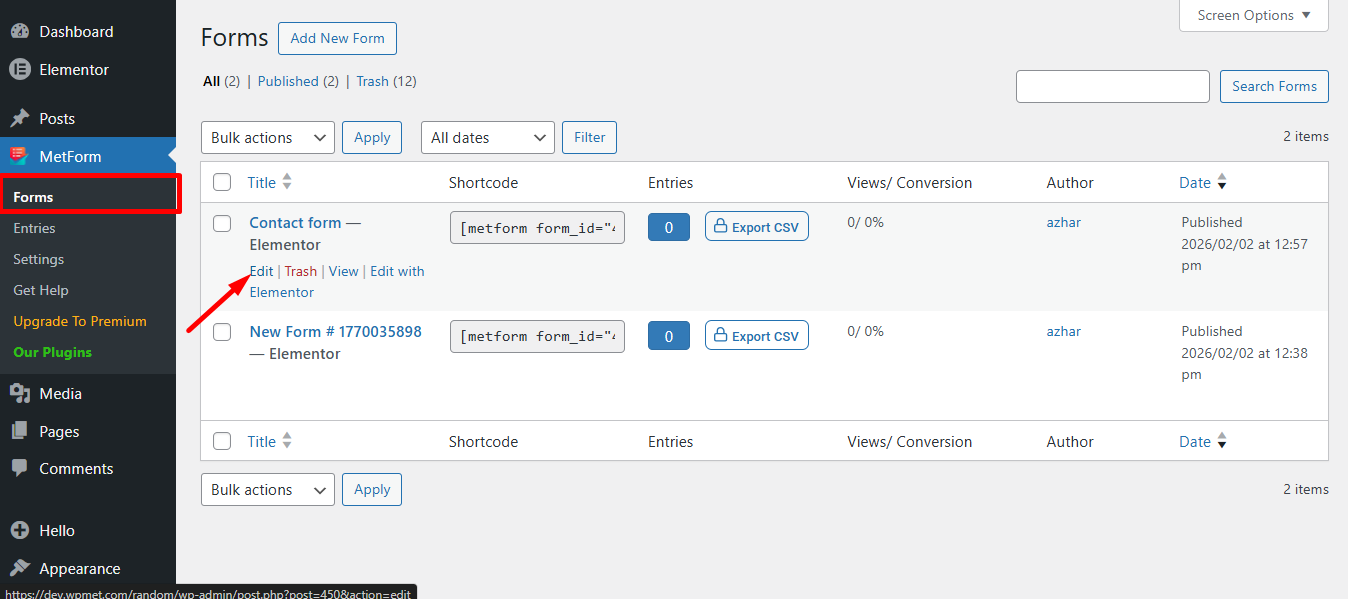
Also, you can open a new form if you need. follow the Video Skærmcast:
Setting Notification Email #
You can send a submission copy to the admin by email. You can also set different WordPress forms email notifications for separate Forms. Følg videoen Screen-cast
Or follow the step-by-step process
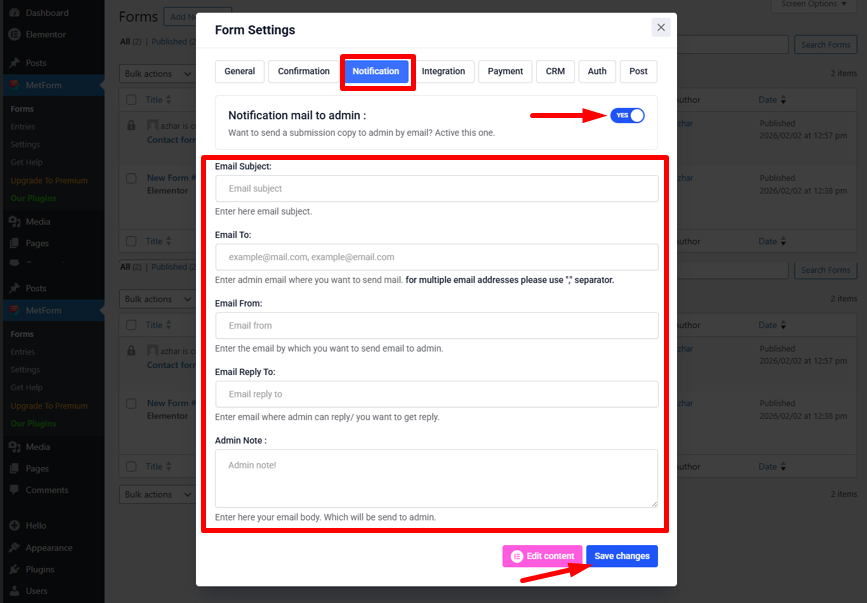
Naviger til Formularindstillinger → Meddelelser fanen
- Skift meddelelsesmailen til admin mulighed: Giv admin besked, når brugerindsendelsen er afsluttet, eller enhver form for kundedata er behandlet.
- Email emne: Angiv emnet for e-mailen.
- E-mail til: Indtast den admin-e-mail, hvor du vil sende mail. For flere e-mailadresser, brug venligst "," separator.
- E-mail fra: Indtast den e-mail, hvormed du vil sende en e-mail til administratoren.
- Email svar til: Indtast en e-mail, hvor administratoren kan svare, eller du vil have et svar.
- Admin note: Indtast her din e-mail-tekst, som vil sende til administratoren.
- Gem ændringerne.
Conditional Admin Email Routing #
This MetForm feature is dynamic and conditional admin settings for your email form. You can set conditional admin email routing that allows you to send the form to a different email address based on the selections made on the form.
Get tags from different widgets like dropdowns, checkboxes, buttons, text widgets, etc. and assign these tags to “E-mail til” fields to send forms to the right team automatically.
For instance, all purchase-related forms should be directed to the sales team, while forms related to technical issues should be sent to the support team.