

An effective way of collecting customer information is through forms. WordPress forms are an easy solution for creating forms on your website. But managing and storing form data can be a great challenge. That’s where integrating Google Sheets can help. Connecting WordPress forms to Google Sheets lets you easily store, manage, and analyze your form data.
With this integration, every time a form is submitted on your WordPress website, the data will automatically be stored in a Google Sheet. By integrating your WordPress forms with Google Sheets, you can streamline your data collection process and gain valuable insights from the submissions.
In just three simple steps, you can connect your WordPress forms to Google Sheets and start collecting and analyzing valuable customer data.
Why connecting WordPress Forms to Google Sheets is a smart move
When you connect WordPress forms to Google Sheets, it allows you to automatically collect and store form submissions in a spreadsheet. This eliminates the need to manually transfer data from the form to a spreadsheet, saving time and reducing the risk of errors.
Additionally, it allows multiple users to access the data at the same time and also can be helpful for backup and stressful recovery. Connecting WordPress Forms to Google Sheets allows for streamlined data management and improves the overall efficiency of data collection and organization.
Once the data is stored in a spreadsheet, it can be easily organized, sorted, and filtered, making it easy to find the information you need. Google Sheet integration with WordPress form can help you in various ways:
- Data collection: By connecting WordPress forms to Google Sheets, all the form data will be automatically collected and organized in a Google Sheet, making it easier to manage and analyze.
- Real-time updates: As soon as someone submits a form on WordPress, the data will be instantly updated in the linked Google Sheet, giving you real-time access to your data.
- Ensures accuracy: This eliminates the need for manual data entry and ensures the accuracy of the information collected.
- Data Sharing: On Google Sheets, multiple people can access the same data simultaneously, allowing for easier teamwork and collaboration.
- Email list building: By collecting contact information through a form, you can quickly build an email list that you can use for targeted marketing campaigns.
- Easy backup and recovery: Data recovery in Google Sheets is much easier and safe in Google Sheets. Even if you delete the Google sheet file, it can be recovered from Google Drive’s trash folder.
Overall, connecting a WordPress form to a Google Sheet can help you make better use of the data you collect and improve your overall business performance.
How to connect WordPress Forms to Google Sheets?
When it comes to connecting WordPress forms to Google Sheets, MetForm comes with the easiest way. You just have to integrate the Google credentials with MetForm in your WordPress site and will be able to export data to GoogleSheets.
Connecting WordPress forms to Google Sheets with MetForm involves three major steps. The first step is setting up the Google Cloud console platform for form integration. Secondly, enable the Google Sheet API, and finally, integrate MetForm with the Google API app.
Prerequisites:
We need you to have an account on the Google Cloud Platform. So if you don’t have an account, create one before starting the form integration procedure.
Required plugins:
- Elementor: Download Plugin
- MetForm Lite: Download Plugin
- MetForm Pro: Get Plugin
Step 1: Setting up a project in the Google Cloud console
Now you need to create an App on the Google cloud console to get the integration credentials for Google Sheets. The process includes creating a new project, then registering an App, and generating the credentials for integration.
Create a new project
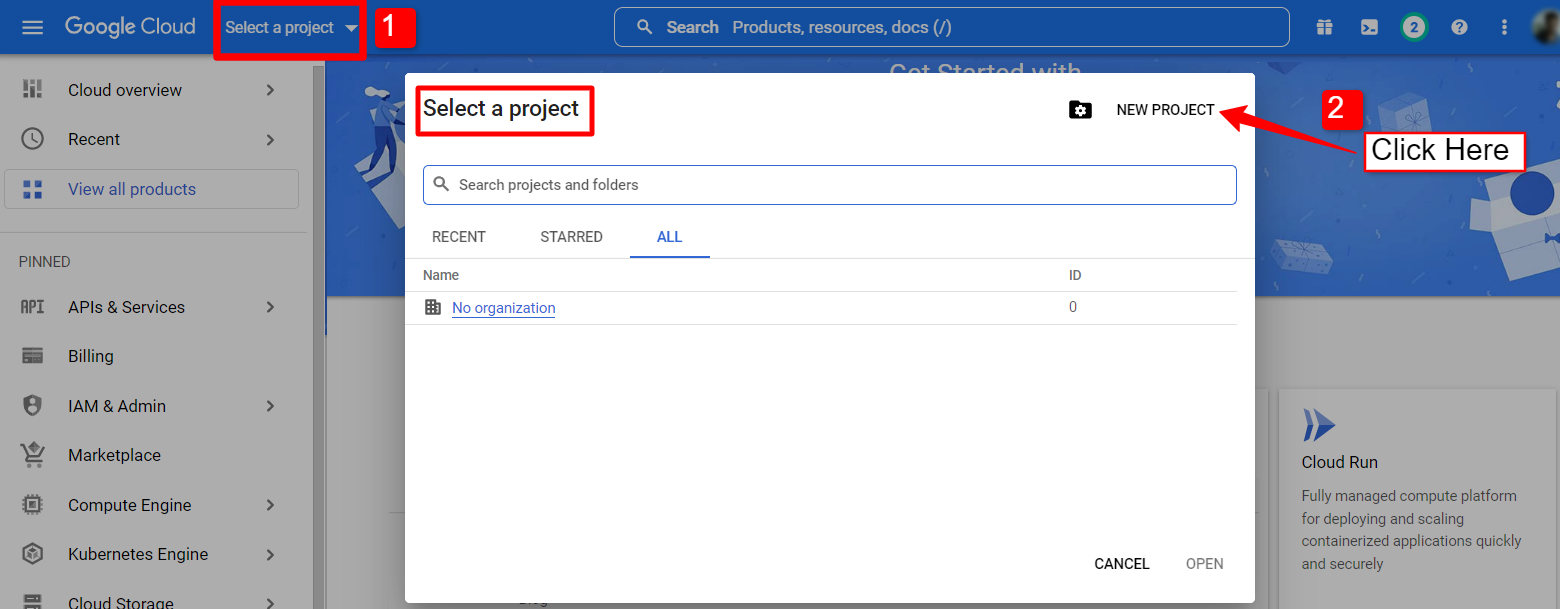
First, log in to your Google Cloud console account and create a new project. Click on the drop-down at the top left corner, and on the popup click on the New Project.
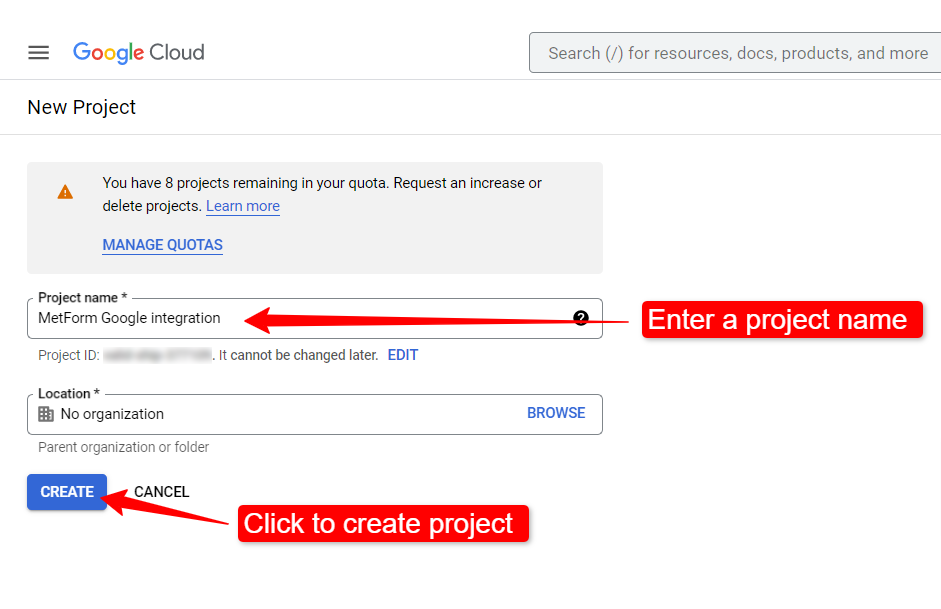
To create a new project, enter a Project name and location (if applicable), and click on the Create button.
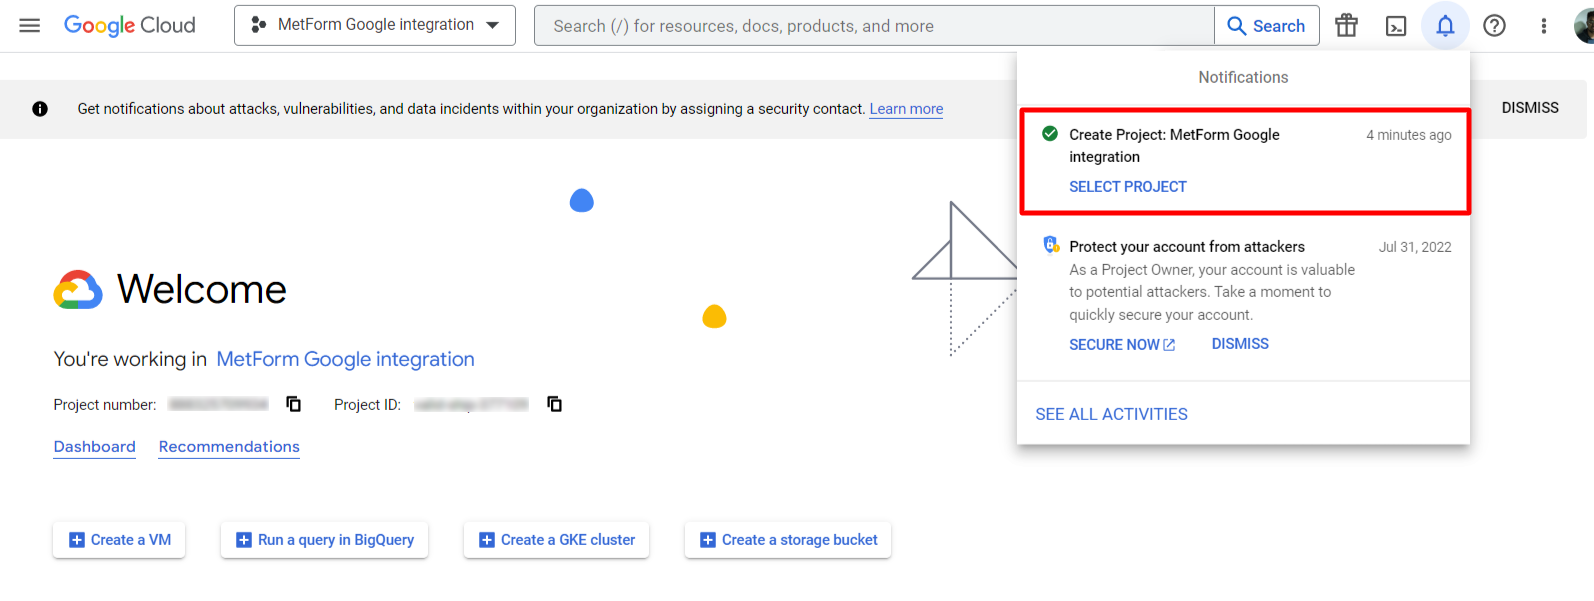
It may take a few seconds to create the project. Open the notification bar to check if the project has been created. Once the process is complete, click on the project you just created to open the project page.
App registration
After that, open the project dashboard, and under the API section, Go to APIs overview.
Next, open the OAuth consent screen from the sidebar. Then on the OAuth consent screen select the User Type to External and proceed by clicking on the “Create” button.
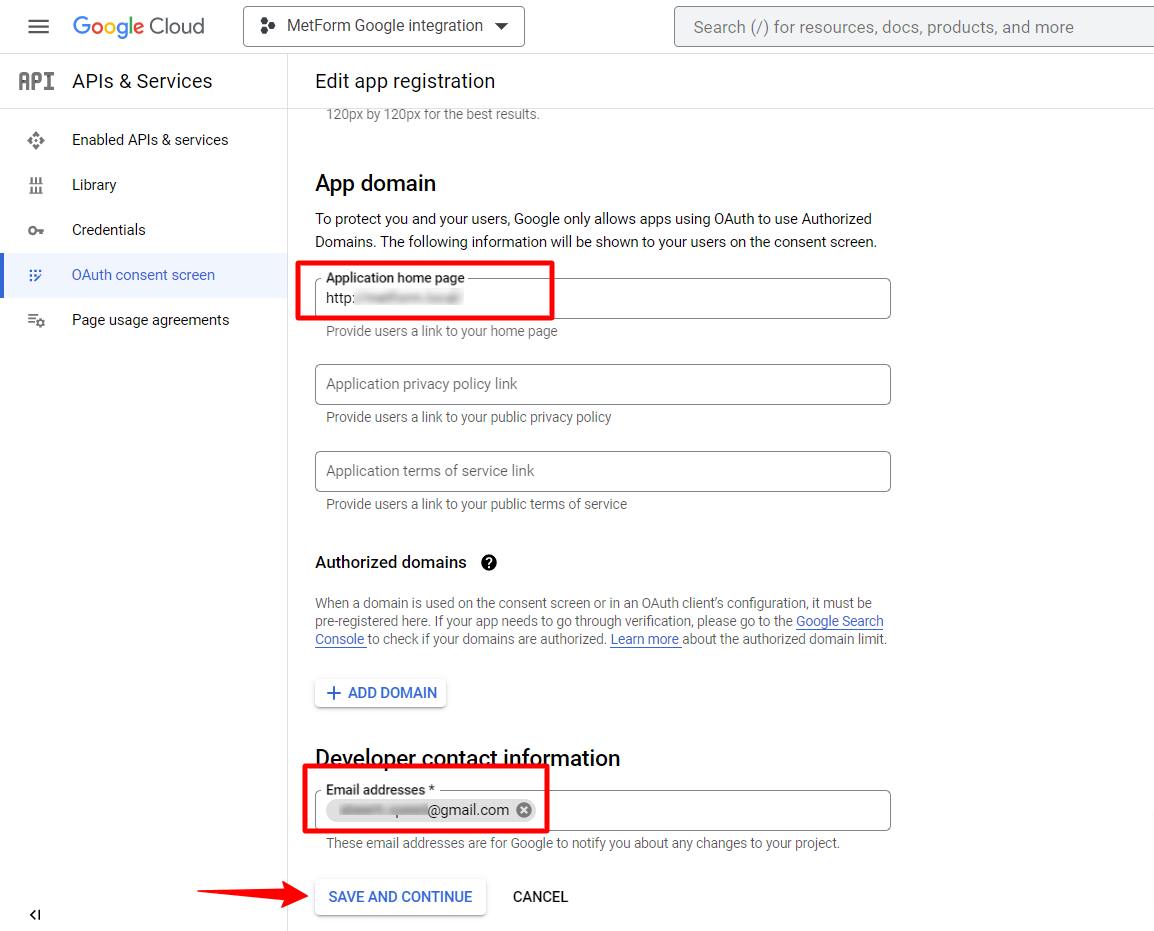
On the next screen, enter your App information including your App name and User support email. You can also add the App logo and App domain information. Then enter the Authorized domains and Developer contact information, and click on Save and Continue.
Then proceed to the Scopes and Test Users tabs, which are optional. You may add information if desired, or leave them unchanged. then, click on the save button.
Finally, Publish the App from the OAuth consent screen.
Generate App credentials
Credentials like Client ID and Client Secret are required to connect WordPress forms to Google Sheets.
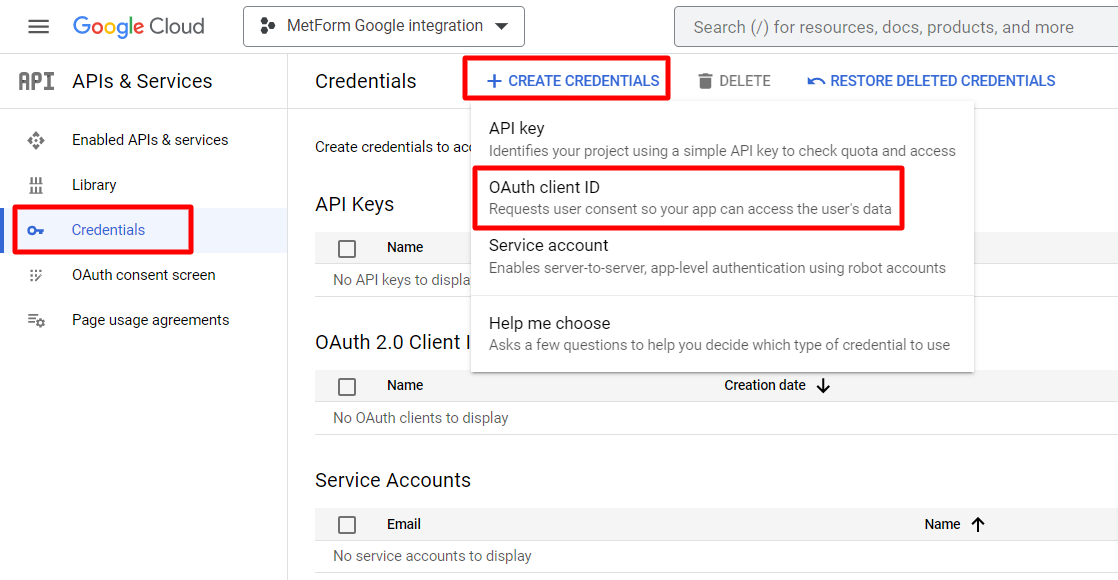
To get the Client ID and Client Secret, go to the Credentials, click on Create Credentials, and select OAuth client ID. To create an OAuth client ID, choose Application type to “Web application” and enter a name.
In order to proceed, you have to add an Authorized redirect URI. You will get this redirect URL from your WordPress dashboard if you have the MetForm plugin activated on your site.
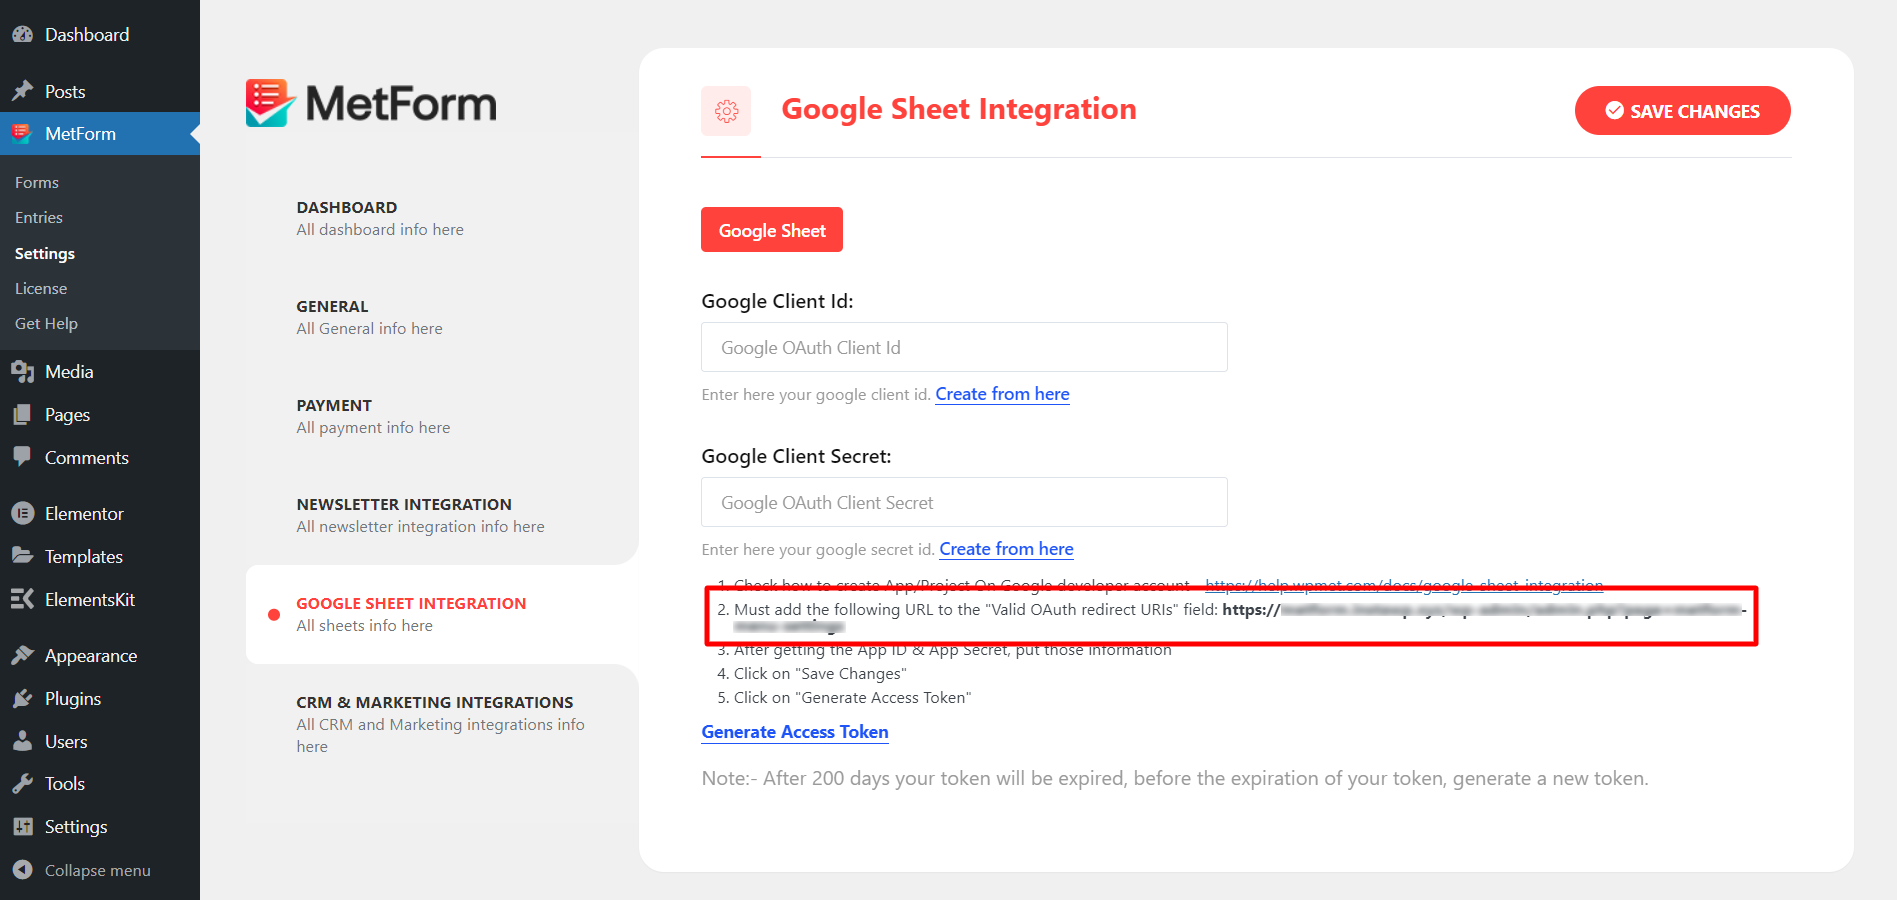
Open a new tab on your web browser and log in to your WordPress site. Navigate to your WordPress dashboard > MetForm > Settings > Google Sheet Integration. There you will find the redirect URI, copy that and go back to the Credentials page on the Google Cloud console.
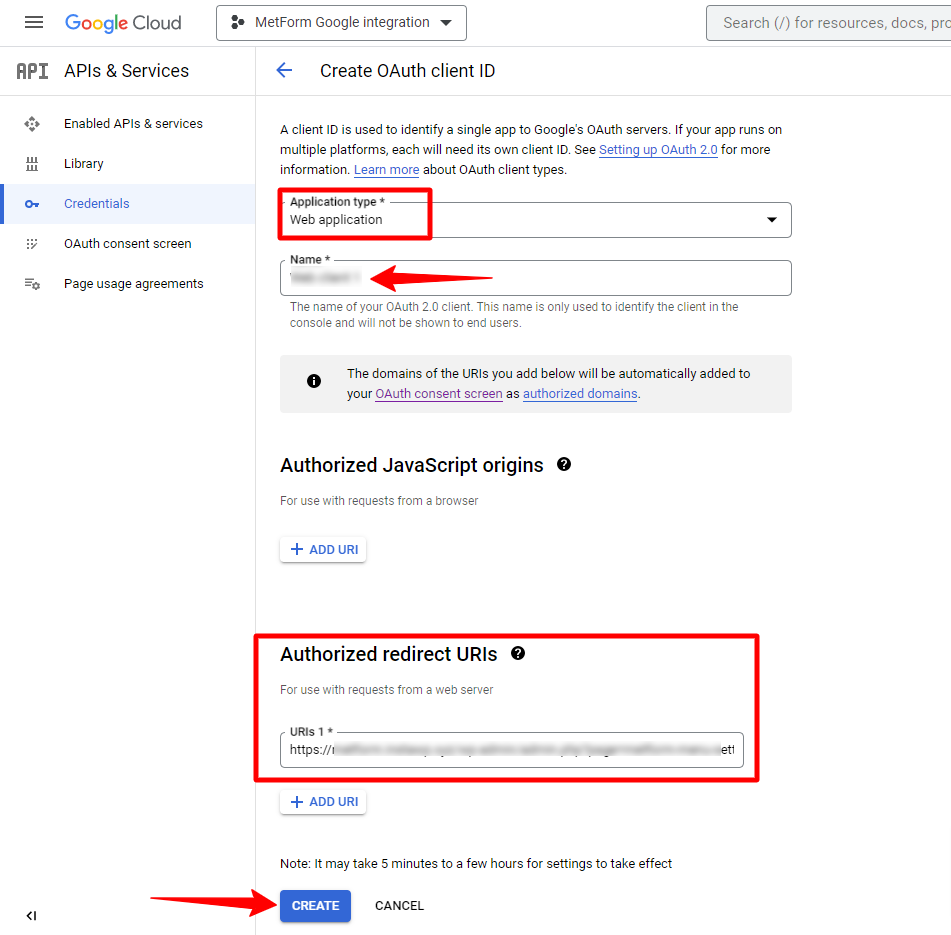
After adding the Authorized redirect URI, click on the “Create” button.
Once the OAuth client is created, you will get your Client ID and Client Secret on a popup window. Copy those credentials and move to the next step.

Verify with App Credentials
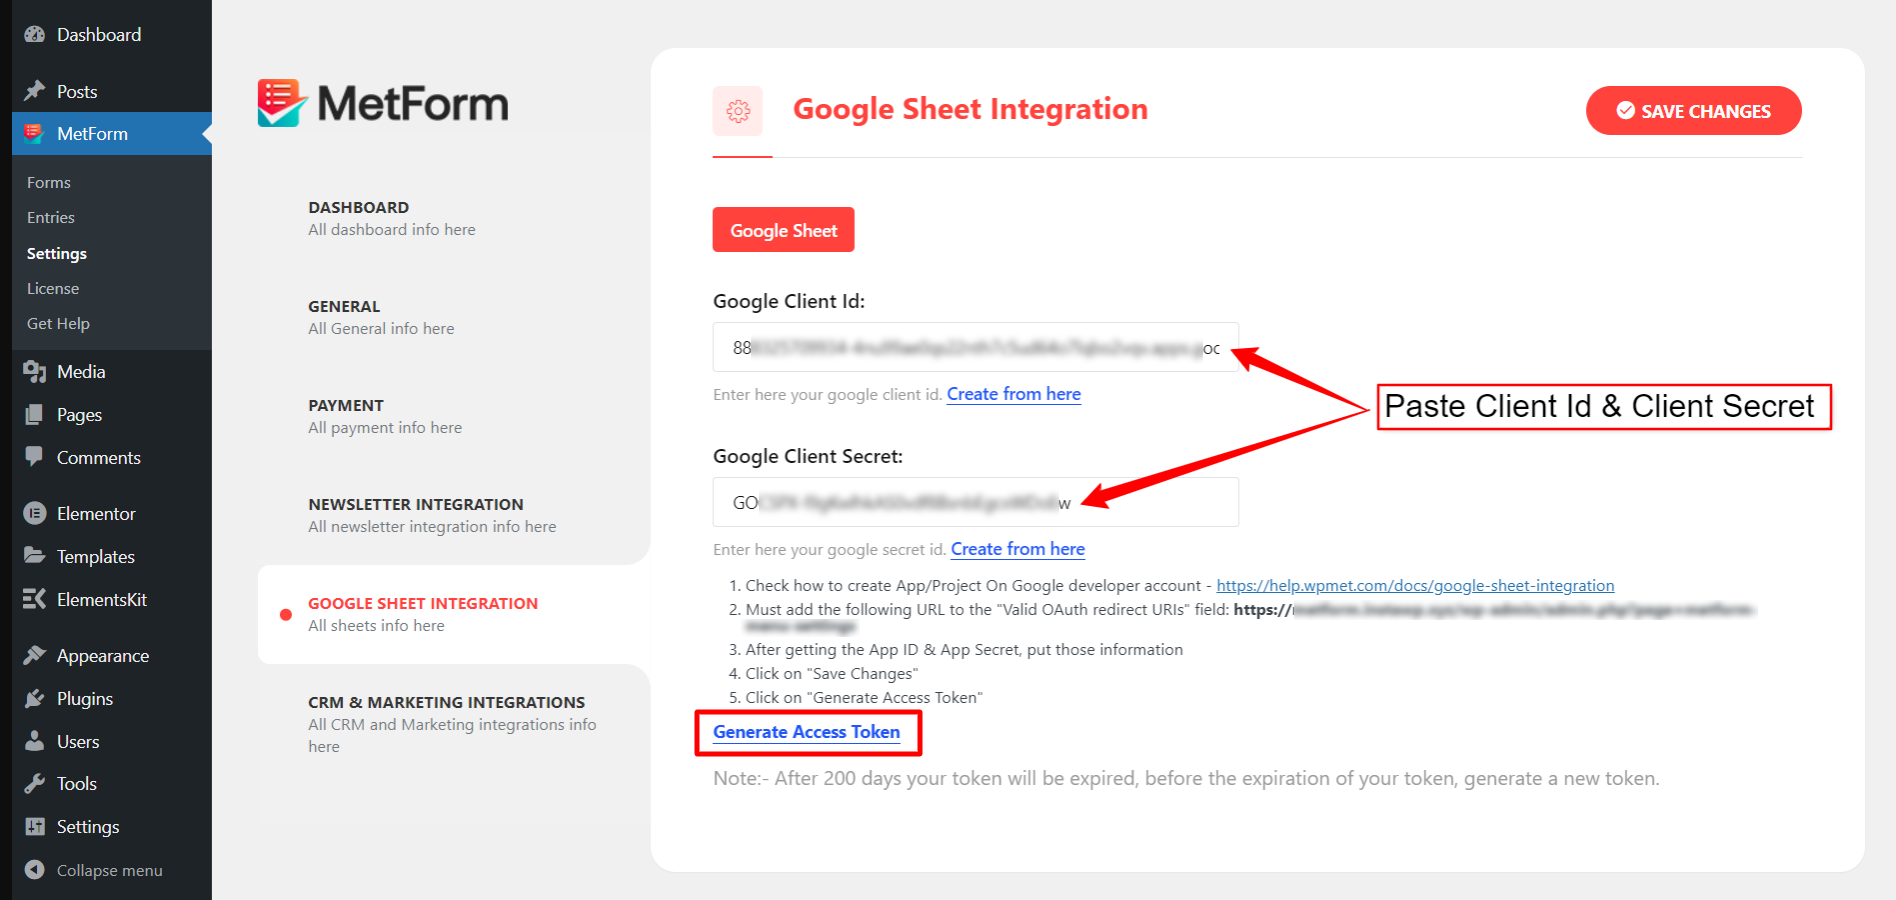
Now, again navigate to WordPress dashboard > MetForm > Settings > Google Sheet Integration and paste the Google Client ID and Google Client Secret on the required field. Then click on the Save Changes button.
After that, click on Generate Access Token in order to approve the access for the app that will link WordPress forms to Google Sheets.
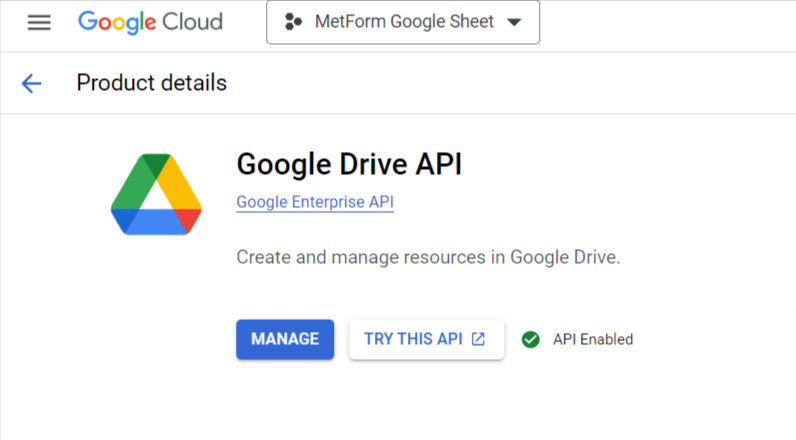
Step 2: Enable Google APIs (Google Sheets and Google Drive)
In the next step, you have to enable Google Sheets API and Google Drive API from the project Dashboard. To enable Google Sheets API,
- Go to the project dashboard on Google Cloud Console.
- Navigate to the APIs and Services > Library of the current project.
- Find the Google Sheets API and open it.
- Then Enable the Google Sheets API
Similarly, for Google Drive API, navigate to Library > Google Drive API and enable the API.
[Note: In order to select a specific Google Sheet, you need to enable the Google Form API]
Step 3: Integrate Google Sheets with MetForm
The final step is to integrate the WordPress form into Google Sheets.
For an existing form, click on Edit under that form to open the form settings. Move to the Integration tab and enable the Google Sheet.
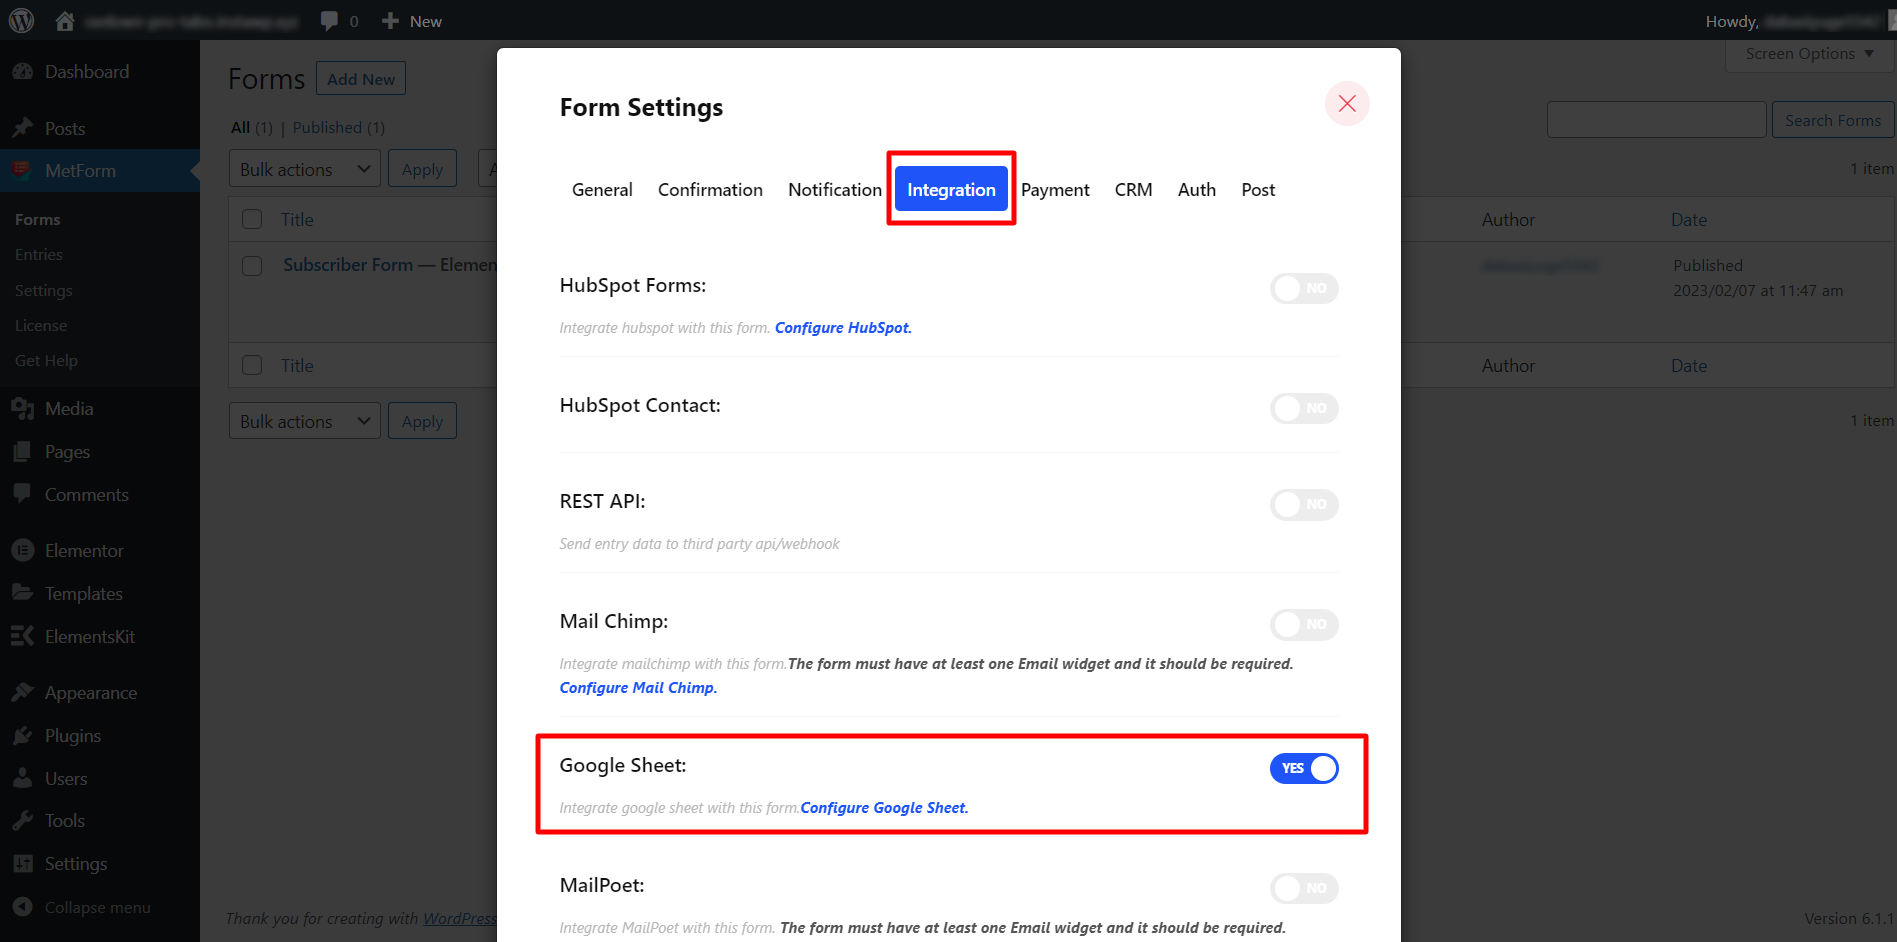
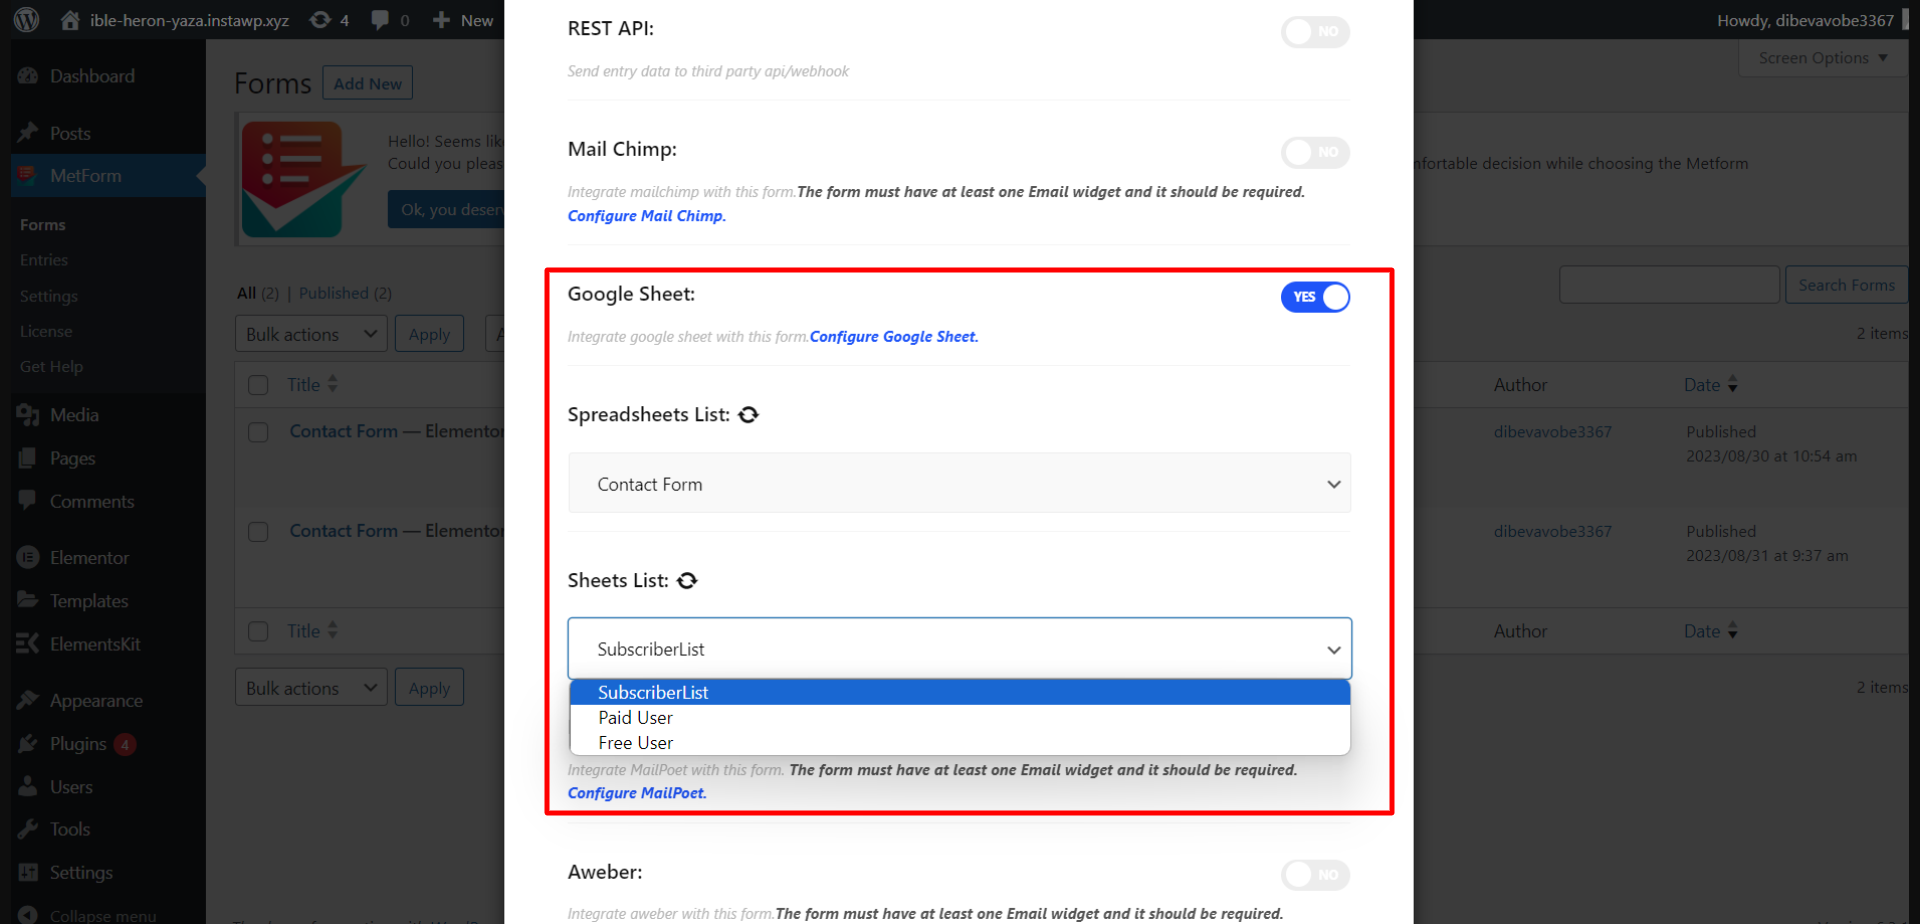
After that, you can select specific Google Sheets to export data. When you enable Google Sheets, the “Spreadsheets List” and “Sheets List” options will appear.
First, select a spreadsheet from the drop-down list. After selecting the spreadsheet, you can choose sheets if the spreadsheet has multiple tabs.
That’s it. Google sheet integration with MetForm is complete now. Now submit the data and your WordPress form will send those directly to Google Sheets.
✔ Try out the best Contact Form 7 alternatives in WordPress ✔
Data export from WordPress form to Google Sheets
Let’s see how it works. For example, we will be showing two types of forms:
- General forms (such as event registration forms, feedback forms, etc.)
- Quiz forms.
General Forms:
To send data to Google Sheets from WordPress forms like event registration forms, contact forms, and feedback forms, you can create a general form with MetForm.
For that, go to MetForm > Forms > Add new. Then in the “Create Form” popup, enter a Form name and choose the form type General Form.
MetForm has dozens of form templates available including templates:
- Contact forms
- Booking forms
- Feedback forms
- Subscription forms
- Support forms
- Event Registration form
- Newsletter sign-up forms
And more.
You can choose one template and proceed by clicking on the “Edit Form” button. After that, as shown in Step 3, the Form Settings, enable Google Sheet integration to connect WordPress forms to Google Sheets.
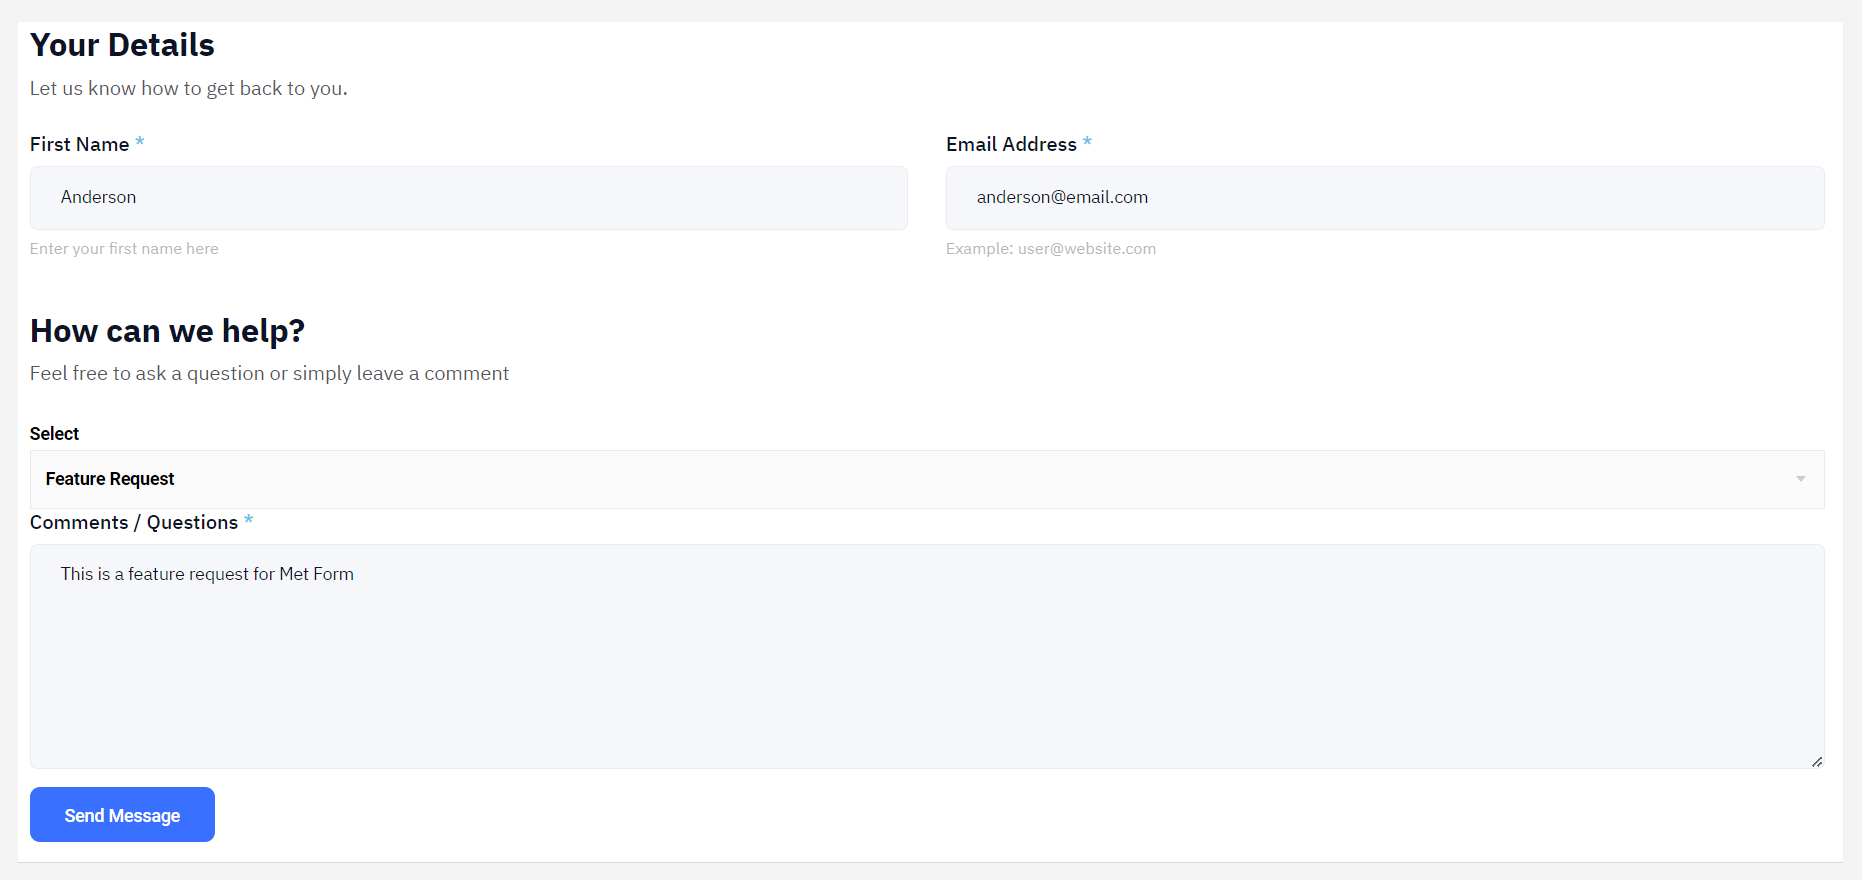
Export data from WordPress form to Google Sheets:
WordPress Form Submission:
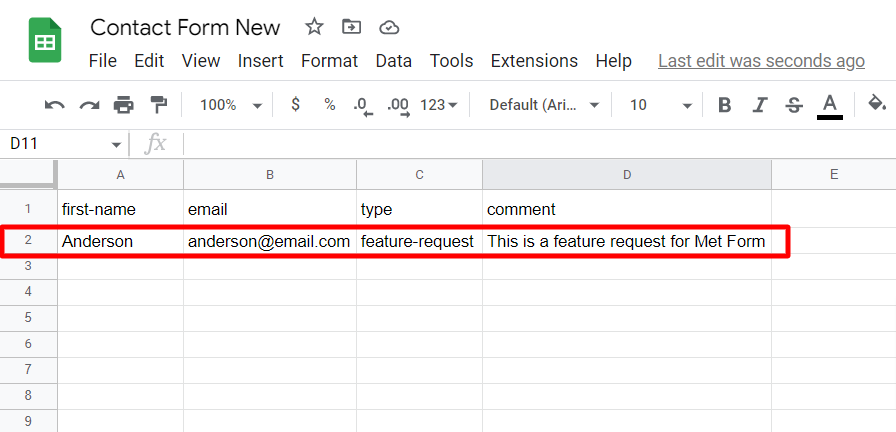
Exported data in Google Sheets:
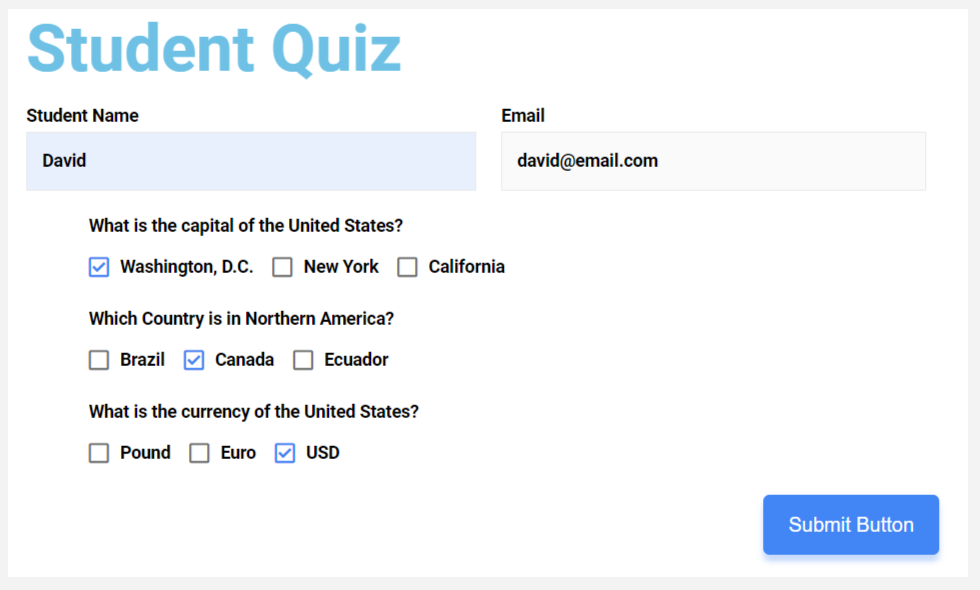
Quiz Form:
You can also create quiz forms using MetForm. For that, navigate to MetForm > Forms > Add new and select the form type “Quiz Form” and click on the Edit form button to design a quiz form. Also, don’t forget to enable Google sheets integration in the Form settings as shown in Step 3.
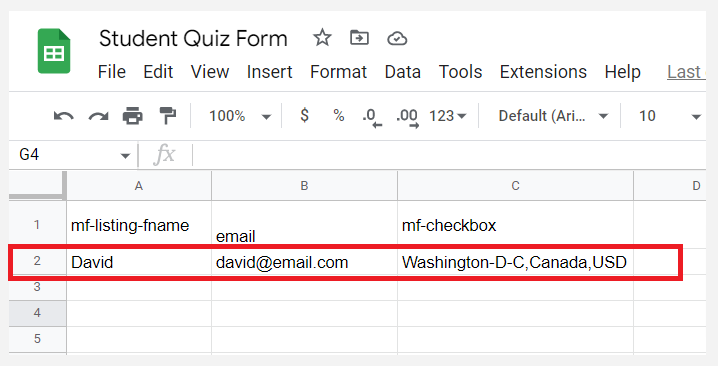
Export data from WordPress form to Google Sheets:
WordPress Quiz Form Submission:
Exported quiz data in Google Sheets:
Google Sheet integration with Elementor Pro form using ElementsKit
There is another way to connect WordPress forms to Google Sheets. This method is particularly for Elementor Pro forms.
You can connect Elementor Pro forms to Google Sheets using ElemensKit. To do so, generate Google credentials (Client ID & Client Secret) for ElementsKit OAuth redirect URI. Then add the credentials in the ElementsKit > User Settings > Google Sheet For Elementor Pro Form and generate an access token.
After that, create an Elementor Pro form and the data will be sent to Google Sheets for each submission.
Read the documentation on integrating the Elementor Pro form with Google Sheets:
Learn: How to integrate Elementor Pro form to Google Sheets with ElementsKit
In Conclusion
If you have followed the above steps, you should be able to connect WordPress forms to Google Sheets, and the form submission data will be seamlessly exported to Google Sheets.
MetForm offers a range of convenient and ready-to-use features to meet everyone’s needs. Get MetForm Pro and have next-level experience in building WordPress forms!

Leave a Reply