Do you have a strong will to work for people and make the society better? Then starting a nonprofit organization is the best idea. It just requires you to send the core message of your organization to the right channel.If you build a nonprofit website, it will be easy to make it heard.
The fact is, most people get stuck at this step by thinking it is a technical thing to create a website for a nonprofit website. If you are one of them, let me assure you that you can do it yourself without any doubt.
Now you might be wondering how it is even possible! Throughout this blog, you will learn where to start, what you need, and how to get it done within a short time.
What is a nonprofit website?
A nonprofit website is an online platform that is used by a nonprofit or charity organization to promote its cause, solicit donations, and provide information about its work. The website basically helps to make the organization’s vision and mission visible to its target audience.
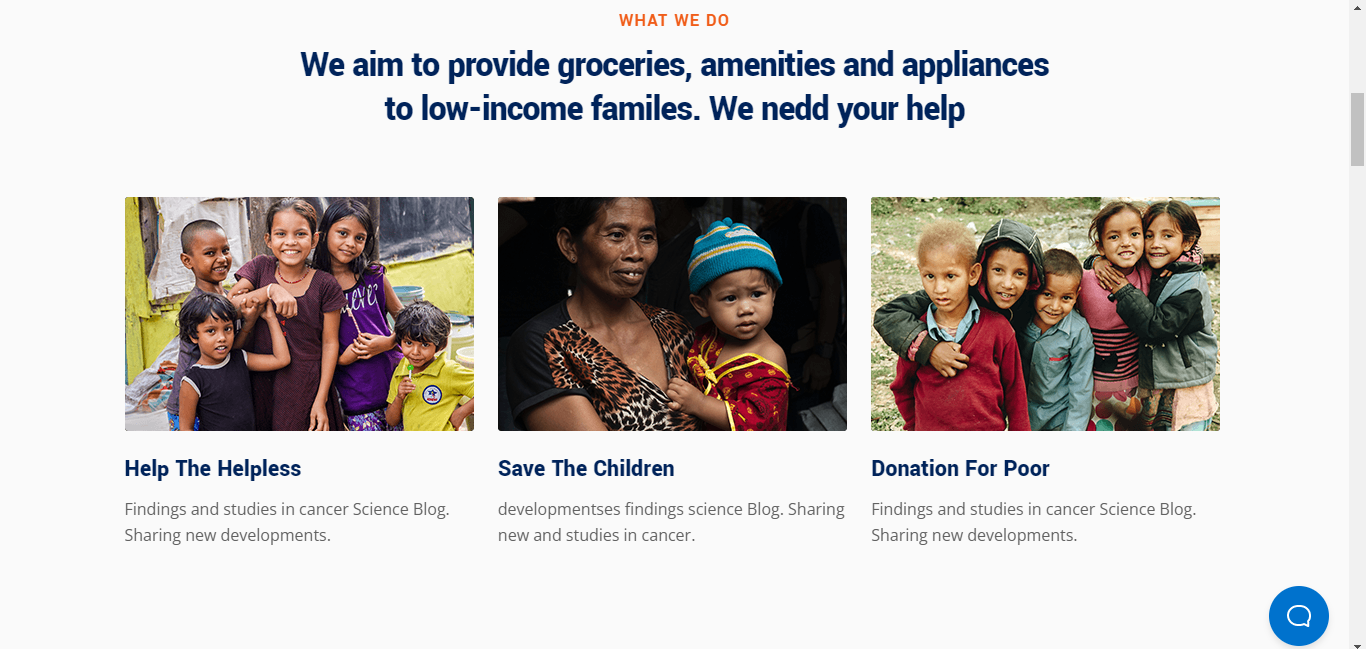
A nonprofit website typically includes a page with the organization’s core messages, information about the organization’s programs and events, blog, and a donation button. These are the basic things that are used to be common for any nonprofit organization. Depending on the niche and the type of the organization, the site structure might vary.
Things you need to create a non-profit website
Here, the goal is designing the entire website yourself. But before you start the design process, you need some essential things that are mentioned below —
Domain name
The domain name will be the same as the organization’s name. It will be the online identity for your organization.
Hosting
The web hosting will be the database where you store the information regarding your organization.
CMS
You need a content management system (CMS) to make it easy to manage the content.
Theme to style the site
The website will require a theme for better user interface.
Plugins to customize and design the site
You will need some sort of tools for the site’s design. In the further section of this post, you are going to learn the details about each of these mentioned things.
Steps to build a non-profit website
Finally, you are going to start the actual process of creating a nonprofit website from scratch. Here everything is explained in detail with easy to follow instructions.
Step 1: Choose a Content Management System
The first step to build a nonprofit website is choosing the right content management system. A content management system makes it easy to upload, modify, edit, and delete content. It means you will get full control over your content and you can choose what you want to show and what not.
Obviously, there are other options. But unless you have a high budget or a team of high-end developers, you shouldn’t go for something custom.
Different Content Management Systems are available out there with a variety of features. Among them, WordPress is the most popular one. WordPress comes with versatile features, an easy navigation system, and lots of third party resources. On top of that, it is free to use.
Step 2: Register a domain name
As mentioned above, you need a domain name as an online identity. It needs to be unique and catchy. Before you even choose the organization’s name, check the availability of the domain.
It could happen that you have chosen a name for the charity but that particular domain name is not available. Checking the availability before choosing the name will help to stay out of the issues.
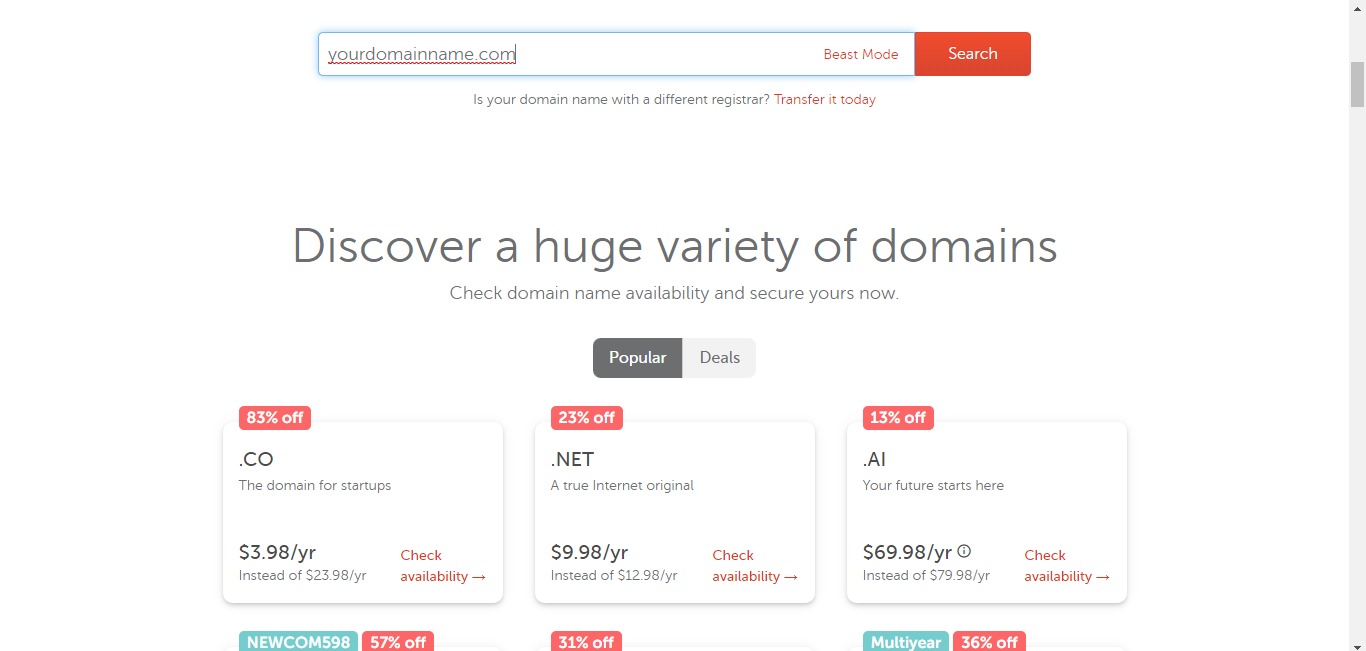
Different renowned domain registration platforms are out there, where you can check the domain name’s availability. Namecheap and GoDaddy are the two most popular domain registration platforms. Visit the official website and check for the availability.
It won’t cost more than $15 unless it is a premium domain. While registering the domain name, choose .org as the extension as it is more relevant to organizations like charity and nonprofit.
Step 3: Choose a hosting plan
Now it is time to choose a hosting provider where all the information of your website will be stored. The good thing is, there are particular web hosting services for WordPress that perform better than others.
Go through the available options for WordPress web hosting services and choose one that matches your needs. While finalizing the hosting plan, check the price, speed, storage, and customer support.

Though the pricing of hosting services varies, the average cost will be $3 to $50 per month. If you have a tight budget, you can start with the Bluehost’s shared hosting.
Step 4: Install Elementor and ElementsKit plugins
No matter what CMS you use, it will require some addons or tools to design and customize the website. The same goes for WordPress. Once you are done with WordPress installation, you need to install the plugins that will help you to customize the pages of your website.
However, you don’t have to install too many plugins. So, what do you need?
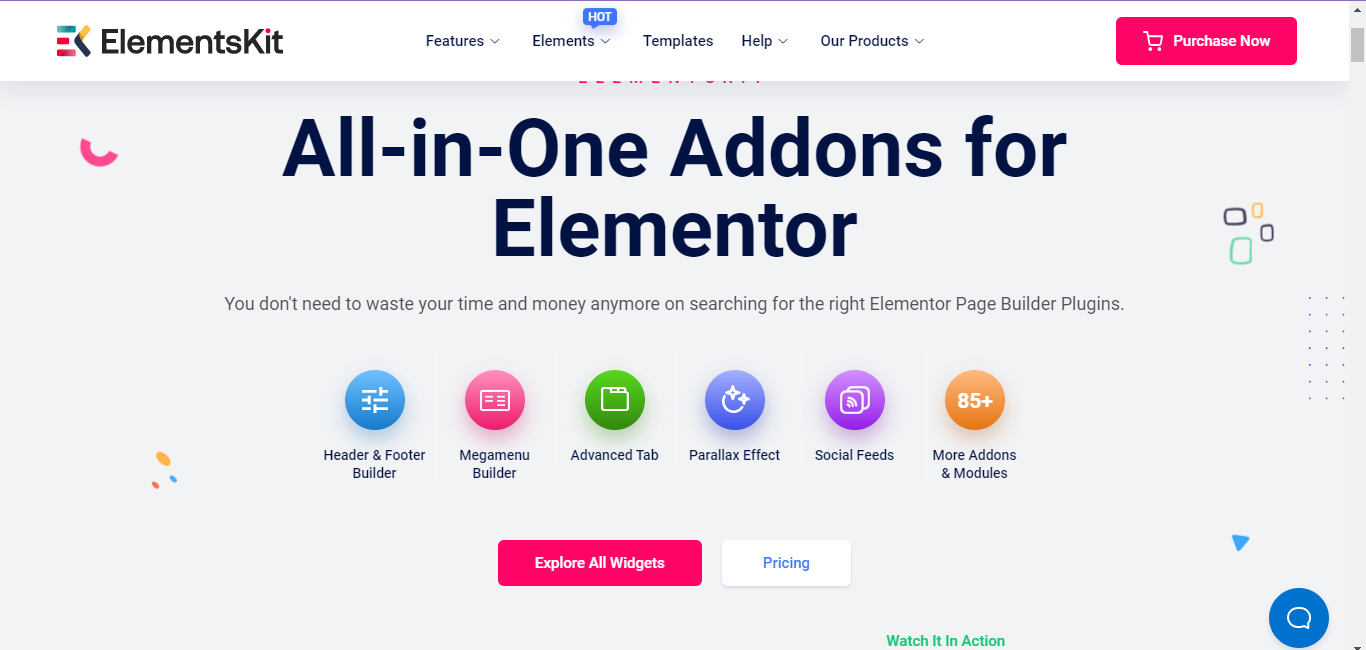
Here Elementor is a user-friendly page builder that allows users to create pages for WordPress websites without coding. And ElementsKit is an Elementor addon that allows to get more functionalities for Elementor.
Once you download these plugins, go to your WordPress dashboard > Plugins > Add new. Then first upload the Elementor plugin > Install > Activate. However, you can install the free version as well.
Now upload the ElementsKit plugin > Install > Activate.
Step 5: Integrate ElementsKit’s charity template for nonprofit website
After the installation of Elementors and ElementsKit, you are now ready to design the nonprofit charity website. From the WordPress dashboard, you need to start designing the pages. Don’t worry! You don’t have to write any code.
ElementsKit comes with ready templates to design a wide range of websites without coding. Users can simply choose the particular template while designing their website.
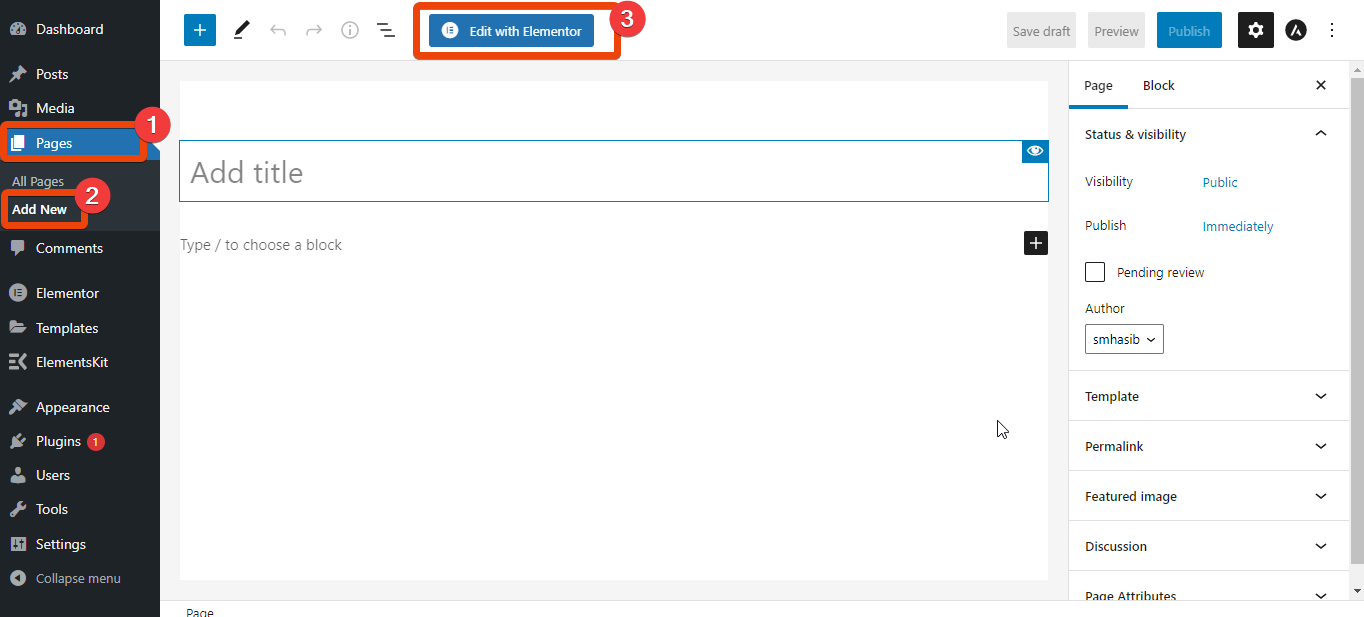
First, you need to create a page to integrate the template. Go to your WordPress dashboard > Pages > Add New. From the top of the page, select ‘Edit with Elementor’.
It will redirect you to the Elementor Editor. Now click on the ElementsKit icon from the page and it will show all the available templates.
Go through the templates’ list and choose the ‘Charity Template’. Click on insert and all the demo content will be imported to the page. You will see all the available sections that are required for a nonprofit organization.
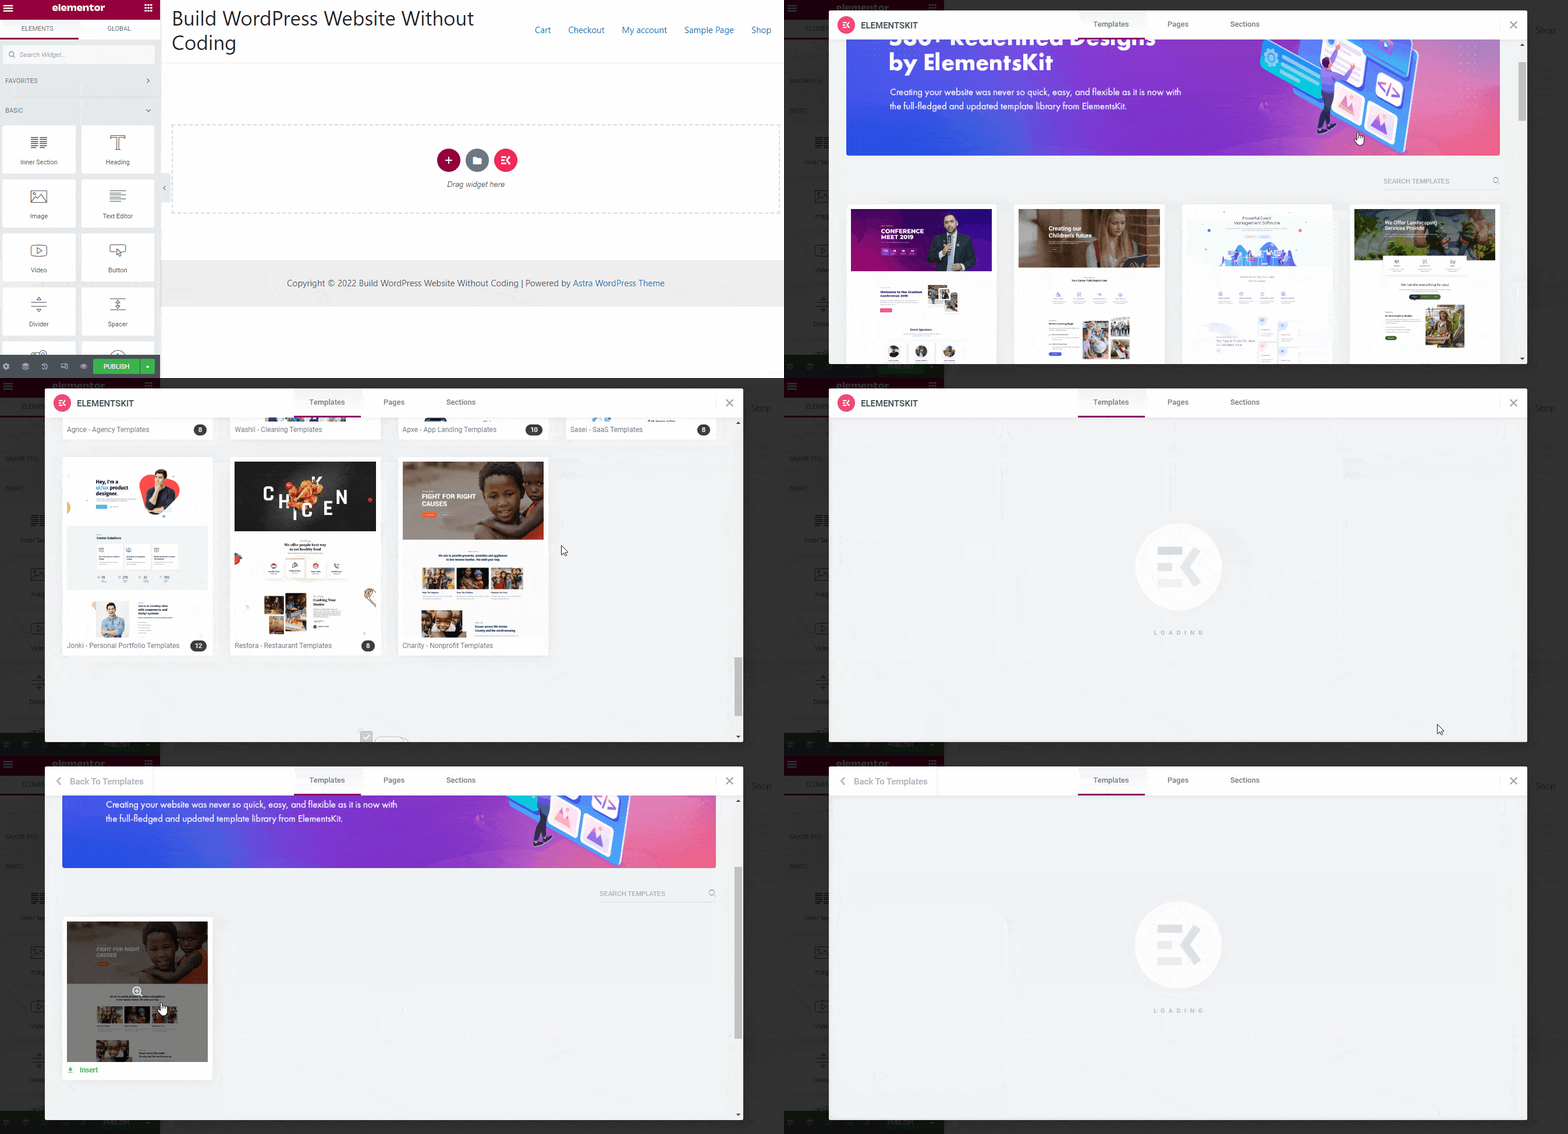
Each of the section of the template are highly customizable. You can change the images, texts, or even styles.
Step 6: Customize the charity template
As mentioned earlier, all the sections of the template are customizable. Now it is time to customize the sections according to your requirements.
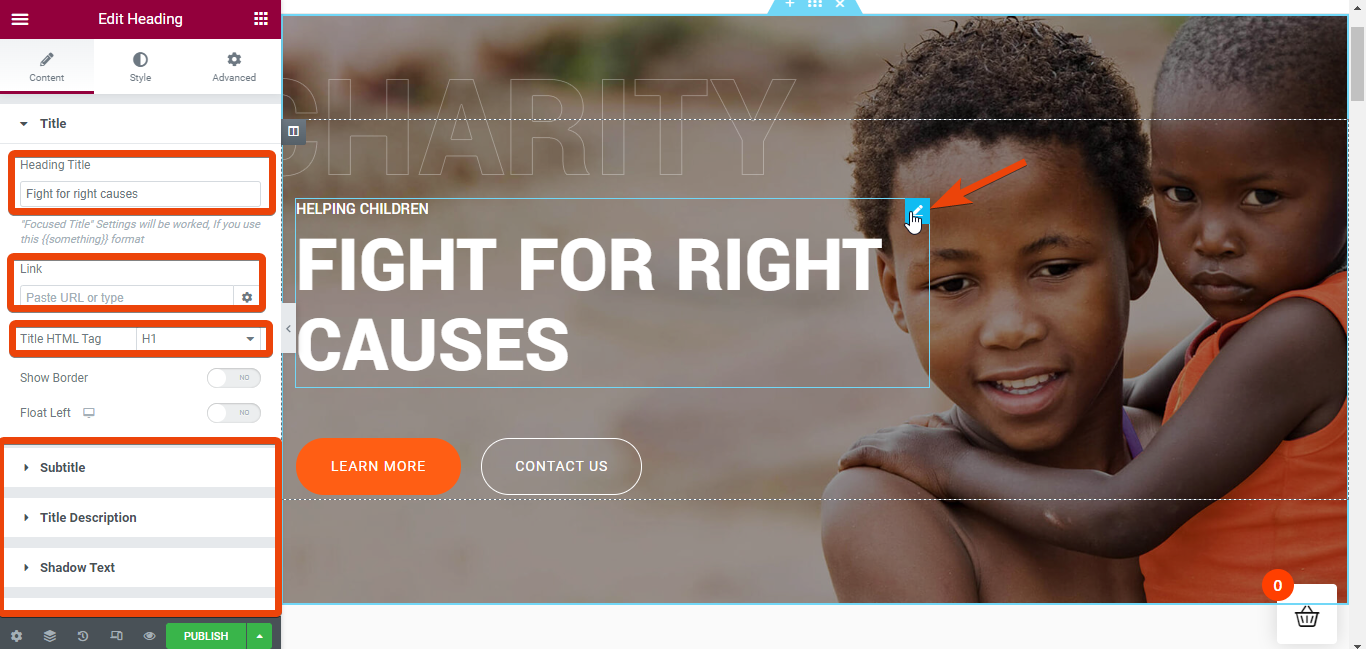
Choose any of section from the page and click on the edit icon. You will get all the customization options. For instance, if you want to edit the heading, click on the edit icon on the top of the heading.
Now you can edit the heading title, link, subtitle, title description, and all the things.
Step 7: Showcase your works
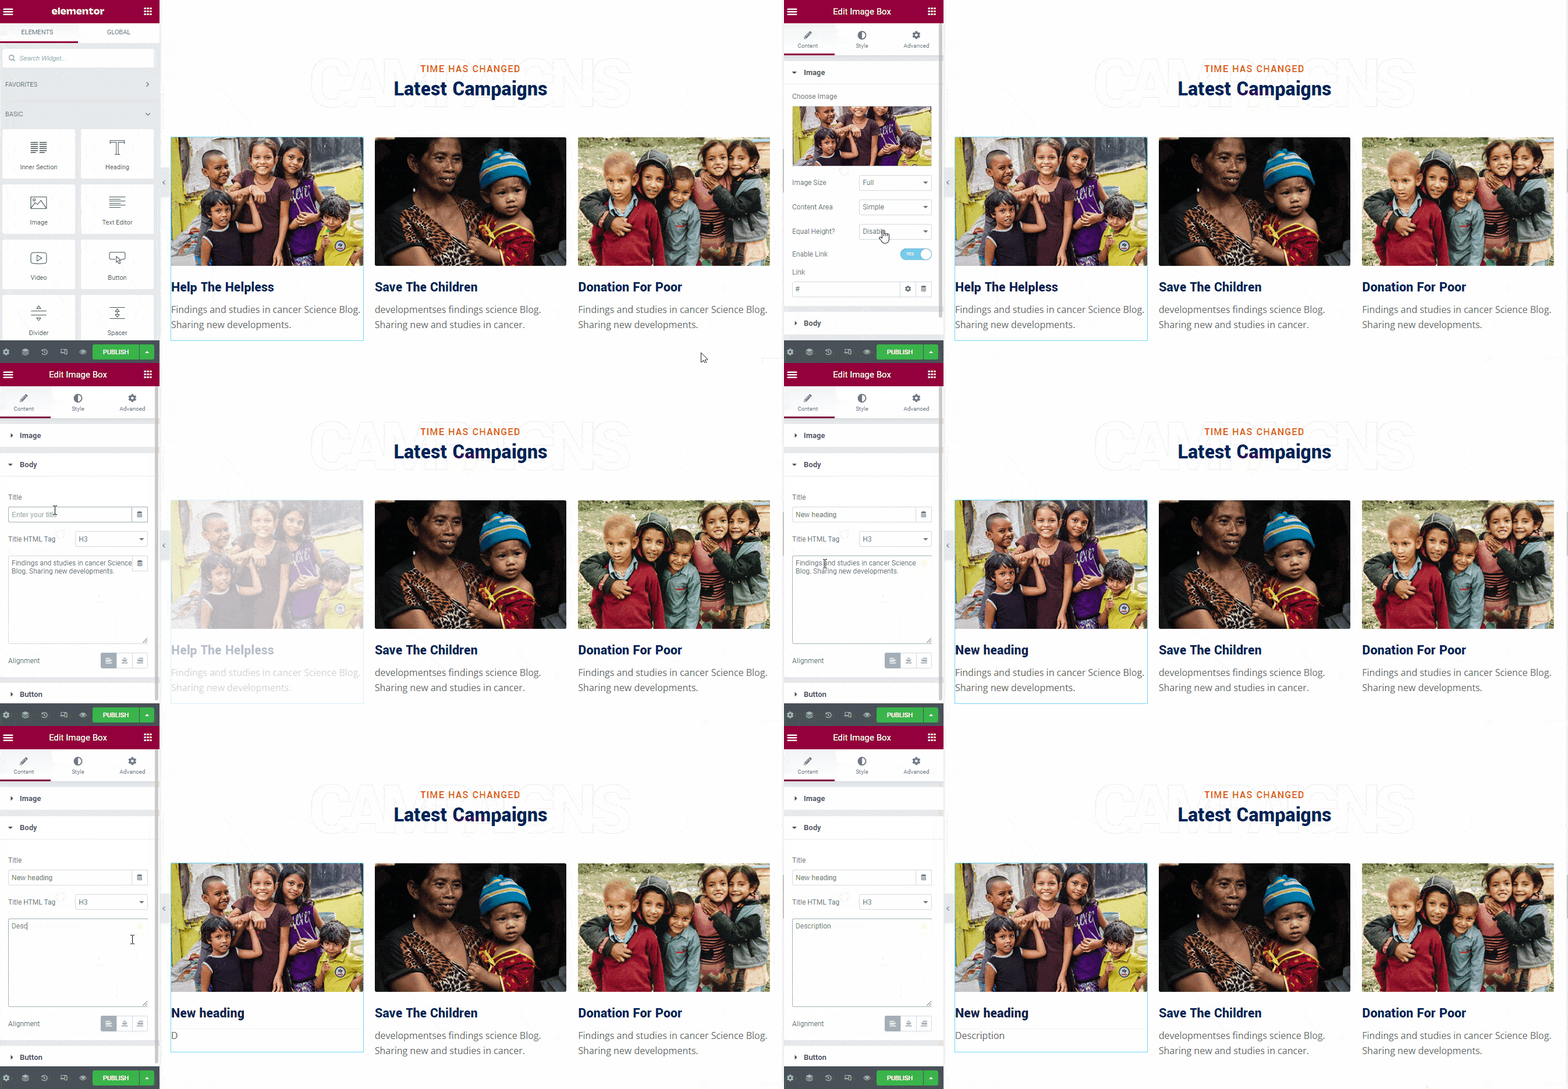
You might want to showcase all your works and campaigns to the visitors, right? For this, scroll down on the page editor and you will see a section named latest campaigns. In this section, you can customize the demo content with a few clicks.
Click on the edit icon and you will get the option to change image, heading under image, and description for the image. You can choose any image for each of the sections and then add new headings and descriptions.
Step 8: Add your team members
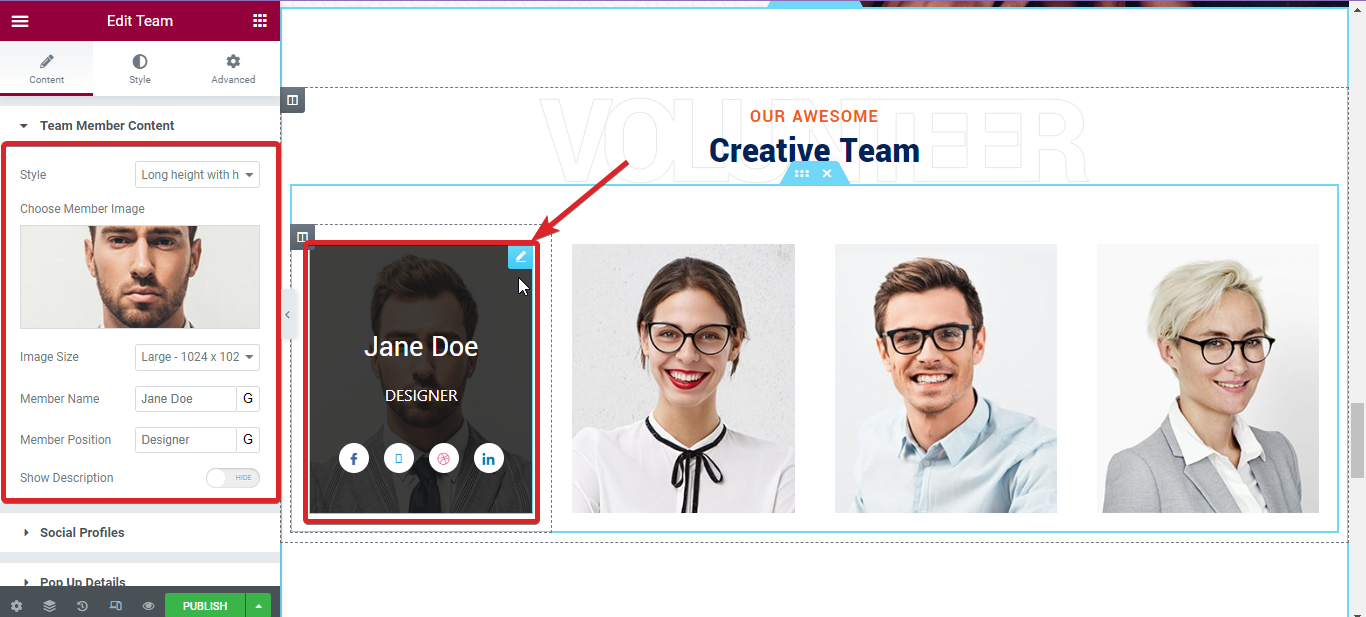
In the template page, there is a ready section for the team members which has a heading ‘OUR AWESOME Creative Team’. There are demo images and team member headings. Replace the demo images with your own team member images. Also, change the name, social profiles, and designation according to your needs.
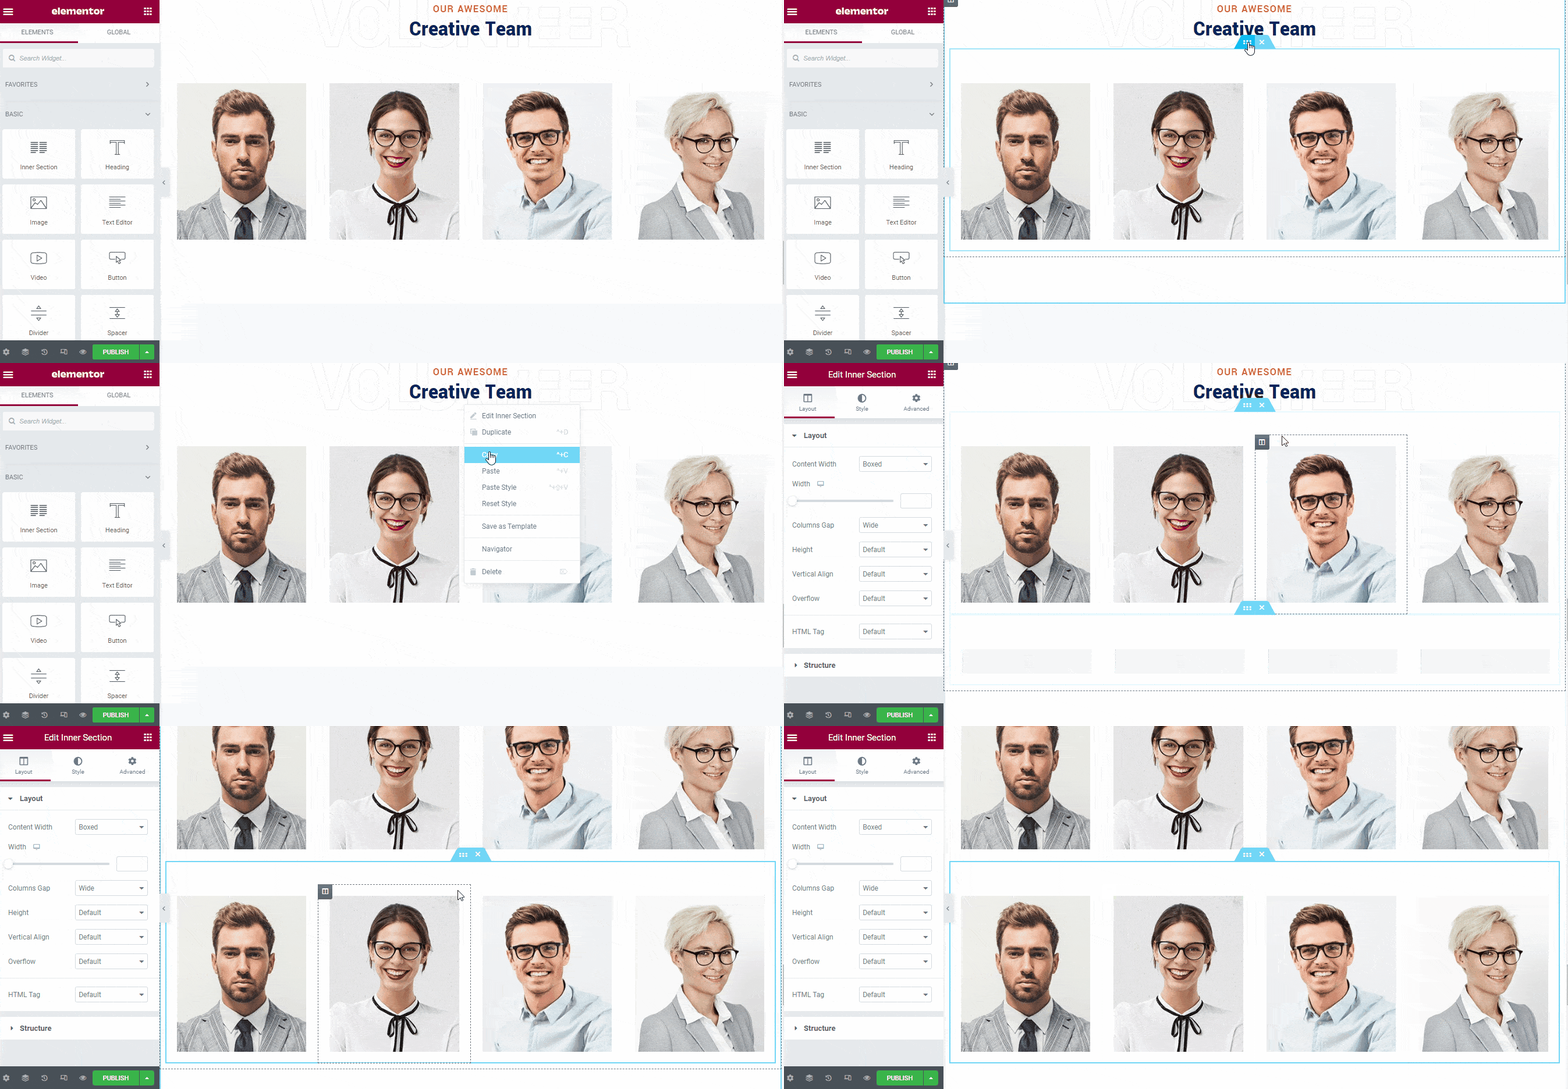
There are only four demo team members. You might need more. For this, you can simple duplicate the whole section and add new team members.
Similarly, if you go through the other sections of the template, you can edit and customize them easily.
By default, the template will have header and footer. But you can create custom header and footer with Elementor if you want.
Step 9: Integrate a donation plugin
Initially, you might not have any plan of collecting donation. But if you want to collect donation in future, you will have to integrate at least one donation plugin.
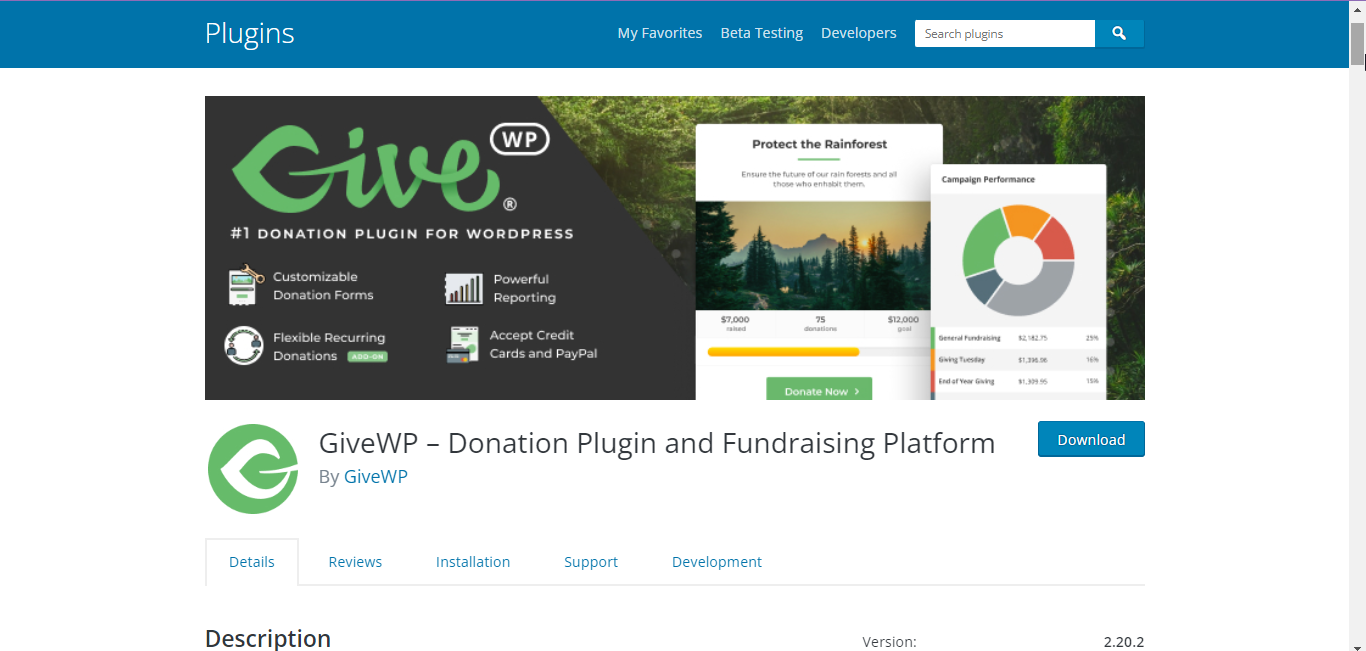
There are different donation plugins available and you can start for free. For instance, you can start with the GiveWP – Donation Plugin and Fundraising Platform.
Step 10: Preview and publish the non-profit website
Finally, preview the pages you have created and if everything looks good, publish them.
Features to integrate in a non-profit website
If you want to build an effective nonprofit website that gets more engagement, you need to include some essential features in the website.
- Must keep a page with the vision of the organization
- If you are accepting donation, mention it clearly and keep a payment gateway
- The site should have an easy to understand navigation system
- Let people know about your team with a team page
- Use high quality images and videos about your campaigns
Final Words
Following the above steps, you can easily build a nonprofit website from scratch. As you will use ready template, there won’t be need of writing codes. Moreover, the charity template of ElementsKit is highly customizable that gives a professional look to the website.


Leave a Reply