

A pricing list in WordPress can be a powerful addition to attract visitors’ attention to product costs. It helps to provide necessary costing information elegantly. You can also show the products’ short descriptions and features along with prices.
You can use a custom code to create a WordPress pricing menu list. You can find some WordPress themes that consist of pricing list shortcodes. It’s easy — you just have to copy-paste the shortcodes to a page and you can create a pricing list. However, using a standard plugin is the easiest way to design a pricing list.
In this article, we’ll show you how to create a neat and clean price menu list in WordPress using a plugin.
Why Add a Pricing List in WordPress Sites?
A pricing list on the WordPress site helps visitors check the product prices quickly. It showcases your products or services in an organized and easy-to-understand way. You can remove any pricing confusion and increase conversions by adding a list.
Additionally, a pricing list allows you to add buttons for purchases or subscriptions for the visitors to easily buy your products or services. Again, by understanding your competitors’ pricing strategies you can make your own pricing structure and model.
How to Add Pricing List in WordPress
Using a pricing list WordPress plugin can be the fastest way to organize your pricing list. Since a plugin goes with all WordPress themes you don’t have tension to find any particular plugin or shortcodes. There are several plugins on the internet. To make your desired price menu, you have to pick an efficient plugin. Such a plugin is the latest ElementsKit, all-in-one addon for Elementor, that provides all necessary and stylish customization features.
Highlight Important Facts 👉 👉👉 Create a News Ticker in WordPress
Now, we’ll show you how you can create a WordPress pricing list using ElementsKit within a short time.
Let’s learn…
First Things First…
From your WordPress dashboard, go to Plugins -> Search ElementsKit in the search bar -> Find the plugin and Install it.
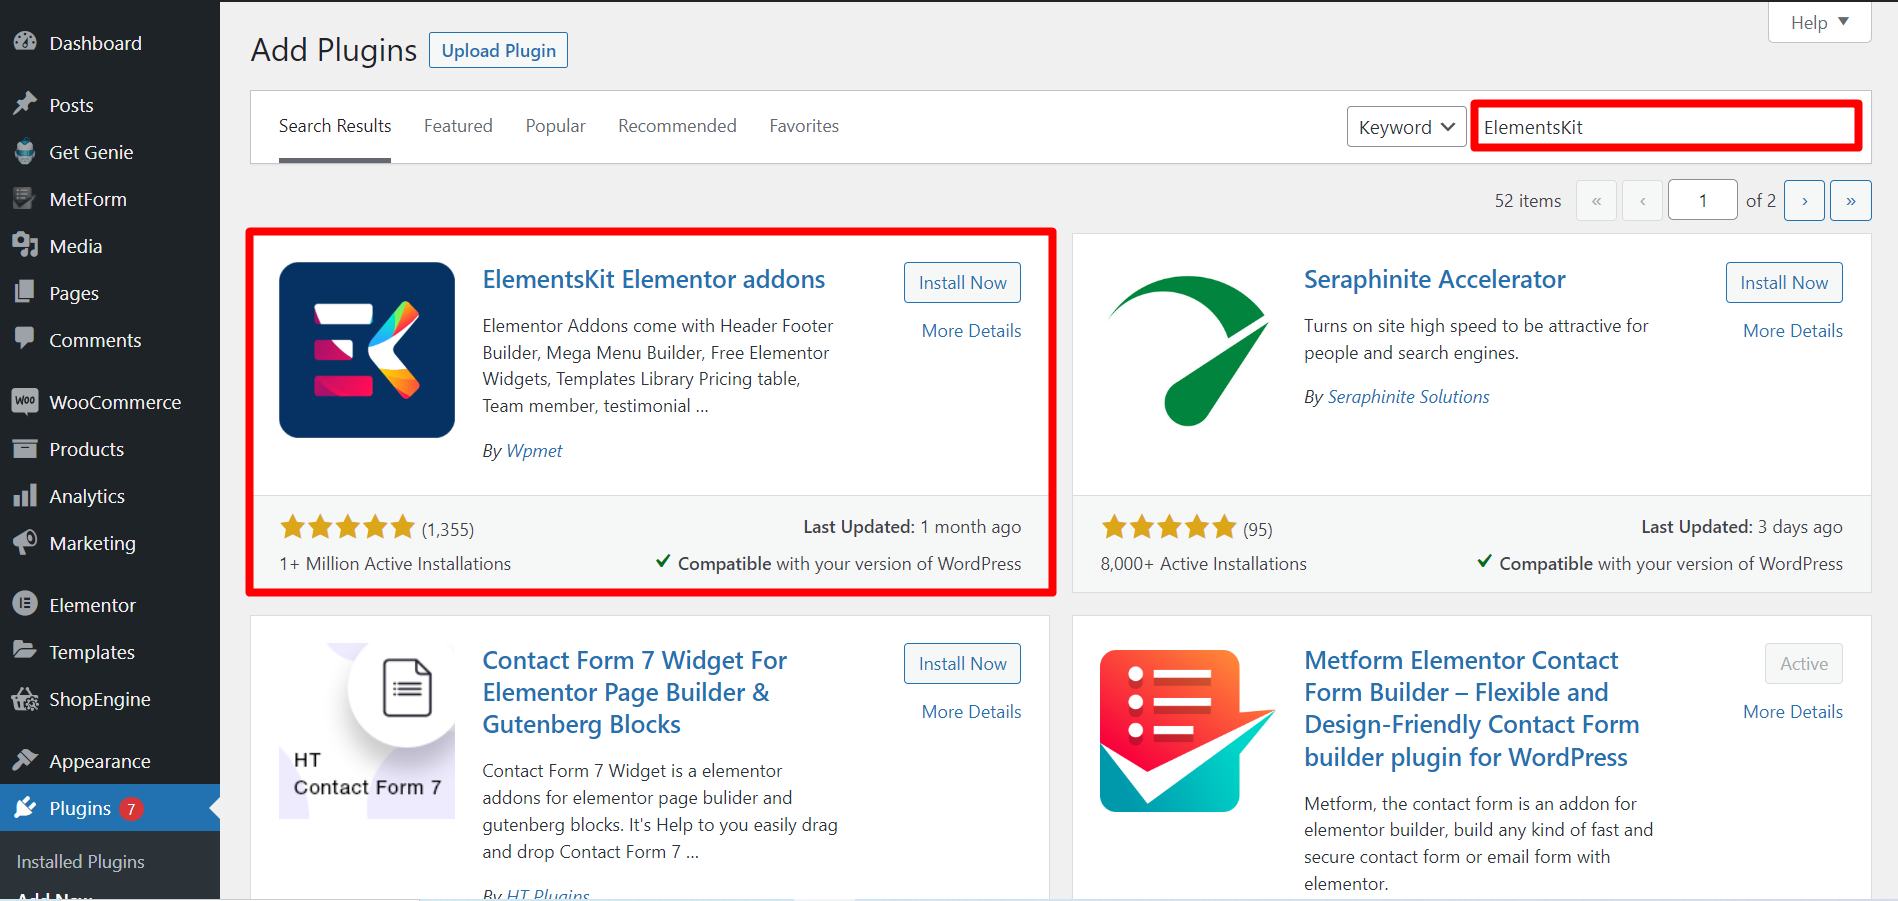
However, Price Menu is a premium widget, so you have to purchase and activate the ElementsKit license.
Let’s move to the main part…
Step 1: Drag and Drop
Open a page where you want to display the pricing list -> Click edit with Elementor -> Search the Price Menu widget -> drag and drop it.

Step 2: Content Section
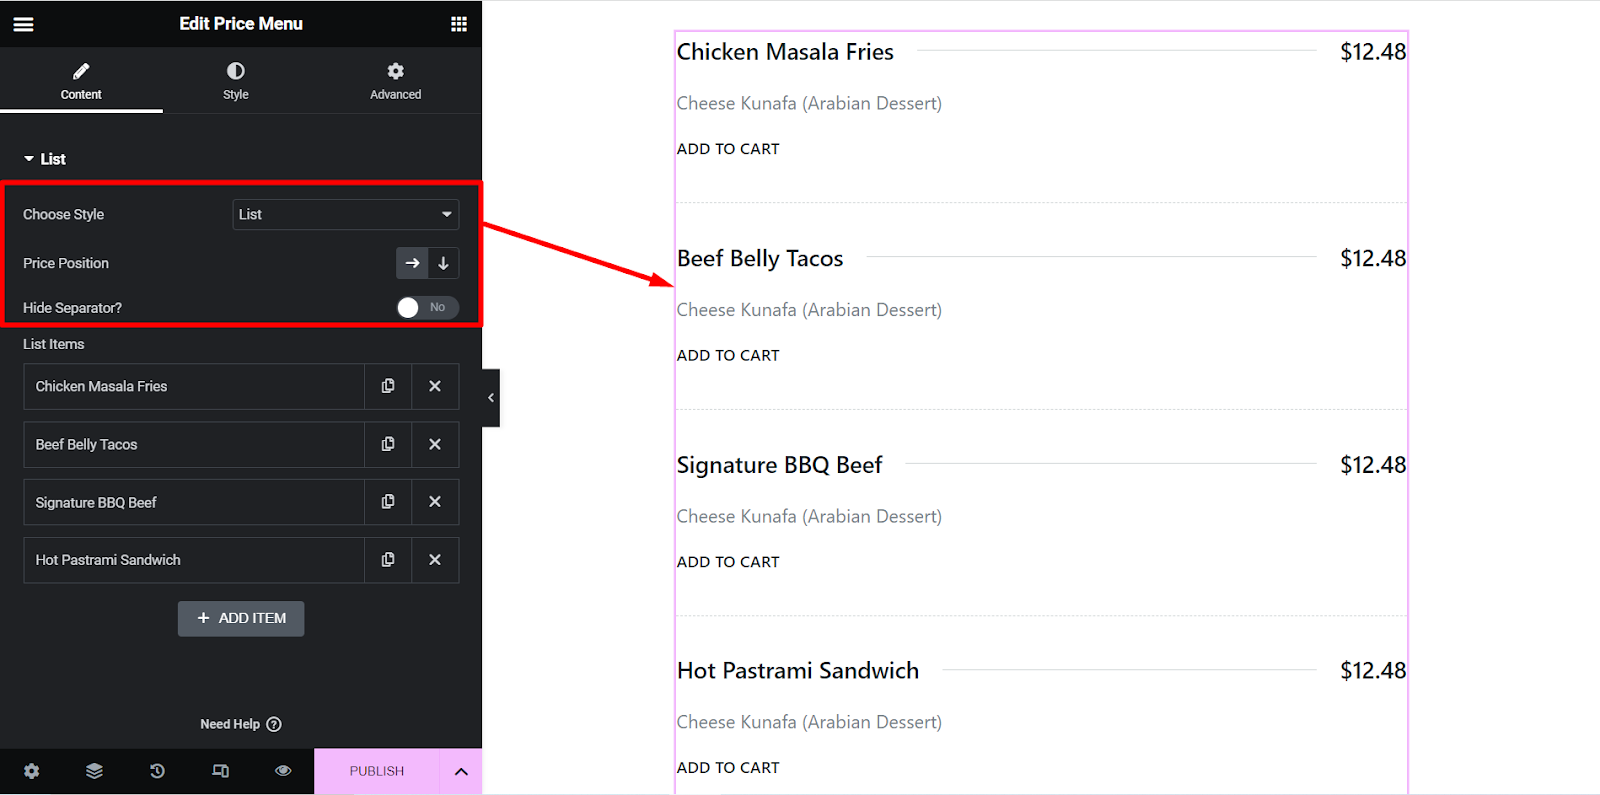
Style: List
In this style, the menu will be displayed as a list.
✔️ Choose Style – List
✔️ Price Position – You can display prices on the right side or at the bottom.
✔️ Hide Separator? – You can show a separator between an item and the price or skip it.
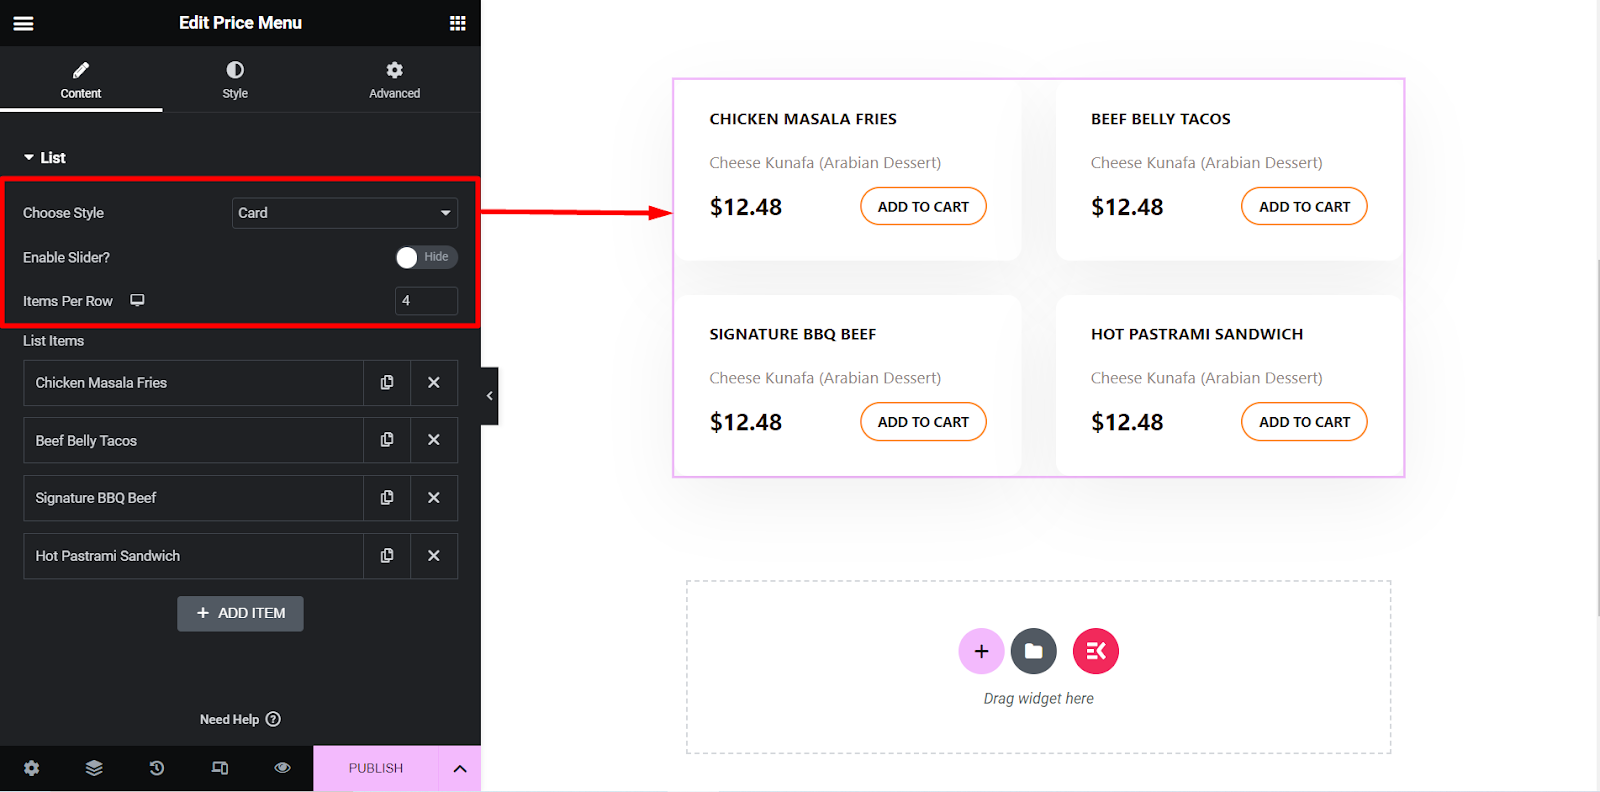
Style: Card
In this style, the menu will be displayed in a card style.
✔️ Choose Style – Card
✔️ Enable Slider? – You can show the menu in slide style or keep it as it is.
✔️ Items Per Row – Here, you can set the number of items you want to show per row in the menu.
Slider Settings
If you select the card menu style and enable the slider option then you can adjust this slider settings.
Here, you can set the speed, control autoplay, loop, and so on.
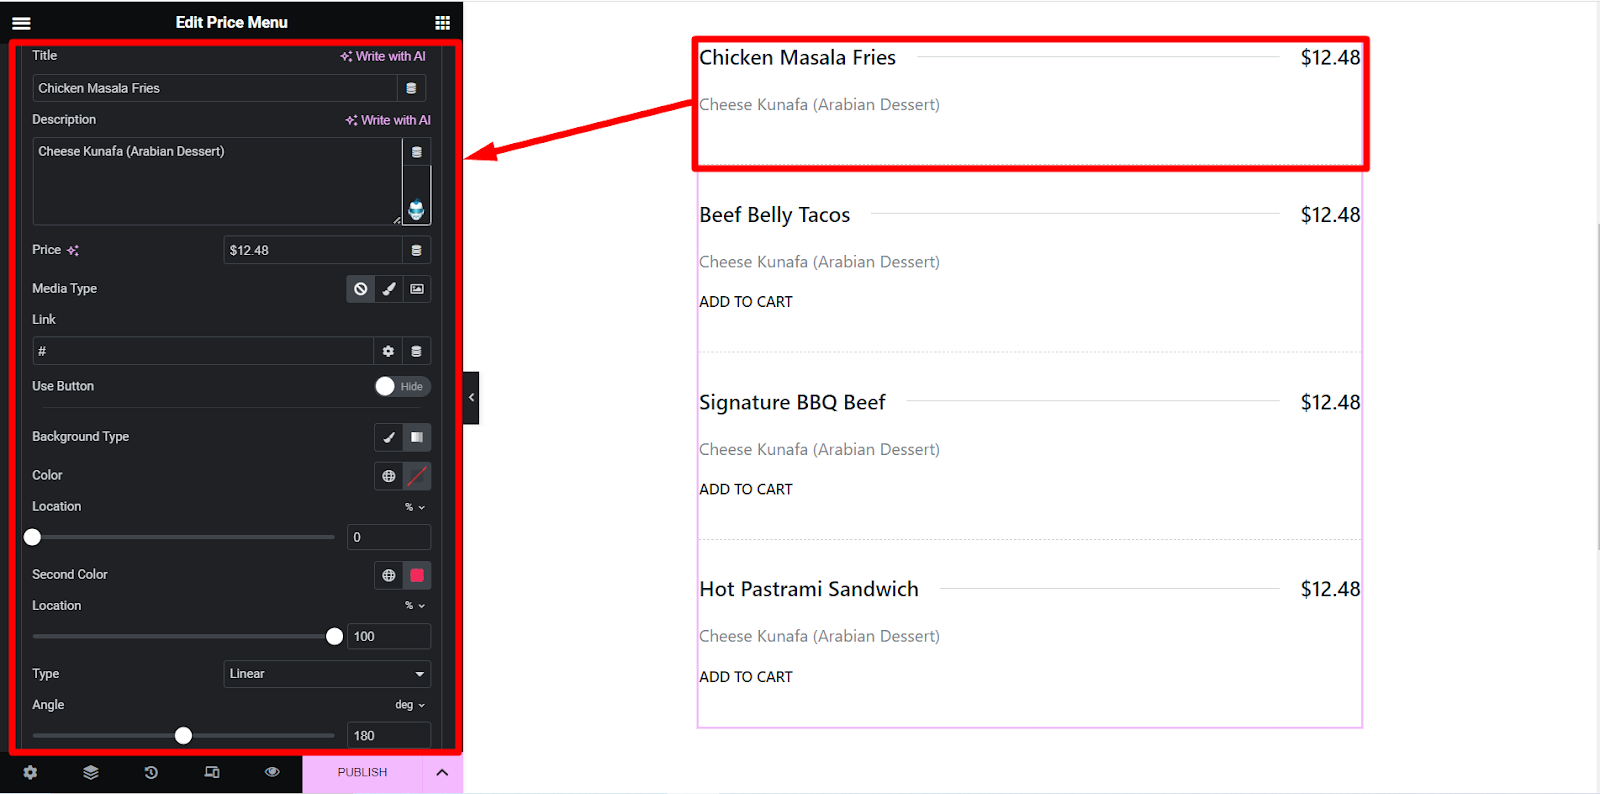
Next, when you expand an item, you’ll find these settings –
✔️ Title – Write the name or title of the item here.
✔️ Description – Explain briefly about the item here.
✔️ Price – Set the price for the item here.
✔️ Media Type – You can add the item image and an icon here.
✔️ Use Button – You can keep a button by toggling the button to Show or skip it.
✔️ Button Text – If you use a button then write a text for the button.
✔️ Button Link – You can insert a link to the button to redirect your customers wherever you want.
✔️ Add Icon In Button? – This is an icon setting option in the button, you can click Yes or No.
✔️ Icon Position – Fix the icon position here, you can place it before or after the button text.
✔️ Button Icon – From the options you can choose any icon.
✔️ Background Type – You can change the menu’s background color as you wish.
Here, the image shows options for Chicken Masala Fries –
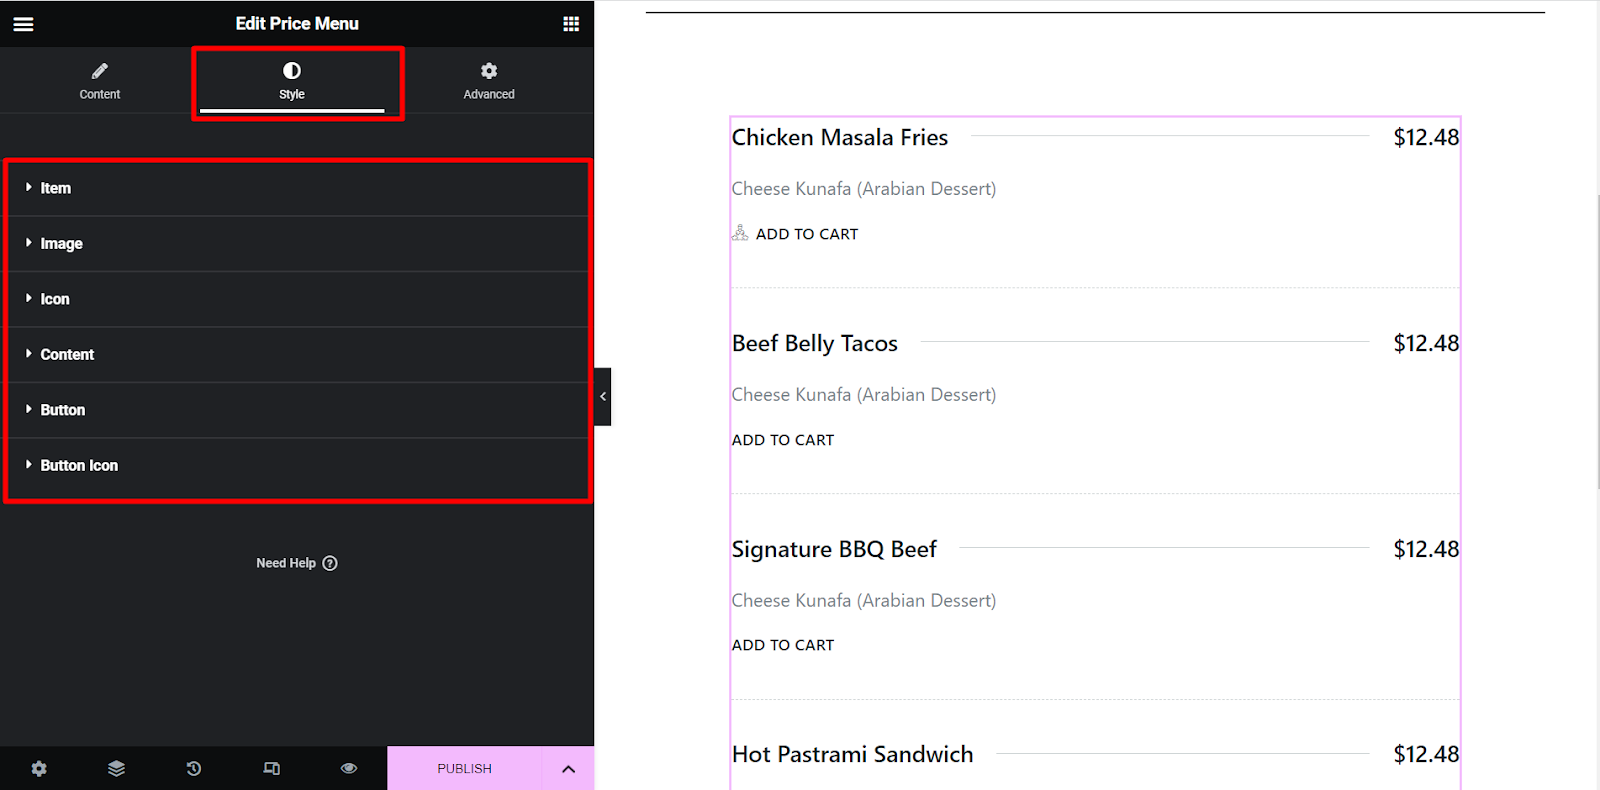
Step 3: Style Section
✔️ Item – Here you will style items’ vertical alignment, space, border, color, background type, etc.
✔️ Image – You will find image customization options here like size, border radius, and spacing.
✔️ Icon – This styling option allows you to style the icon.
✔️ Content – Find color, typography, padding, and other options to sort the content part of the menu.
✔️ Button – Like the other styling features it presents all the button designing options.
✔️ Button Icon – Click this option to design the button icon based on your choices.
So, after customizing the menu according to your choices you just have to click the PUBLISH button. Your stylish menu is ready to grab visitors’ attention!
Here is our final output of adding pricing list in WordPress-
Why ElementsKit?
ElementsKit is enriched with all the latest features. It is recognized as the complete package for Elementor addons. It provides you –
✨ Header & Footer Builder
✨ Megamenu Builder
✨ Multi Widgets Area
✨ 500+ Ready Sections
✨ 90+ Custom Addons
✨ 35+ Ready Home Page and many more.
Start Making Pricing List in WordPress
For any business, a pricing list is an essential thing without any doubt. It makes it easier for your visitors to choose the best one for their needs.
We have shown you how to add a pricing list in WordPress using the ElementsKit plugin. Using plugins is the best practice today as the method is by far the simplest. With ElementsKit, you will get tips for designing an effective and attractive pricing list for your website.
Moreover, ElementsKit provides you with tons of helpful features for your Elementor website. Now you can build anything you want with this trendy tool! 😎 👇

Leave a Reply