


Maintaining an online store is getting competitive over time because of increasing eStores and their innovative strategies. Therefore, owners need to come up with something that actually helps them to demonstrate the value of their products. And, in this case, nothing can beat WordPress before and after slider as it shows the value of your product exactly the way you want.
There are multiple options to add before and after sliders in WordPress. But, using WordPress plugins will come to your mind first, if you consider the time and effort you have to put in. Moreover, since there are numerous before and after slider plugins in WordPress, you also need to focus on using the handiest plugin.
That’s why, here, we will show the process of adding a before and after slider by using the most suitable WordPress plugin. But, before that, let’s dig deep into what’s a before and after slider along with what are its additional benefits besides showcasing values.
What is a before and after slider?
A before and after slider is a plugin that allows users to compare two images on WordPress sites to present the benefits and opportunities of using products or services. Besides, it gives anyone a clear vision of which is the best option for them.
To cut a long story short, an Elementor before and after slider allows you to take the best decision by showcasing the comparison of two images.
Why use a WordPress before and after image slider?
Customers never get a product or service at the minimum cost that doesn’t provide any value. Rather, they don’t mind paying higher if the product fulfills their requirements or needs. It means you need to showcase the benefits of your products on landing pages to convince customers to take action. This is why a WordPress before and after image slider comes in handy!
Apart from this, it also offers other benefits that are going to carry business in the long run such as:
- It simplifies the customer’s decision-making process.
- An online before and after slider boosts the sales and revenue of your business.
- Let you showcase the benefits of using your products or services.
- A before and after slider creates highly-converting WordPress landing pages.
- It compares two images in a way that grabs customers’ attention.
These are the reasons that will make you utilize this WordPress before and after image slider without giving it a second thought. Now, it’s time to explore the quick hack of using Elementor before and after slider.

Steps to add before and after slider in WordPress
Here, we will use plugins to add before and after slider in WordPress. Though you can also use online tools to create comparison images for WordPress. But, using WordPress plugins is the best option for adding comparison images on the site because it requires zero coding. Thus, follow the steps below to create a WordPress before and after slider in an instant:
Step 1: Install the Elementor before and after slider plugin.
To enjoy the benefits of the before and after slider, two plugins need to be installed on your WordPress site and they are:
- Elementor (Free)
- ElementsKit (Free)
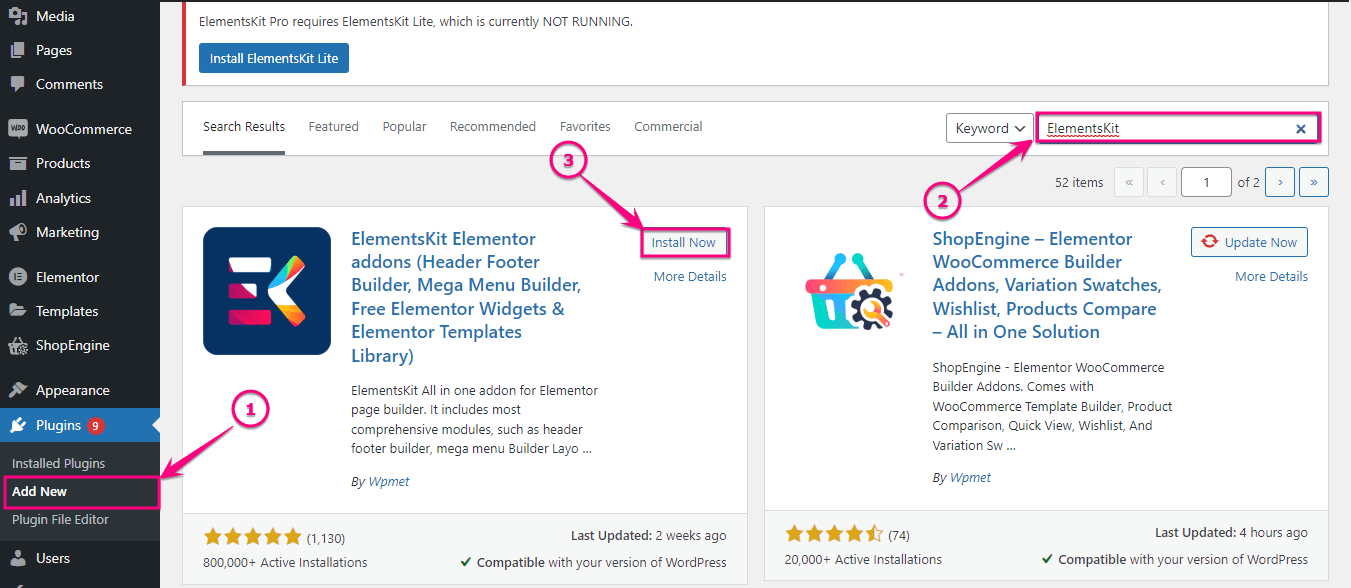
The free version of these plugins will be enough to add WordPress before and after slider. So, in the first step, you need to install Elementor and ElementsKit on WordPress. To do that, go to (1). Add New option under plugins and search for the plugin in the (2). Search box. After that, click the (3). “Install Now” button and after installing, activate it. Like this, install and activate both plugins.
Step 2: Enable the Image comparison widget.
Now, enable ElementsKit’s image comparison widget. To enable it, go to (1). ElementsKit and click the (2). Widgets tab.
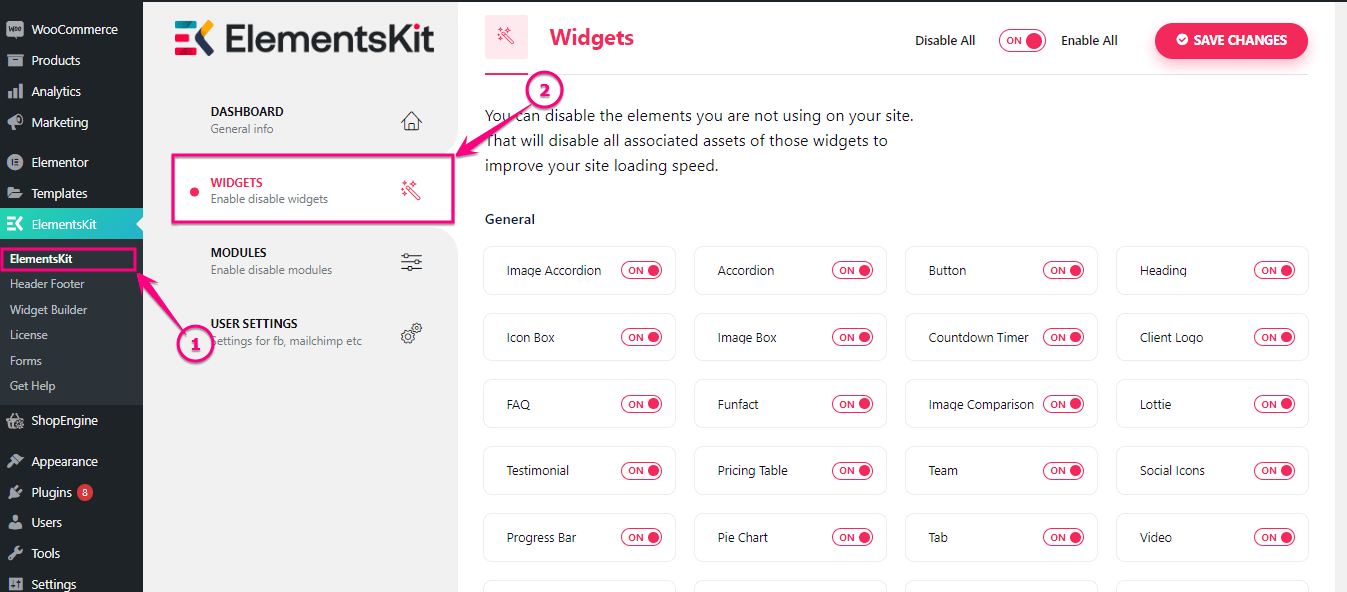
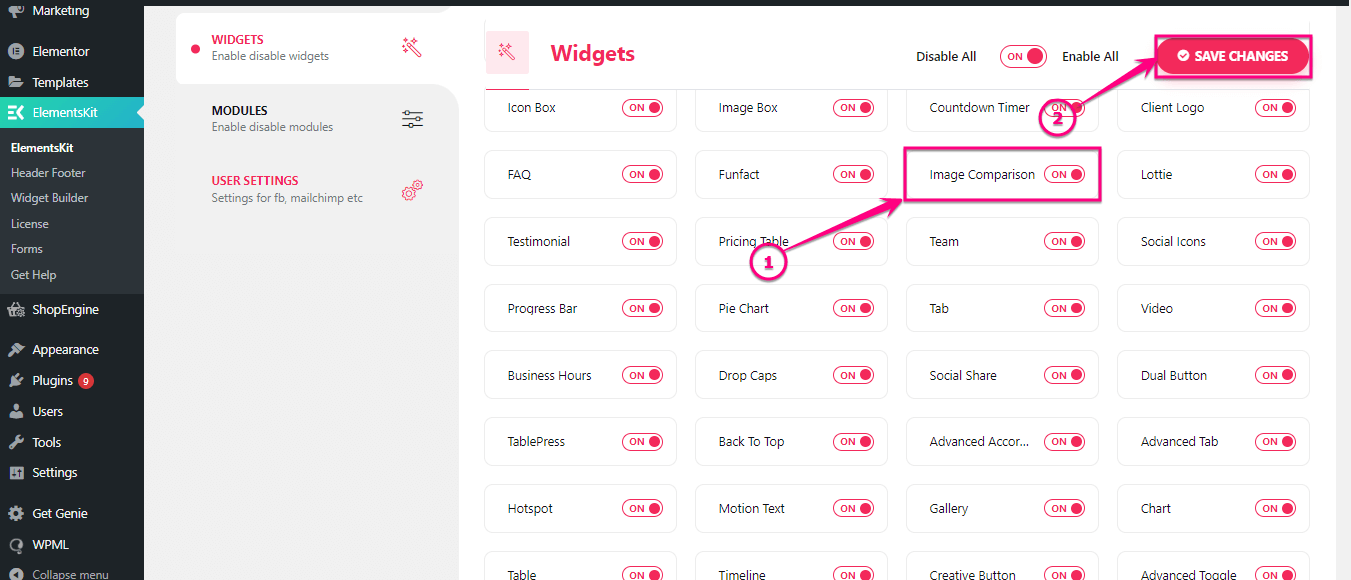
After that, enable the (1). Image Comparison widget and click the (2). Save Changes button.
Step 3: Add WordPress before and after image slider.
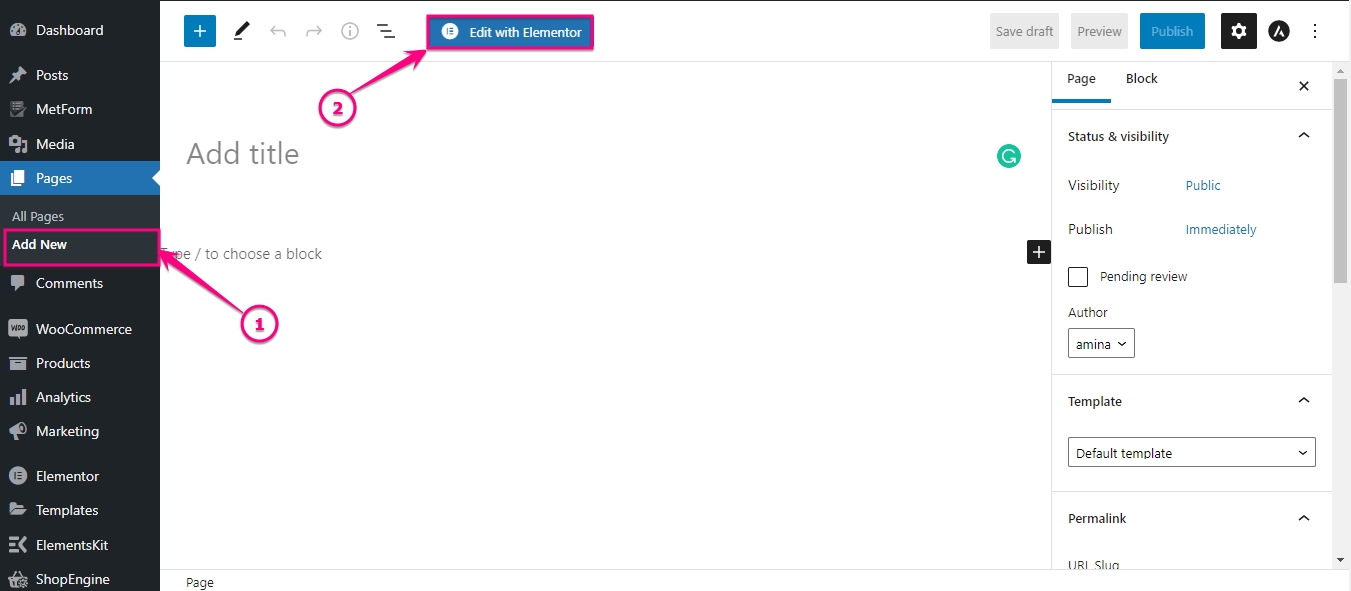
In this step, you need to go to the page where you want to add WordPress before and after slider, or else, you can also add a new page for it. Then, click the (2). Edit with Elementor button to add before and after slider online.
Then, search for the Image Comparison widget in the search box. After finding the widget, drag and drop it on the plus icon.

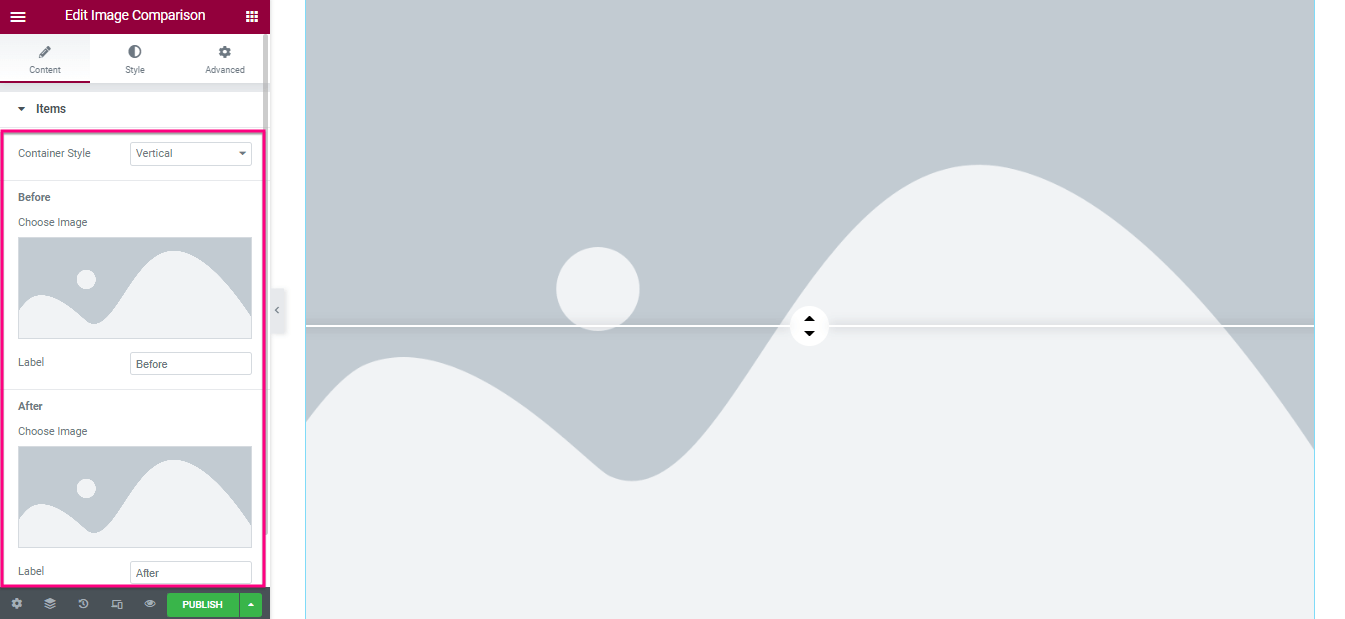
From the left side of your Elementor dashboard, select before and after images along with labels under the items tab.
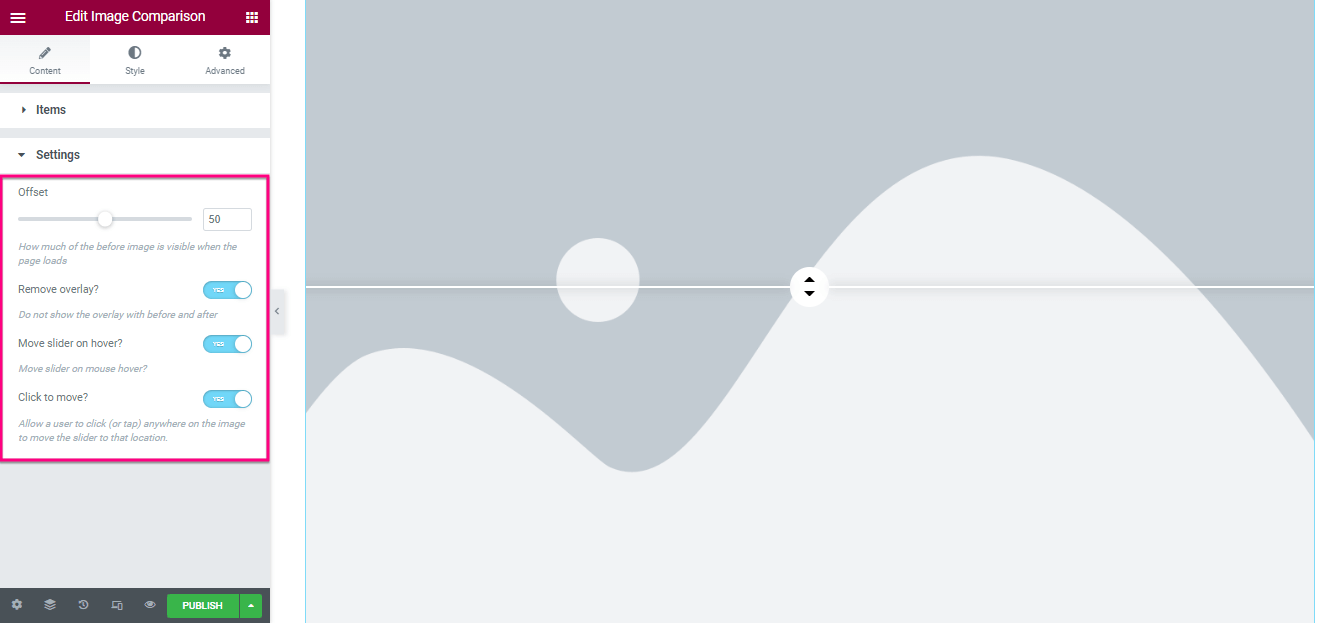
Now, enter the Settings tab and adjust the offset for your WordPress before and after image slider. Also, enable or disable the overlay, move the slider on hover, and click to move options.
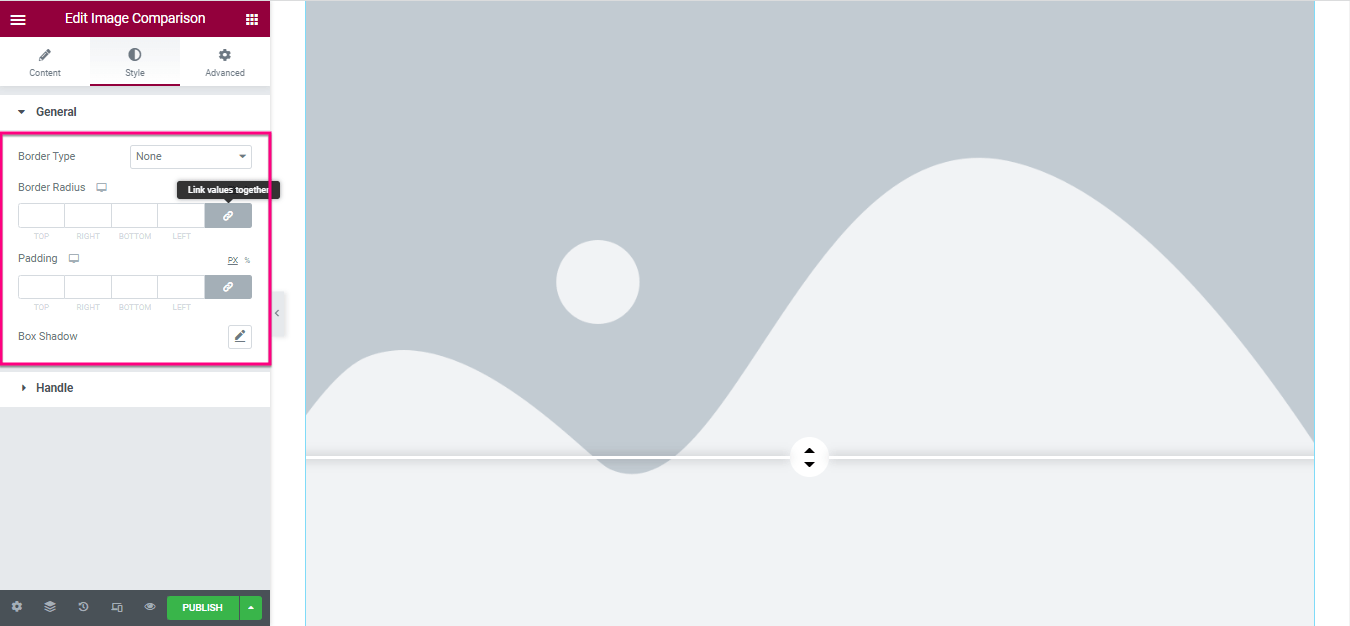
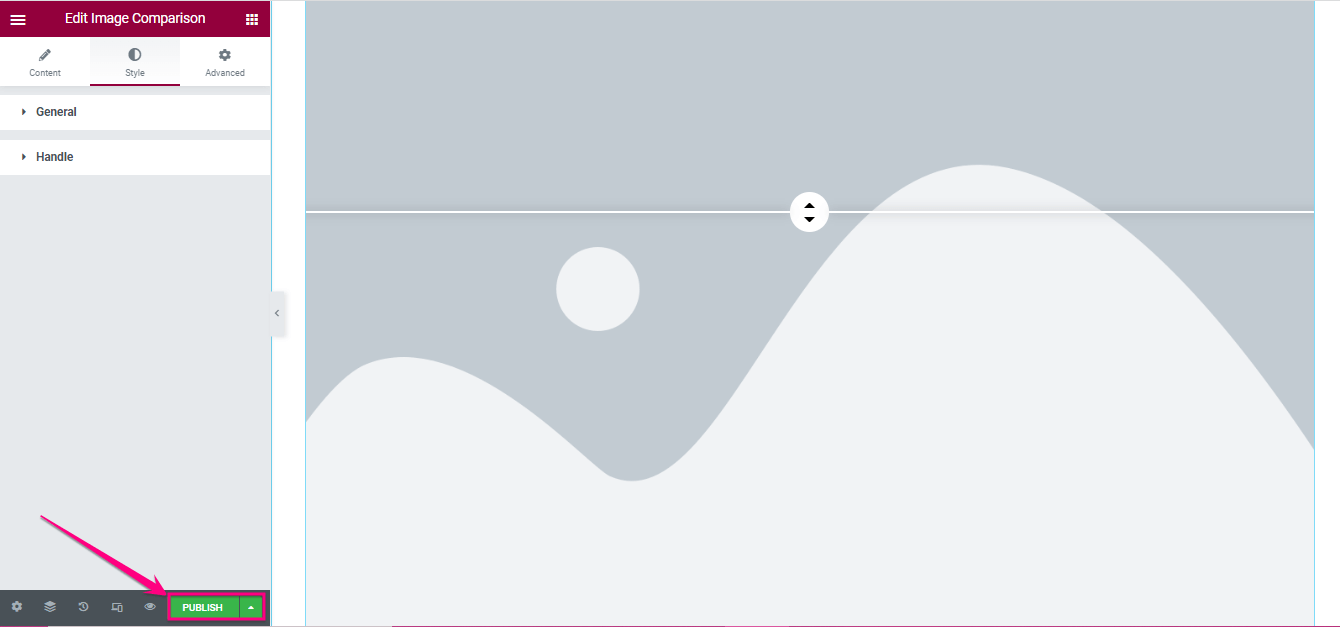
After Editing content, visit the style tab and adjust Border Type, Border Radius, Padding, and Box Shadow which you will find under the general tab.
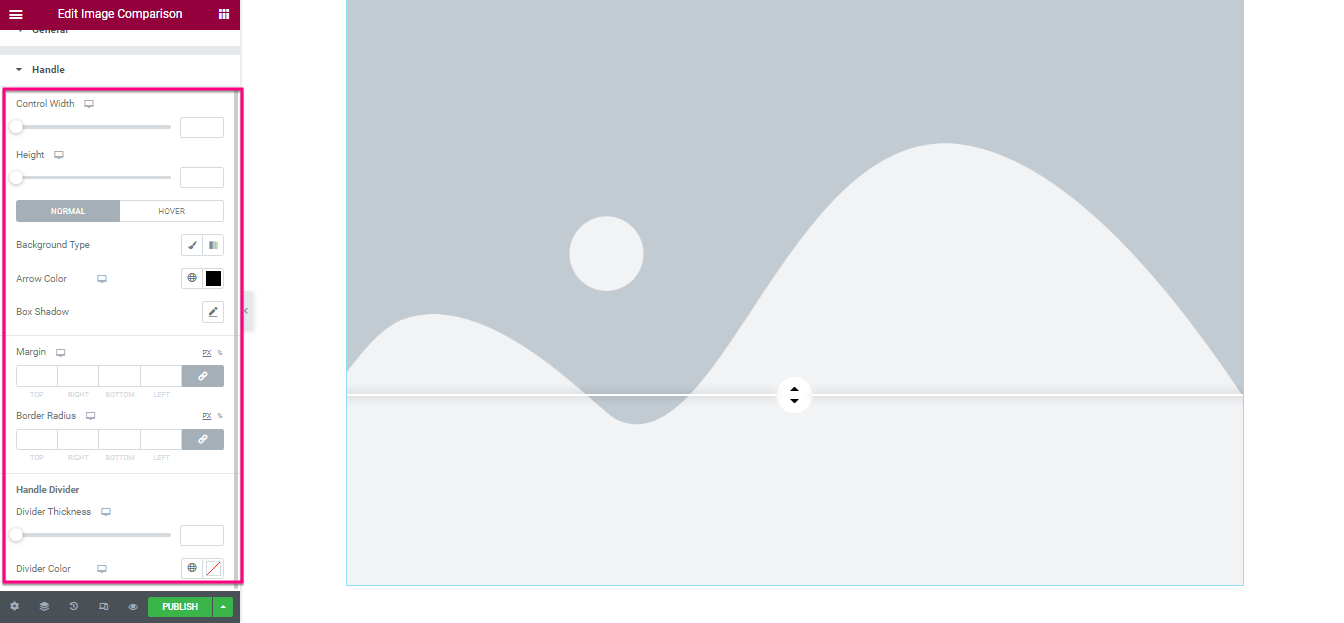
Now, go to the Handle tab and customize:
- Control Width
- Height
- Background type
- Arrow Color
- Box Shadow
- Margin
- Border Radius
- Divider Thickness
- Divider Color
Finally, press the publish or update button to make your WordPress before and after image slider live.
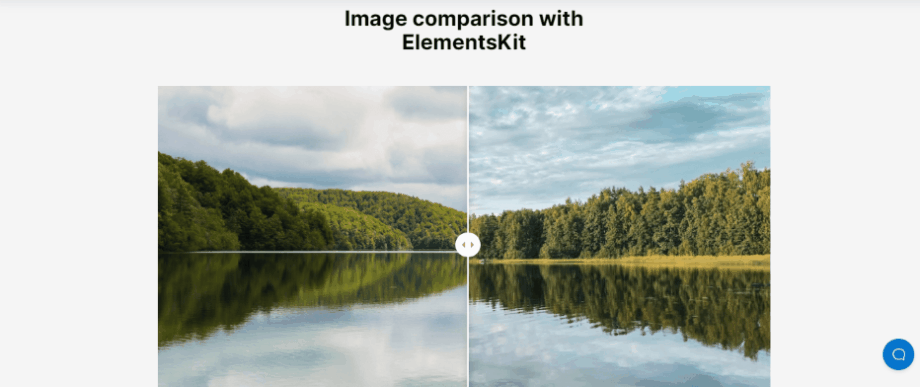
Final WordPress comparison image
Here is the beautiful comparison image that we have built with ElementsKit:
Demos of stunning WordPress before and after slider
You can add and enjoy any type of comparison image in WordPress if you select the right plugin which will make your landing page more beautiful and attractive to your customers. We have used ElementsKit for creating a stunning comparison image in WordPress. Besides, you can add a variety of before and after sliders. Here are some more examples of WordPress comparison images built with ElementsKit:

Showcase before and after image slider
Displaying WordPress before and after slider not only convinces visitors to receive your services but also helps them to get back to your website again if your product is satisfying. In addition to these, it also offers other facilities that have been described above. However, you already knew how to add comparison images on WordPress.
Thus, check the whole process and add before and after slides on WordPress using ElementsKit without putting much effort and time. Though you can use any plugin to create this comparison image. But, those plugins might not give you a vast amount of options like ElementsKit.
For example, you can enjoy Image masking, Behance feed, comparison table, etc along with adding comparison images on WordPress if you use ElementsKit as it’s an all-in-one Elementor addon. So, use the best WordPress before and after slider plugin for showcasing comparison images on your site.
Leave a Reply