

Fancy text styles grab viewers’ attention quickly. WordPress website owners often ask how to add animation to text. Absolutely, you will find several methods to design your WordPress site texts. You can manually add HTML CSS effects which require a bit more code. But coding is a great way to add WordPress custom text animation to your site. Again, a plugin with the best widget is relatively handy, effective, and also popular.
However, we have tried to cover both techniques as easily as we can. If you run a WordPress site then take time to read the blog and understand the processes of adding Elementor text animation in WordPress. Following the steps and instructions properly will let you customize your own animation smoothly.
What is an Animated Text Effect and how does it appear?
WordPress Animated text effects are a great way to add a little fun and excitement to your articles and titles as well. When you choose to use a fancy animated text effect, you can create various effects. Some effects are simple as changing the text color or size, while some are detailed animations such as blinking or flashing text.
Animated text is a bit different from regular text. Usually, this type of text does not move on its own. Instead, it has an effect that makes it appear as if it is moving across the screen. So, the fancy texts make people more likely to click on the content, links or open emails.
The role of Animated Texts in your Website
There are different types of animated text effects available in WordPress themes, but they all share the same basic functionality. They change the color or style of text and simply change a test style. For example, you can change a “call-to-action” button with a red background and white text that says “Click here!” when clicked on.
A WordPress animated heading or a hero section with fancy texts plays the following roles-
- Makes your designs visually more interesting.
- Highlight special offers and important information.
- Makes your product features noticeable.
- Makes a website more interactive and promotes the business.
How to Add Animated Text Effects in WordPress
Animated text effects can be used to add flair and personality to your WordPress site. Did you also worry about ‘how do I add animation to a text message?’
In this WordPress text animation tutorial, we’ll show you the ways of adding these effects; but before that, you must have a clear idea about an animated text and its role; let’s learn!
The easiest way to add Animated Text Effects
using a WordPress plugin
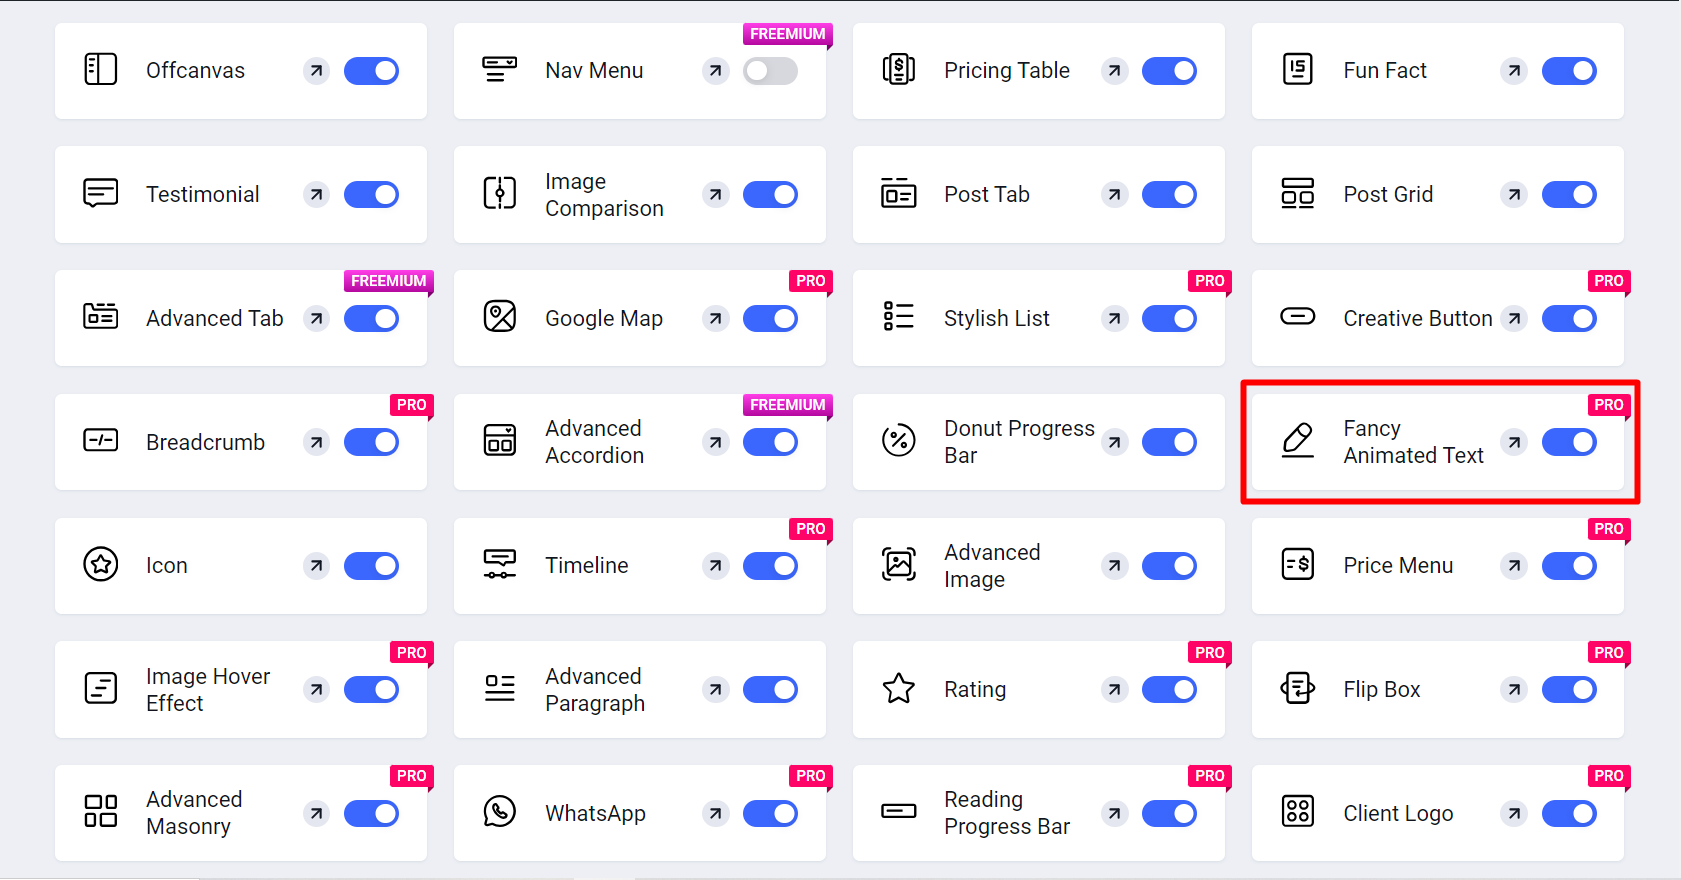
Today’s market gives you different kinds of WordPress text animation plugins to make text styling tasks easier. ElementsKit is such a powerful plugin as well as addon for Elementor page builder. With ElementsKit, a WordPress text animation plugin, you will get everything under one hood.
Fancy animated text is an impressive widget presented by ElementsKit pro.
Learn how to animate text on WordPress pages using ElementsKit:
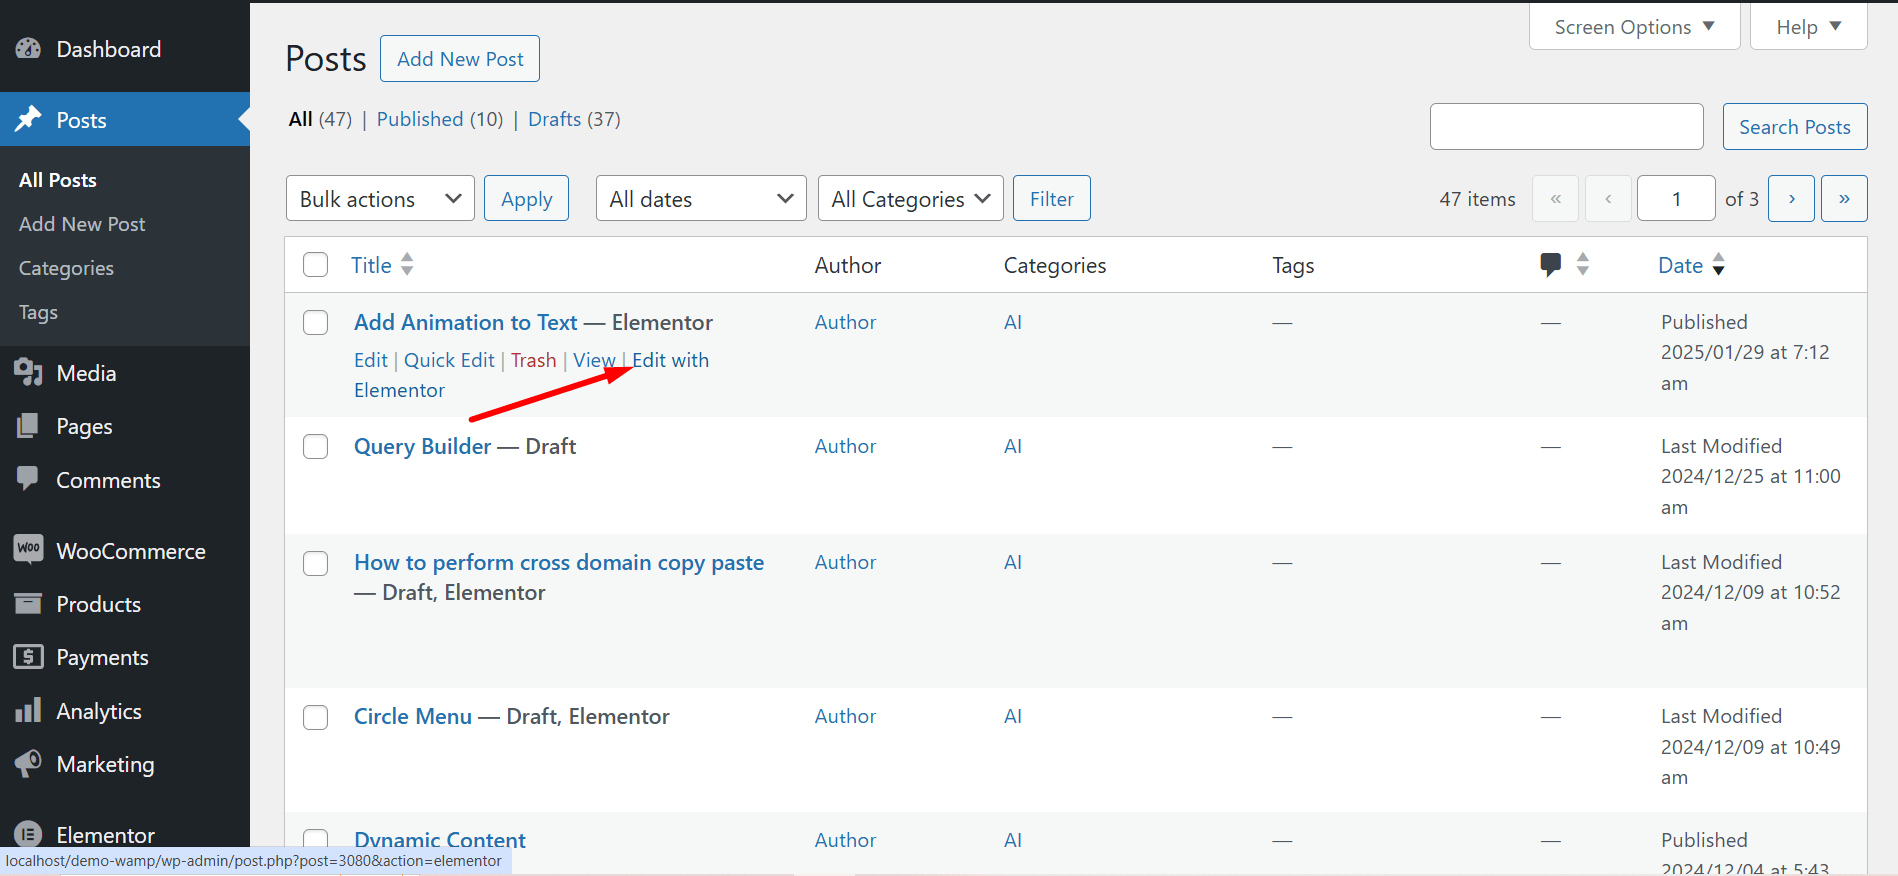
Login to your Dashboard -> Select any Page or Post -> Click edit with ElementsKit
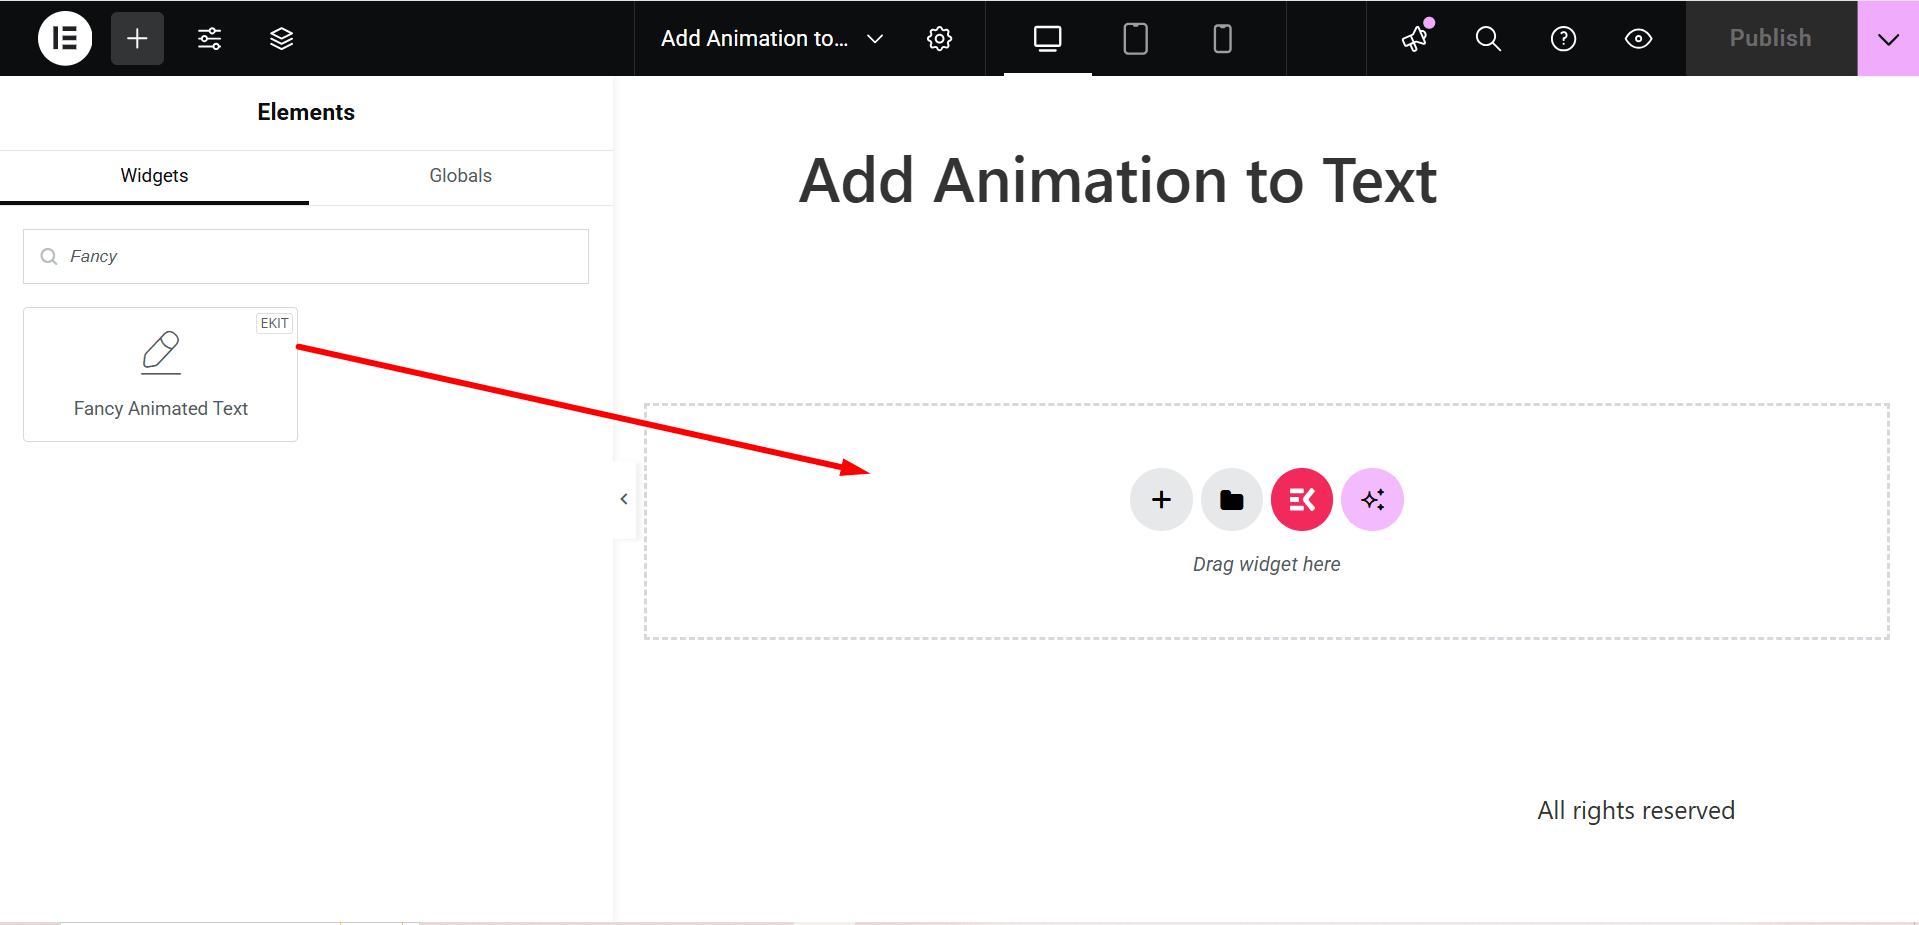
Search ElementsKit Fancy Animation Text widget -> Drag and Drop the widget
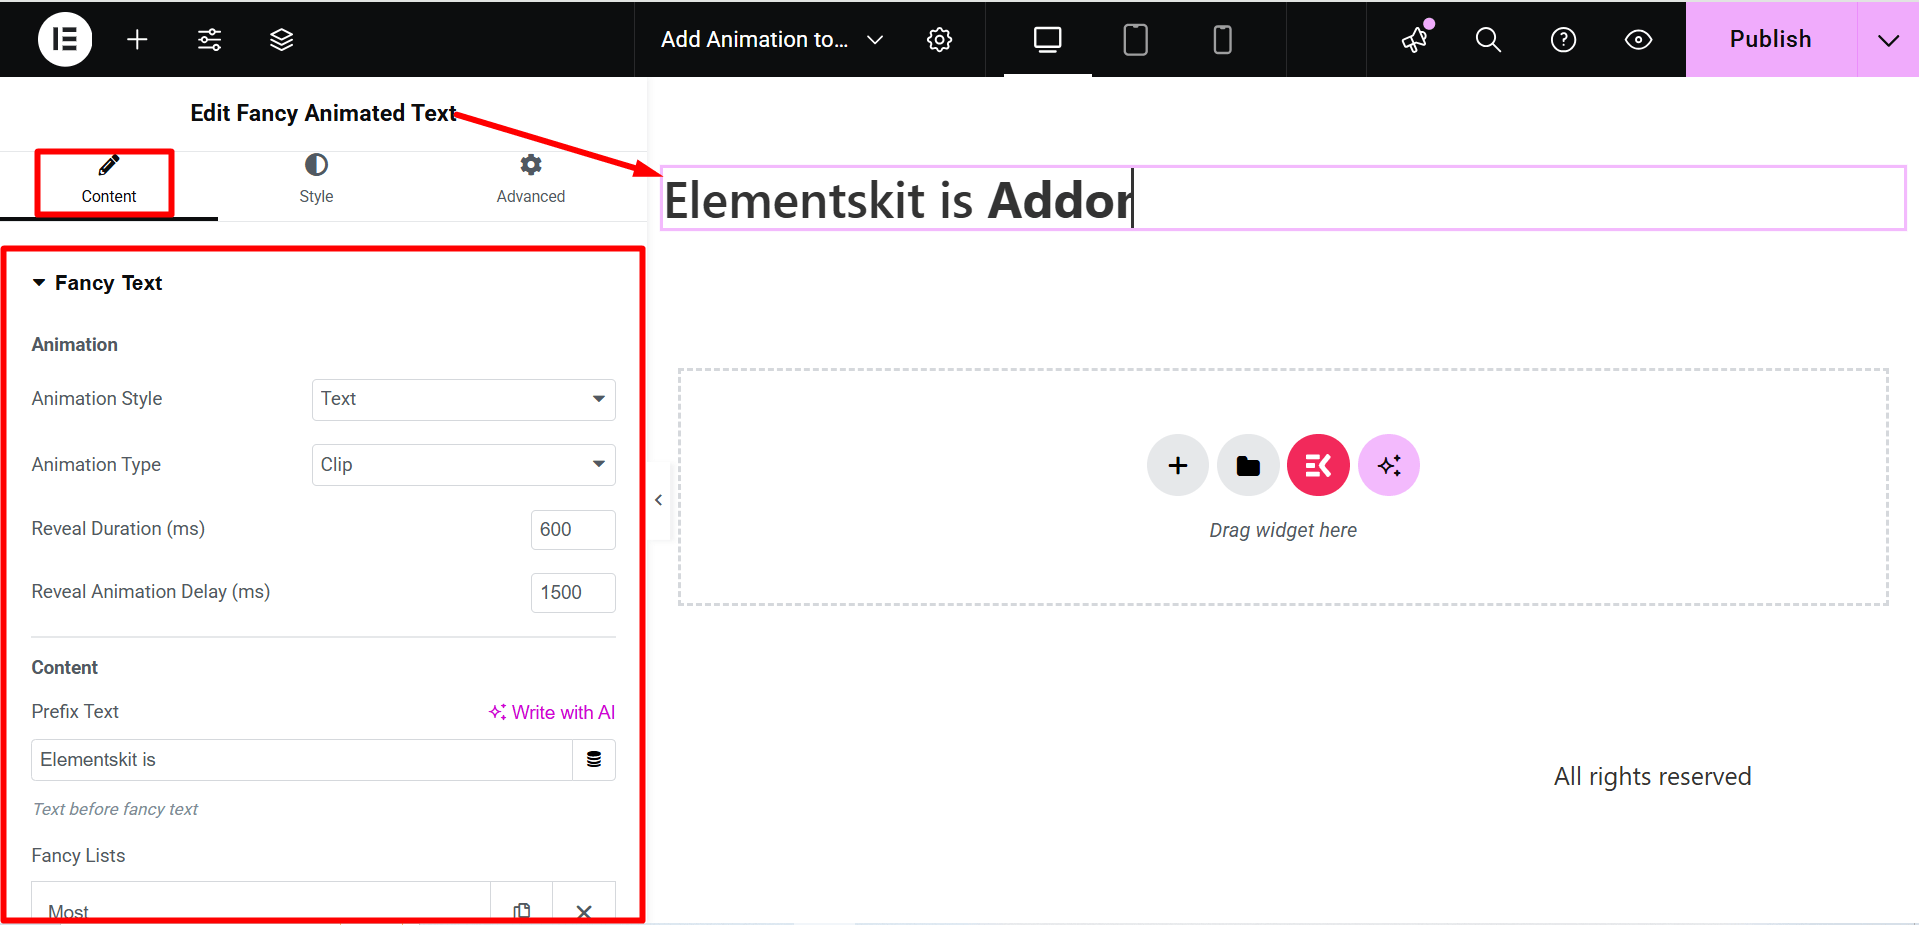
Content Section
The part is called the Fancy Text part, it contains the following fields-
Do you know why ElementsKit is so popular? 🤔
Check here 👉 World’s Top Ranking Websites Built with ElementsKit
Animation
- Animation Style – Here the two WordPress animation options are Text or SVG, both allow you to make different animation styles.
- Animation Type – Based on your animation type you will get various choices here.
- Reveal Duration (ms) – You can set the animation duration in milliseconds using the option box.
- Reveal Animation Delay (ms) – Adjust the animation delay time here. It specifies an animation can start later, immediately from its beginning, or instantly and partway through the animation.
Content
- Prefix Text – You need to write the prefix content here that you want to display. It means it will be written before the fancy animation.
- Fancy Lists – Add items here for fancy WordPress text animation.
- Suffix Text – Write the suffix content you want to display. So, it will be specified after the fancy animation.
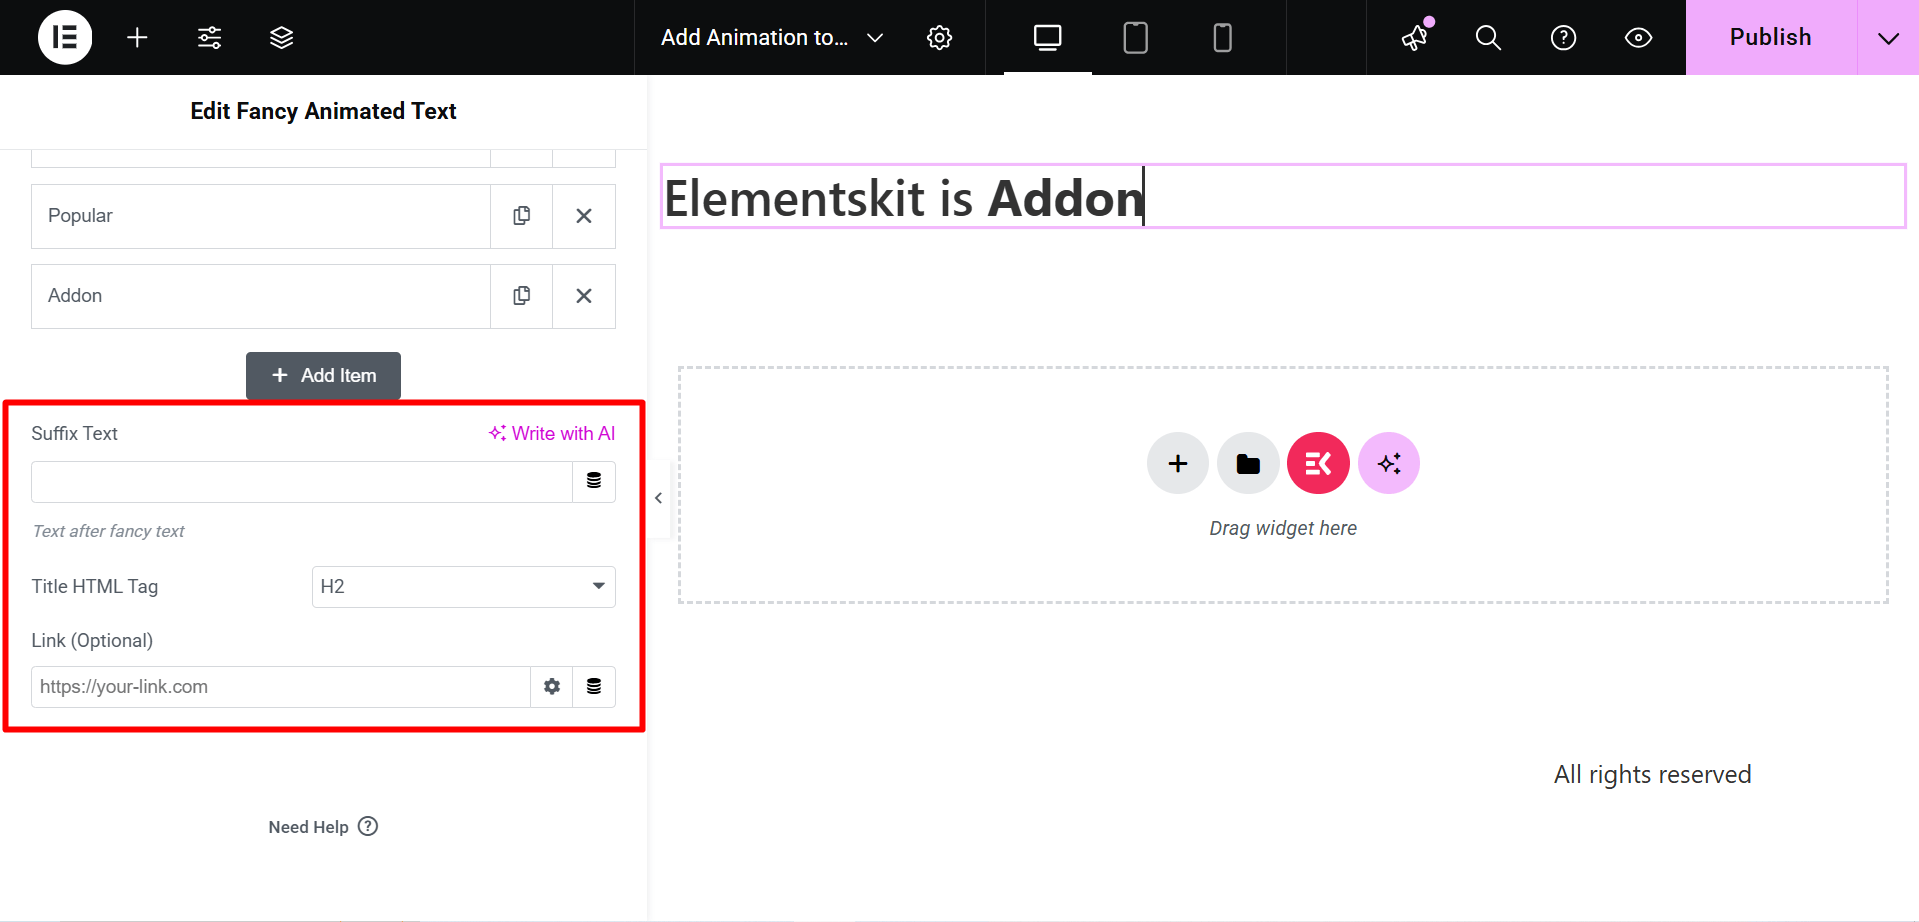
- Title HTML Tag – Select the HTML tag of the content here.
- Link (Optional) – Add any link if you want the users to redirect to any other location.
Style Section
- Heading Text – Utilize this field to adjust WordPress animated heading alignment, typography, color, etc.
- Fancy Text Lists – Use this field to adjust typography, color, and padding.
- Fancy Cursor – You can give the cursor a fancy look with color, width, and height using this field.
After editing and styling all your required statements click update and see the changes from the front end. An example is –
How to animate text in Gutenberg
Not only WordPress but also you can add animated text in Gutenberg using a block plugin. Gutenberg plugin such as GutenKit has a dedicated block called “Fancy Animated Text” for text animation. However, this feature is only available in the paid version but it will allow you to highlight text with wonderful animation effects in minutes.
So, let’s check out how GutenKit animates text in Gutenberg by adopting only three steps:
Step 1: Enable “Fancy Animated Text” block.
First, install and activate free GutenKit from the plugin directory by navigating to Plugins >> Add New. After installing GutenKit free, upload the pro version of this plugin.
Then, visit the blocks section of GutenKit and enable the “Fancy Animated Text” block.

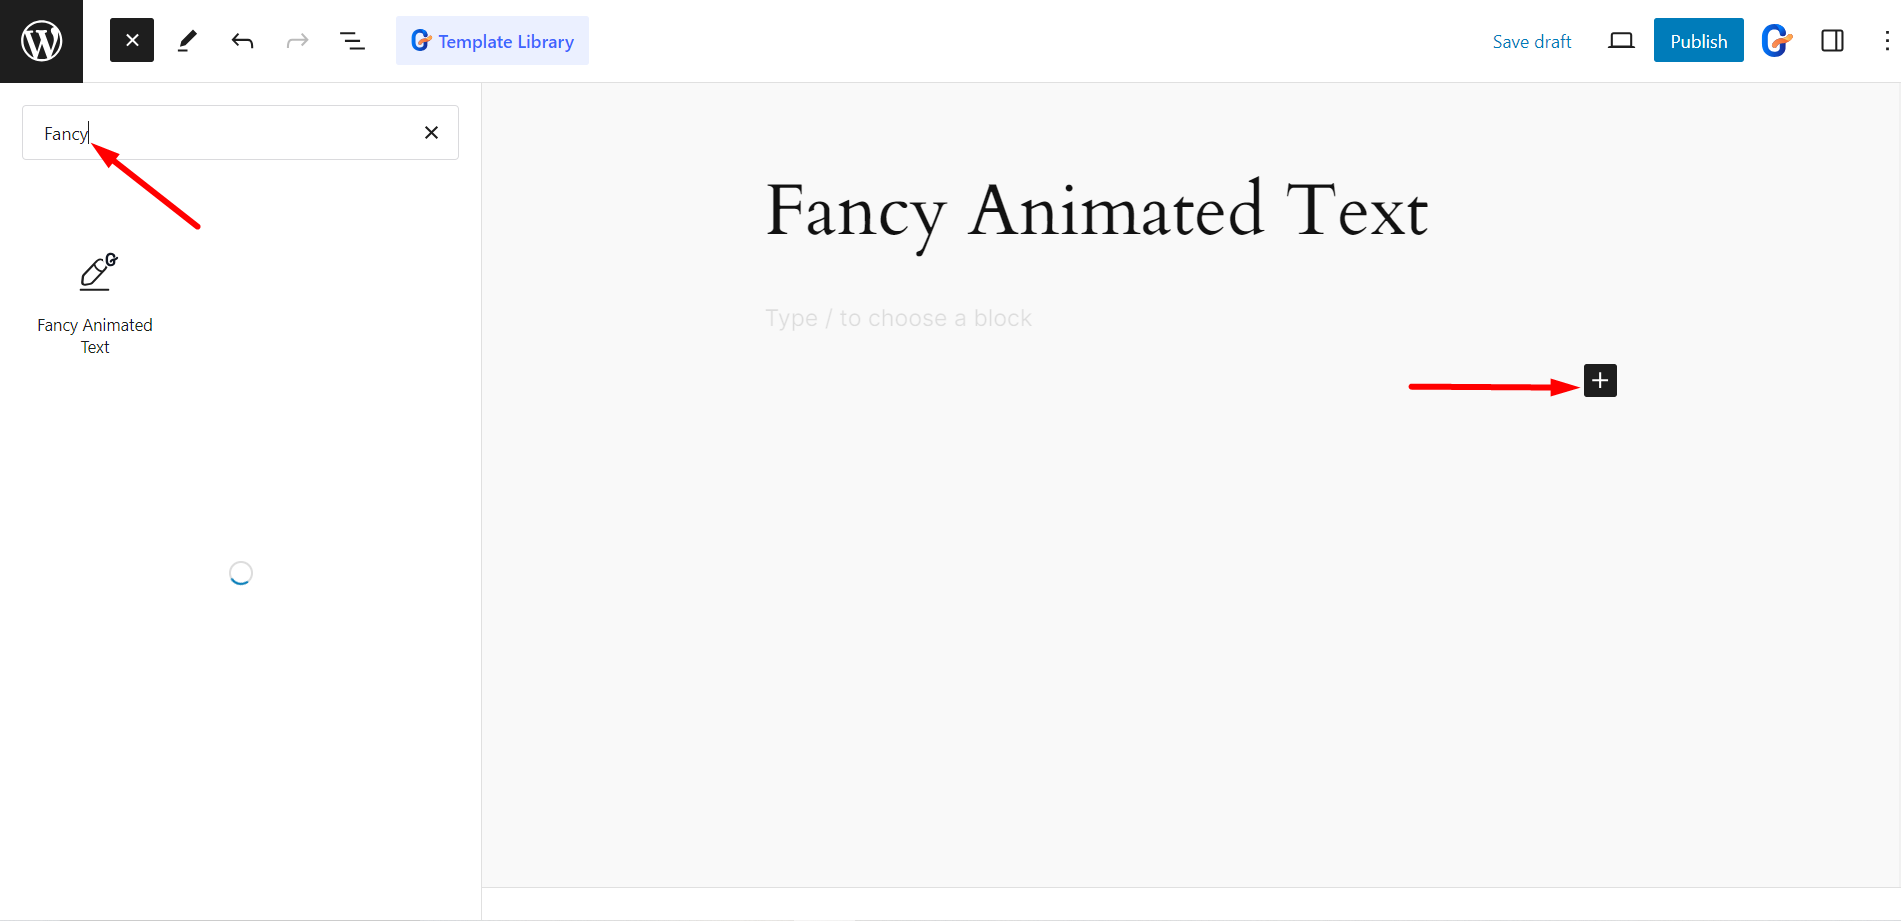
Step 2: Add fancy animated text to Gutenberg.
In the second step, you need to go to a new page by visiting Pages >> Add New Page. Then, add the “Fancy Animated Text” block by clicking the plus icon and searching for it.
Step 3: Customize animated text inside Gutenberg.
Last step is customizing the animated text according to your preference by leveraging the animation options displayed on the right side. Here you will get option to set and adjust Animation Style, Animation Delay, Prefix Text, Suffix Text, Title HTML tag, and Link.
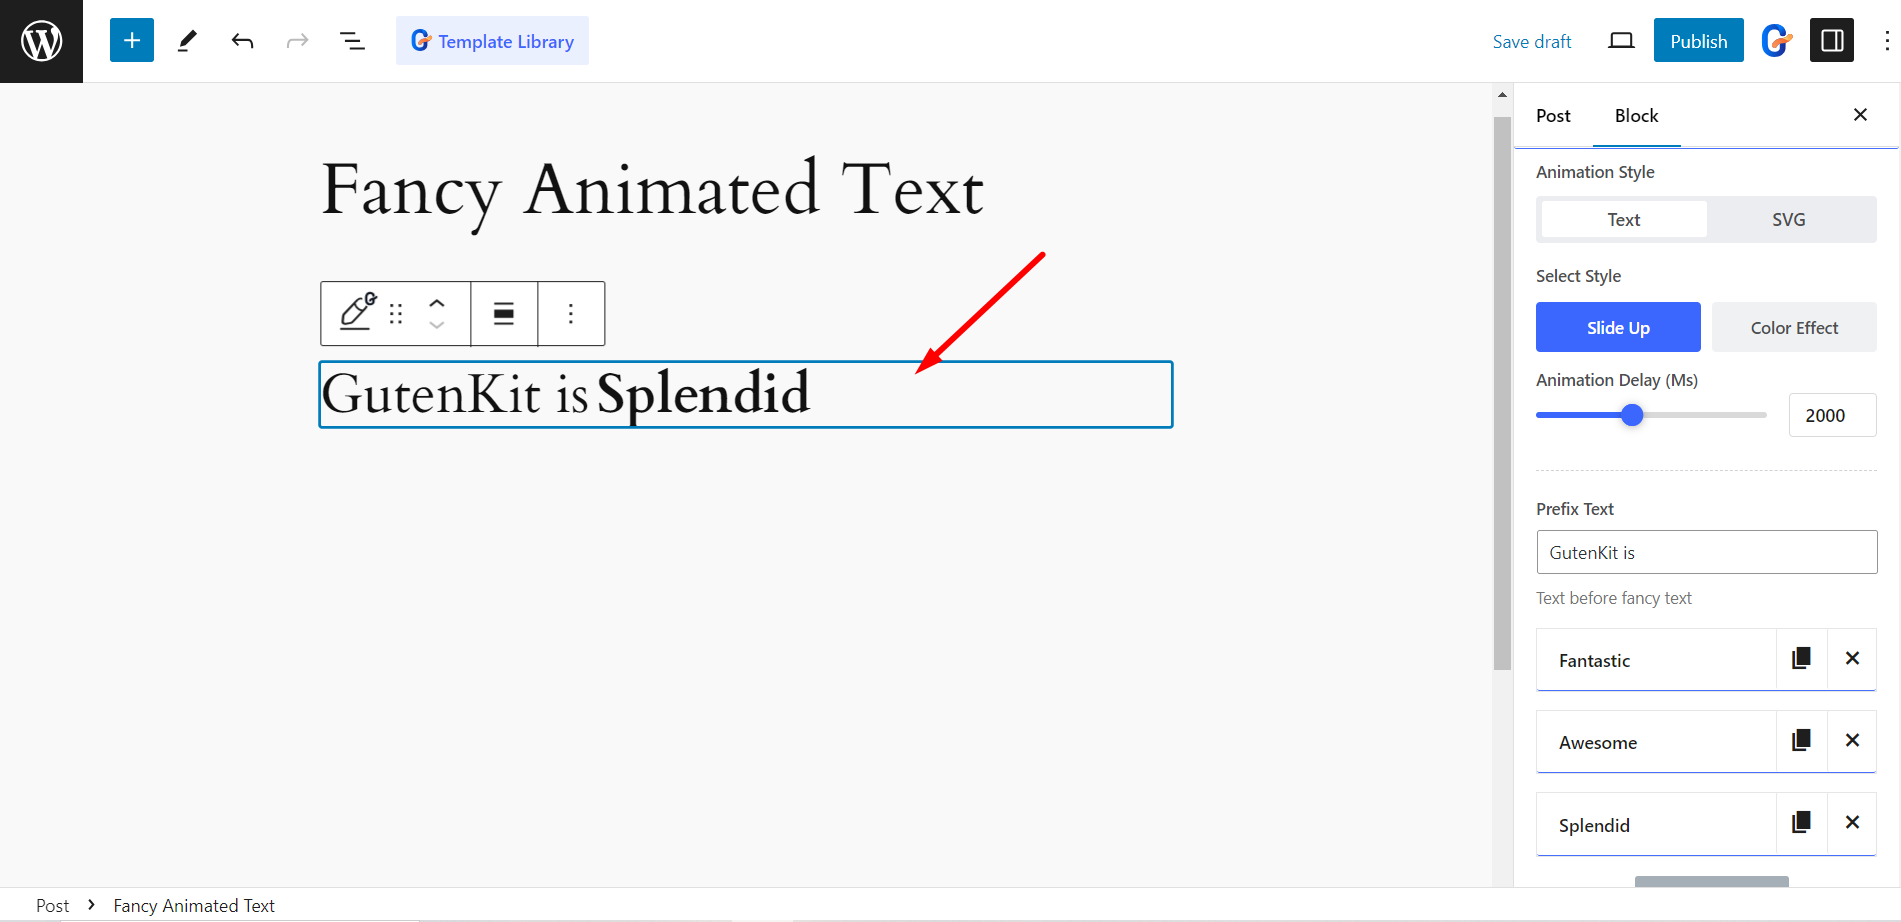
Also, you can customize the style of your animated text including Heading Text and Fancy Text Lists by adjusting the Alignment, Typography, Color, Hover Color, Text Shadow, border radius, padding, etc. After updating and tailoring text with your preference, press the “Publish” button.

👉 Also, check the documention of Fancy Animated Text for detailed guide.
Applying CSS
When creating CSS text animations in WordPress, keep the following basic yet important things in mind:
- Setting a right animation-name – This is the name that will be displayed on an element when it is moved by a CSS animation. For example, if you have a button with an animation named “fadeIn”, this would be the value that you would use for this property.
- Animation-duration – This is the number of seconds that an animation will take to complete. You can also set this to none or 0 to make an animation last indefinitely or until something else happens (like a page load).
- Animation-timing-function – This controls how the element moves from one spot to another based on how long it takes for a specific amount of time (in milliseconds). For example, if you set this property to ease-out, then your element will start moving slowly and then speed up at the end of its duration before starting again at the beginning.
- Animation-delay – This is a value that specifies what number of milliseconds should be added after an animation has finished before it starts again (for example, 1s).
- Animation-iteration-count – This is the amount of time you need to play the animation. Using CSS property you can count this iteration.
- Animations-direction – It is the order or direction in which an animation should be played. It can be normal, reverse, alternate, and alternate-reverse.
- Animation-fill-mode – These values specify how an element should be displayed. It can be before and after an animation has been applied to it.
- Knowing @keyframes – It specifies the properties of the animation that change over the course and also the values that those properties should take. For instance:
@keyframes example {
  0%   {background-color: red;}
  25%  {background-color: yellow;}
  50%  {background-color: blue;}
  100% {background-color: green;}
}
Generally, percentages are used to indicate the timing of the animation. The keyframe above demonstrates that the element’s background color will transform 25 percent of the way from red to yellow, through the animation.
However, from and to can be used in place of 0% and 100%, respectively.
Check out the Best WordPress Timeline Plugins! 👌
Creating an animate.css File
You have to create a separate file first with all the necessary properties, in the text editor you work in. You can choose the keyframes for any animation. Next, you have to put them together with particular CSS classes to apply with any text on your WordPress site.
Start with writing a simple code to your CSS file. A sample code for an animation text in WordPress may look like-
```@keyframes MyAnimation {
from {
opacity: 0;
transform: rotate(20deg);
animation-duration: 3s;
}
to {opacity: 1;}
transform: rotate(0deg);
}
}
Now to bind this keyframe to a CSS class we have set a text named MyAnimation. So, just after the above code you need to put the below code in the file.
.MyAnimation {
 animation-name: MyAnimation;
}
You can find all the basic WordPress CSS animation knowledge and practice the codes here!
You can repeat this procedure to create as many as possible animations according to your needs. Then, save the file as animate.css. Alternatively, you can download the Animate.css file. It is a well-liked file that contains the keyframes and CSS classes for tons of popular animation designs. Moreover, using the file will lessen the pain of coding the complex animation.
The above code will animate the text of your h1 tag ‘MyAnimation’. You can change the duration of the animation by changing the “3s” to a different value. You can also change the colors by changing the hex values. Once you have the CSS file saved, you can make further changes to the appearance of your website, you can edit the CSS file. You can change the font, the size of the text, and the color of the text by editing the CSS file. You can also change the background color and the size of the header by changing the CSS file.
Loading Your animate.css File to WordPress Site
After you are done with the file work, upload it to your theme’s directory. We have divided the whole process in three steps,
Step-1
Go to the site using File Transfer Protocol (FTP) -> Choose the FTP client (FileZilla, WinSCP, Cyberduck, etc.) -> Select the necessary credentials in your hosting account.
Step-2
Access to your public_html directory -> Navigate to wp-content – > Themes -> Select the folder of the active or child theme
Step-3
Now, search for a subdirectory named css. If you get it then upload your animate.css or animate.min.css file from the Animate.css file with the subdirectory.
However, if you don’t have the subdirectory folder you can easily create a new one. For that, just after loading the file do a simple editing to create the new file and it is done.
Call the Animate Stylesheet Via functions.php
You will find the functions.php file in your active theme folder. Now, you are required to add this snippet of code to call the Animate Stylesheet:
add_action( 'wp_enqueue_scripts', 'wpb_animate_styles' );
function wpb_animate_styles() {
 wp_enqueue_style( 'animate-css', get_stylesheet_directory_uri() . '/css/animate.css', '3.5.0', 'all');
}
Remember, if you used the animate.min.css file from Animate.css, you’ll need to write animate.min.css in the end line instead of animate.css. After saving all the changes go to your WordPress dashboard.
Apply Animations Using CSS Classes
So now it is possible to apply any class you want in the animate.css file to see different animation effects in posts and pages. Also, the Animate.css file allows you to reference a complete list of all.
Finally, Select a post or page in the Classic Editor -> Switch over to the text editor -> Or click on the three-dot icon from the block toolbar if it is a Block Editor -> Select Edit as HTML-> Add the animated class and the class for your animation to the element tag -> Preview
These are two effective techniques to add animated text to your site, and they can help make your site more engaging and visually appealing. By using one of these techniques, you can add some movement and interest to your pages.
However, applying CSS can be a bit difficult if you don’t have any idea of coding. So, taking expert help is recommended for creating CSS animations in WordPress. Alternatively, ElementsKit fancy animated text is a smart widget that supports you in designing any stylish animation quickly. With the widget, you can transform your chosen texts into fancy animations.
Another popular practice for applying animation on WordPress websites is adding motion text. Read this guide to learn the no-code way of showing motion text on your WordPress websites.
Leave a Reply