


Integrating a comparison table in the content makes it more user-friendly. Whether it is your eCommerce website or selling affiliate products, you can easily share a comparison between similar products. Or, it could be any kind of data for which you want to show a detailed comparison.
The good thing is that it is easy to create a comparison table in WordPress.
There are two options to create a comparison table in WordPress — the default Gutenberg editor of WordPress and WordPress plugins for comparison tables.
However, the default table of WordPress has some limitations. It is hard to customize the layout. That’s why I would recommend using a plugin that makes things easier.
A step-by-step guide to creating a comparison table
I have shared the whole process in a few steps in this step-by-step guide. Follow each step, and you will have a user-friendly comparison table. Whether it is a product comparison or anything else, you will have endless opportunities with the method I am sharing.
Step 1: Install the essential plugins
As I mentioned, you should use WordPress plugins to avoid the hassle of customizing or writing new code. Though different comparison table plugins are available out there, the best one you can use is ElementsKit. It is an Elementor addon that allows users to create a wide range of web pages with a few clicks.
Install —
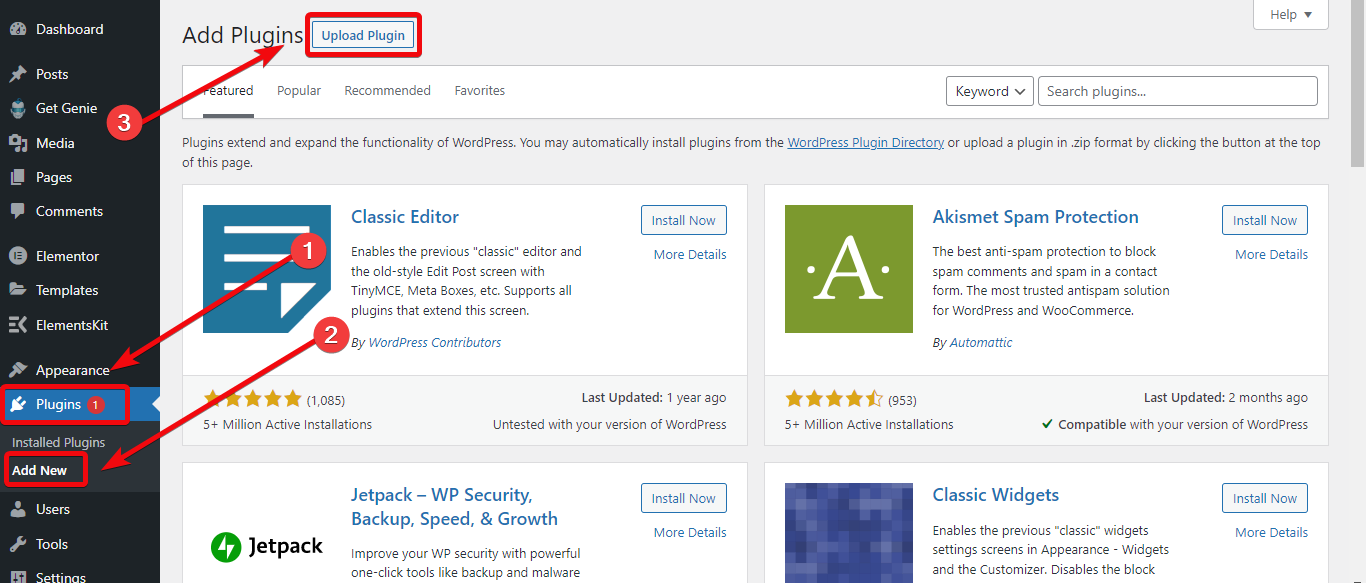
You can install them in the same way as installing any other WordPress plugins. First, from your WordPress dashboard, go to Plugins > Add new > Upload the plugin. Then install and activate the plugin.
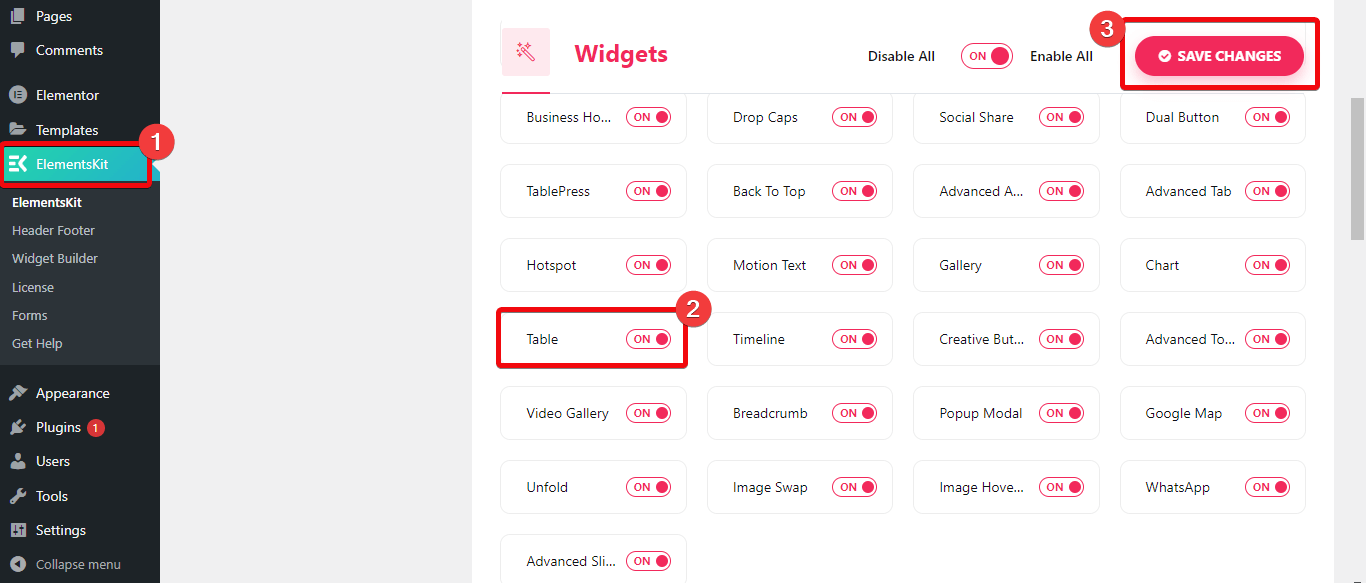
Once you have installed the ElementsKit plugin, you will get a dashboard for the plugin from where you need to enable the table widget. Go to the ElementsKit’s dashboard > Widgets and enable the table widget.
Step 2: Create a new page
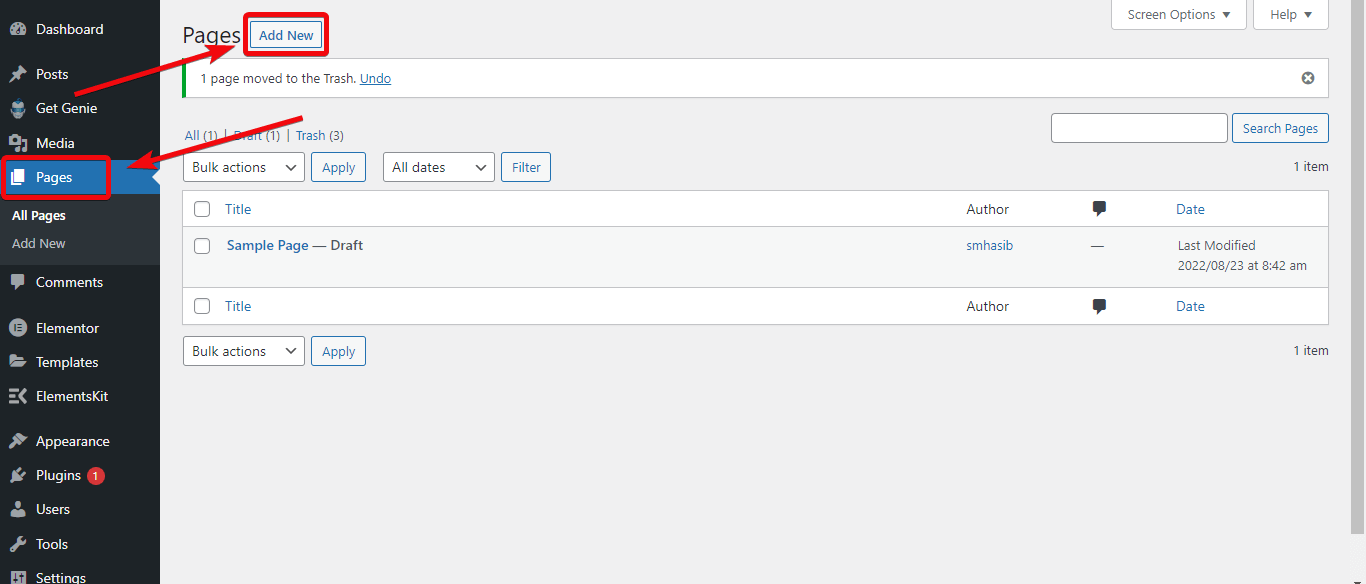
Now you need to select the page where you want to integrate the comparison table. If you want to incorporate the comparison table to a new page, go to your WordPress dashboard > Pages > Add new. Now create a new page and choose edit with Elementor.
If you want to integrate the comparison table to an existing page, go to the pages and select that particular page where you want to add a comparison table and choose edit with Elementor.
Step 3: Create the comparison table
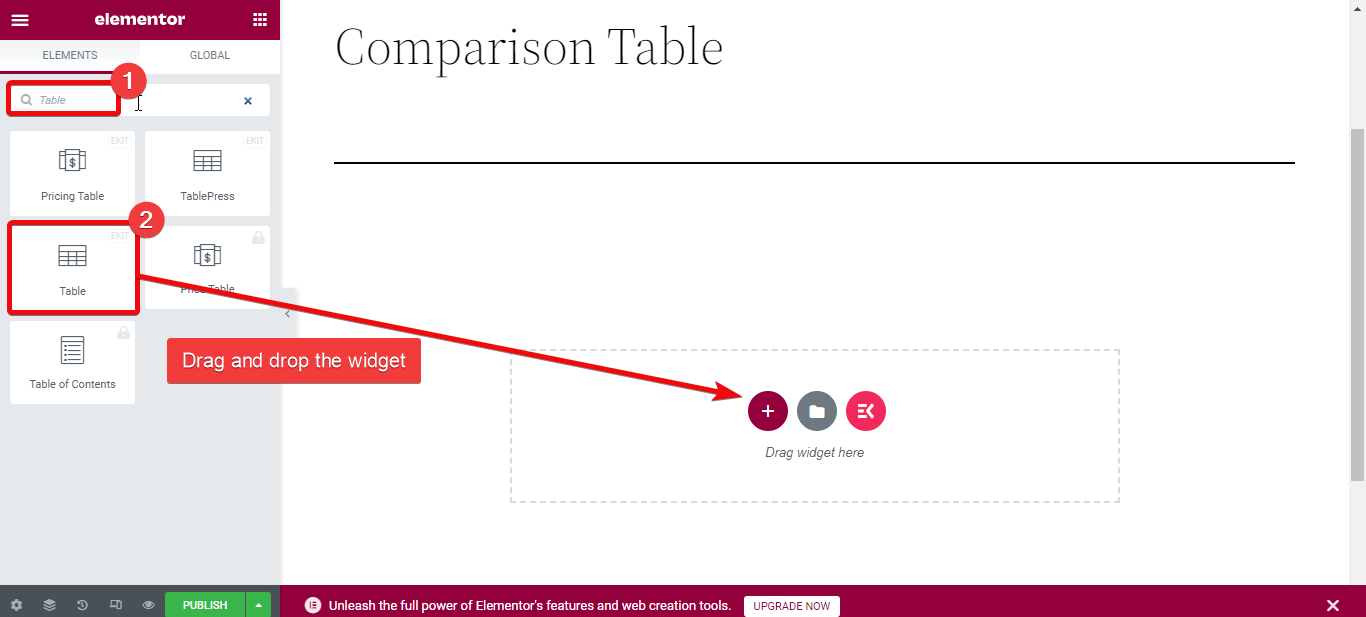
If you are in the page editor, you can insert the Table inside the page. For this, go to the widget library on the left side of the page editor. Search for Table, and you will see ElementsKit’s table widget. Drag and drop the widget on the page editor.
You will have two options to create a comparison table — upload a CSV file with the data or create a custom table.
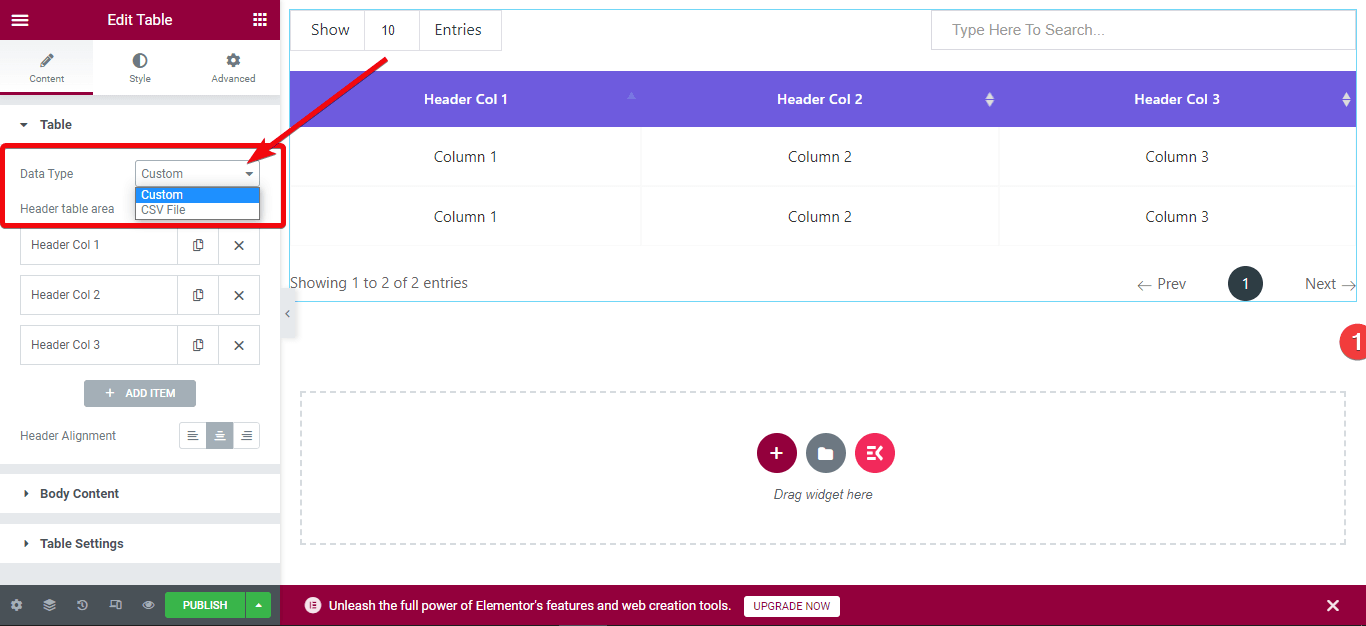
The best thing is that if you have arranged the data for products and inserted them in a CSV file, you can directly upload the file to create a table. For this, go to the page editor and choose edit. Now from the content tab, select the data type as CSV.
There are two options to upload the table data: choose a remote URL of google Sheets or directly upload a CSV file to your WordPress media library.
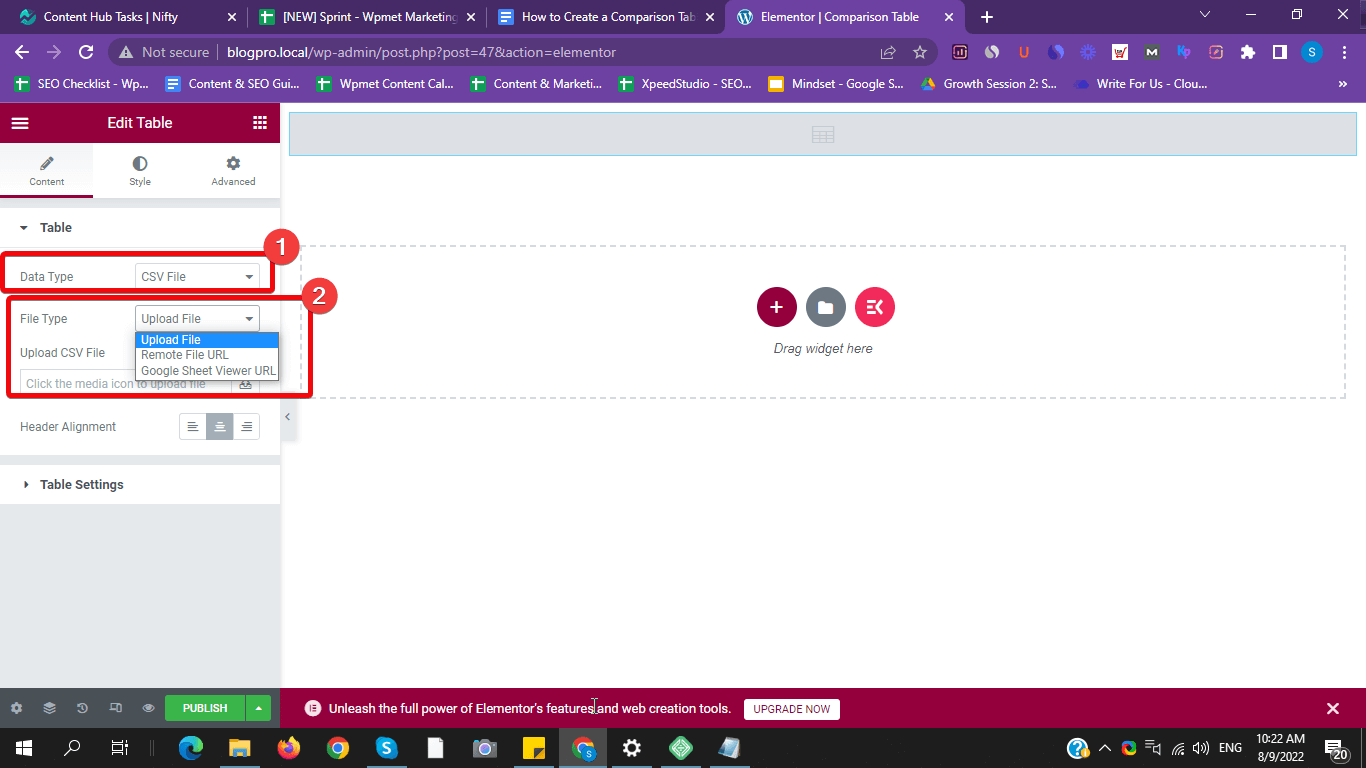
Select the CSV file where you have added the comparison data and upload it. A comparison table will be created automatically. Or, insert a Google sheet public link in the remote URL field.
For a custom one, check the next step.
Step 4: Customize the custom comparison table
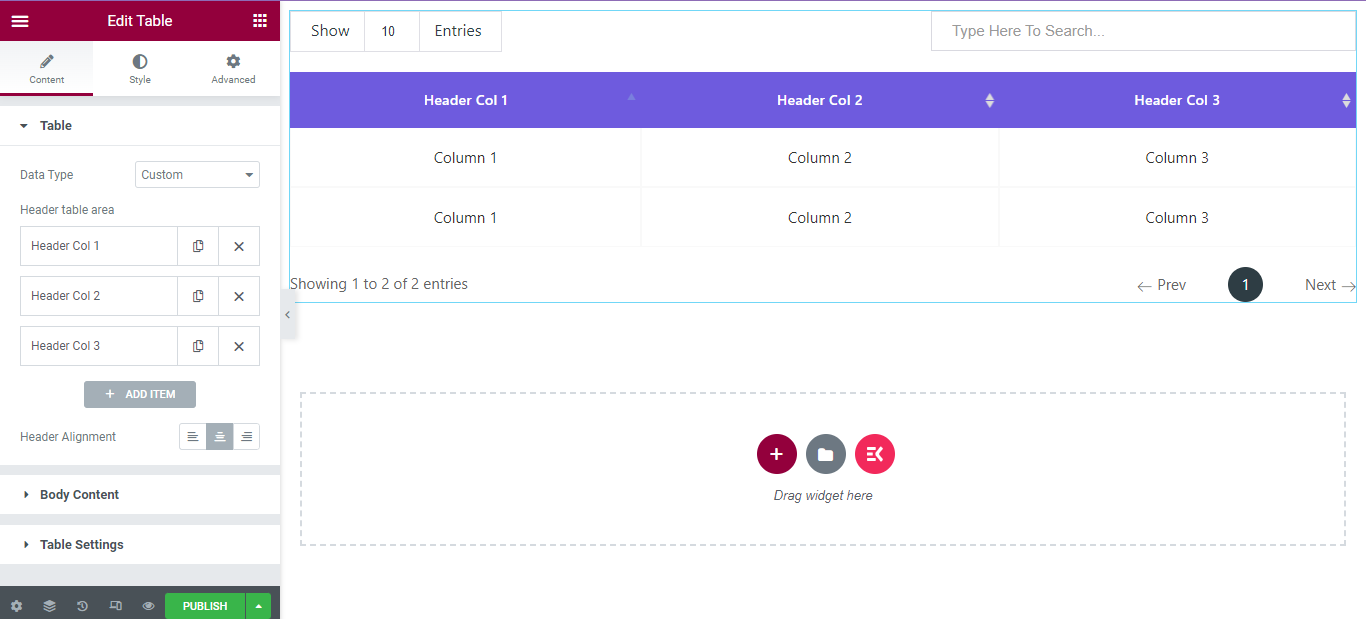
If you want to create a custom comparison table in WordPress, choose ‘custom’ as the data type. A default table will be created inside the page. You can then do unlimited customization to the table field. For instance, you can add rows, columns, images, and more.
To make the comparison table attractive, you can customize the colors, spacing, border, and more without writing code.
Let’s say you want to add a new column to the custom table. For this, go to the editor section of the widget. Under the table section, click on ‘ADD ITEM.’ A new column will be created. Similarly, you can add more columns.

To add new rows, go to the ‘Body Content’ tab and click on ‘ADD ITEM’. Then enable a new row from the settings, and a new row will be created. Under the row tab, you will get the option to add the texts.
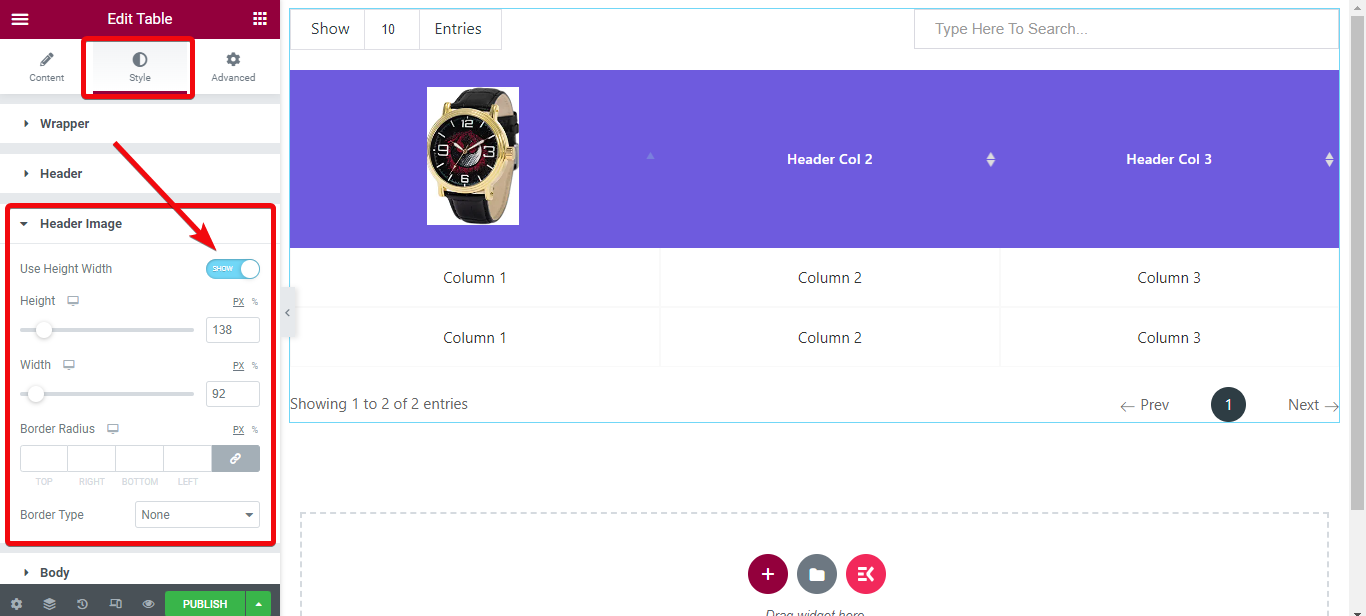
You might want to add product images to create a product comparison table. Let’s say you want to add pictures on the heading. For this, go to the table settings and click on the column where you want to add the image. Now choose the image that you want to show.
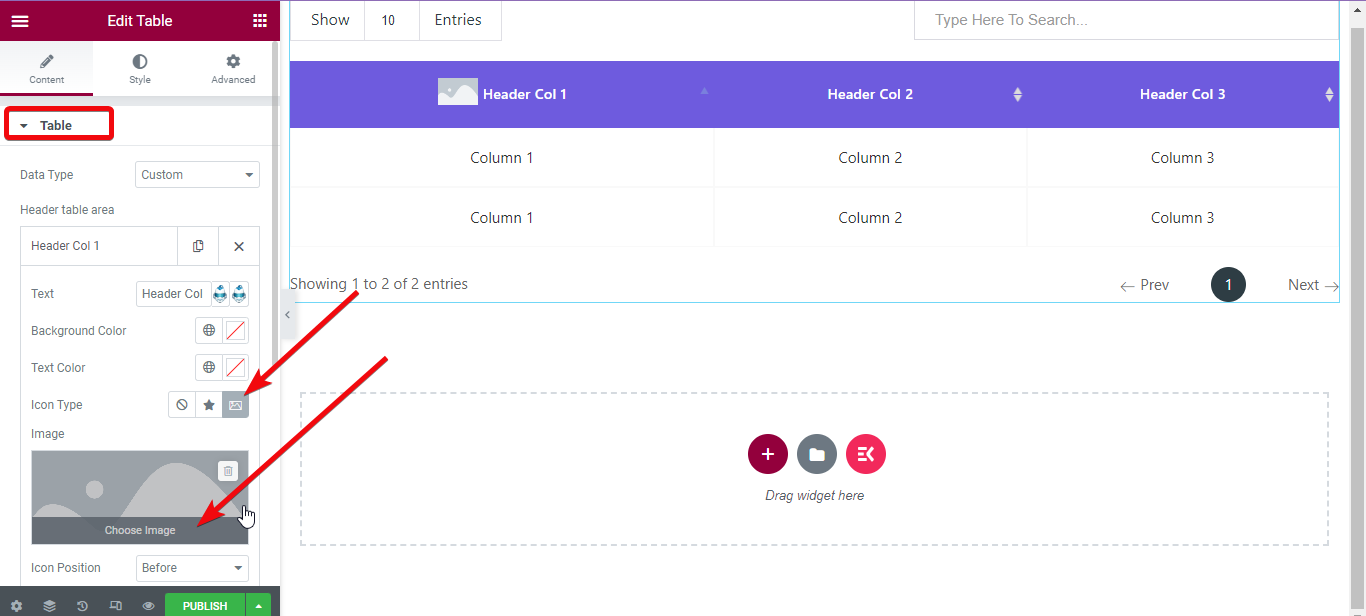
To change the image padding, margin, and other settings, go to Style tab > Header Image > Enable Height Width from the widget editor. Now adjust the image sizing.
Choose the product images one by one and upload them.
Step 5: Preview and publish
Finally, it is time to check the created comparison table. On the page editor’s bottom, there is an option named preview. Hit that button and check the table you have created.
Check more table styles that are designed with the ElementsKit page builder addon.

To learn more about on creating a comparison table, read the documentation of the ElementsKit Table widget for Elementor.
What is a WordPress comparison table?
A comparison table looks mostly the same as a standard table with data. But the comparison table shows a detailed comparison between the product features.
Benefits of showing a comparison table
Wondering why you should show a comparison table for your site visitors? Well, when a particular niche has multiple products for a customer, it is widespread that the customer gets confused. A comparison table helps the customer to make his decision by seeing the detailed features of each option.
For affiliate marketing, showing a detailed comparison among the products you are reviewing is crucial. Because readers often are not interested in reading detailed texts about a product.
Instead, showing everything in a table makes them more comfortable reading the data and getting the necessary information. A user-friendly comparison table also increases the ‘Click Through Rate’ and conversion rate.
Can you create a comparison table without a plugin?
Whenever someone recommends you to use a plugin for any particular customization to a page, what is the first thought that comes Into your mind? “What about doing it without a plugin!” right?
Let me clear you one thing. You can always create pages and different sections inside WordPress without any plugin. But the customization option will be limited. That’s why using a particular plugin is the best solution. Especially with the ElementsKit page builder addon, you will have limitless options.
Why ElementsKit to create a comparison table in WordPress
ElementsKit is one of the lightest Elementor addons where you can turn on/off the options so that it loads faster. You can use a single feature if you want and turn off other features and the plugin won’t call those function while loading.
Besides creating a comparison table, you can do lots of other things as well. In fact, using the ElementsKit page builder you can design a whole new WordPress website without writing any code.
You can design portfolio website, business website, dropshipping website, SaaS website, and more.
Also, ElementsKit’s function is not limited to only creating tables. Like the table widget, it has 85+ more widgets, ready templates, 15+ modules, and more.
Wrap up
If you have followed the above step-by-step guide, you have created a user-friendly comparison table in WordPress. You can go for a wide range of styles for the table and test with them. Try to give the best experience to users.

Leave a Reply