Pinterest is one of the most robust social media platforms with millions of users worldwide. And I guess, if you are involved with an online business, you are likely to have a Pinterest business account. But do you know that if you have a WordPress website, you can add Pinterest feed to your site?
Wondering why you need to add Pinterest feed to your WordPress website? I will dilate on that onwards! In a nutshell, Pinterest is a cracking medium for sharing ideas through images, Gifs, and videos. You can share creative and promotional materials with your target audiences through Pinterest pinboards.
But all of your target audiences and clients may not be active on Pinterest. But that doesn’t mean, they should miss out on your innovative and all-important pins. This is where adding the Pinterest feed to your WordPress website will come into play.
This write-up will exclusively deal with the method of adding the Pinterest feed to a WordPress website. A bunch of tools and plugins are on hand to add Pinterest feed to your WordPress website. But I would walk you through how to add Pinterest feed to your WordPress website with ElementsKit.
Why Add Pinterest Feed to your WordPress Website with ElementsKit:
ElementsKit is a widely used Elementor addon that comes with scads of handy features. These features include 74+ free & premium widgets, 45+ predesigned templates, 79+ ready pages, and 416+ ready sections. ElementsKit supports the integration of different social media feed widgets, including Pinterest feed.
With ElementsKit’s drag-and-drop Pinterest feed widget, you can not only add Pinterest feed smoothly to your WordPress website but also derive a number of benefits. What are they? Let’s check them out-
- Drag and drop widget for displaying the Pinterest feed
- Easy integration with a WordPress website
- Hassle-free configuration system
- Bottomless customization options with colors, typography, etc.
- Enables displaying other social media feeds like Facebook, Instagram, etc.


How to Add Pinterest Feed to your WordPress Website with ElementsKit:
Adding or embedding Pinterest feed to your WordPress website with ElementsKit is super simple. You can showcase all your engaging marketing and advertising pins to your website visitors. Zealous to know how to embed Pinterest feed to your WordPress website?
Let’s jump to the process straightaway-
Visit your WordPress Dashboard:
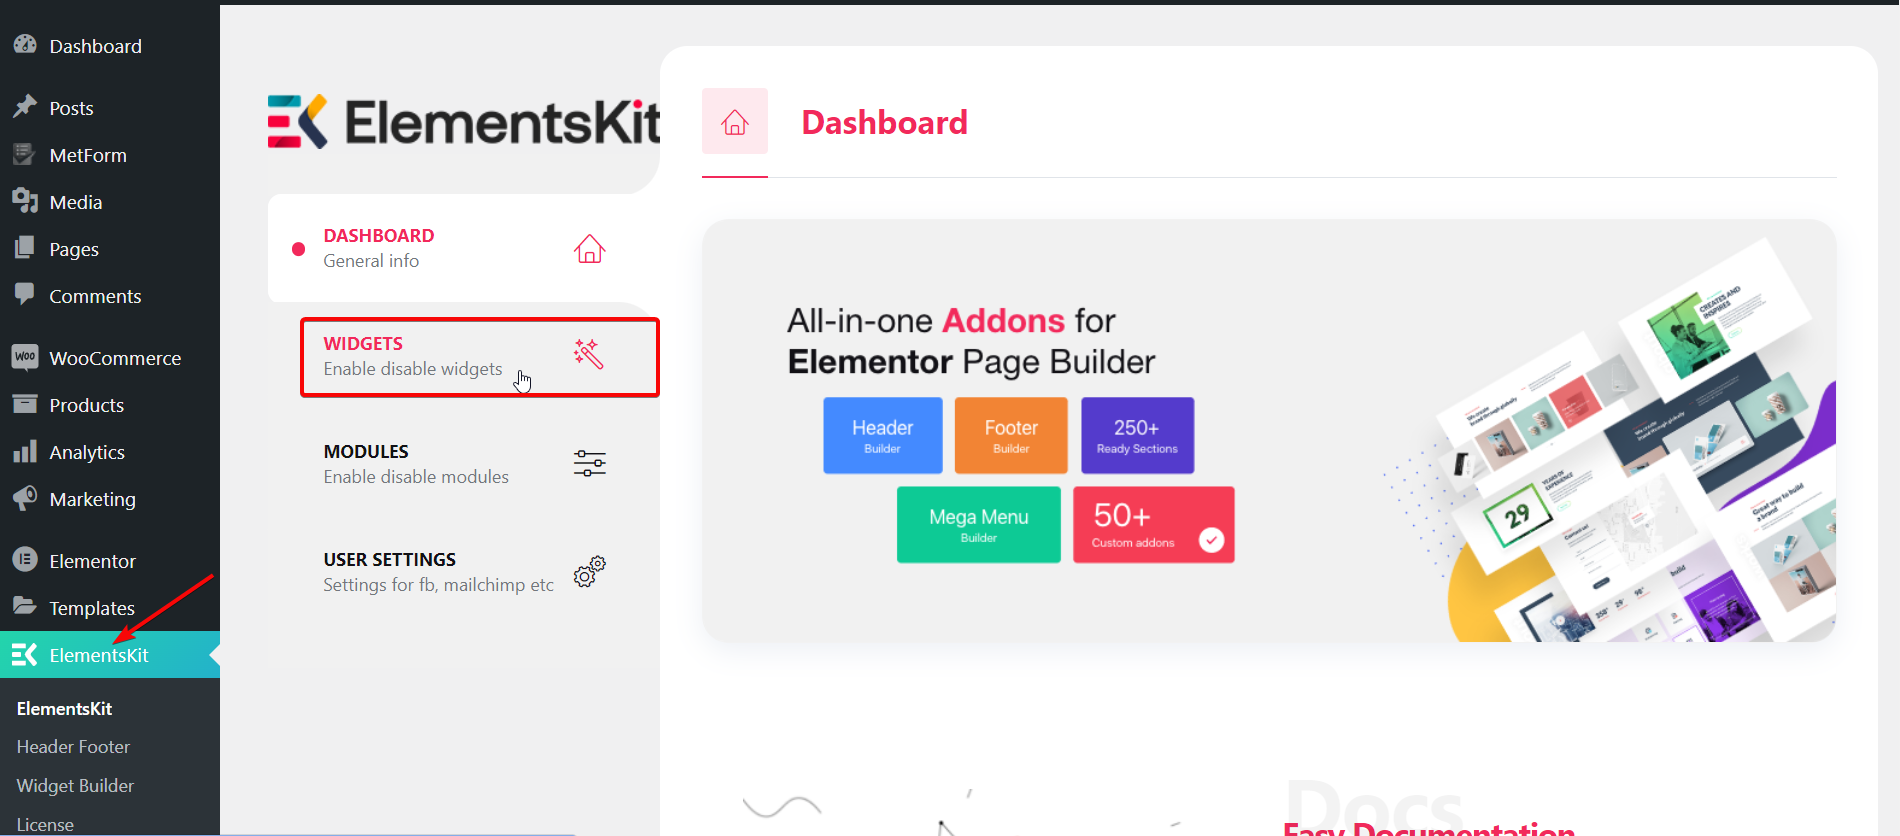
First up, you have to log in to your WordPress website’s admin panel and move right onto your dashboard. Navigate to ElementsKit > Widgets from the dashboard.

Turn on the Pinterest Feed widget Toggle:
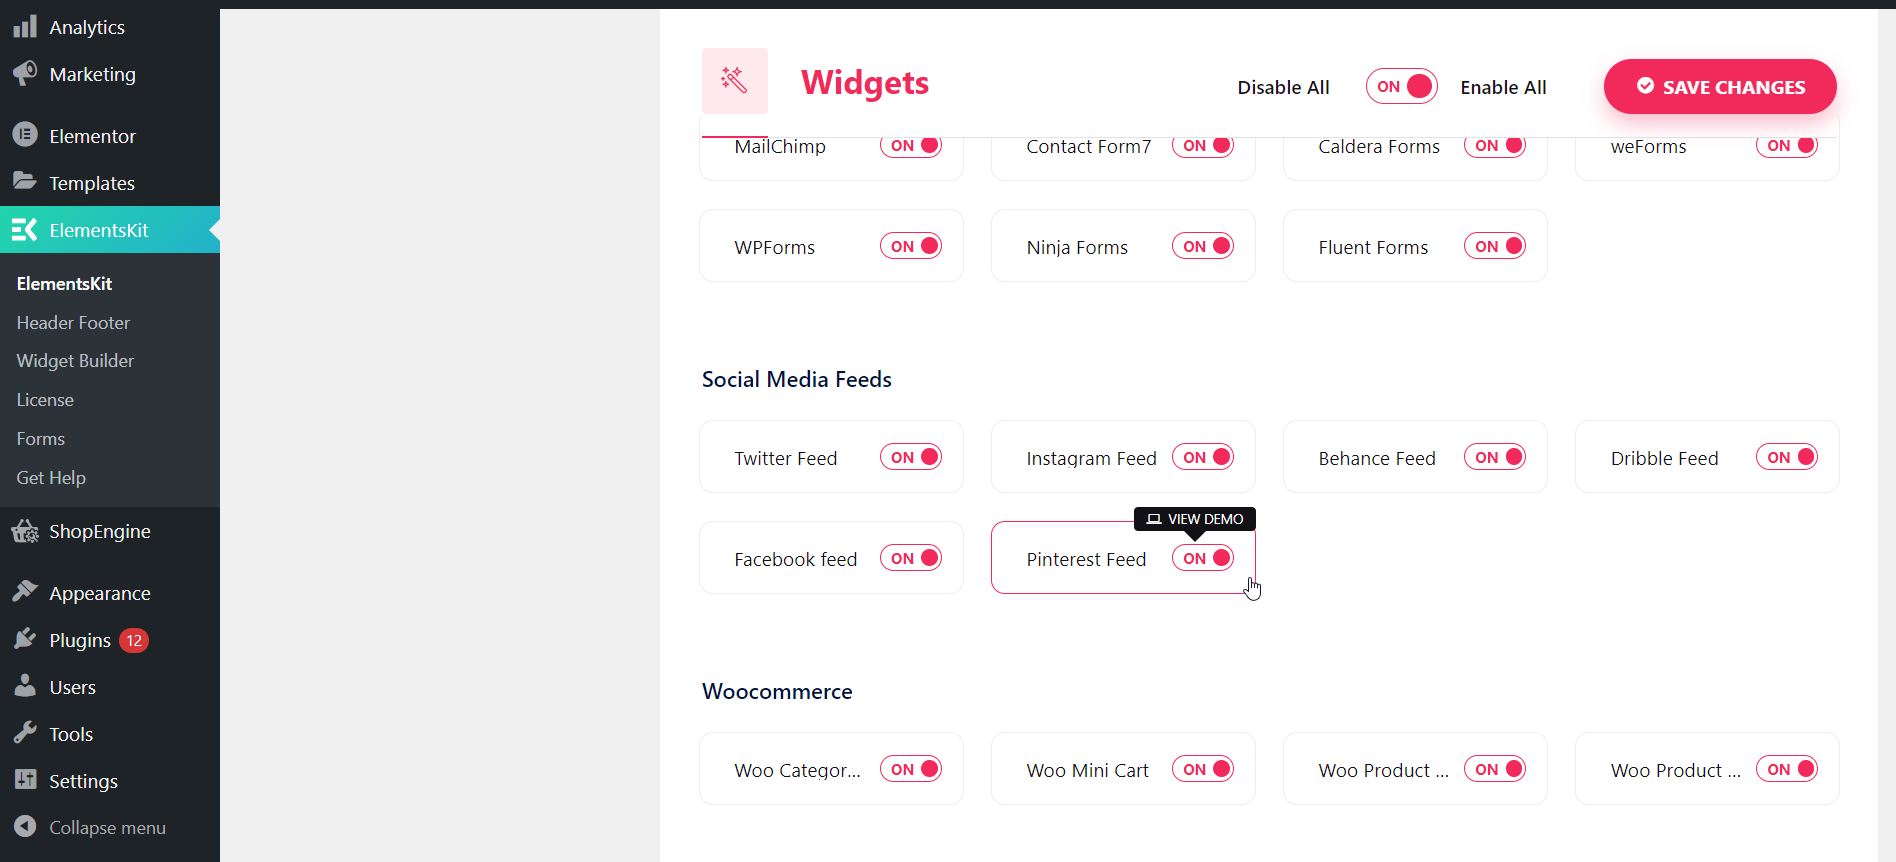
A list will show up immediately after that. All you have to do is scroll down to the Social Media Feeds section and find the Pinterest Feed widget from the list. Next, enable the widget by switching on the toggle button. Then, hit the Save Changes button.

Open a New Page or a Post in the Elementor Window:
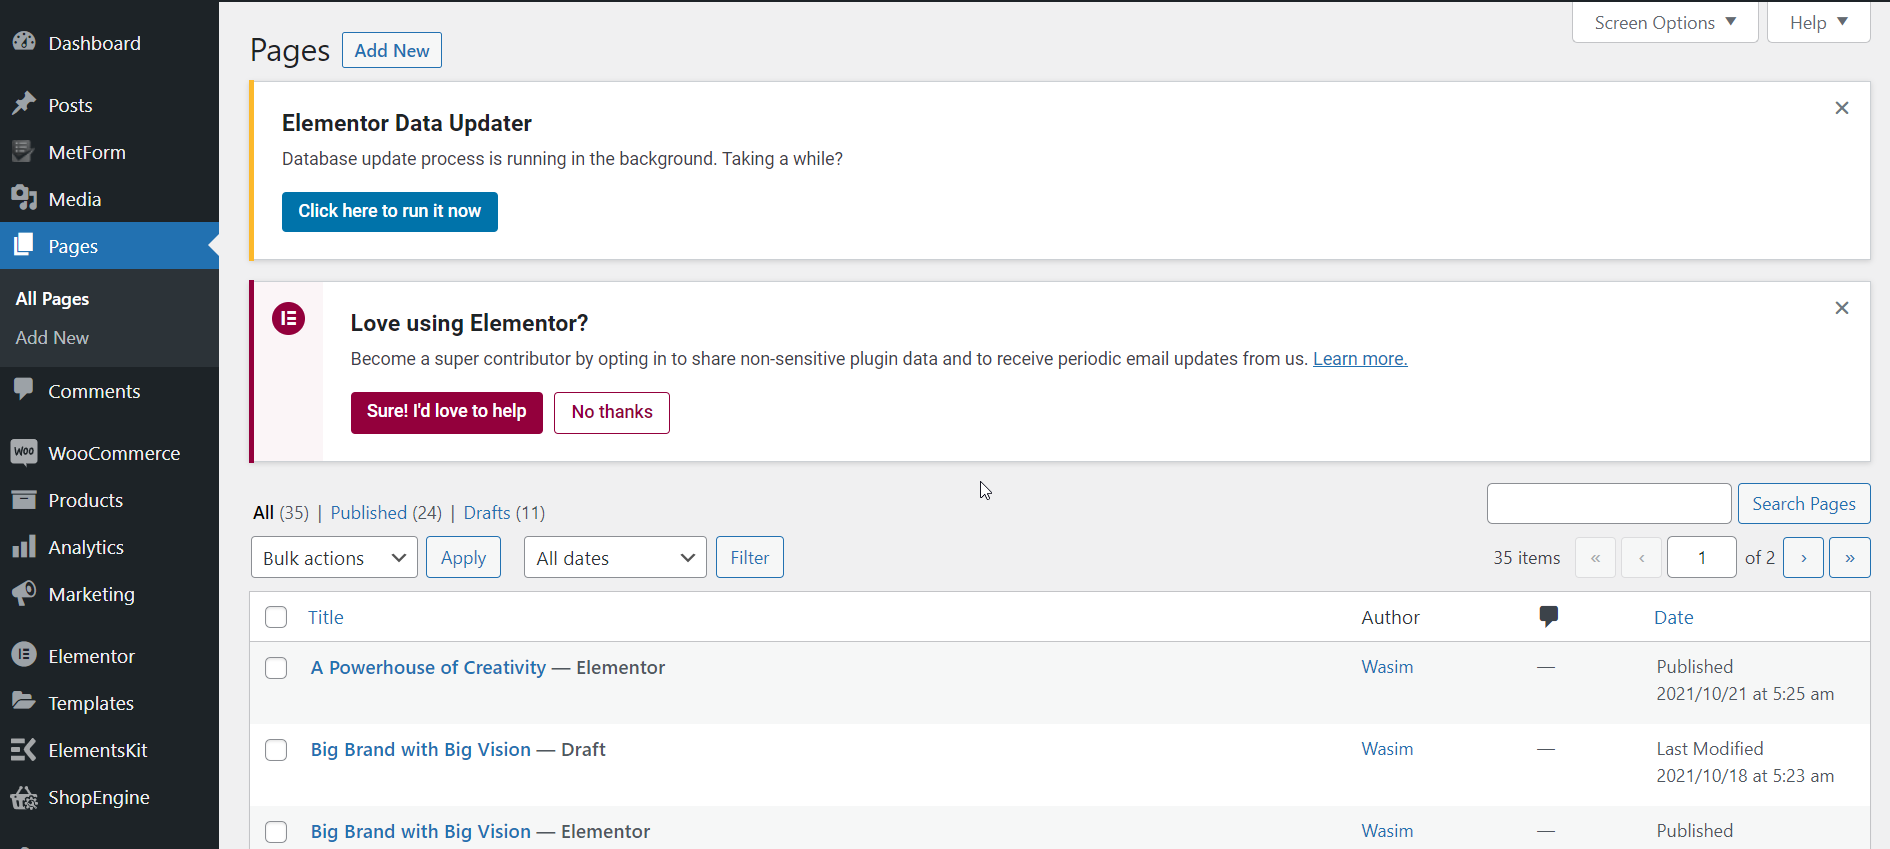
Now, go back to the dashboard and navigate to Pages or Posts. Then, create a new page by clicking the “Add New” button.

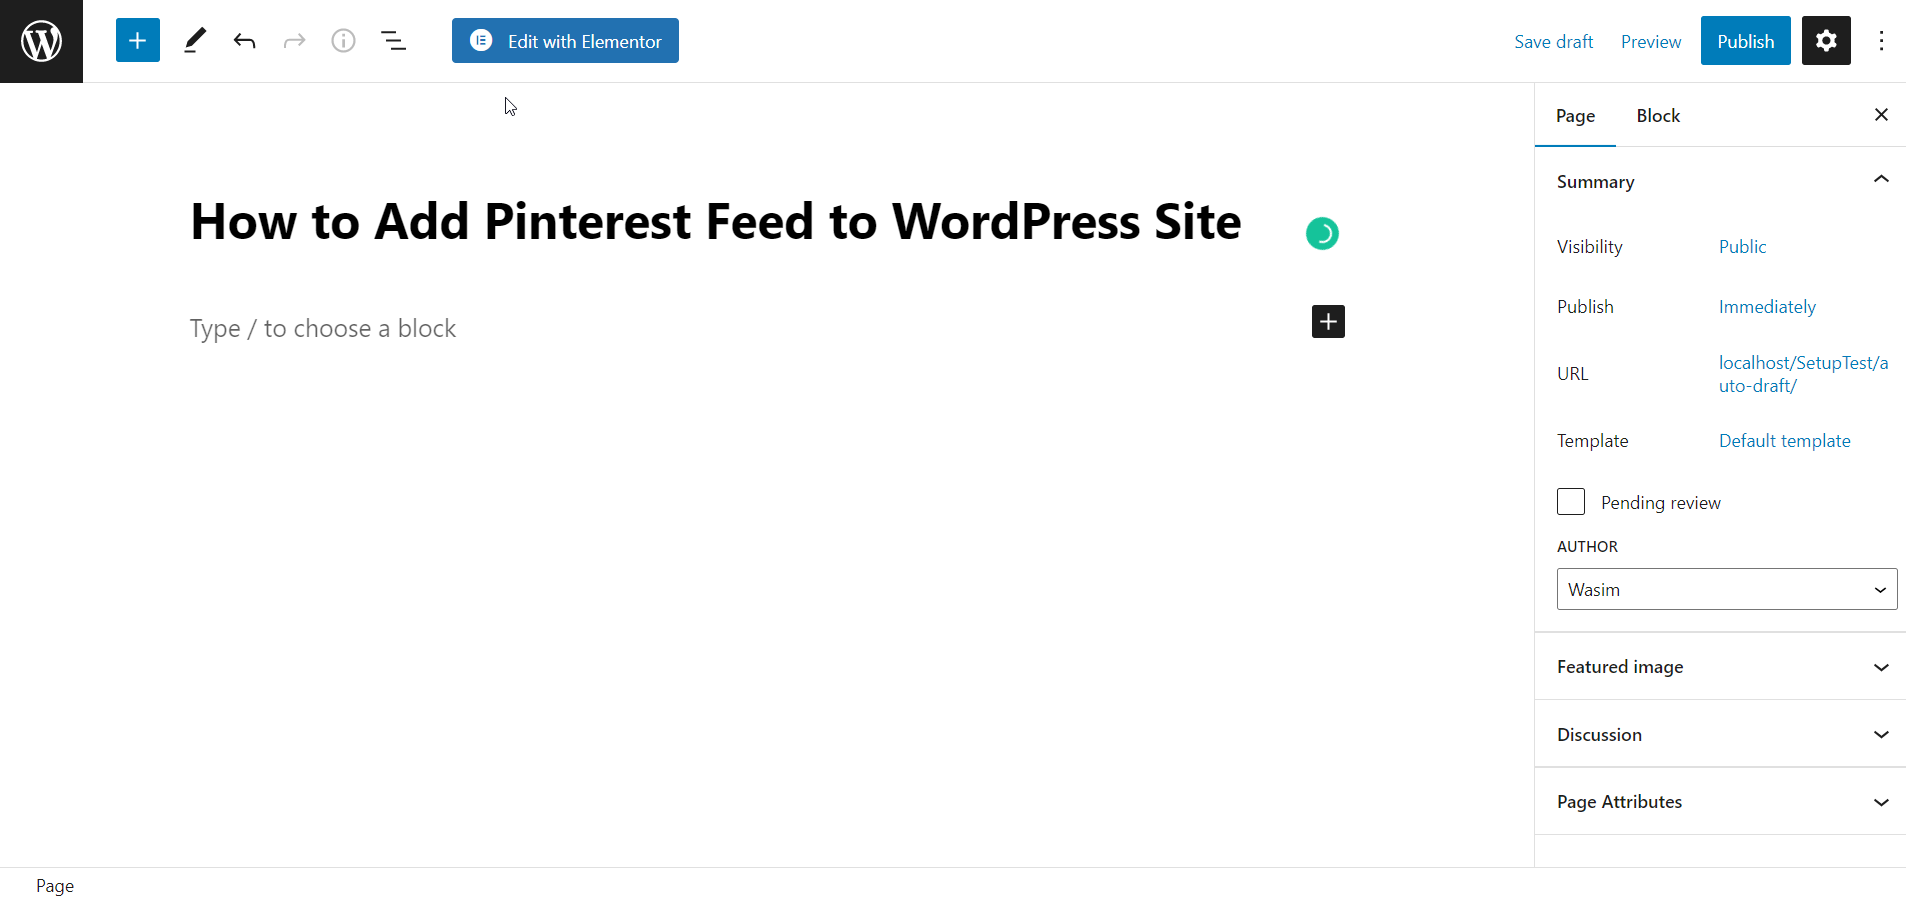
With that, you will move to a new page under the Gutenberg editor. Switch to the Elementor editor by hitting the button “Edit with Elementor“.

Drag and Drop the Pinterest Widget:
Now, you are in the Elementor window. At this point, move to the left-sided panel and find the Pinterest widget. Just drag and drop the widget into the designated area.
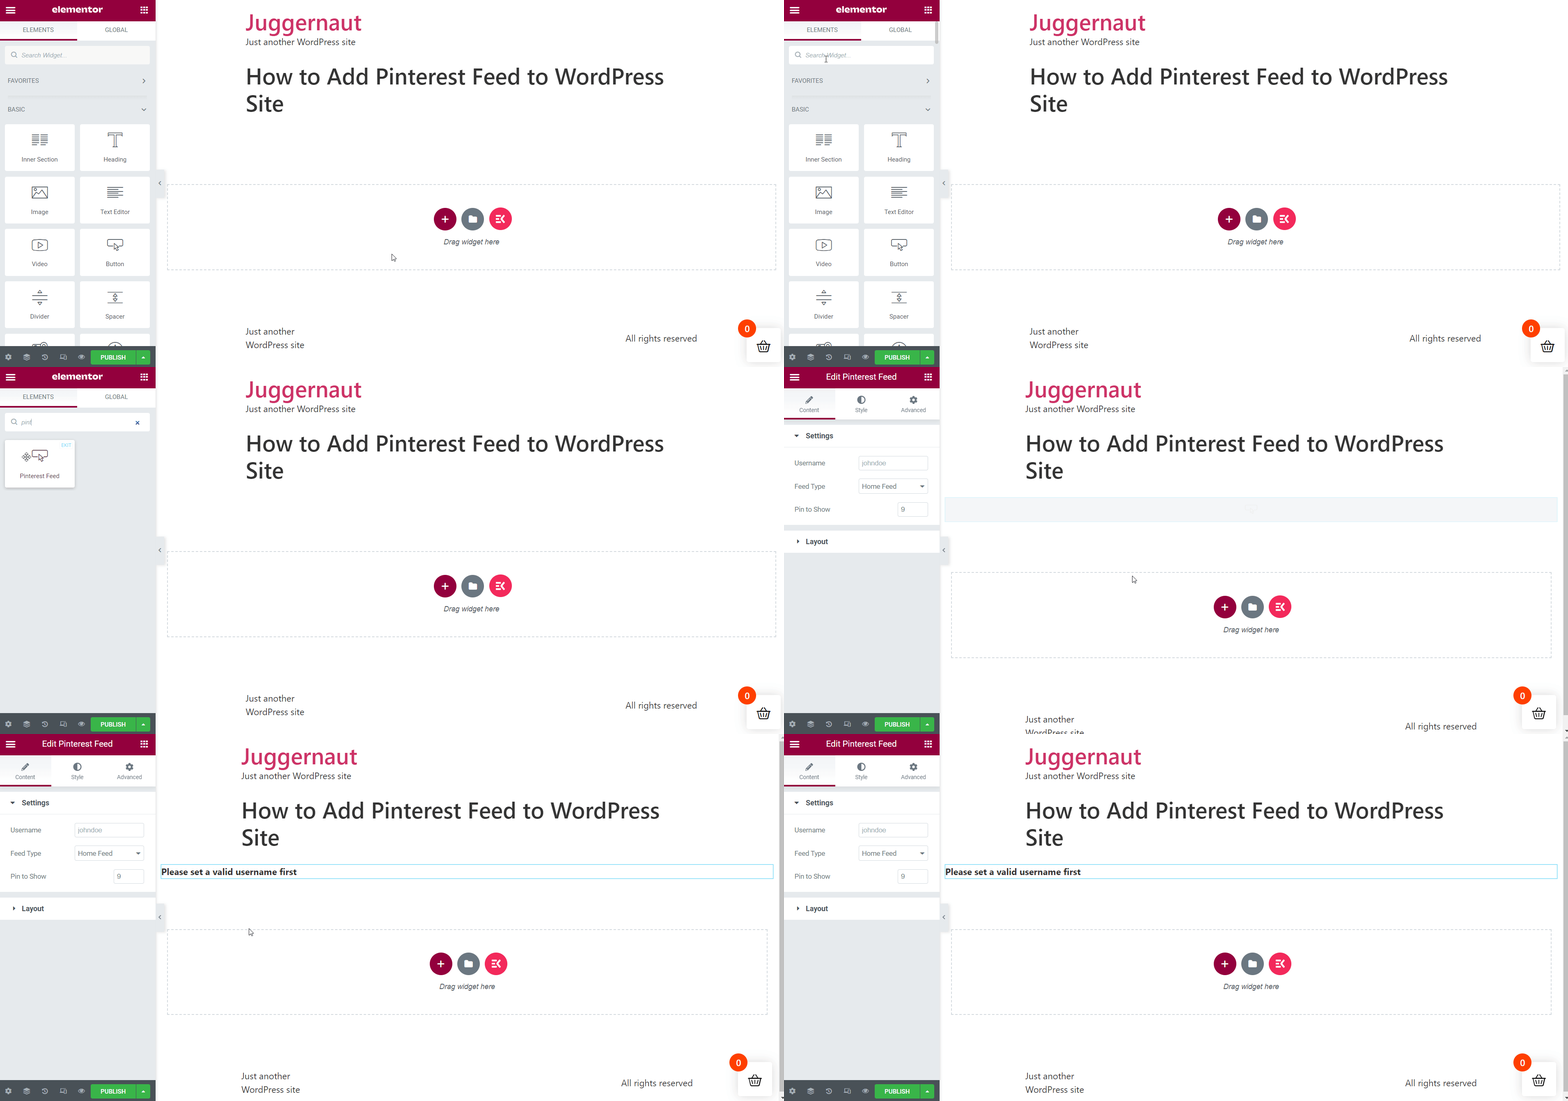

You can also learn how to add Facebook feed to your WordPress website-
Configure the Pinterest Feed Setting:
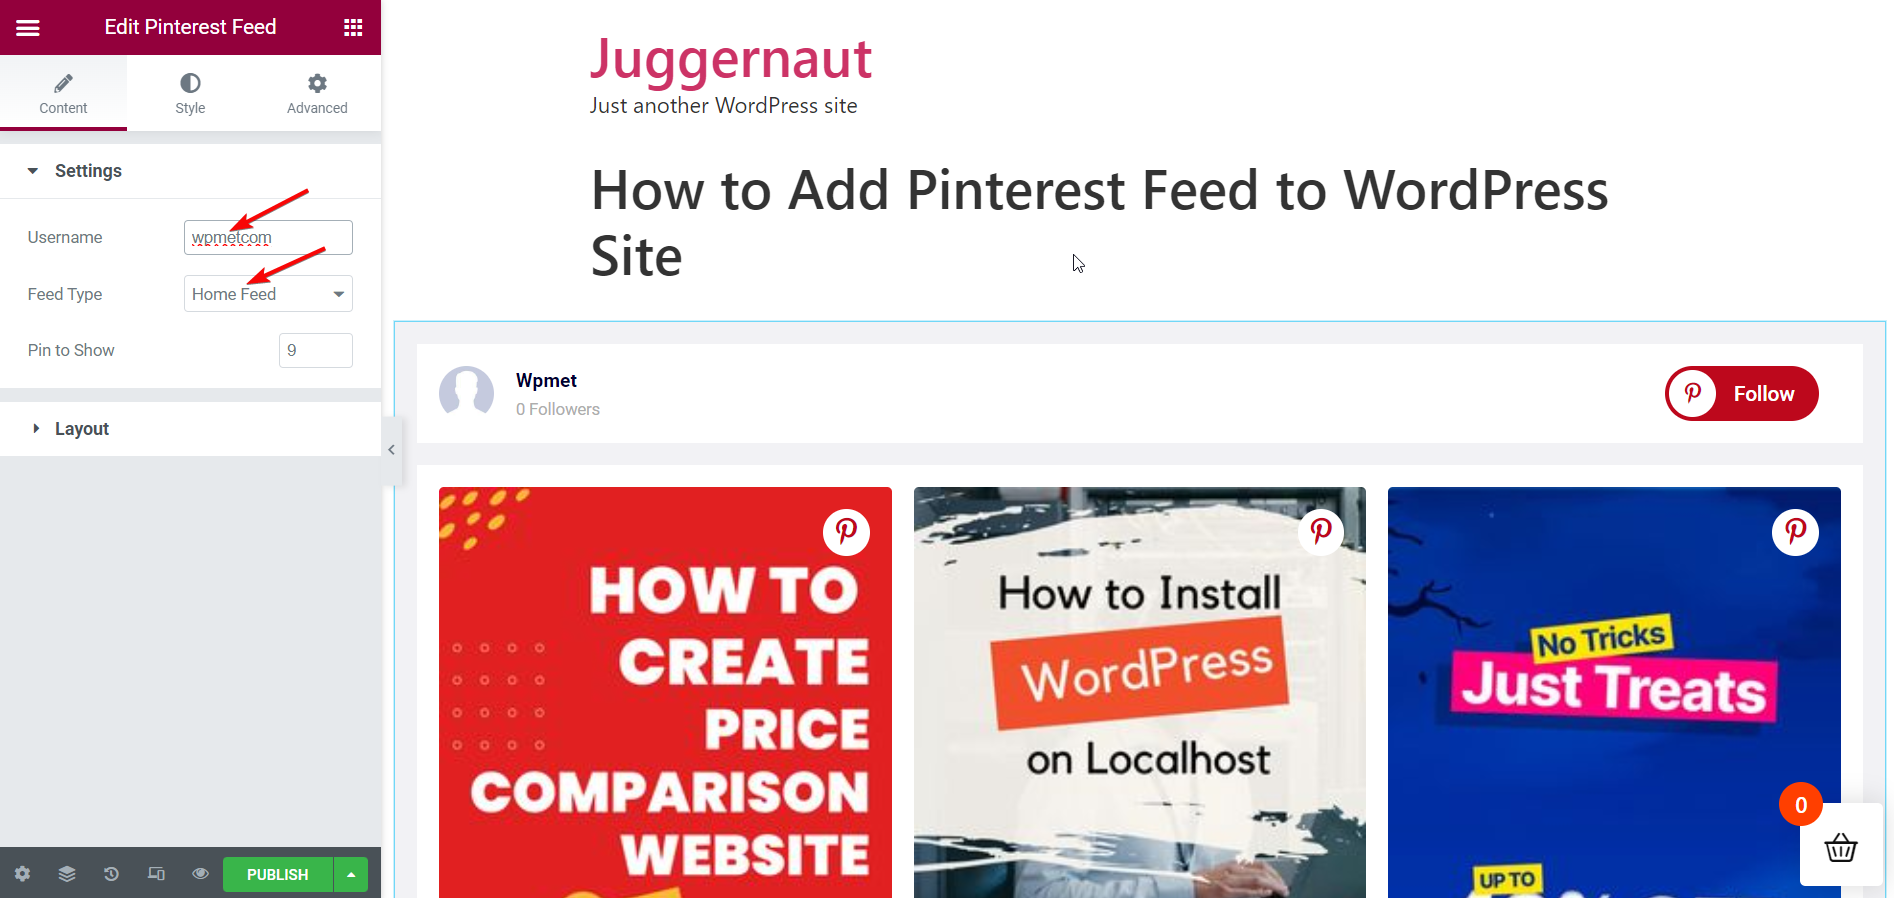
In order to configure the Pinterest feed setting, you need to go to the Setting section under the content tab. Enter your Pinterest Username afterward.
Feed Type: Home Feed
This one shows Pins from the profile’s home feed. All you have to do is set the Feed Type to Home Feed. Then, set the number of Pinterest Pins that should show up on the web page.

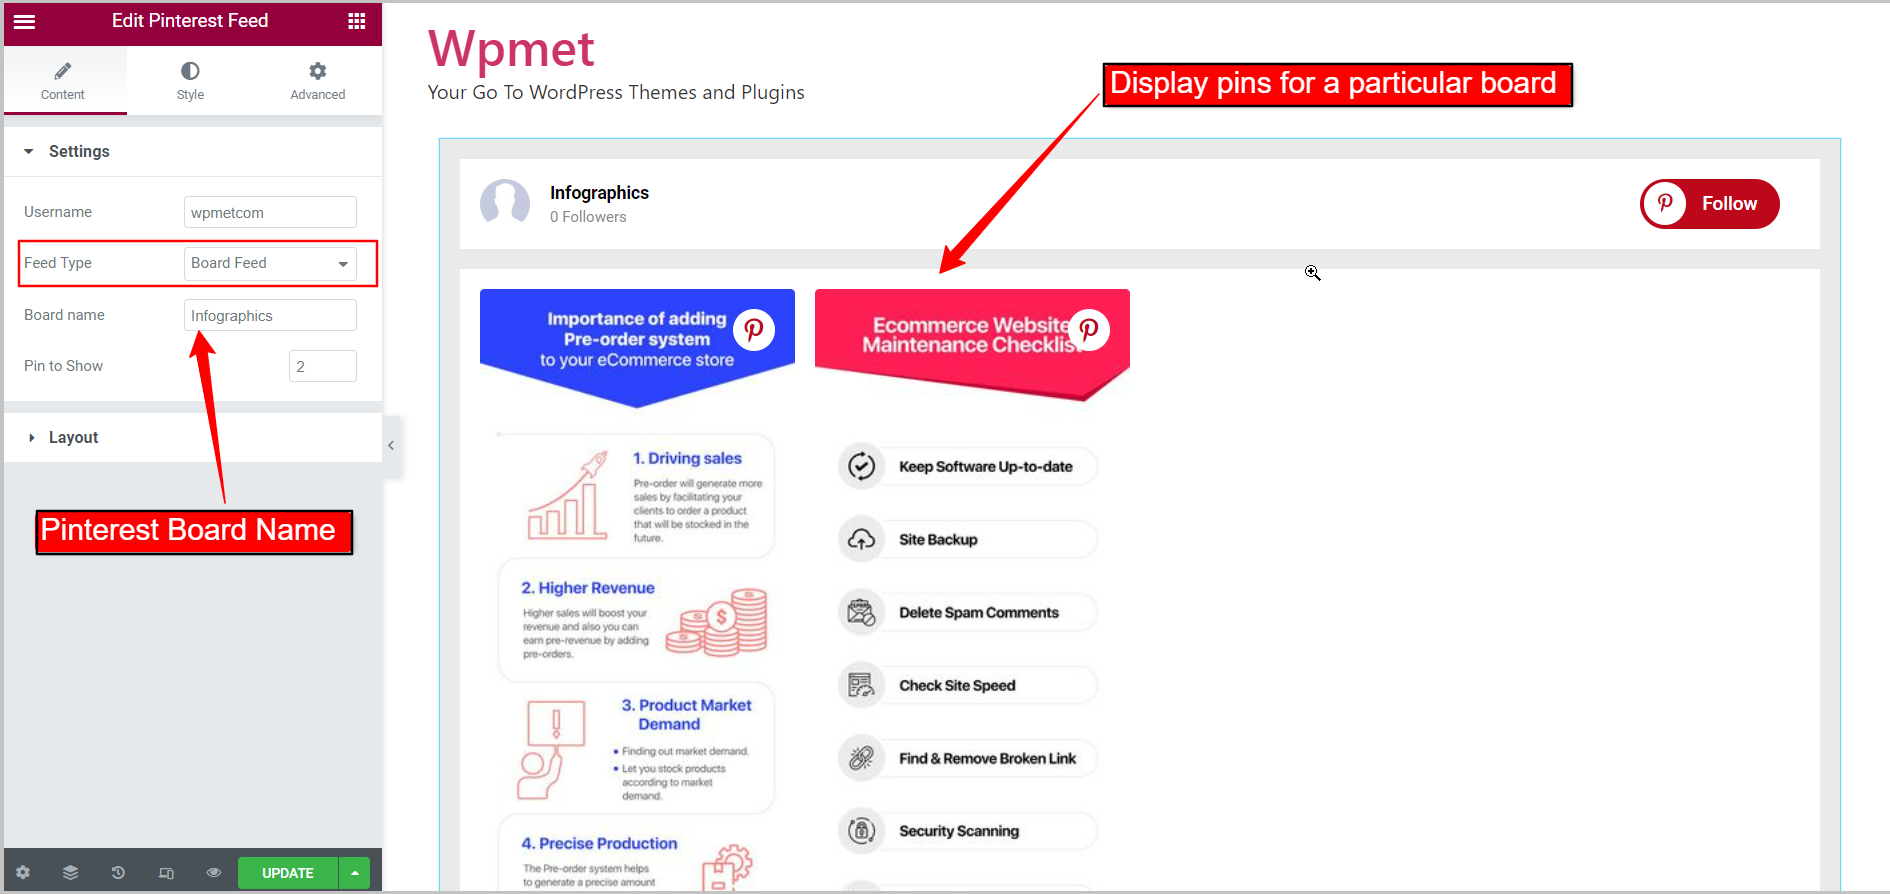
Feed Type: Board Feed
It shows a particular board from your Pinterest profile. In this case, set Feed Type to Board Feed. Then, enter the Pinterest board name you want to display. Again, set the number of Pinterest Pins to show up on the web page.

Configure the Pinterest feed layout:
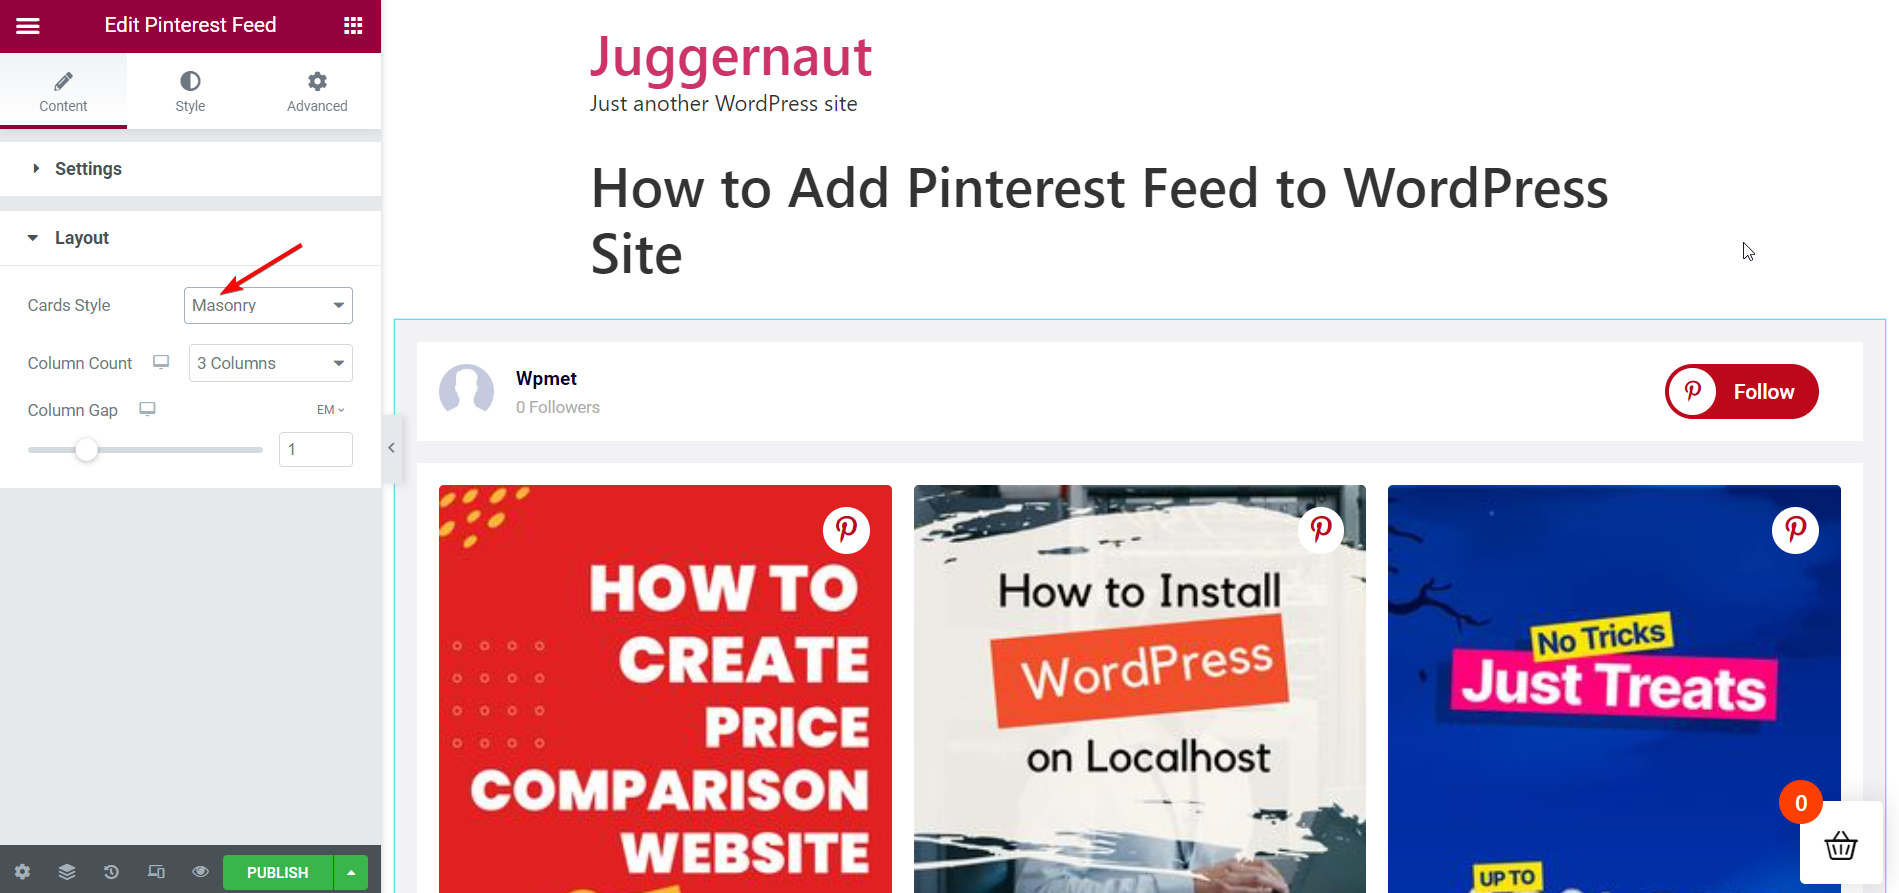
Go to the Layout section under the Content tab.
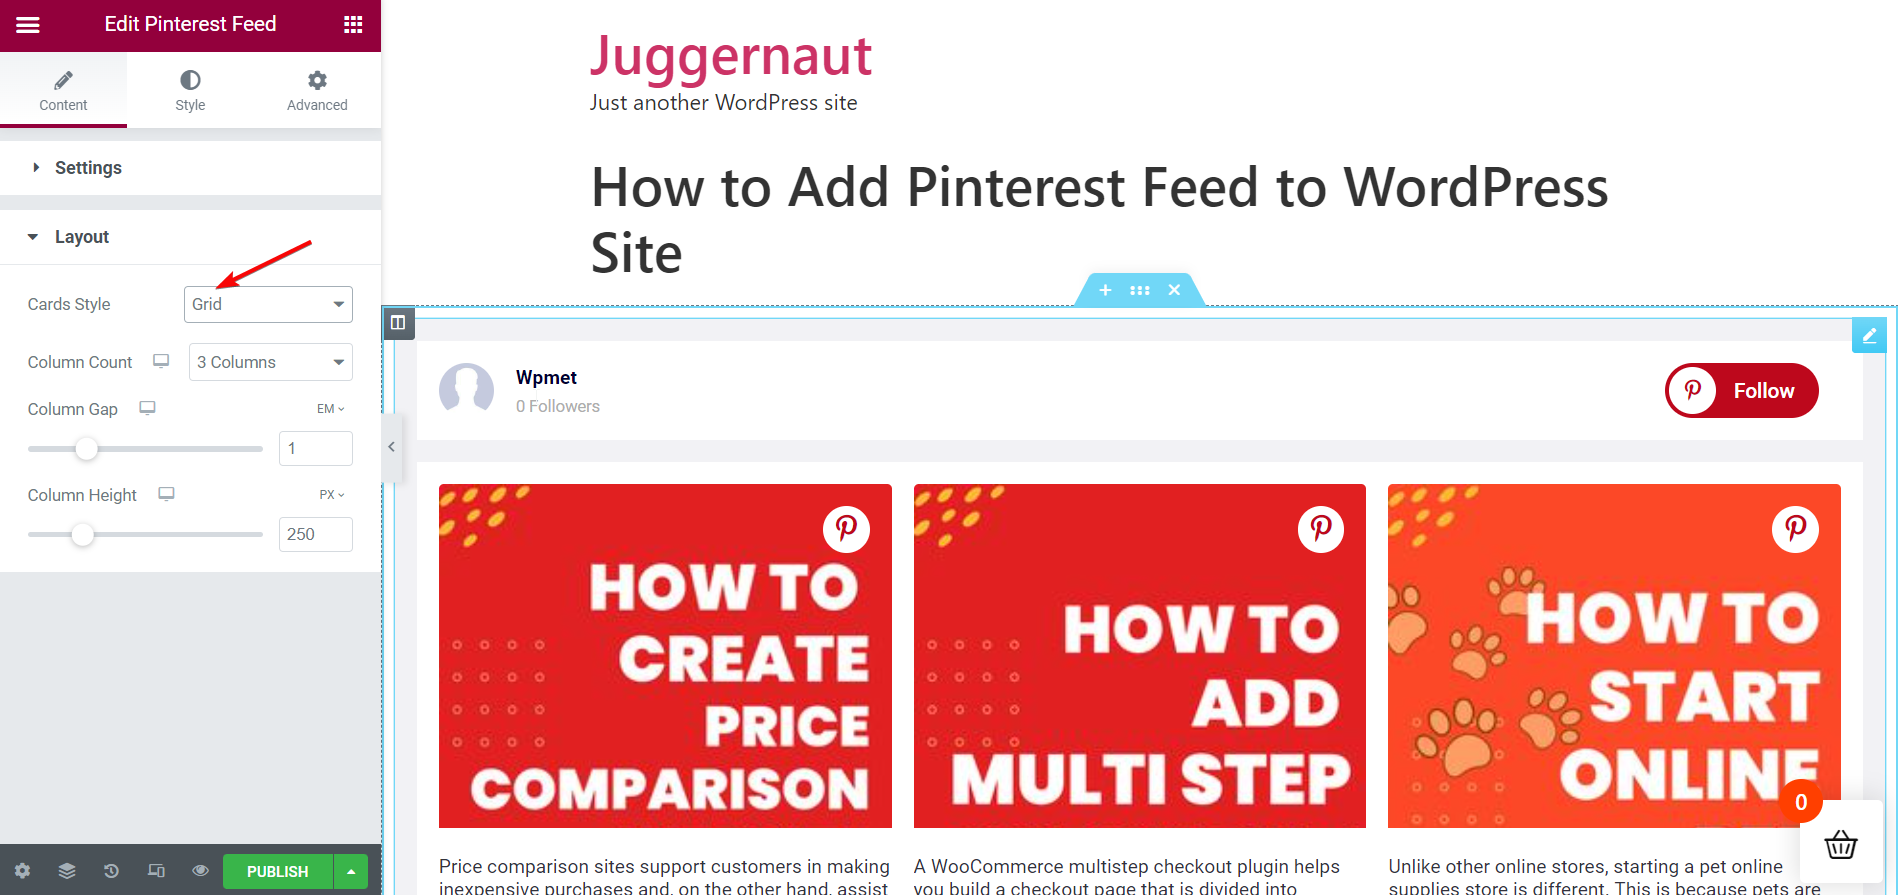
Cards Style: Grid
The widget has two layout styles available. Set Cards Style to Grid first up. Then, set the number of items to show in a single row through Column Count. Adjust the gap between columns through Column Gap. Thereafter, adjust the column height of items in each row through Column Height.

Cards Style: Masonry
Next, set the Cards Style to Masonry. As before, set Column Count to show the number of items in a single row. Go ahead to adjust the Column Gap between columns.

Customize styles of Pinterest Feed:
You can customize the look of the Pinterest Feed on your website with the highest number of available options. Follow the steps underneath-
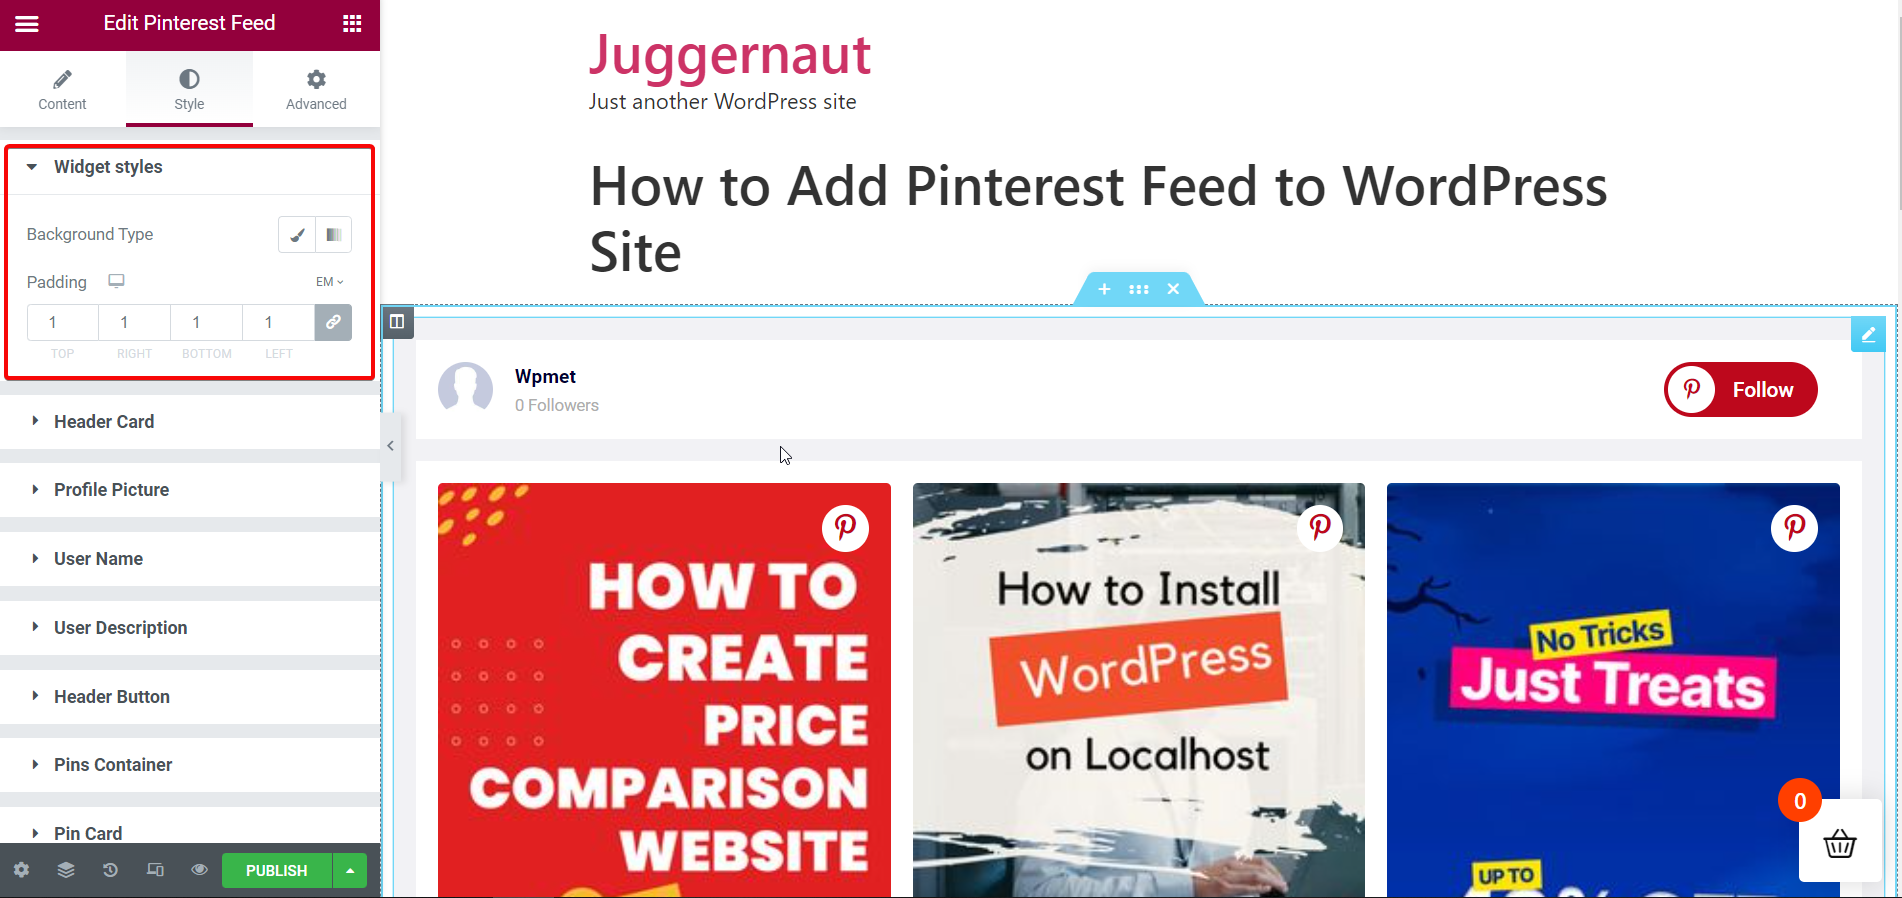
Widget Style:
Style option for the entire feed-
To customize the styles, choose the Background color type; Classic or Gradient. Then, choose a background Color. You can use an image as a background. Set padding for the entire Pinterest feed.

Header Card:
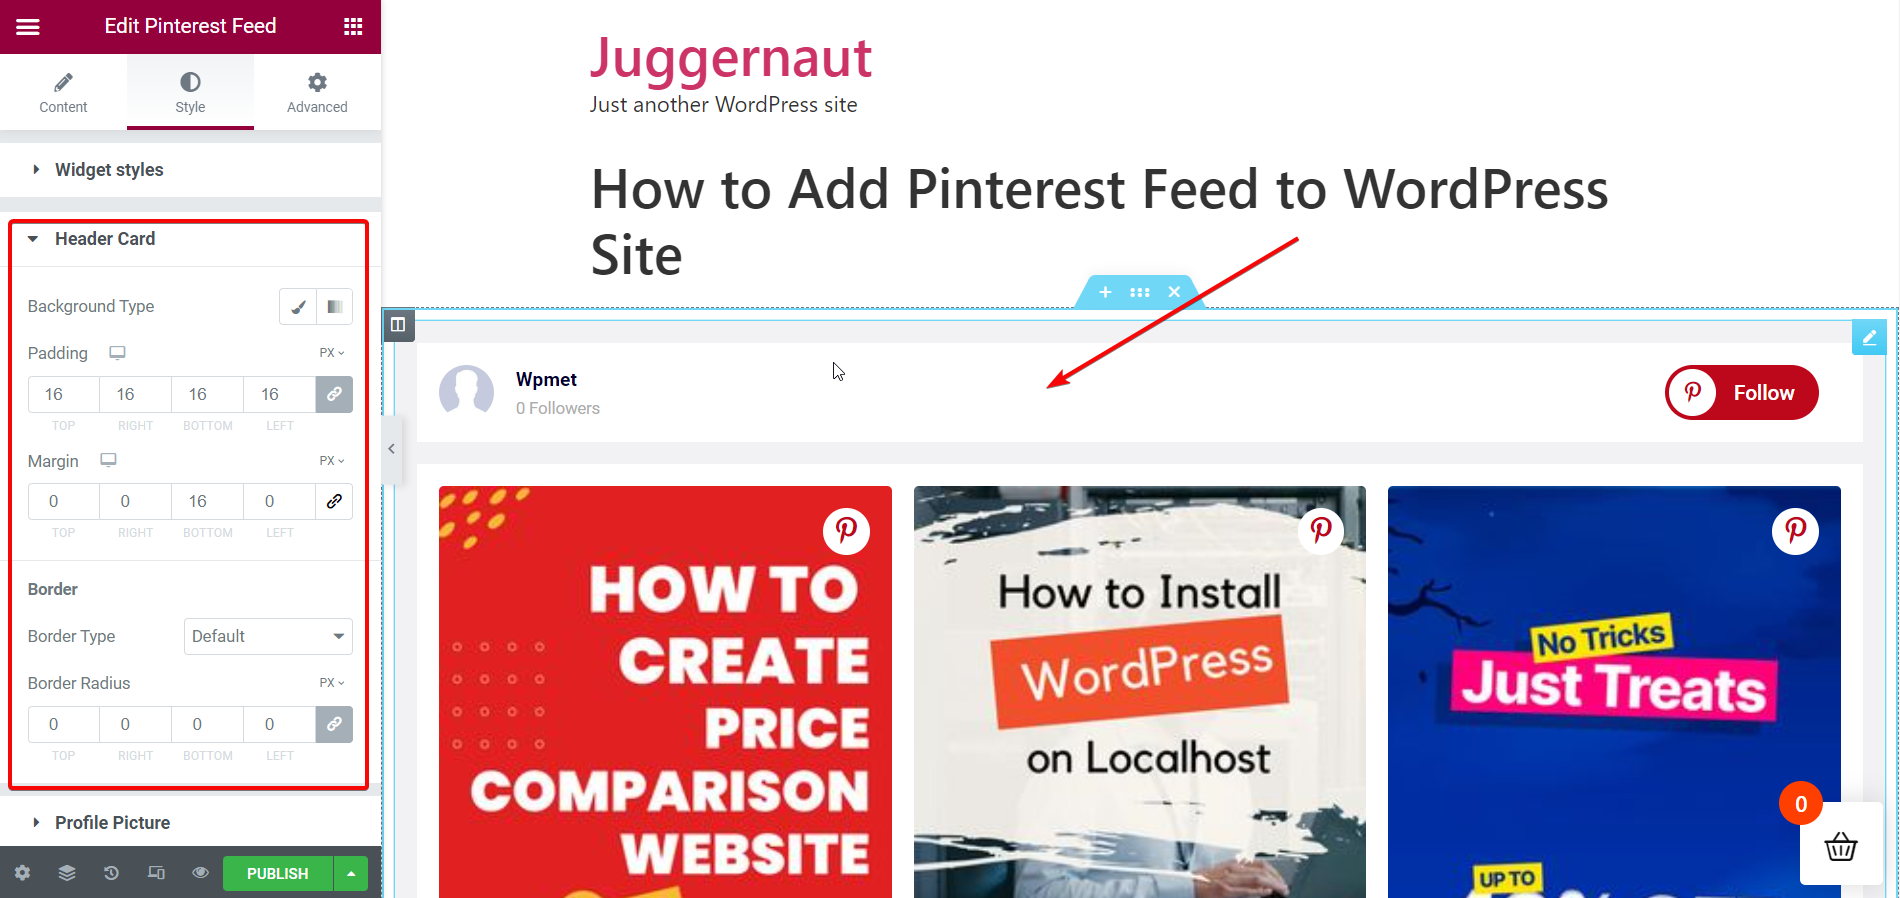
Style options for the header of the feed
To customize the styles, choose the background color type; Classic or Gradient. Thereafter, choose the background color for Header Card. An image can be used as a background. Set padding for the header items and adjust the margin for items in the header card.

Profile Picture:
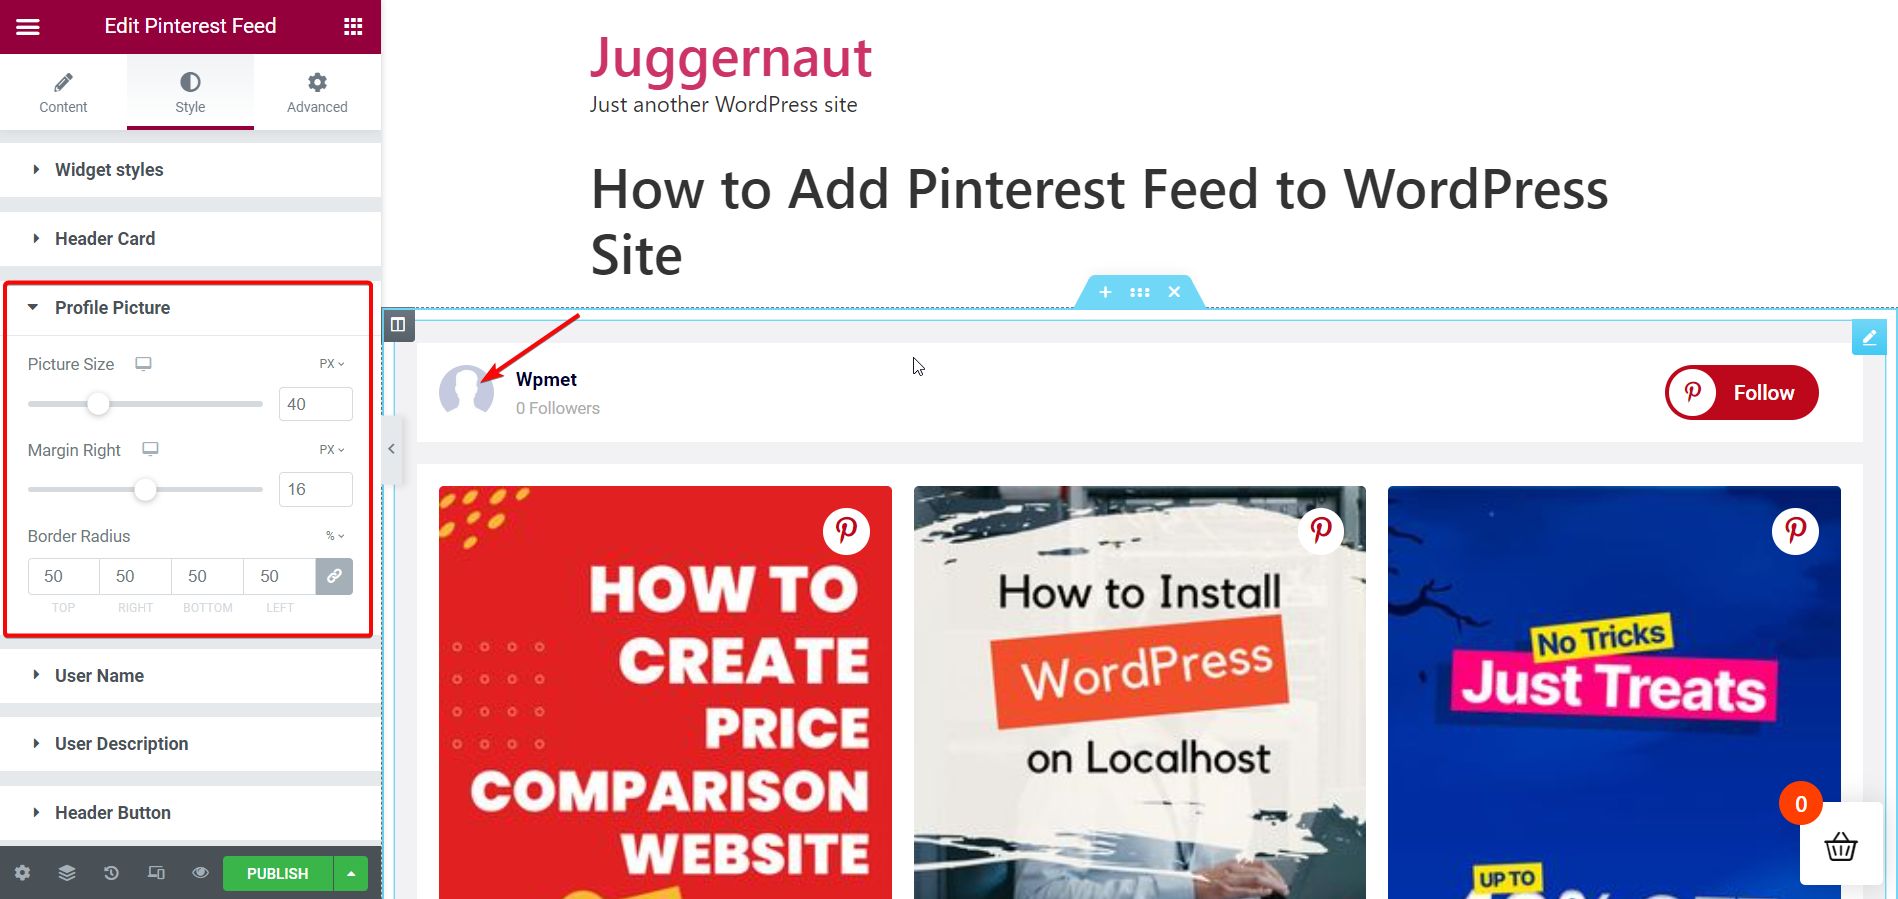
Style options for the Profile Picture in the display
To customize the styles, adjust the size of the profile picture and the margin to the right. Then, set the Border radius of the profile picture.

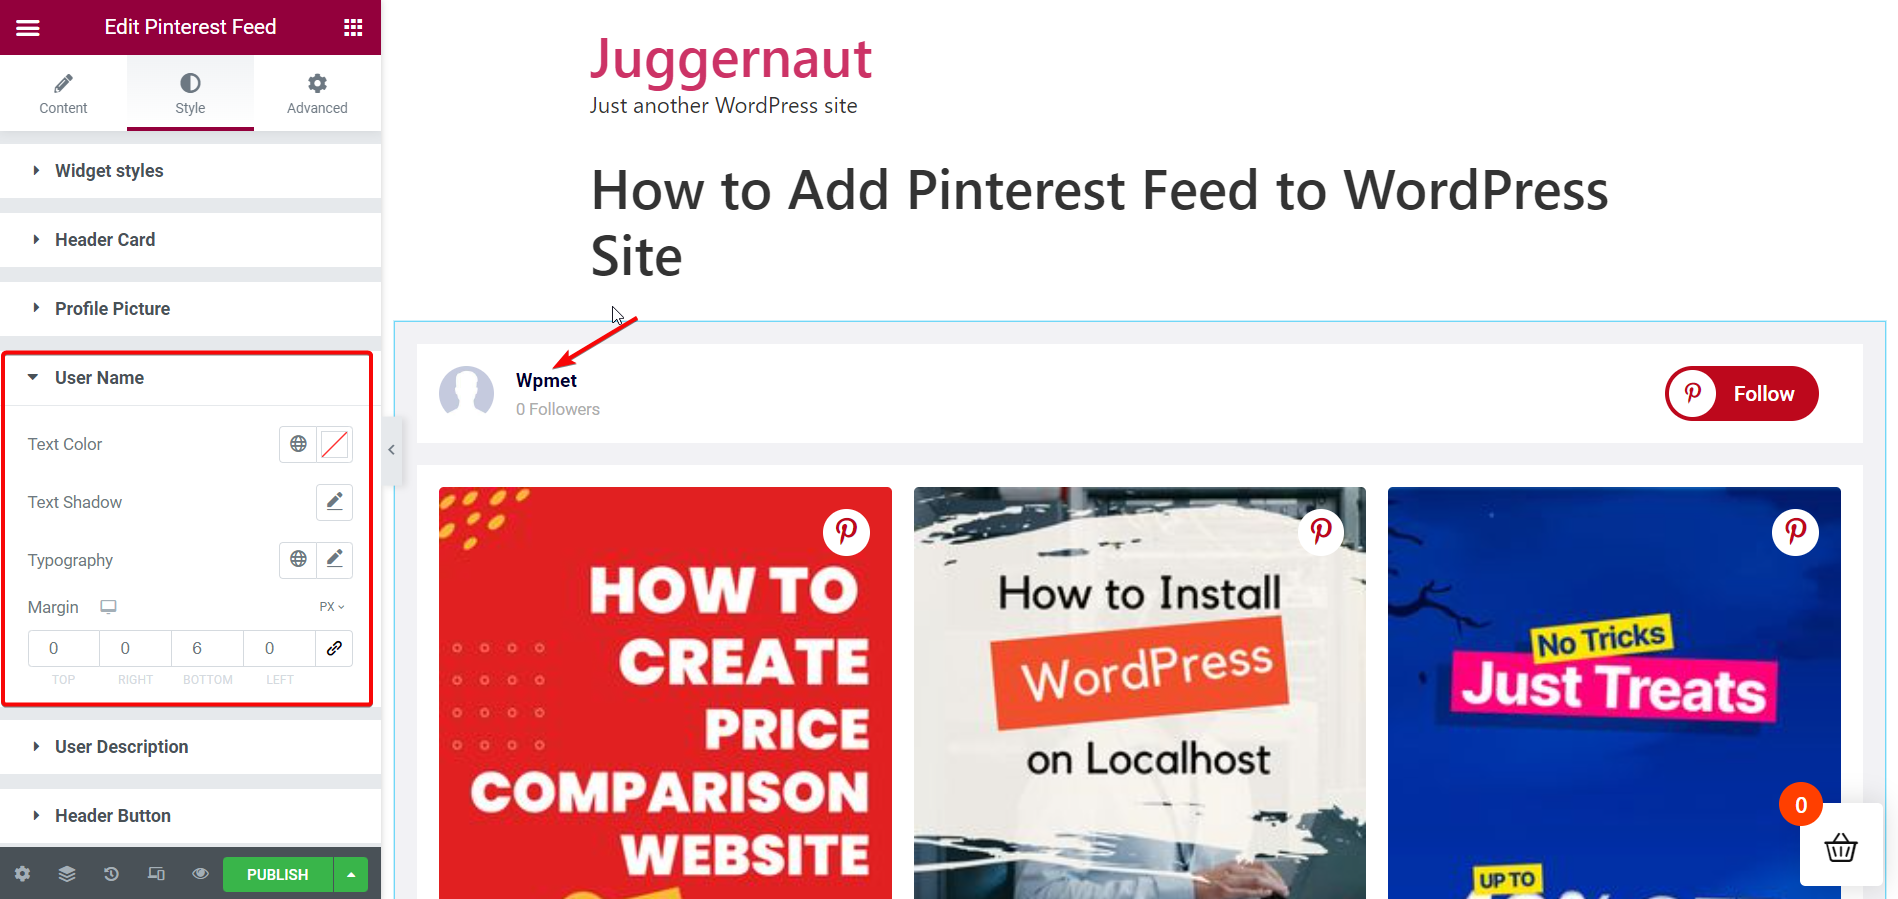
User Name:
Style options for the User Name to display
To customize the styles, choose a color for the user name text. Then, customize the design by adding a text shadow to the user name. Next, set typography for the user name and adjust the margin around the user name.

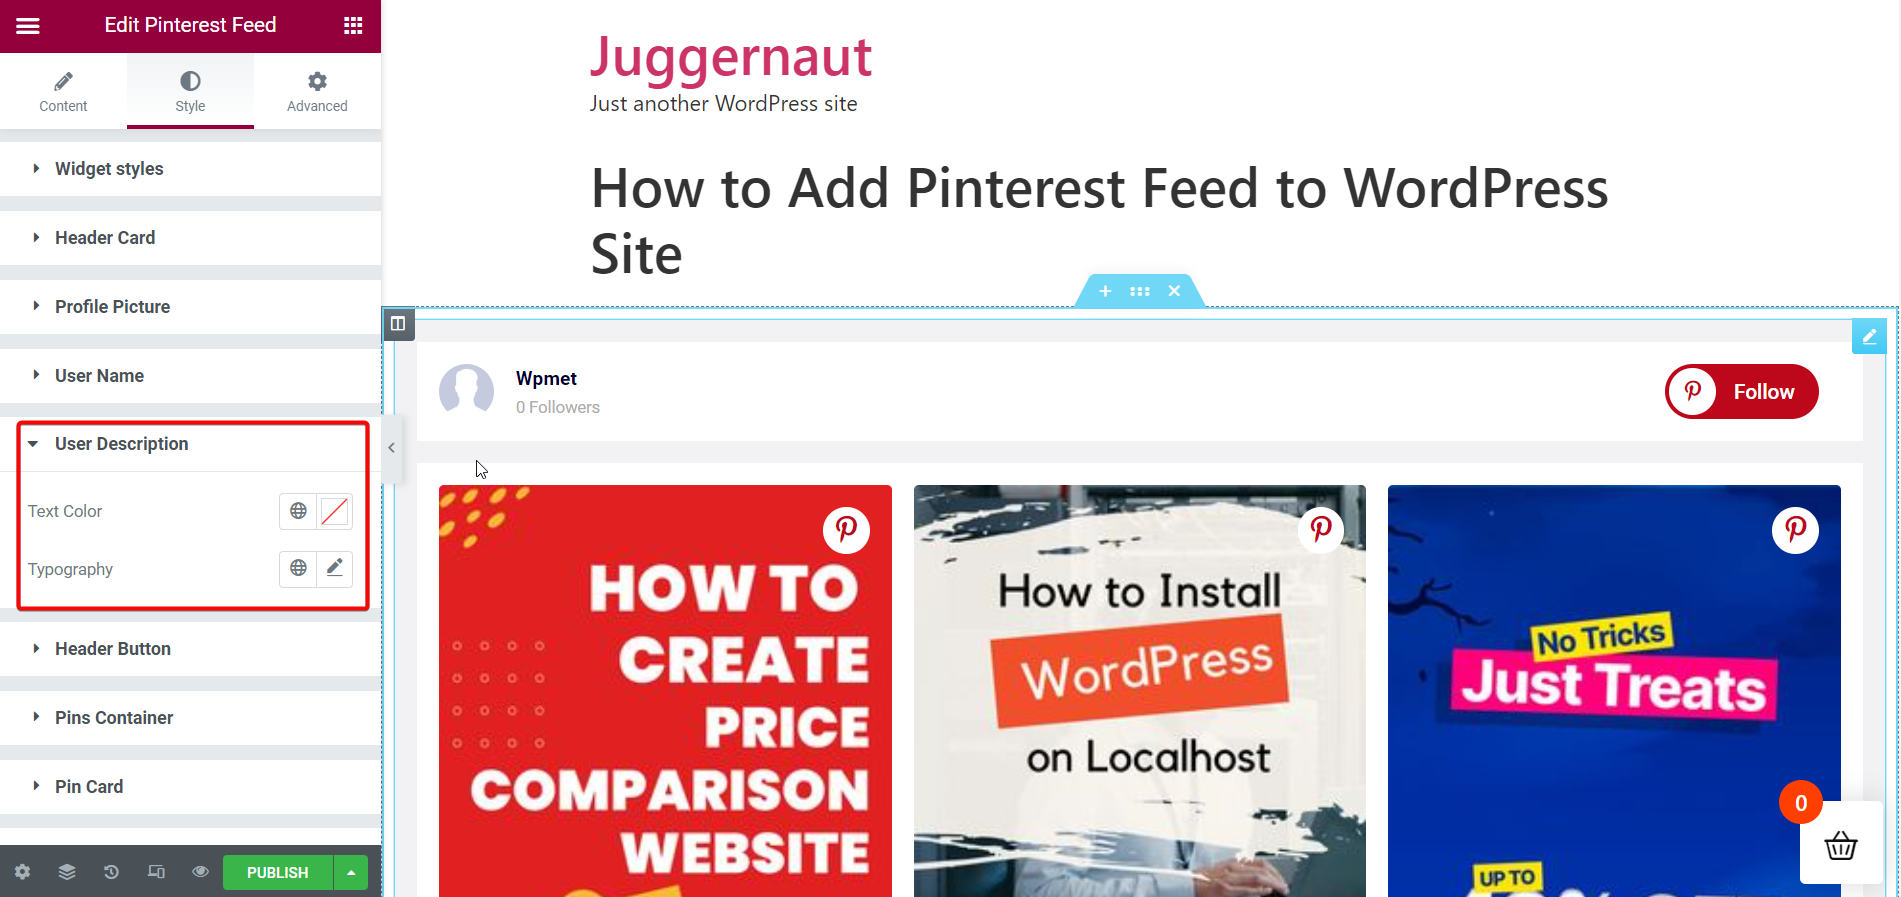
User Description:
Style options for the User Description to display
To customize the styles, choose a color for the user description text and set the typography for the user description.

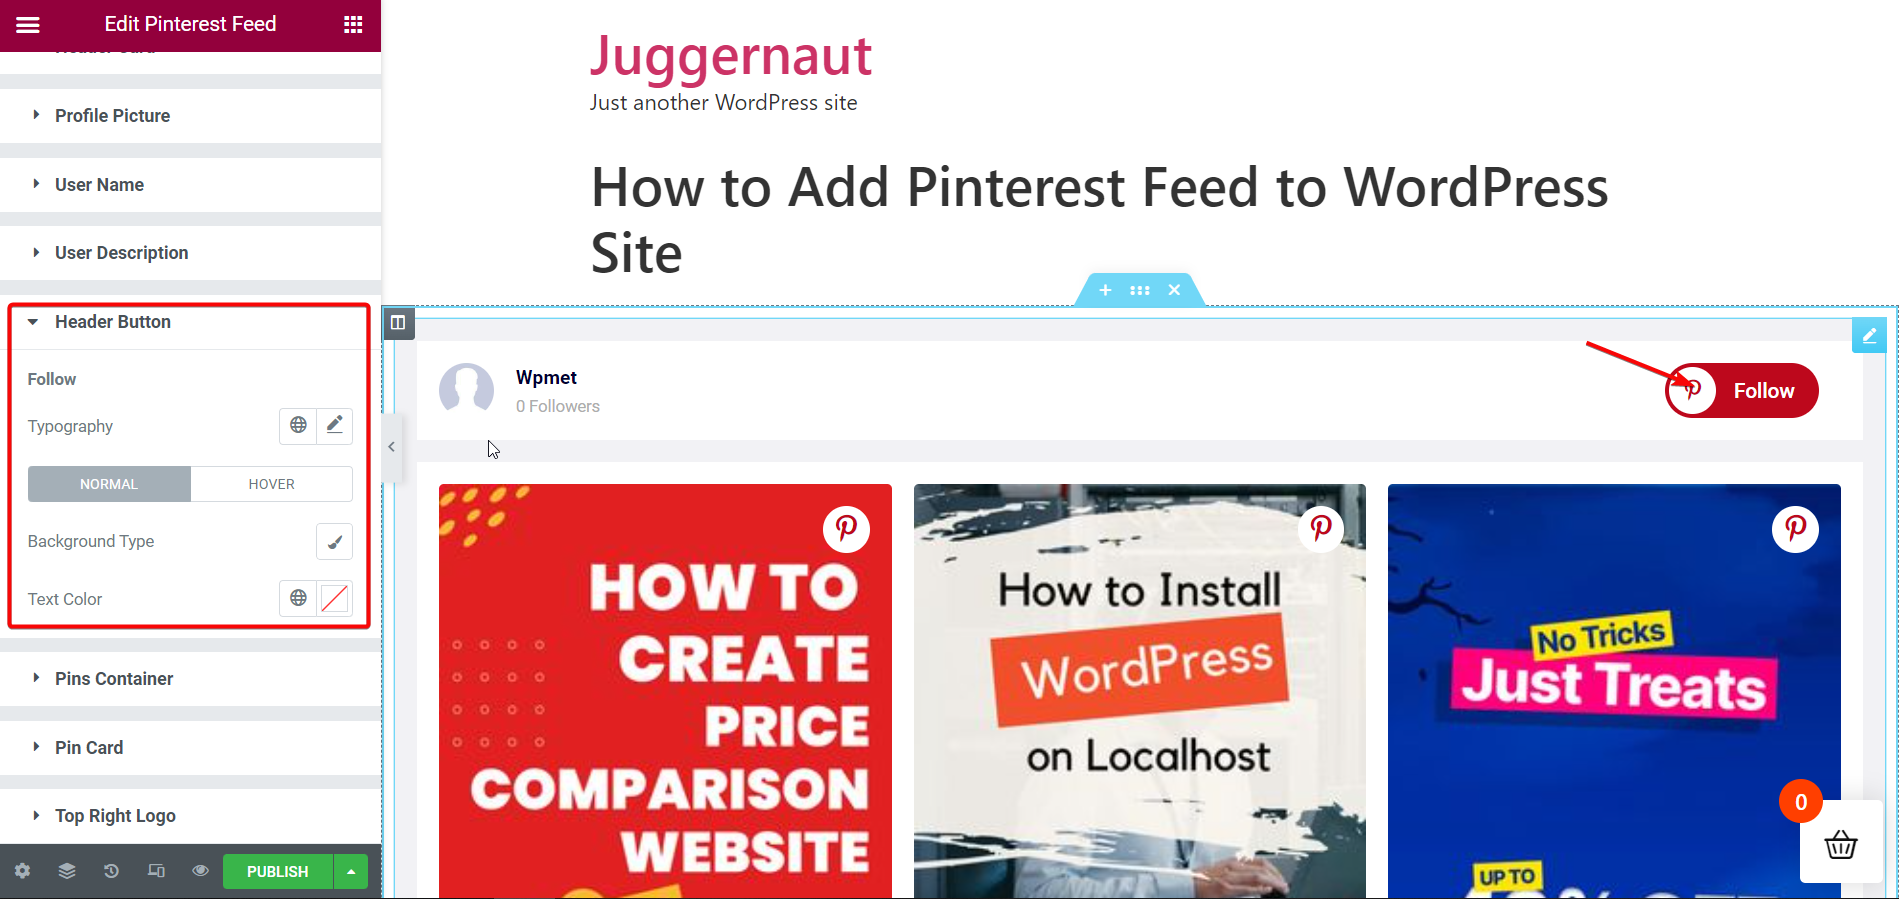
Header Button:
Style options for the follow button on the header
To customize the styles, set text typography for the header button and choose the Background color type; Classic or Gradient. After that, choose the background color for the header button. You can use an image as a background. Select a color for the text in the “Follow” button on the header.

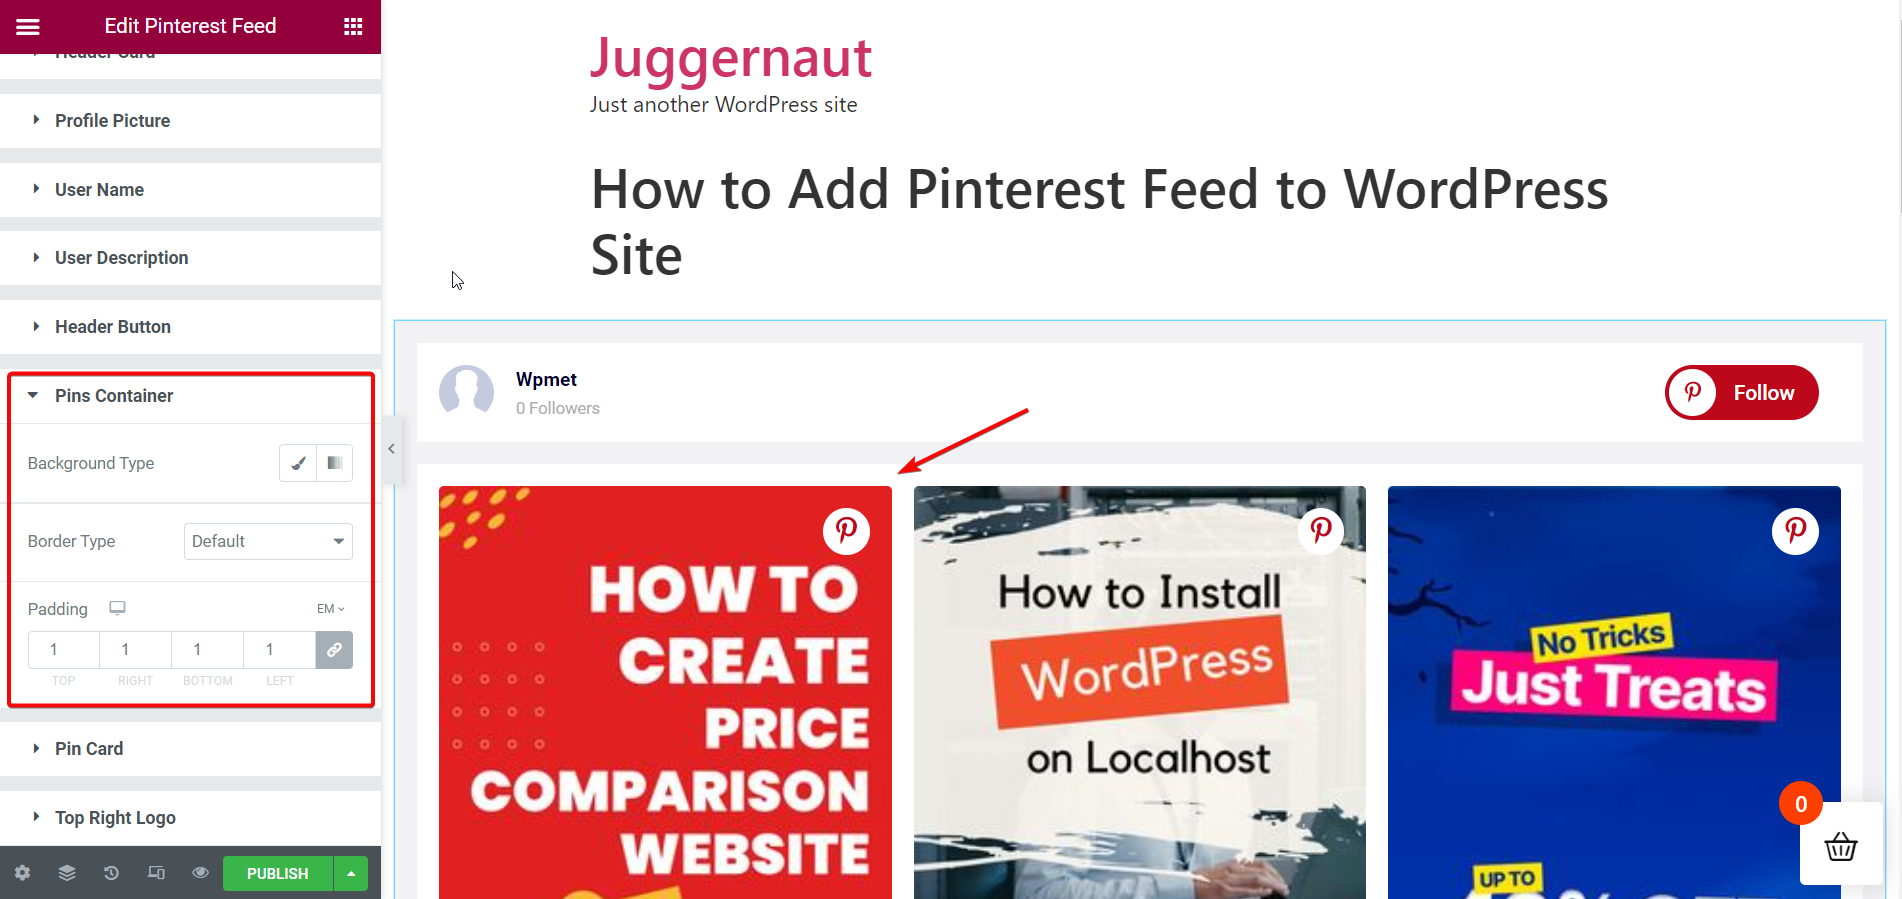
Pins Container:
Style options for the container where pins are displayed
To customize the styles, choose the Background color type; Classic or Gradient. Then, pick the background color for the Pins Container. An image can be leveraged as a background.
Then, select the border type for Pins Container from the given options; Solid, Double, Dotted, Dashed, Groove, or None(no border). Set the border width, border color, and border radius for the Pins Container.

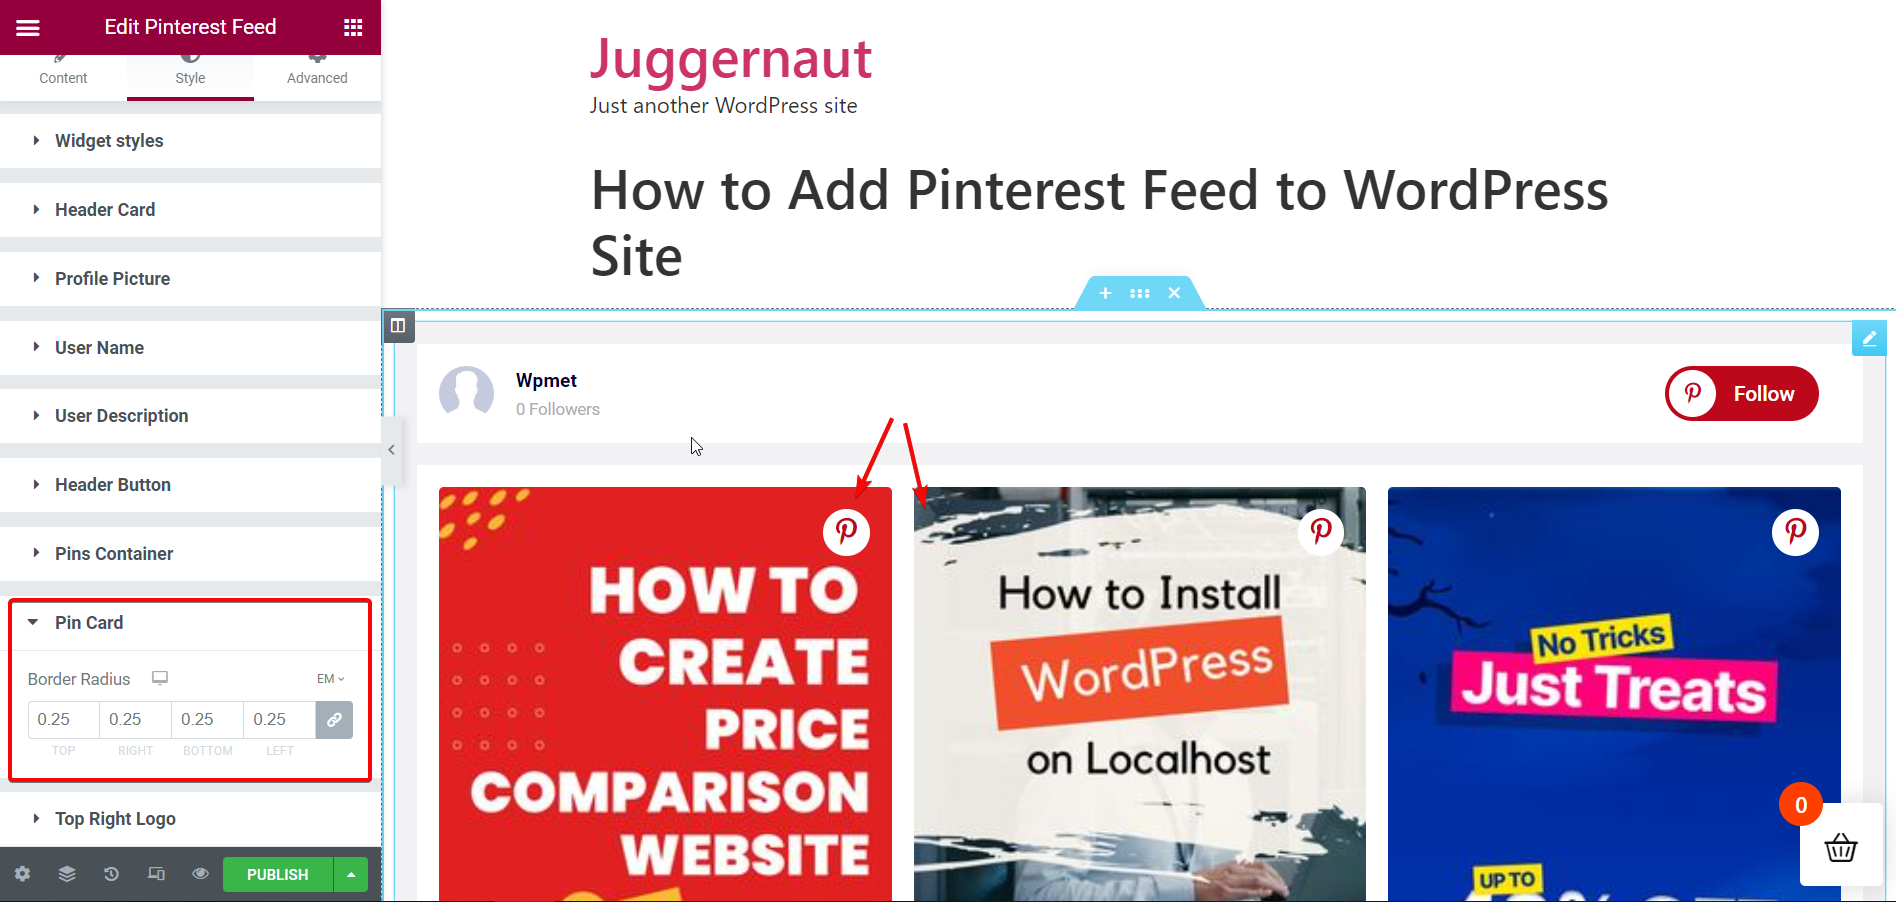
Pin Card:
Style options for the Pin Card
To customize the style, modify the Border Radius for the pin cards.

Top Right Logo:
Style options for the Pinterest logo on the cards at the top right corner
To customize the style, adjust the size of the circle around the logo and the size of the icon.
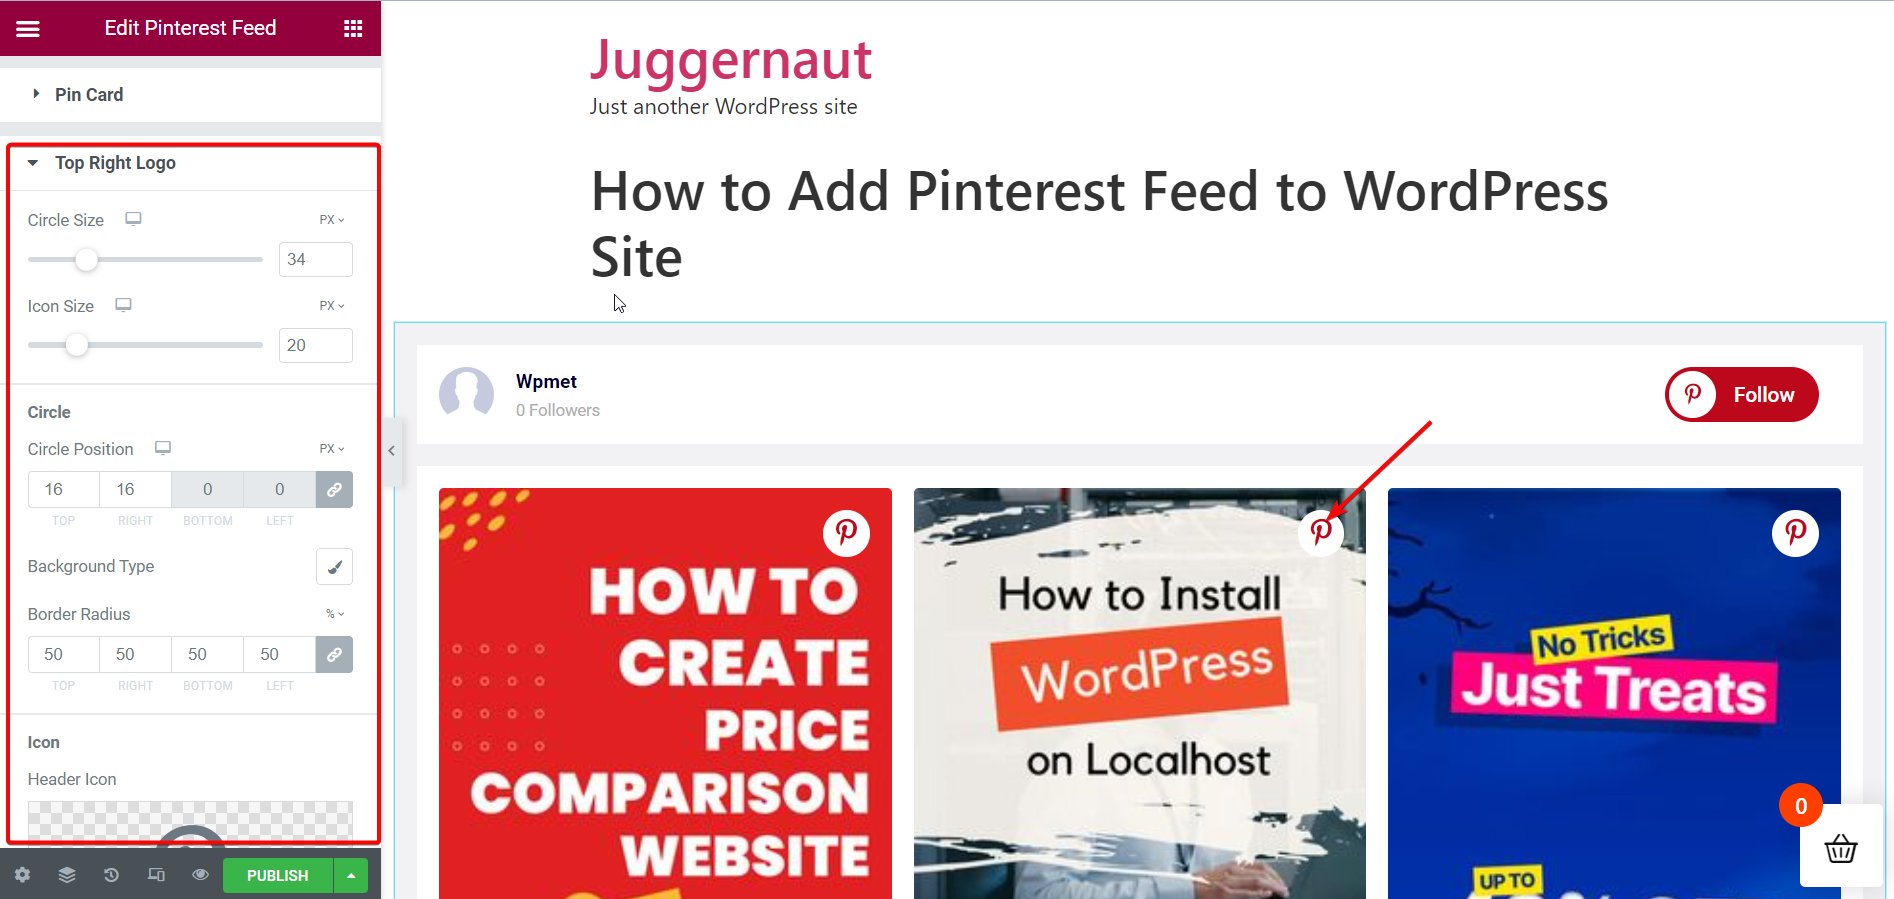

Circle of the logo:
Style options for the Logo Circle
In order to customize the style, set where you want to place the logo on the cards. Then, select the Background color type; Classic or Gradient. Choose the background color for the circle. You can leverage an image as a background too.
Wanna know how to add Instagram feed to your WordPress site? Check out the link below-
Wrap-up:
Pinterest is a popular social media platform and it’s a useful medium for promoting your business. By creating Pinterest pins, you can do the job effortlessly. But your promotional posts will get a boost if you can show these pins right on your website, won’t they?
With ElementsKit, you can easily showcase your business Pinterest feed along with the Dribbble feed, Instagram feed, etc. on your website. All you have to do is just follow the simple steps shown above. And that’s it! Best of all? You can do bottomless customization and styling of each element of your Pinterest feed with ElementsKit.
Leave a Reply