

Navigation menus are like the guiding stars of a website. Imagine your website as a sea full of stuff for sailors to sail through. So they need a navigator for reaching to their desired destination with ease.
That’s where navigation menus come in. It plays a key role in guiding visitors and providing them a seamless browsing experience through your website.
So if you are a website owner or a developer, you have to put extra effort and focus to design a user-friendly navigation menu for your website.
For WordPress users, you have the flexibility to design the WordPress navigation menu in a couple of ways.
In this guide, we’ll walk you through the depths of Gutenberg and Elementor for creating a navigation menu. At the end of this blog, you will be able to create and customize the WordPress navigation menu and elevate your website’s user experience.
The website navigation menu is like the map of your website, guiding visitors through its pages. These menus appear as a set of links or buttons typically displayed on a webpage, usually at the top or side.
It helps to improve the accessibility and user experience of your website by providing a structured way to explore the website pages and their content.
With WordPress, creating and customizing menus for your website is fairly easy. You can add pages, posts, custom links, or even categories to your WordPress navigation menu.
The default method of creating a WordPress menu is quite simple. It provides a simple interface for creating and managing navigation menus.

However, you will find multiple WordPress plugins that add advanced features and flexibility in customization for the navigation menu. Some of these plugins come with an intuitive drag-and-drop interface, allowing you to arrange menu items in the desired order effortlessly.
In essence, the WordPress navigation menu is a crucial element for improving the user experience of your website, helping visitors find what they’re looking for quickly and efficiently.
The conventional method for adding a navigation menu involves creating the menu within the WordPress dashboard and then incorporating it into a page or post.
But using GutenKit blocks, you can create WordPress navigation menu directly into a page or post. And even create a custom page while creating the nav menu. Let’s find out how 👇
📢 Prerequisite
To create a WordPress navigation menu directly into the web page, you need to install and activate the GutenKit block editor plugin on your WordPress website.
After installing the plugin, open a page in the Gutenberg editor (the default WordPress editor).
In the editor, find and select the GutenKit Nav Menu block. Then add the navigation menu to the editor section.
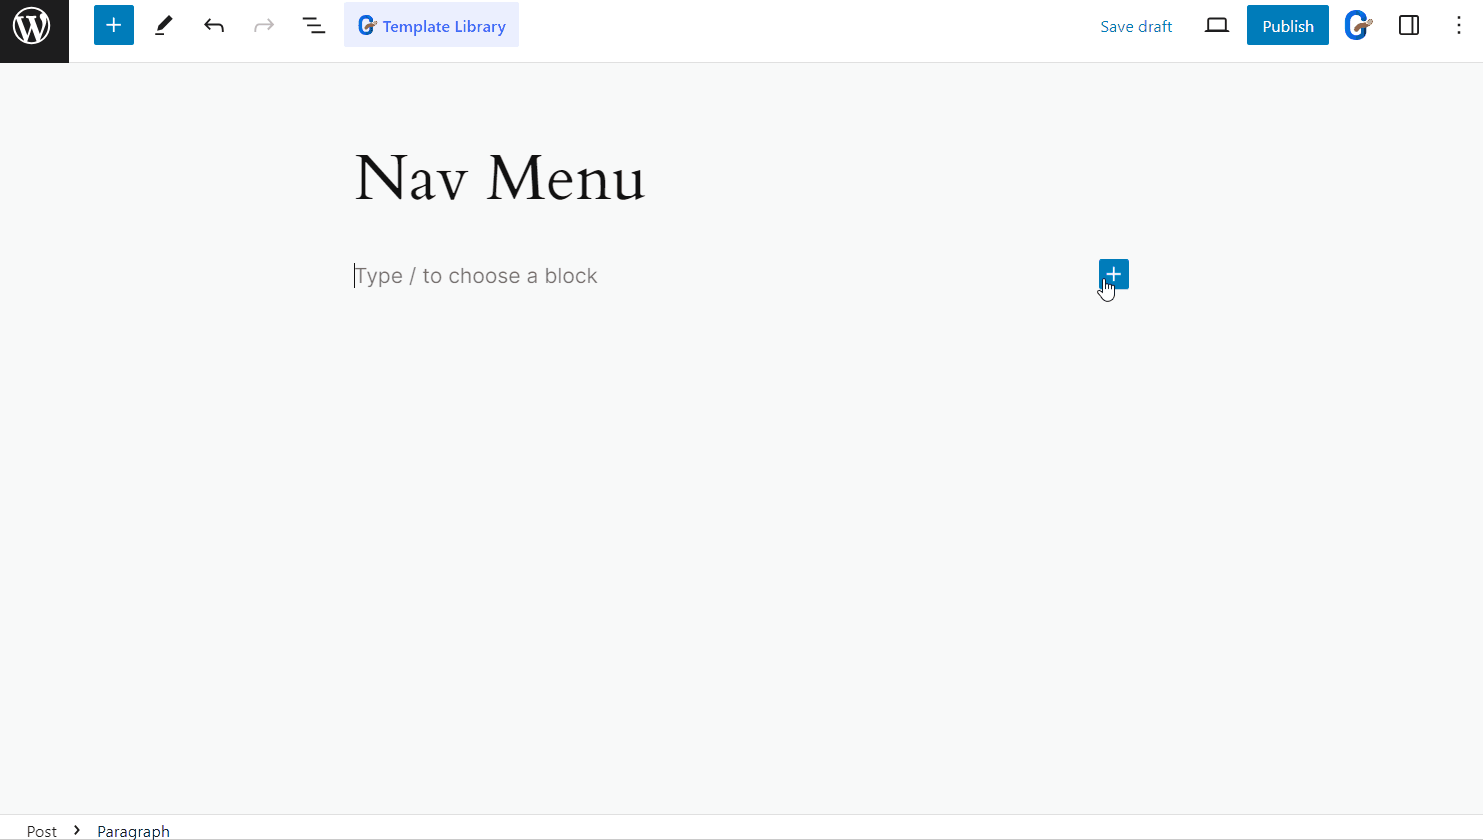
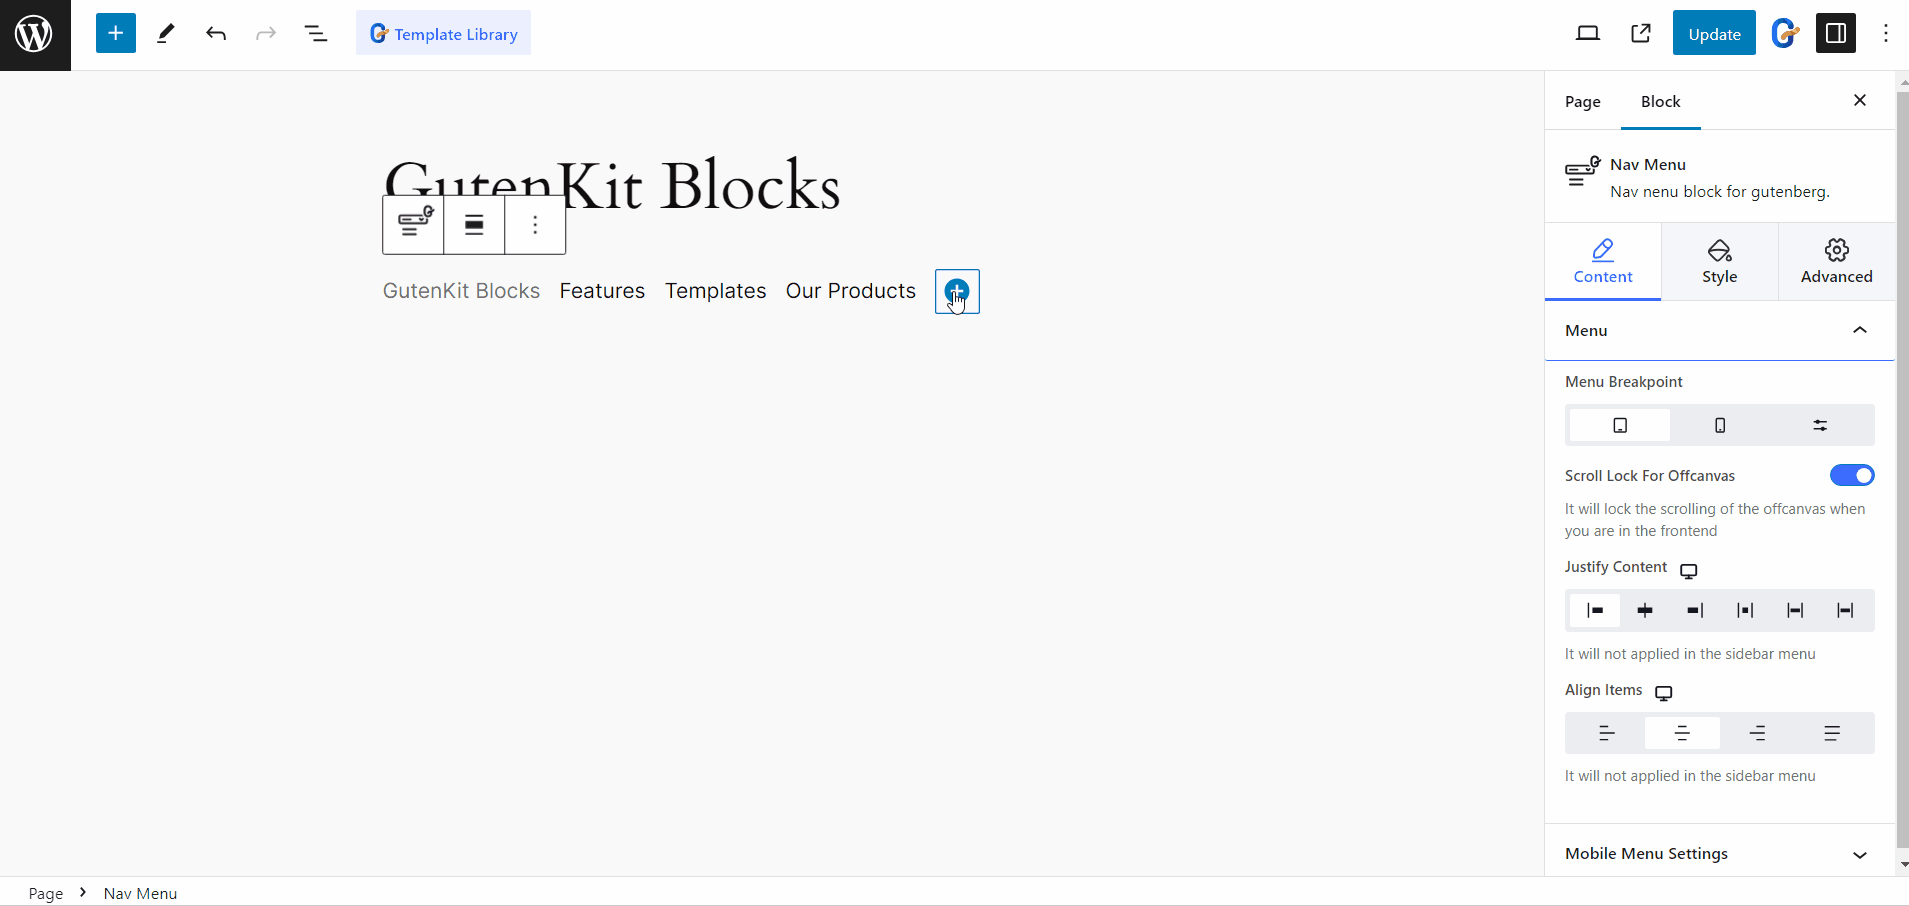
In the Nav Menu block, you can add menu items just by clicking on the ➕ (plus) icon button, i.e. Add Menu button.
👉 Adding an existing page to the navigation menu
When you click on the Add Menu button, a list of your website’s existing pages will appear. Or, you can also search by typing the page name or URL in the search field.
Besides, you have the option to change the Menu Label and Page URL from the sidebar and custom pages to the WordPress navigation menu.
For example, while creating a menu, I suddenly realized that I forgot to create the “My Account” page on the website.
So typically, I had to go back to the dashboard and create a new page named “My Account”. Then go back to the editor and add this page to the navigation menu.
Well, with GutenKit this hassle is eliminated! Here is the procedure of creating new pages directly from the navigation menu bar!
- While adding menu items, type the page name in the search field.
- If the page doesn’t exist on the website, you will see a “Create draft page” option.
- Click on it and a a page will be created and as a draft on your WordPress site.
Besides, this page will be added to the WordPress navigation menu.
Later you can edit the page content and publish it for your website.
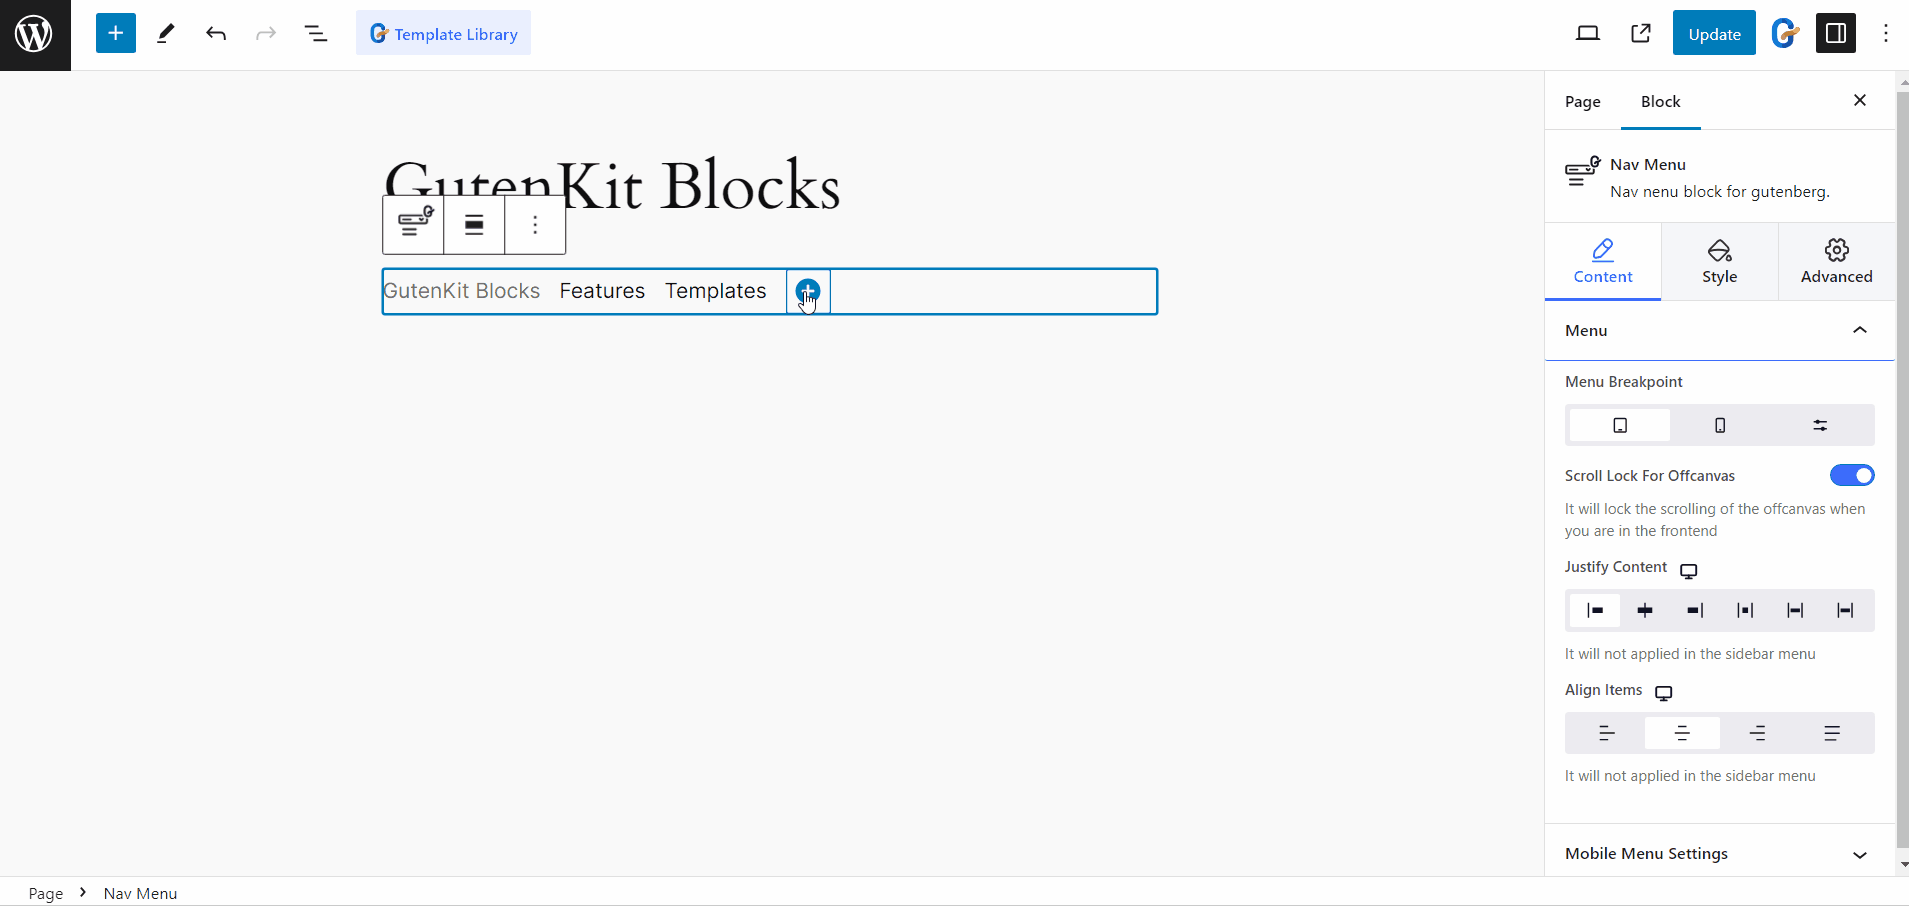
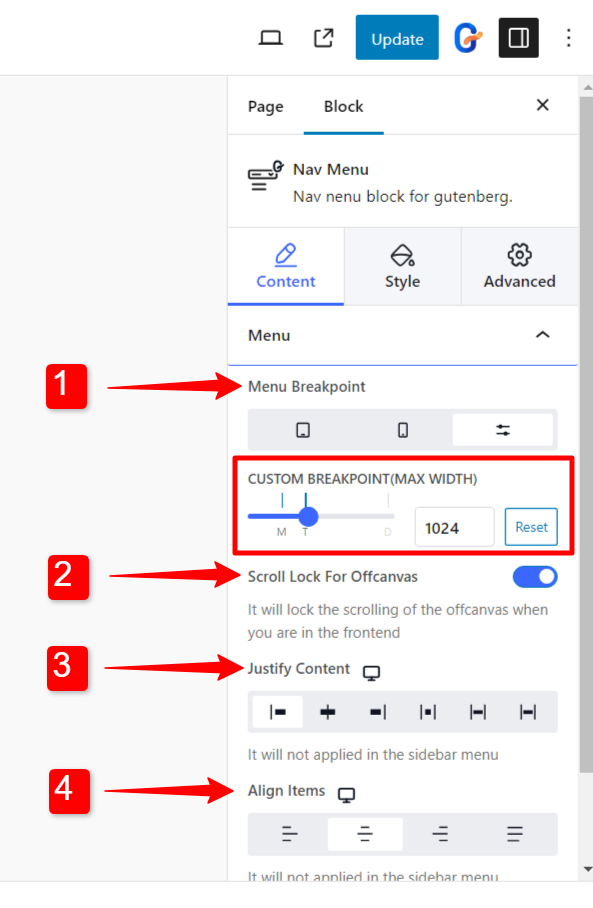
In the next step, you can configure how the navigation menu will appear on your website. Use the following GutenKit settings to tailor the menu appearance:
- Menu Breakpoint: While customizing the menu, you can set the Menu breakpoint for tablet, or mobile, or add a custom breakpoint.
- Scroll Lock For Offcanvas: You can apply the scroll lock when the menu appears as an offcanvas menu.
- Justify Content: You have multiple options to justify the menu content like Start, Center, End, etc.
- Align Items: You can also align the menu content to the right, left, or center.
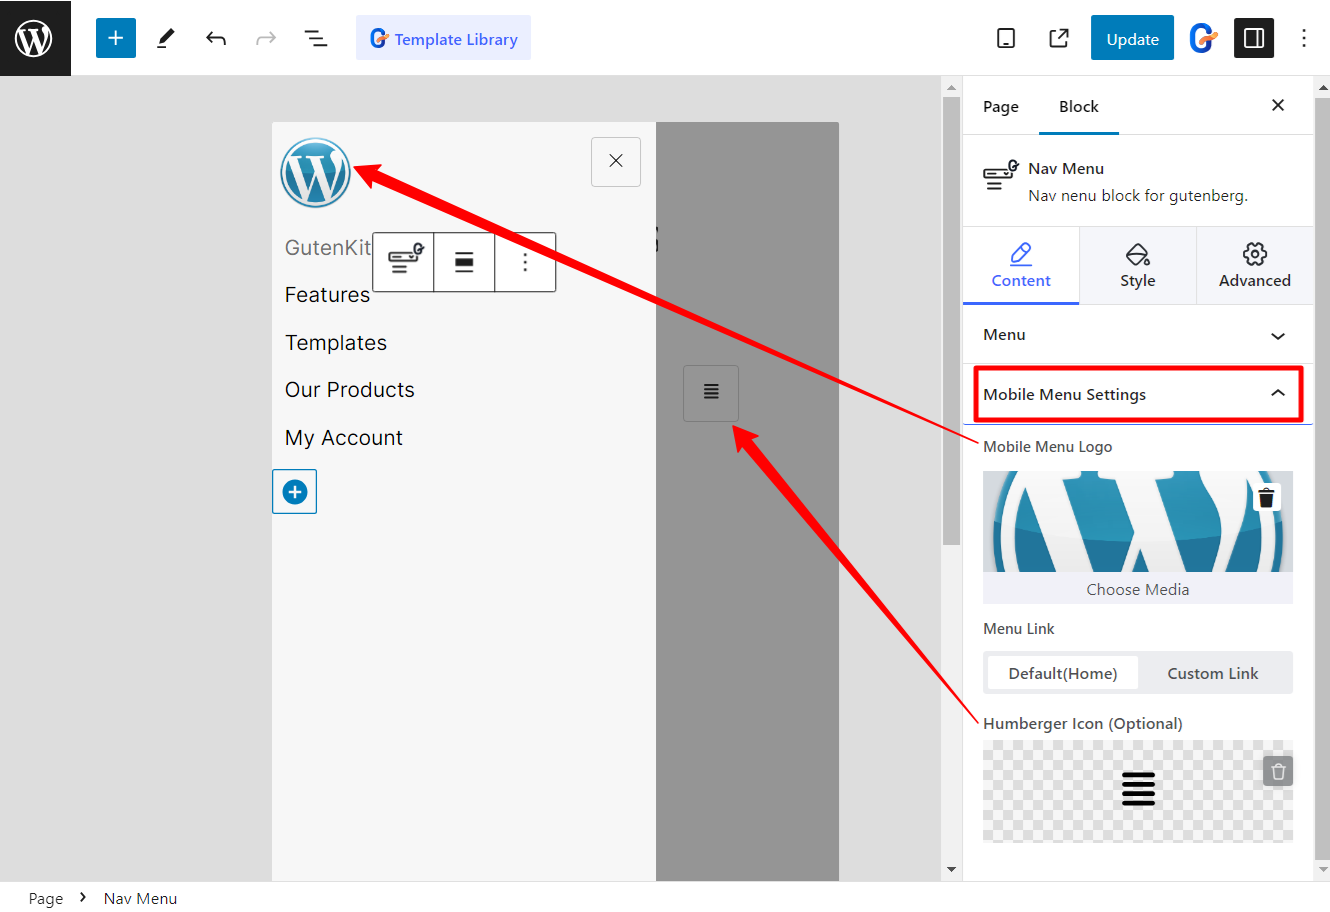
🟢 Mobile Menu Settings
With the GutenKit block editor, you can separately configure the mobile menu appearance. The following settings are available for the Nav Menu block.
- Mobile Menu Logo
- Menu Link
- Hamburger Icon
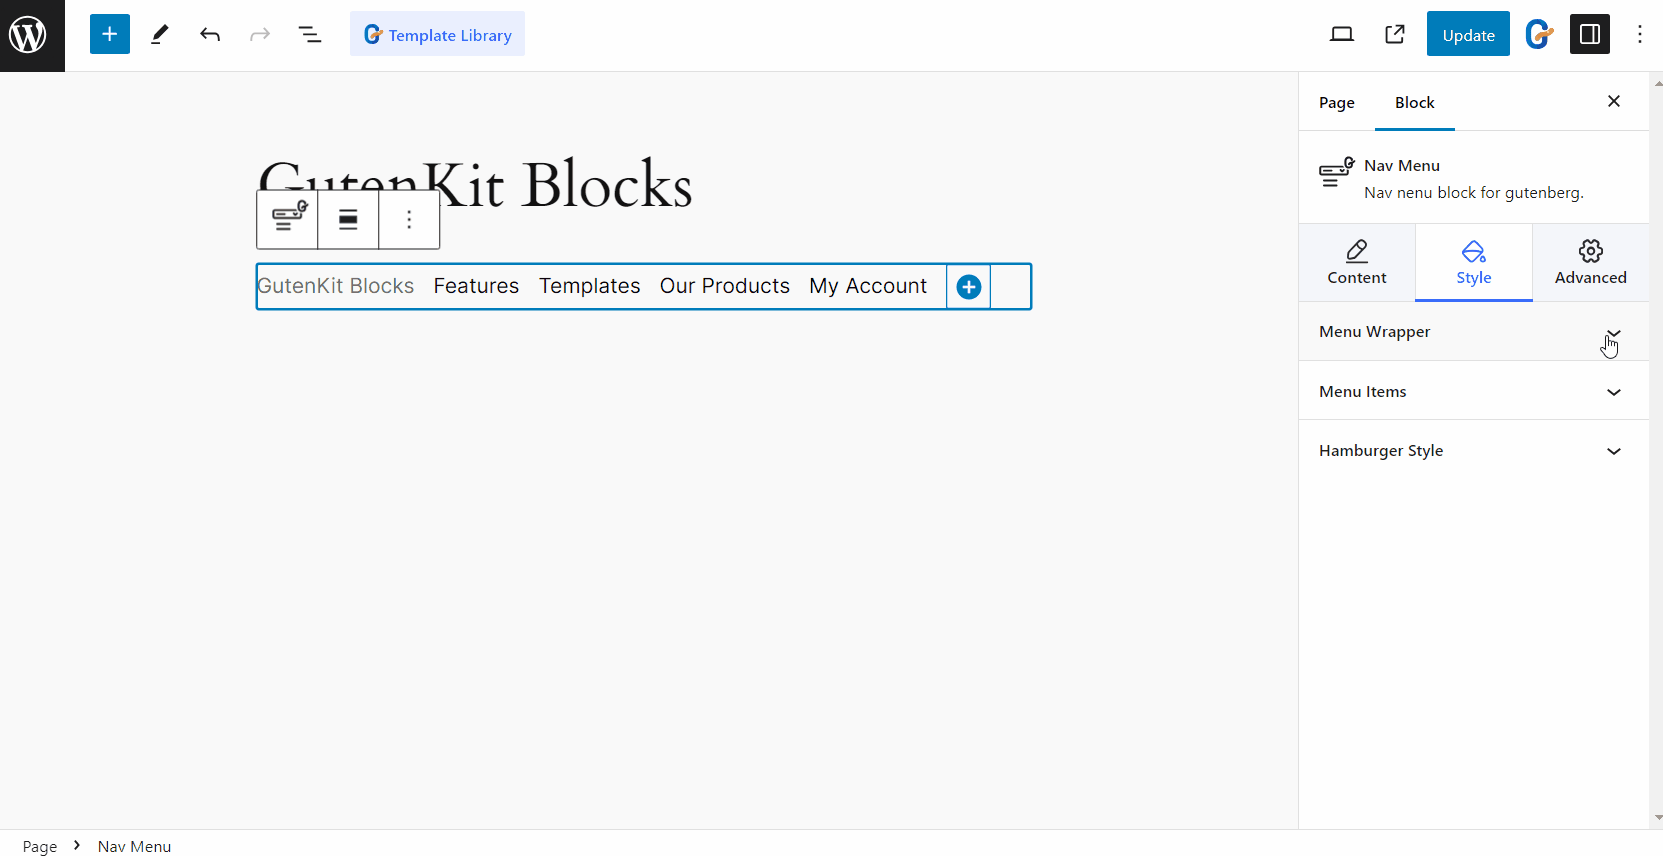
To customize the GutenKit navigation menu in WordPress, move to the Styles tab in the block editor. Under the style tab, you can customize the Menu Wrapper, Menu Items, Hamburger, and Mobile Menu Logo.
For Gutenberg, you need to edit the site header in the Full Site Editor (FSE). To do this, make sure you have a block theme installed and activated on your WordPress site.
Moreover, to build a navigation menu in the header, you need a block editor plugin that is fully compatible with the WordPress Full Site Editor.
In this regard, GutenKit page builder blocks can be a great option. With it, you can easily edit the site header and add a custom navigation menu.
Prerequisites:
- WordPress Block theme. Example: Hello Blocks or Twenty Twenty Five
- FSE-compatible block editor plugin: GutenKit Page Builder Blocks.
Now, let’s go through the steps to create a navigation menu for your site’s header.

#️⃣ Step 1: Access to the global header in the Full Site Editor
First, log in to your WordPress site to access your site’s full editor. From the dashboard, proceed the following:
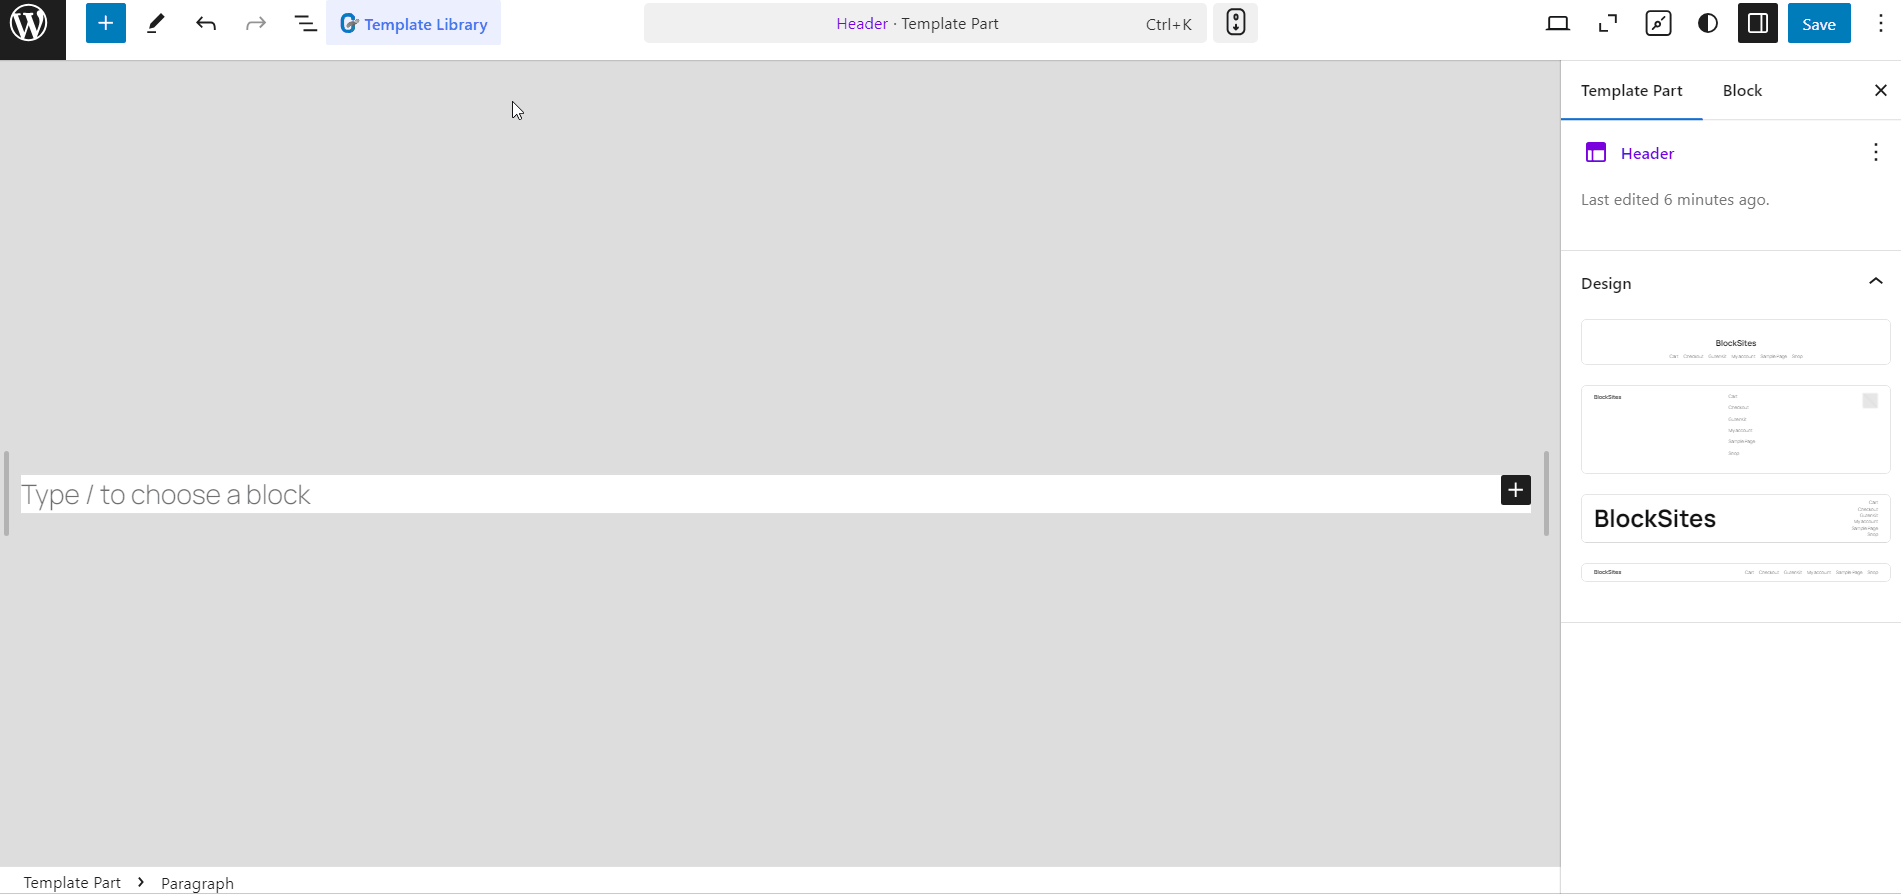
- Go to Appearance > Editor.
- On the editor’s navigation bar, select Patterns.

- In the patterns, you will find Header patterns.
- Click on the ‘Header’ and you will be able to edit the site header.

This will minimize the navigation bar and expand the editor section to let you start editing the global header on the WordPress Full Site Editor.
Now you can edit the site header. Adding the WordPress navigation menu is quite similar to adding it to a page.
Firstly, you can bring the GutenKit Nav Menu block into the editor. Then you can add menu items, configure the settings, and finally customize the menu styles.

Alternatively, you can use the ready patterns from the GutenKit template library for Gutenberg to quickly build a professionally designed WordPress navigation menu for your website.
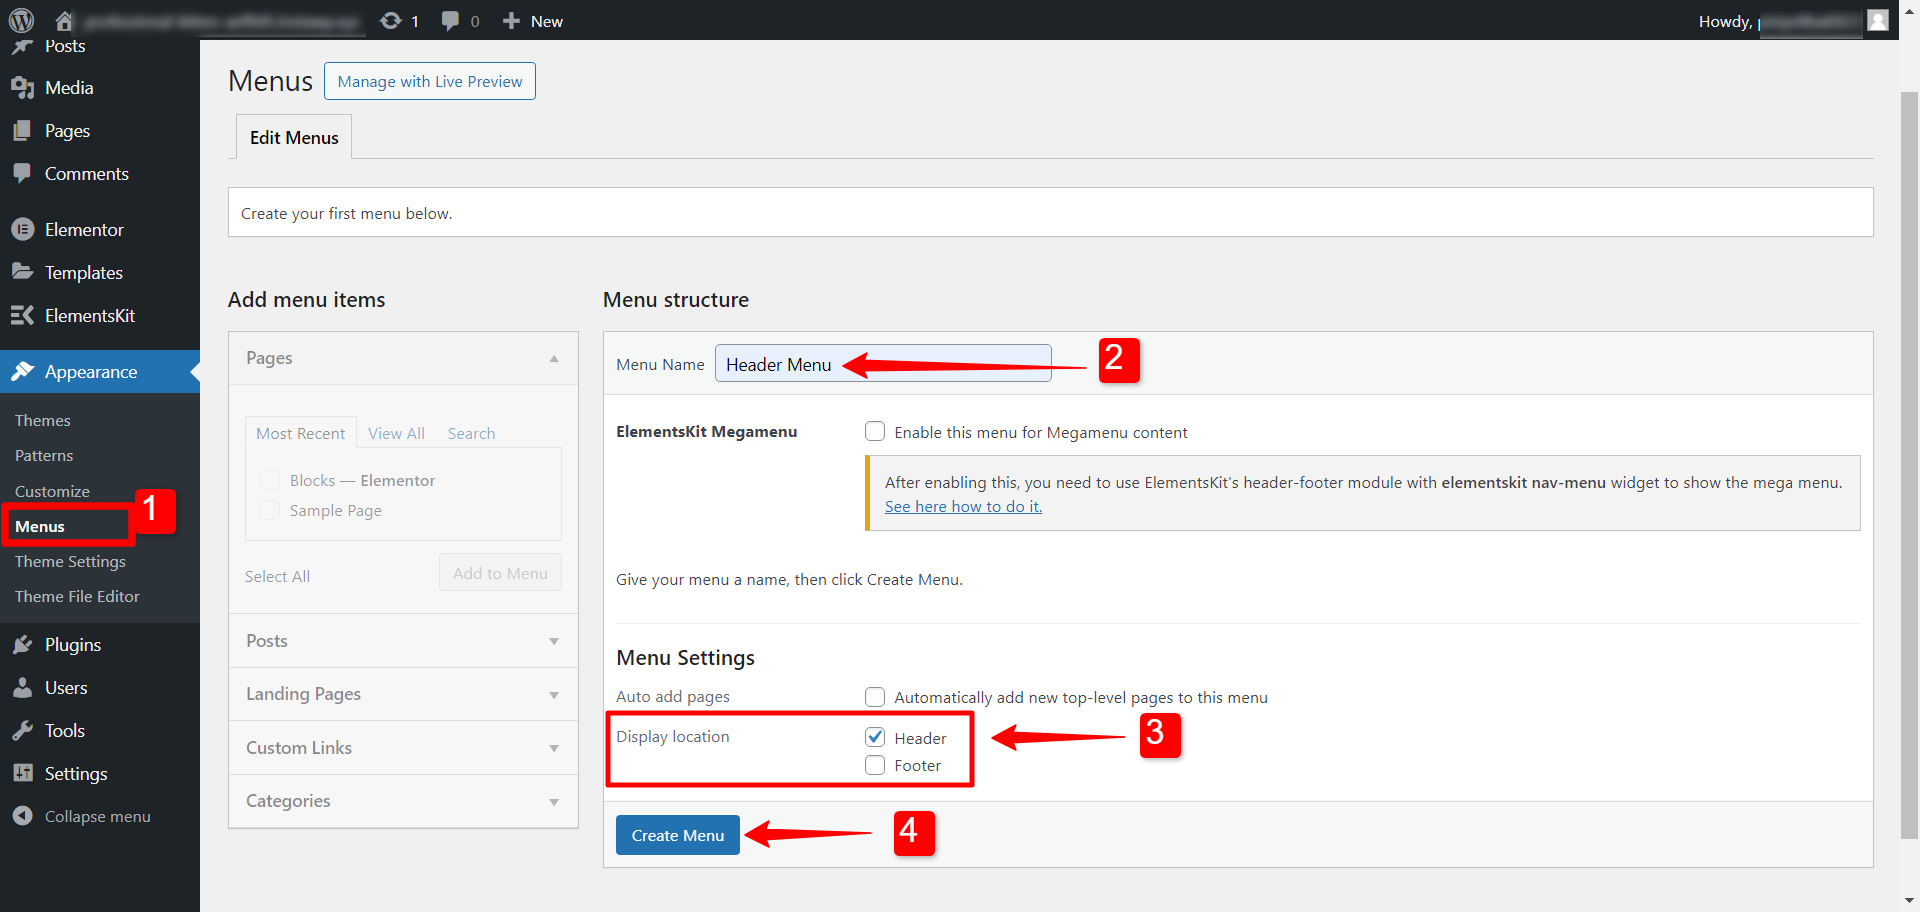
If you are still using the classic editor, you have to add the WordPress navigation menu from the Appearance > Menus from your dashboard. To add a new menu:
- Step 1: Go to Appearance > Menus.
- Step 2: Enter the Menu Name.
- Step 3: Select the Display Location.
- Step 4: Click on the “Create Menu” button.
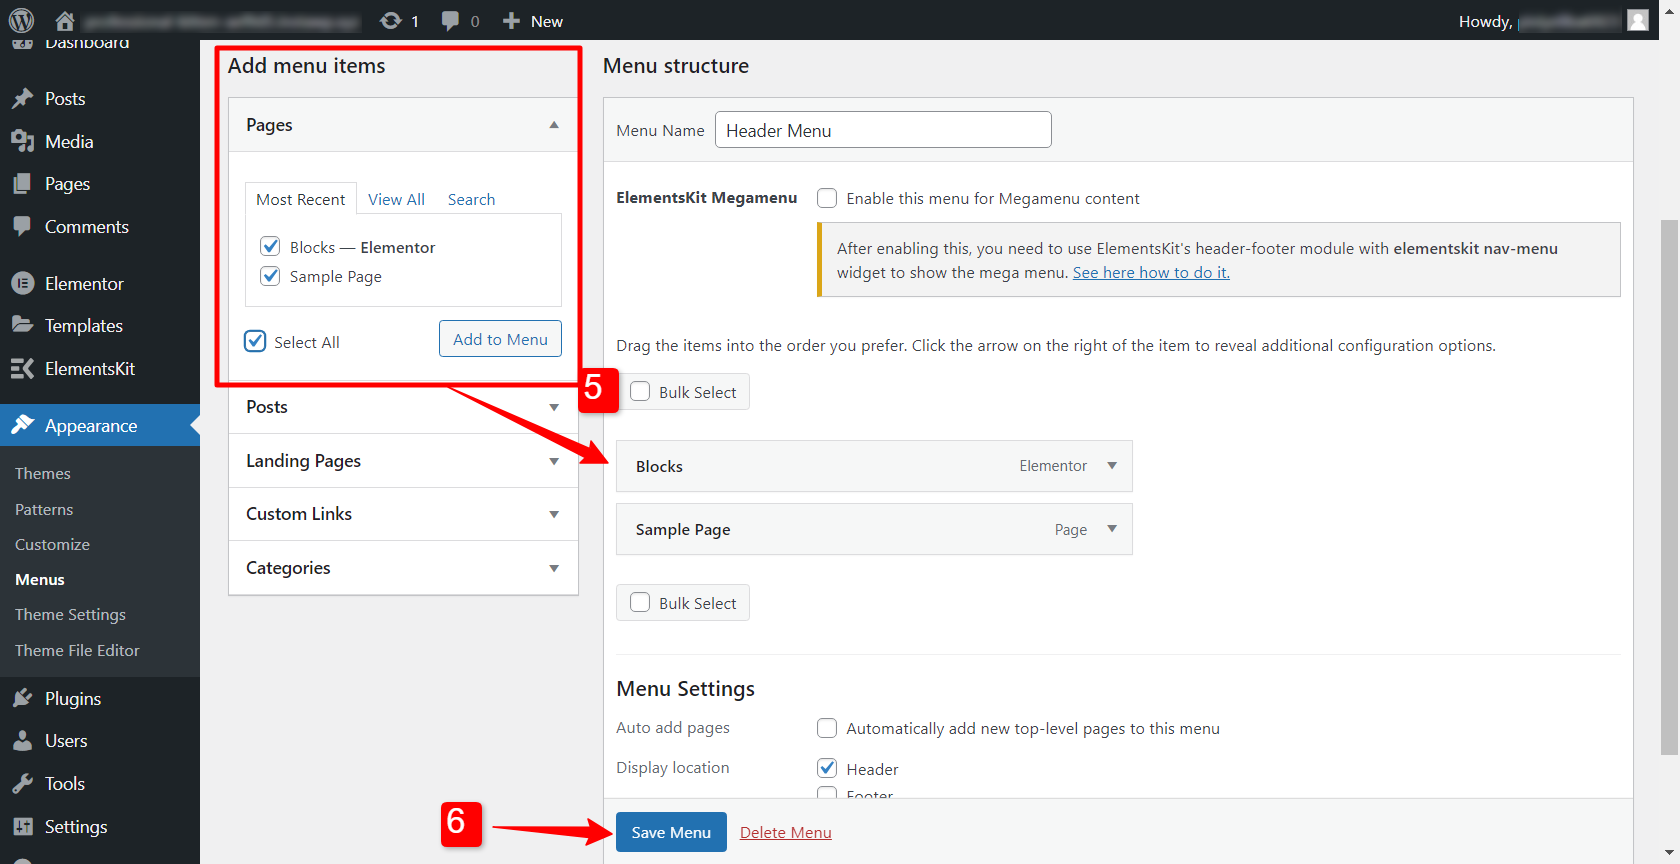
After creating menu you can add menu items from the sidebar.
- Step 5: After that, add pages, posts, custom links, and categories to the menu.
- Step 6: Finally click on the Save Menu button.
If you are an Elementor user, you can easily edit and customize WordPress navigation menus using ElementsKit.
In the Elementor editor, drag and drop the ElementsKit Nav Menu widget. After that, you can customize the Menu Settings, Mobile Menu Settings, and Menu Styles.
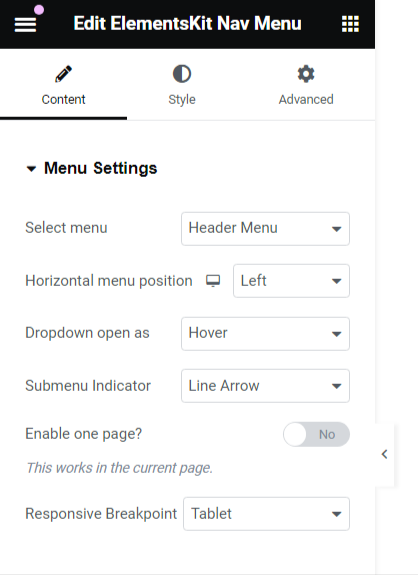
#️⃣ Menu Settings
- Menu Selection: When you choose “Select Menu,” you’ll view your website’s current menu options.
- Horizontal Menu Alignment: Determine where you want your menu to appear—options include Left, Center, Right, and Justified.
- Dropdown Behavior: Opt for dropdowns to open on Hover or Click.
- Submenu Indicator: Customize the icon that accompanies parent menus and facilitates navigation to the submenus. If you’re using ElementsKit’s pro version, you’ll find the Dropdown Indicator Icon feature in place of the “Submenu Indicator” option.
#️⃣ Mobile Menu Settings
- Mobile Menu Logo: Assign a logo specifically for mobile display.
- Menu Link: Maintain the default link for the homepage or specify a custom URL in the provided field. Clicking the logo will direct users to the designated link.
- Hamburger Icon (Optional): Select an icon from the library or upload your own SVG.
- Submenu Click Area: If the menu contains submenus, designate an icon for easy navigation within those areas.

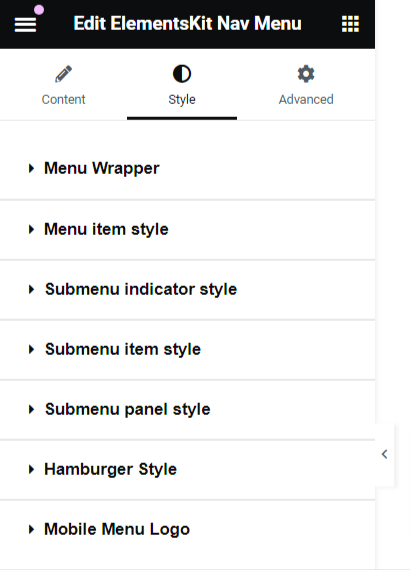
#️⃣ Menu Styles
Menu Wrapper Customization: Here, you can fine-tune aspects such as menu height, background style, padding, width, border radius, icon spacing, and more.
Menu Item Styling: Customize the appearance of menu items with options for background style, color, border-spacing, item margin, and more.
Submenu Item Customization: Similar to menu items, personalize submenu items with various styling options available in this section.
Submenu Panel Design: Expand this section to access a multitude of customization options for styling the submenu panel to your liking.
Hamburger Icon Styling: Explore different styling options for the hamburger icon, including colors, sizes, positions, and additional features.
Mobile Menu Logo Customization: Tailor the mobile menu logo to your preferences using the options provided in this section.
And that’s it! With these steps, you can easily add a navigation menu to your WordPress website. If you’d like more information, be sure to check out the documentation of ElementsKit Nav Menu widget for Elementor.
Besides, you can also create a mega menu in WordPress with ElementsKit . It comes with the Mega Menu widget for Elementor that lets you create multi dimensional menus with both vertical and horizonal orientation, making the site navigation more functional and user-friendly. Using ElementsKit Mega Menu widget for Elementor, you can easily design a WordPress mega menu with the menus you have created on your WordPress dashborad.
To learn how to the create a mega menu in Elementor, you can read the mega menu documentation or watch the video for more details.
Wrapping up
By following the step-by-step guide outlined in this blog, you now possess the knowledge to effortlessly craft custom menus tailored to your website’s needs. Remember to keep your menu structure logical, concise, and intuitive to ensure seamless navigation for your visitors. With the flexibility and versatility of WordPress, the possibilities for creating dynamic and engaging navigation menus are endless. So, dive in, experiment, and elevate your website’s navigation to new heights!
Leave a Reply