


For any WooCommerce store, adding a custom thank you page is crucial for customer satisfaction. It allows effective communication with buyers, enhancing their journey and potentially boosting sales.
The default WooCommerce thank you page lacks appeal and customization options, limiting your ability to connect with customers. To unlock more functionality, opting for a custom solution is necessary.
If you’re new to WooCommerce, navigating the process of customizing or adding a thank you page can be daunting.
Here, I’ll share a step-by-step guide to creating a custom thank you page for WooCommerce with ShopEngine, the best WooCommerce thank you page builder.
Quick Overview
This tutorial needs zero technical expertise as all the tools used in this guide are completely optimized for beginners. At first, you need to install a few tools and then, create a thank you page template with ShopEngine.
Plugins needed: Elementor, WooCommerce, and ShopEngine.
The whole process includes six steps to follow. Here are the steps you need to adopt to create a custom WooCommerce thank you page:
- Install and activate Elementor plugin.
- Installation of WooCommerce thank you page builder.
- Create a thank you page template.
- Template customization.
- Integrate flash sale products.
- Preview the custom thank you page.
Why Should You Add a Custom Thank You Page WooCommerce?
Thank you page is the last step of the buyer journey. So, it is normal to think why someone would add a custom thank you page. Well, you can indeed show the default message with the default thank you page, but that is not going to give a great experience to your customers.
A custom thank you page allows you to show custom messages, links, videos, etc. that make the customers happy and help you to encourage the audience to take action.
You can even redirect your traffic to another product page with a custom link on the thank you page. It will increase the chance of getting more sales and better user engagement for the WooCommerce store.
How Custom Thank You Page for WooCommerce Benefits You?
Wondering why the custom that you page matters? Well, it is common to think that a custom thank you page is not mandatory as there is a default one in WooCommerce. If you think so and are not using a custom one, you are missing out a big opportunity.
Here are the possible benefits you can have with a custom thank you page –
- Increases the chance of getting upsells
- You can redirect customers to another product page
- Can display custom messages to make customers happy
- Easy to show product promo video for an upcoming product
- Easy to offer discounted products or flash sale products
Can You Customize the Default Thank You Page of WooCommerce?
People often look for how to customize the default WooCommerce thank you page. It is not difficult to customize the default one when you know how to code. Or, at least, you should have a clear concept of the functions of PHP.
If you are using a particular theme, you will have to edit the codes from the function.php. It can be, however, a complicated process for most people.
Why Don’t We Recommend Custom Code for Thank You Page?
If you are not a coder, understanding the functions of PHP could be difficult for you. You might find different resources and shortcodes for custom WooCommerce thank you pages, but you never know if it is going to work for you.
If the code shows some issues, it would be too hard to fix it. A single character in the code can create tons of errors for the store, and you don’t want that. So, we highly discourage using custom codes if you don’t have deep knowledge of PHP.
But you don’t have to be worried. Just follow the alternative method that we have shared here.
How to Create Custom Thank You Page – Step-by-Step Guide
There are multiple options to add a custom thank you page or customize the existing thank you page. People often use a dedicated plugin just to add a custom thank you page. But that will cost huge and won’t be a feasible solution.
Alternatively, you can use ShopEngine, an WooCommerce thank you page builder that comes with tons of custom features for WooCommerce. Among all the features and functions, a custom thank you page is one of the most popular. There is no need to write any code to implement the custom thank you page.
To add a custom thank you page, you need these two plugins –
Step 1: Install Elementor
The first step to add a custom thank you page WooCommerce is installing Elementor. Just go to the WordPress dashboard and hover over the plugins. Now search for Elementor page builder. Elementor plugin will appear in the search result. Click the install button and then activate the plugin.
Watch this video and follow the method if you find any difficulties in the installation.
The good thing is, you don’t need the Elementor Pro version to use ShopEngine. All the features of ShopEngine work with the free version of Elementor.
Step 2: Install ShopEngine WooCommerce Builder
Now you need to install ShopEngine to add a custom thank you page. Go to the WordPress dashboard and search for ShopEnfinge in the plugin list. Install this WooCommerce thank you page builder and then activate it.
Now, go to the ShopEngine landing page and choose the pricing plan that meets your requirements. Watch this video and follow the steps as described.
Step 3: Add the Custom Thank You Page Template
Once you have chosen the pro plan of ShopEngine, you can choose a ready template for the custom WooCommerce thank you page. The good thing is, you will have unlimited customization opportunities with the WooCommerce thank you page template.
Navigate to ShopEngine from the plugins list of your WordPress dashboard.
From ShopEngine, select Builder Templates, and there will be a list of all the ready templates of ShopEngine.
From the template list, select the Order / Thank you template as shown in the video. Save the template and make it default.
Now, choose to edit with Elementor.
Alternatively, you can select Edit with Elementor from the builder template, and it will redirect you to the page editor of Elementor.
Step 4: Customize the Thank You Page Template
You can now edit all the sections of the thank you page. For instance, if you want to show a product promo video, simply search for a video widget in the widget library.
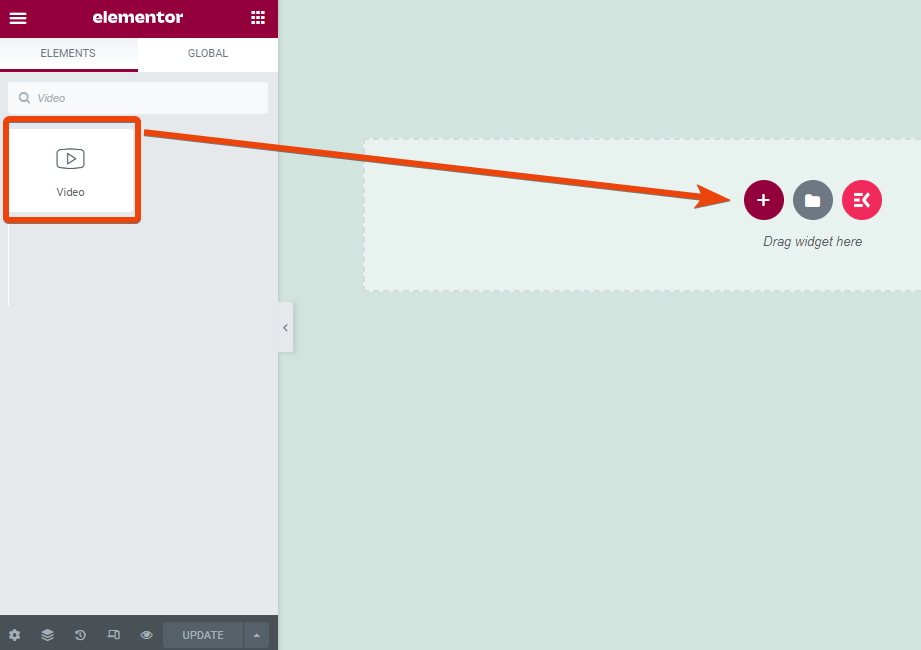
Drag and drop the widget on the page and choose the customization option.
Upload your product promo video on YouTube and copy the link. Paste the link on the widget’s YouTube link option.

From the widget’s options panel, you can customize the video preview and other settings.
Besides YouTube, you can add videos from Dailymotion, Video, or even self-hosted videos.
You will see the thumbnail of the video on the page.
Similarly, if a custom text needs to be added to the page, search for the text widget, drag and drop it on the page and then add the text.
With the text widget, you can share links too.
Step 5: Add Flash Sale Products for Upsell
Running a flash sale campaign for the store? With ShopEngine, you can easily add flash sale products for any page including the thank you page.
To achieve cross-sell from the potential customers, display the flash sale products on the thank you page.
Enable the flash sale option of ShopEngine and then search for the flash sale products widget.
Drag and drop the widget on the page, and it will display all the products that you are offering for flash sale.
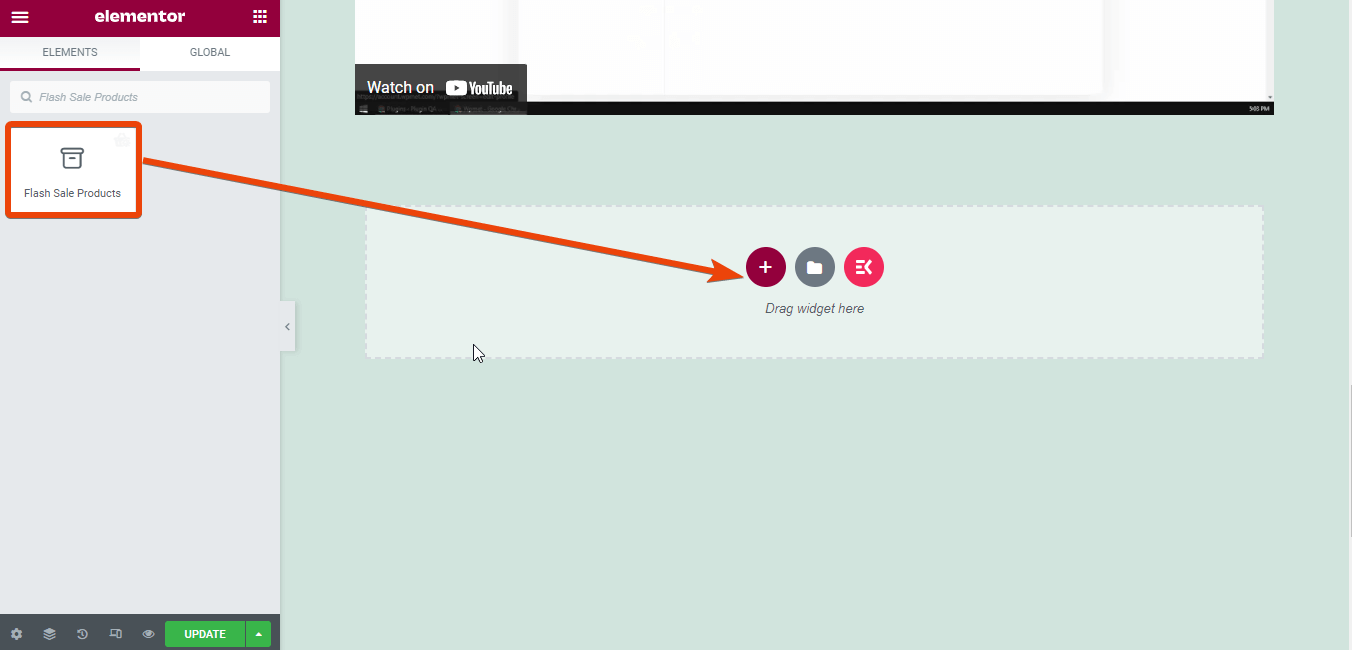
Now choose the flash sale campaign name from the widget settings.
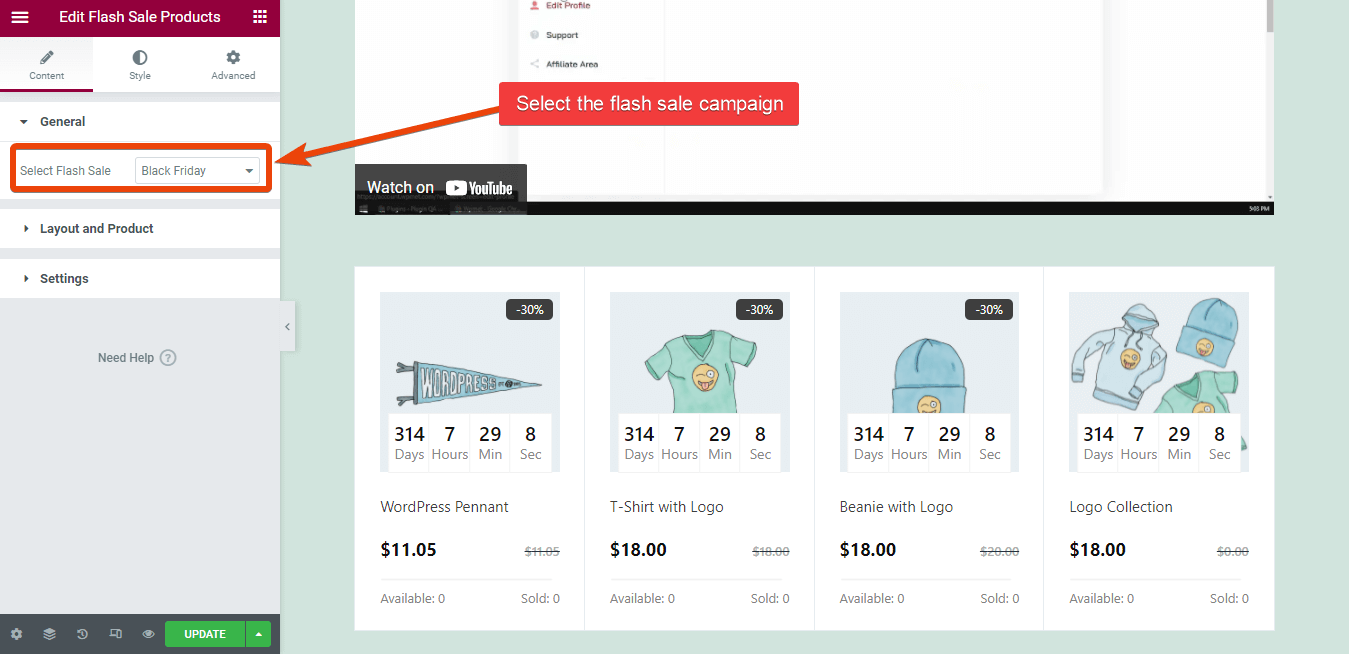
This will increase the chance of getting orders for multiple products.
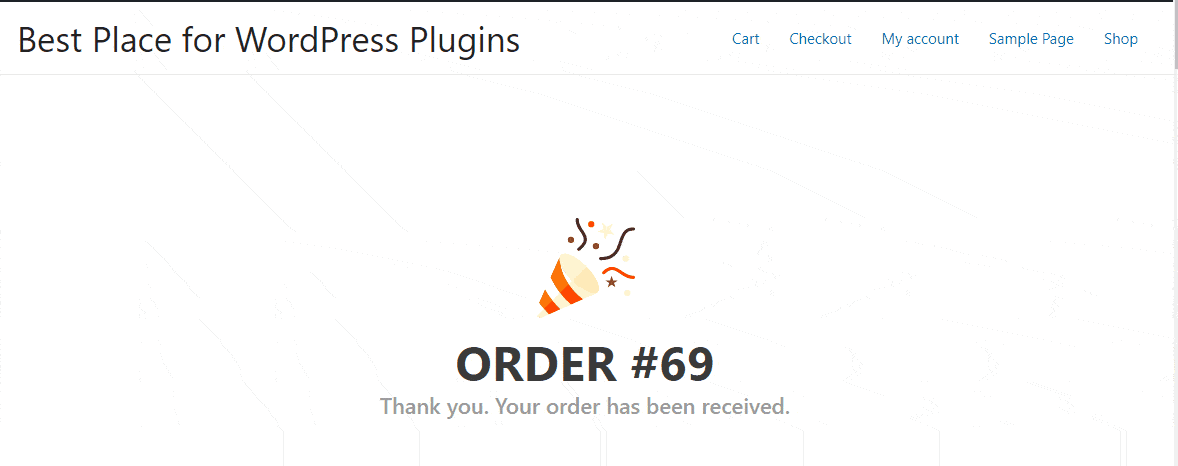
Step 6: Preview the Thank You Page for a Demo Order
Finally, the WooCommerce custom thank you page is ready for your WooCommerce store. Before you finalize the thank you page and publish it, you can check how it looks for an order.
For this, simply make a demo order from your store and after completing the order, the custom thank you page will appear.
Though I just have shared how you can add videos and flash sale products in the custom thank you page, you can actually do more. Check out all the widgets of ShopEngine and choose what you want to implement for the thank you page in your WooCommerce store.
You can even design a functional eCommerce website just using ShopEngine.
Why Do We Recommend ShopEngine?
Well, there are different plugins available to design an Elementor thank you page for WooCommerce, but ShopEngine offers the best.
Wondering why? ShopEngine is the most complete WooCommerce plugin for Elementor. You will get tons of other features in the same plugin. For instance, you can integrate flash sales, partial payment, custom checkout page, and many more.
While most thank you page plugins offer a single feature, with ShopEngine, you are getting tons of other essential features, which means you are saving money on the deal. Further, you can regenerate WooCommerce pages with ShopEngine.
Frequently Asked Questions
Can You Use WooCommerce Thank You Page Shortcode?
Yes, you can use shortcodes to add custom features to the thank you page of the WooCommerce store. But that is not a feasible idea for noncoders.
What is the default WooCommerce thank you page?
Default WooCommerce thank you page is offered by WooCommerce. It shows a simple message of the order number and a message like “thank you, received the order”.
How do you edit your thankyou page in WooCommerce?
There are two options to customize the default WooCommerce thank you page. You can either customize the default one with custom code or you can use a premium plugin. Using a premium plugin is the better idea as it doesn’t take much effort.
Does WooCommerce have a thank you page?
Technically yes. WooCommerce shows a message once a customer orders something in the store. But that is not customizable, and there is no option to add texts, links, or videos.
Can you create a custom thank you page WordPress with an Elementor free version?
There is no option to design an Elementor thank you page with the free version of Elementor. You need to add a third-party plugin along with Elementor to design a custom thank you page.
✅ Check to regenerate WooCommerce pages using ShopEngine’s templates.
Final Words
Adding a custom WooCommerce thank you page or customizing the existing page won’t be a problem if you follow this blog. Though I have shared a few things for the custom thank you page, you can actually add more things.
While adding the custom thank you page in the WordPress WooCommerce store, you will also see tons of other options like custom checkout, partial payment feature, and more. Check them out so that you can add more options to your store. Whatever you do with ShopEngine, there won’t be any need for any coding.

Leave a Reply