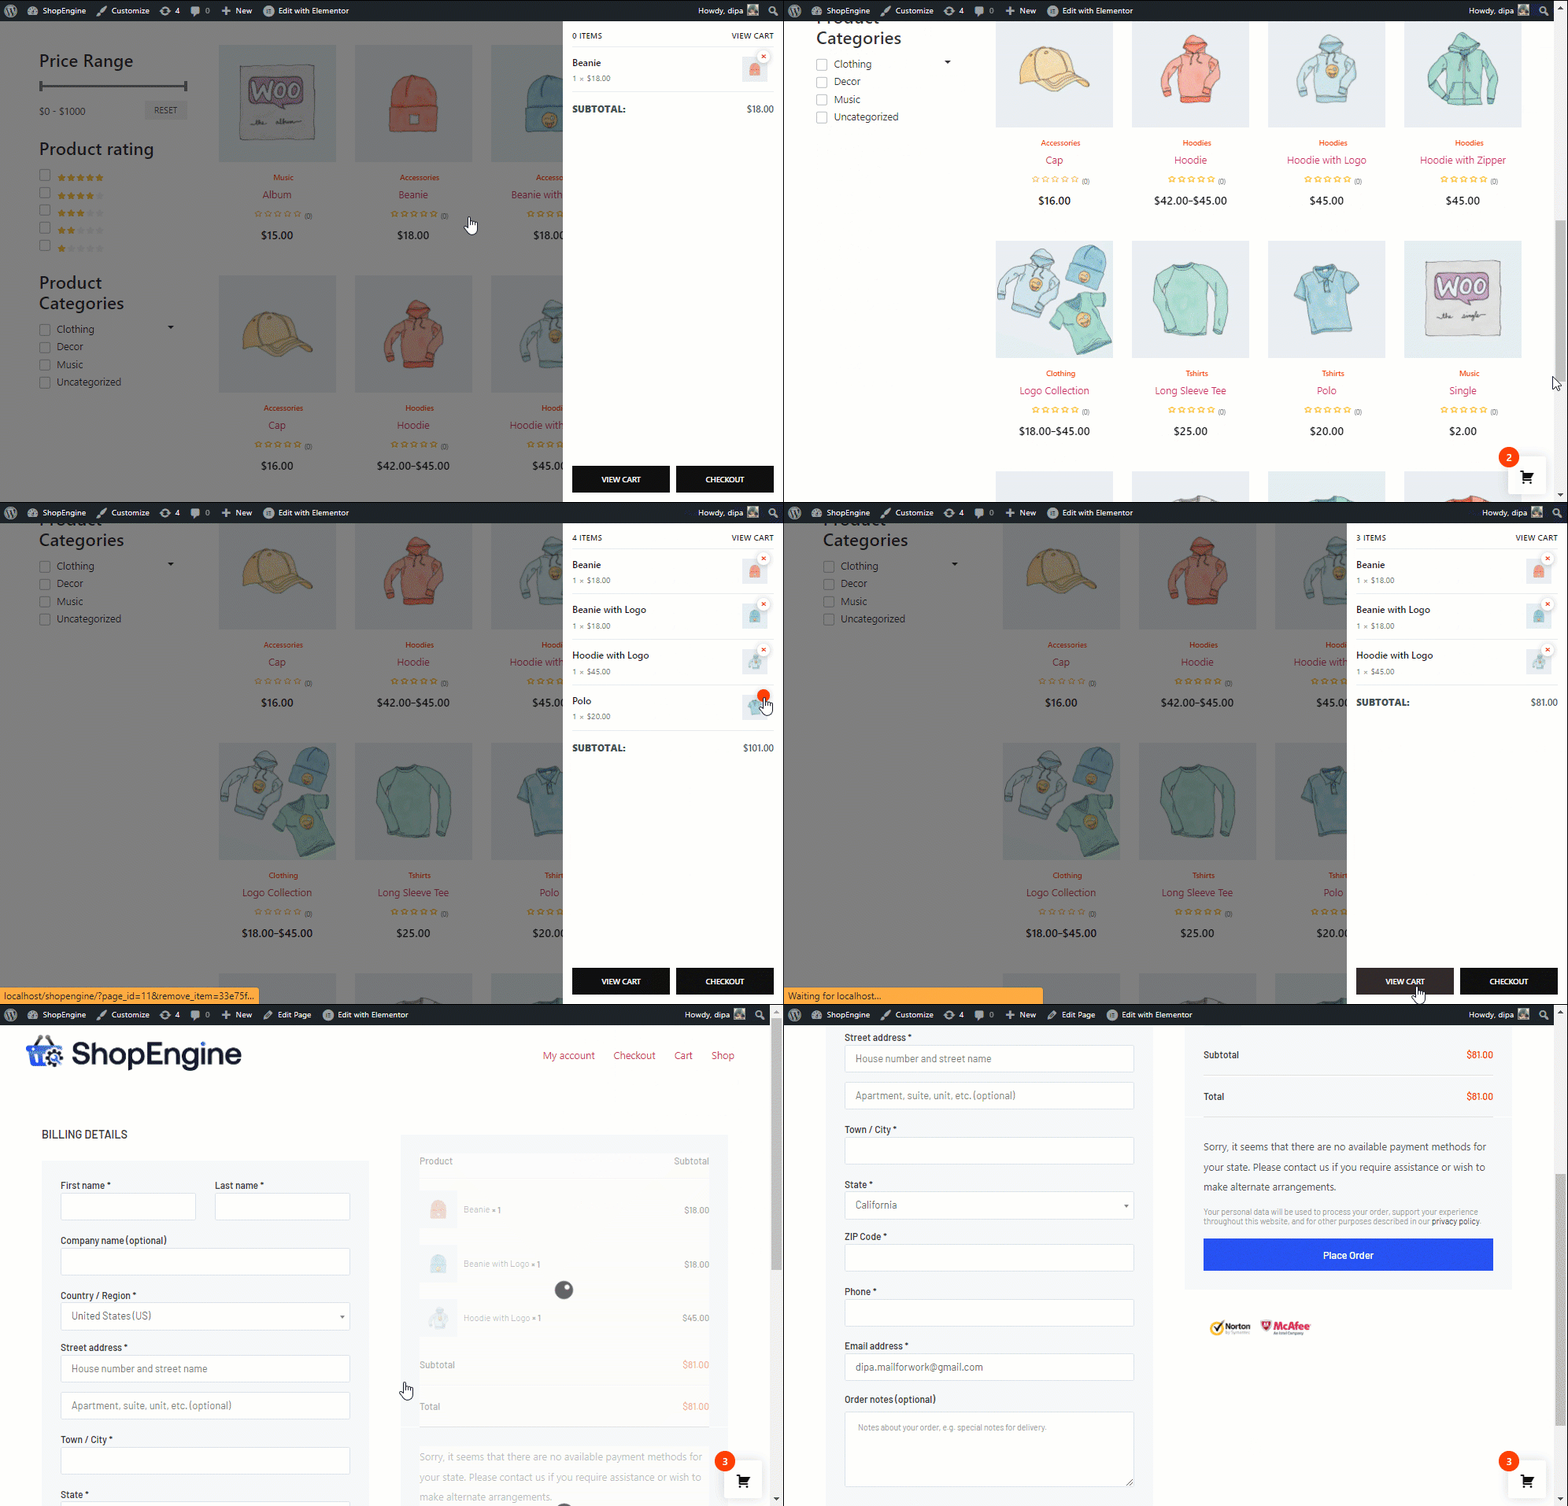
O módulo Sticky Fly Cart do ShopEngine adiciona um carrinho flutuante (também conhecido como carrinho lateral e gaveta de carrinho) ao seu site WooCommerce Elementor. Ele fornece um mini ícone de carrinho que você pode expandir para ver todos os produtos no seu carrinho.
Você pode remover os produtos do seu carrinho usando este fly cart e também ir para a página do carrinho e conferir a página com um único clique. Este fly cart permanece visível nas páginas do WooCommerce.
Quick Overview
To add a sticky fly cart on your WooCommerce site, firstly enable ShopEngine’s sticky fly cart module.
Then configure the followings: 1. Enable Flying Animation 2. Exclude Pages 3. Drawer postion.
You can configure the following parts of your sticky fly cart: Sticky Cart, Sticky Cart Counter, Cart Body, Cart Header, Cart Items, Cart Subtotal, e Cart Buttons.
Tools Used: WooCommerce, Elementor, and ShopEngine.
Como adicionar carrinho lateral ao seu site WooCommerce usando o ShopEngine #
Você pode adicionar um carrinho de compras fixo ao seu site WooCommerce Elementor seguindo 3 passos simples.
Etapa 1: Habilite o módulo Sticky Fly Cart pelo ShopEngine #
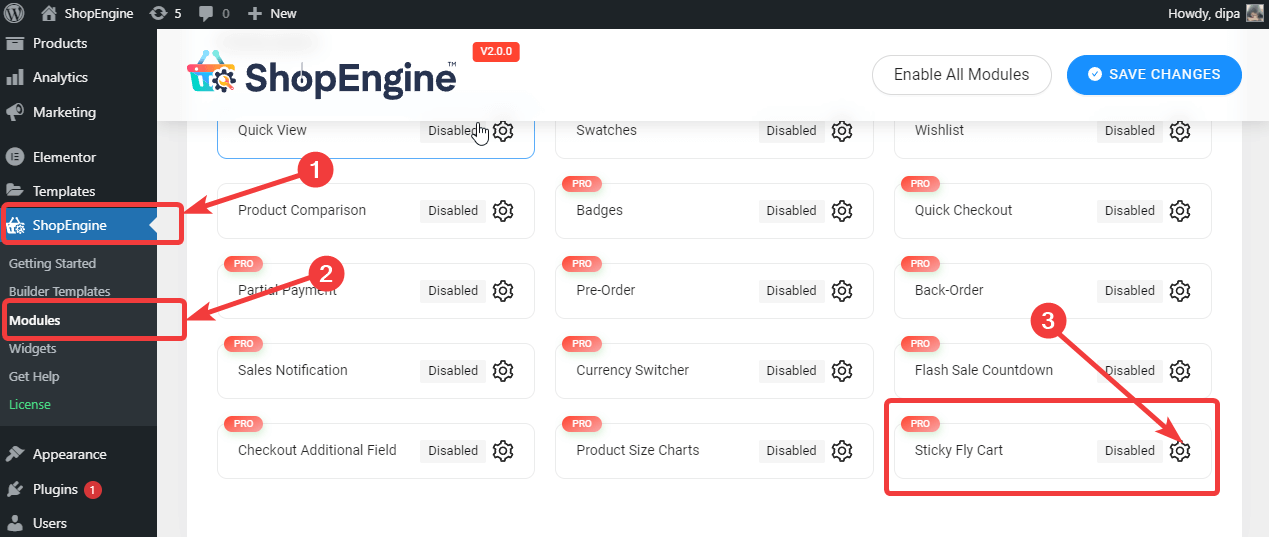
No painel do WordPress, vá para ShopEngine ⇒ Modules ⇒ Carrinho de mosca pegajoso e clique no ícone de configurações.

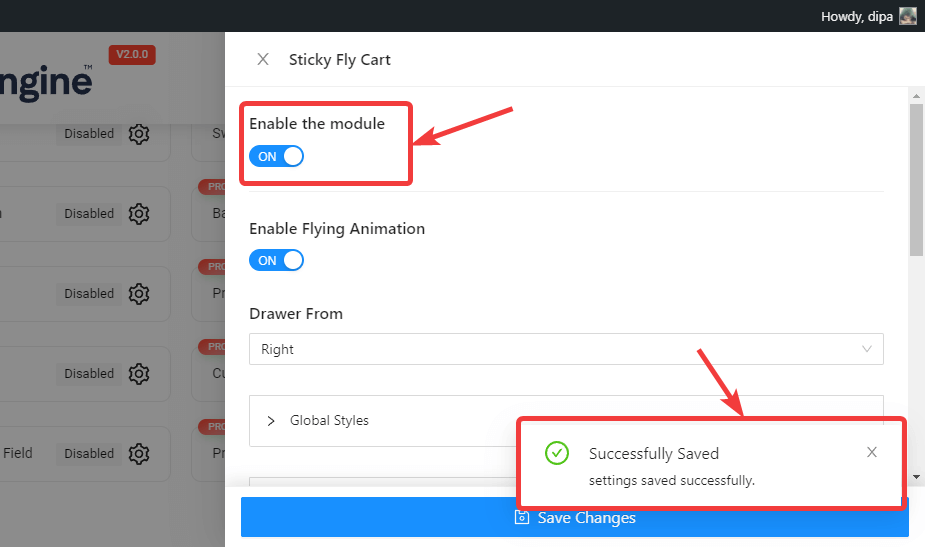
Depois de ver as configurações, ligue o Habilitar o Módulo opção. Você deverá ver uma mensagem salva com sucesso depois disso.

Observação: Você também pode ativar todos os módulos ao mesmo tempo. Confira como você pode ligue todos os módulos de uma vez.
Etapa 2. Personalize as configurações do Sticky Fly Cart #
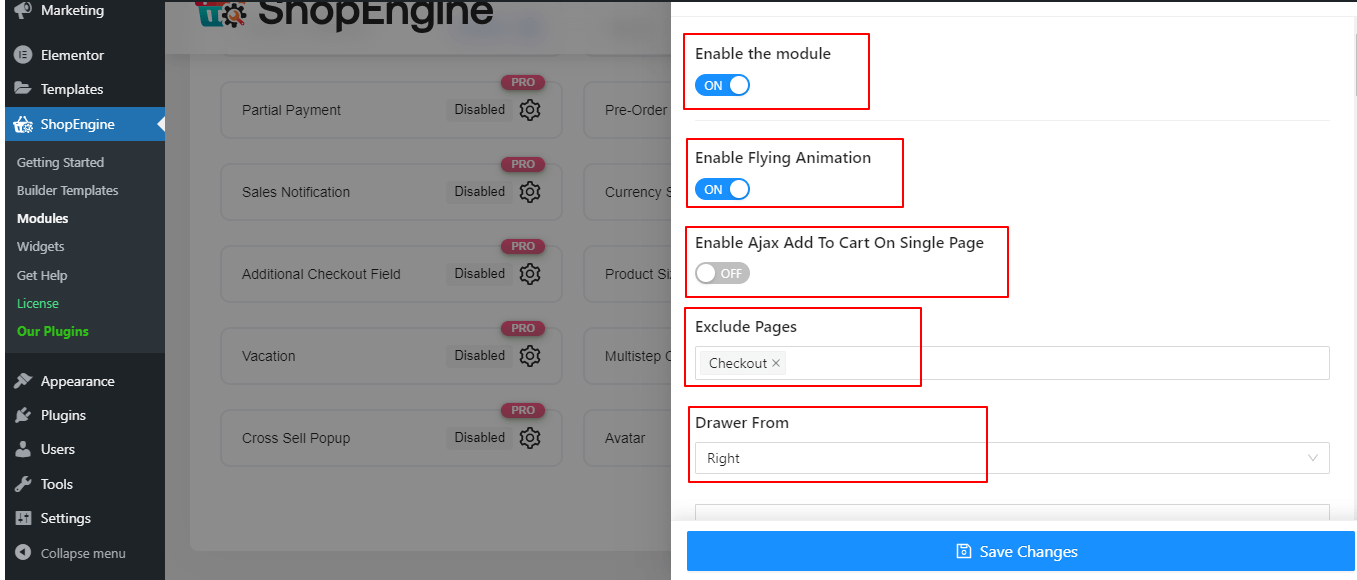
Depois de habilitar o módulo, é hora de personalizar as seguintes configurações:
- Habilitar animação de voo: Ative esta opção para habilitar a animação de voo no seu carrinho adesivo.
- Excluir página: Enter the pages where you want to stop the WooCommerce sticky fly cart from appearing.
- Gaveta De: Esta opção decidirá se o Fly cart será colocado no lado esquerdo ou direito.

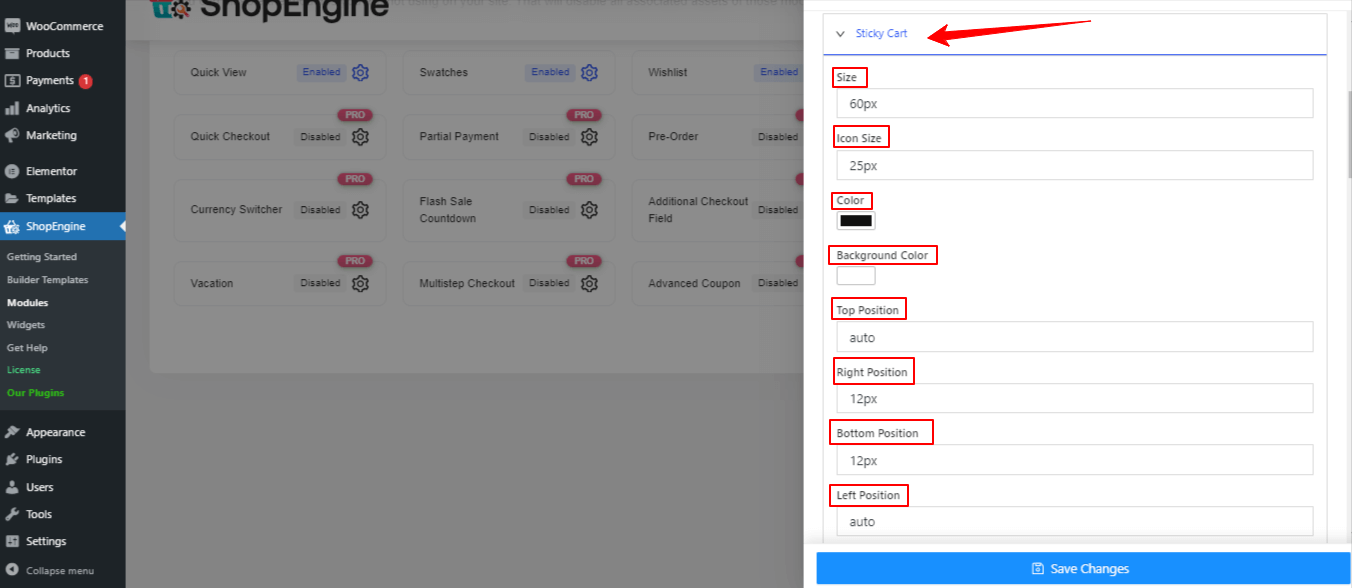
- Carrinho Fixo: Clique no ícone de seta do botão fixo para acessar e personalizar as seguintes configurações:
- Tamanho: Aqui você pode definir o tamanho do botão do carrinho fixo.
- Tamanho do ícone: Altere o tamanho do ícone do carrinho que fica dentro do botão do carrinho fixo.
- Cor de fundo: Altere a cor de fundo do botão fixo.
- Posição superior: Você pode deixar a posição superior como automática.
- Posição correta: Defina a posição correta em pixels.
- Posição inferior: Aqui você pode definir a posição inferior em pixels.
- Posição Esquerda: Altere a posição esquerda aqui.

- Ícone de carrinho fixo
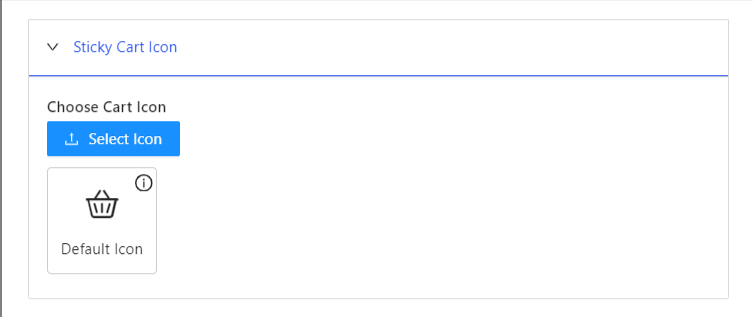

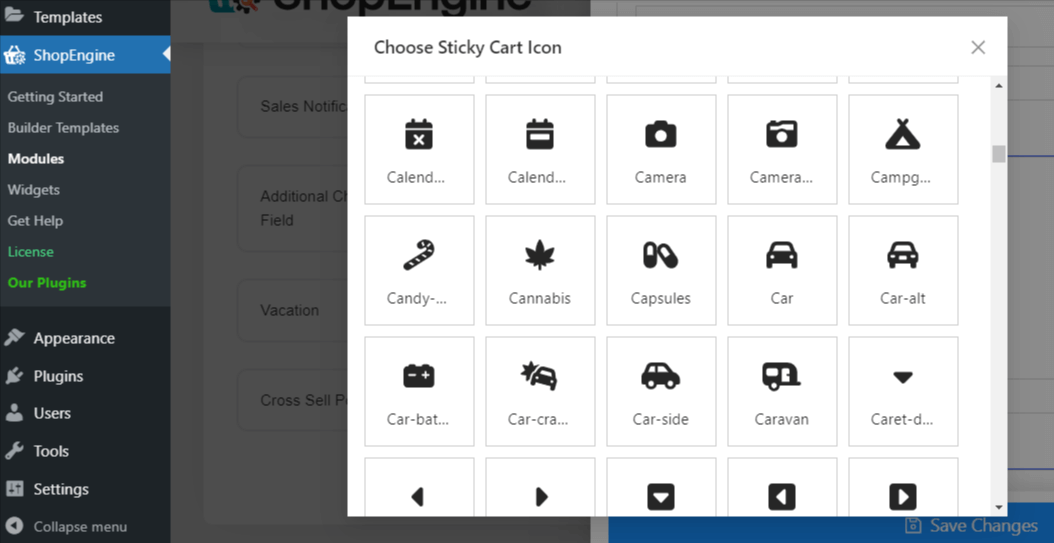
Altere o ícone do carrinho fixo padrão clicando em “Selecionar ícone” opção. Ao fazer isso, aparecerá um pop-up com uma variedade de ícones para usar como o ícone do carrinho fixo.

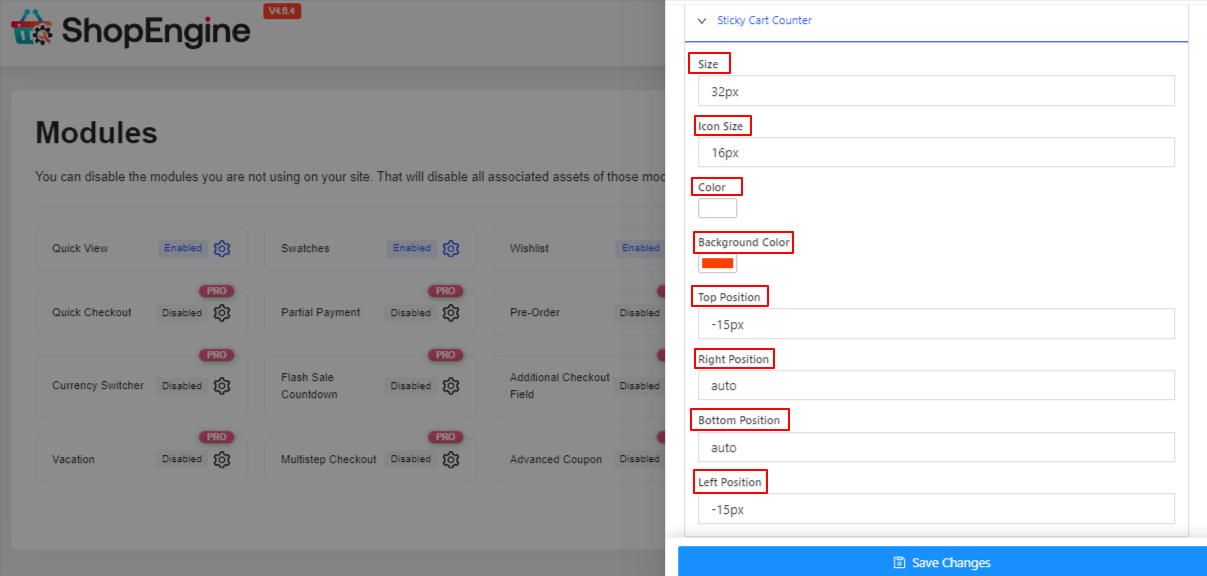
- Contador de carrinho fixo: Clique no ícone de seta do Contador de botões fixos para acessar e personalizar as seguintes configurações:
- Tamanho: Altere o tamanho aqui.
- Tamanho do ícone: Aqui você pode alterar o tamanho do ícone.
- Cor: Escolha uma cor para o balcão.
- Cor de fundo: Selecione uma cor de fundo para o contador de botões.
- Posição superior: Você pode alterar a posição superior aqui se quiser.
- Posição correta: Mude a posição correta aqui.
- Posição inferior Altere a posição do botão se desejar.
- Posição Esquerda: Você pode alterar a posição esquerda usando esta opção.

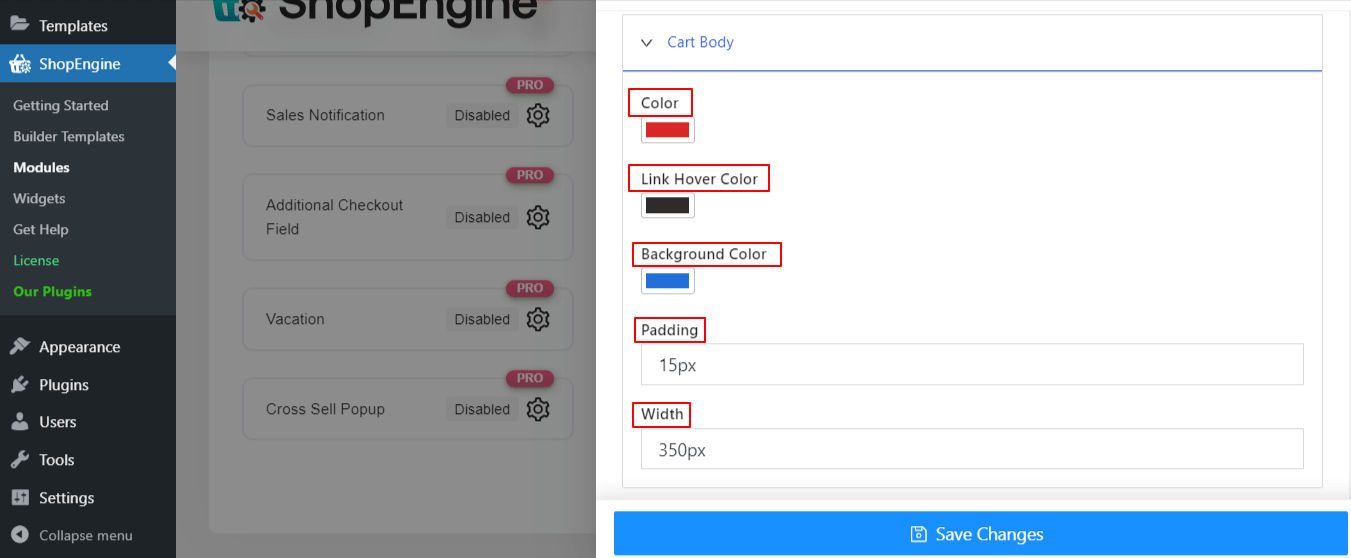
- Corpo do carrinho: Clique no ícone de seta do corpo do carrinho para acessar e personalizar as seguintes configurações:
- Cor: Dê uma cor ao corpo do carrinho.
- Cor do link Hover: Use o seletor de cores para adicionar uma cor como efeito de foco no link.
- Cor de fundo: Alterar a cor de fundo.
- Preenchimento: Ajuste o preenchimento se desejar.
- Largura: Defina a largura aqui.

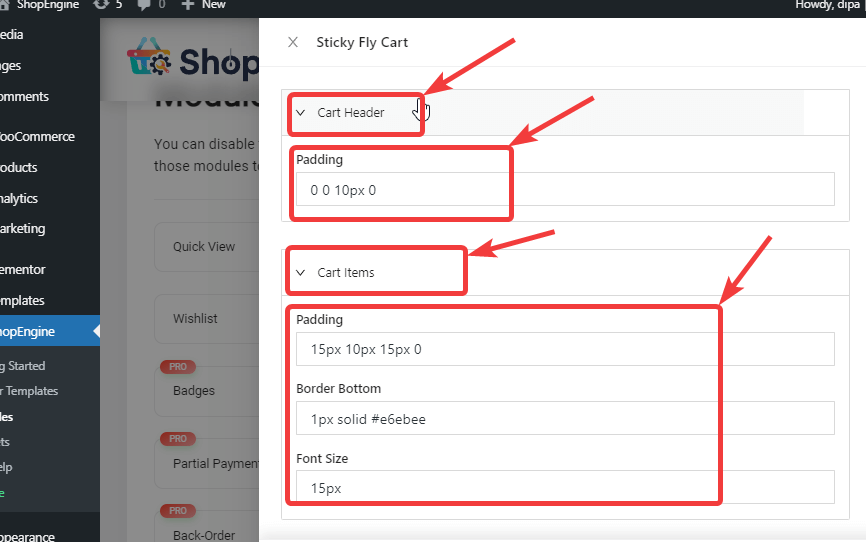
- Cabeçalho do carrinho: Clique no cabeçalho do carrinho e ajuste o preenchimento superior, esquerdo e inferior direito.
- Itens do carrinho: Clique no ícone de seta Itens do carrinho para acessar e personalizar as seguintes configurações:
- Preenchimento: Ajuste o preenchimento superior, esquerdo e inferior direito.
- Borda Inferior: Aqui você pode alterar o tamanho, o tipo e a cor da borda inferior.
- Tamanho da fonte: Você pode alterar o tamanho da fonte aqui.

- Subtotal do carrinho: Clique no subtotal do carrinho e ajuste o preenchimento.


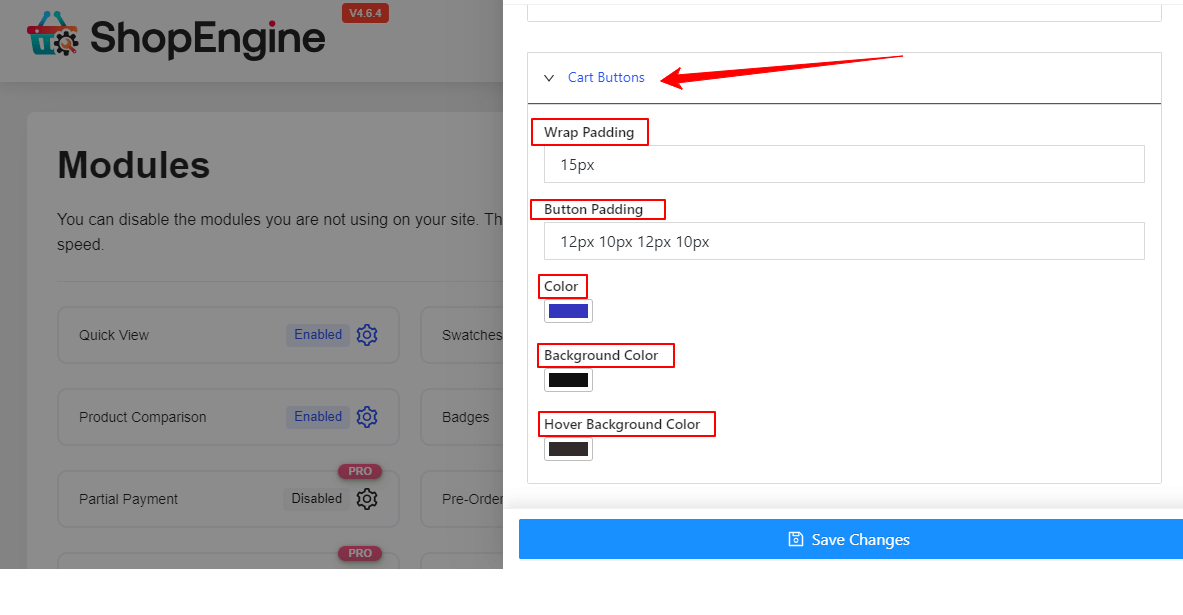
- Botões do carrinho: Clique no ícone de seta do carrinho para acessar e personalizar as seguintes configurações:
- Envoltório de enchimento: Altere o valor do preenchimento do wrap aqui.
- Preenchimento de botões: Ajuste o preenchimento superior, esquerdo, inferior e direito aqui.
- Cor: Escolha uma cor para os botões do carrinho.
- Cor de fundo: Dê uma cor ao fundo do botão do carrinho.
- Cor de fundo do hover: Use uma cor de fundo como hover

Etapa 3: salvar e visualizar o Sticky Fly Cart #
Finalmente clique no botão Salvar alterações para atualizar.
Agora, se você for para o front-end do seu site, deverá ver um carrinho de compras fixo como a prévia abaixo.
