WordPress is currently the most popular CMS (Content Management System) for designing websites without coding. The conventional method to use the WordPress CMS is buying a domain and hosting plan and then installing it within the CMS.
But what about if you don’t have a domain and hosting and you want to use WordPress on a test basis? Well, it is possible to use WordPress locally with local WordPress installation.
If you are new to the term and don’t know how to install WordPress on localhost, this blog is for you.
Here I will walk through all the steps for WordPress localhost installation.
What is Localhost?
Localhost works similarly as a hosting plan. But with localhost, instead of virtual hosting, the local PC will work as the storage device. To use the PC storage as the hosting, you need to use third-party software, which creates the localhost environment to install WordPress.
For instance, you can install XAMPP or LocalWp on your PC, which will create a similar environment to virtual hosting. You can then install WordPress on localhost in the same way as installing with a hosting package and premium domain.

Why Do You Need to Install WordPress on Localhost?
You might be wondering why you would install WordPress on localhost as no one can see it. Or, you might also think localhost is only for beginners with WordPress.
But the fact is, installing WordPress on localhost is beneficial for anyone who is involved with web design and development. Beginners can learn how to design a website using the WordPress CMS, how to design an entire website with WordPress and more. For instance, you can practice designing SaaS website, WooCommerce websites, etc. on the localhost.
For plugin developers, having WordPress installed locally makes it easy to test plugins, themes, and other third-party tools before installing them on the live website.
For instance, suppose you want to design a SaaS website with some WordPress plugins before you try the tools in your live website, you can try them in the localhost. It will help you to avoid any mistakes.
Localhost is mandatory for developers because when they are developing a new WordPress plugin, they need to try it locally to find the bugs and fix them.
What Are the Options to Install WordPress on Localhost?
Regardless of the operating system, it is essential to install localhost software for WordPress localhost installation. The good thing is, you will find localhost software for all operating systems.
Currently, you will find five popular platforms to install WordPress and similar CMS.
Here are the popular localhost software to install CMS locally –
- XAMPP – It stands for Cross-platform, Apache, MySQL, PHP, and Perl
- Local by Flywheel – Local WordPress development tool
- WAMP – It stands for Windows, Apache, MySQL, PHP
- MAMP – It stands for My Apache – MySQL – PHP.
- LAMP – It stands for Linux, Apache, MySQL, and PHP
Among all of them, LocalWP and XAMPP are versatile and support versatile operating systems.
Among all the common localhost software, I do recommend LocalWP and XAMPP. Compared to other platforms, the two offer more features and are easy to use.
The best part is, both of them are open source software, which means you can enjoy all the features for free.
Here I have shared the way to install WordPress localhost with both of the software.
How to Install WordPress Site On Localhost Using LocalWP?
Setting up WordPress localhost using LocalWP is one of the easiest and fastest methods that takes less than a few minutes. Because the whole process includes only two steps from downloading to setup.
Besides, it gives you the advantage of setting up as many sites as you want only with a few clicks. Also, you can delete any site with a single click. That’s why it is considered to be the best alternative to set up WordPress localhost.
Let’s explore the complete process on how to set up WordPress on localhost:
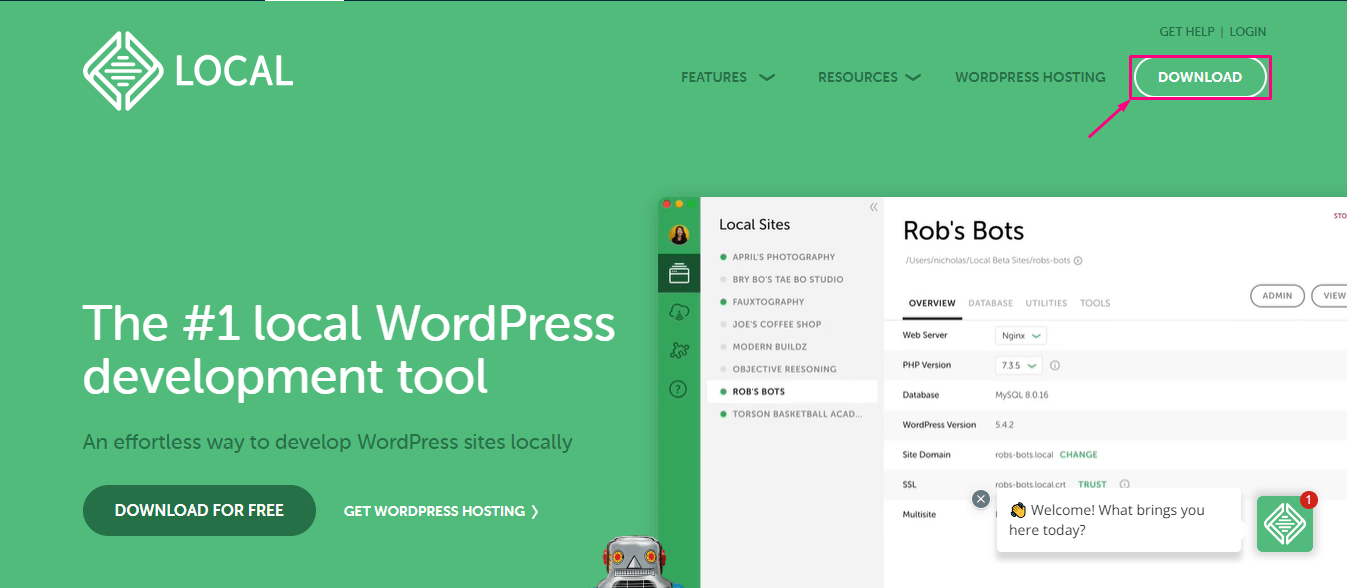
Step 1: Download LocalWP.
First, search for LocalWP on the Search Engine and hit the “Download” button.
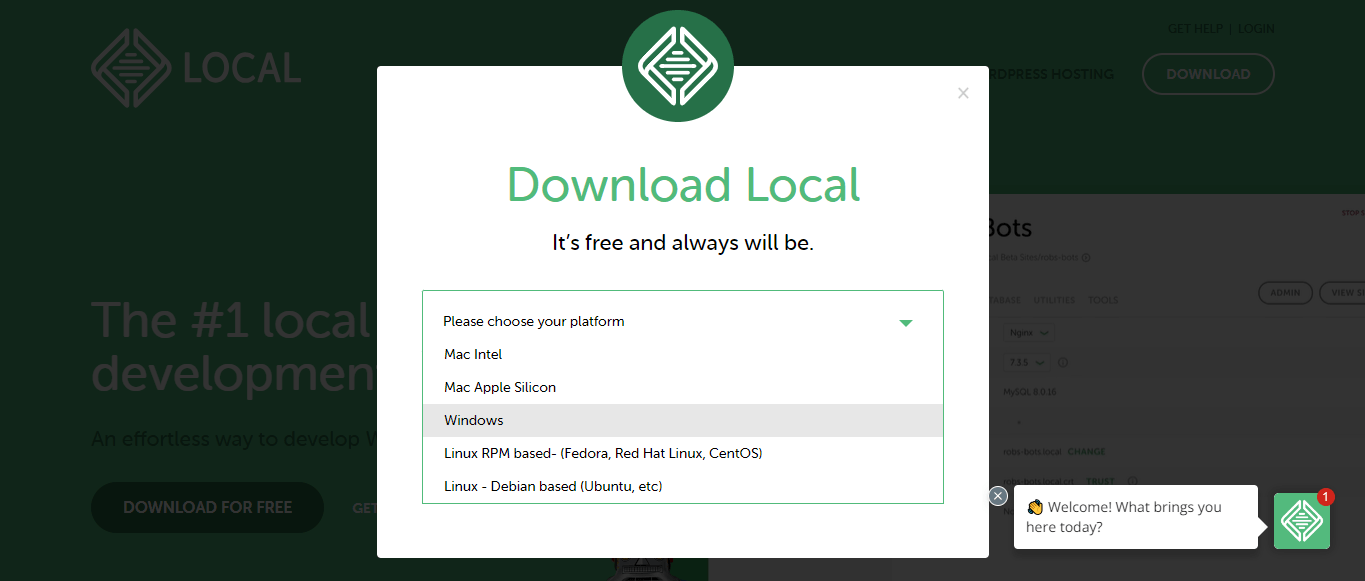
After pressing the button, a tab will open up including options to choose on which platform you want to download LocalWP. From here select a platform on that you want to download LocalWP.
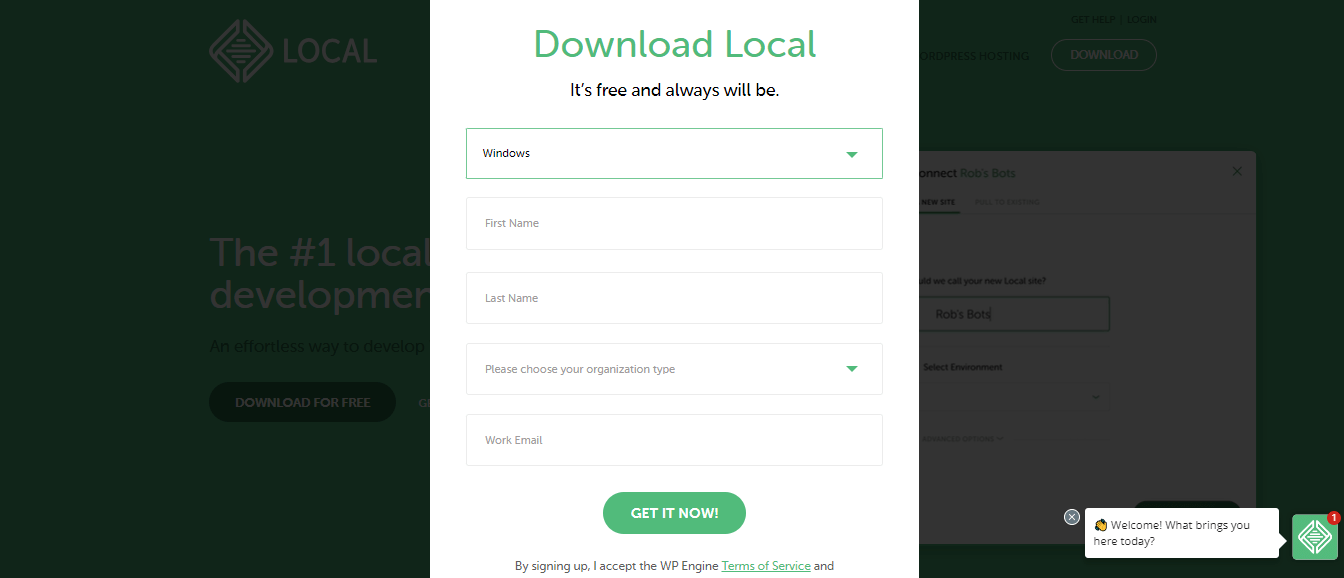
After selecting a platform, more fields will be visible such as First Name, Last Name, Organization type, and Work Email. Now fill in these fields and press the “GET IT NOW!” button.
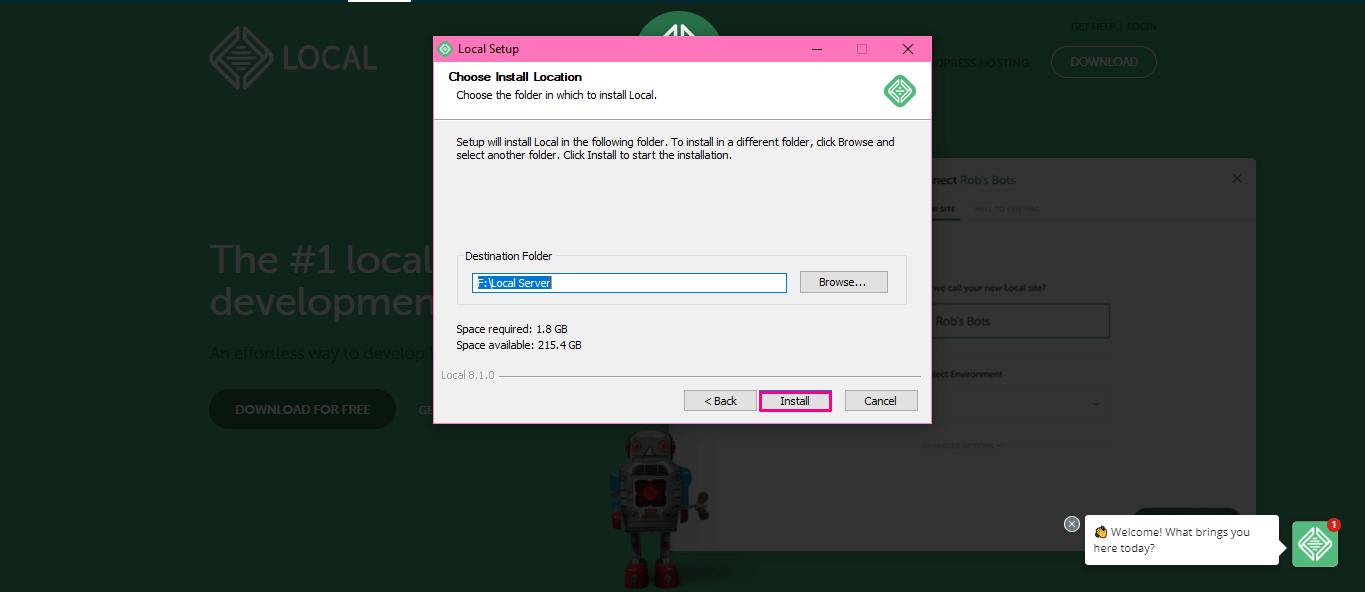
Finally, you have to enter the Destination Folder and hit the “Install” button. This will take a few seconds to finish the installation.
Step 2: Create a WordPress Site on LocalWP.
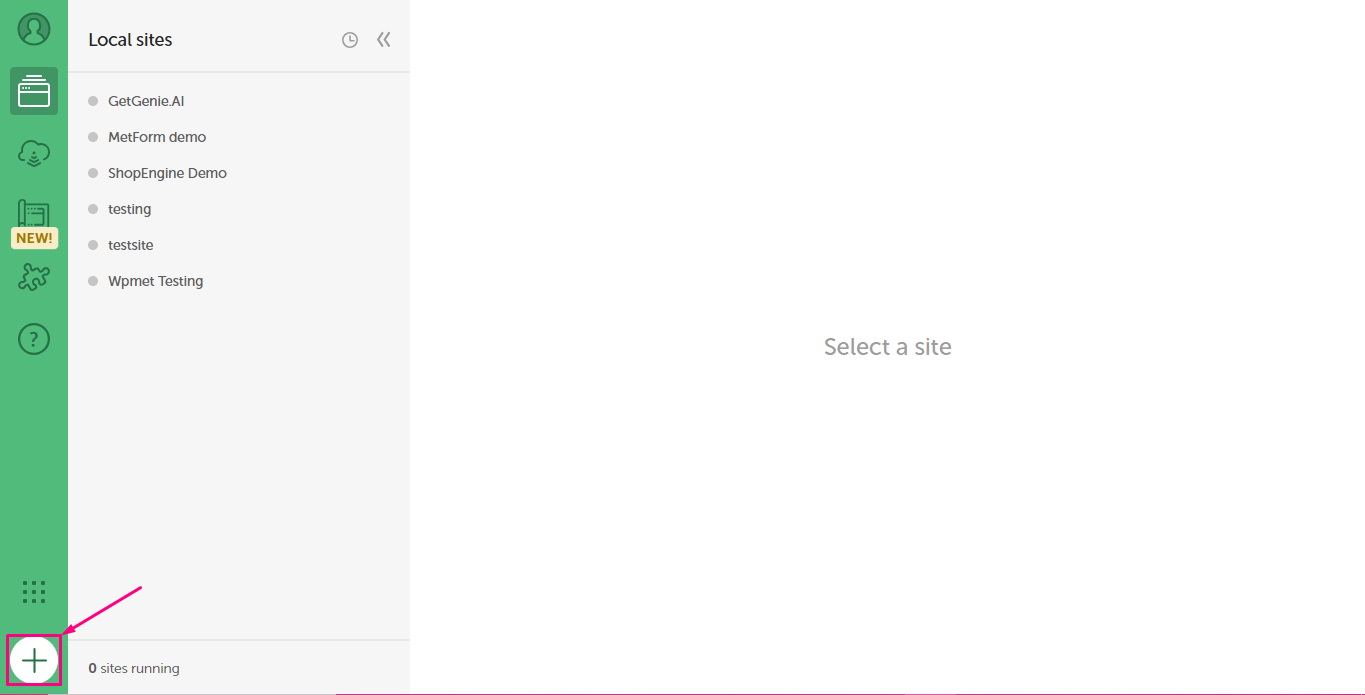
After completing the LocalWP installation, open it on your device and press the “Plus” icon.
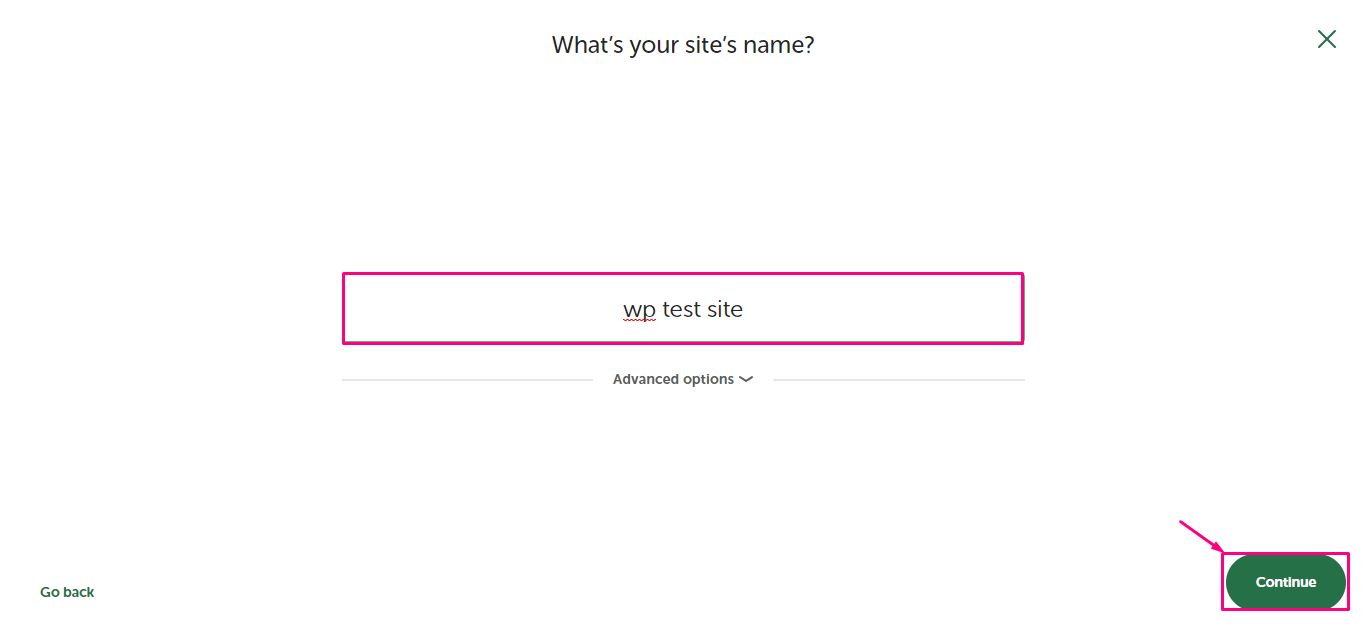
Now, enter the name of your site and tap on the “Continue” button.
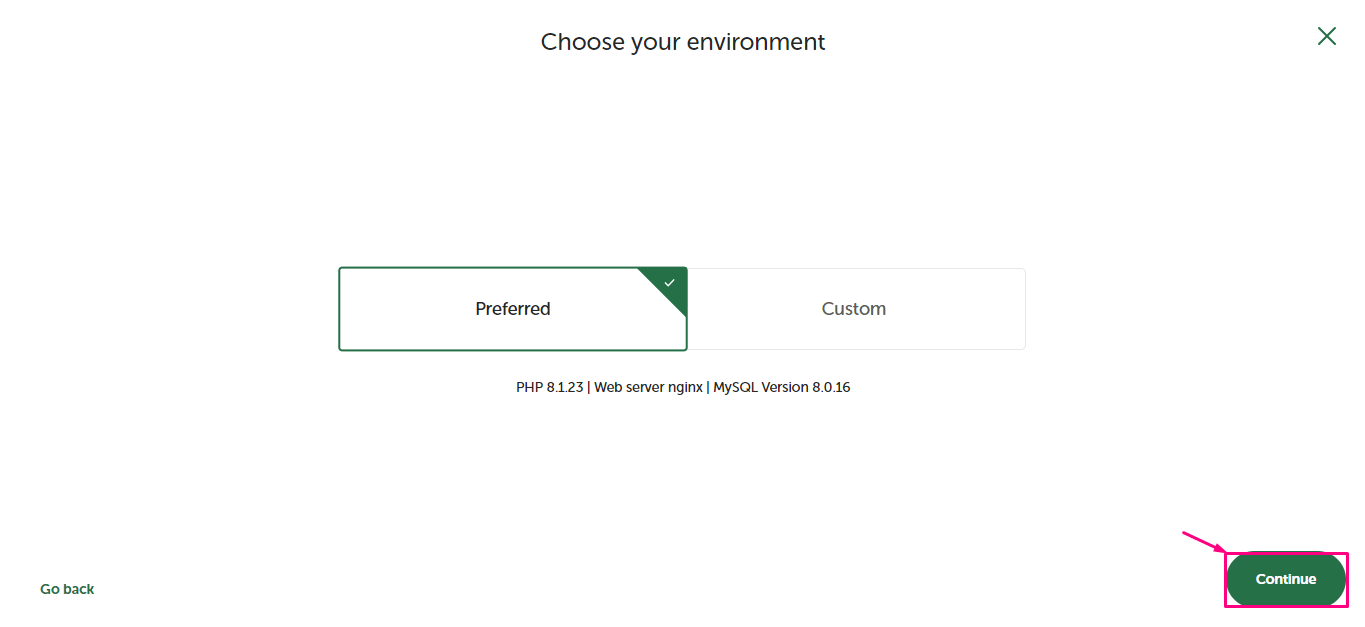
After that, choose the environment you want for your site and select Continue. Here we’re choosing the “Preferred” tab.
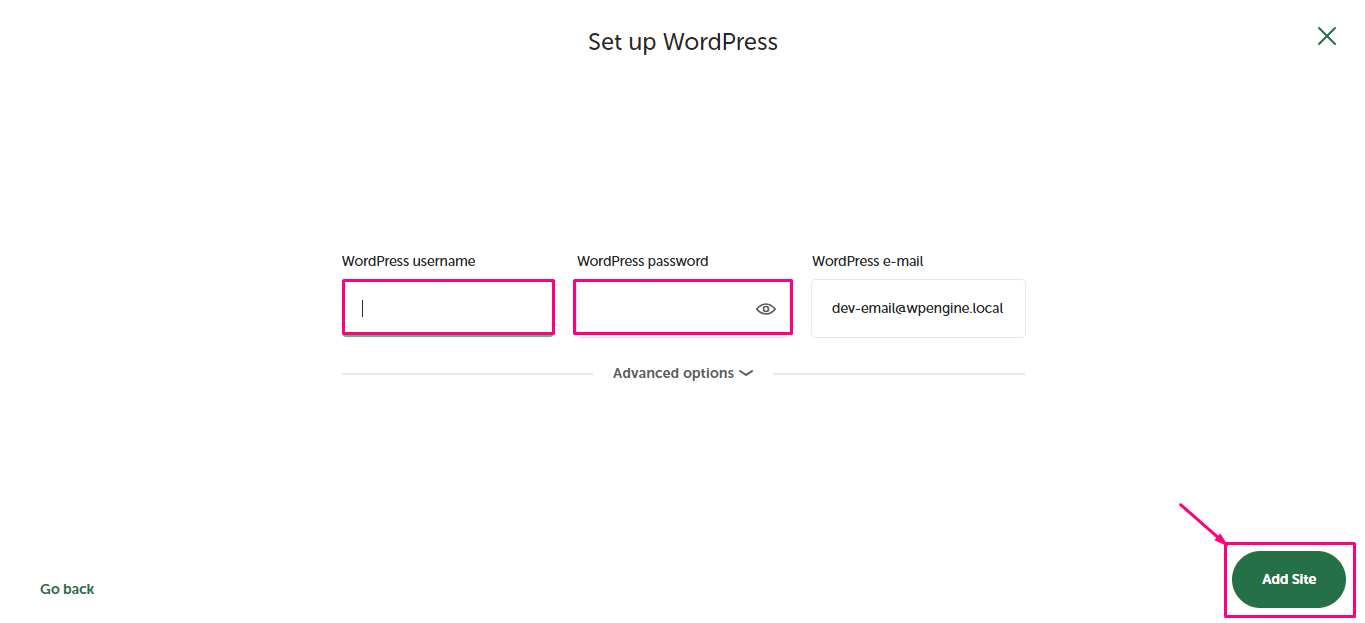
Finally, you have to set a username and password for your site. Then, hit the “Add Site” button. This will take a few minutes to develop your site.
After adding a new site on LocalWP, select the site and click the “WP Admin” button.
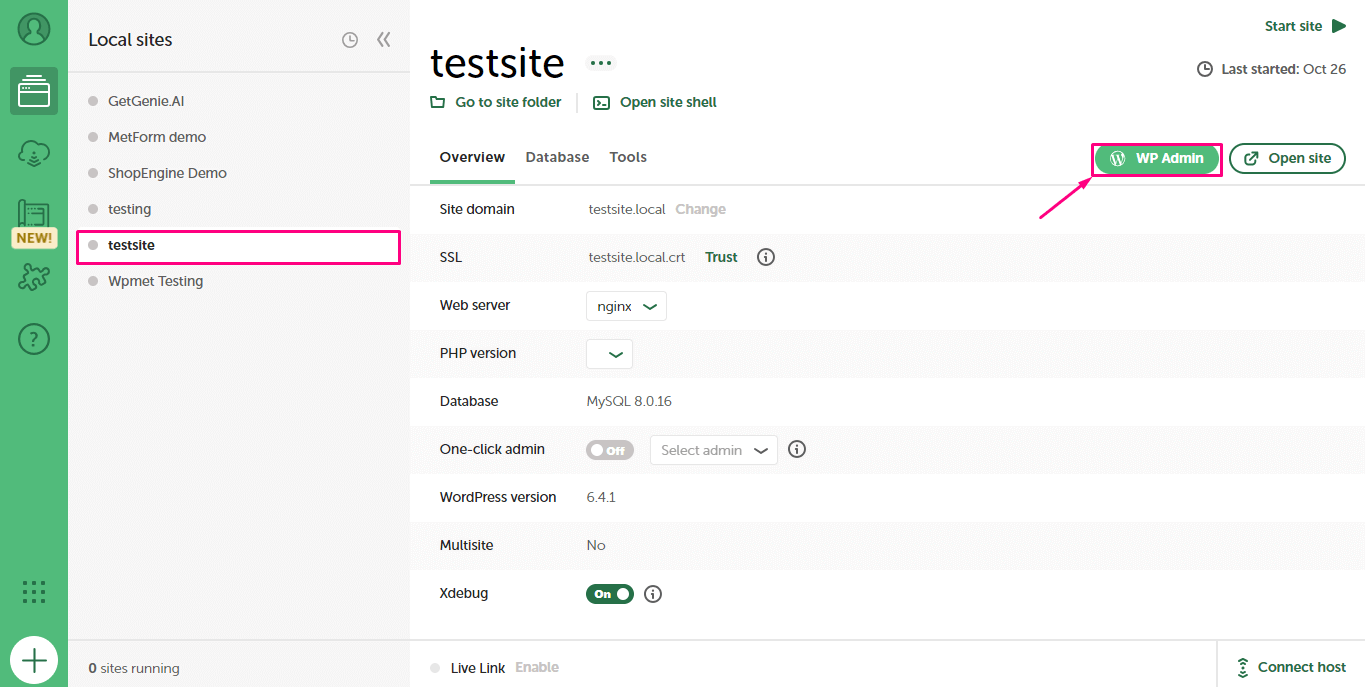
It will open up your site on a browser from where you have to enter your username and password to login to your site. Following the same process you can enter multiple sites on LocalWP.

How to install WordPress locally with XAMPP?
Step 1: Download XAMPP Localhost Software
XAMPP supports all operating systems, and you can choose yours while downloading the software. As mentioned earlier, it is open-source software, you don’t need to give any personal information.
Simply visit the official website of XAMPP and find your operating system on the list. For Windows, you can select XAMPP. Though the official website mentioned the Windows version up to 8.0.12, you can use this for upper versions of Windows as well.
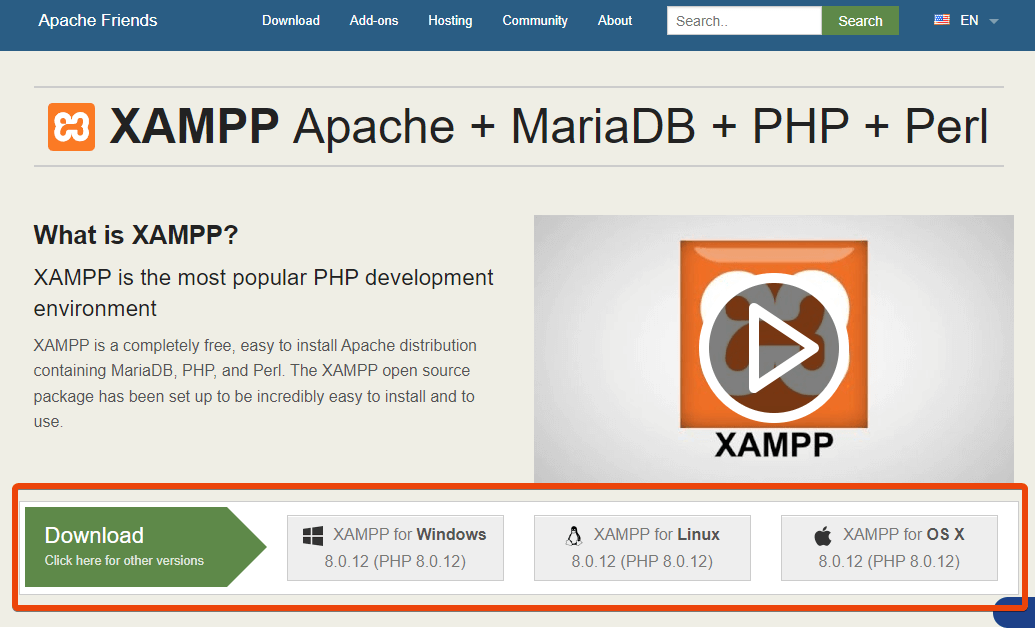
Choose other operating systems like Linux and OS X if you are using one of them.
Once you hit the download button, wait for a while as the file size is around 160 MB.
Step 2: Install XAMPP Server on Local Storage
Once you have downloaded the software on your PC, now it is time to run the software for WordPress local install.
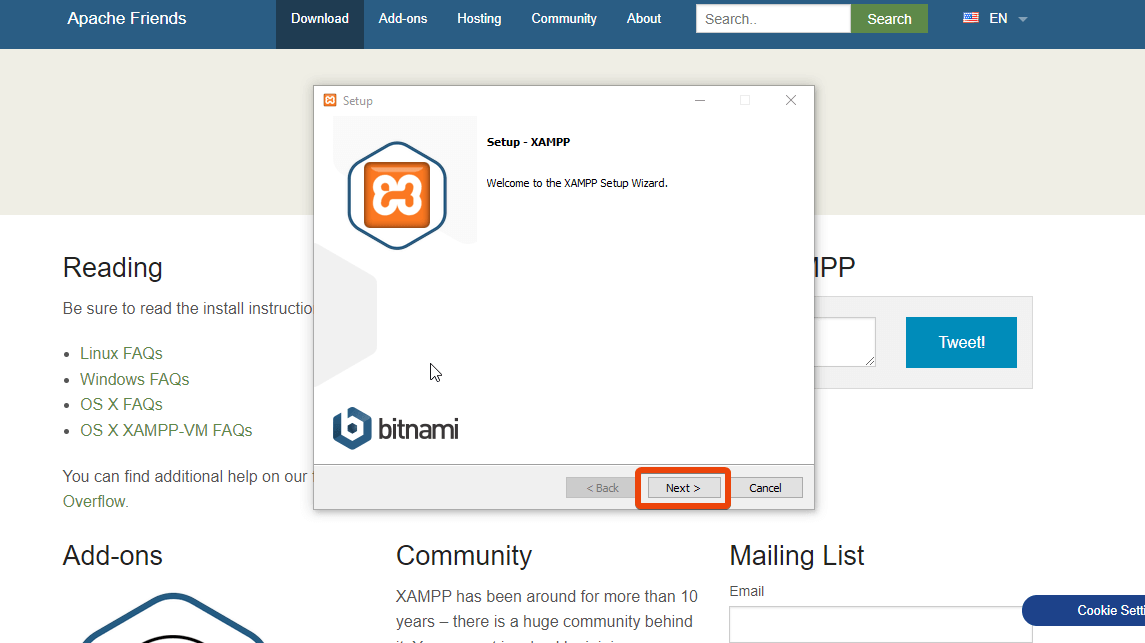
There is no need for any special command to install the software. Simply run the file, and it will initiate the installation process. By default, it will show some options are selected. But you don’t need to enable all of these options.
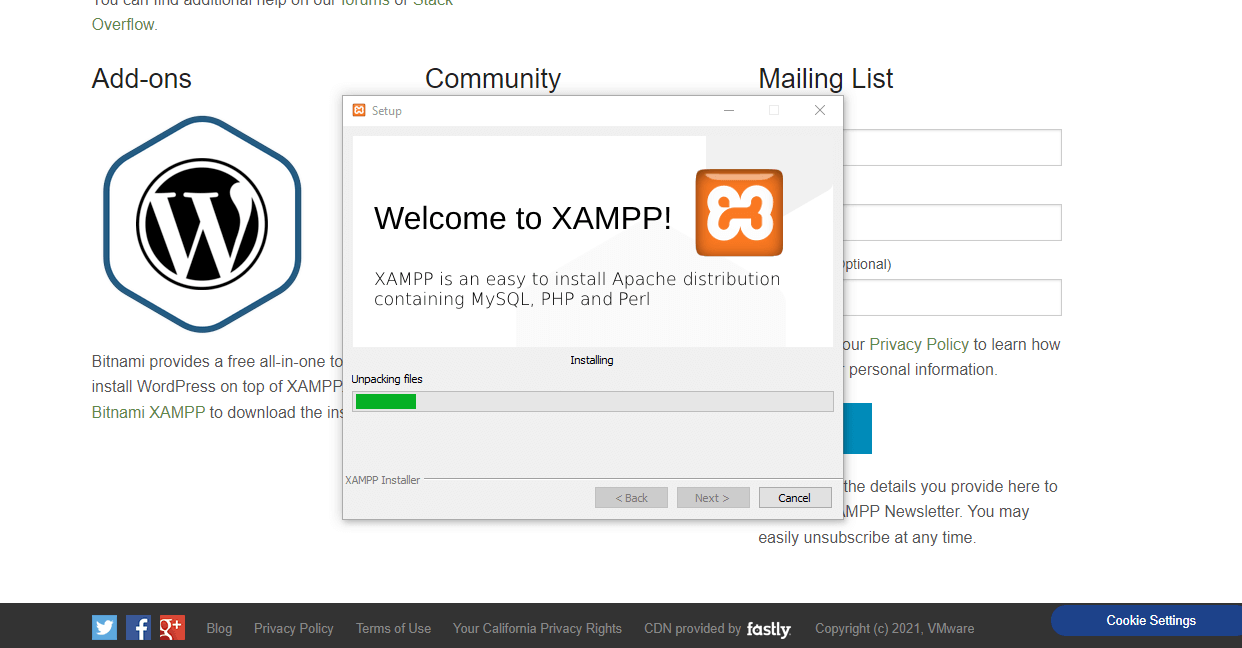
To use localhost for WordPress, you need to select only apache, MySQL, and PHP.
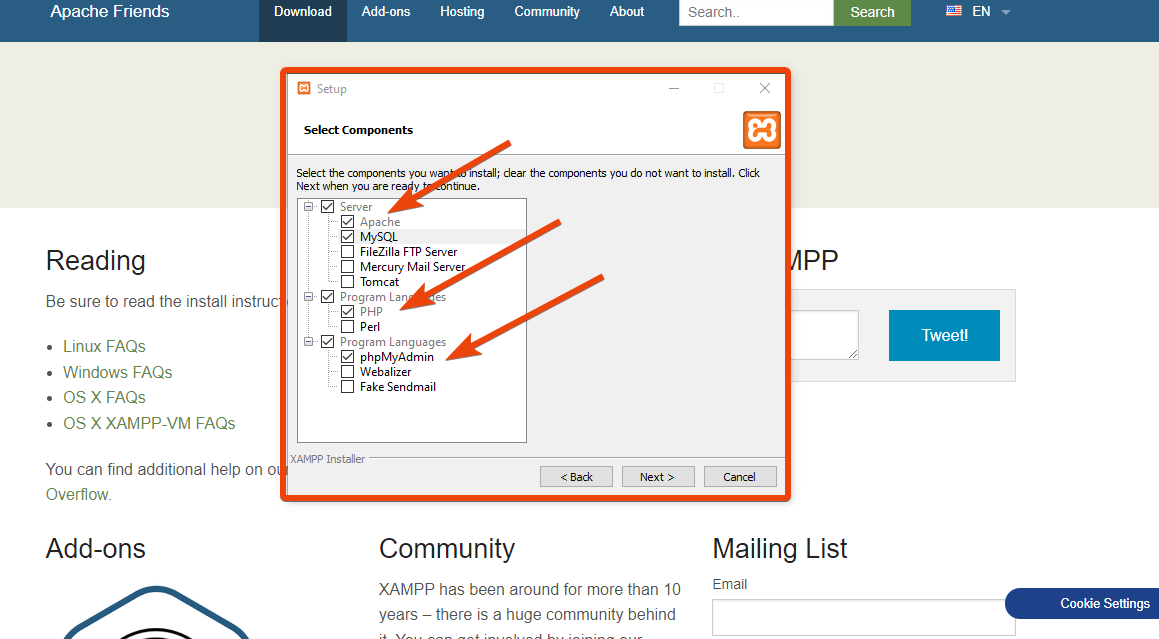
Once you select these options for checkboxes, click the next button. It will automatically start the process of installation.
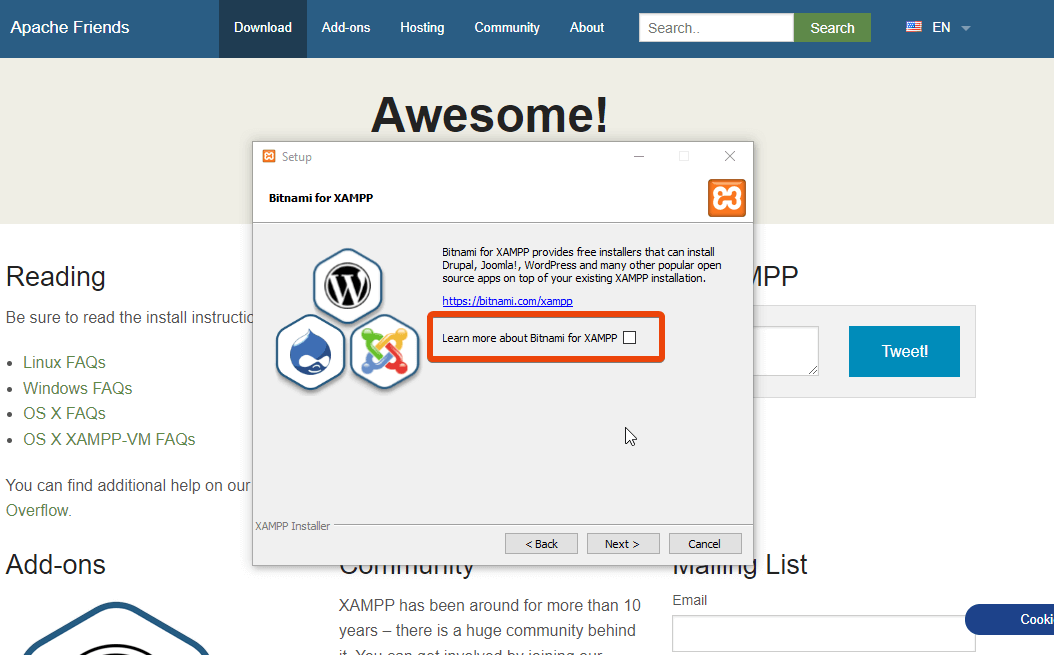
It will show an option if you want to learn more about Bitnami for XAMPP. Uncheck this box as it isn’t needed for you.
However, if there is antivirus software on your PC, it can show some error messages. Simply select continue and run the installation process.
After the final installation, it will show a message with a box. Click the Finish button and it will be done. In the entire process, keep everything in the default settings to avoid any complications.
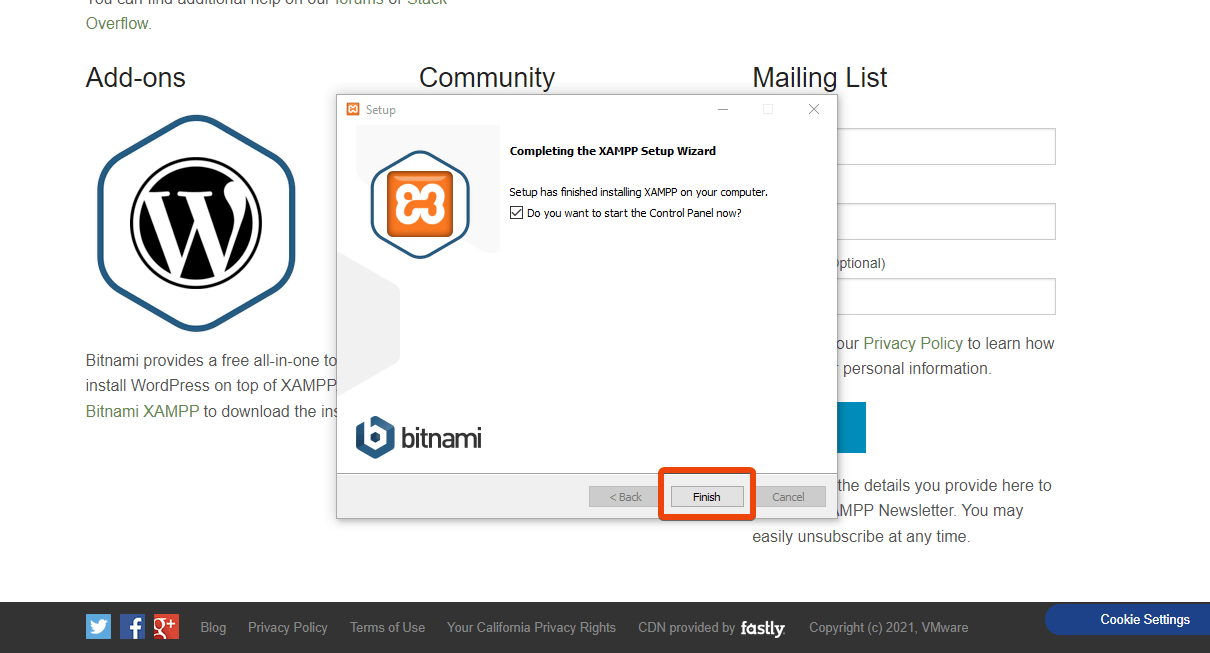
Now XAMPP is installed on your PC. Go for the next steps to install WordPress on localhost.
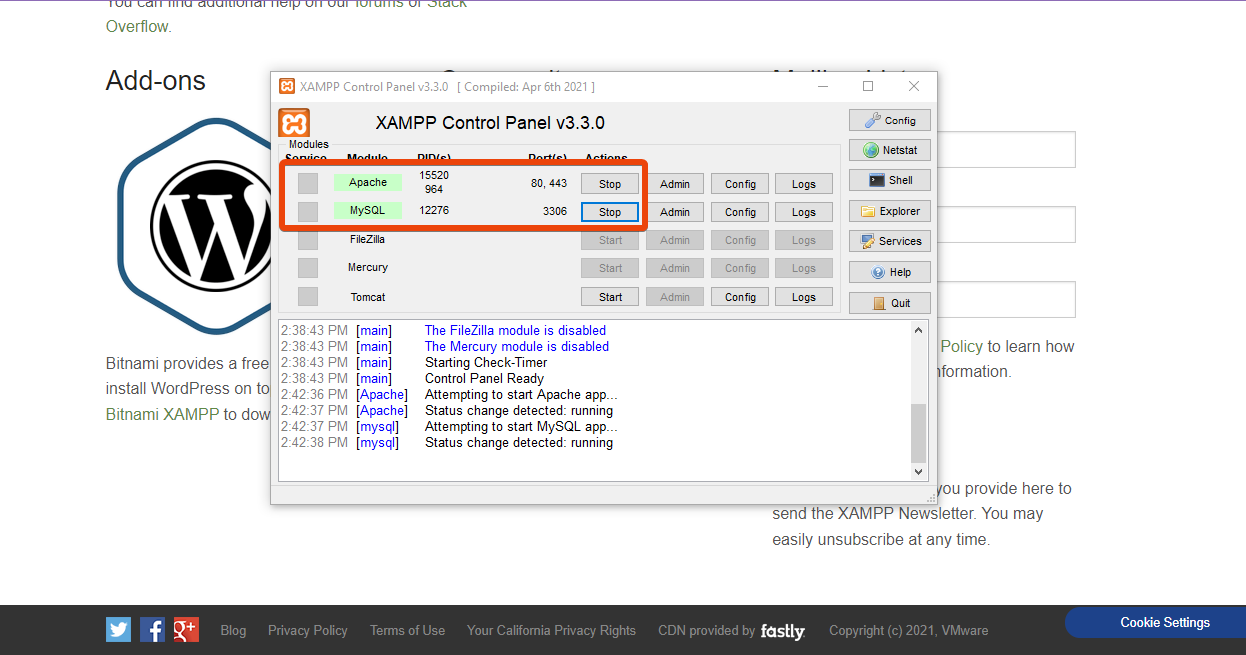
Step 3: Start the Modules to Test the Server
To install WordPress locally, you need to run the Apache module and MySQL module.
Simply go to the XAMPP control panel and turn on these modules.

Click on the start button for both of the modules. Both of these module should turn green once you enable them.
Step 4: Download WordPress for Localhost
When someone is using a domain and virtual hosting, he/she can install WordPress directly on the hosting server.
For localhost, you need to download the latest version of WordPress to your PC storage. You will then have to manually unzip the WordPress zip file in the targeted folder of XAMPP. Go to the official website of WordPress and download WordPress.
Step 5: Create a Local Database Server
Now you need to create the database for the localhost where you will perform the further steps. You need to create a folder for it. It will be the folder where you will save all the data for your local website.
Navigate to the folder where you have downloaded the XAMPP software. If you have kept everything in the default settings, you will find the folder here – C:\xampp.
Under this link, you will see a folder named htdocs.
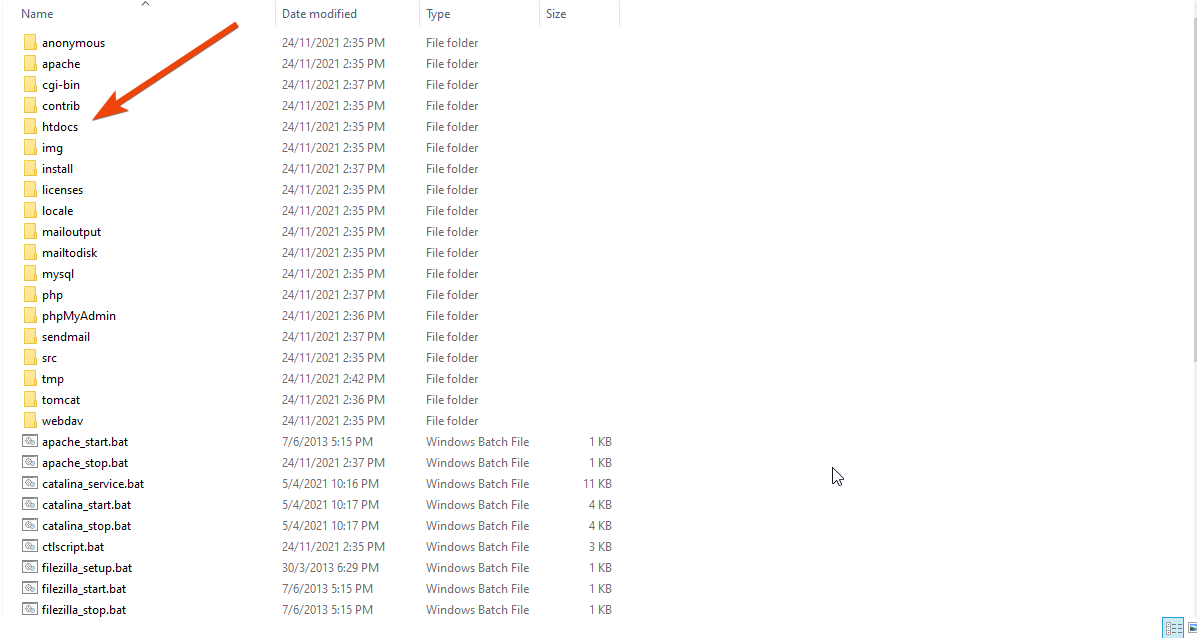
Open the folder and create a new folder for your local website. Remember that the folder name will be the sub-name for your website.
In the folder, unzip the downloaded WordPress file.
Now from the MySQL module, click on the admin button.
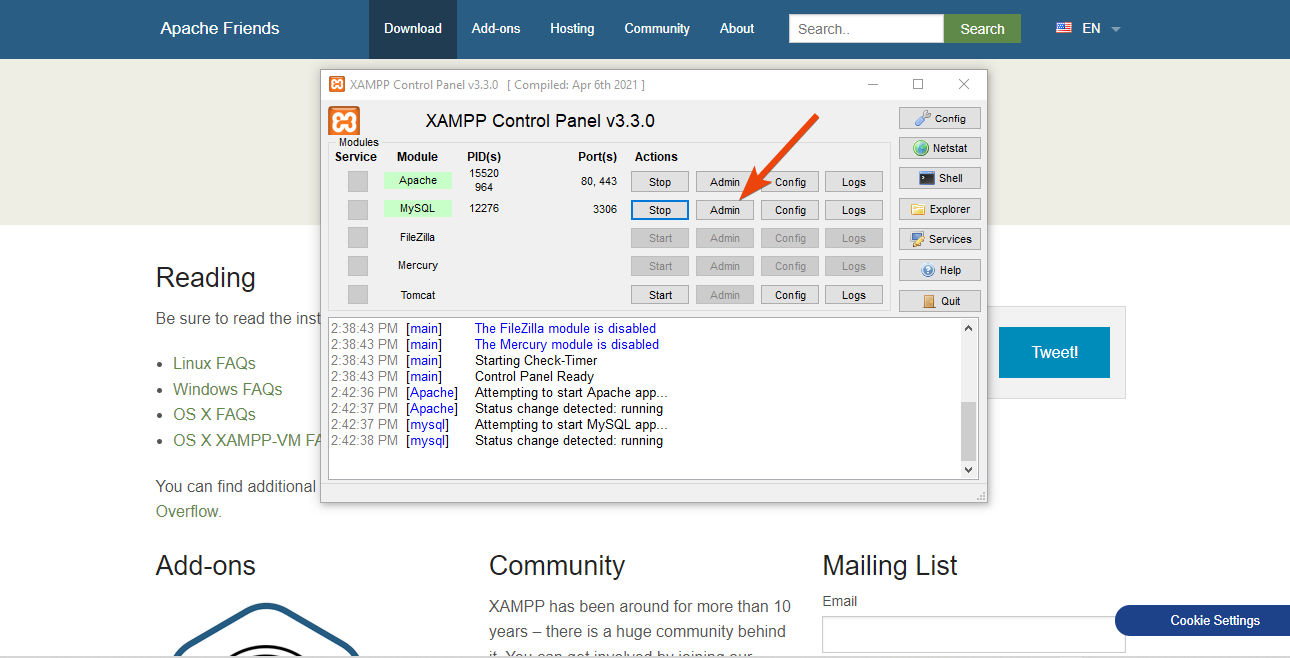
From the top, click on database and give a name for your database. Here I have used wpment as the server name. Now click on the create button.
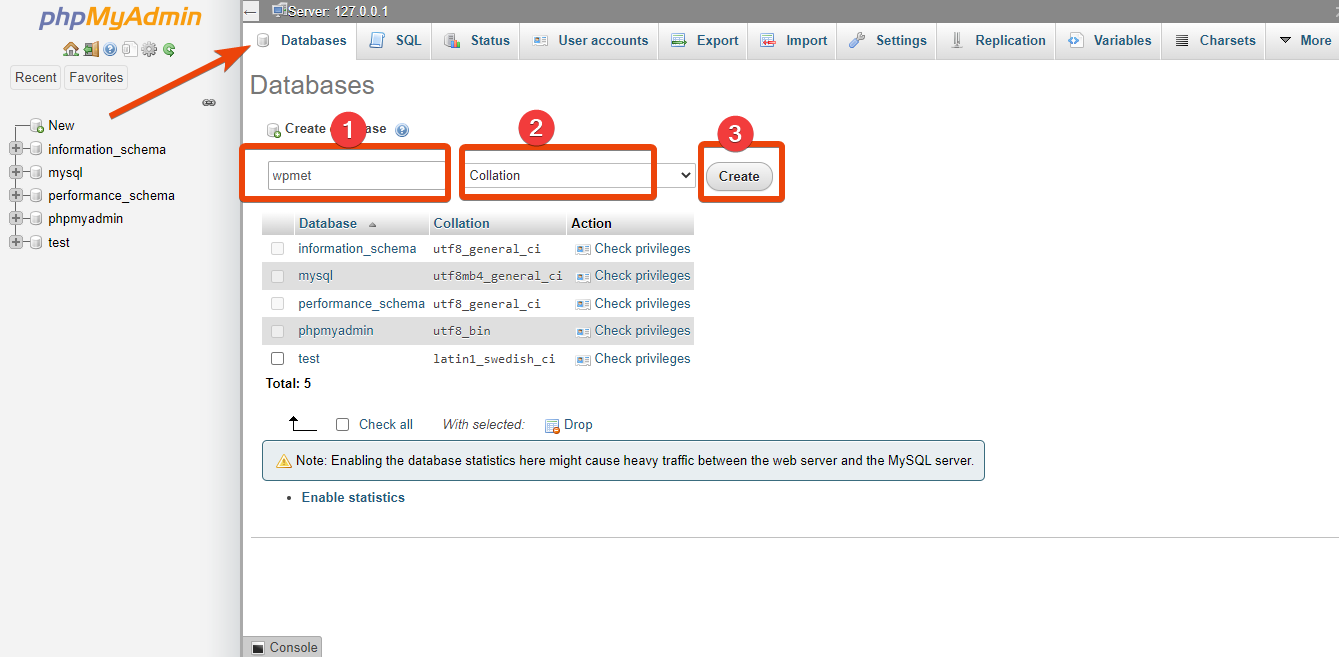
However, here you don’t need to create a user server like the regular WordPress installation for a live website.
Step 6: Install WordPress on XAMPP for Localhost
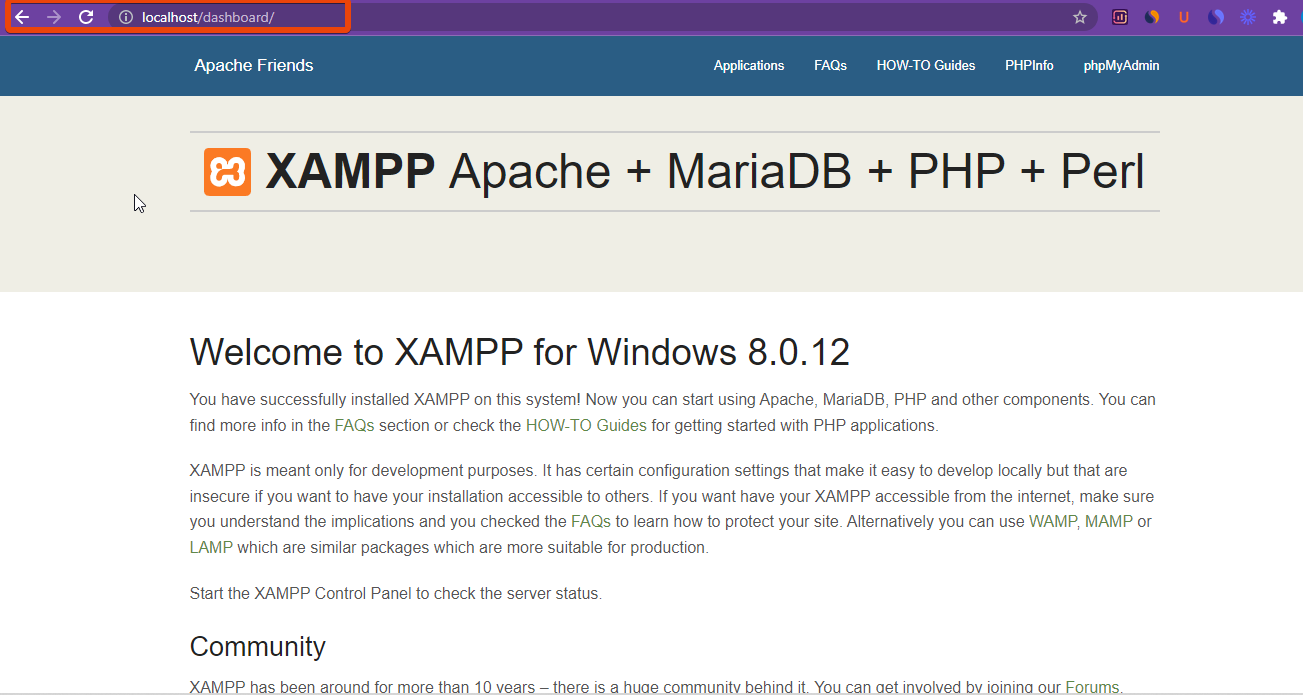
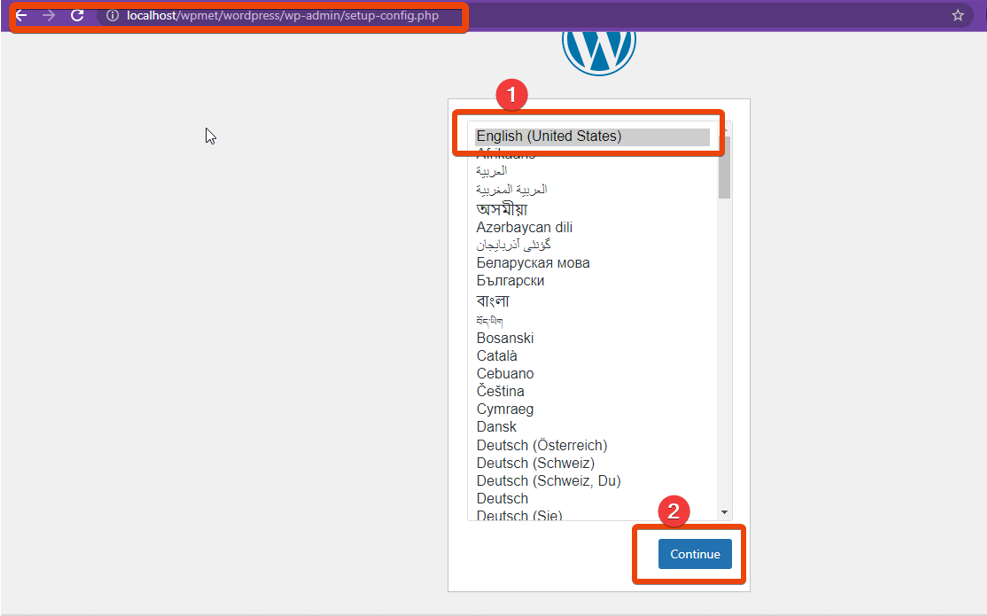
Now you can visit your local website with the link http://localhost/foldername
Now give the credentials for the databes.
- Database Name: Here give the database name you have created for PHPMyAdmin
- User Name: Keep the user name as ‘root’
- Password: Keep it blank
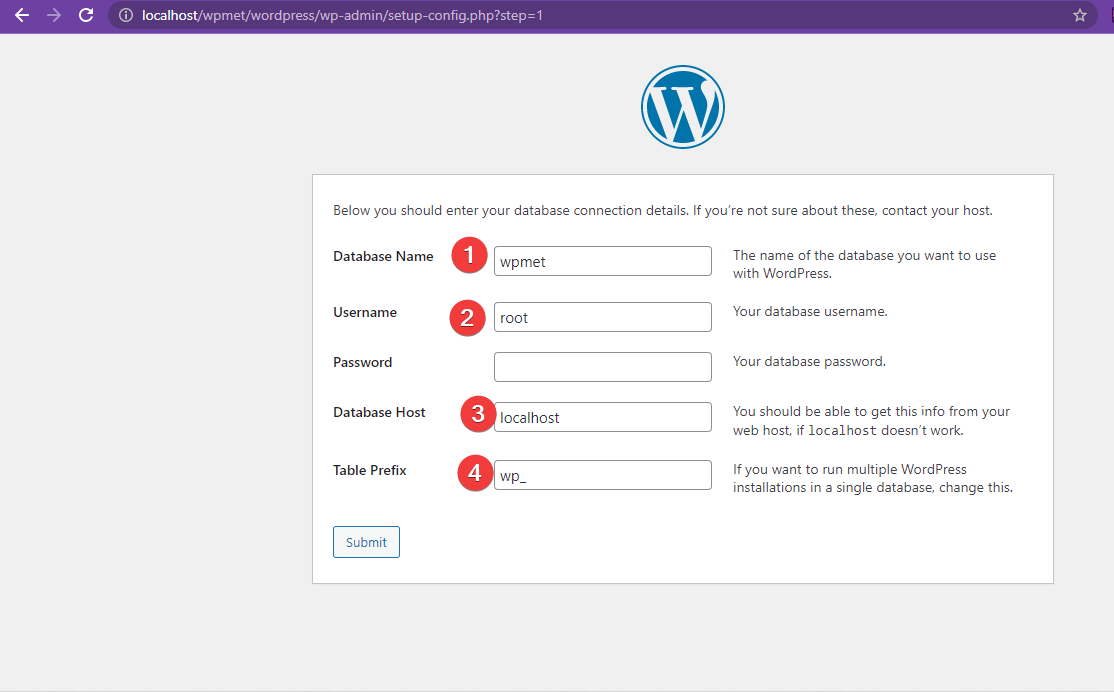
Finish the rest of the installation process in the normal method.
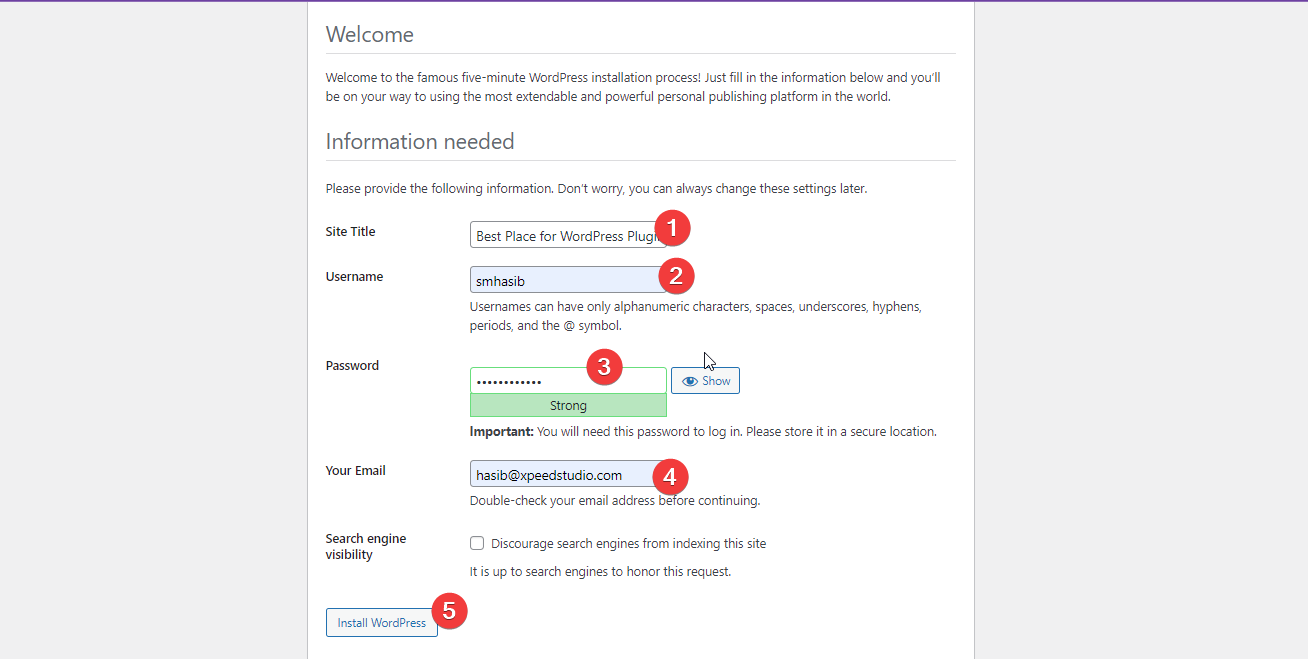
If everything you have set in the right way, a new website will be created for the localhost.
If you have followed the steps properly, you won’t have to ask again how to install WordPress on localhost. As XAMPP supports all operating systems, you don’t have to struggle with anything.
Whether it is a Mac or a Windows device, this method will help to install WordPress locally.

How to Add or Install Themes and Plugins On WordPress Localhost?
Once you have run the local website with XAMPP, you can install any WordPress plugin and themes as you wish.
There are two ways to install themes and plugins on the localhost WordPress website.
In the first method, you need to go to your site and give the credentials you have created while creating the site locally.
Next, from the WordPress dashboard, hover over to Plugins> Add New.
Now search for the plugin that you want to install. For example, suppose you want to install the popular WooCommerce plugin ShopEngine. Now search for ShopEngine in the search box. The plugin will appear in the list.
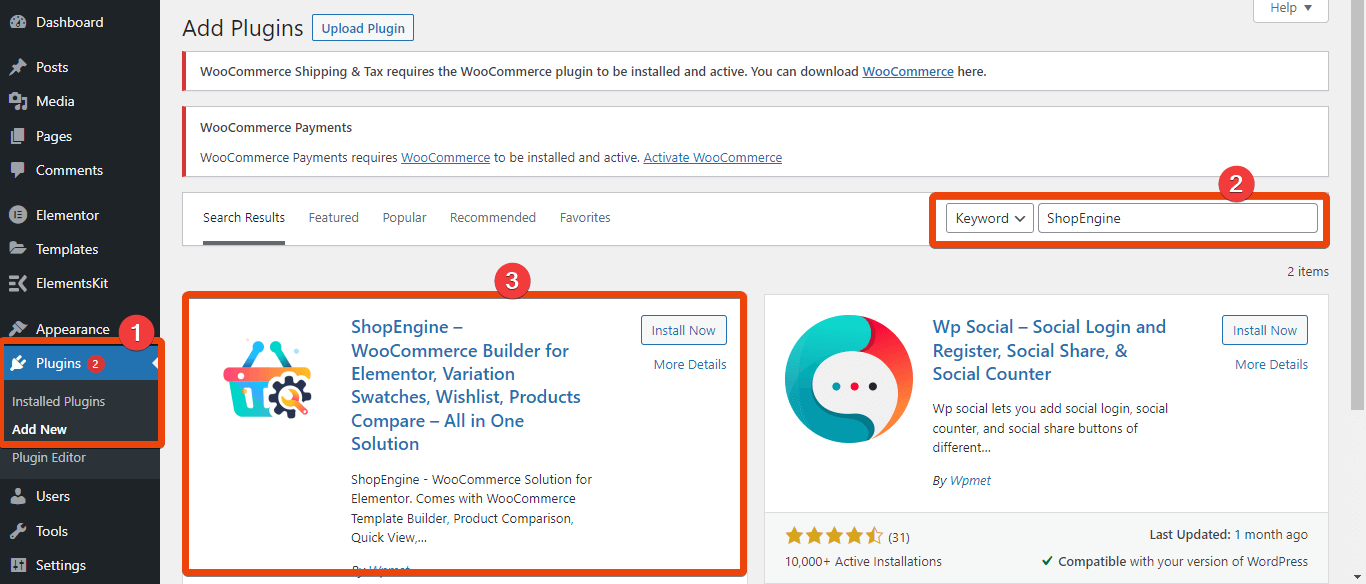
Click on the ‘Install Now’ button and then activate the plugin. Similarly, you can install other plugins.
But, if you have the zip file of the plugin, you can simply go to the XAMPP folder and then go to htdocs > your website > WordPress > wp-content > plugins. Copy and paste the zip file of the plugin. Unzip the file here and the plugin will be installed for the local website.
Similarly, you can install ElementsKit all-in-one website design plugin, different form builders, and more on the localhost. This will be handy to you for practicing.
You can also add a theme to your WordPress website. To install the theme directly on the local website, go to WordPress dashboard > Appearance > Themes.
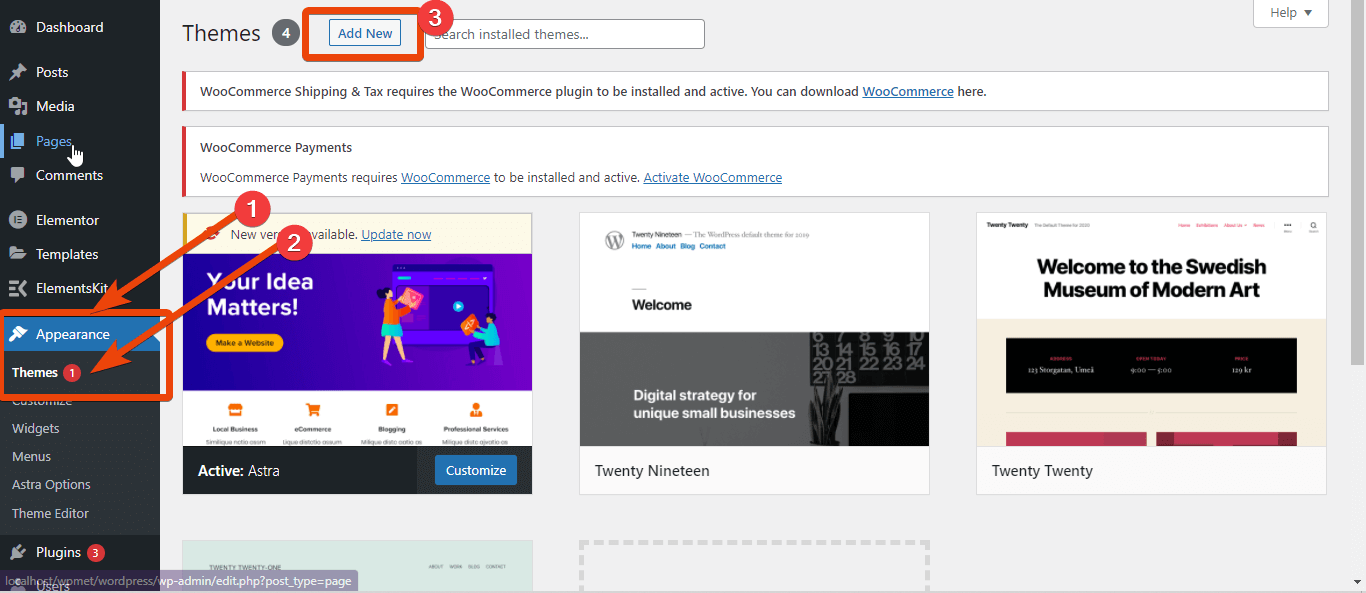
Next, search for the theme you want to install for the local website. After finding the theme, press the “Install” button to install the theme on WordPress localhost.
In another method, you can directly install WordPress themes and plugins on localhost. If you have the zip file of a custom WordPress theme, simply unzip it in the htdocs folder. But this time, instead of plugins, go for the ‘themes’ folder. Unzip the theme file here and it will be installed for the local website.
How to uninstall WordPress on localhost?
Besides knowing how to install WordPress locally, you also need to learn how to install WordPress from localhost. Let’s learn!
Suppose you have tested the essential things for your projects and now you don’t need to use the software anymore. In that case, you can uninstall the XAMPP software in a few steps.
For Windows, go to the Control Panel > uninstall a program. From the program list, select XAMPP and hit the uninstall button.
It will uninstall the XAMPP server.
Now you need to install the XAMPP app from Windows. For this, search for Apps & features in the Windows search bar.
Under the Apps & features option, locate the XAMPP app. Click on the app icon, and it will show the uninstall option. Hit the button, and it will uninstall the XAMPP app.
Now find the uninstall.exe file for XAMPP from the C:\xampp folder. Run the file, and it will remove all the files and features of XAMPP.
If you have followed all these steps, the localhost software will no longer be available on your PC.
Frequently Asked Questions
Is Xampp safe?
Yes, XAMPP is 100% free to use as a local server for your PC. Thousands of people are using XAMPP as a localhost WordPress without any issues.
Does xampp install PHP?
Yes! When you are installing XAMPP on your PC, it installs PHP along with MySQL and Apache.
How to move the WordPress localhost site to live?
There are two ways to convert a local website to live. You can use a third-party plugin, tool or you can manually transfer WordPress from a local server to a live website.
How to run WordPress on localhost XAMPP?
If you have installed the XAMPP software successfully, you can run it from the folder where you have installed it. Simply go to the folder and run the xampp_start.exe file. To control the XAMPP software and customize the local server, run the xampp-control.exe file.
Can I run multiple local websites under XAMPP?
Yes, you can run multiple local websites with custom code for the local server. However, if you don’t have an understanding of codes and server data, it could be complicated.
How does localhost WordPress work?
When you install localhost WordPress, the server software uses the PC storage. It works as a virtual database and shows data when the user calls.
Final Words
Did you go thoroughly to the steps I have shared? There won’t be any confusion regarding how to install WordPress on localhost.
Most popular CMSs are free to use, and you can practice them with XAMPP. So, install WordPress on localhost and try out different features. Start with popular plugins and themes to understand how WordPress works. It will give you a detailed idea about WordPress.
If you are looking for a complete solution to design a website from scratch without coding, check out ElementsKit.
Leave a Reply