

Are you thinking of building a multilingual site to extend your business all over the world? If so, then you have come to the right place to get a proper guide regarding creating a multilingual site in WordPress.
English is the most used language in the world. That’s why website owners mainly use English on their landing pages to communicate with their audience. Nevertheless, the number of non-English speakers is also high. As a result, marketers miss out on a large portion of the audience while branding.
Hence, website owners now started to think of creating multilingual websites to expand their business all over the world. But, building a multilingual site can be challenging if you don’t have proper knowledge regarding how to create multilingual website in WordPress.
On that note, here we have shared the best practice of creating a multilingual website in WordPress. So, without further ado, let’s check out how to create a multi-language website in WordPress.
Importance of creating a multilingual WordPress site
A multilingual WordPress site refers to a site that can be translated into multiple languages. This allows a visitor to select a language from a dropdown menu and translate the whole landing page with a single click. Therefore, it boosts the engagement of the visitors.
Besides, having a multilingual site also brings other business opportunities. Let’s check out the importance of creating a multilingual site in WordPress:
- A multilingual WordPress website will help you to expand your business by making your site available in different languages. As a result, you can target a broader audience.
- This will let you accomplish new milestones and business goals as your target audience will be broader.
- Making your content available in multiple languages will help you to rank well on SERP. Because Google will show your content for suitable non-English search queries. As a consequence, there is a chance of getting 47 percent more traffic to your website.
- Since a multilingual site lets you expand your business all over the world, you will be able to increase the reach and sales of your business.
- It also provides the finest user experience to your visitors as they can see the content of your website according to their preferred language.
So, these are the benefits of having a multilingual site that will let you step into the international market and achieve new business goals.
How to create multilingual website in WordPress (8 Easy Steps)
Building a multilingual site doesn’t require technical knowledge. Just you need to select a multilingual website builder and that builder will provide you with the easiest option to translate your site. Have a look at the following simple steps to know about how to create multilingual website in WordPress without any hassle:
Step 1: Pick a domain name that reflects your business.

First, you have to select a well-suited domain name that goes perfectly with your brand. But, before picking one, make sure your domain name is available. Then choose a domain name by keeping a few things in mind:
- Use a short, precise, and unique domain name.
- Don’t use numbers or hyphens to make it unique.
- Select an easy to remember domain name.
Step 2: Adopt an appropriate hosting service for your website.
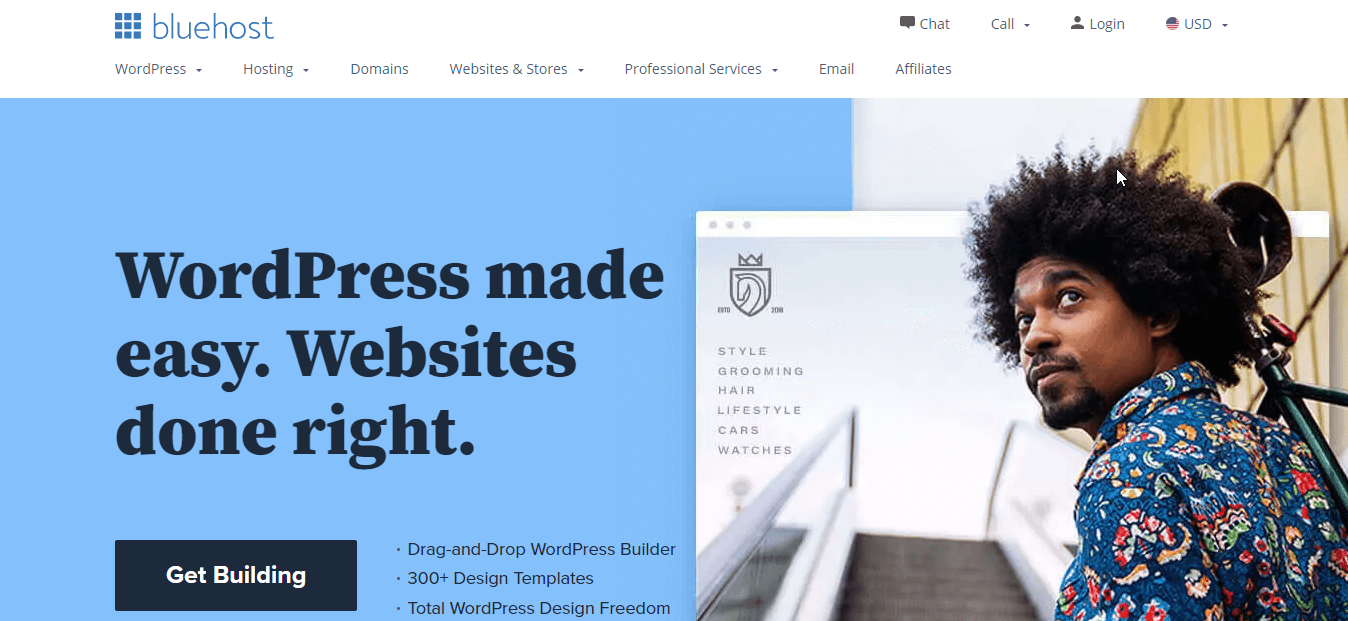
After picking a domain name, choose a hosting service that will provide a digital space where your files and documents will be saved. Or else, you can rely on the hosting service provider to pick a domain for you. There are many popular hosting available for WordPress websites such as Namecheap, Hostinger, Bluehost, A2 Hosting, etc.
You can pick any hosting provider according to your requirements and then move on to the next step which is choosing the right CMS for your website.
Step 3: Install WordPress, the best content management system.
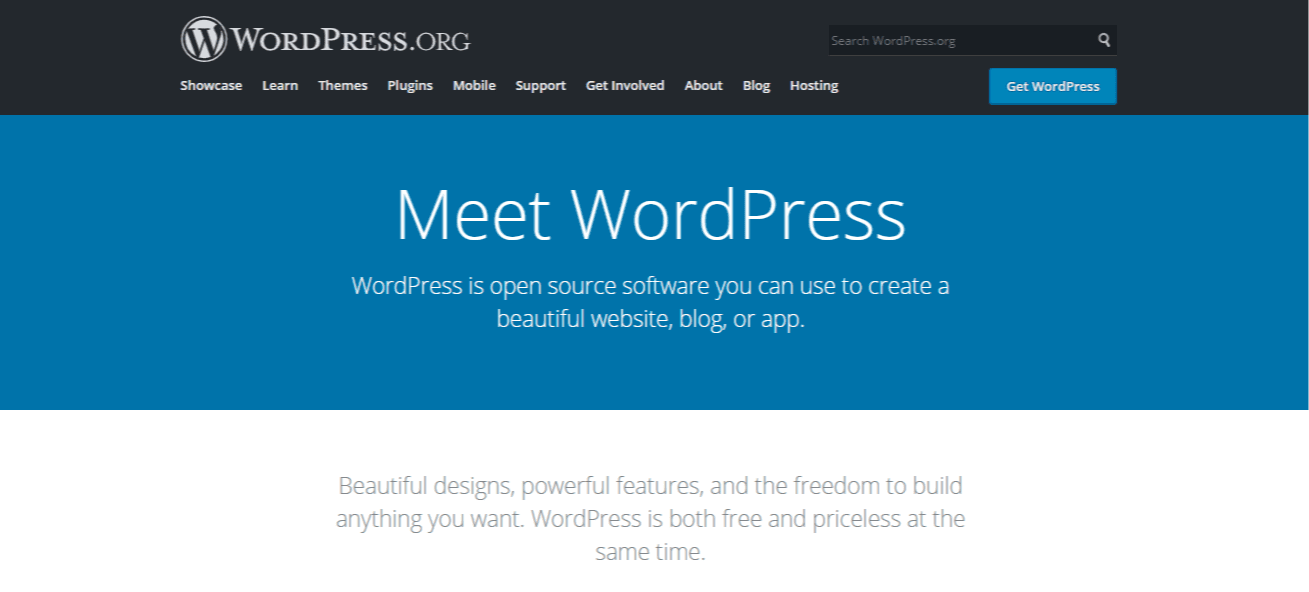
Now, you have to select a content management system to create a multilingual website. As of today, WordPress powers over 43% of websites all around the world. It is considered to be the best CRM for its excellent user experience and massive collection of plugins and themes.
On top of that, its free version is more beneficial than the pro. So, install WordPress without giving any second thoughts.
Step 4: Pick Elementor, the most convenient website builder.
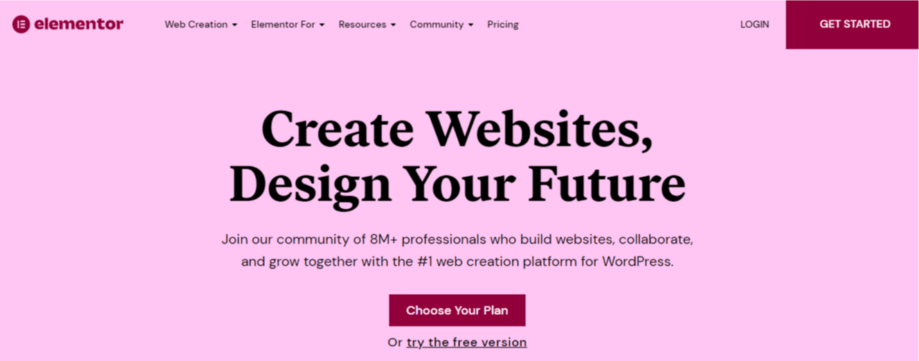
In this fourth step, you need to install Elementor which allows you to build your complete site by the easiest drag and drop option. You won’t require any coding knowledge to build a site with Elementor. Besides, Elementor is also compatible with all the popular themes and plugins. So, you will face no issues while working with it.
Step 5: Choose ElementsKit to create a multilingual site.
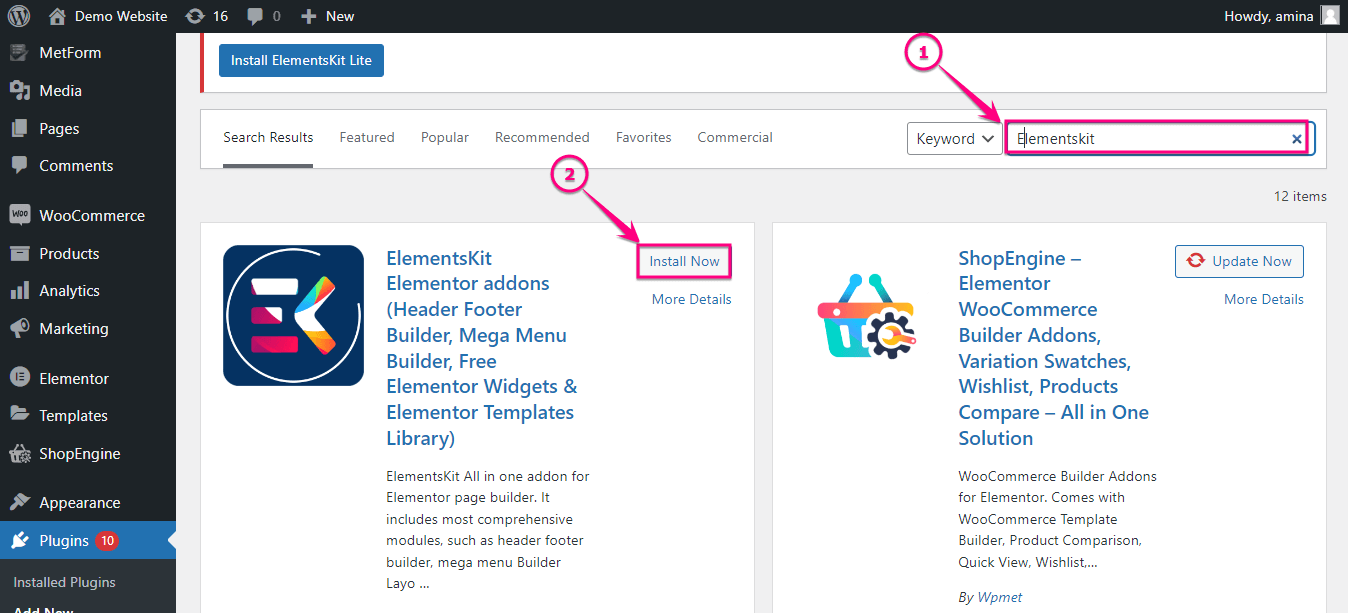
Now, install ElementsKit on your site to enhance your website building facilities and translate your sites into multiple languages. Go to the Plugins>> Add New and search for ElementsKit to install and activate it. Then install and activate ElementsKit, the multilingual website builder which has more than 600k active users.
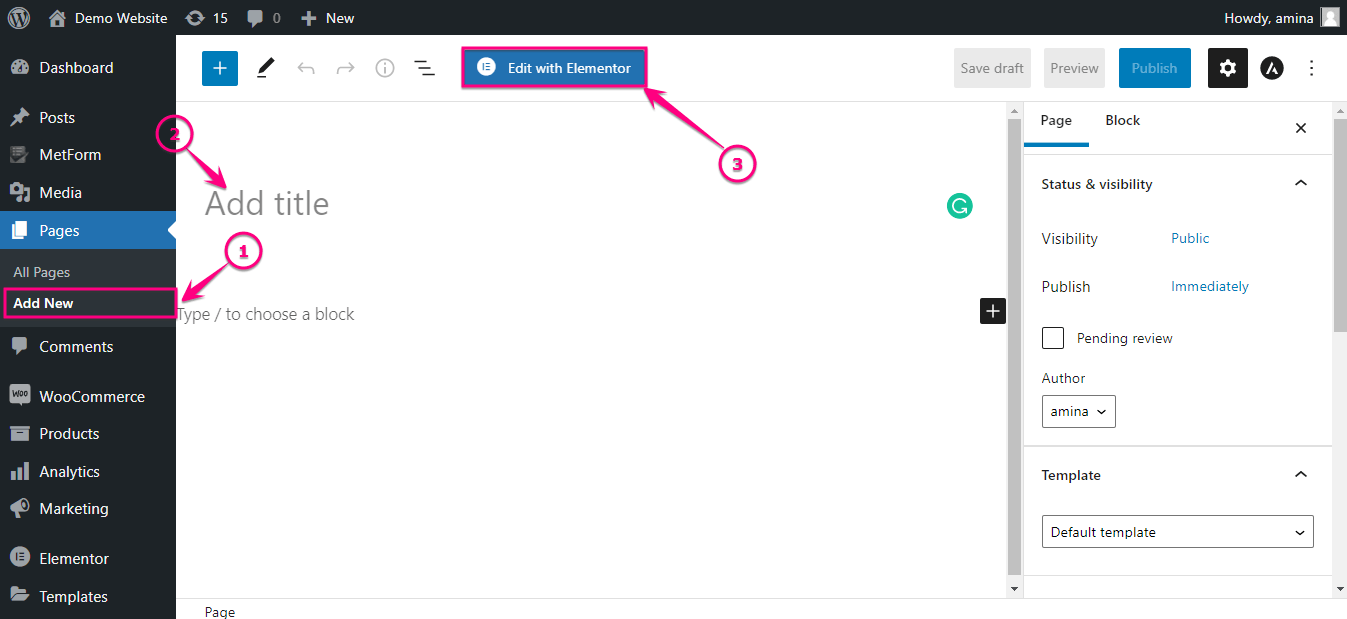
After that, add a new page by going to the Pages>> Add New option. Then give a title to your page and click the “Edit with Elementor” button.
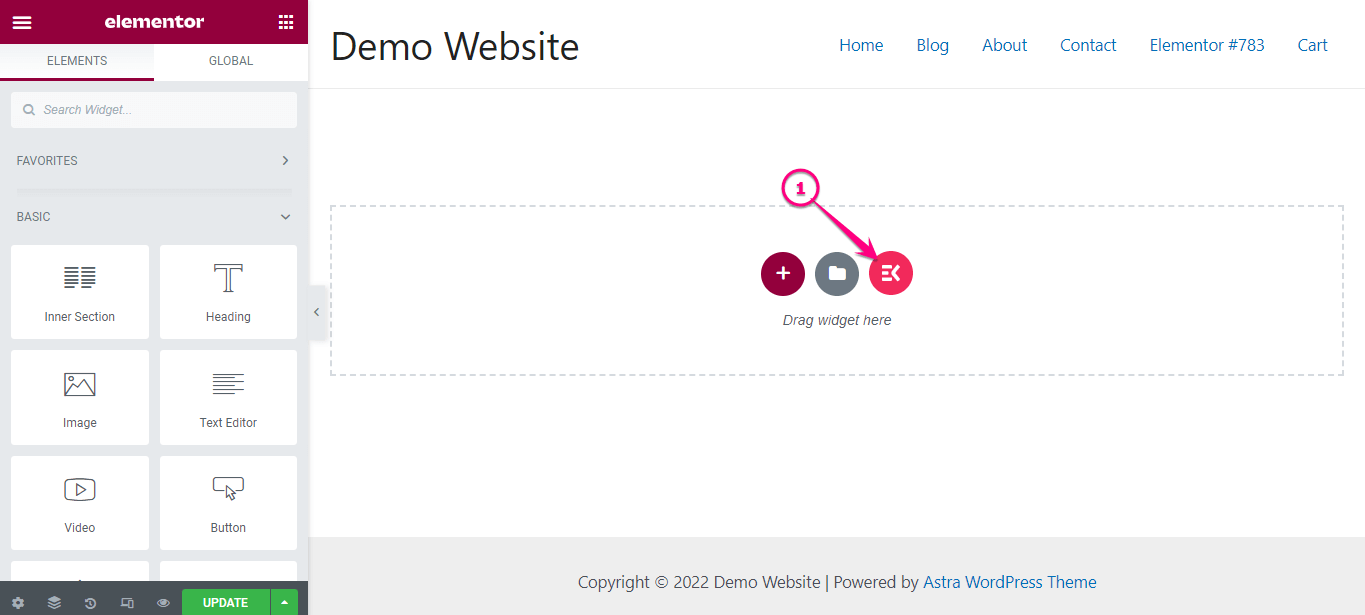
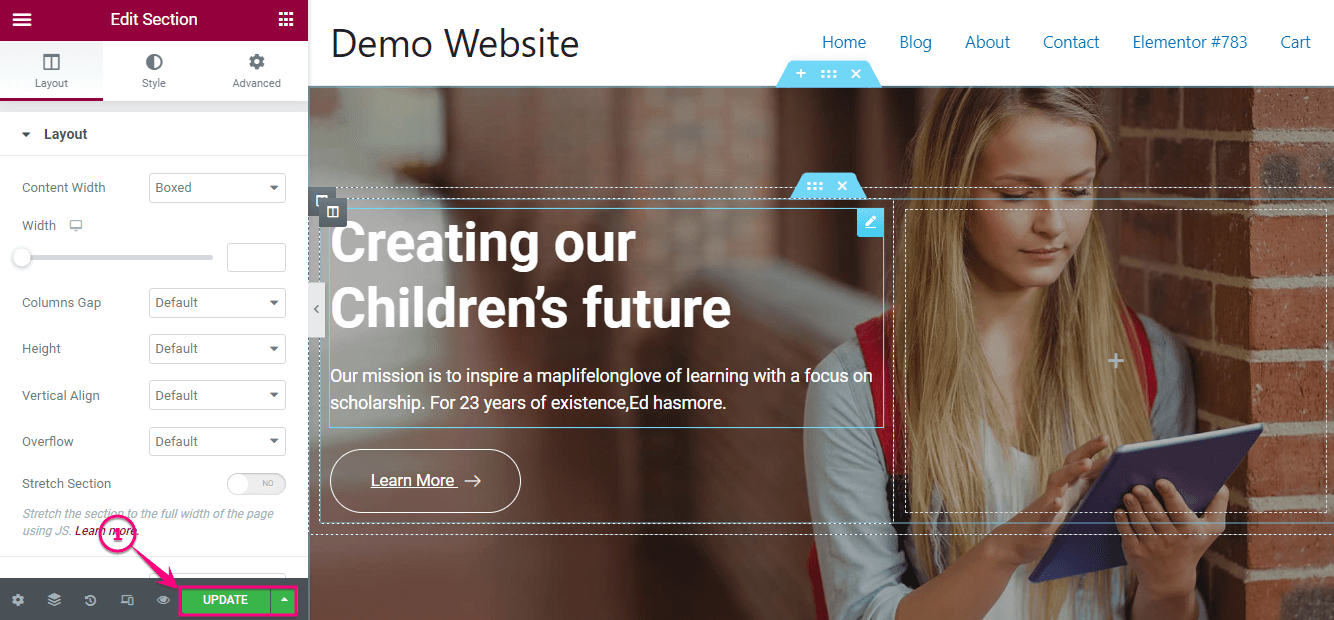
This will take you to the Elementor dashboard from where you need to click the ElementsKit icon like the added image.
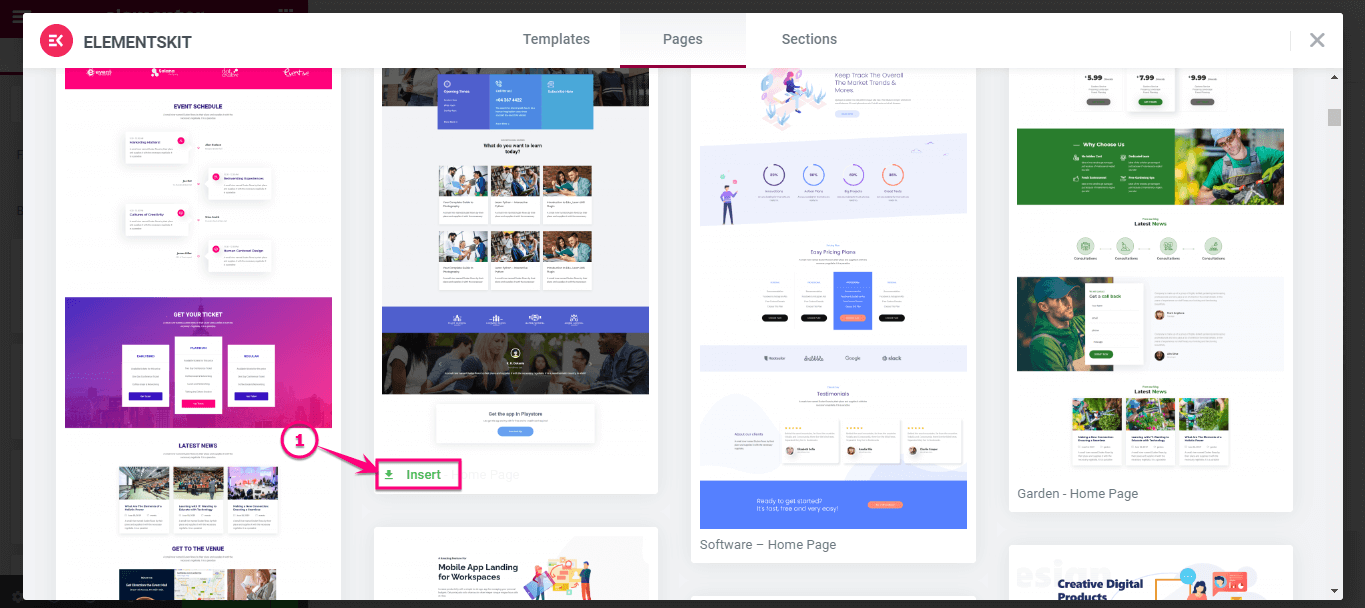
Now, insert a template to add a page by pressing the “Insert” button.
Finally, make your page live by clicking the “Update”/ “Publish” button.
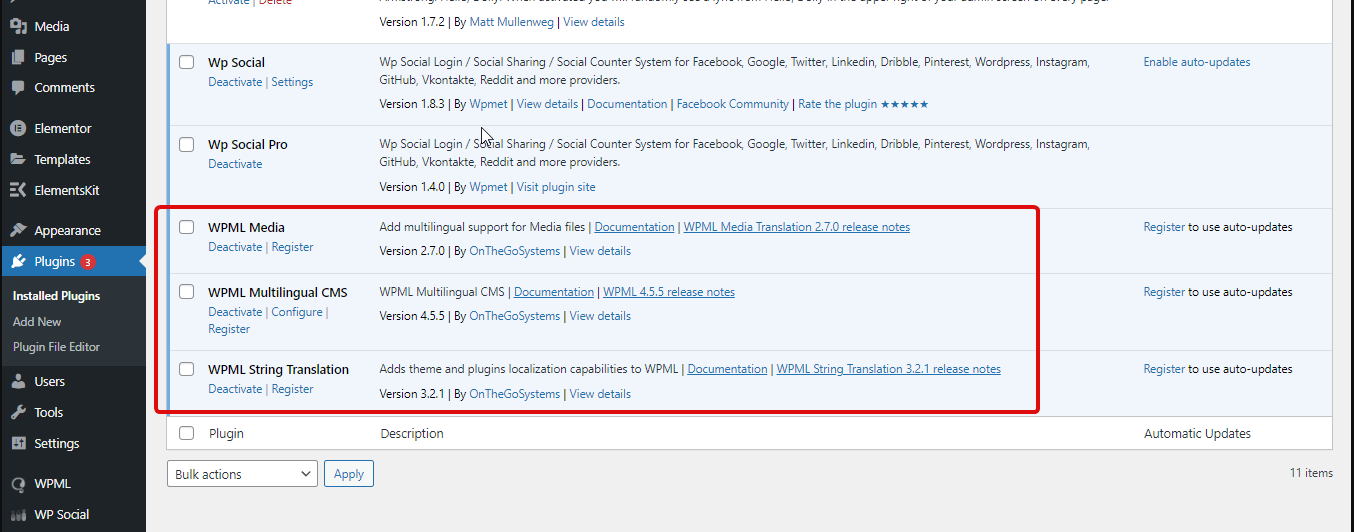
Step 6: Install and activate WPML plugins.
To translate your sites into multiple languages, you will require some plugins to be installed and activated on your WordPress site. Here are the plugins that will let you create a multilingual website:
After installing and activating these plugins, you can translate your site into any language that is available in WPML. Can’t install the essential WPML plugins? Have a look at the documentation on how to install WPML plugins.
Step 7: Make some necessary settings with WPML plugins.
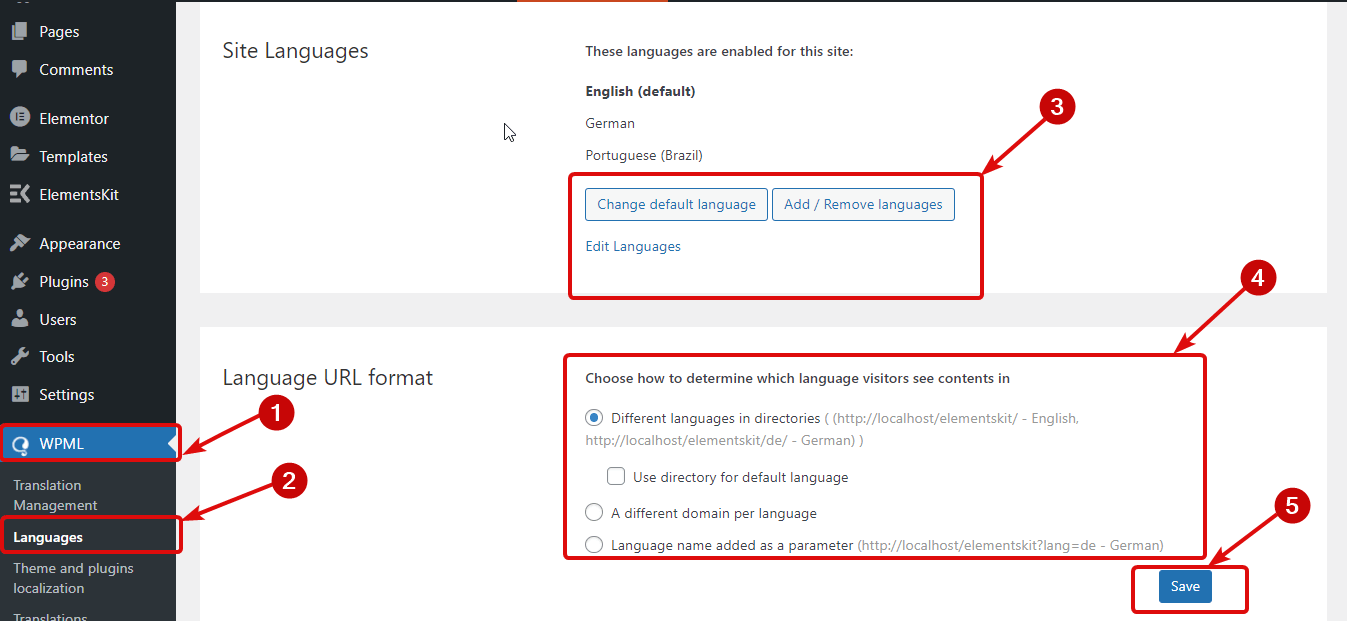
After installing and activating the necessary WPML plugins, go to the WPML from your WordPress dashboard and click “Languages”. Here you will find two fields that are Site Languages and Language URL format.
Site Languages field: Through this field, you can change the default language and add or remove languages by respectively clicking the “Change default language” and “Add/ Remove languages” buttons.
Language URL format: It will let you change the URL format of the active language. Select a suitable option from here.
Now, press the “Save” button to add all the changes to your site.
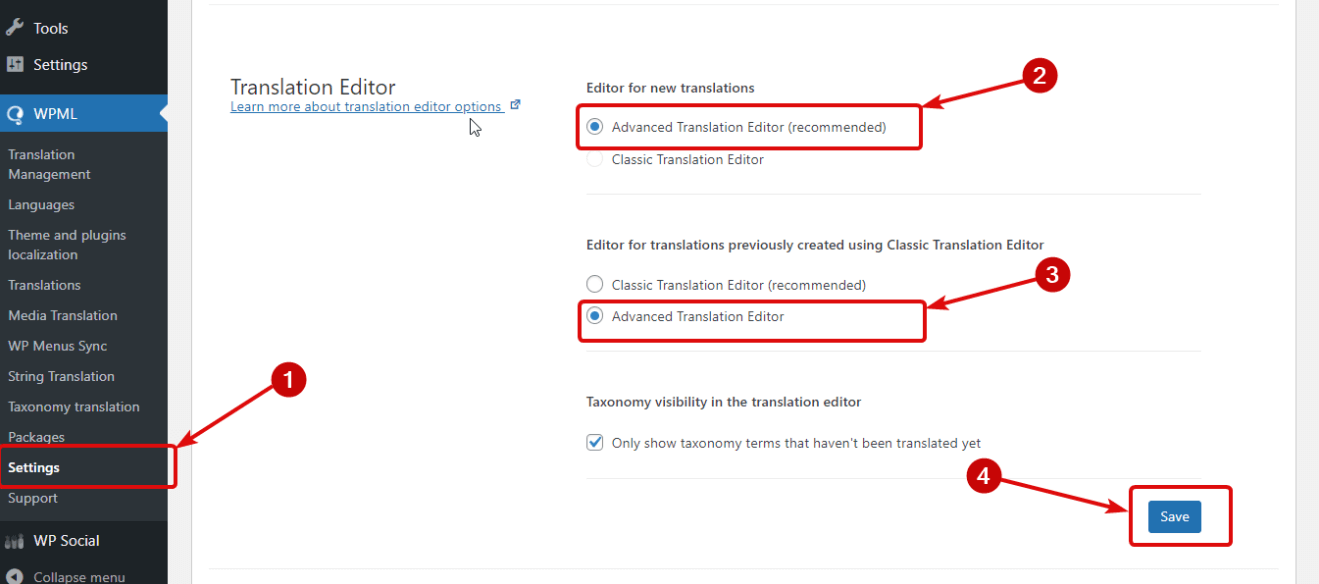
After that, go to the settings under WPML and scroll down until you find Translation editor. Then, select the “Advanced Translation Editor” for both “Editor for new translations” and ” Editor for translations previously created using Classic Translation Editor”.
Step 8: Translate your pages and posts in multiple languages.
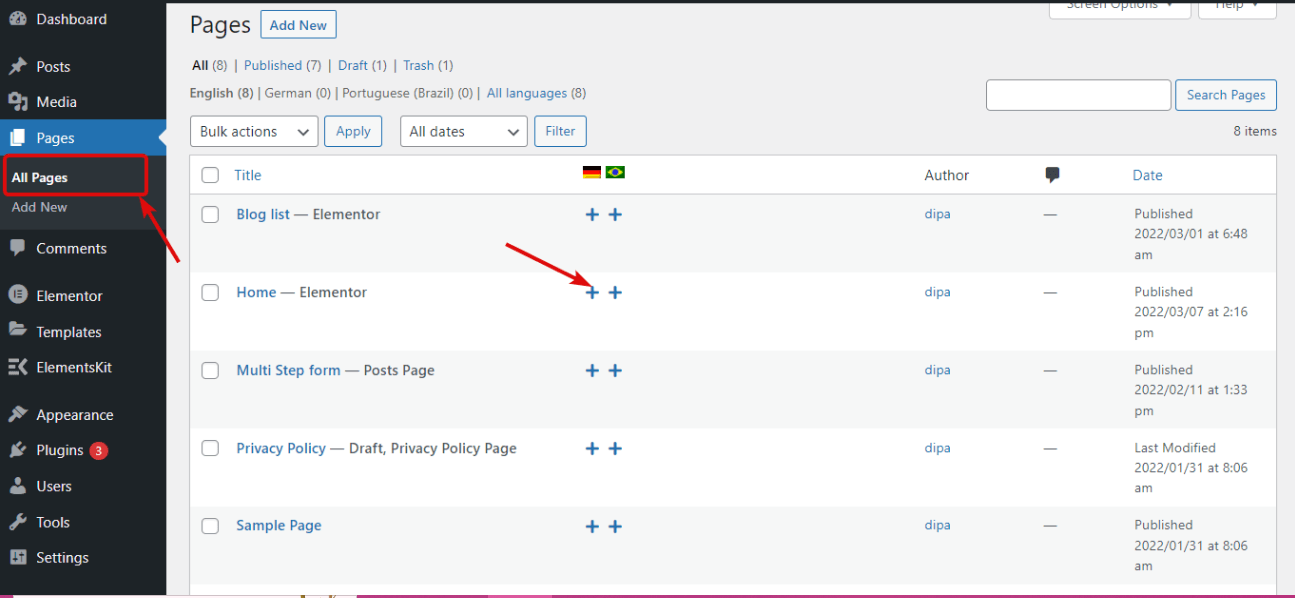
Now it’s time to perform the final step. To do that, go to the “All Pages” option under Pages and translate the page by clicking on the “+” icon of your selected language.
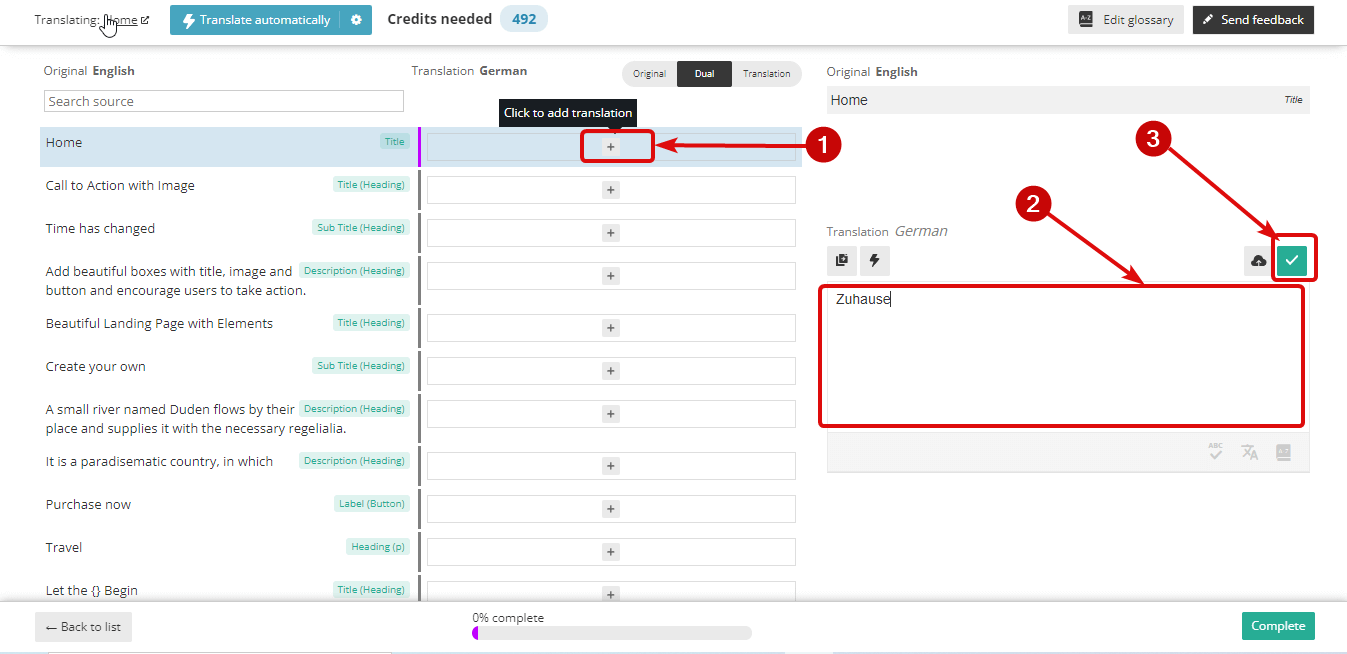
This will open up an advanced translation editor from where you can translate the content of your page separately by clicking on the “+” icon. After clicking the plus icon, you will see the content is translated into your selected language. Finally, press the check sign to add the translated content.
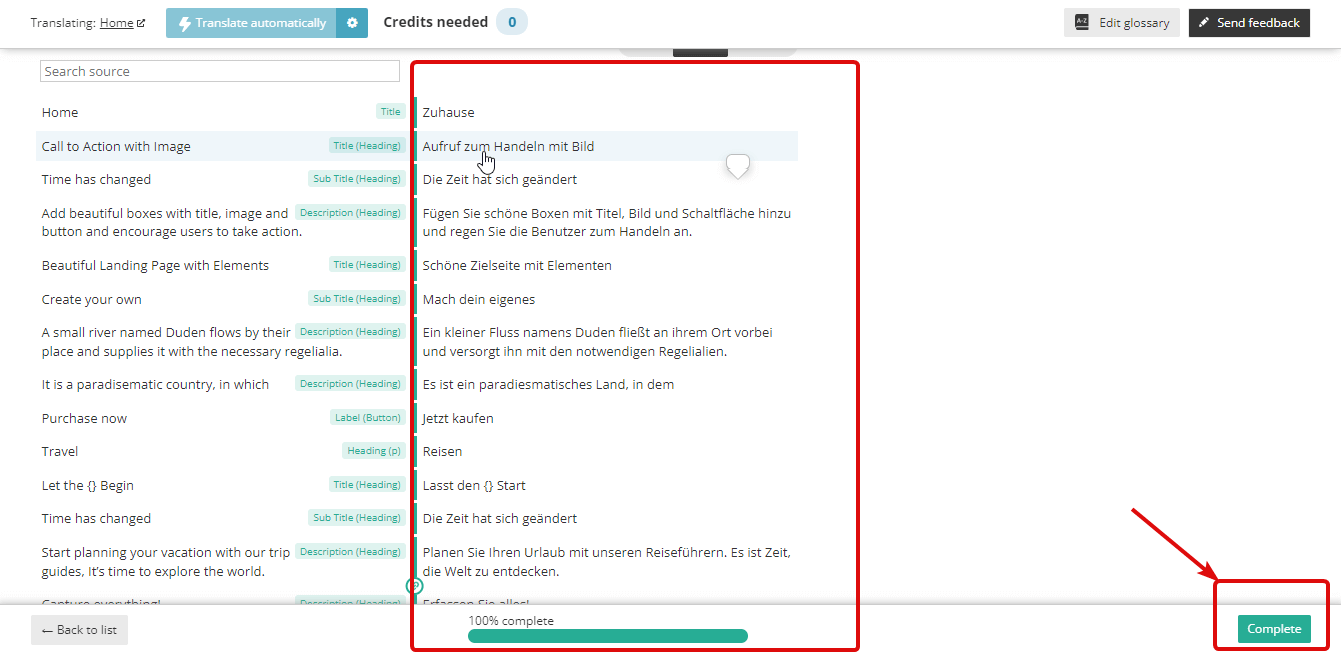
After translating all the content of your site, click the “Complete” button to make all translations live.
Here is your created multilingual site built with ElementsKit:


How to translate your blog posts into multiple languages?
The process of blog post translation is similar to page translation that has been shown above. You have to just go to the posts instead of the pages. After that translate your blog post by clicking the plus icon of your preferred language same as above.
This way you can translate the blog posts into multiple languages with ElementsKit’s WPML compatibility feature.
Get started with a multilingual website
Successful communication is necessary for any business or non-business website. Because without communication, the whole purpose of building a site will go in vain. In this case, translating your site into multiple languages can solve this problem and let you fulfill the purpose of building a site.
As ElementsKit is now fully compatible with WPML, building a multilingual site is not that difficult and burdensome. You can easily create a multilingual site without any technical expertise. So, read out the above steps on how to create multilingual website and follow them to attain all your preset goals with ElementsKit’s WPML compatibility.
Leave a Reply