Das Anpassen der Antwortnachricht ist eine Profifunktion von MetForm. Diese Meldung wird angezeigt, nachdem ein Benutzer ein Formular ausgefüllt hat.
It confirms to the users whether their message has been successfully submitted or not. Either way, creating such a response message is quite easy for the MetForm pro users.
Hier zeigen wir Ihnen, wie Sie die Antwortnachricht bearbeiten.
Ein Formular öffnen #
Gehen Sie wie folgt vor, um ein Formular zu öffnen, in dem Sie die Antwortnachricht hinzufügen.
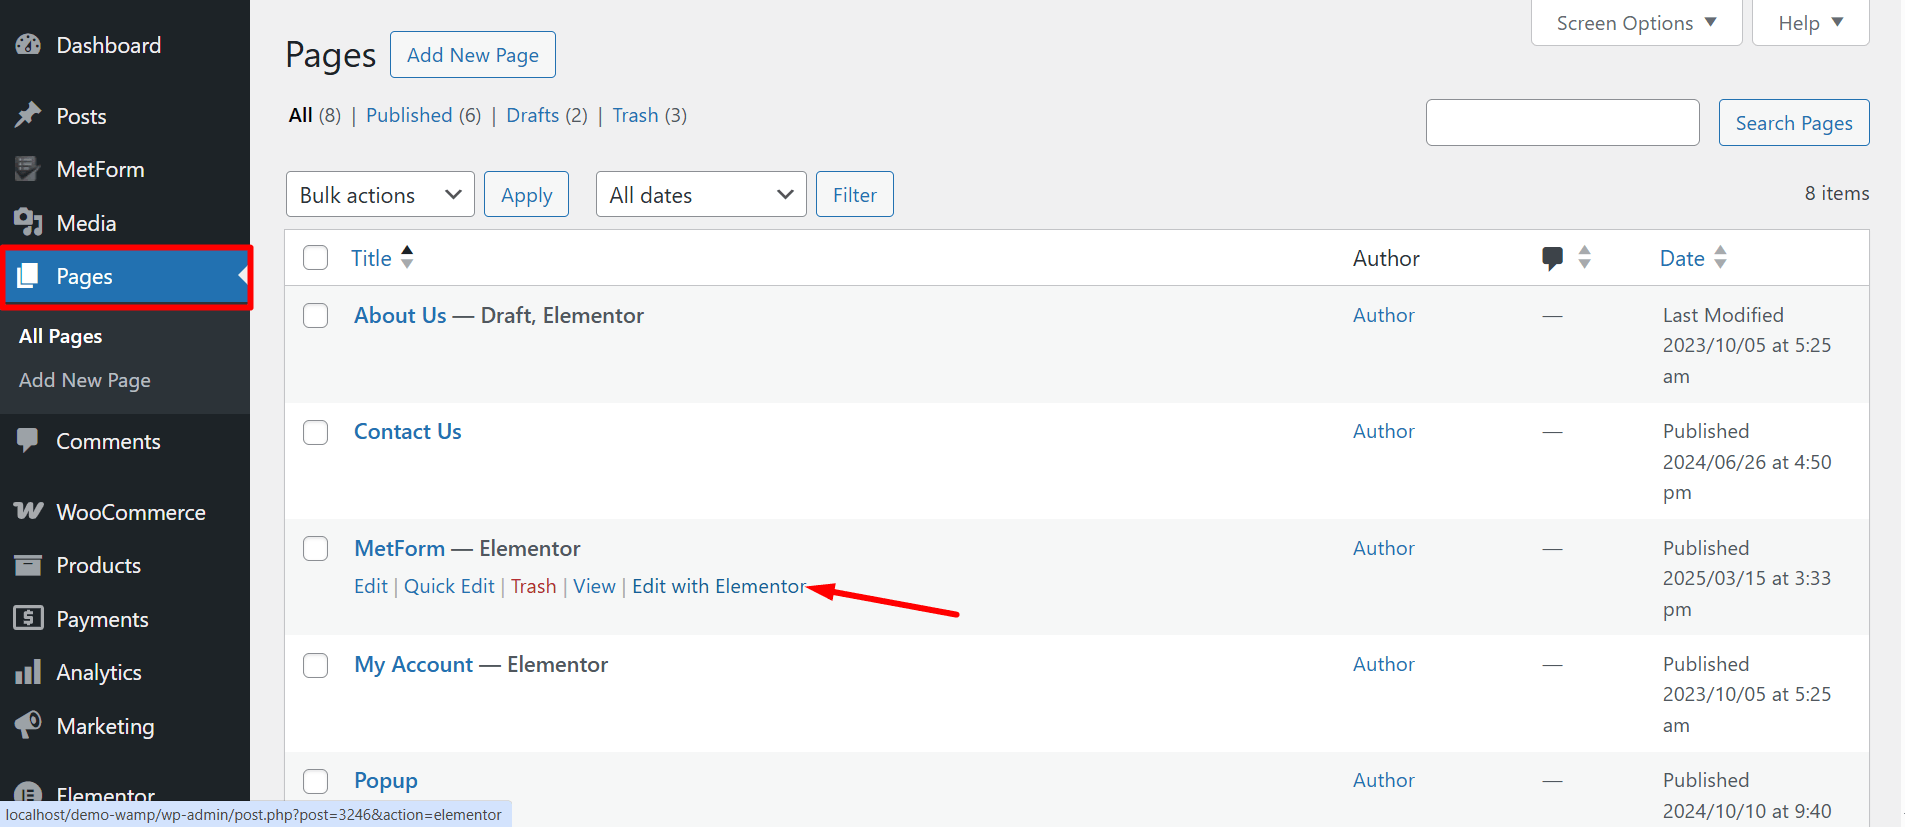
- Melden Sie sich beim WordPress-Administrationsbereich an und erstellen Sie eine neue Seite.
- Öffnen Sie die Seite mit dem Elementor-Editor.
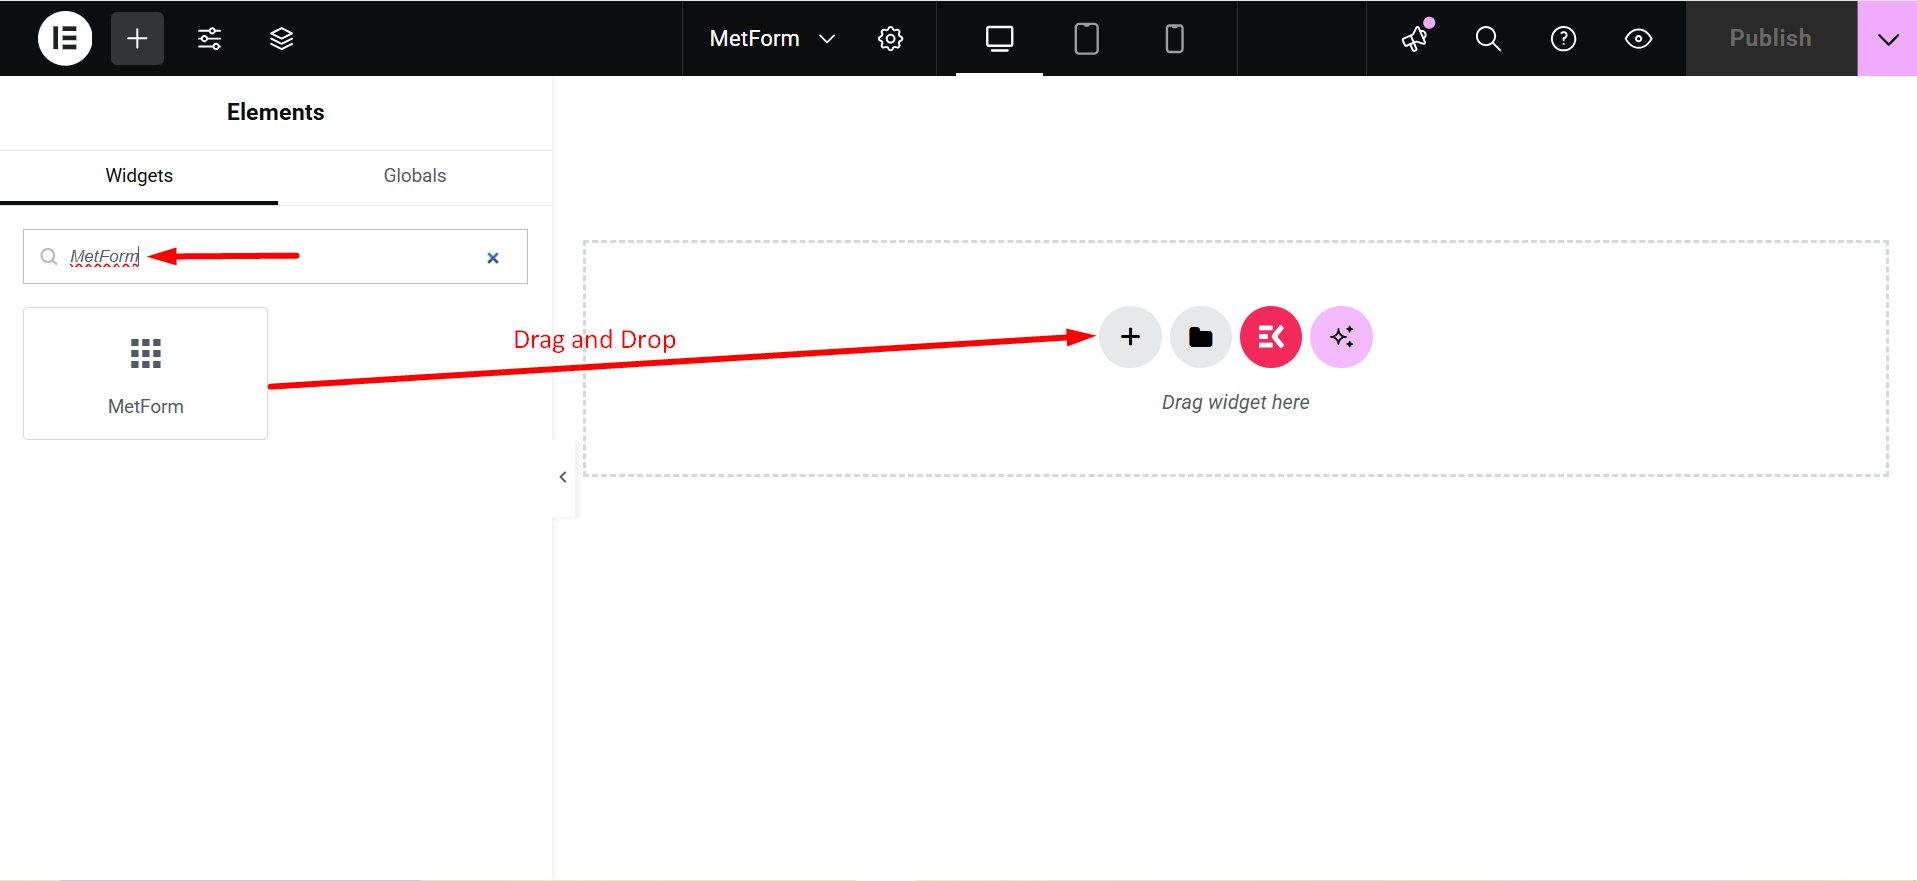
- Suchen nach MetForm Klicken Sie im Elementor-Suchfeld auf und ziehen Sie das Symbol per Drag & Drop auf die Seite.
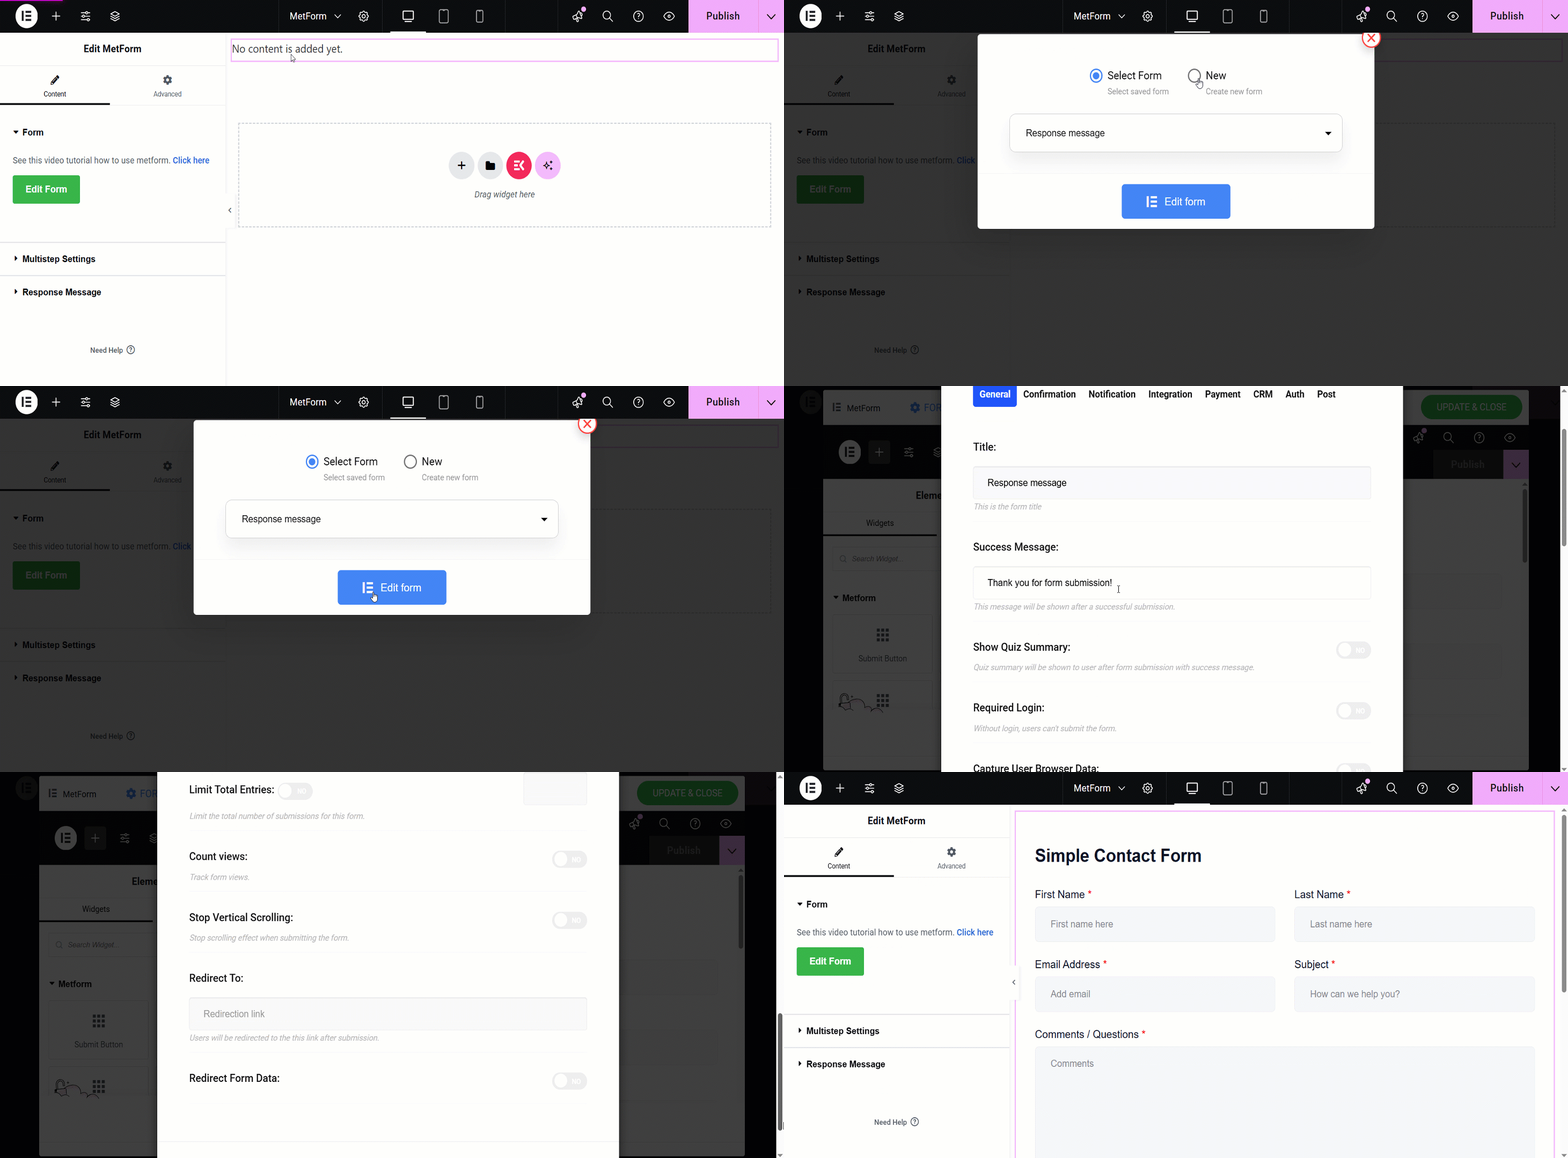
- Klick auf das Formular bearbeiten Schaltfläche auf der linken Seite.
- Wählen Sie nun ein vorhandenes Formular aus oder klicken Sie auf Neu Klicken Sie auf die Schaltfläche, um ein neues Formular zu erstellen.
- Fügen Sie das erforderliche Feld hinzu und klicken Sie auf AKTUALISIEREN & SCHLIESSEN Taste.
Um einen klaren Überblick über das Erstellen eines neuen Formulars und das Hinzufügen des erforderlichen Felds zu erhalten, folgen Sie der Videoanleitung unten –
Bearbeiten der Antwortnachricht #
Benutzer von MetForm Pro können den Text, das Erscheinungsbild und andere Stile der Antwortnachricht anpassen. Hier finden Sie die Schritt-für-Schritt-Anleitung zum Bearbeiten der Antwortnachricht.
Bearbeiten des Antwortnachrichtentextes #
Start by accessing to your WordPress dashboard:
Navigieren Sie zu pages/ posts > select the page or post where you want to add the form.

Suchen Metform on the search field > Drag-and-Drop

- Klick auf das Formular bearbeiten button and choose the form. Choose your form from the drop-down and click on the blue Formular bearbeiten button. However, you can also create a new form if you want.
- Now, you can just click on the FORMULAREINSTELLUNGEN Option in der oberen linken Ecke.
- Bearbeiten Sie die Erfolgsmeldung Eingabefeld und klicken Sie auf Änderungen speichern Taste.
- Klicken Sie abschließend auf AKTUALISIEREN & SCHLIESSEN Taste.
Now, look at the visual presentation of this entire procedure –

Zusätzliche Anpassungseinstellungen der Antwortnachricht #
After toggling the Antwortnachricht button, it’ll show you the additional settings:
Response Type: Pop Alert Box and Alert.
- Pop Alert Box: It is a message displayed as a pop-up, often using JavaScript
alert(). It notifies users with important information or warnings.
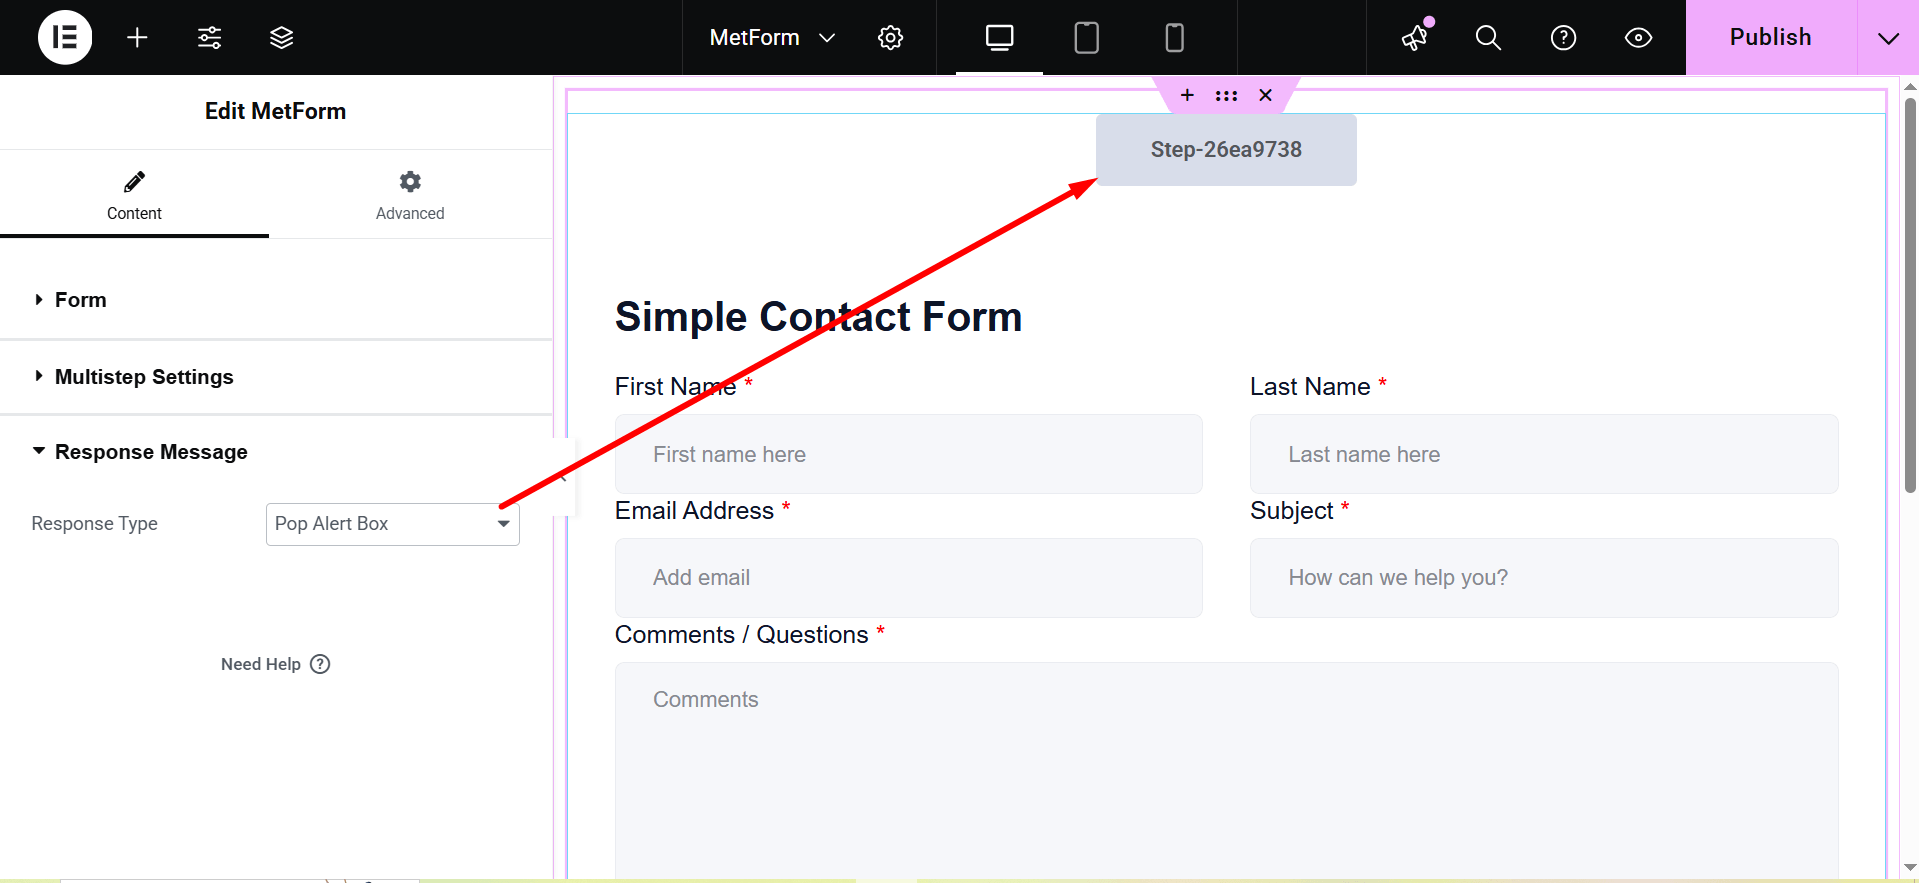

- Alert: This is also a pop-up message box.
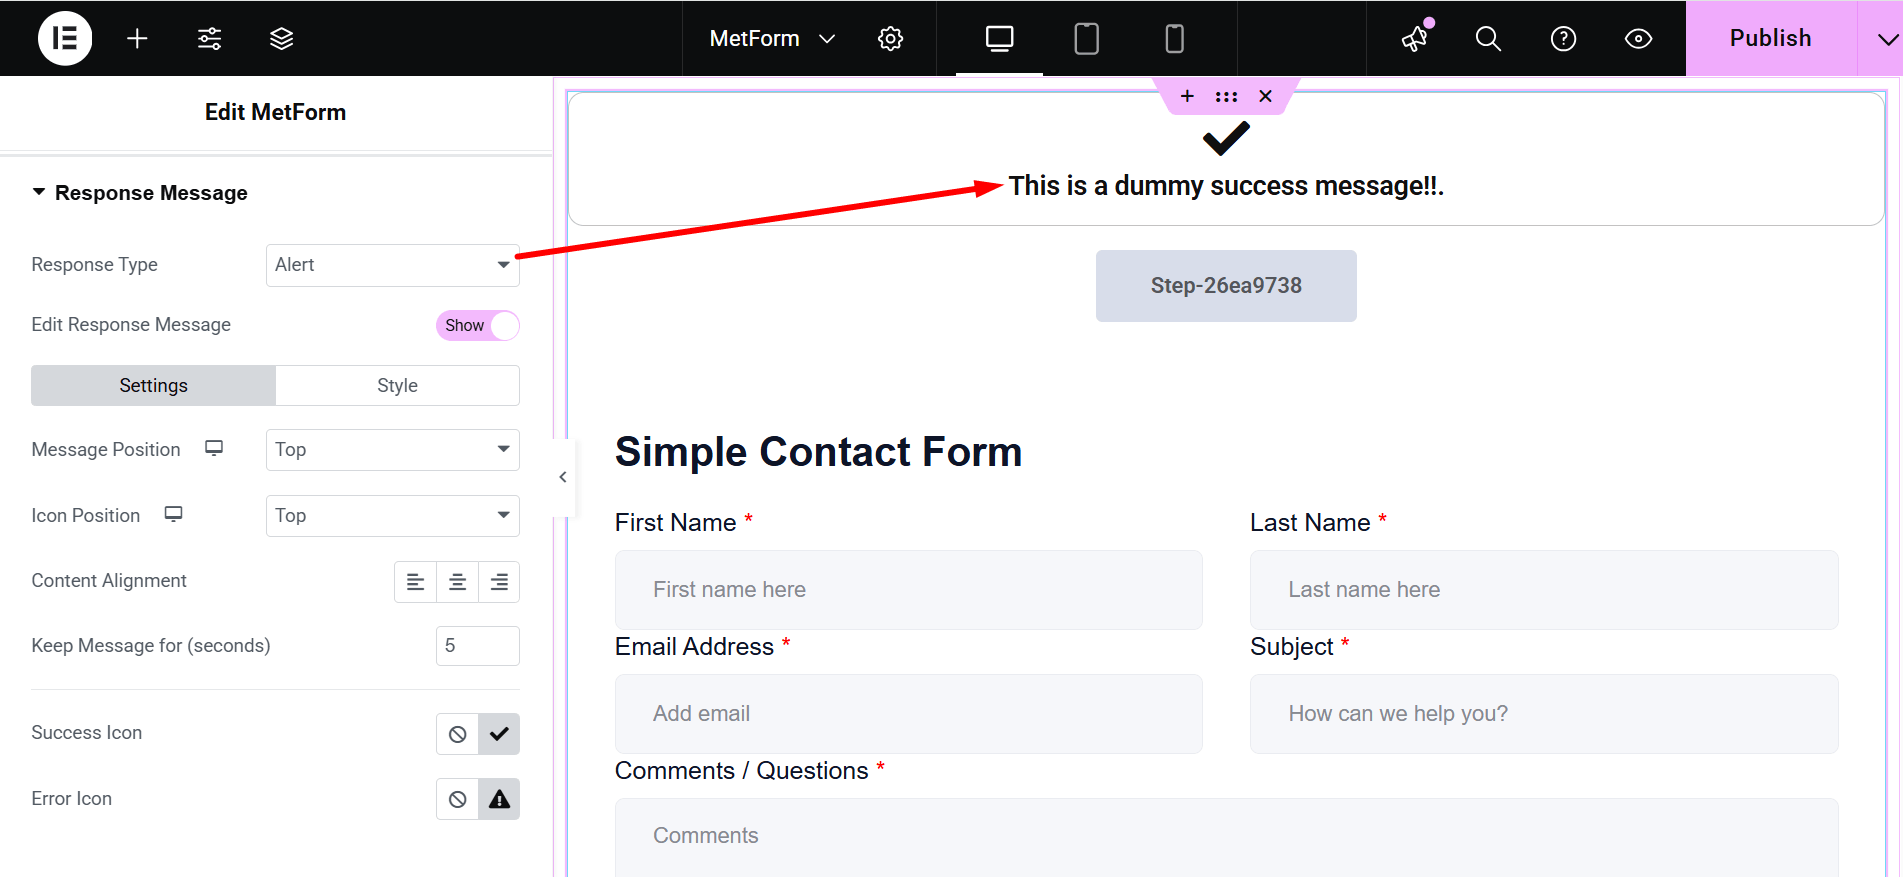

- Edit Response Message: Show/Hide. If you choose “Show”, there are two customization options: Settings and Style.
- Einstellungen:`
- Message Position: You can show the message on the Top or at the Bottom.
- Symbolposition: Choose the position Top or Side
- Inhaltsausrichtung: It lets you adjust the alignment.
- Keep Message for (seconds): Defines how long the message remains visible.
- Success Icon: Represents a visual indicator for successful actions.
- Error Icon: Displays a symbol to indicate an error or failure.
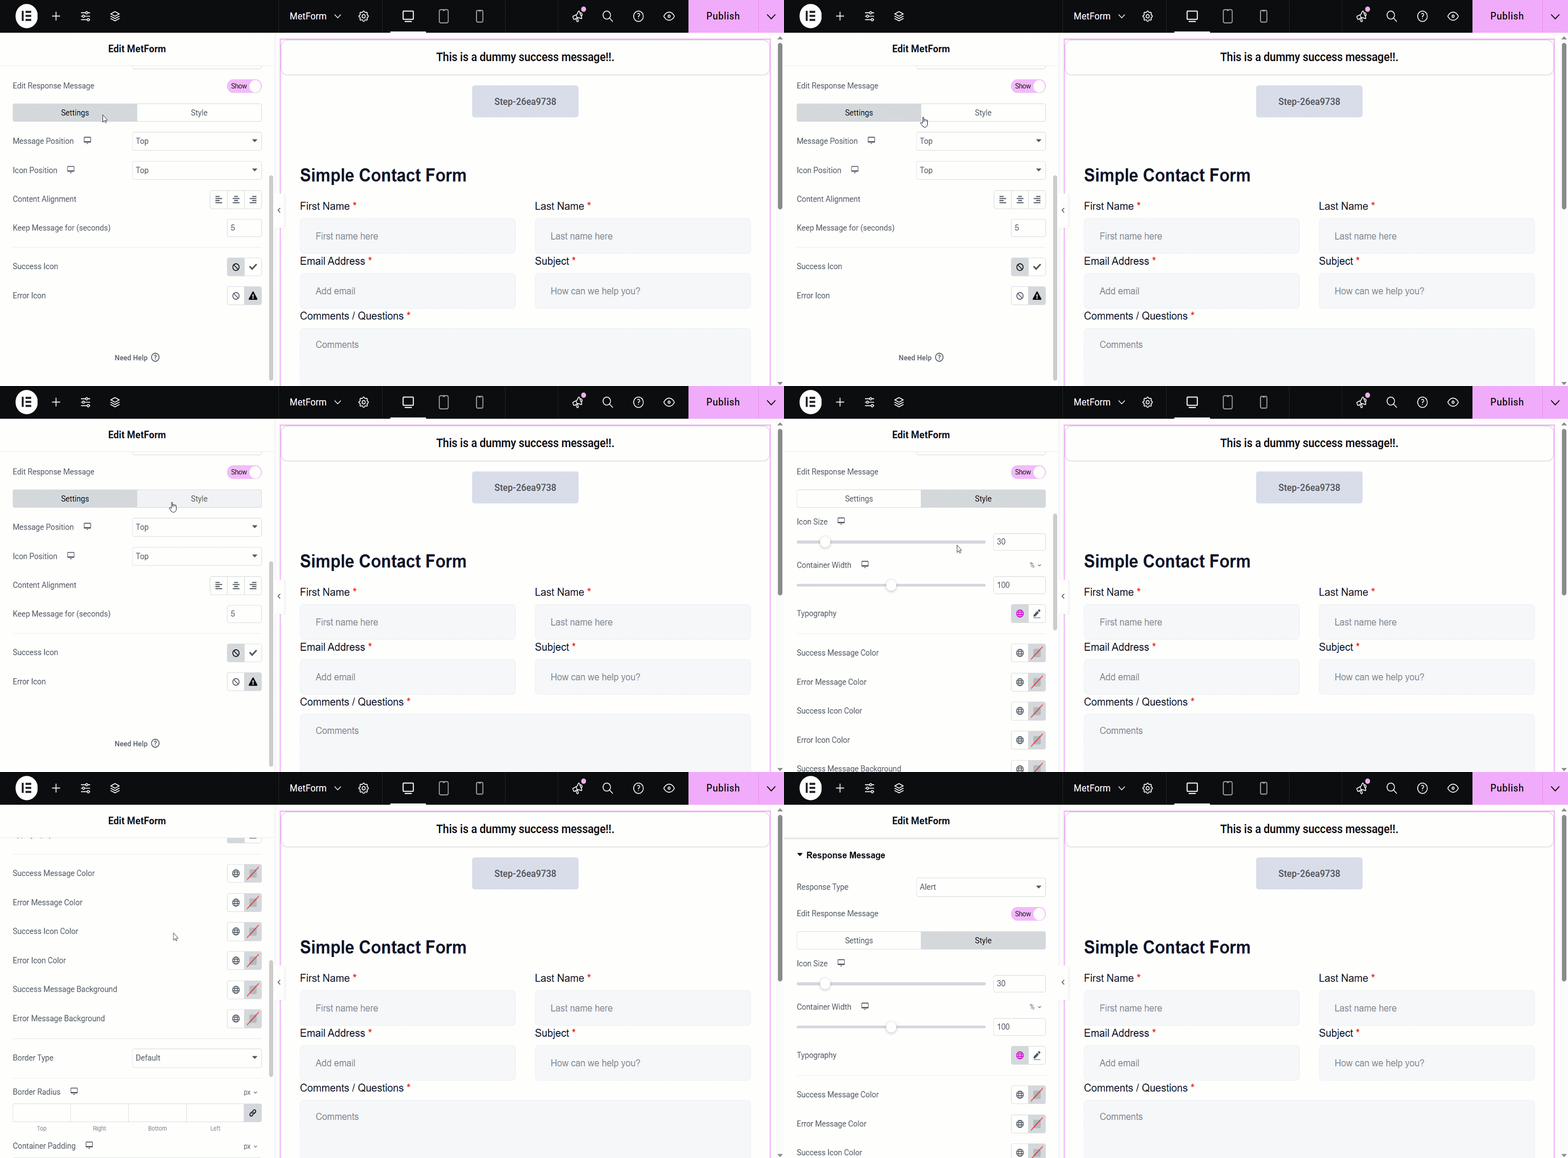
- Stil: Here you can change the colors of Typography, Success Message Color, Error Message Color, Success Icon Color, Error Icon Color, Success Message Background and Error Message Background.
- Symbolgröße: This bar lets you adjust the dimensions of the displayed icon.
- Behälterbreite: Sets the overall width of the message container.
- Randtyp: The available border types are solid, double, dotted, dashed, and groove.
- Grenzradius: Controls the roundness of the container’s corners.
- Behälterpolsterung: Sets the spacing inside the message container.
- Symbolrand: Defines the space around the icon.
- Containerrand: Specifies the spacing outside the message container.

Zu beachtender Punkt: Diese Funktion zum Bearbeiten von Antwortnachrichten ist nur für Benutzer der Pro-Lizenz verfügbar und funktioniert nicht, wenn ein Formular über einen Shortcode verwendet wird.
Zusätzliche Funktion
Above the Response Message section, you might have already noticed another amazing feature called “Enable Multistep”. By enabling this feature you can create forms with multiple steps.
Here’s the video guideline about creating a multistep form using MetForm 👇


