


WooCommerce sales notification module will let you show product sales notifications through a popup to your website visitors. You can make your site social proof by this notification. Now, ShopEngine has added a new module that is sales notification. By using this module, you can easily add a sales notification in a few seconds.
Quick Overview
This documentation will walk you through a no-code method of integrating sales notification in WooCommerce. For this guide, you need to install and activate ShopEngine’s free and pro verisons along with Elementor (free) and WooCommerce (free).
Here are the steps to follow while adding sales notification:
✅ Enable sales notifcation.
✅ Configure sales notification.
✅ Live notification for WooCommerce.
Also, you will learn the signification of using sales notification on your site.
Why use sales notification? #
You have already learned what a sales notification is. Now it is time to know the benefits of using a sales notification. Here are the reasons why you should use a sales notification:
- It will boost your sales.
- Will make your site social proof. As a result, you can gain the trust of your customers.
- You can encourage your customers to try out your product.
- User engagement will be increased.
Steps of adding sales notification in WordPress with ShopEngine #
Luckily, now you don’t need to use a separate plugin to add a sales notification to your WordPress site. ShopEngine provides a salgsmeddelelse module along with 17+ modules. Here are the easy 2 easy steps of adding a sales notification. Follow the following steps:
Step 1: Enable the WooCommerce Sales notification module. #
First, enter your admin dashboard and go to ShopEngine>> modules.
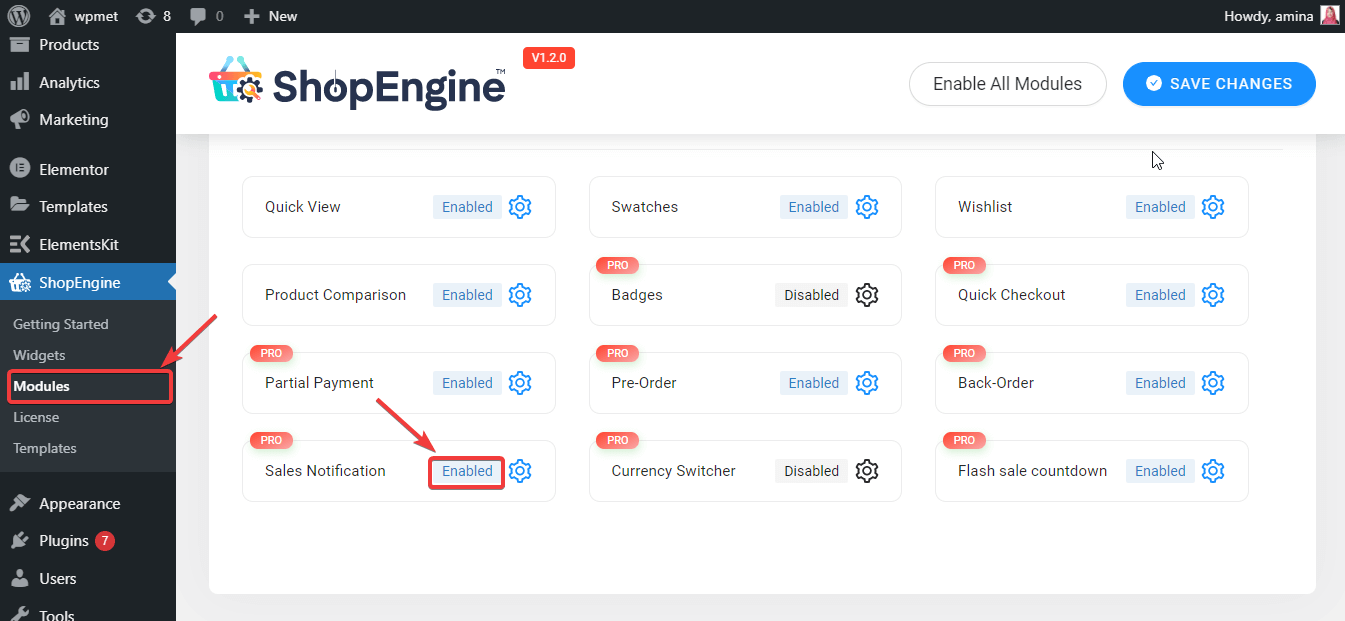
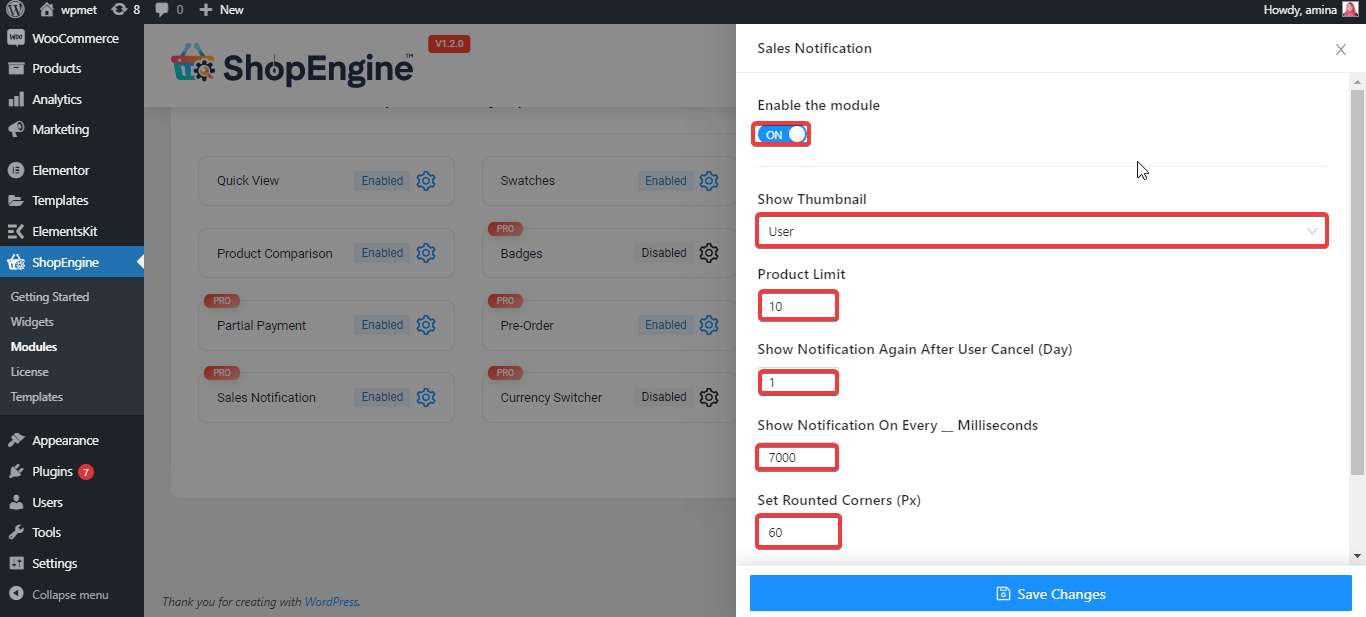
After that, enable the module and insert the following information in the gaps:
- Show thumbnail: Here you can set user or product.
- User: If you choose this option then your visitors can see the picture of your customer who has recently purchased your product.
- Product: It will show the purchased product.
- Product limit: You can enter the product limit for showing notifications.
- Show notification again after user cancel: This defines the time of showing notification after canceling it by site visitors.
- Show notification on every- millisecond: Visitors will see sales notification every 7000 milliseconds. You can customize it.
- Set rounded corner: You can set pixels for your sales notification. It will make your sales notification more round or square.
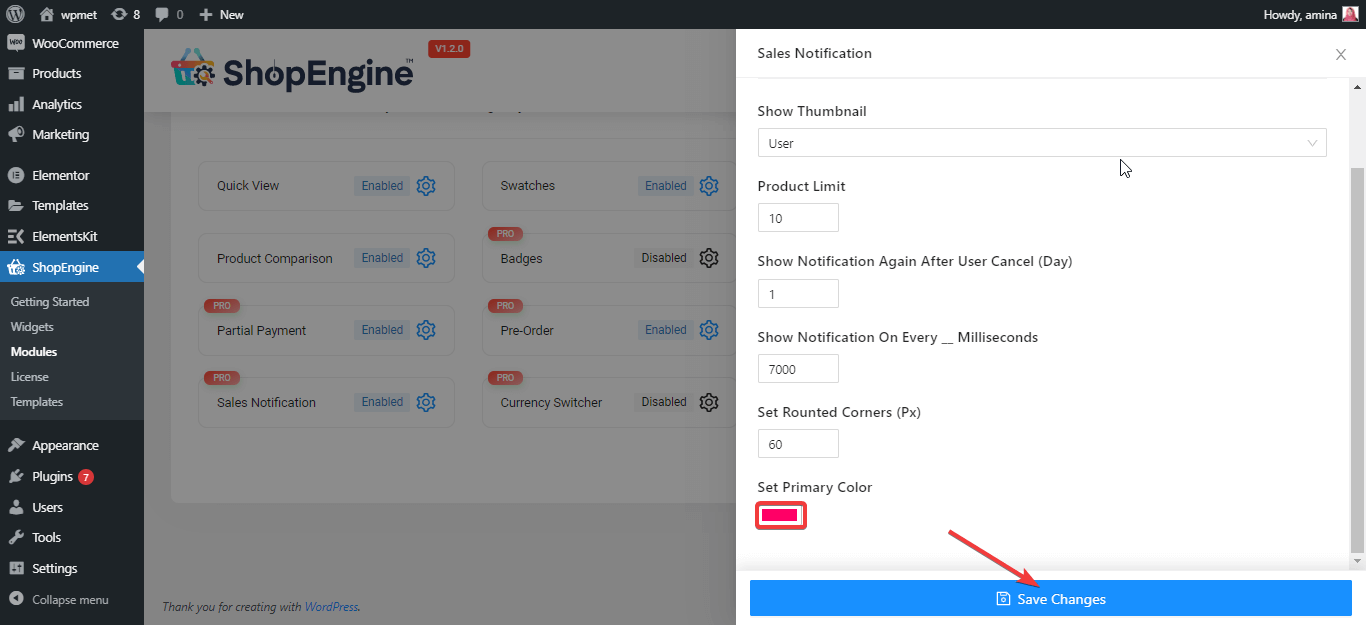
- Set primary color: Set color for your sales notification.
Finally, press the save changes button and make your notification live with ShopEngine, WooCommerce sales notification plugin.
Step 2: visit your site. #
Now, visit your site and see how it works. Here is the outcome of using a sales notification module of ShopEngine.
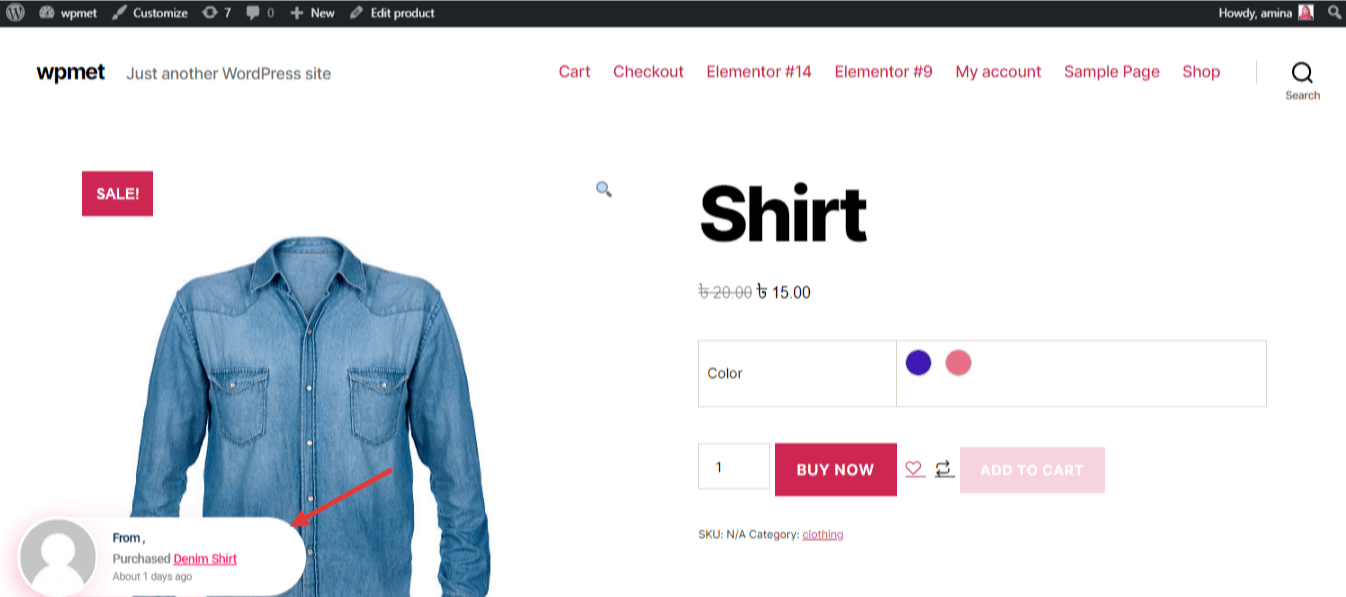
Bemærk:
Sales notification will only show after purchasing a product. Without purchasing, it can’t get data to produce a notification.


