When you are offering a flash sale for your WooCommerce store, showing the countdown is a must. It will encourage potential customers to make their purchases before the end of the countdown.
With ShopEngine’s ‘Flash Sale Countdown’ module, you can enable flash sale countdown in any WooCommerce store. You can customize the type of flash sales too.
Quick Overview
ShopEngine comes with a Flash Sale Countdown module that allows you to add a sales countdown timer in minutes. This process requires zero coding. Since this is a premium feature, you need both its free and premium versions.
Plugins påkrævet: Elementor (free), WooCommerce (free), ShopEngine (free & pro)
This complete process requires a few steps to follow. First, enable the module and make the necessary settings. After that, integrate this with targeted pages with flash sale widgets. Also, customize according to your brand.
How to Enable Flash Sale #
Follow the step-by-step guide to learn how to add countdown timer in WordPress website –
Step 1: Enable Flash Sale Countdown #
Go to WordPress Dashboard => ShopEngine => Modules
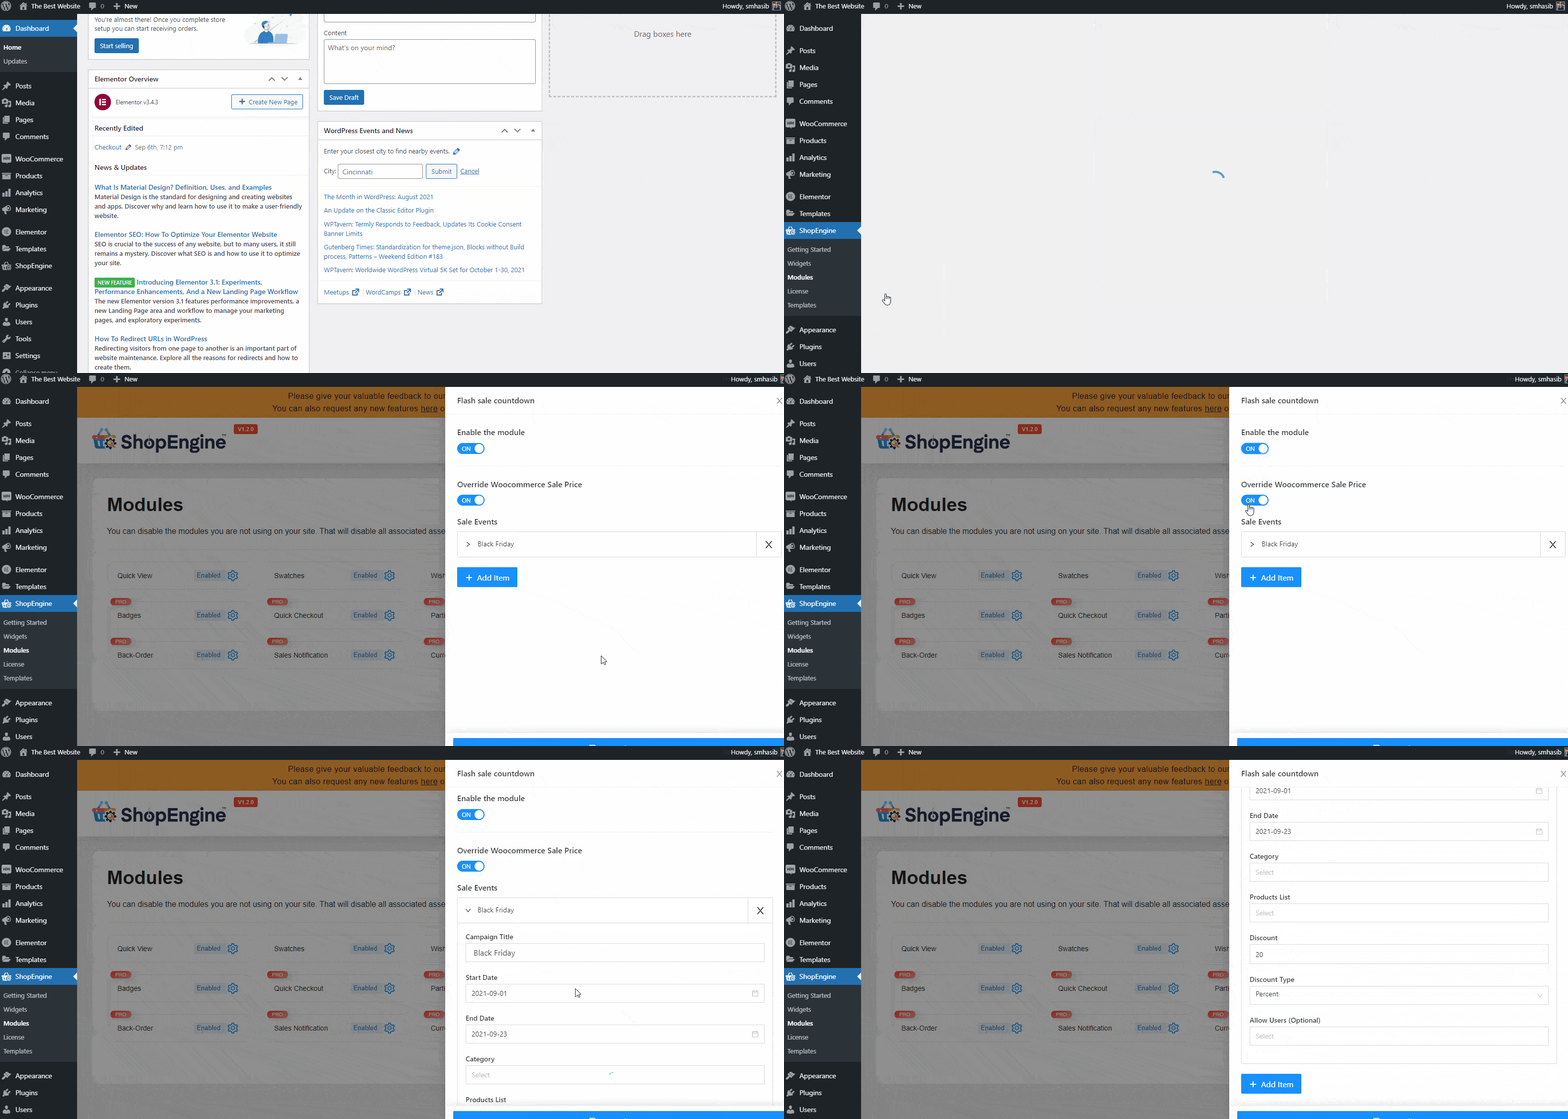
Aktiver Flash Salg Nedtælling module from the list. You will see different options for the flash sale countdown. You can select to overwrite WooCommerce sale price.
Step 2: Set the Flash Sale Countdown Campaign #
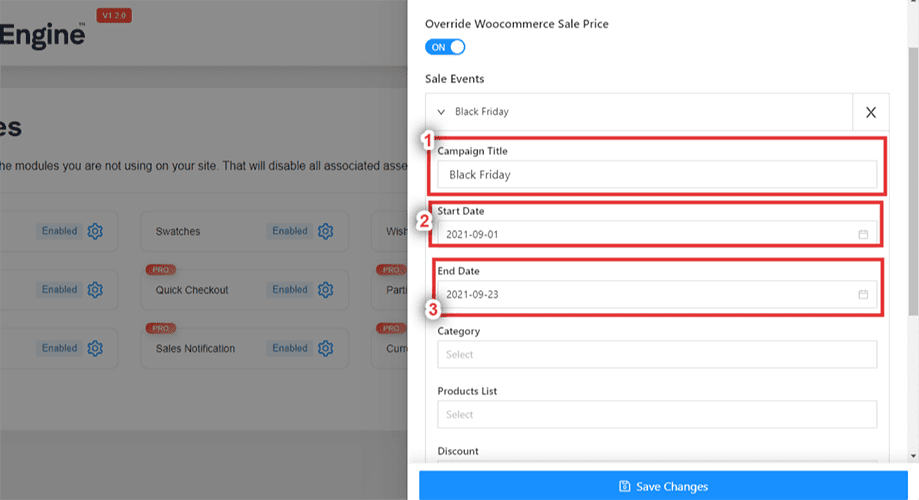
Give the Campaign Title => Vælg Starting Date and => Ending Date for eCommerce flash sale countdown.
Step 3: Select the Type of Flash Sale #
Vælg nu kategori for which you want to offer flash sale. You can choose multiple categories. Also select the product list.
Select the discount type from two options – Fixed and Percent.
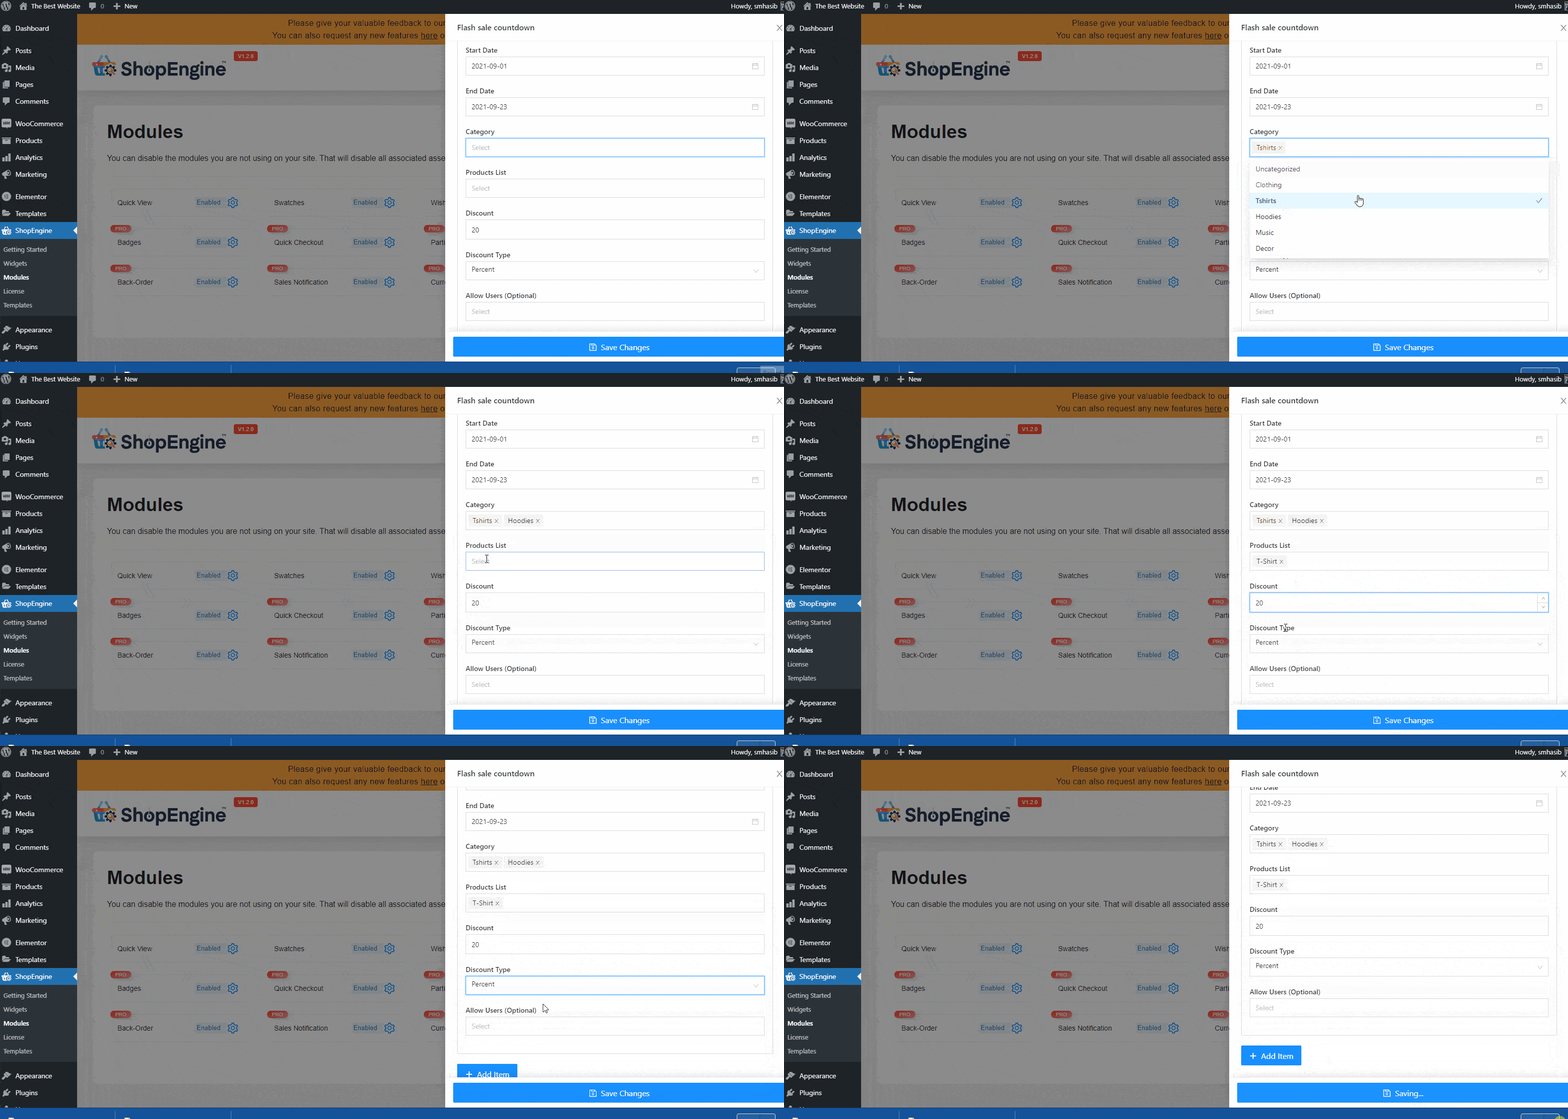
Set the amount of discount. Hit the ‘Gem ændringer' knappen.
Step 4: Choose the Page For Flash Sale Countdown #
Most WooCommerce stores used to show the flash sale products on the home page. However, you can show sales countdown timer for other WooCommerce pages of the store as well.
Let’s see how you can add the ‘Flash Sale Countdown’ for the Shop Page.
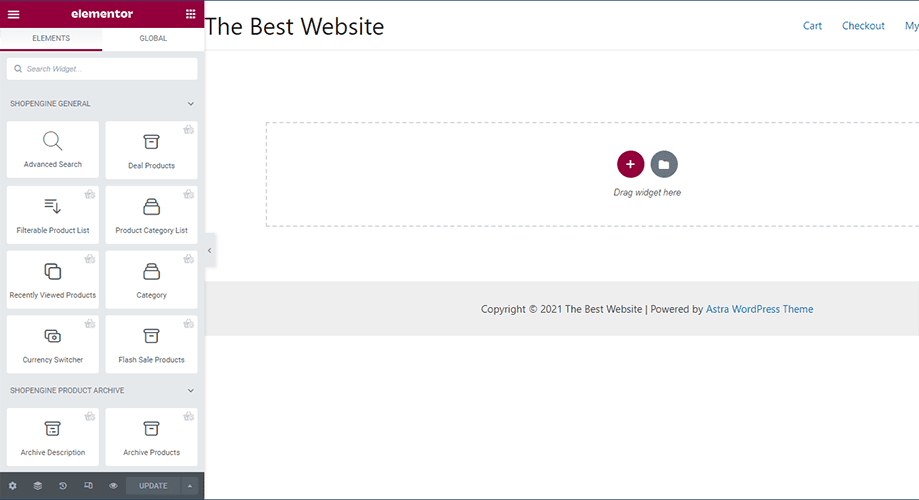
Gå til ShopEngine => Templates => Choose Shop =>Select the Template and choose Edit with Elementor.
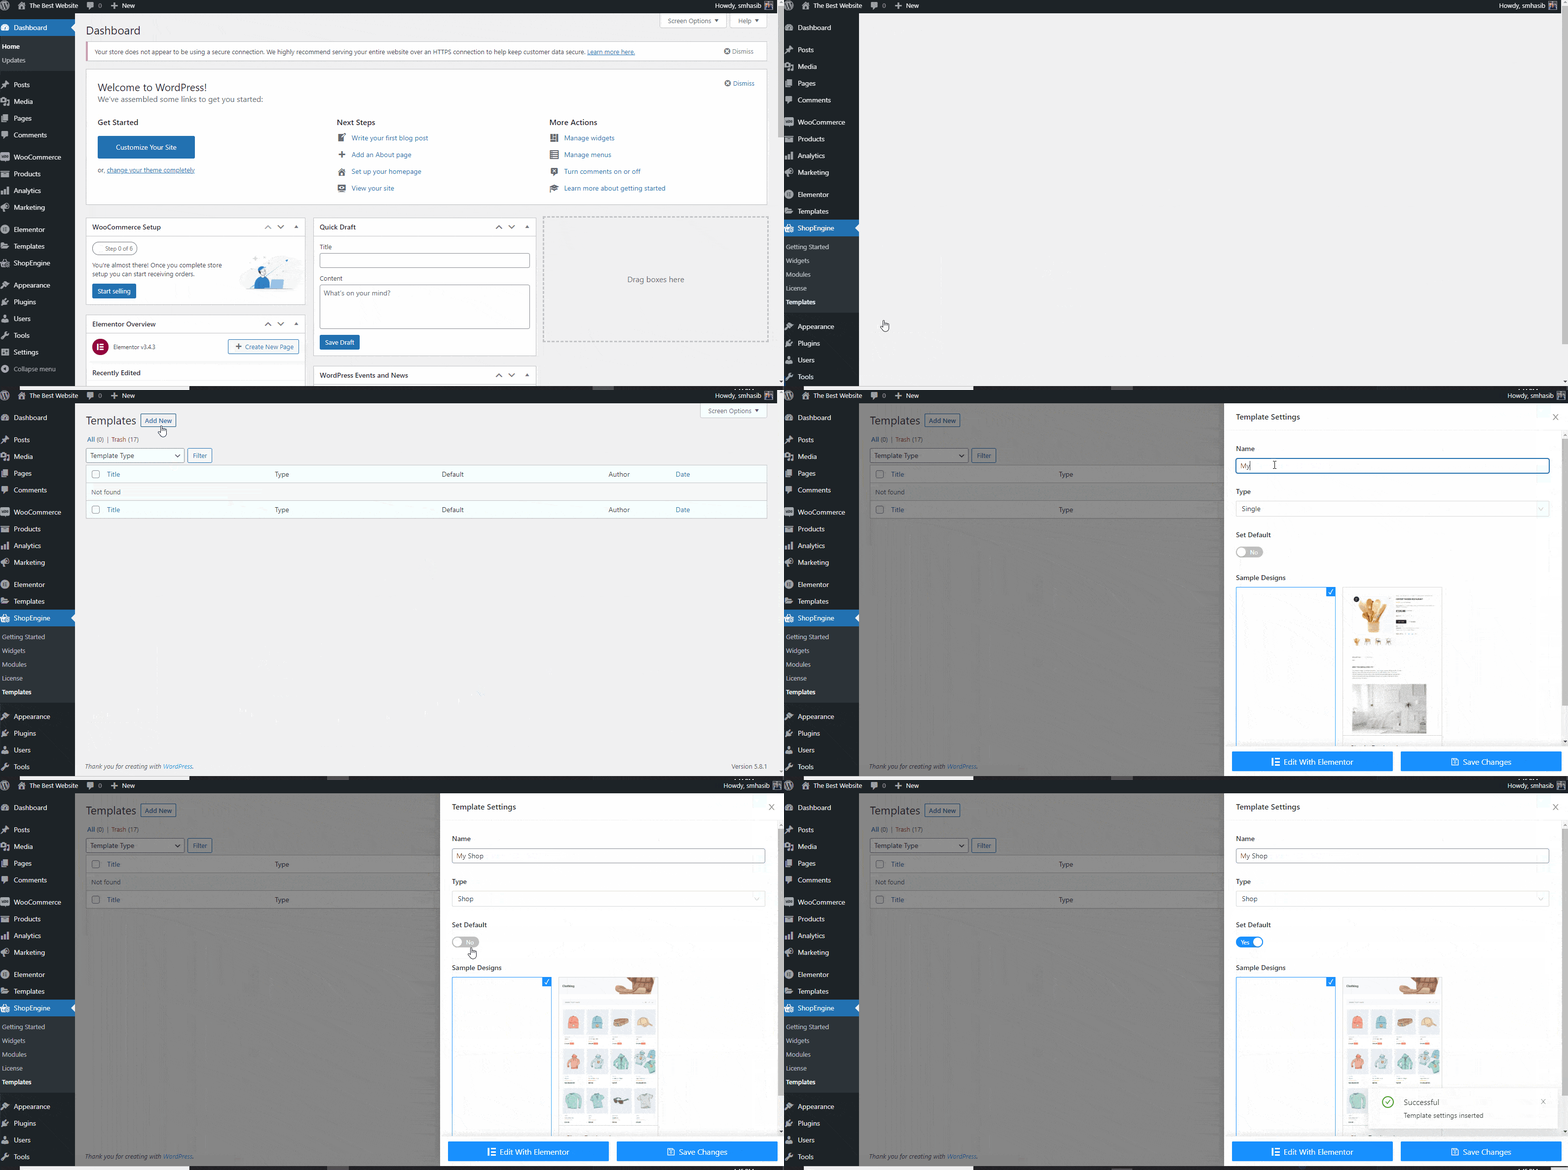
Now you will see a page like the following image –
Step 5: Add Flash Sale Products Widget #
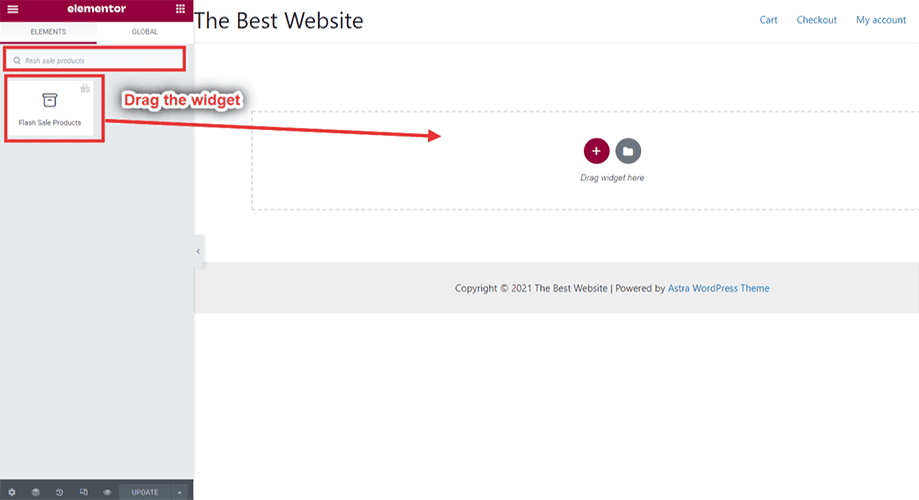
On the left bar, search for ‘flash sale products’ widget. Træk og slip the widget in the shop page.
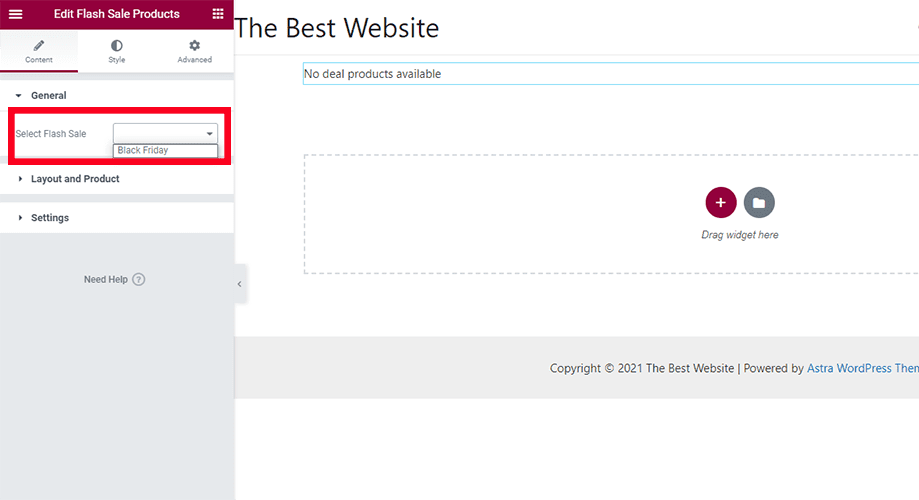
Nu select the campaign. Here, we have selected Black Friday campaign.
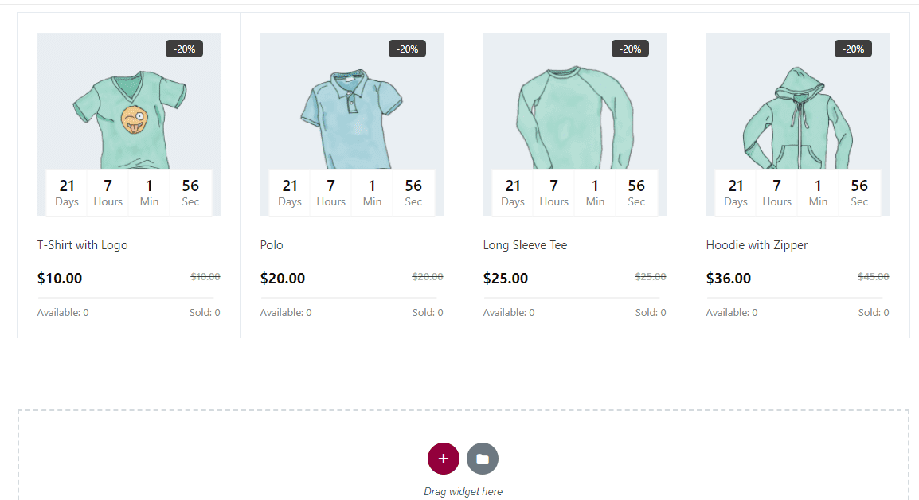
After selecting the campaign, you will see the flash salg nedtælling for the product.
Step 6: Customize the Flash Sale Countdown Style #
You can change the flash sale widget settings from the left bar. Choose Content and you will see different options.
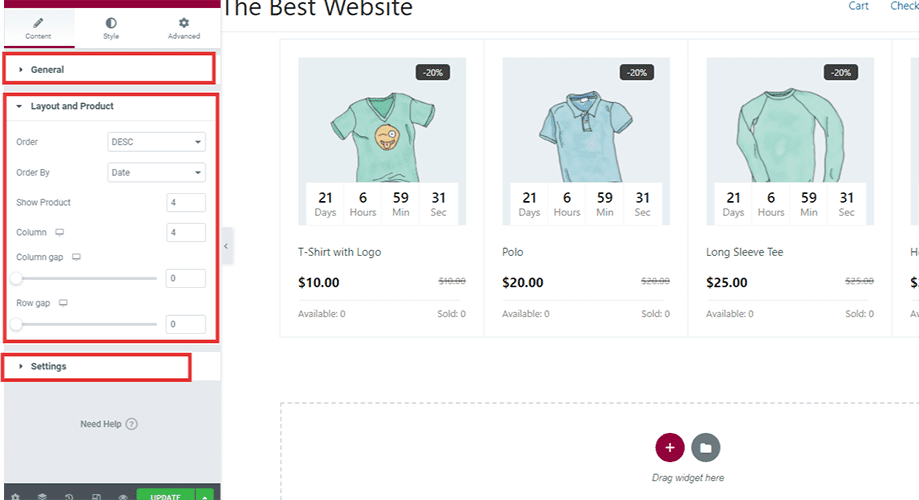
Bestille: Choose the product order in ascending or descending style.
Bestil efter: Select the product order based on date, product ID, price, and more.
Vis produkt: Choose the number of products you want to show.
Column and Row Gap: Customize the column and row gap if you need.
You will also have the Style tab and Advanced tab in the left bar. Check them out if you need to customize the shop page.
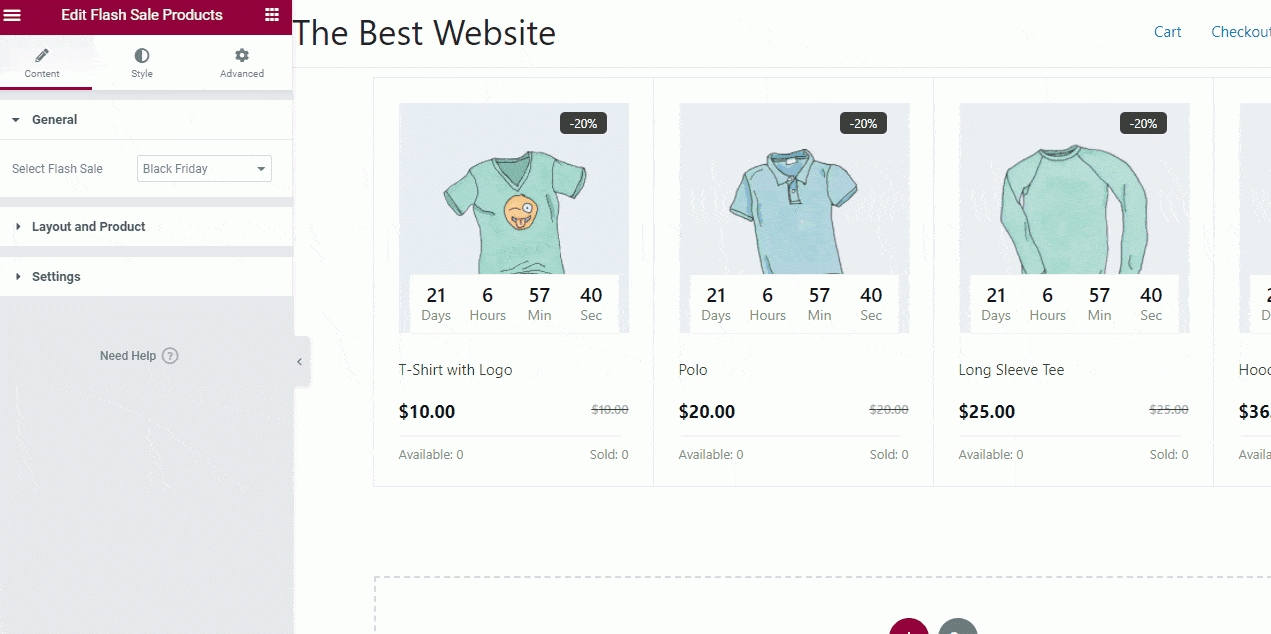
If everything is okay, update the page and publish to live your WordPress countdown timer.
Now your visitors will see the flash sale countdown when they are visiting the shop page or the product archive page.


