

Your website plays the role of a physical store in an online platform. It’s the most crucial gateway through which your audience interacts and engages.
Thankfully, with the blessing of ongoing technological advancements, you will get to enjoy new features now and then in Elementor. Here Elementor glass morphism is a one-of-a-kind feature to induce elegance in your website design. But, do you know how it works?
No worries, if you don’t. In this blog, we’ll demonstrate the codeless guide on how to add to the frosted glass screen effect in Elementor along with its opportunities. So, let’s explore how to elevate your web interface.
What is the Glass Morphism effect in Elementor?
Glassmorphism is a unique feature that adds a frosted glass-like appearance to the background of your website. It aims to introduce a dazzling website background with blurring effects, transparency, and highlights.
Perks of displaying Elementor glass morphism effect in WordPress
Do you know that 59% of the audience prefers to scroll through beautifully designed web pages rather than simple ones?
It means without integrating a tempting interface, your website will be unattractive to almost two-thirds of your web audience. That’s why you should focus more on unique effects and customizations that will redefine your Web UI. One such customization is the frosted glass effect because it will induce professionalism and make pricing along with other pages more appealing to your visitors.
Besides, frosted glass UI helps in accomplishing many more business opportunities. Here are the main benefits of implementing the glass morphism effect in WordPress:
- You can highlight certain sections with this glass effect to guide your audience to important segments.
- It helps to pull off dynamic and unique web pages by adding a blurring effect to the Elementor background.
- This can enhance readability by adjusting the color contrast of your text and background.
- It introduces a sense of transparency into your web design.
- The glass effect can boost device responsiveness by making it visually appealing to different screen sizes.
- It also unlocks branding scopes adding multi-layer glass effects with perfect web copies.
Step-by-step guide on adding frosted glass effect in Elementor
There are two methods of adding the glass screen effect in WordPress. One is through CSS or coding and another is using Elementor addon for Glass Morphism. Since the Elementor addon is the easiest method of all, here we’ll demonstrate the complete system using one of the popular plugins. So, let’s jump in:
Step 1: Install and activate the glass-morphism plugin
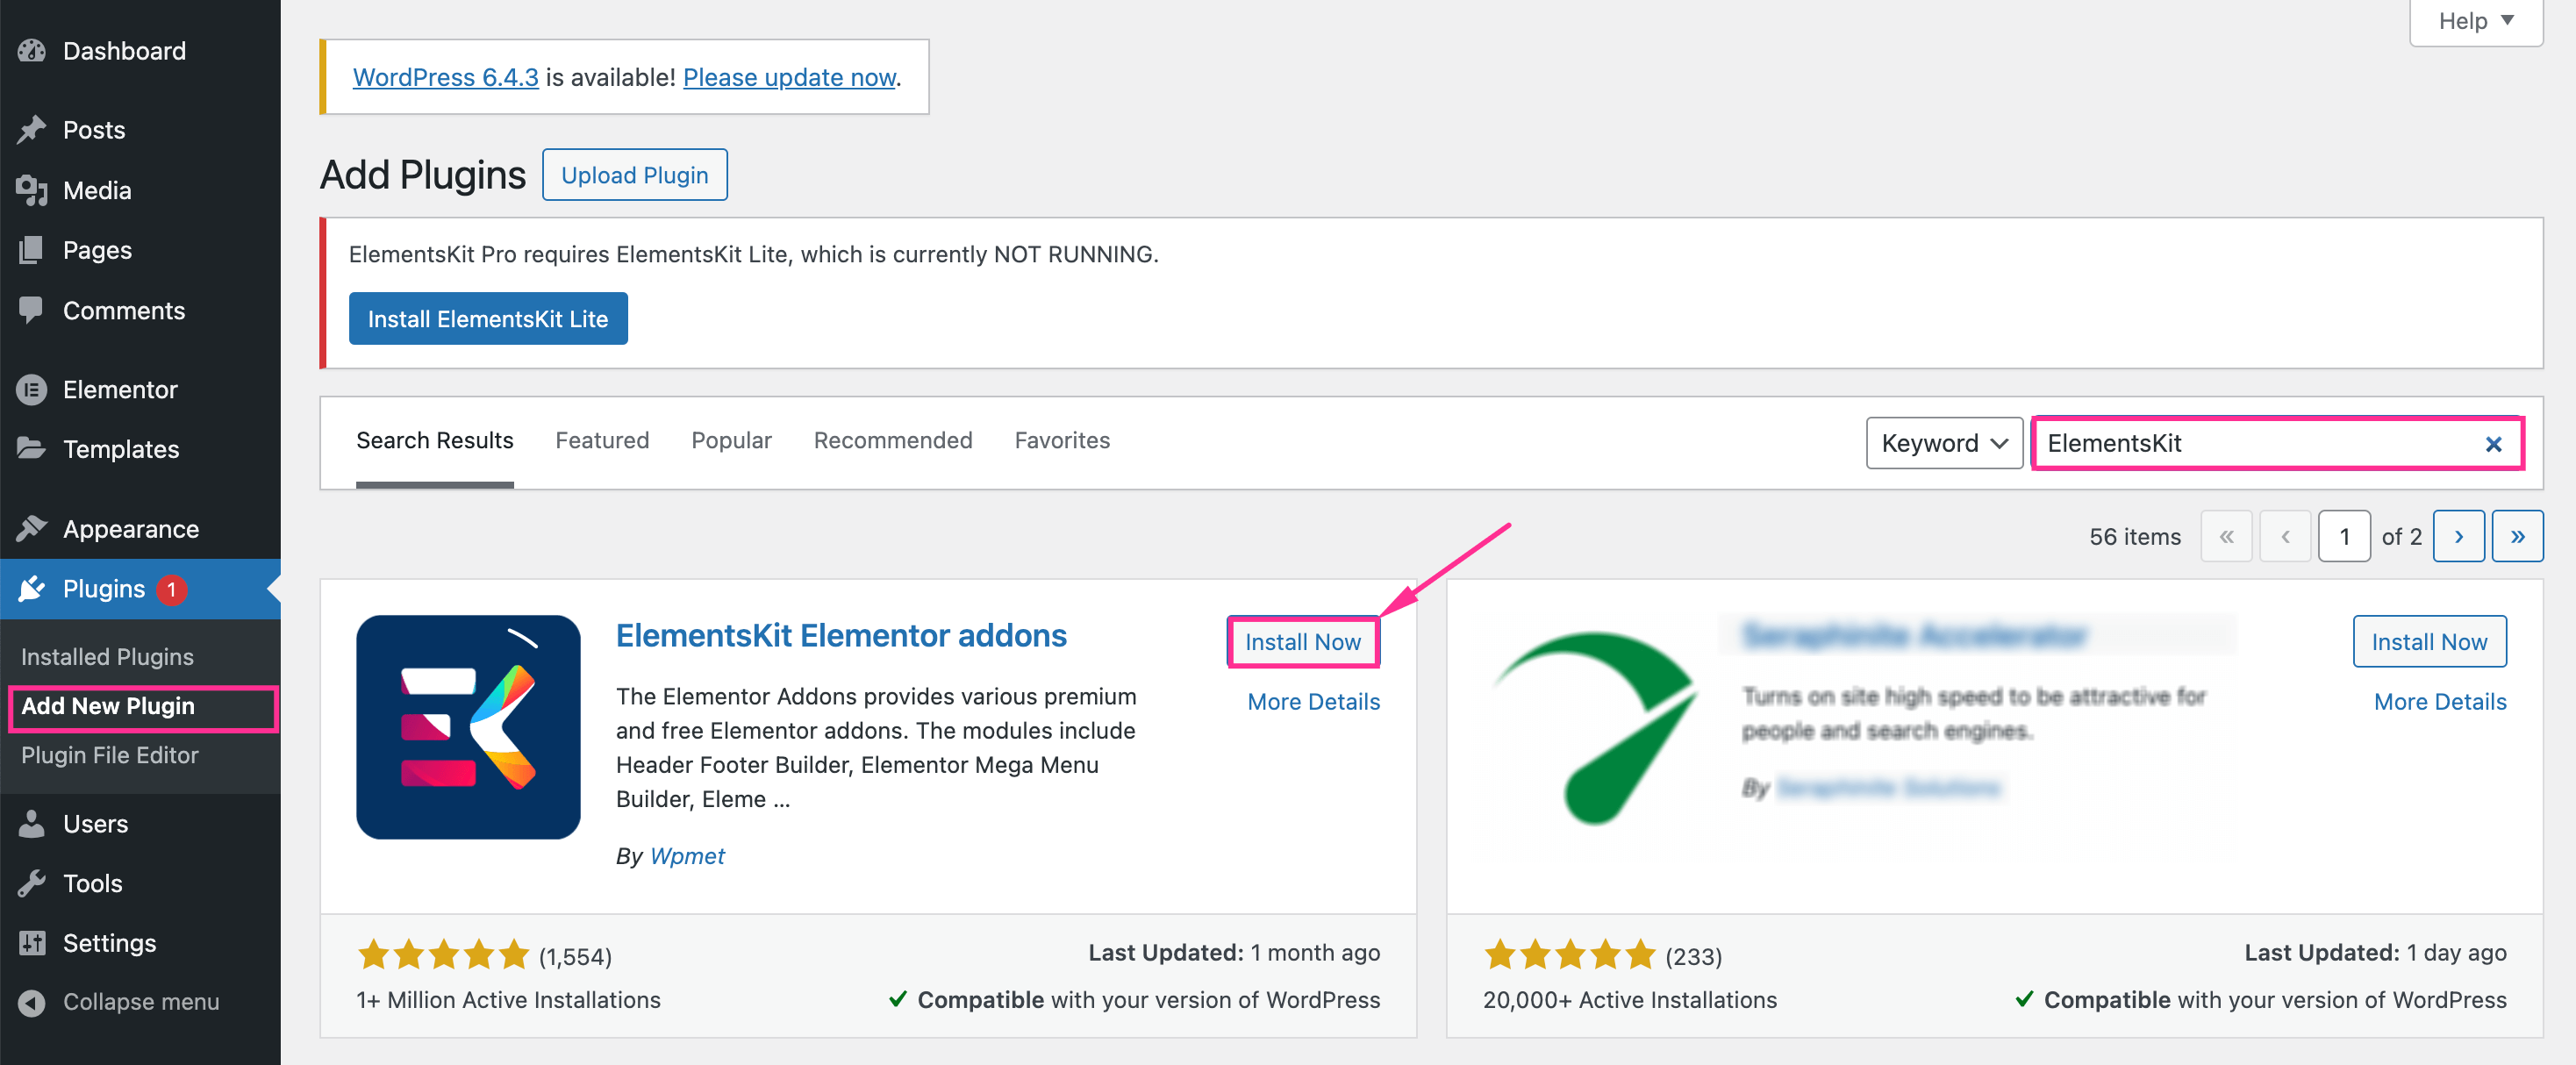
To add glass morphism effects in WordPress, you will need a plugin that includes this feature. Luckily, there are numerous options in the WordPress ecosystem. However, here we’re using ElementsKit, a plugin admired and used by millions considering the flexibility in use and customization. Since it’s an Elementor addon, you need to install Elementor first.
After installing Elementor, navigate Plugins >> Add New Plugin and search for ElementsKit. Then hit the “Install Now” button and activate it after completing the installation.
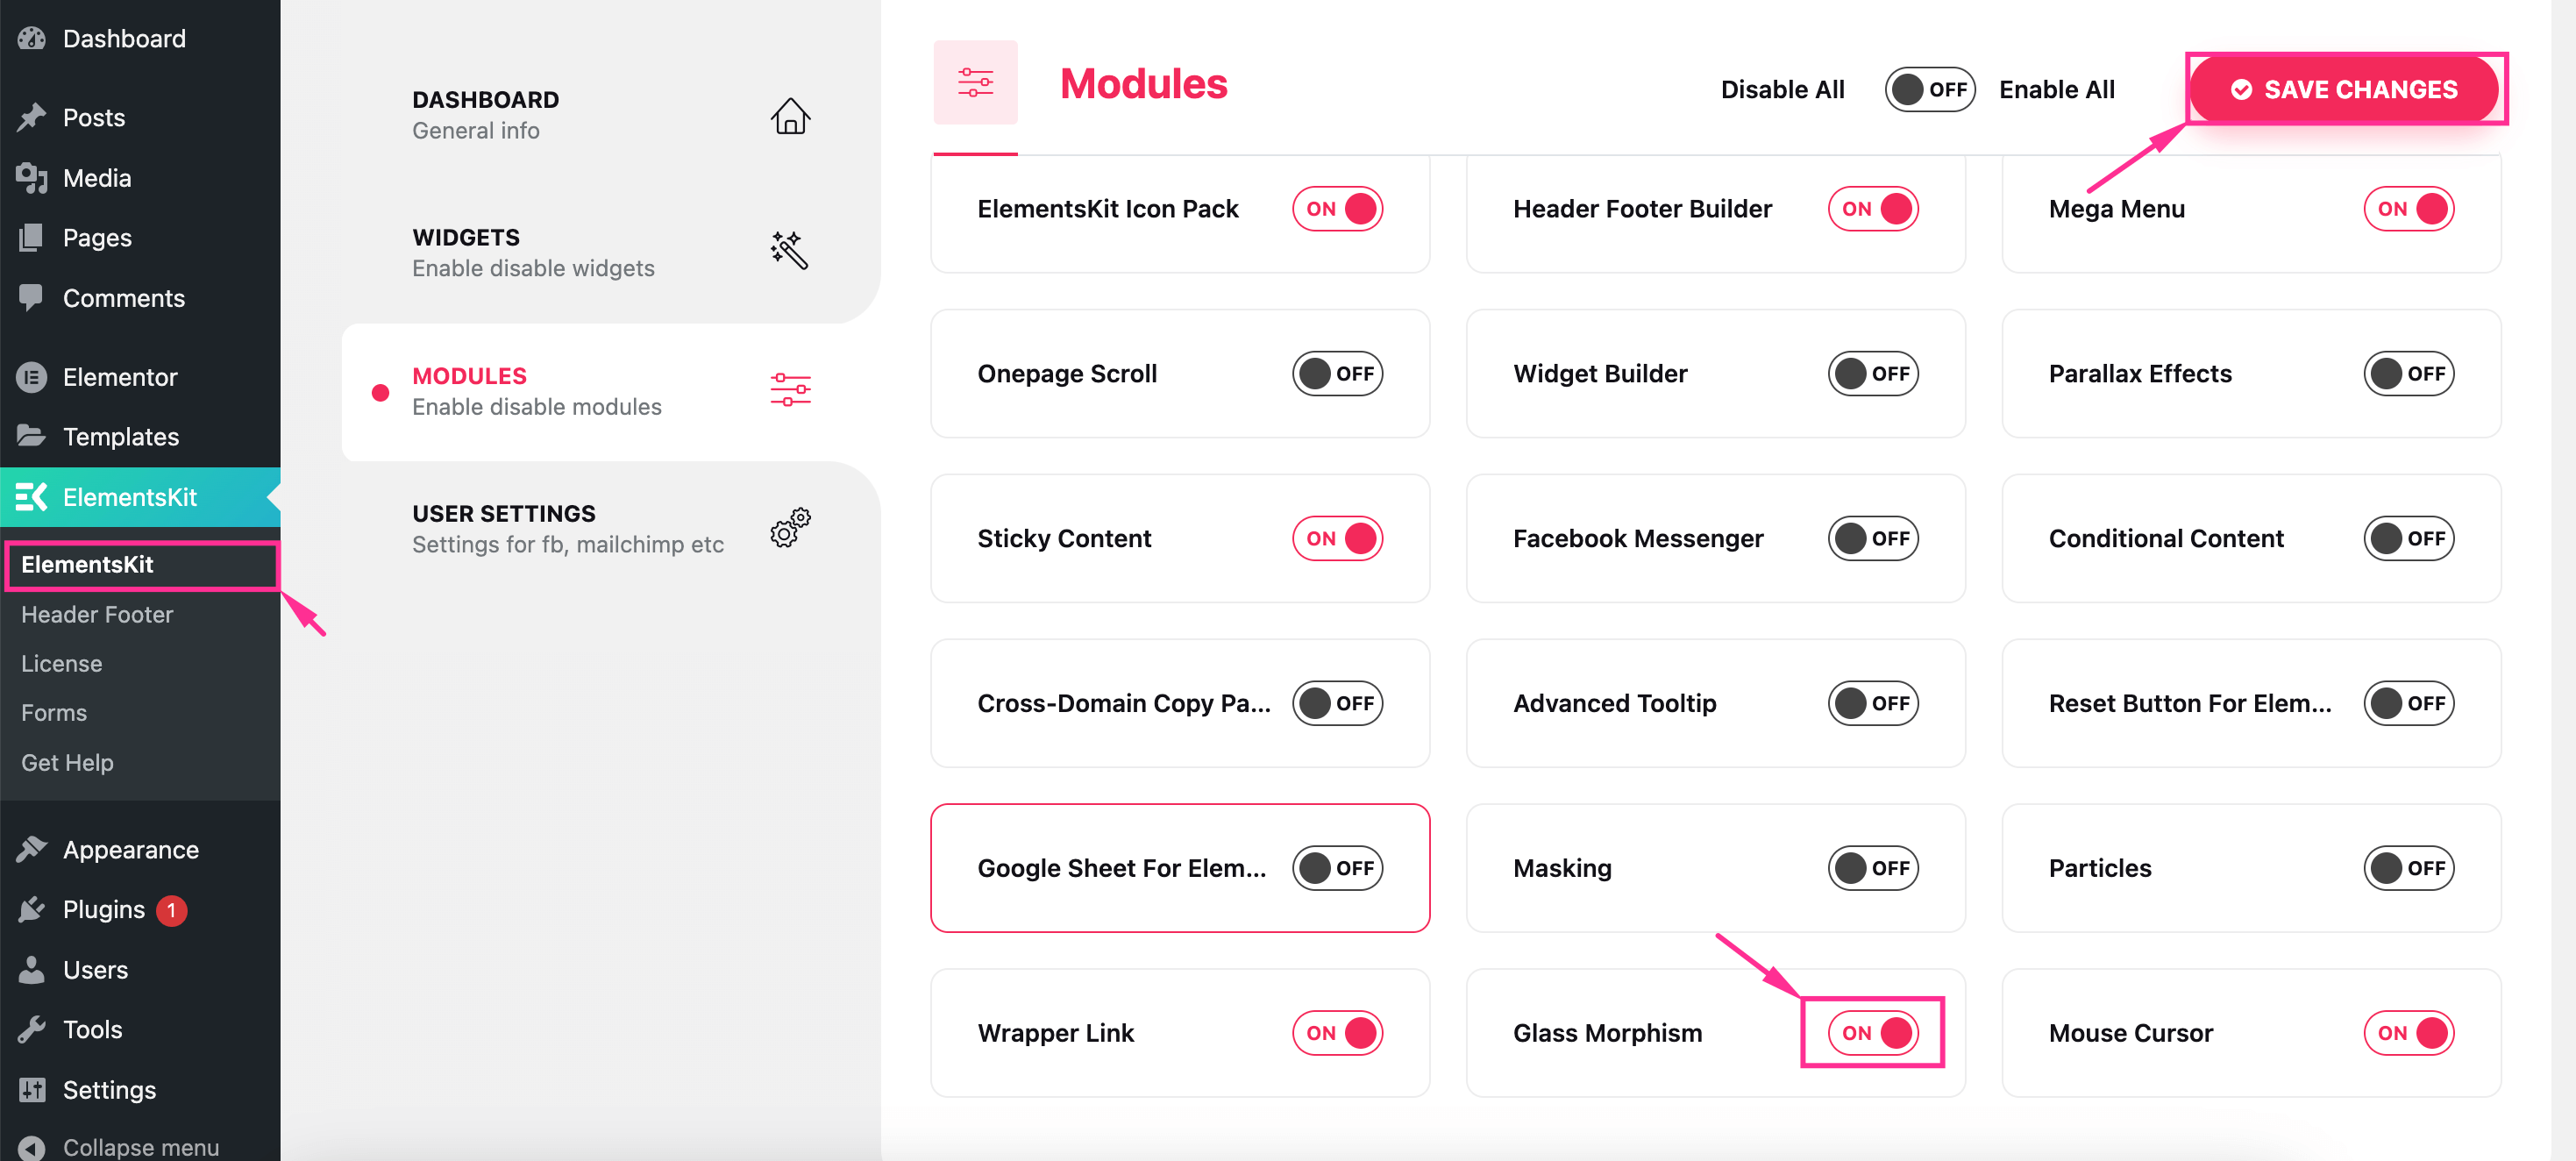
Step 2: Enable the Glassmorphism module.
In the second step, you need to activate the Glass Morphism module. For that, go to ElementsKit >> ElementsKit and hit the “Modules” tab. Then enable the “Glass Morphism” module and press the “Save Changes” button. Thus, all the effects of Glass Morphism will be active for your website.
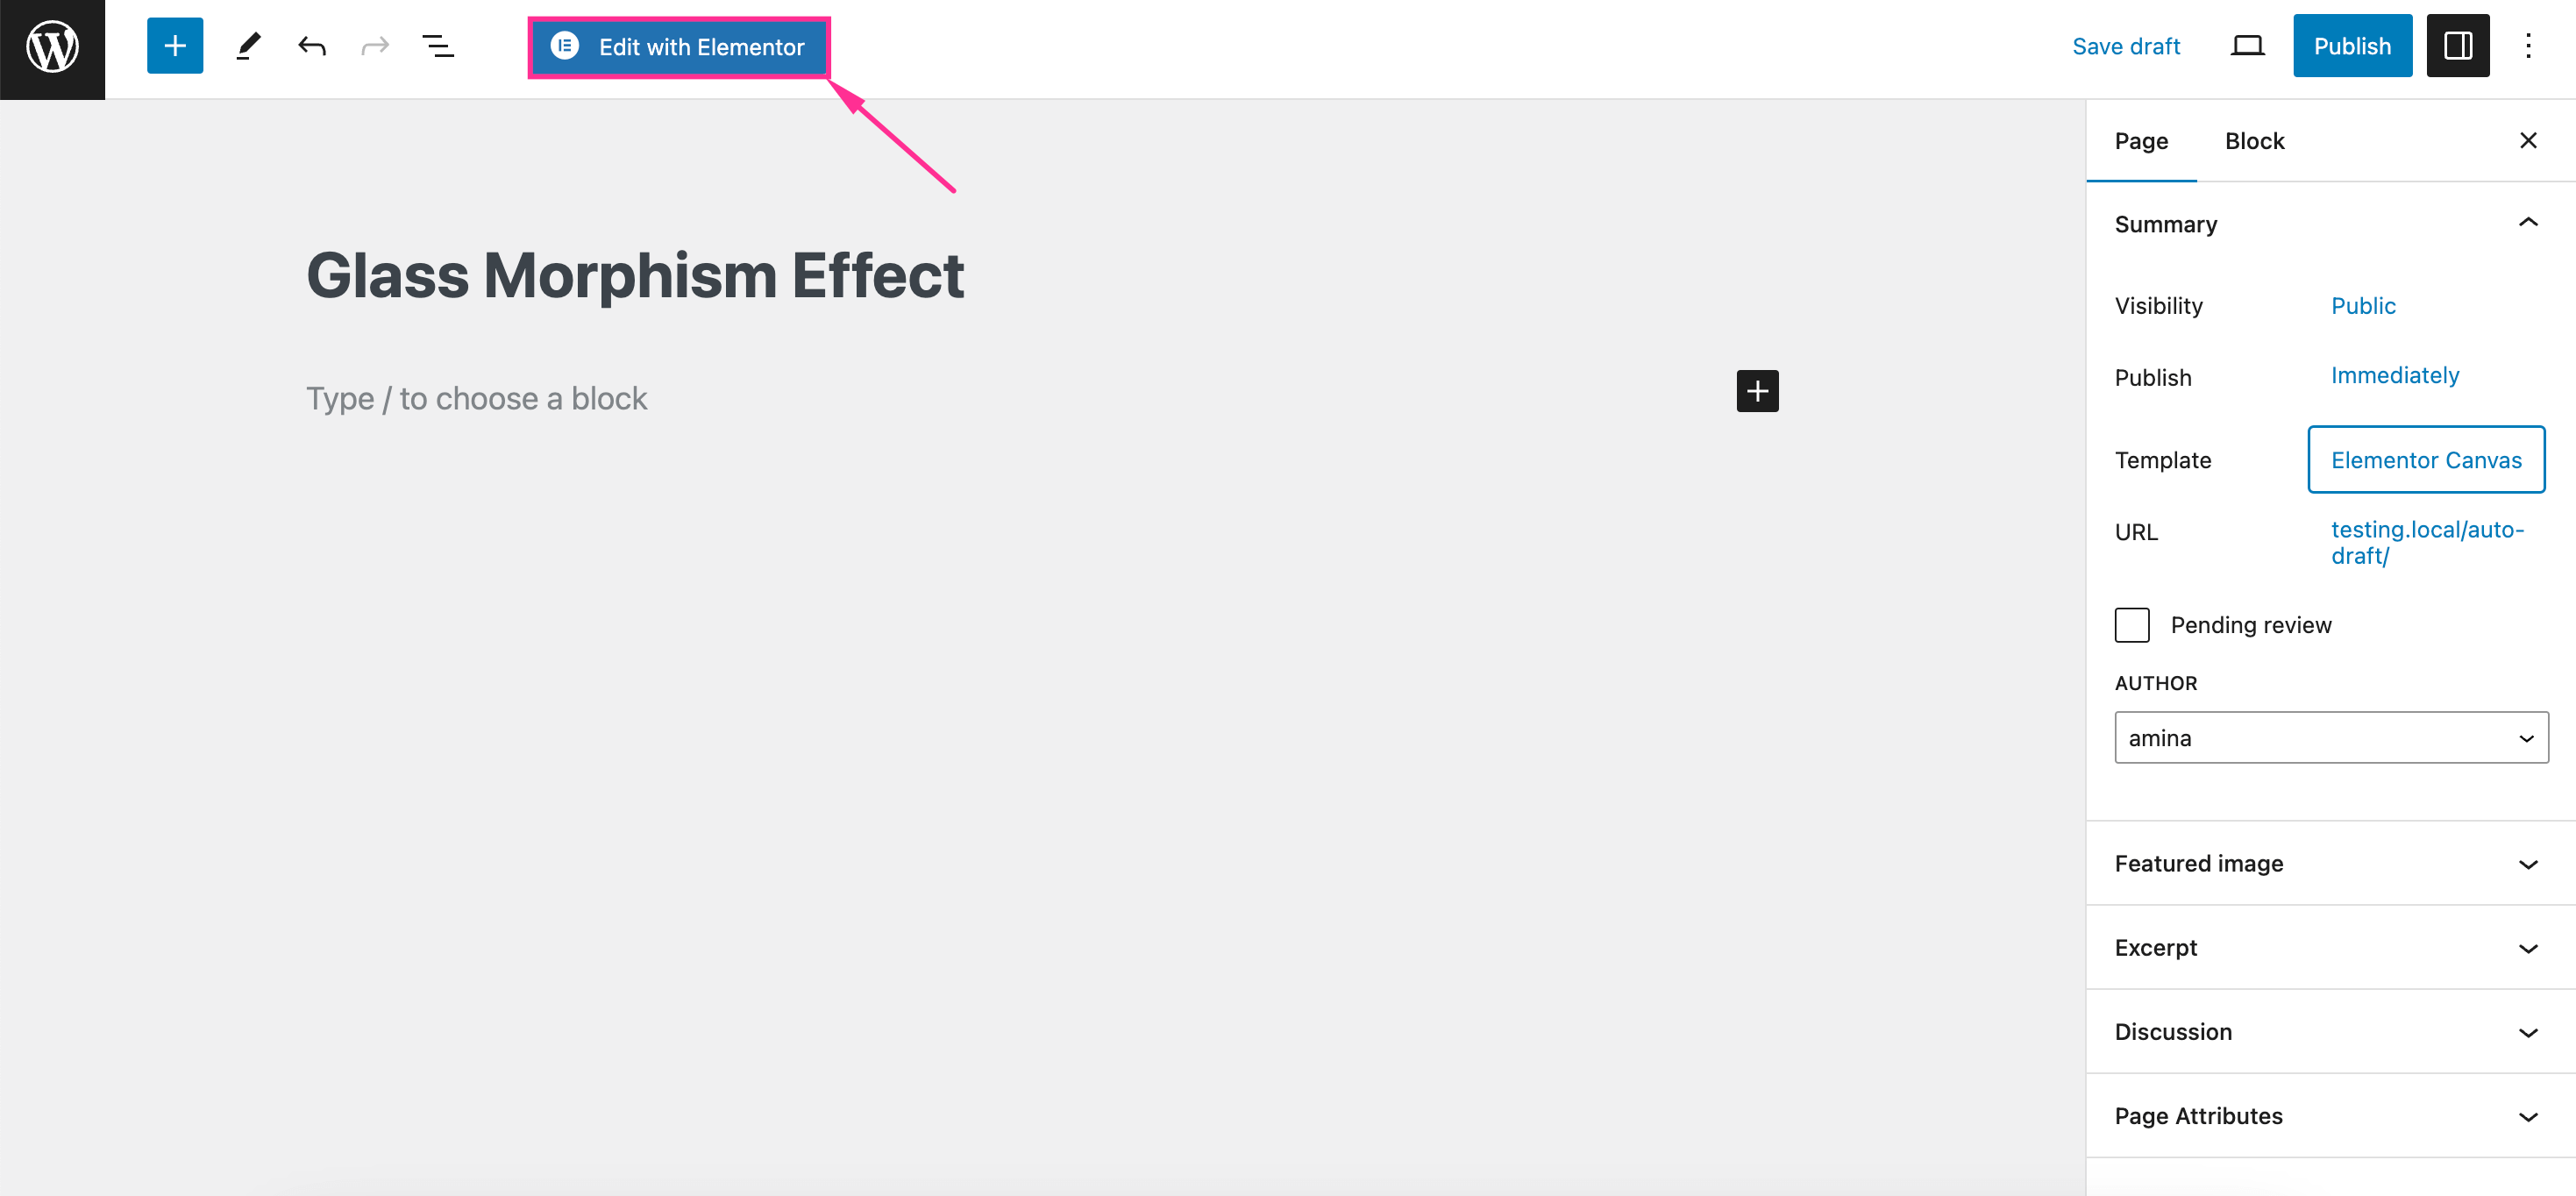
After that, visit the page where you want to add the Glass-morphism effect from the Pages tab and press the “Edit with Elementor” button to access the Elementor editor. From there, you can add enticing frosted glass after effects to any section of your Elementor page.
Step 3: Display the glass effect on your site.
This is the most important step for adding the Elementor Glassmorphism effect. In case of adding a Glass Morphism effect, select a section and navigate to the “Advanced” tab. Then scroll down and press the “Edit” icon of glass morphism. There you will get to see the following effects that will let you adjust the Glassmorphism background according to your desire:
Blur: This effect adds a multilayered, transparent, and glass-like effect to your background. The more you increase the “px” value the more blurring effect will be added to your selected section. So, adjust the blurring effect from this option.
Brightness: This option allows you to brighten the background of your glass screen effect. Insert a certain value or adjust the toggle. You can enjoy a real-time editing experience from ElementsKit’s Glass Morphism module.
Contrast: Color contrast is the most important factor while designing elements of your website. It will make your design visually appealing and maintain the right contrast among different elements and make your design visually appealing.
Saturation: This option lets you customize the color intensity by dragging the slider from left to right. You can also directly enter a value for this section. The color intensity will be higher the more you drag the slider to the right or insert a high value for saturation.
Grayscale: It defines how much gray effect you want to induce in your design. The more you increase the pixel value, the more it adds a gray effect to your design. From here, select the value for Grayscale and give an appropriate appearance.
Hue: You can also adjust the hue of the glass effect. Hue mainly refers to the option that controls the intensity of two or multiple color blends. Through this option, you can tone up or down the brightness of different color blends.

FAQ
How do you blur the background in Elementor?
ElementsKit’s Glass-Morphism offers a blurry effect along with many other options that you can adjust in a real-time editing interface. With this tool, you can add blurriness to your Elementor background by dragging the toggle button from left to right.
✅ Guide to designing WordPress toggle content in Elementor.
Summing up
ElementsKit’s Glass Morphism effect can breathe new life into your web interface. Whether you’re a neophyte or an experienced web designer, this guide will introduce a straightforward and friendly approach to displaying a mesmerizing glass morphism effect on your WordPress website. Besides, it doesn’t require any coding expertise. So, follow this guide and transform your web design into a visually appealing one by bringing frosted glass morphism effects to Elementor.

Leave a Reply