


Upgrading to ShopEngine Pro gives you access to dozens of features, including Quick Checkout, Partial Payment, Flash Sale, Multi-step checkout, and a larger set of pre-designed templates.
Purchase, Install and activate ShopEngine Pro #
Requisito previo:
Install the following plugins before you start using ShopEngine:
- WooCommerce: Descargar complemento
- Elementor: Descargar complemento
or, Gutenberg: Descargar complemento
Step 1: Purchase ShopEngine Pro Plugin for WooCommerce #
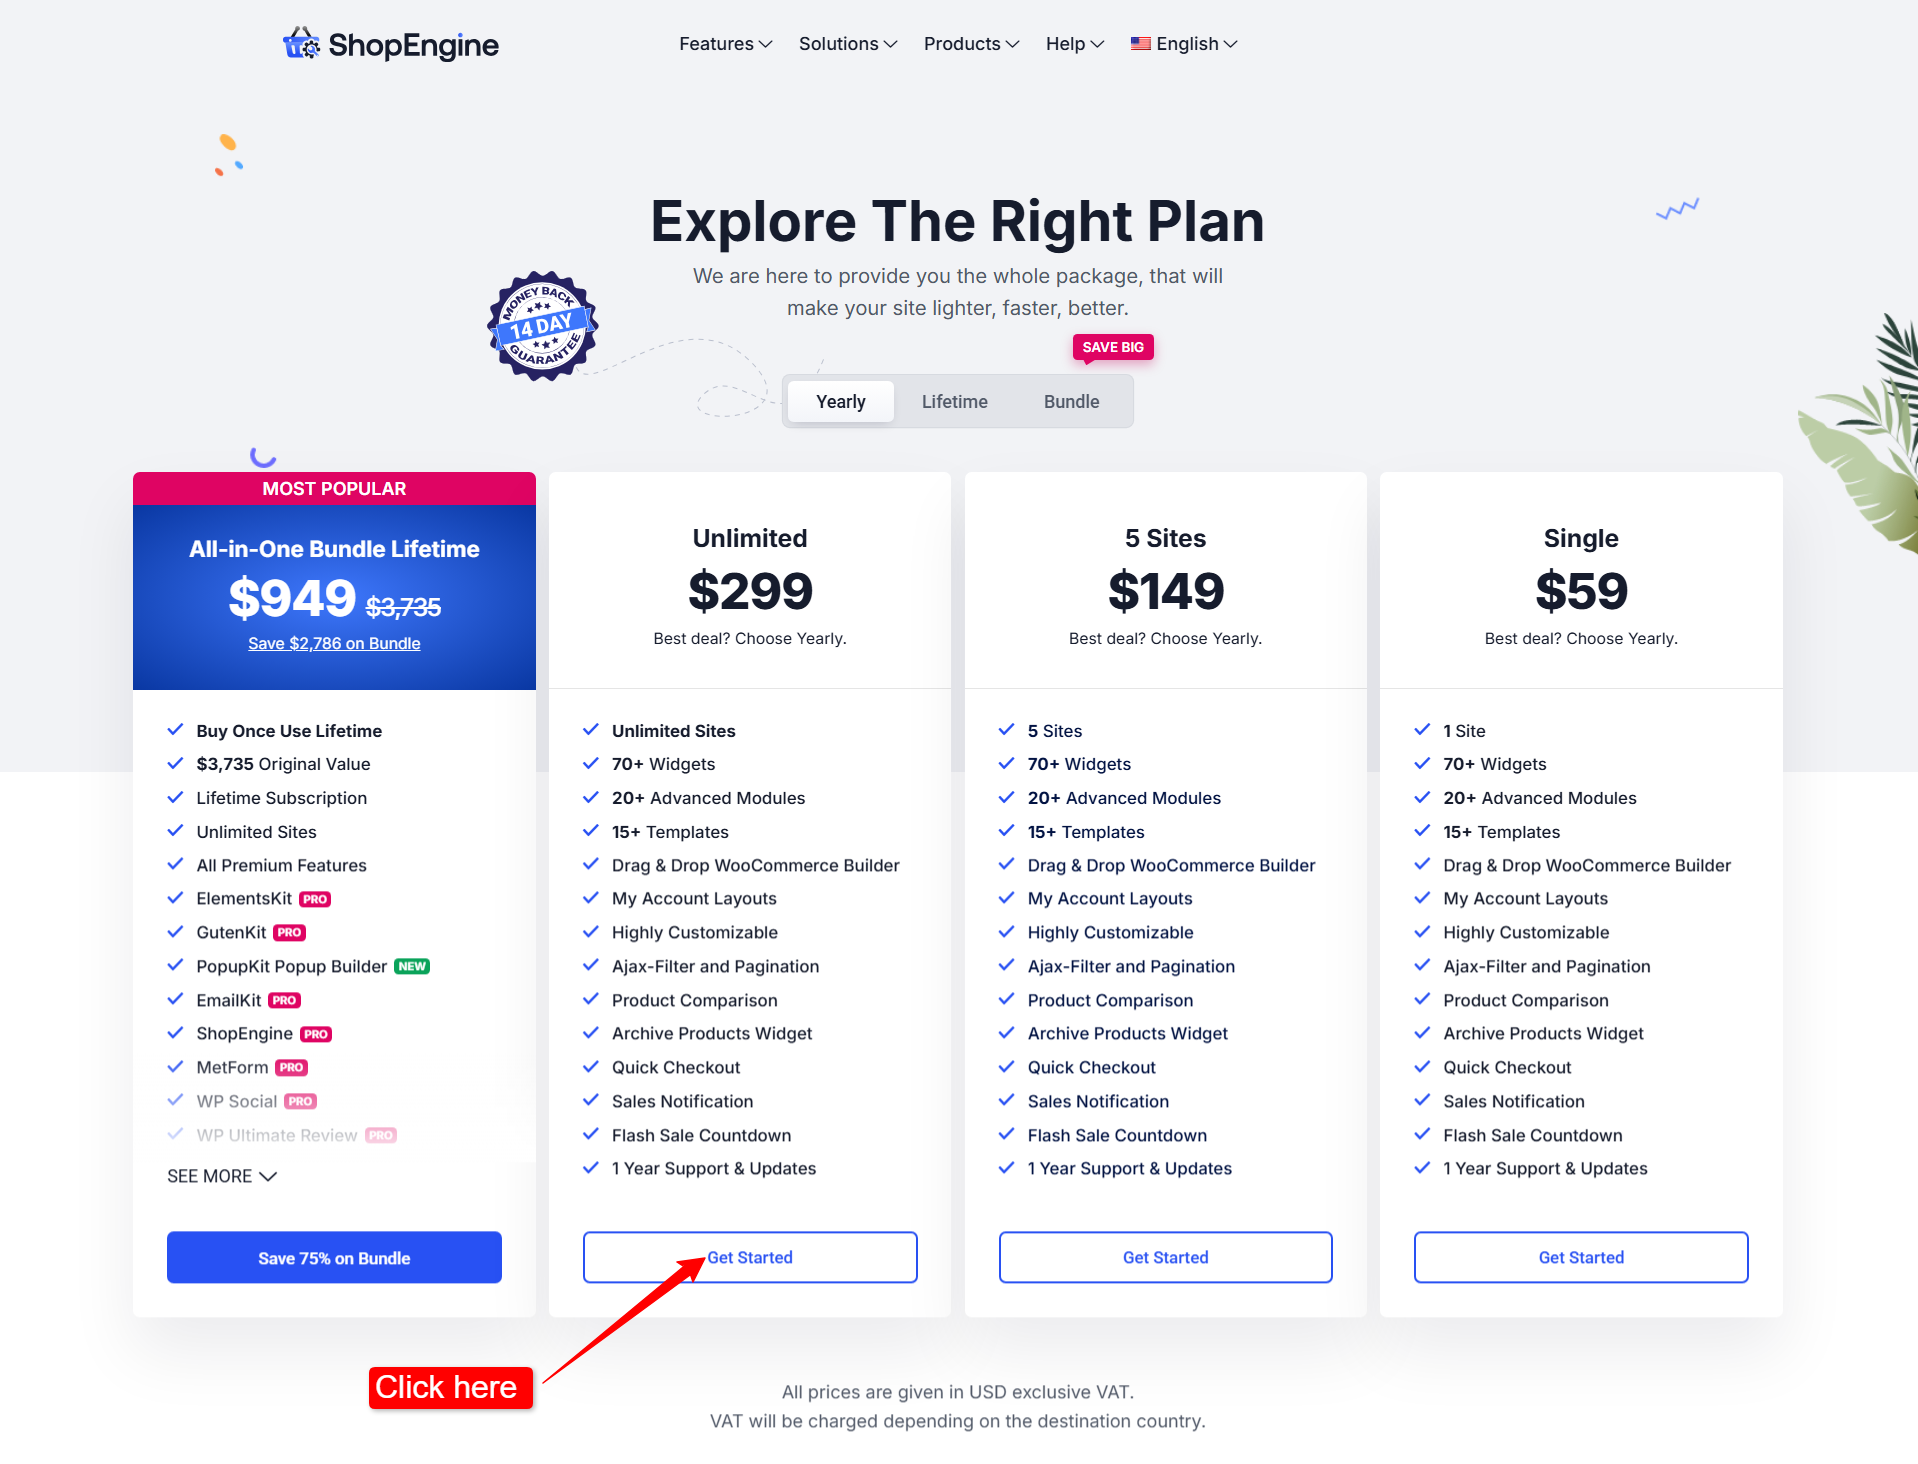
You can check the pricing plans for ShopEngine Pro on its website.
- Navega por el ShopEngine Pro pricing page and choose the pricing plan you prefer.
- Clickea en el COMPRAR AHORA button for the plan you have chosen.
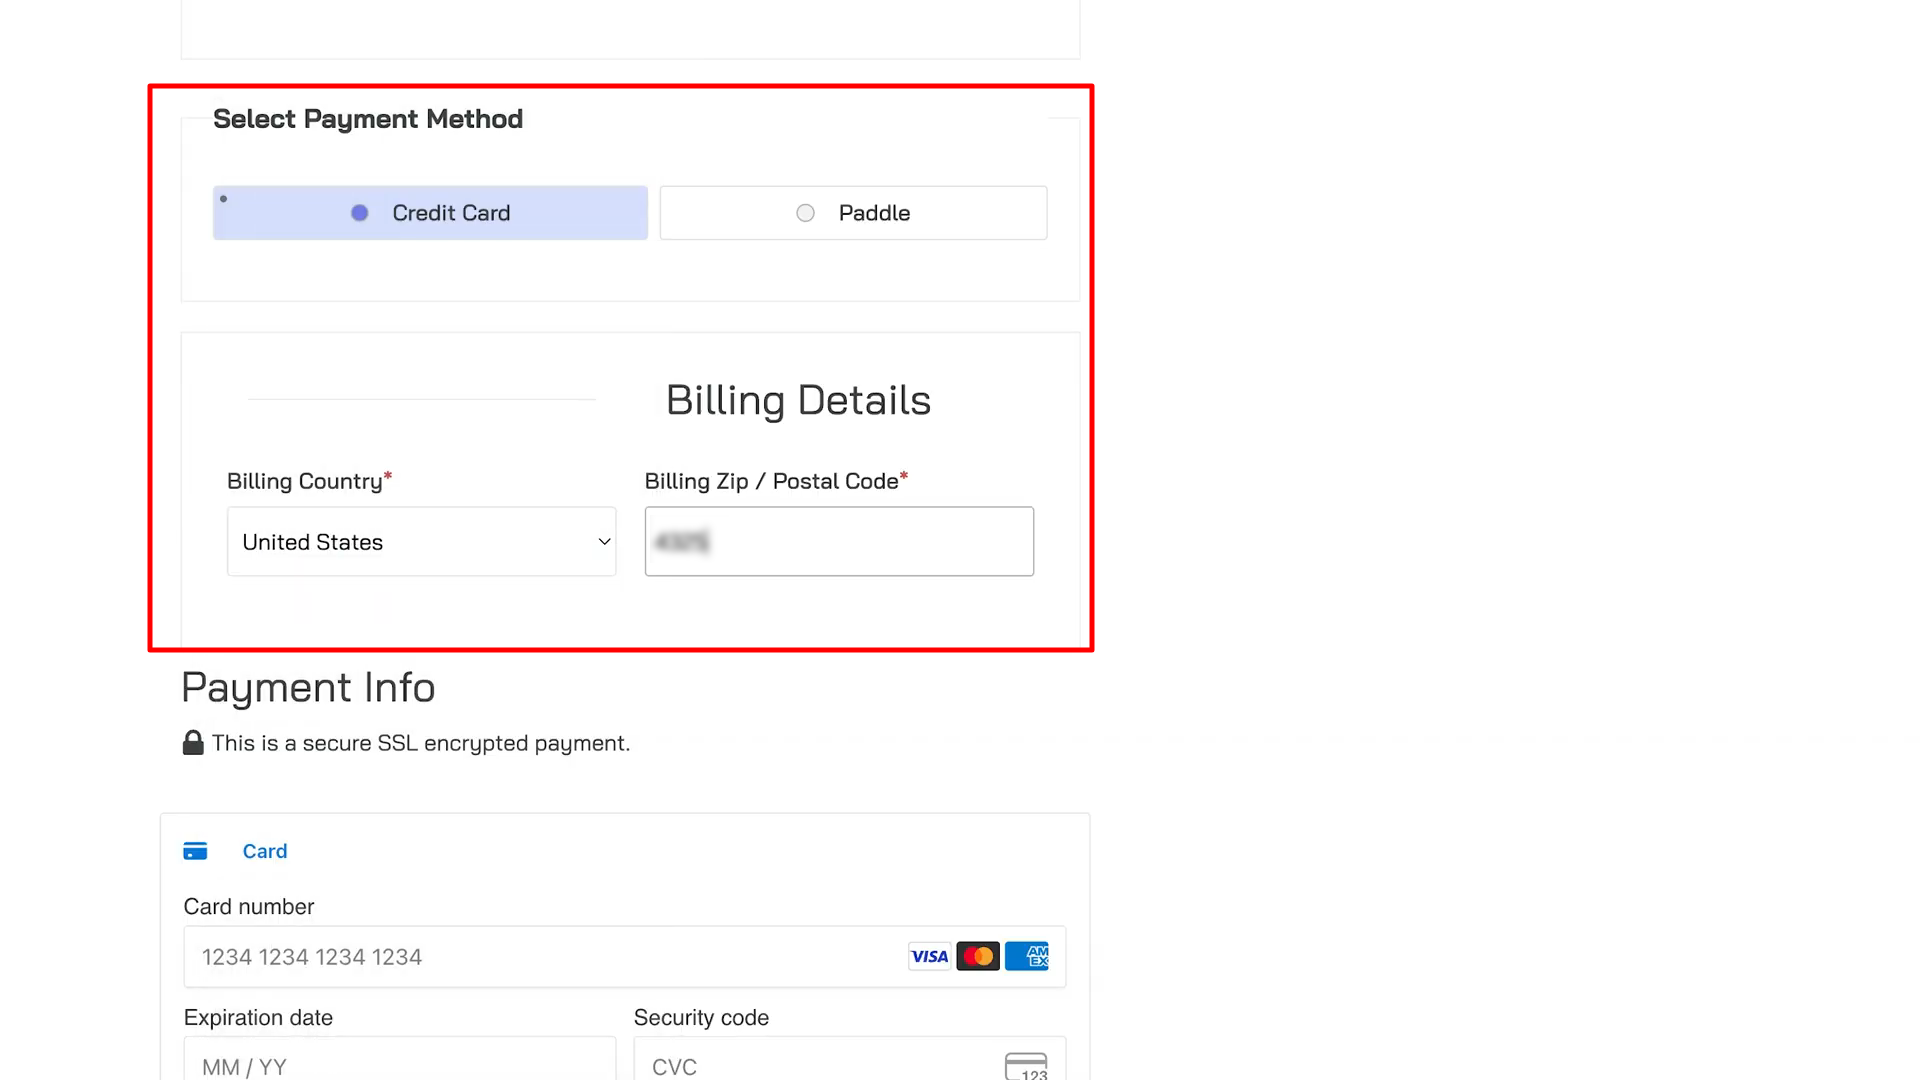
As soon as you click on the purchase button, you will be redirected to the Verificar page. There, you need to enter your personal information necessary for the purchase, including your email y nombres (first name and last name).
Then select the payment method between Tarjeta de crédito o Paddle.
For the card payment,
- Select Billing Country
- Enter Zip / Postal Code
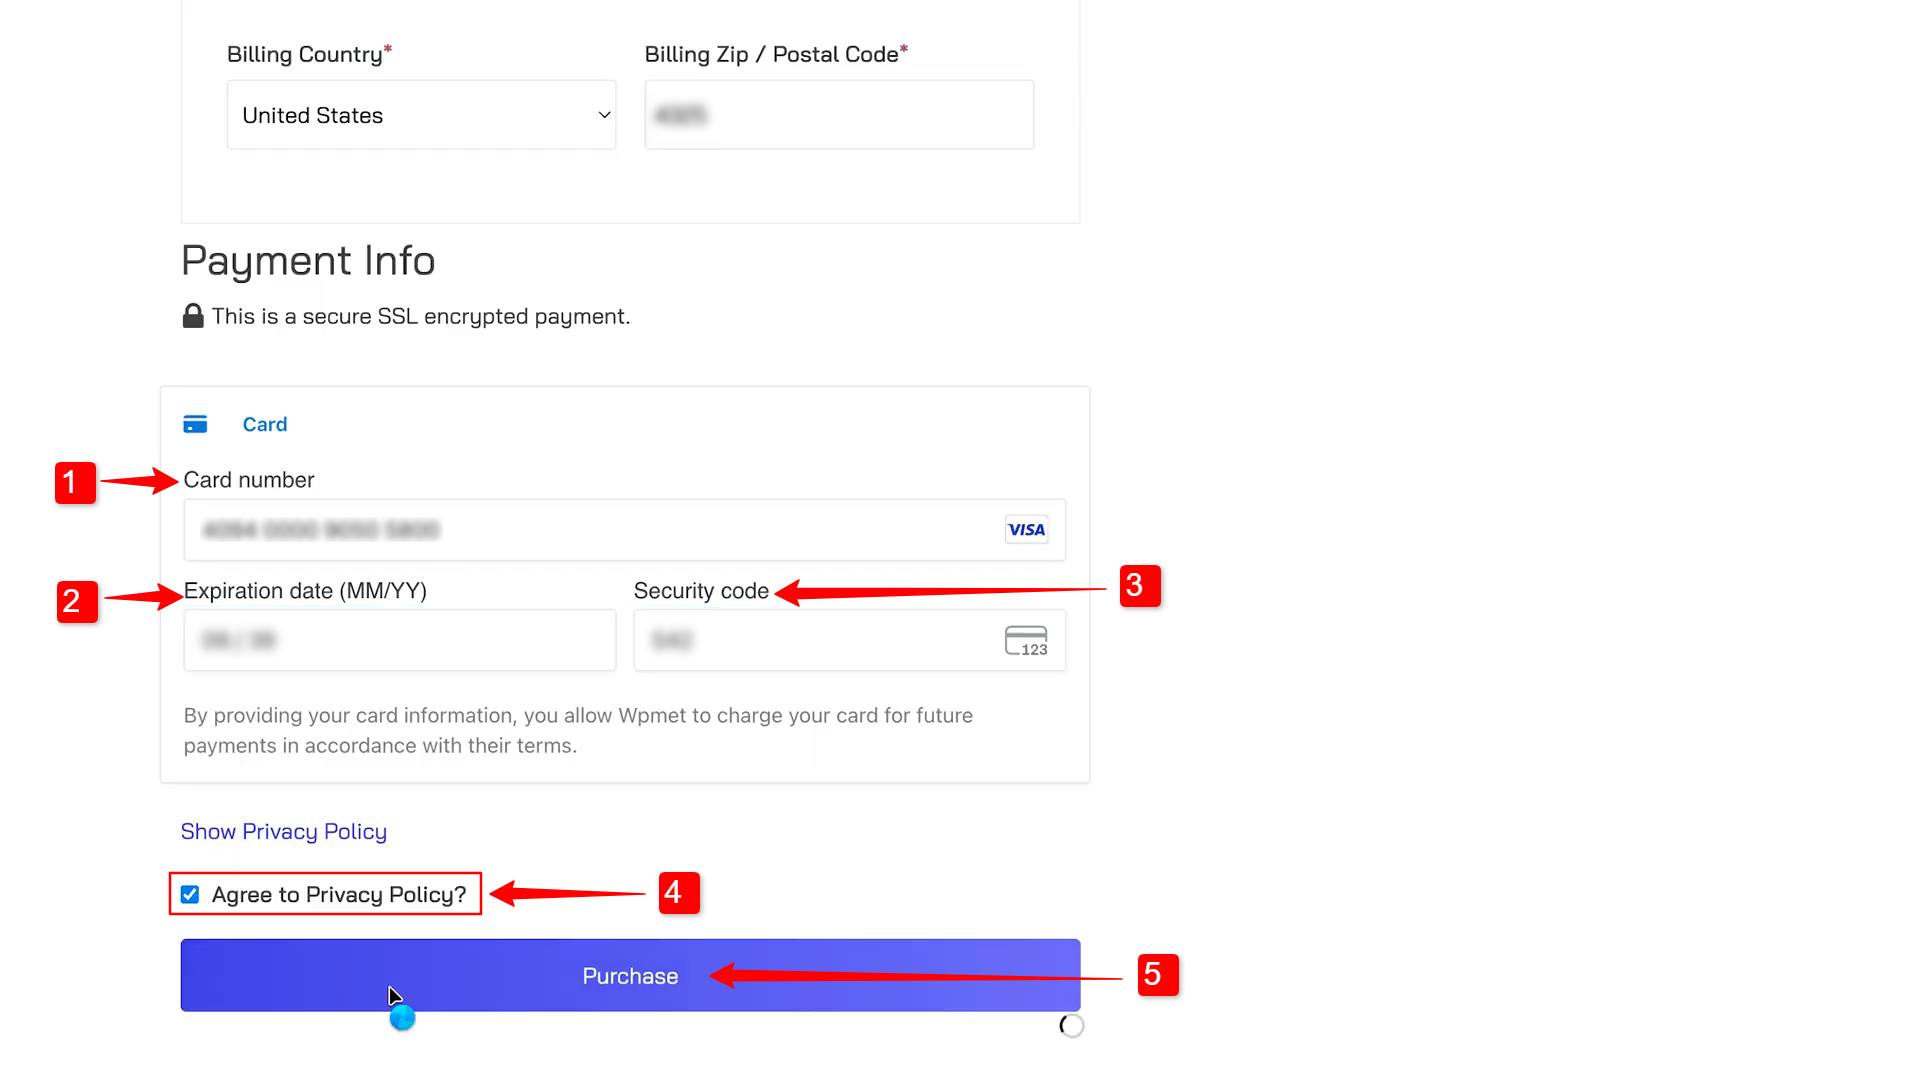
Then enter the following payment information:
- Card number
- Expiration date
- Security code (CVC)
- Check the box to agree to privacy policy
- Finalmente, haga clic Compra botón.
Once you complete this step, you can see your payment information including the order details.
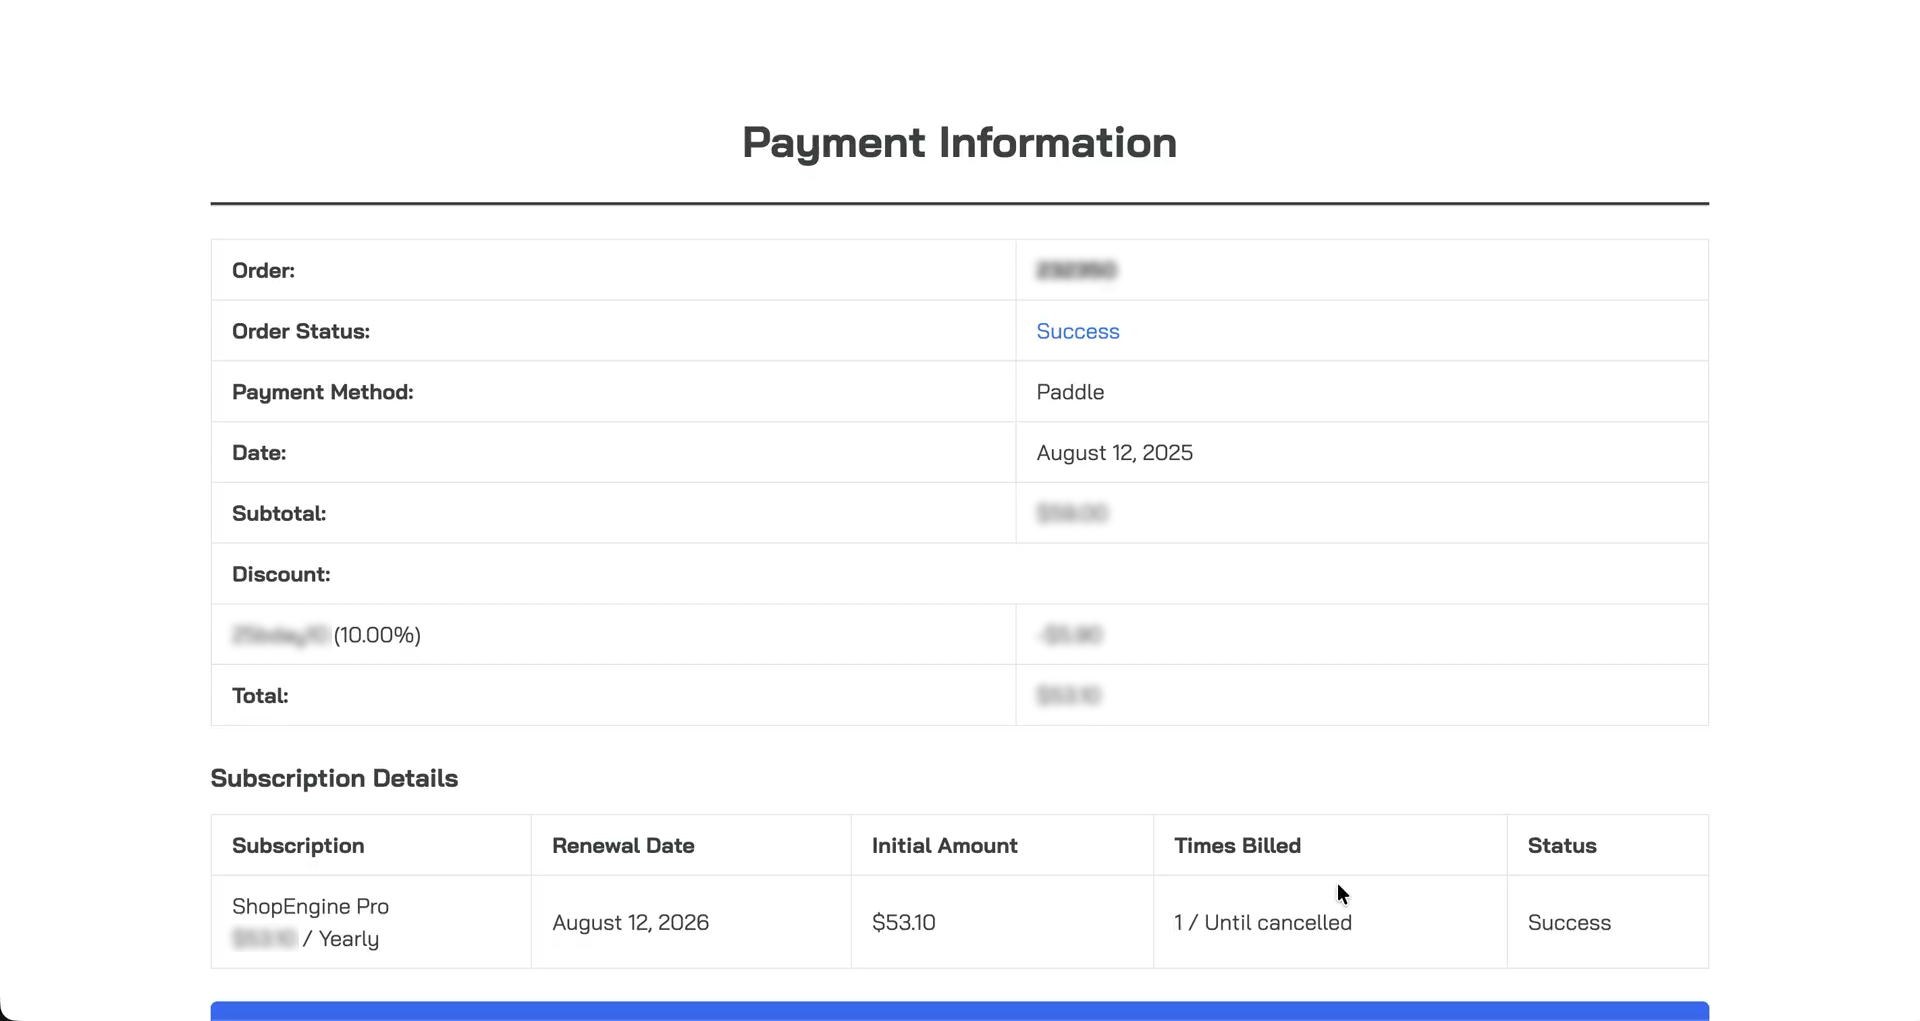
Meanwhile you will receive an email with your account credentials. Please check your email inbox to get the account details.
Step 2: Get ShopEngine Pro Plugin #
Once your payment is completed, you’ll receive a confirmation email. Inside the email, you’ll find:
- Your Username for Wpmet account
- Link to set new password
- The login URL
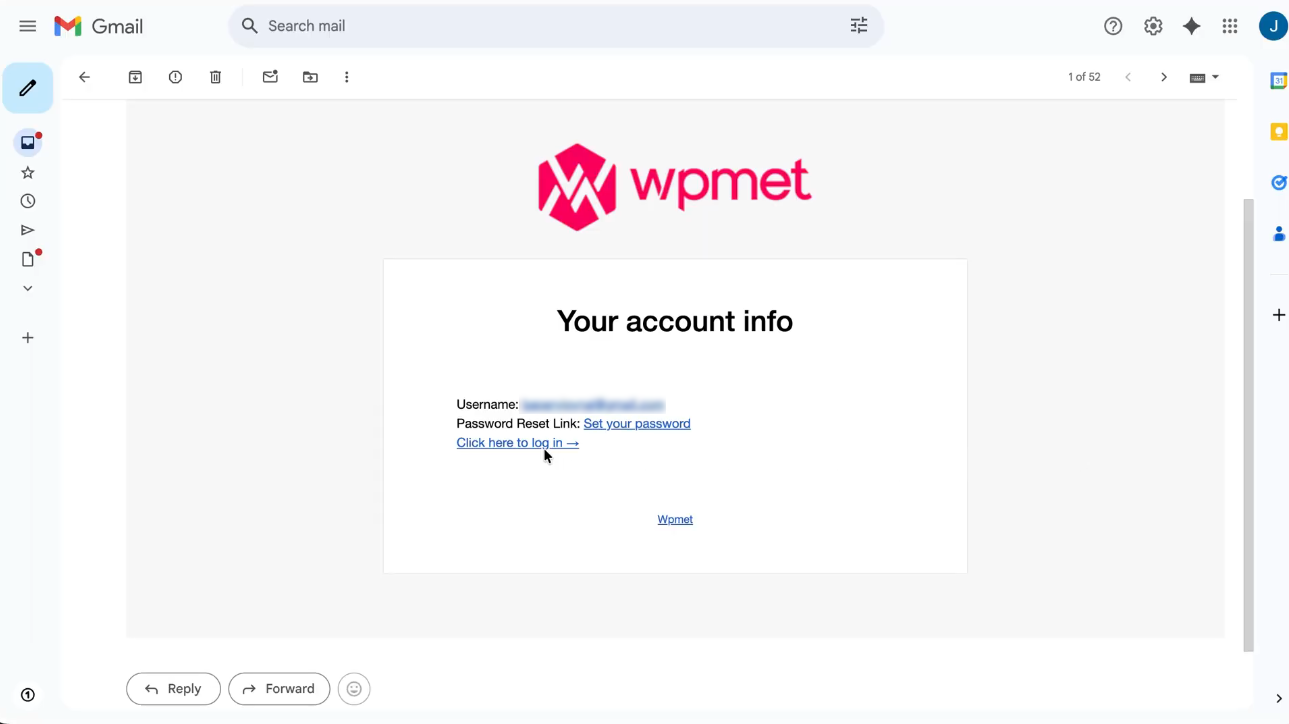
Go to the given links to access your Wpmet account.
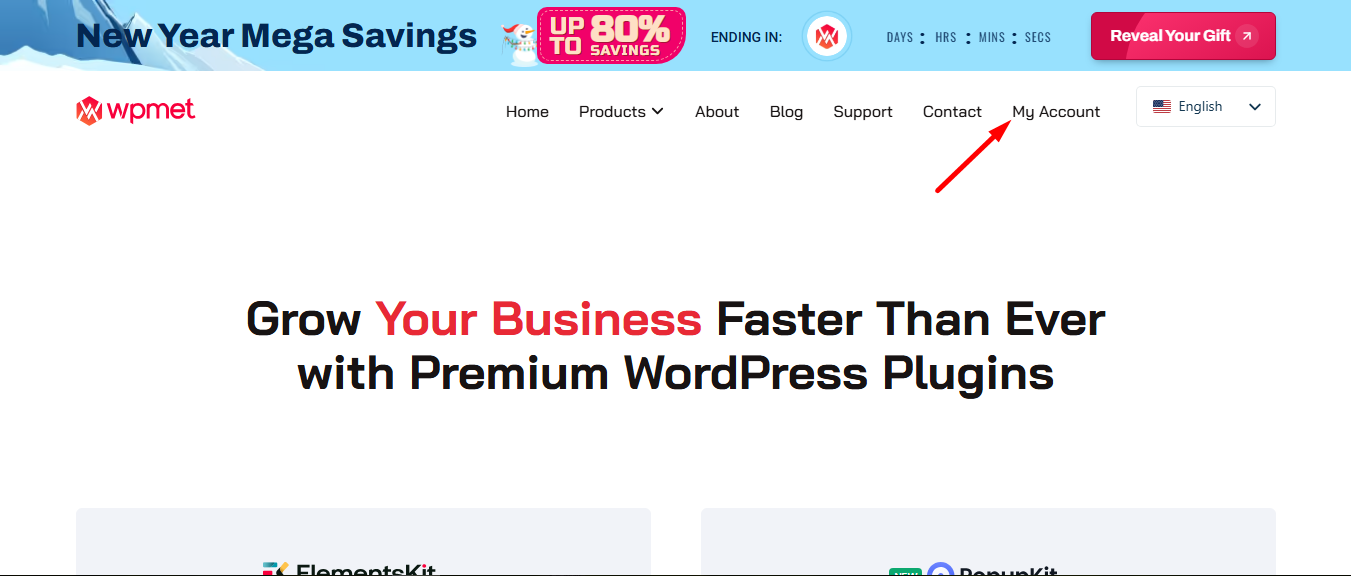
Alternatively, you can access your account logging in directly through our official website.
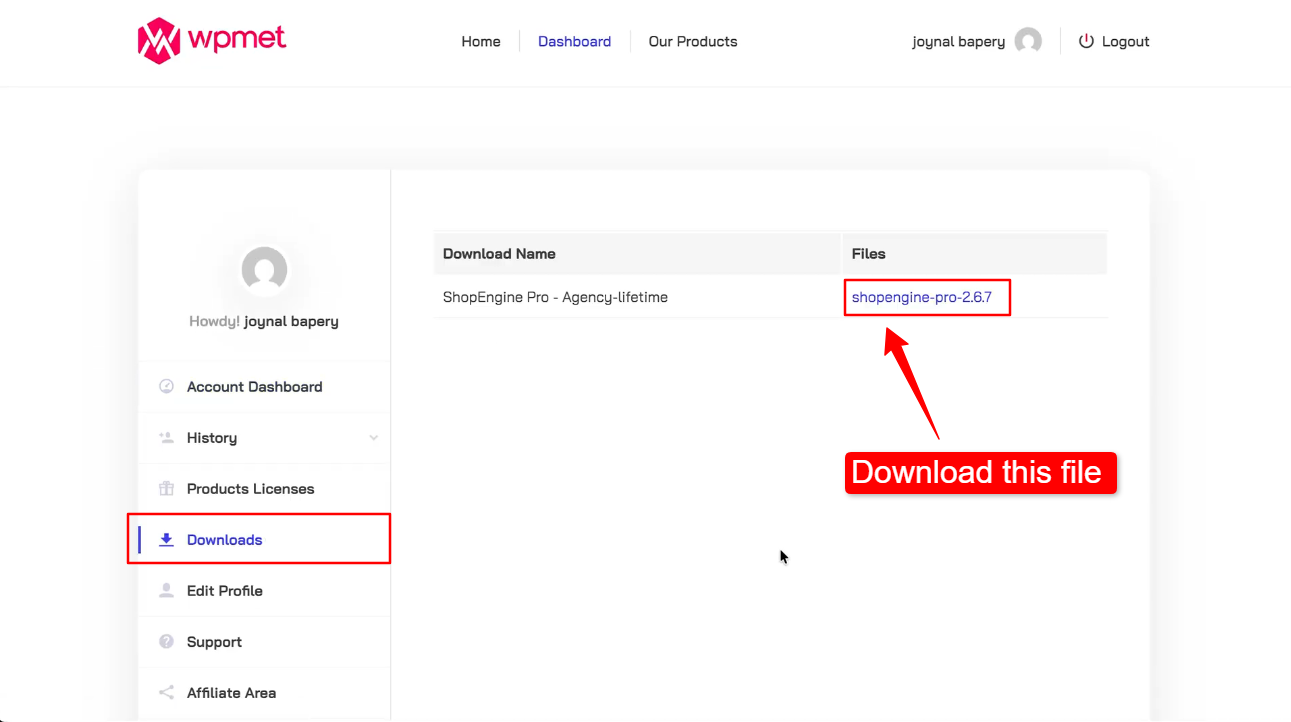
Once logged in, navigate to the Descargas tab from your Wpmet dashboard. There you will find a downloadable file for ShopEngine Pro.
Click on the file, and the plugin will be downloaded in .cremallera format.
Step 3: Install and Activate ShopEngine Pro Plugin #
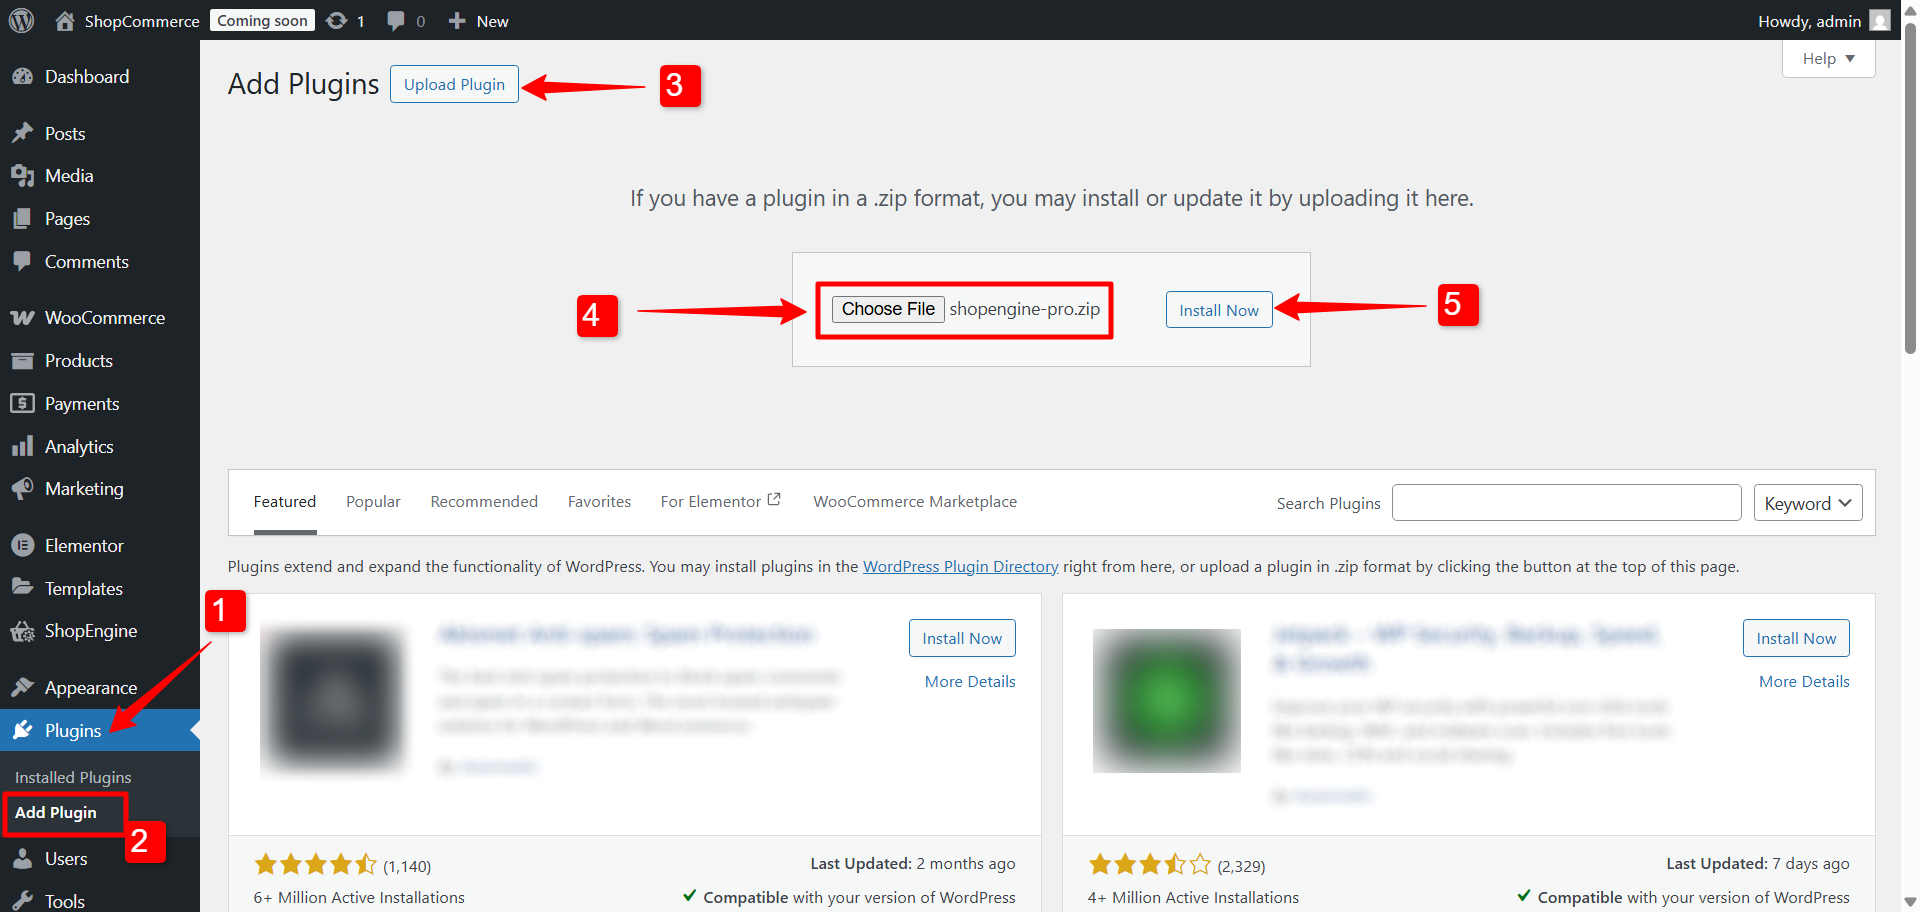
Now you have to install the plugin in your WordPress site. To install the plugin:
- Log in to your WordPress dashboard and go to Complementos.
- Ir a Complementos → Agregar nuevo to add new plugin.
- Clickea en el Subir complemento button on the top left corner.
- Golpea el Elija el archivo button and upload the shopengine-pro.zip file that you have downloaded earlier.
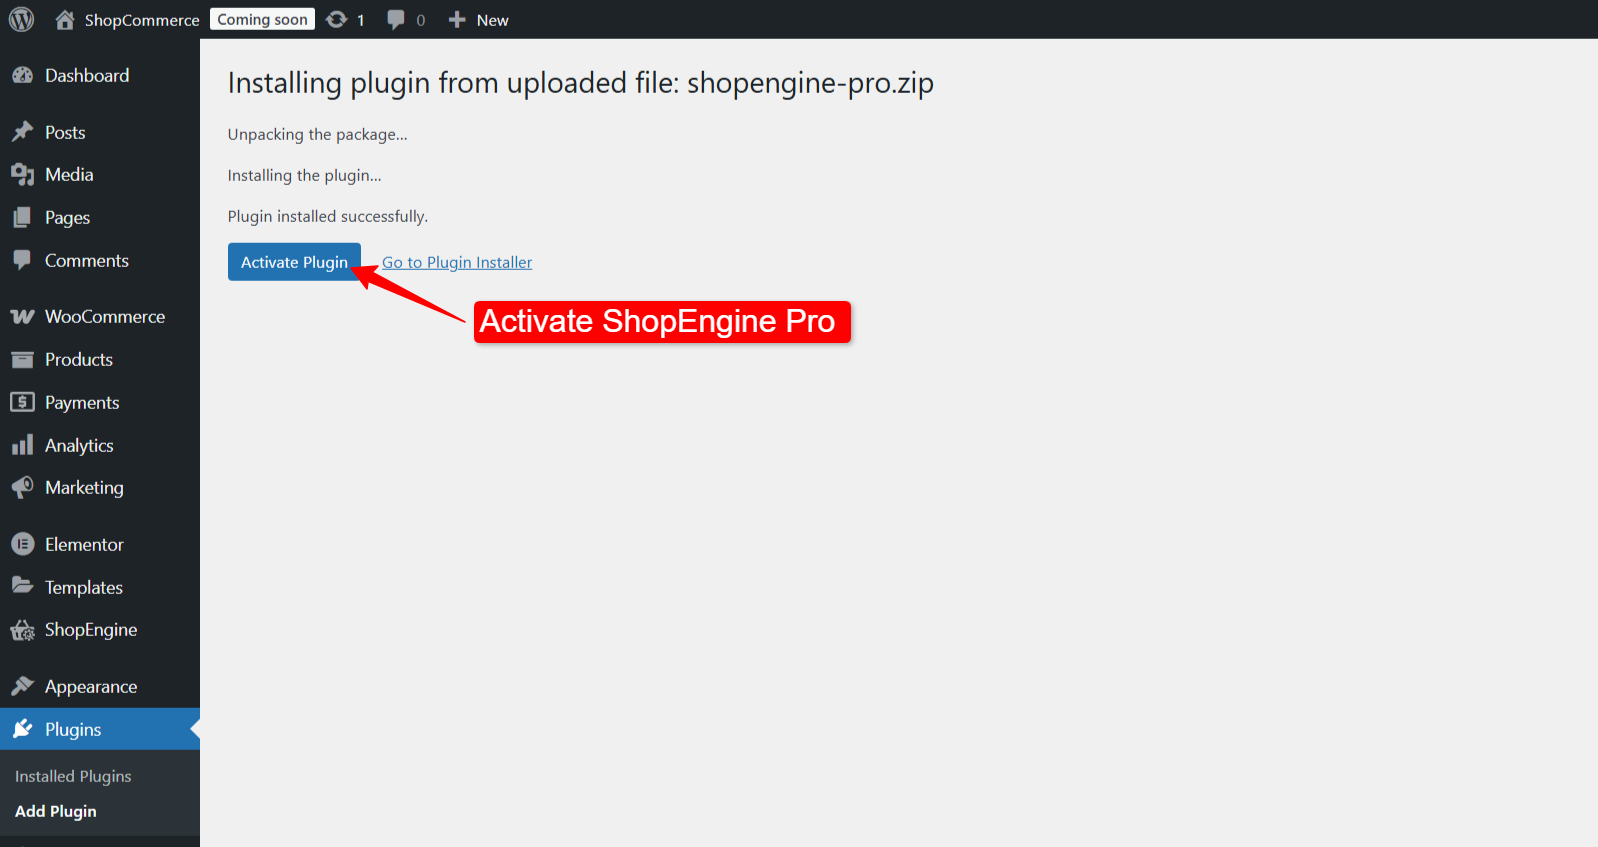
- Luego haga clic en el Instalar ahora botón.
However, you’ll see the message below if the free version isn’t installed on your site yet. Make sure to install and activate it first.
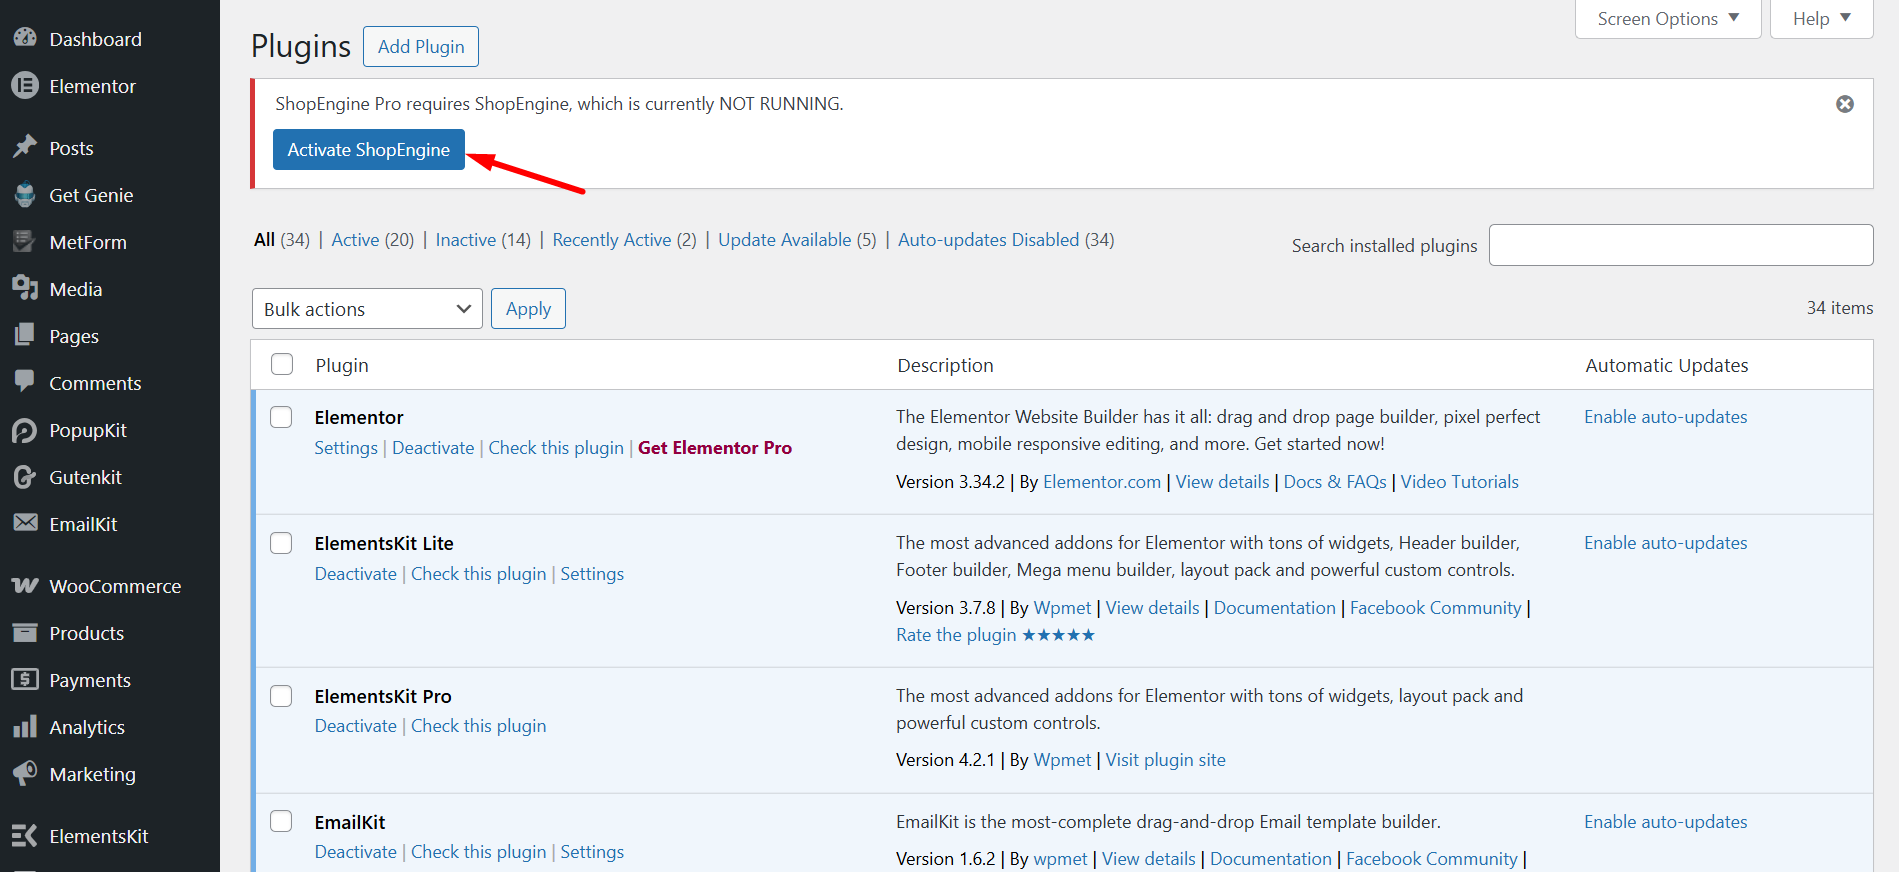
Once the plugin is installed, you have to activate the ShopEngine Pro plugin in order to use it.
Step 4: Activate ShopEngine Pro License #
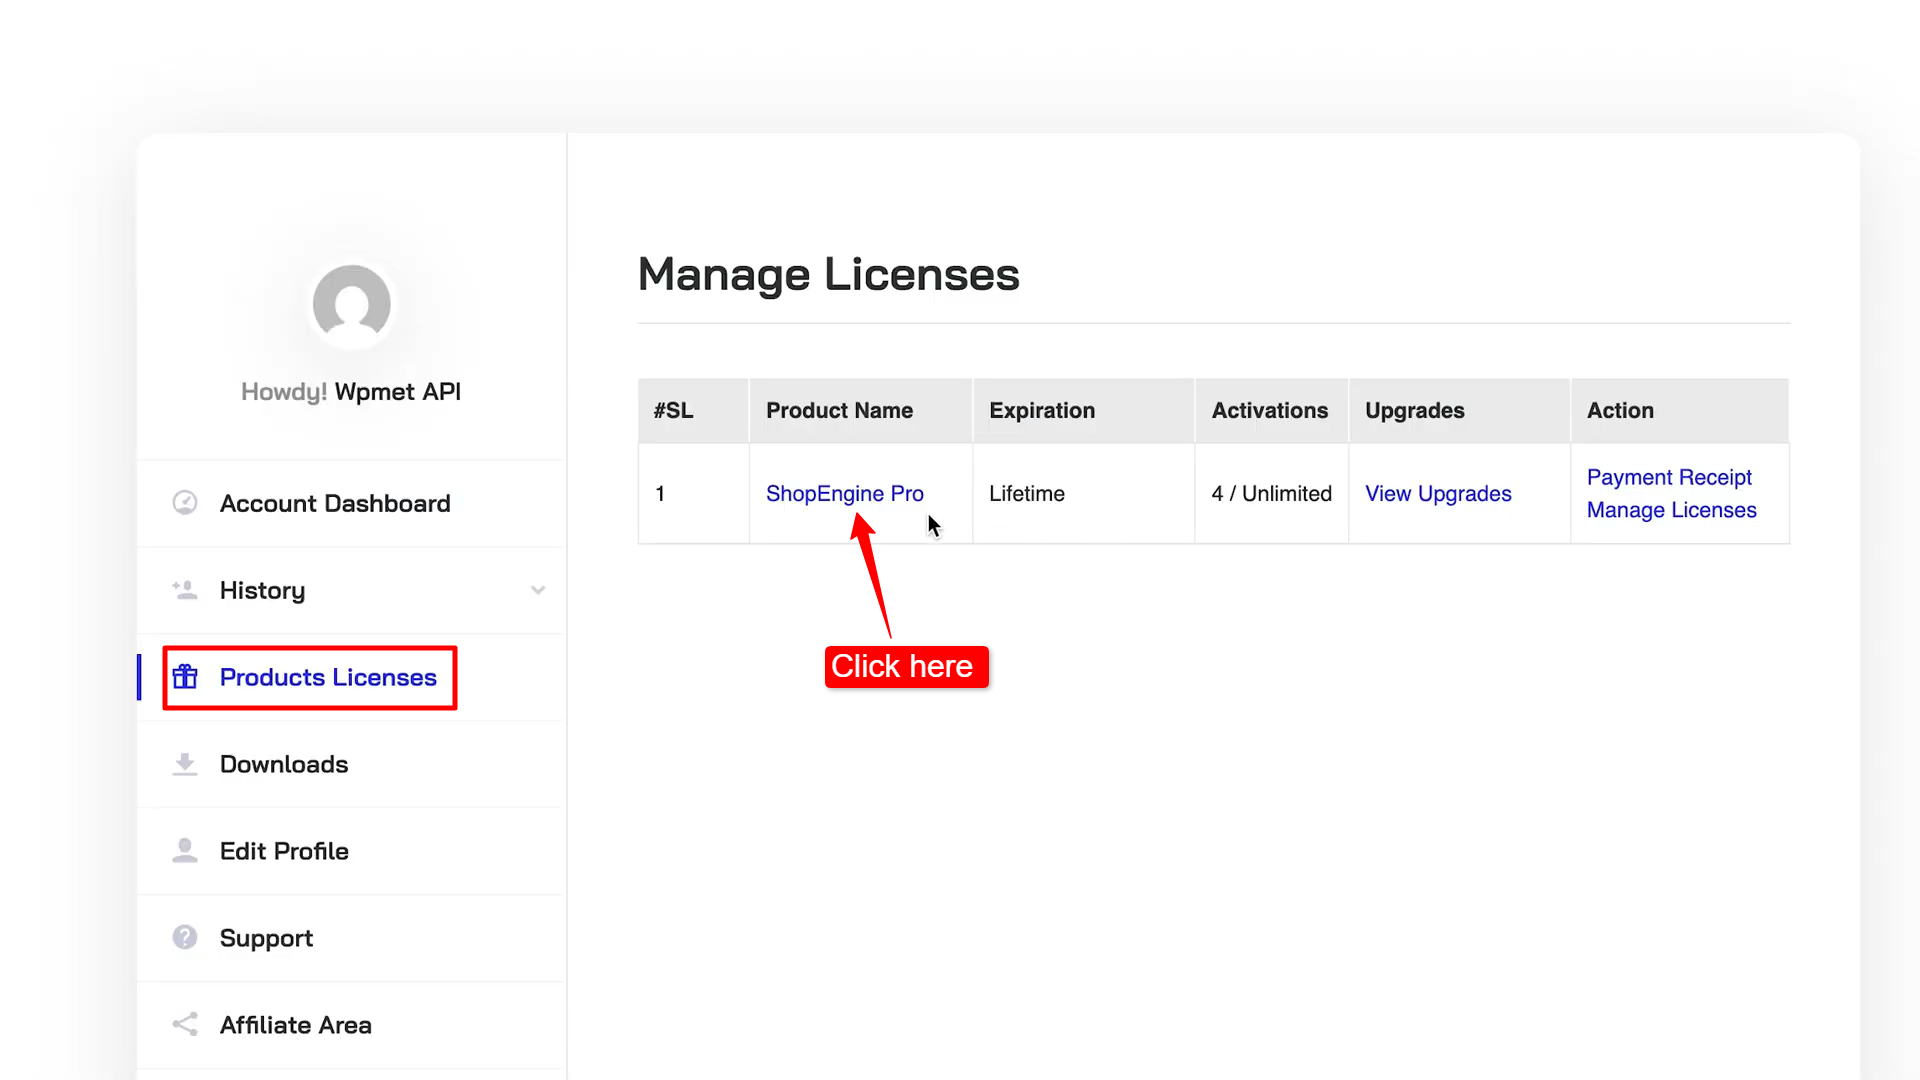
To get the product license key, go to your Wpmet account dashboard again. This time, switch to Product Licenses tab and click on the TiendaEngine Pro under product name.
On the license management page,
- Enter your domain en el campo requerido.
- Clickea en el Agregar dominio botón.
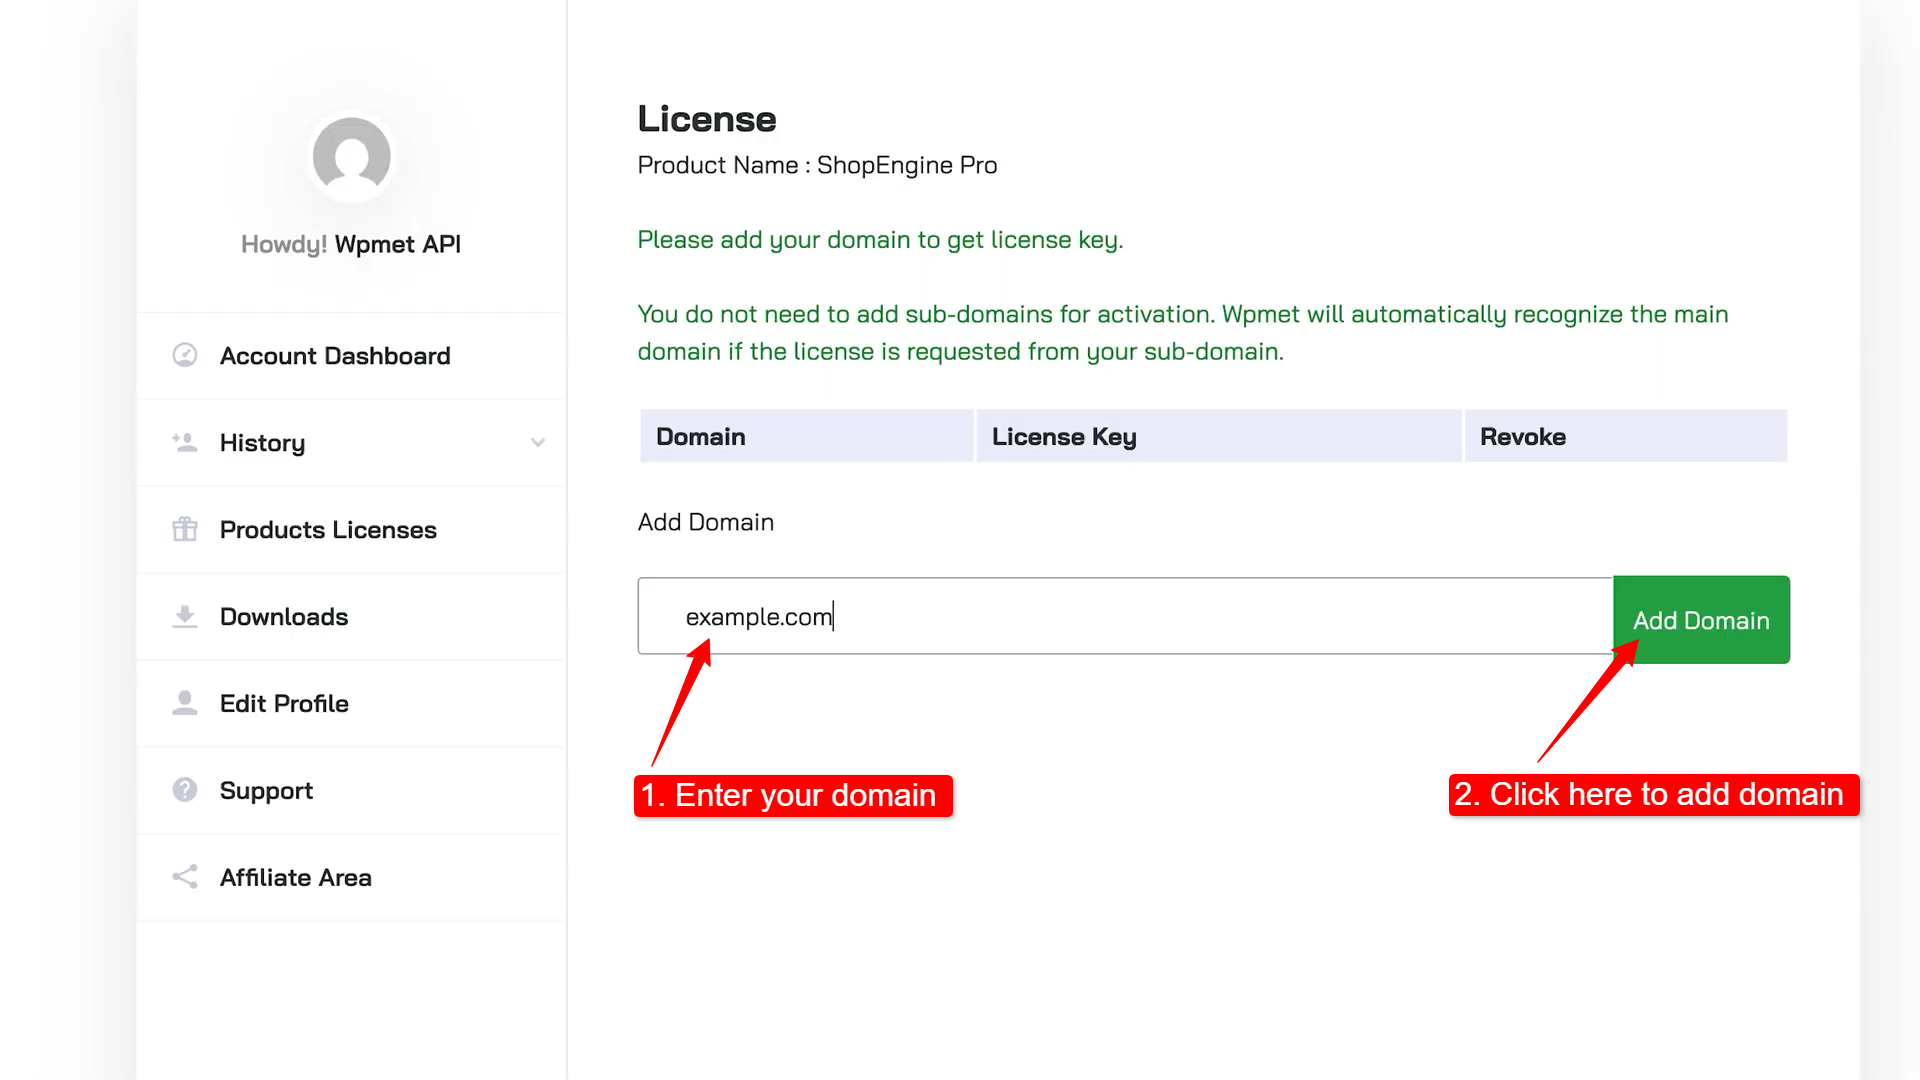
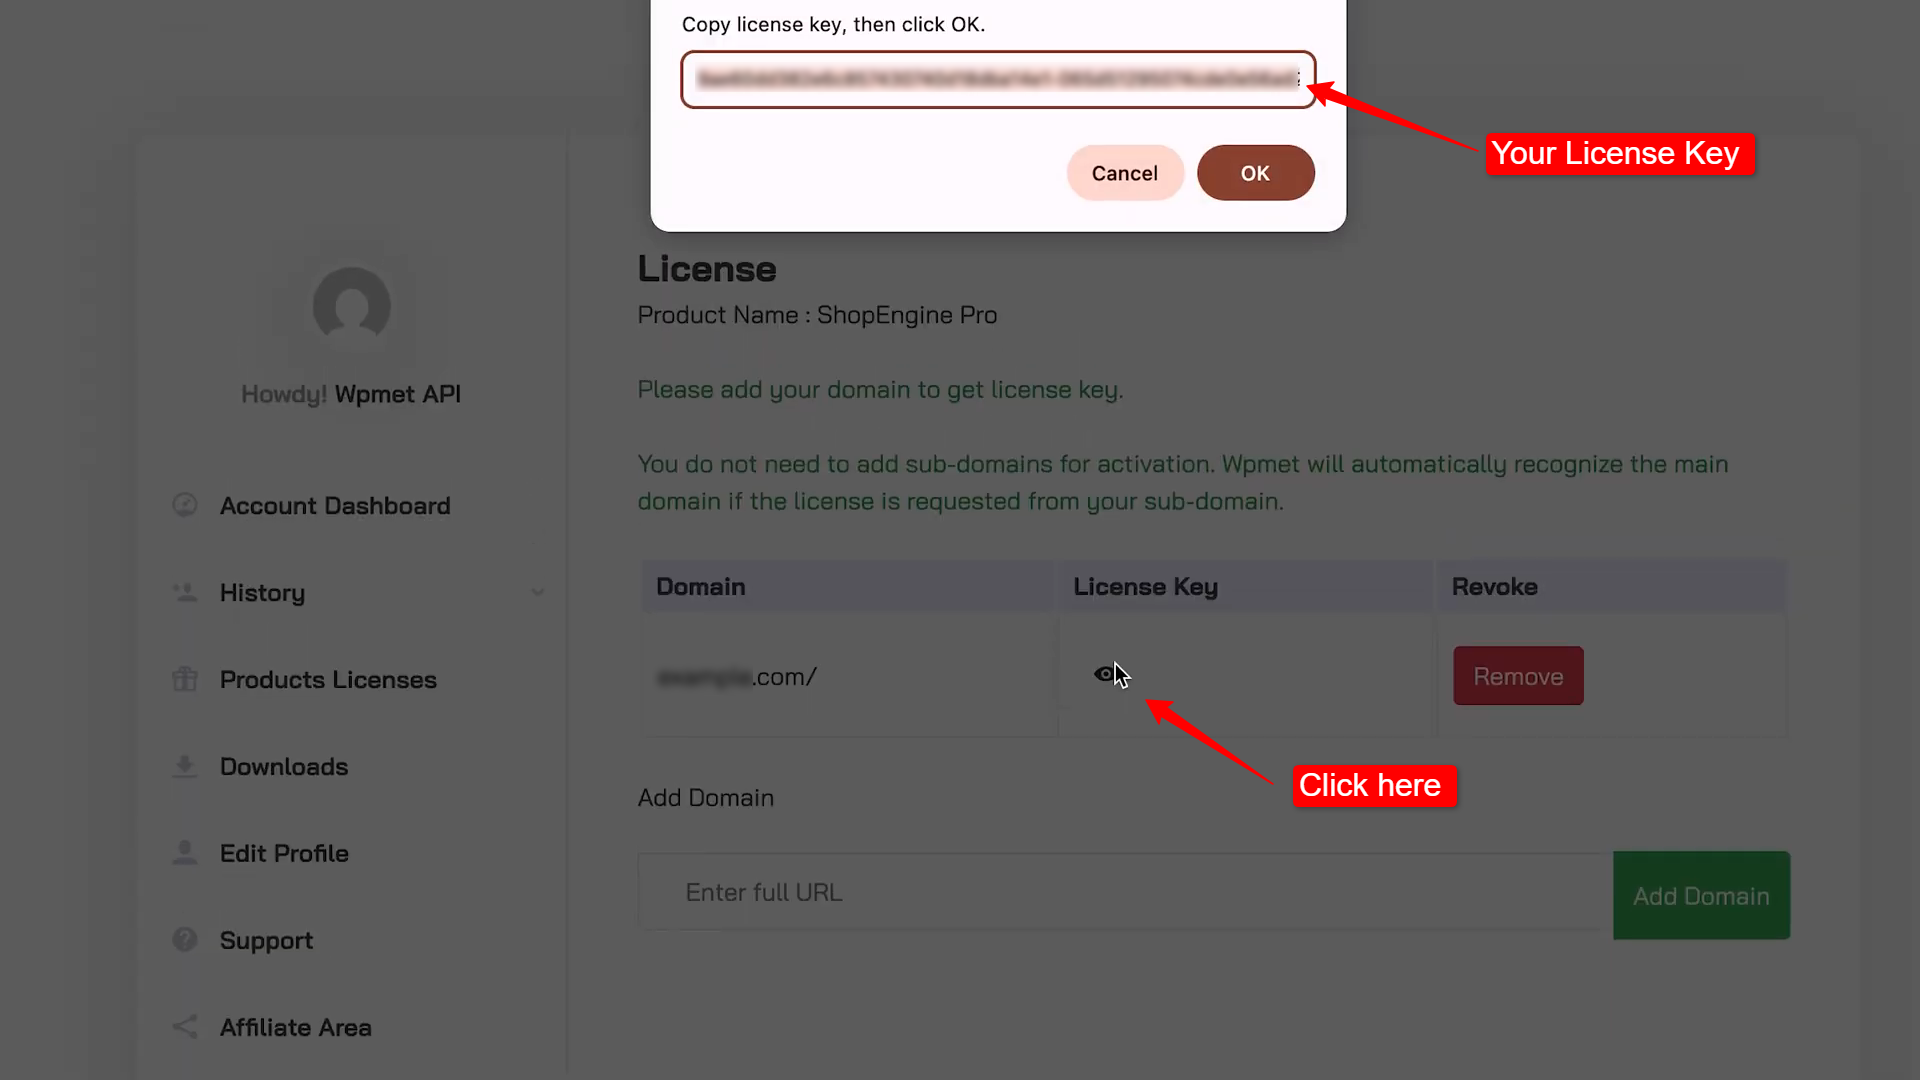
After that, you will see a table appear, where you have a license key against your domain.
Click on the 👁 (eye icon) to view the license key. Copy the key y vaya a su panel de WordPress.
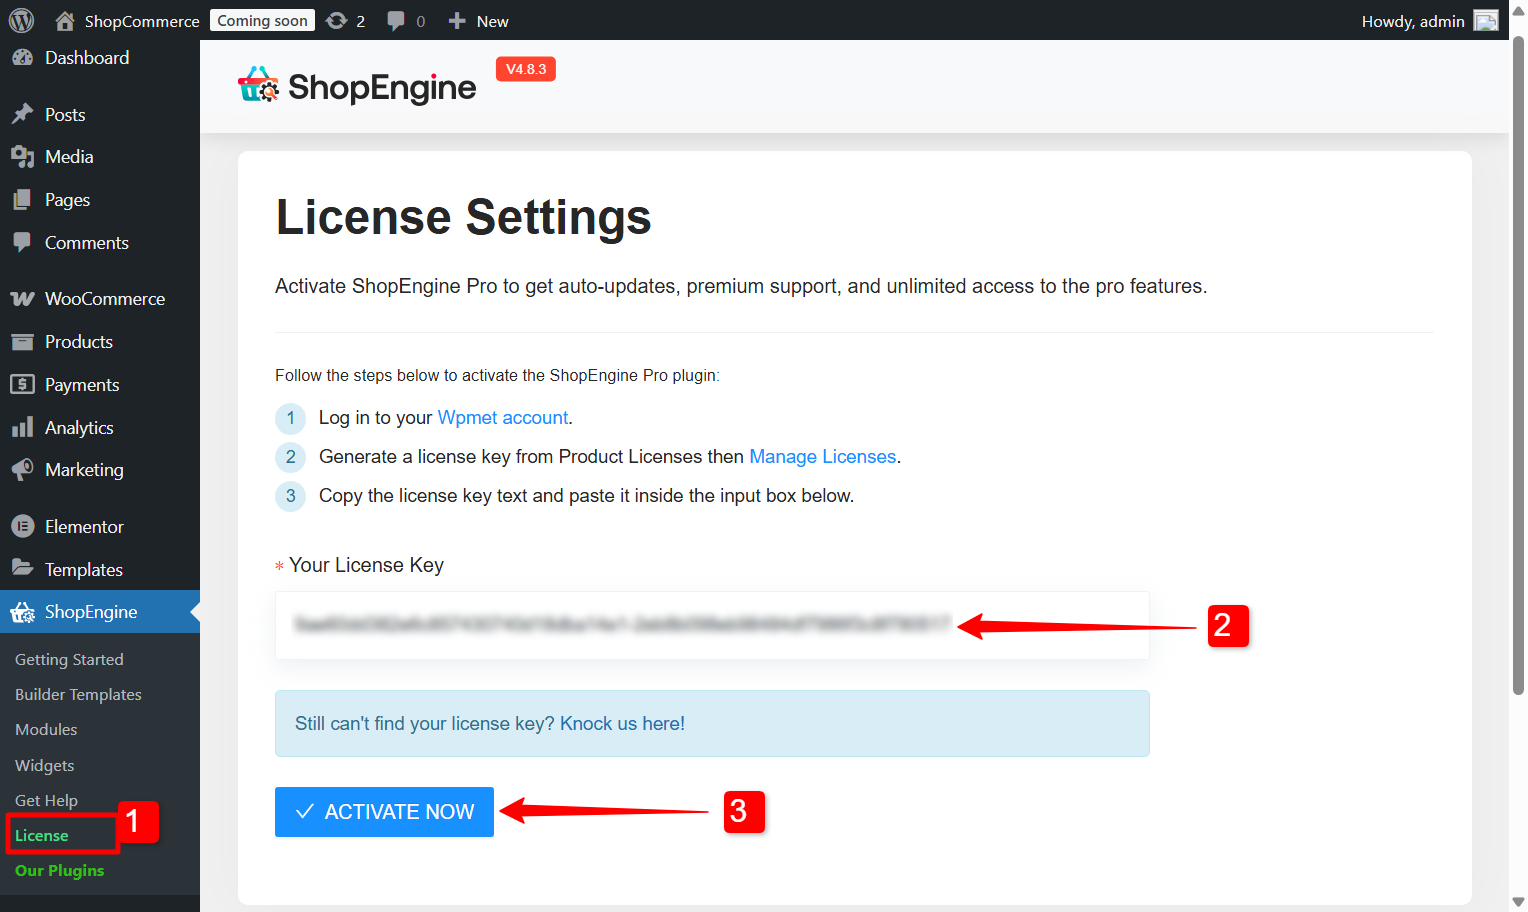
Step 5: Activate the license key on your WordPress #
On your WordPress dashboard,
- Navegar a ShopEngine → License.
- Enter your license key on the field.
- Clickea en el Active Now botón.
Then you will get the following message: Congratulations! Your product is activated for “[domain_name]“
That’s it. Now you should have all the premium features of ShopEngine.


