


Want to Add a Menu to Your Elementor Site?
This guide will show you how to create, set up, and customize a navigation menu in Elementor using the ElementsKit Nav Menu Widget.
Navigation menus are key for any website, helping visitors quickly find what they need. Most site owners place menus in the header for easy access across all pages.
With the tips in this guide, you’ll have a functional, stylish menu ready in no time. Let’s get started!
What is an Elementor Mega Menu in WordPress?
Mega menus have become a popular way to improve website navigation, helping users easily browse your content and find what they need.
In WordPress, the default navigation menu allows you to include pages, posts, categories, and URLs, with the design typically controlled by your theme. However, upgrading to a mega menu offers more flexibility and customization to provide better site’s experience to users.
Why Use the ElementsKit Nav Menu Widget?
- You can create custom and advanced menus in the drag and drop style
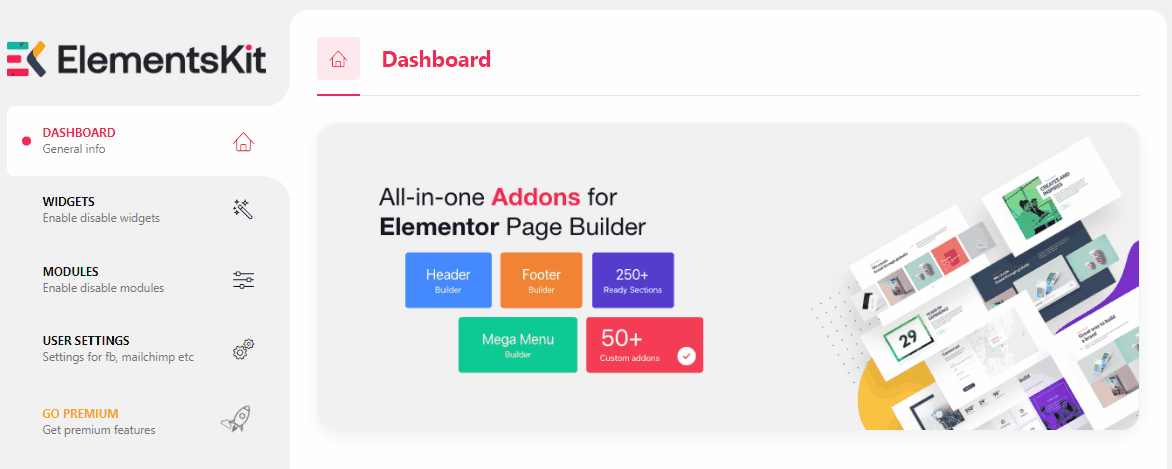
- ElementsKit offers all-in-one solution along with the navigation menu
With the ElementsKit add-on for Elementor, you can build a feature-rich mega menu that enhances your website’s functionality and design effortlessly.
🔔 Did you know?
Using a WordPress theme or page builder often limits your control over the header and footer design.
What about getting full control in customization? Check this out to learn more How to Create & Customize Header Footer – Elementor Page Builder
What Elementor’s Mega Menu by ElementsKit has to offer:

Like the mega menu for Elementor, ElementsKit also opens up a slew of possibilities for ‘hacking’ into your normal WordPress menu.
To be more specific, the plugin will assist you in the following aspects:
- Customize menus with tags, colors, hover effects, and icons
- Style top-level and submenu appearances
- Create vertical or horizontal menus
- Choose header layouts from the ElementsKit library
- Add animations for submenu displays
- Drag-and-drop the nav menu widget with one click
- Compatible with eCommerce platforms like WooCommerce
- Build content using Elementor widgets
- Fully responsive with off-canvas menus for tablets
- Display builder content or simple lists as submenus on tablets
And of course, the best part is that the ElementsKit Nav menu is available for both free and premium versions. So even if you don’t purchase the paid subscriptions, you would still experience this amazing Elementor menu feature on your site.
How to create Menu Items in Elementor
Let’s take a look at some real-world instances and go over our WordPress big menu lesson. Now you’re about to go abroad to create your WordPress mega menu, header, and adding up its contents.
Create a Menu
To create an Elementor menu, you need to do is Turn On the mega menu option from the ElementsKit startup Modules page and after turning it on, click on the Save Changes button.
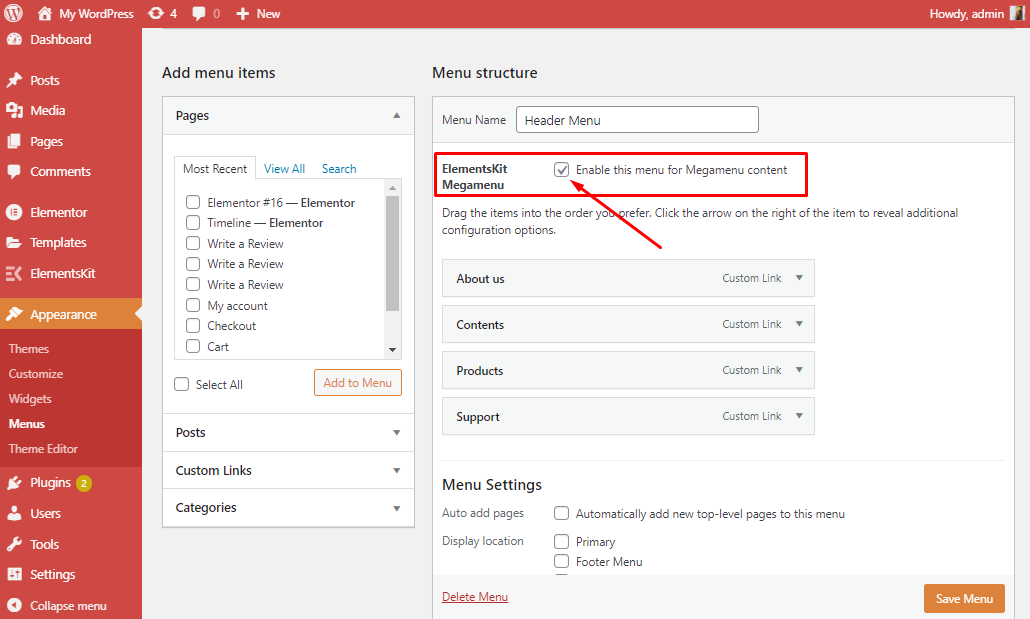
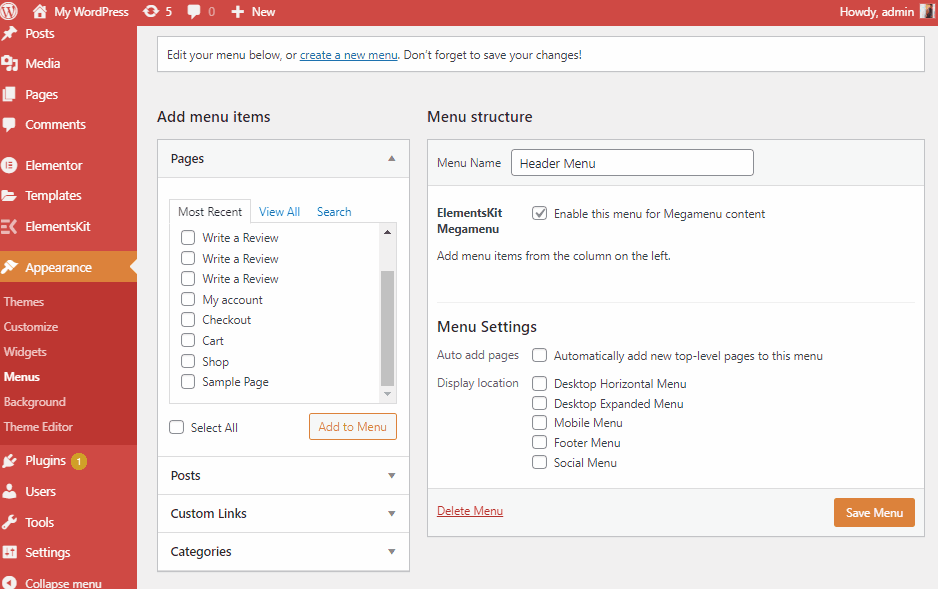
Creating a menu in Elementor requires a few simple steps. Go to your WordPress dashboard and then click on Menus. After that, you’ll see a section named Menu structure. Then input your Menu Name or menu header and click on Create Menu.
Now Expand Custom Links and put your URL as well as Link Text, then click on Add to Menu.
📝Quick Note
You can add, remove or edit as many mega menu items as you want by repeating the same method.
It’s time to add your menu items in Elementor through ElementsKit. But before that, you need to tick ✅ the enable the menu for the mega menu content section as shown in the image, underneath the Menu Name section.
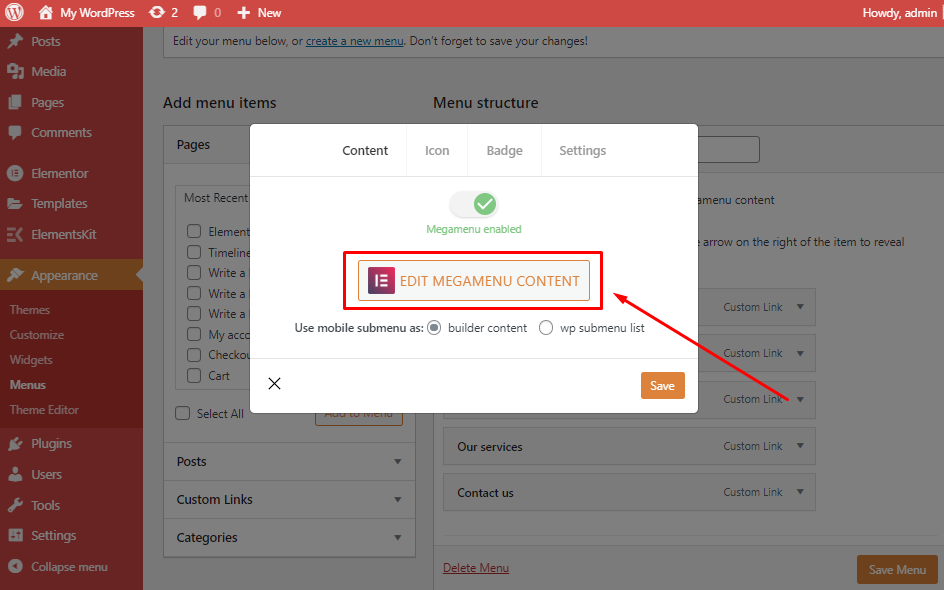
Then you’ll see a Mega Menu tag on your Link Text. After clicking on the Mega Menu tag a popup will open.
To enable the Mega Menu option you need to click the enable EDIT MEGA MENU CONTENT button and save. You’re all set!
🧐 More Info on Elementor Menu
Don’t forget to visit our documentation on ElementsKit Mega Menu Builder for Elementor

Import a Menu (Vertical Mega Menu)
To create a vertical menu, first, you need to turn on the vertical menu widget. Then click on save changes.
Then click on Templates at the left side of your dashboard. After just clicking on Import Templates.
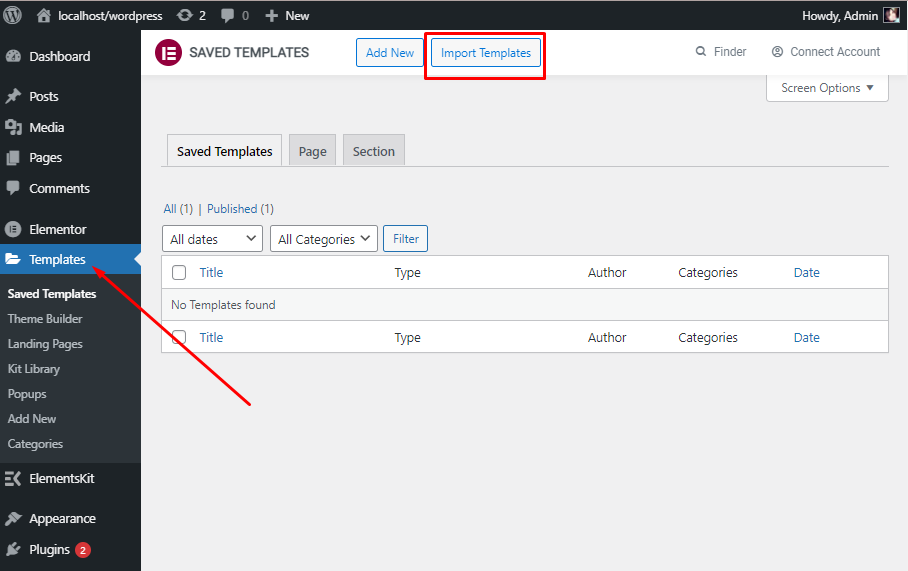
Now you have to select choose file from your device. Then just click on Import Now. And you’ll see all your imported data at once.

Furthermore, to create a vertical menu with your data you need to go to Appearance then click on Menus. You can also follow create a menu from above. For more details, you can visit our documentation site on the vertical menu.
Customizing the Menu
It’s time to customize your content and to do that you need to click on the EDIT MEGA MENU CONTENT button. Right after clicking on the button, you will see that an Elementor menu style screen has popped up.
All you need to do is click on the ElementsKit icon and select which predefined header you want to insert into your website.

Right after clicking on the ElementsKit widget button, it will take you to its widget library. In which, you will get tons of pre-made pages, templates, and sections. But to create a mega menu section you need to click on the Sections
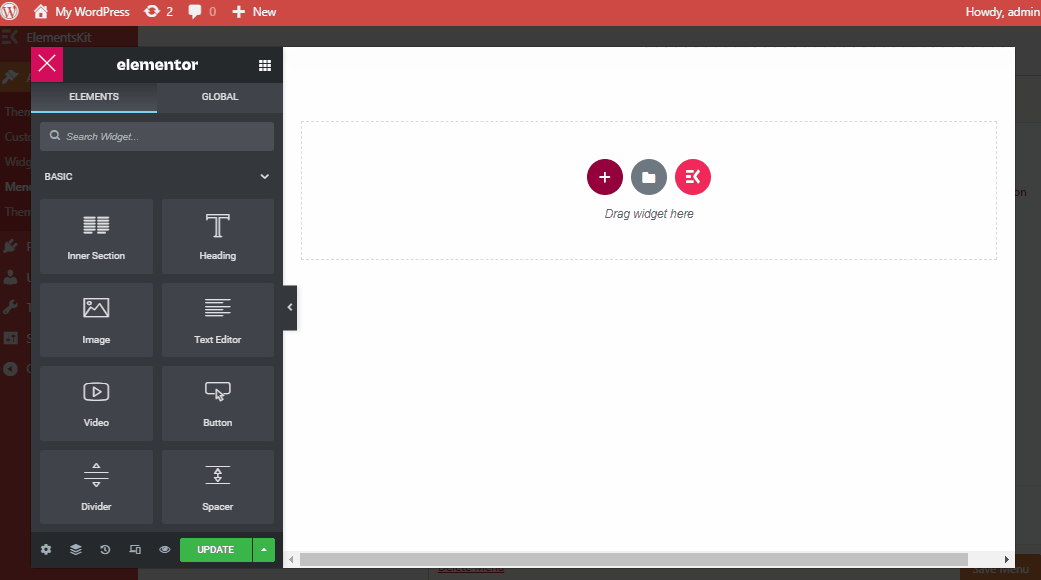
To create and customize your menu items on Elementor. You need to select the Mega Menu items layout and start customizing to your heart’s content!
Here you will find 3 parts (Layout, Style, and Advanced) of customizing your Elementor menu through ElementsKit:
Layout:
In this section, you will see multiple options for editing an Elementor menu layout and structure. You have total control over how your mega menu should be presented.
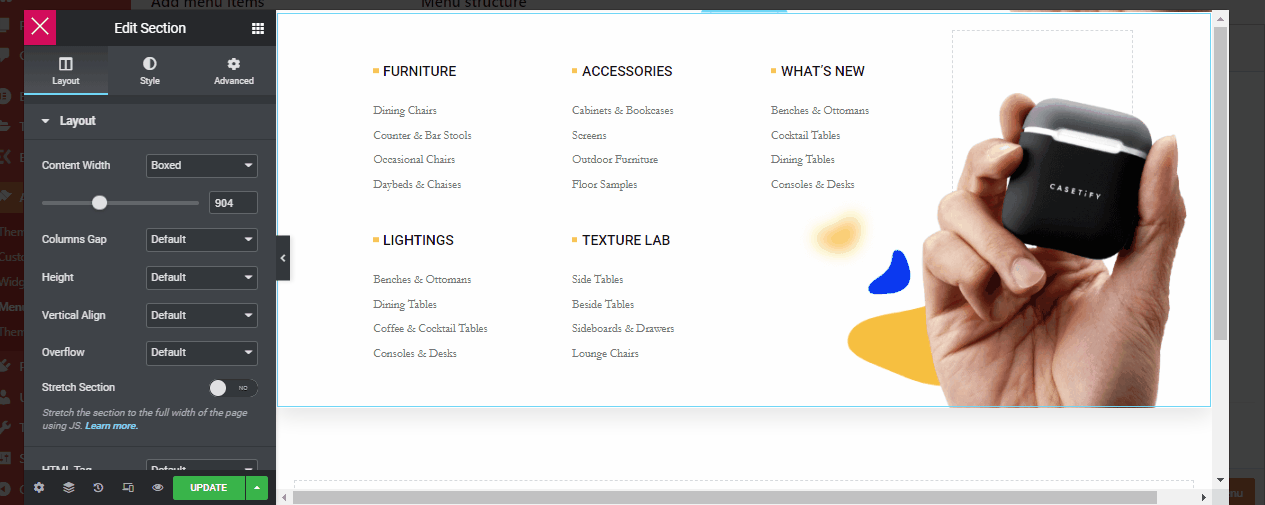
Now with the ElementsKit mega menu widget, you can customize your Content Width, either you can make it a full-screen menu or customize any size you prefer to want by sliding Right or Left. Column Gaps between your mega menu can also be customized the way you like.

With the ElementsKit Elementor menu, you can edit the height of your menu items. It also has multiple options to edit the Vertical Align, Overflow, HTML tags that can be changed according to your demand.
Style:
With ElementsKit mega menu style options, you can change the entire menu look. To be more specific you can change or edit the Background, Background Overlay, Border, Shape Divider, and of course Typography.
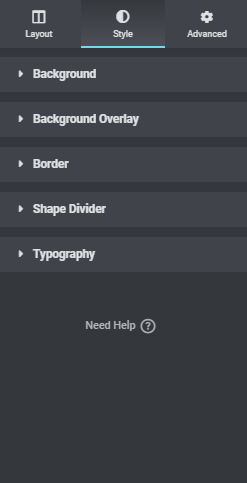
Elementor mega menu widget by ElementsKit is a lifesaver. It has a range of menu-style elements that will assist you in making the best out of your menu items.
Advanced:
Our menu-style advanced options for your WordPress menu are something you’ve always been looking for. Yes, ElementsKit Elementor mega menu options will also help you access and edit the entire advanced sections too.

In which you can create a brand new menu layout. ElementsKit has more advanced alternatives like adding up effects, sticky, motion effects, hover customization, and many more which will improve your editorial experience even better and will make your mega menu smarter.
The last and the most important part is to sync a mega menu you need to create a header on your Elementor website.
Now we will show you how to create an Elementor custom header template. Well, there is another good news for you with the ElementsKit nav menu widget, you can create the nav menu layout by just clicking on our pre-built WordPress menu layout options.
Let’s get started!
First of all, you need to go to ElementsKit on your WordPress dashboard then click on the header footer, to activate the nav menu widget on your website.
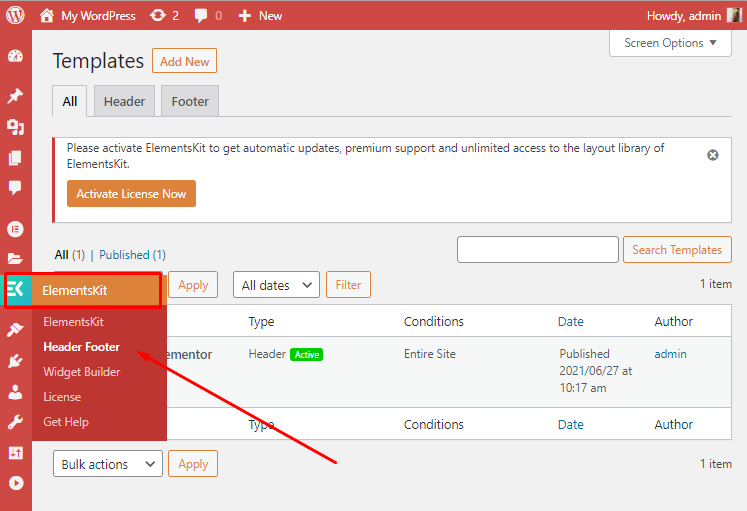
Then click on add new mentioned just right after templates.

After clicking on the add new button a Template Settings will pop up, which is the final part of integrating a mega menu in your website.

Here in this section, you need to give your nav menu a name called the header title. You can also change the conditions of the header and click on activation (if you’re ready and happy with your mega menu items.)
In the final part, don’t forget to click on the edit with elementor button just right before the save changes button.
Now we will show you 2 ways of how you can add your mega menu through the nav menu widget by ElementsKit.
Method One:
To add a nav menu widget to your website the first method you can do after clicking that edit with elementor button, all you need to do is click on the ElementsKit widget icon then go to sections and select a header style whichever you prefer.

After that, you will see your Header title which you added from your WordPress dashboard will appear on the select menu section. And just by clicking on the header title, you will see that all your mega menu items are visible.
Method Two:
You can also embed the nav menu widget through the drag-drop option and also add up different elements around it too (e.g. images, videos, other sections, etc.)
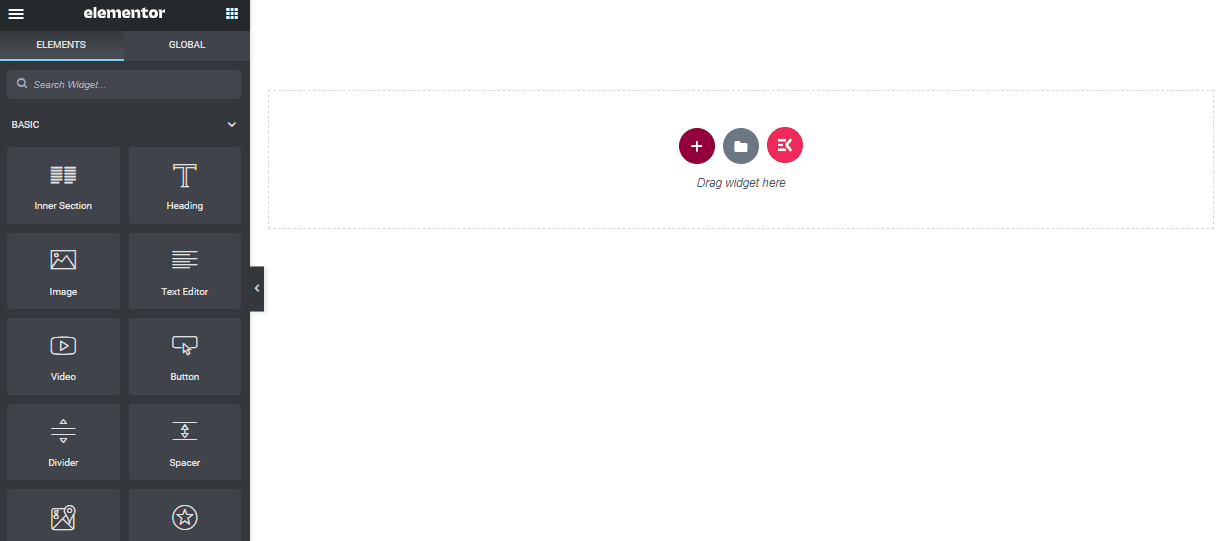
All you have to do is select any type of section (i have selected three sections for this example). The search what widgets you would prefer to add in from your Elementor dashboard.
Here in this example, we have dragged an image, a nav menu, and a video. You can add as many sections and widgets as you like.
Then again the same method can be used to activate your nav menu: on the select menu section, you will see your Header title which you added from your WordPress dashboard will appear. And just by clicking on the header title, you will see all your mega menu items are inserted.
Now you know that using the nav menu widget is super simple and you’re all set to rock ‘n roll! Do keep in mind that you’re also allowed to create an off-canvas menu in ElementsKit as well.
🛠 Additional Info
To know more about the off-canvas menu in ElementsKit, don’t forget to check out our latest video on building an off-canvas menu using ElementsKit

Final Thoughts
Mega menus are wonderful tools for improving website navigation. They allow you to organize a large number of categories and goods to make it easier for users to browse your content.
Creating Mega Menu with ElementsKit add-on for Elementor is always there to give you the best support at no price. If you’re adding it by yourself, then the ElementsKit add-on’s built-in Nav Mega Menu option can be a start for you.
ElementsKit is straightforward, takes little time to set up and tweak, is also simple to use. However, we hope this article was helpful enough to give an overview of the entire aspect of the mega menu.
Please leave a comment below if you have any queries regarding Mega Menu, Nav Menu, or its functionalities.
If you liked this article, you will surely find some more helpful tips and blogs by joining our WPmet community follow us on Facebook/Twitter. Lastly, please don’t forget to subscribe to our channel on YouTube for useful tutorials.
Leave a Reply