Erste Schritte #
Der Instagram-Widget ermöglicht es Ihnen, Ihre neuesten Informationen anzuzeigen Instagram Beiträge auf Ihren WordPress-Sites. Hier ist ein umfassender Artikel, der jede Methode im Detail erklärt. Befolgen Sie die Schritt-für-Schritt-Anleitung, um eine Verbindung zum Instagram-Feed herzustellen.
Instagram generieren Benutzer-ID und Zugangstoken #
So generieren Sie eine Instagram-Benutzer-ID und ein Zugriffstoken.
First browse to this link: developers.facebook.com/apps. Note that you need to be logged in here with your Facebook credential. Or, it will automatically synch with your Facebook account, if you stay logged in.
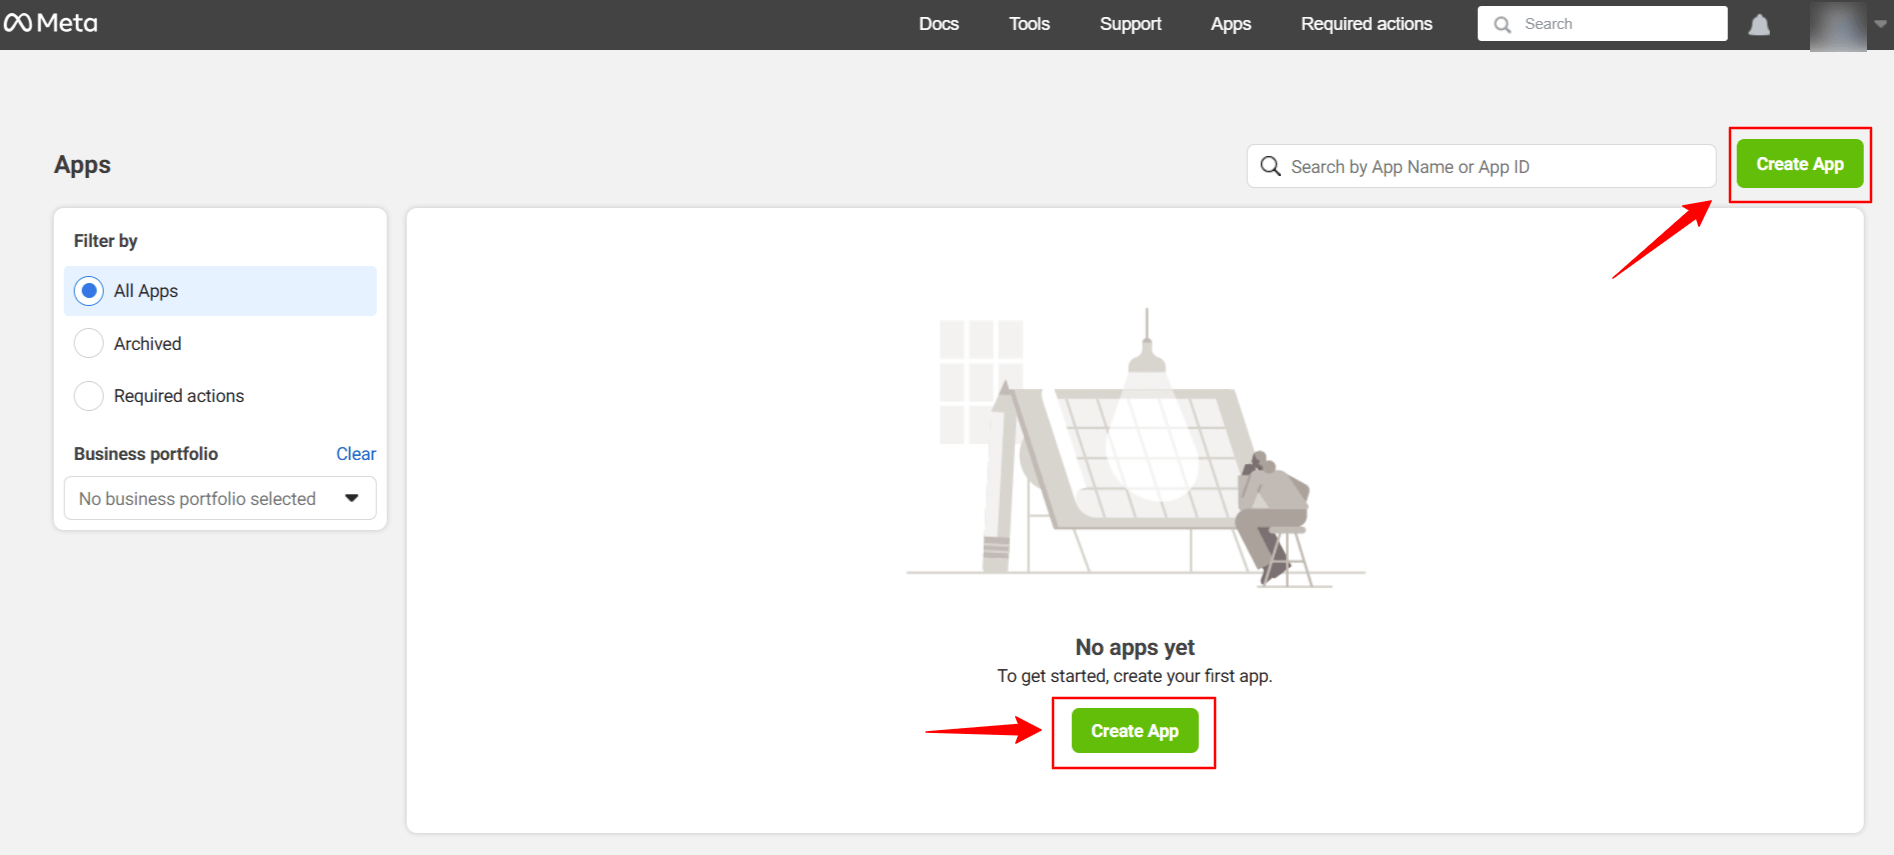
Klicke auf Create App. Doing this, a page will load an interface with different tabs.
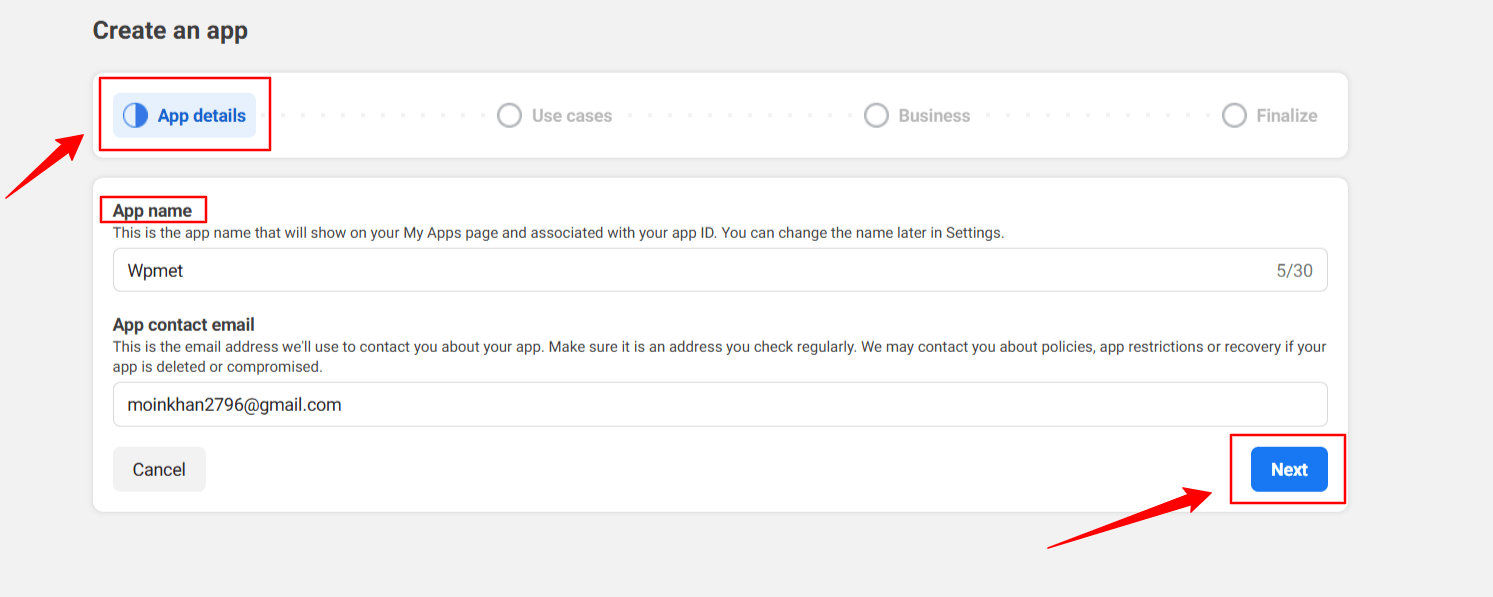
Give a name to the app, for this demo tutorial, I enter the app name as Wpmet. Drücken Sie dann die Nächste Tab.
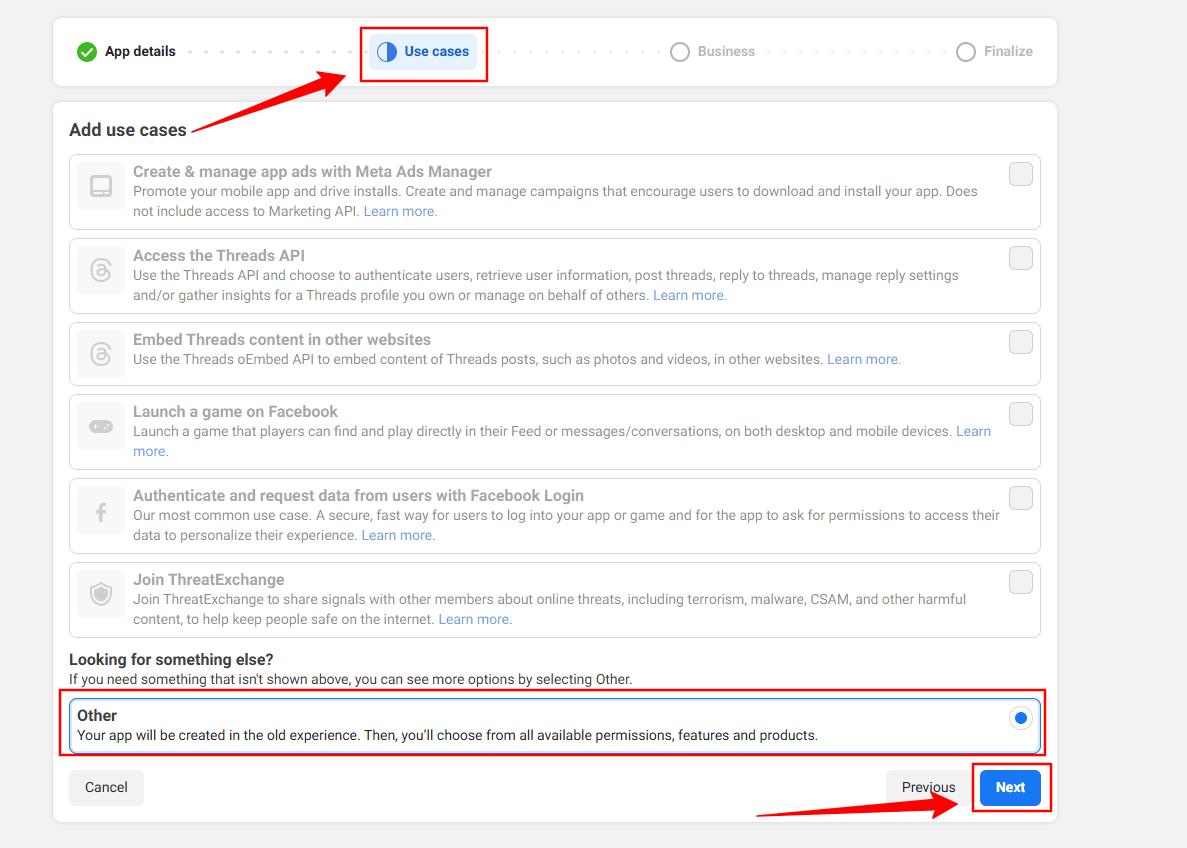
Then, select the “Other” option from the Use Cases tab. And, hit the Nächste Taste.
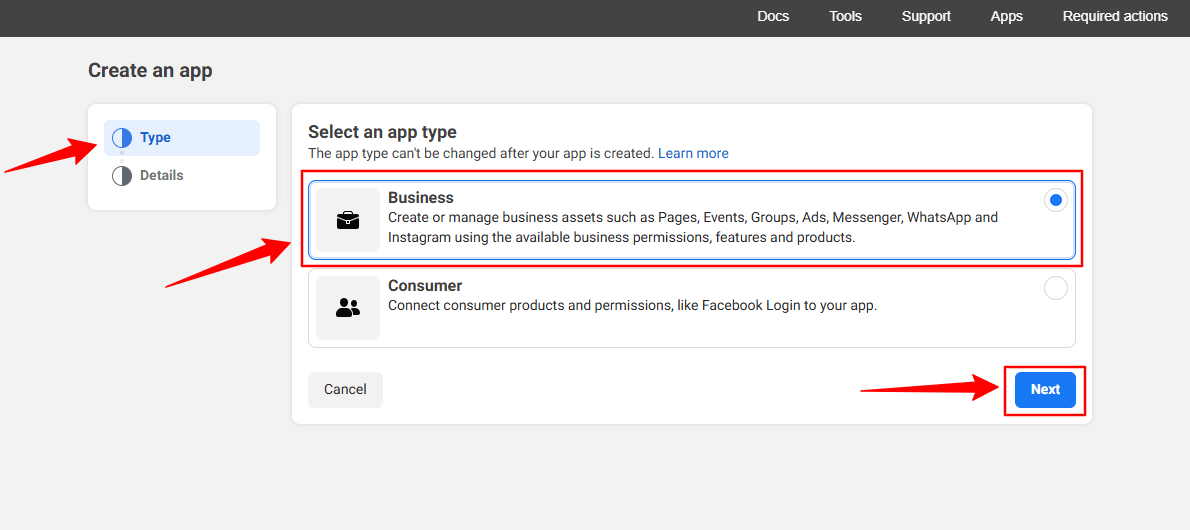
In the next screen, you’ll see two options. First, select Geschäft von dem Typ Tab.
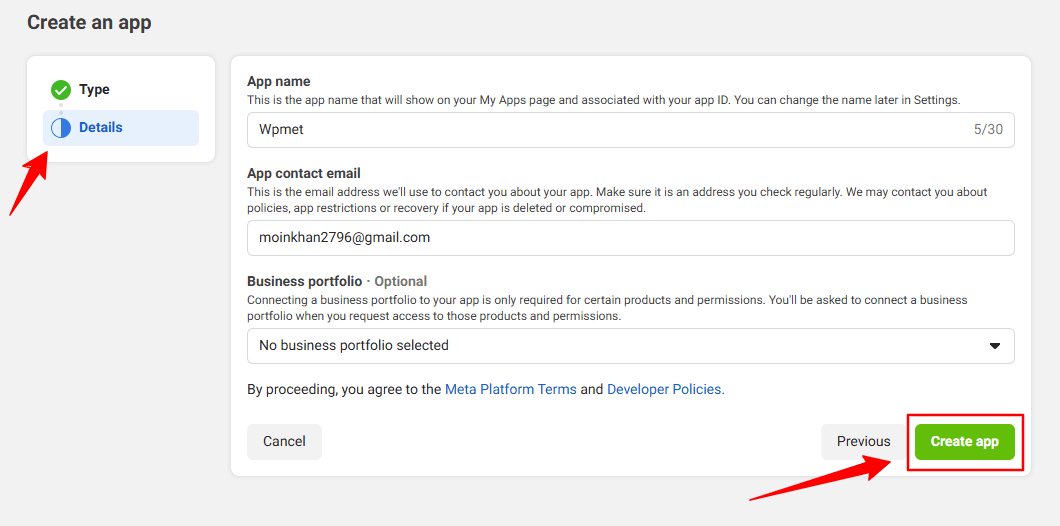
However, you don’t have to put any information in the Einzelheiten option, just click the App erstellen Taste.
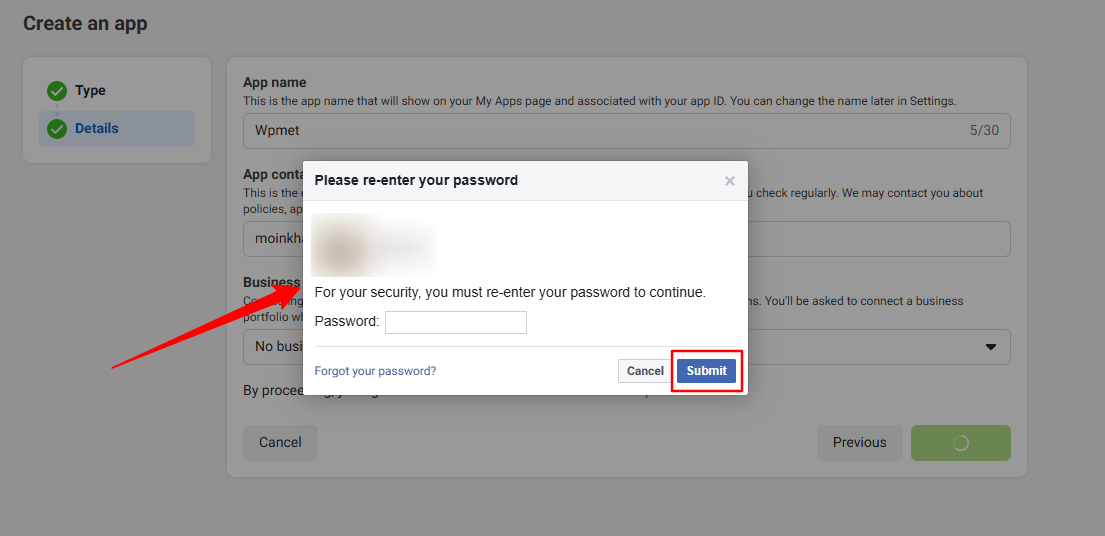
You may need to re-login with your Facebook credentials. Once, you’ve successfully login with your Facebook details, you’ll see all the apps.
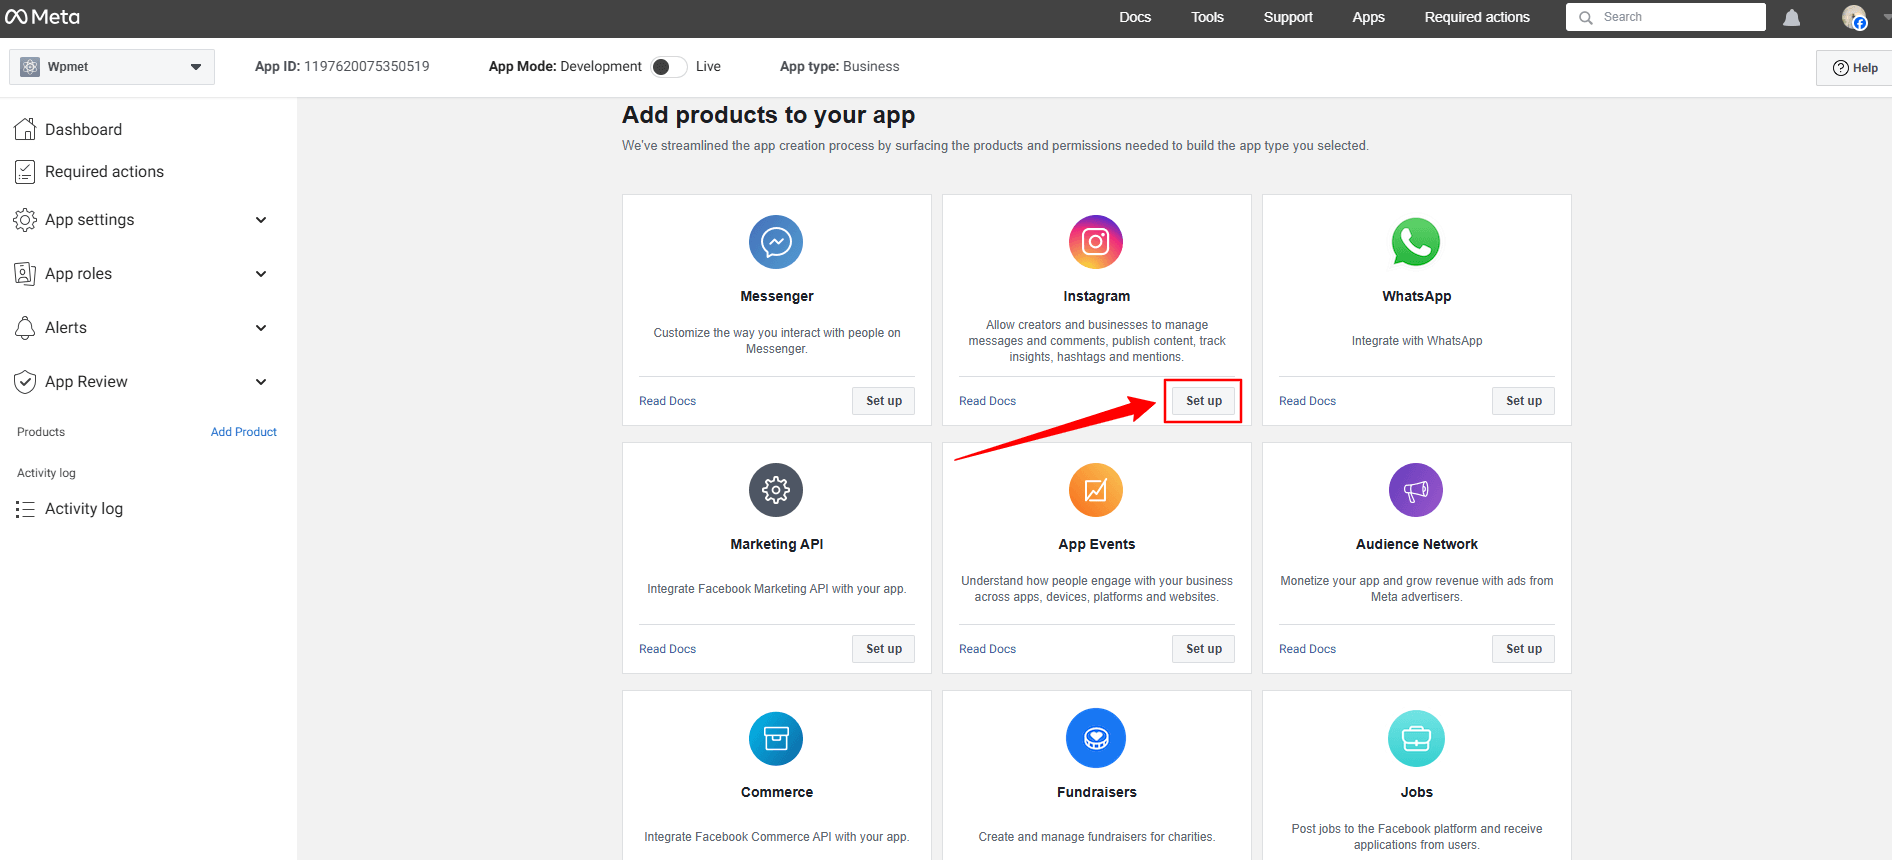
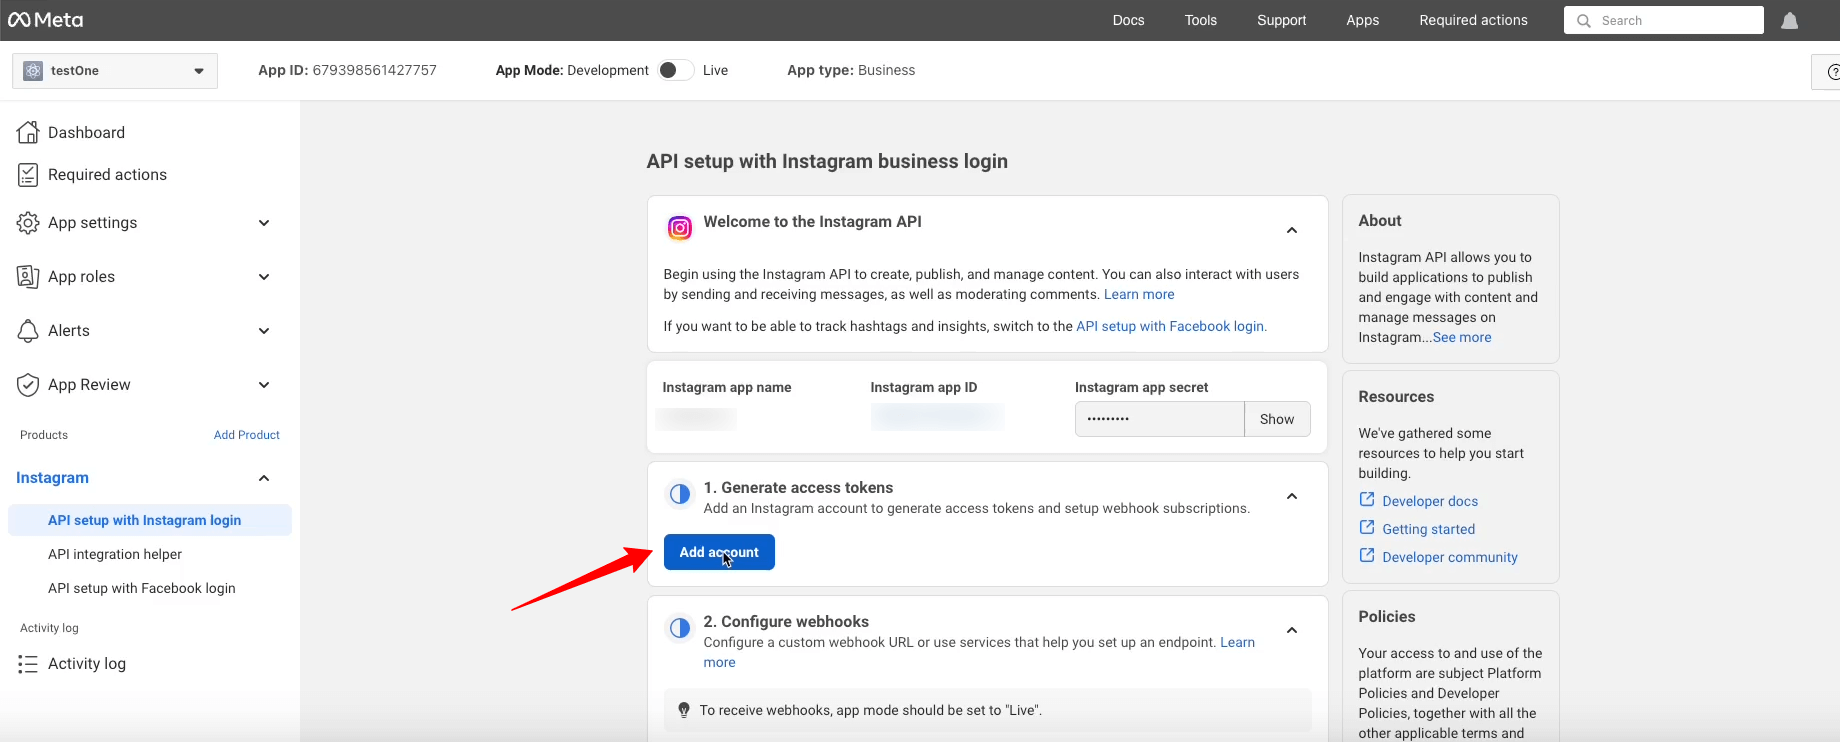
Look for the Instagram app, click the Set up option. Now, a page will load before you, where you can add Instagram account from the Generate Access Token option by clicking the Add account button. However, when you’ll click this button a popup will appear saying only a professional account can be used.
Here’s the professional account requirement popup.
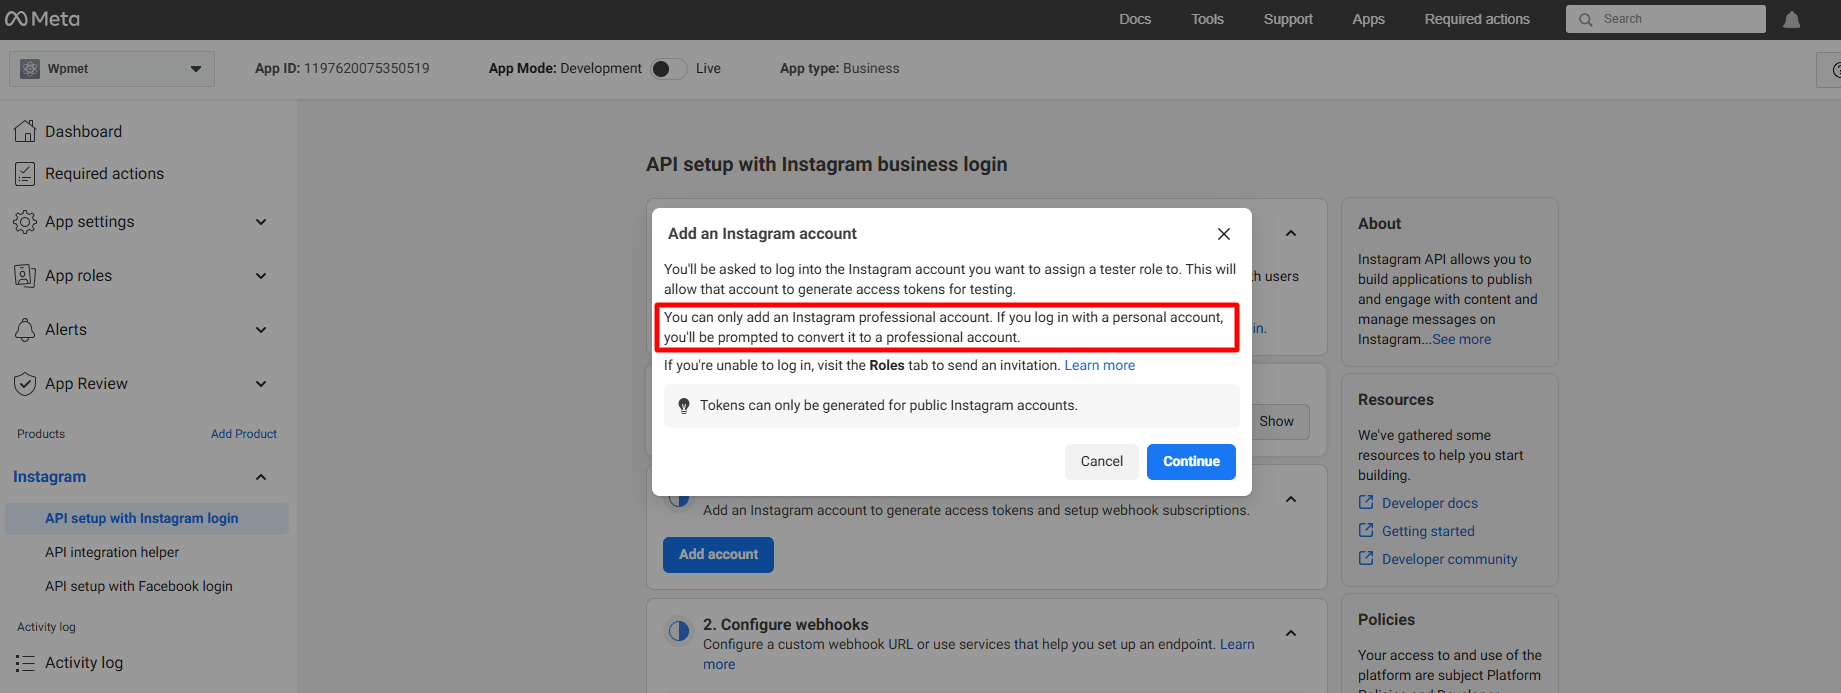
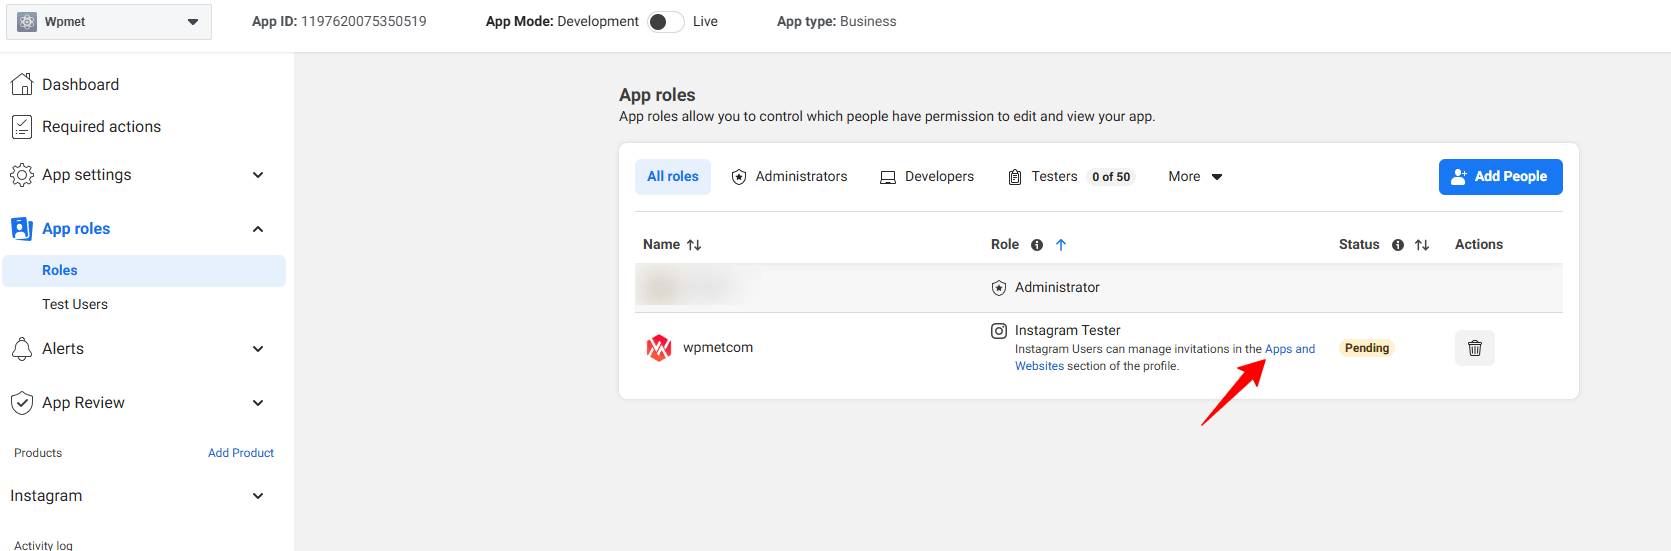
But, here we won’t proceed with this. Rather, we’ll add a regular account. To do this, go under the App Roles runterfallen.
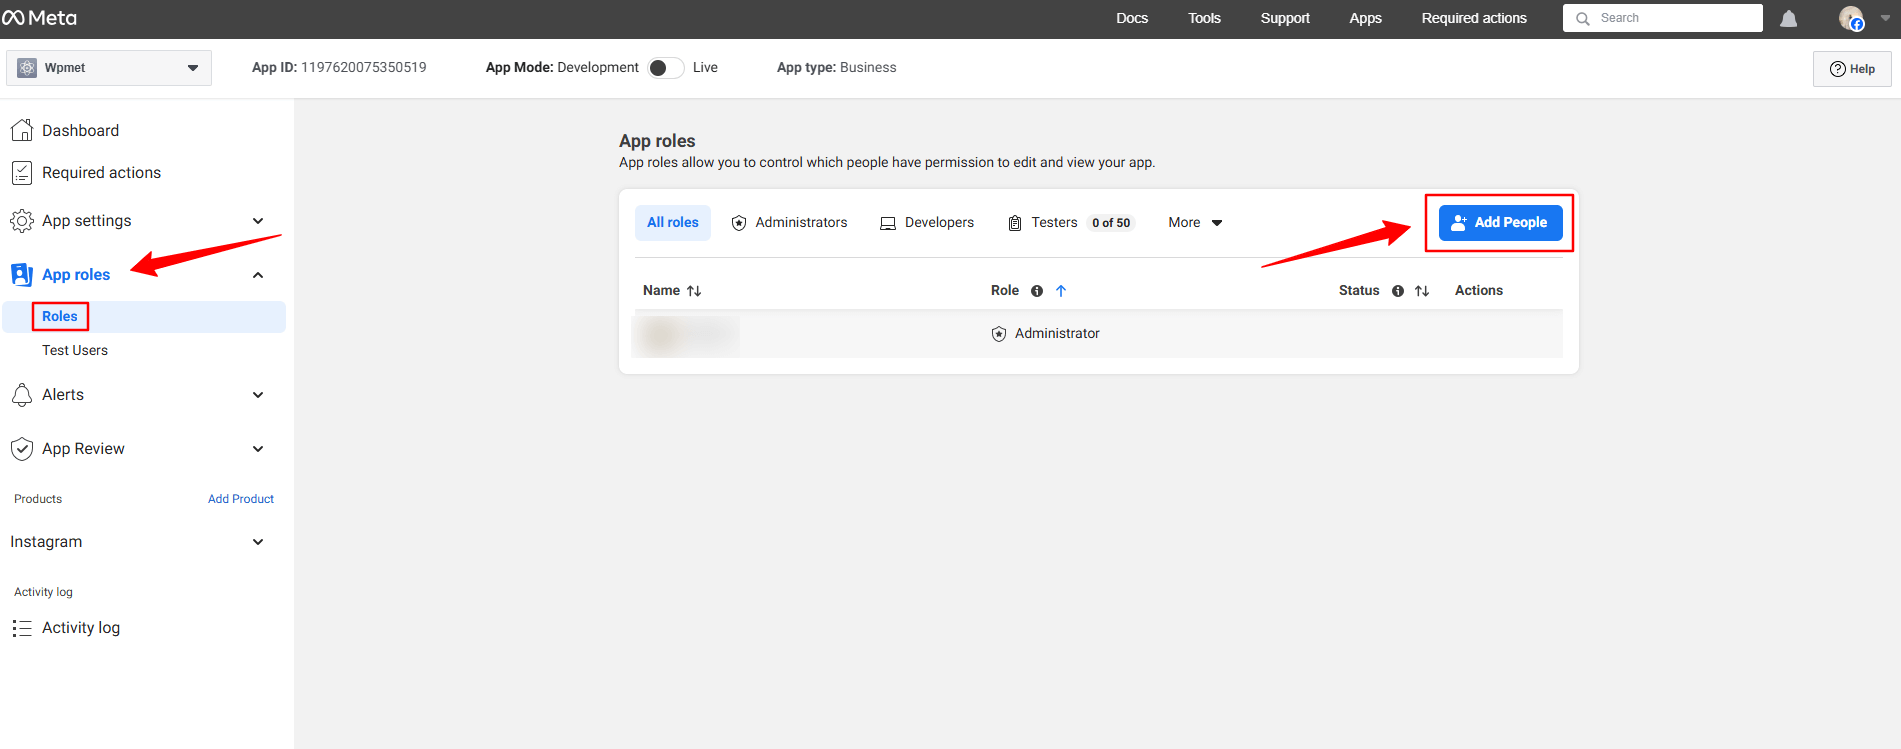
Drücke den Roles unter der App roles dropdown. In the next page, you’ll see an Add People button. Clicking here will reveal a popup like image below.
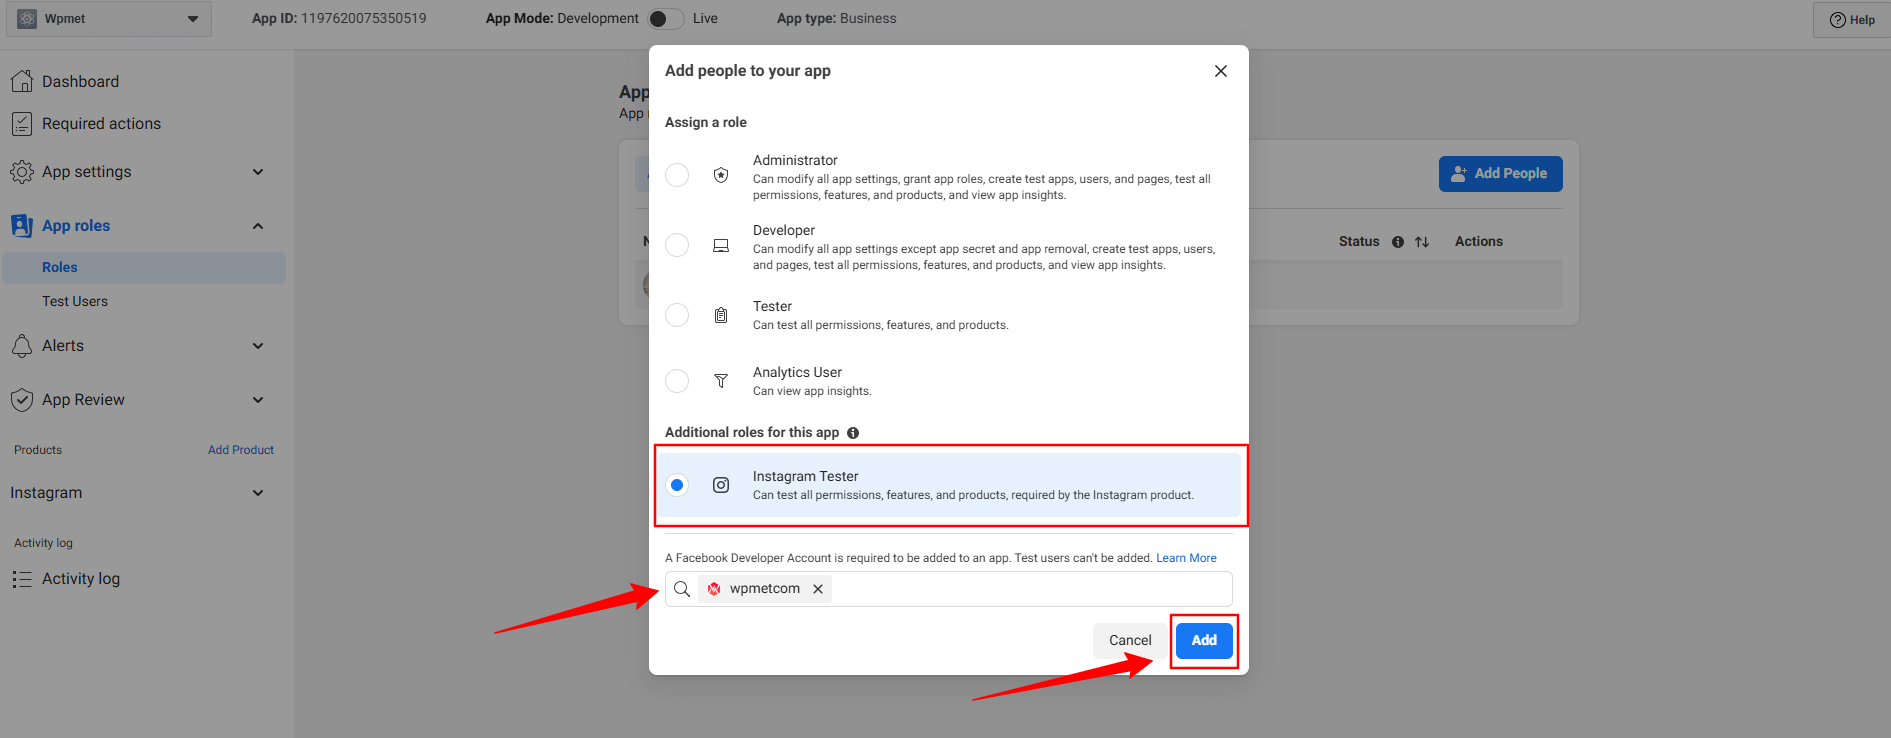
Wählen Sie hier die Instagram Tester option. When you’ll check this option, a search box will reveal. Search for the Instagram account that you want to integrate with your Elementor website. For example, in our case, we’ve searched for the Wpmetcom Instagram profile and click it from the search result to add in the box.
Drücken Sie dann die Hinzufügen button. You will see the pending status with the newly added profile. To resolve that, you need to verify your Instagram account.
Click in the Apps and Websites, marked in the above image. Doing this will open up the Facebook profile in a new tab.
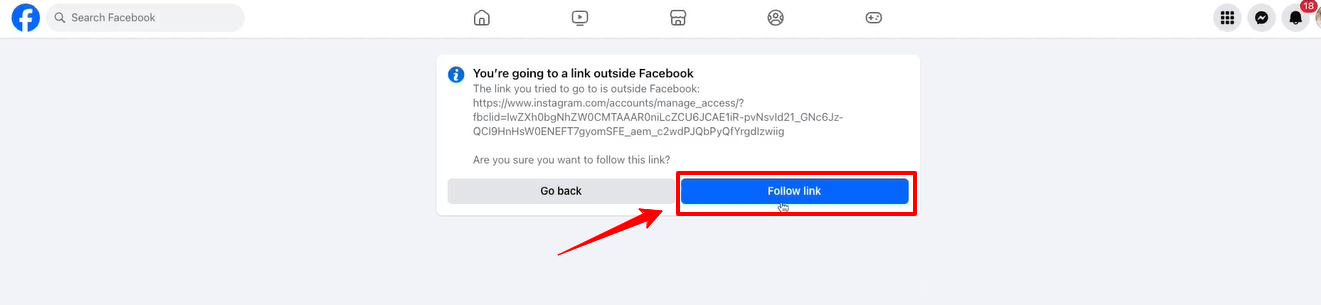
Drücke den Follow link option and it will take you to your Instagram profile web page.
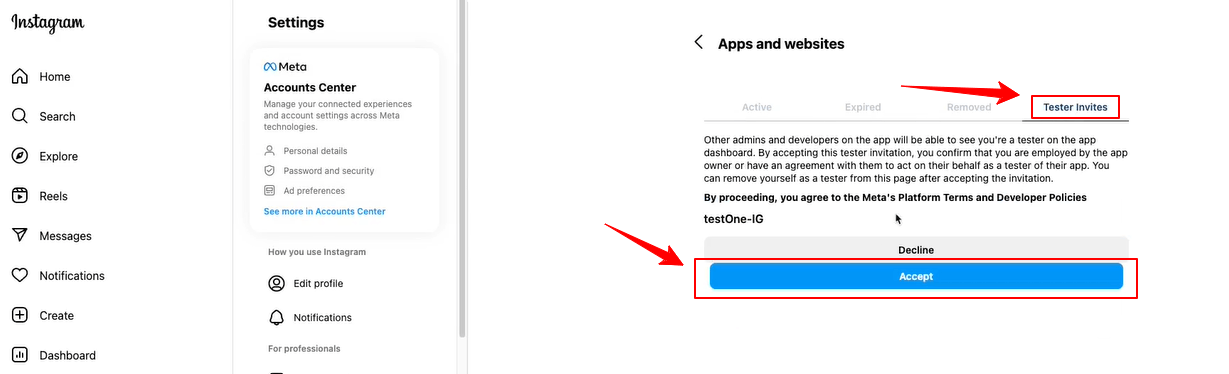
When the Instagram page will load on your screen, navigate to the Tester Invites tab and click the Accept button. Then, return to the Facebook developer dashboard and refresh the page. Now, there will be no pending status anymore with the newly added profile.

Now, you will see the green check mark with the Generate access tokens option. Click the Generate token option next to your instagram account and you’ll see a popup to re-login with your Instagram account.
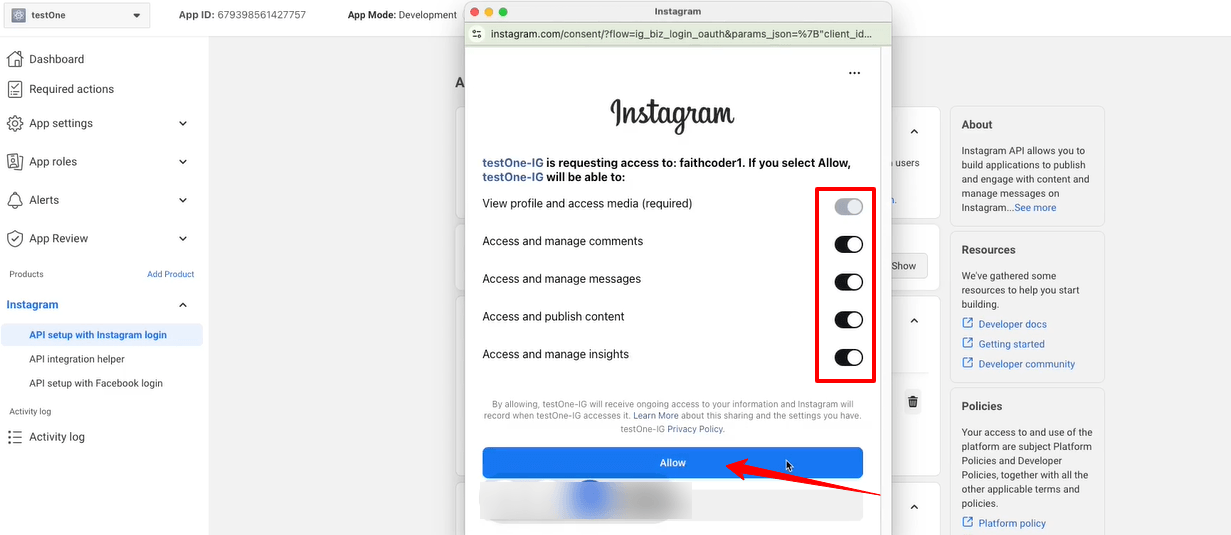
You also need to allow all the access and actions. Toggle all the options to permit like the image above and click the Erlauben Taste.
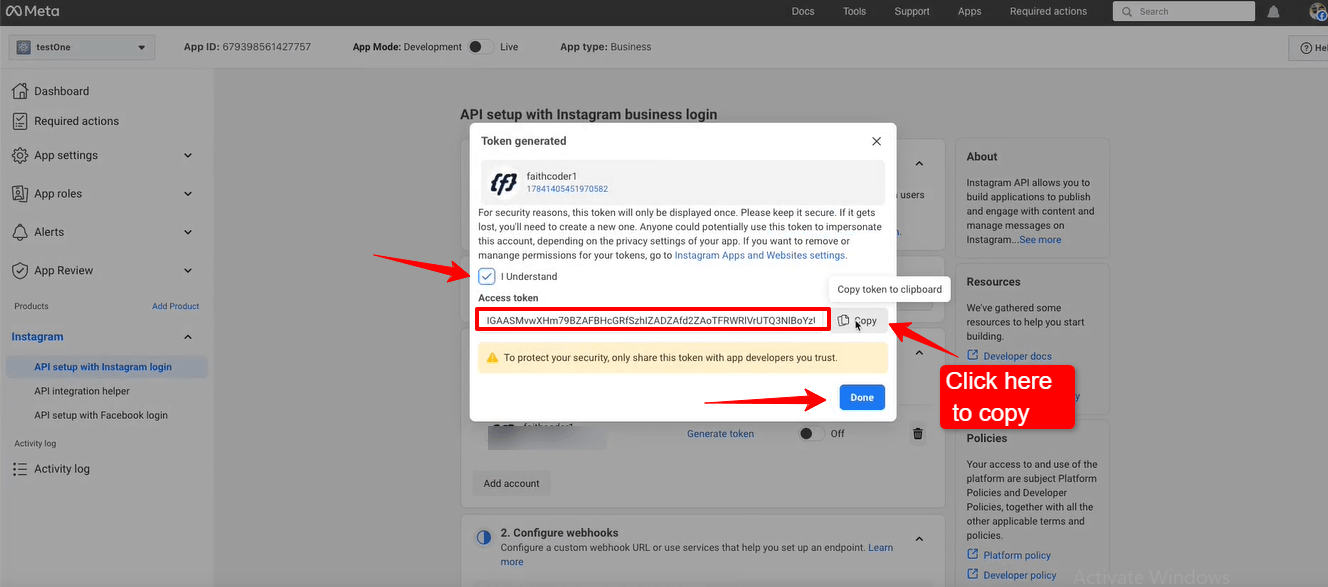
Up next, you’ll see the access token. Check the box with I Understand and select the Kopieren button to copy your Instagram access token. You need to paste it within the ElementsKit settings. We’re going to show the process in the next phase.
Schlagen Sie die Erledigt button to clear the popup.
Adding Instagram Access Tokens to ElementsKit #
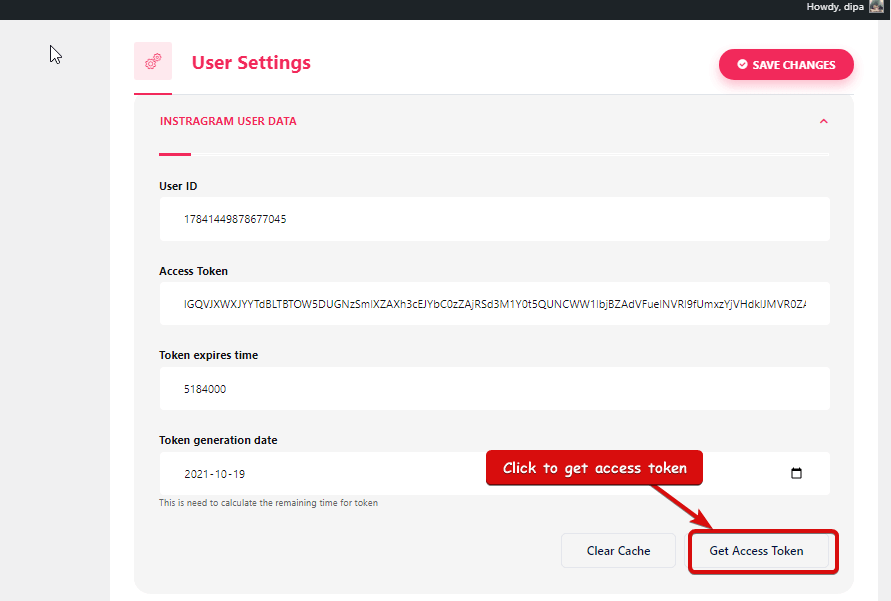
Sie benötigen eine Benutzer-ID und Zugangstoken um eine Verbindung zu Ihrem Instagram herzustellen.
- Schritt=>1: Gehe zu Elementskit=> Benutzerdaten=> Klicken Sie auf Instagram-Benutzerdaten zum Erweitern -> Klicken Sie auf Zugriffstoken erhalten.
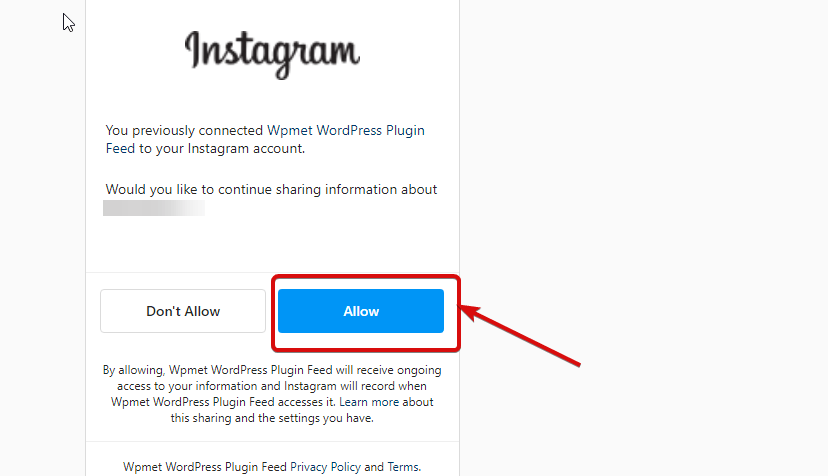
- Schritt=>2: Geben Sie Ihr Instagram-Konto ein Referenzen und klicken Sie auf Anmeldung. Oder Sie können sich mit Ihrem anmelden Facebook-Konto. Sobald Sie um Erlaubnis gebeten haben, klicken Sie auf „Zulassen“.
- Schritt=>3: Hier ist dein Instagram Benutzer-ID, Langlebiges Token, Token läuft ab und Token wird generiert. Kopieren ihnen.
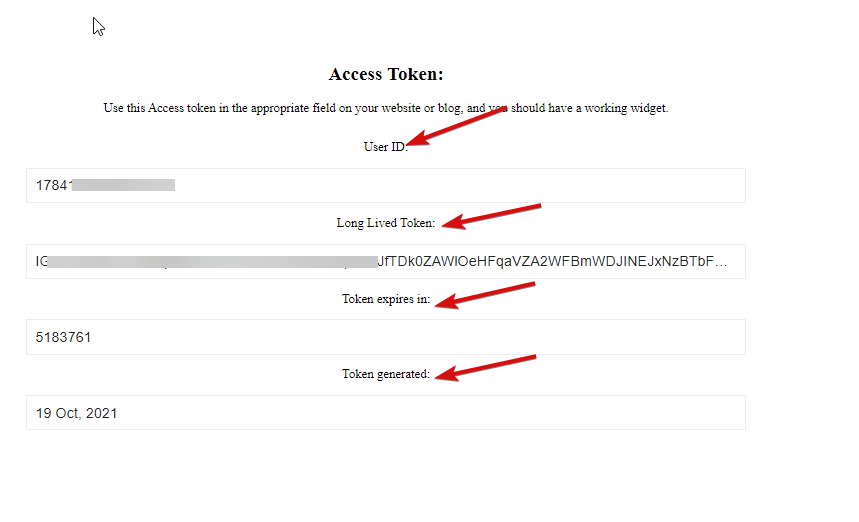
- Schritt=>4: Dann geh zu Instagram-Benutzerdaten Und Paste Die Benutzer-ID, Long Lived Token, Token läuft ab in und Token generierte Werte.
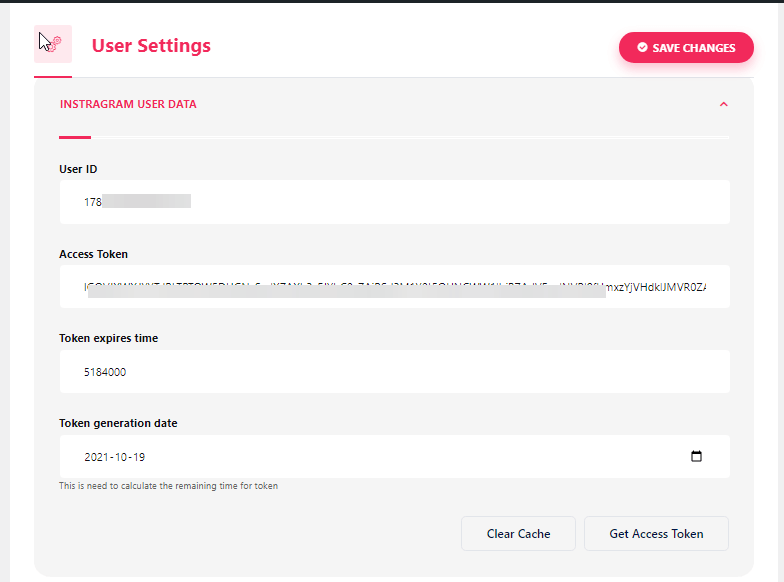
Hinweis: Sie müssen die Daten synchronisieren, bevor die Token-Ablaufzeit überschritten wird.
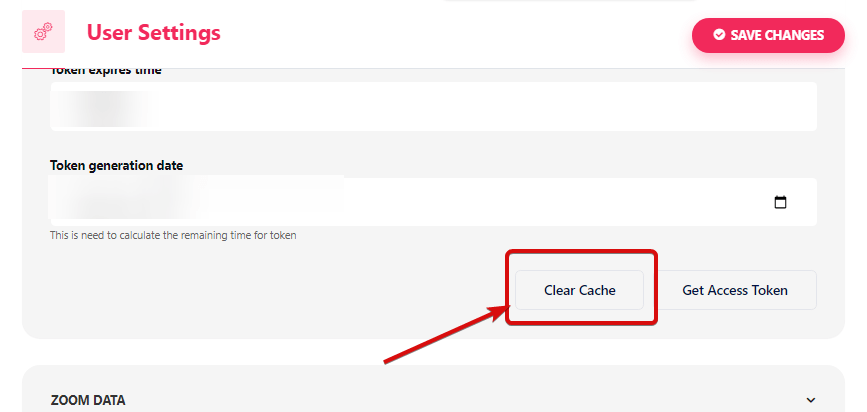
- Wenn beim Synchronisieren der Daten Probleme auftreten, klicken Sie einfach auf „Cache leeren“.
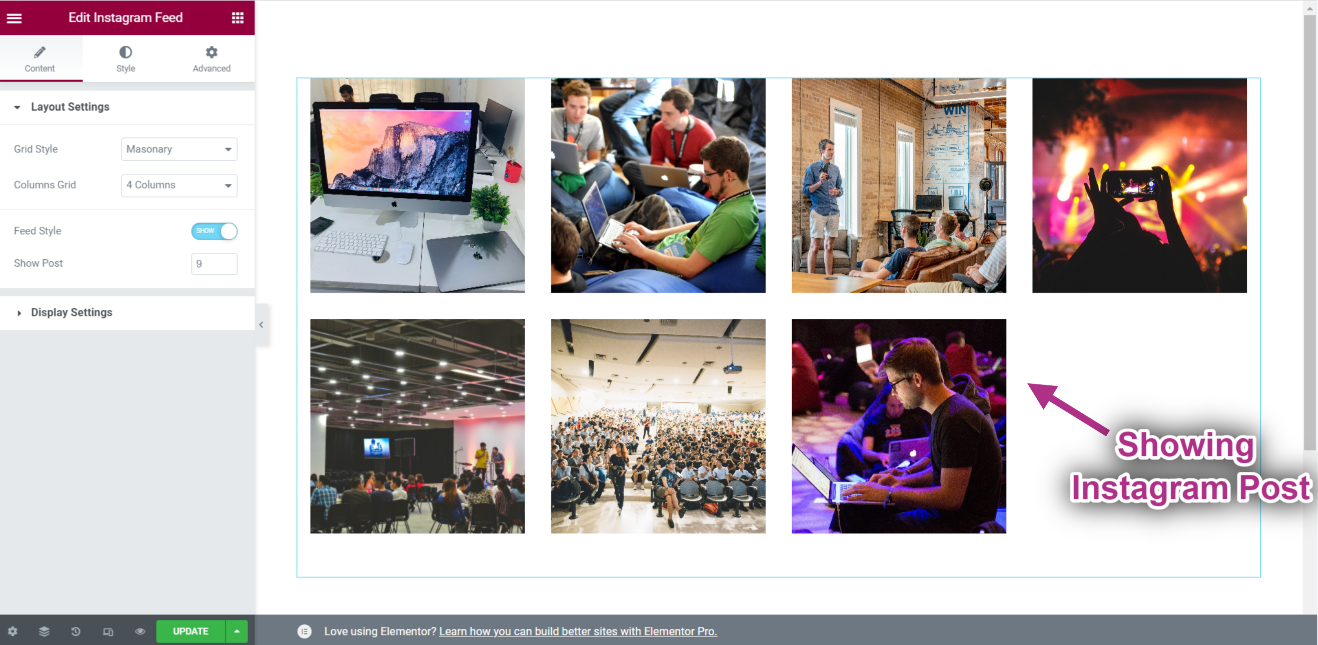
- Schritt=>5: Gehe zu Elementor=> Suchen Instagram-Feed=> Einfach Ziehen Sie das Feld per Drag & Drop.
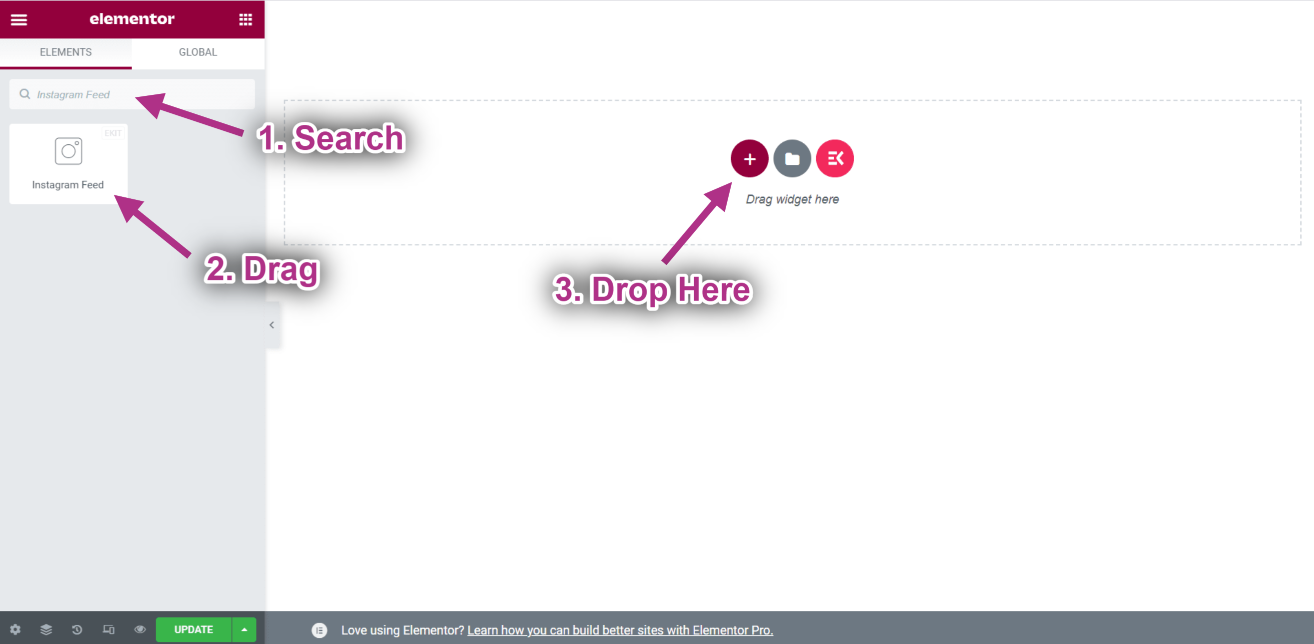
- Jetzt können Sie Ihren Instagram-Beitrag in Ihrem Instagram-Feed-Widget sehen.