

 German
  English
  Spanish
  Italian
  French
  Danish
  Portuguese
  Swedish
  Polish
  Korean
  Japanese
 Erste Schritte mit dem ElementsKit Conditional Content-Modul #
ElementsKit Bedingtes Inhaltsmodul ermöglicht es Ihnen, den Inhalt verschiedener Teile Ihrer Seite basierend auf verschiedenen Bedingungen auszublenden/einzublenden. Sie können die Sichtbarkeit des Inhalts basierend auf Browser, Gerät, Anmeldestatus, Benutzerrolle, Datum, Tag und Uhrzeit festlegen.
Sie können mehrere Bedingungen für denselben Inhalt festlegen. Sie können den Inhalt sichtbar machen, wenn alle oder eine der Bedingungen erfüllt/wahr sind.
Das Tolle an diesem Modul ist, dass Sie Bedingungen auf beliebige Inhalte, innere Abschnitte und Widgets anwenden können.
So verwenden Sie das ElementsKit Conditional Content Module #
Erfahren Sie, wie Sie in 3 Schritten bedingte Sichtbarkeit auf Ihre Website-Inhalte anwenden können mit ElementsKit Bedingtes Inhaltsmodul .
Schritt 1: Aktivieren Sie das Conditional Contents-Modul von ElementsKit #
Sie müssen das Conditional Content-Modul von ElementsKit aktivieren, bevor Sie es auf Ihrer Website nutzen können.
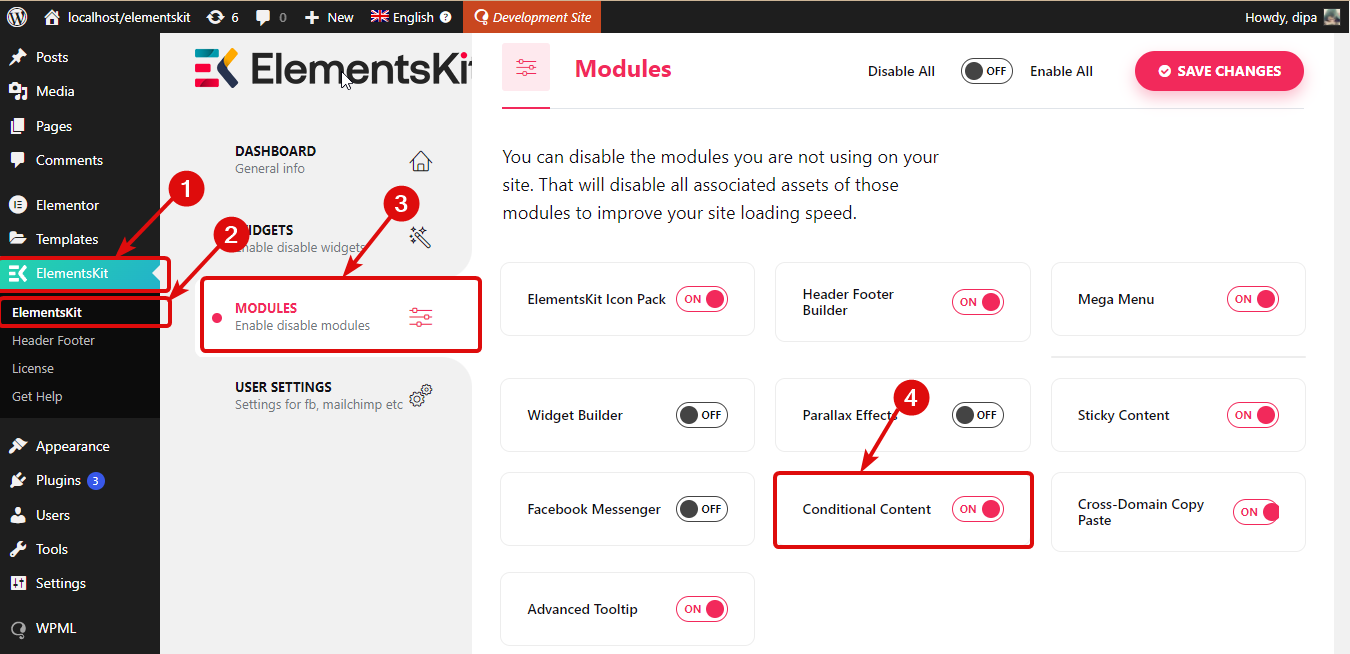
Um das Modul einzuschalten, Gehen Sie zu ElementsKit ⇒ Module ⇒ Bedingter Inhalt. Stellen Sie sicher, dass die Umschaltoption von Bedingter Inhalt ist aktiviert und klicken Sie auf Änderungen speichern tum den Status zu aktualisieren.
Schritt 2: Bedingten Inhalt für ElementsKit aktivieren #
Sie können diesen Inhalt zwar auf jeden kleinen Inhalt, jedes Bild oder jedes Widget anwenden, für dieses Dokument werde ich den bedingten Inhalt jedoch auf einen inneren Abschnitt anwenden.
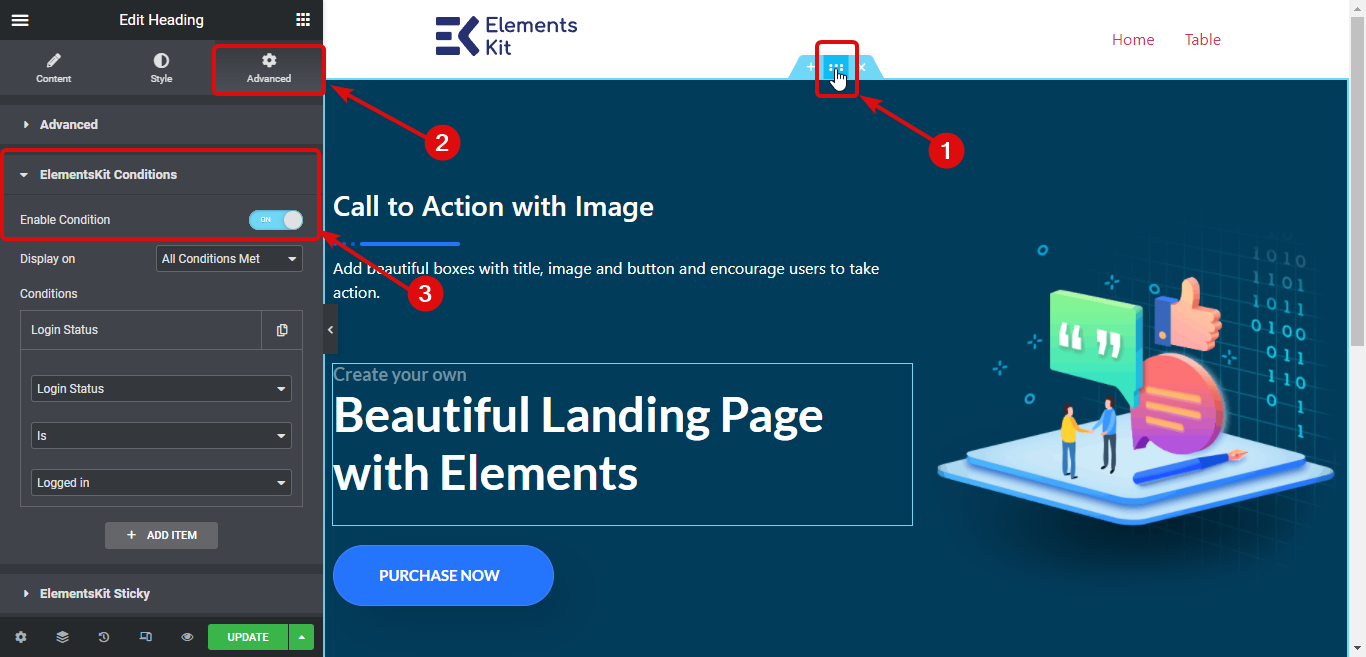
Klicken Sie dazu auf die sechs Punkte, um zu den Einstellungen für diesen inneren Abschnitt zu gelangen. Wechseln Sie dann zu Registerkarte „Erweitert“. und scrollen Sie nach unten zum ElementsKit-Bedingungen Abschnitt. Aktivieren Sie die Option „Bedingung aktivieren“.
Schritt 3: Bedingungen anwenden #
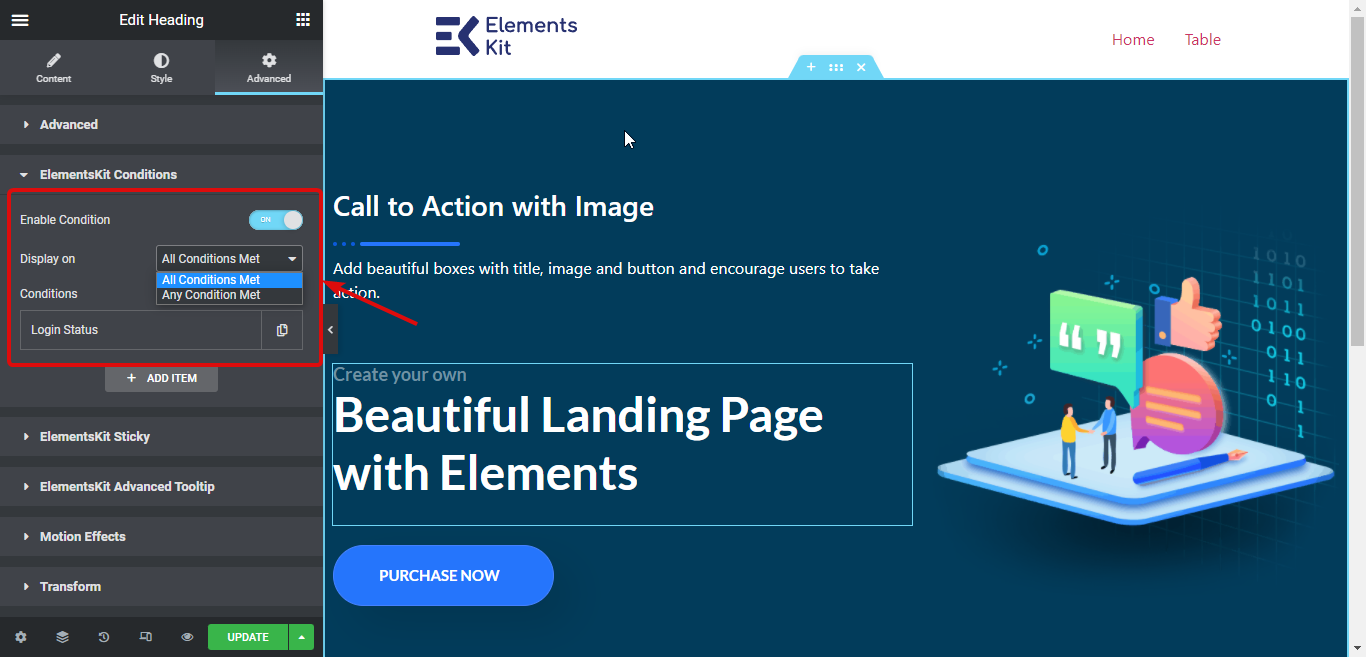
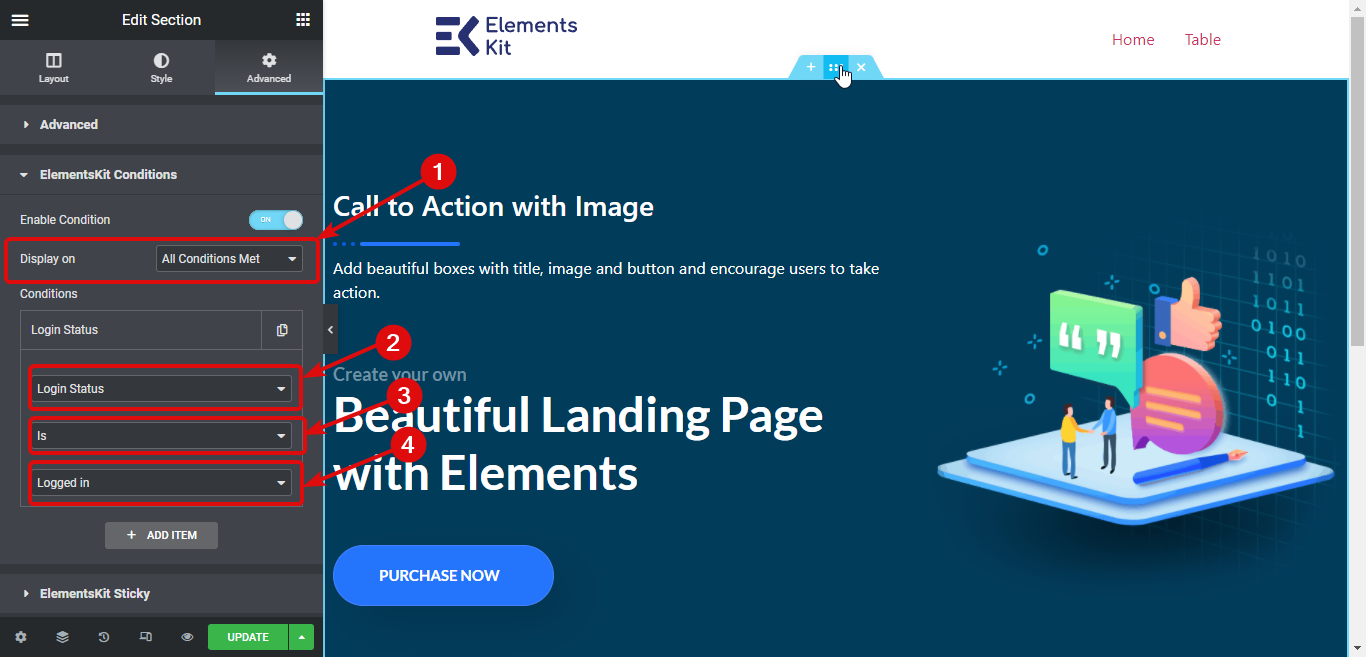
Nachdem Sie die Bedingung aktiviert haben, stehen Ihnen zwei Optionen zur Verfügung: Anzeige unter und Bedingungen.
- Anzeige auf: Wählen Sie „Alle Bedingungen erfüllt“, wenn Ihr gesamter Inhalt nur angezeigt werden soll, wenn alle Bedingungen erfüllt sind. Wählen Sie „Jede Bedingung erfüllt“, wenn Ihr Inhalt angezeigt werden soll, wenn eine der von Ihnen hinzugefügten Bedingungen erfüllt ist.
- Bedingungen: Um eine Bedingung auszuwählen, müssen Sie drei Optionen festlegen.
- Wählen Sie die Aktion wie Anmeldestatus, Benutzerrolle, Browser usw.
- Wählen Sie „Ist“/„Ist nicht“.
- Im dritten Dropdown-Menü müssen Sie Wählen Sie den Wert für die Aktion. Sie finden in der ersten Dropdown-Liste relevante Wertoptionen für die von Ihnen ausgewählte Aktion.
Notiz: Um eine neue Bedingung hinzuzufügen, klicken Sie auf das + ARTIKEL HINZUFÜGEN. Sie können so viele Inhalte hinzufügen, wie Sie möchten.
Hier wähle ich beispielsweise eine Anzeige auf „Alle Bedingungen erfüllt“. Wählen Sie dann „Anmeldestatus“ „Ist“ „Angemeldet“. Der Inhalt ist also nur für angemeldete Benutzer sichtbar.
Schritt 3: Aktualisieren und Vorschau #
Sobald Sie die Bedingungen festgelegt haben, klicken Sie auf Aktualisieren, um alle Änderungen zu speichern. Jetzt sollten Sie die von Ihnen festgelegten Bedingungen auf dieser Seite sehen.
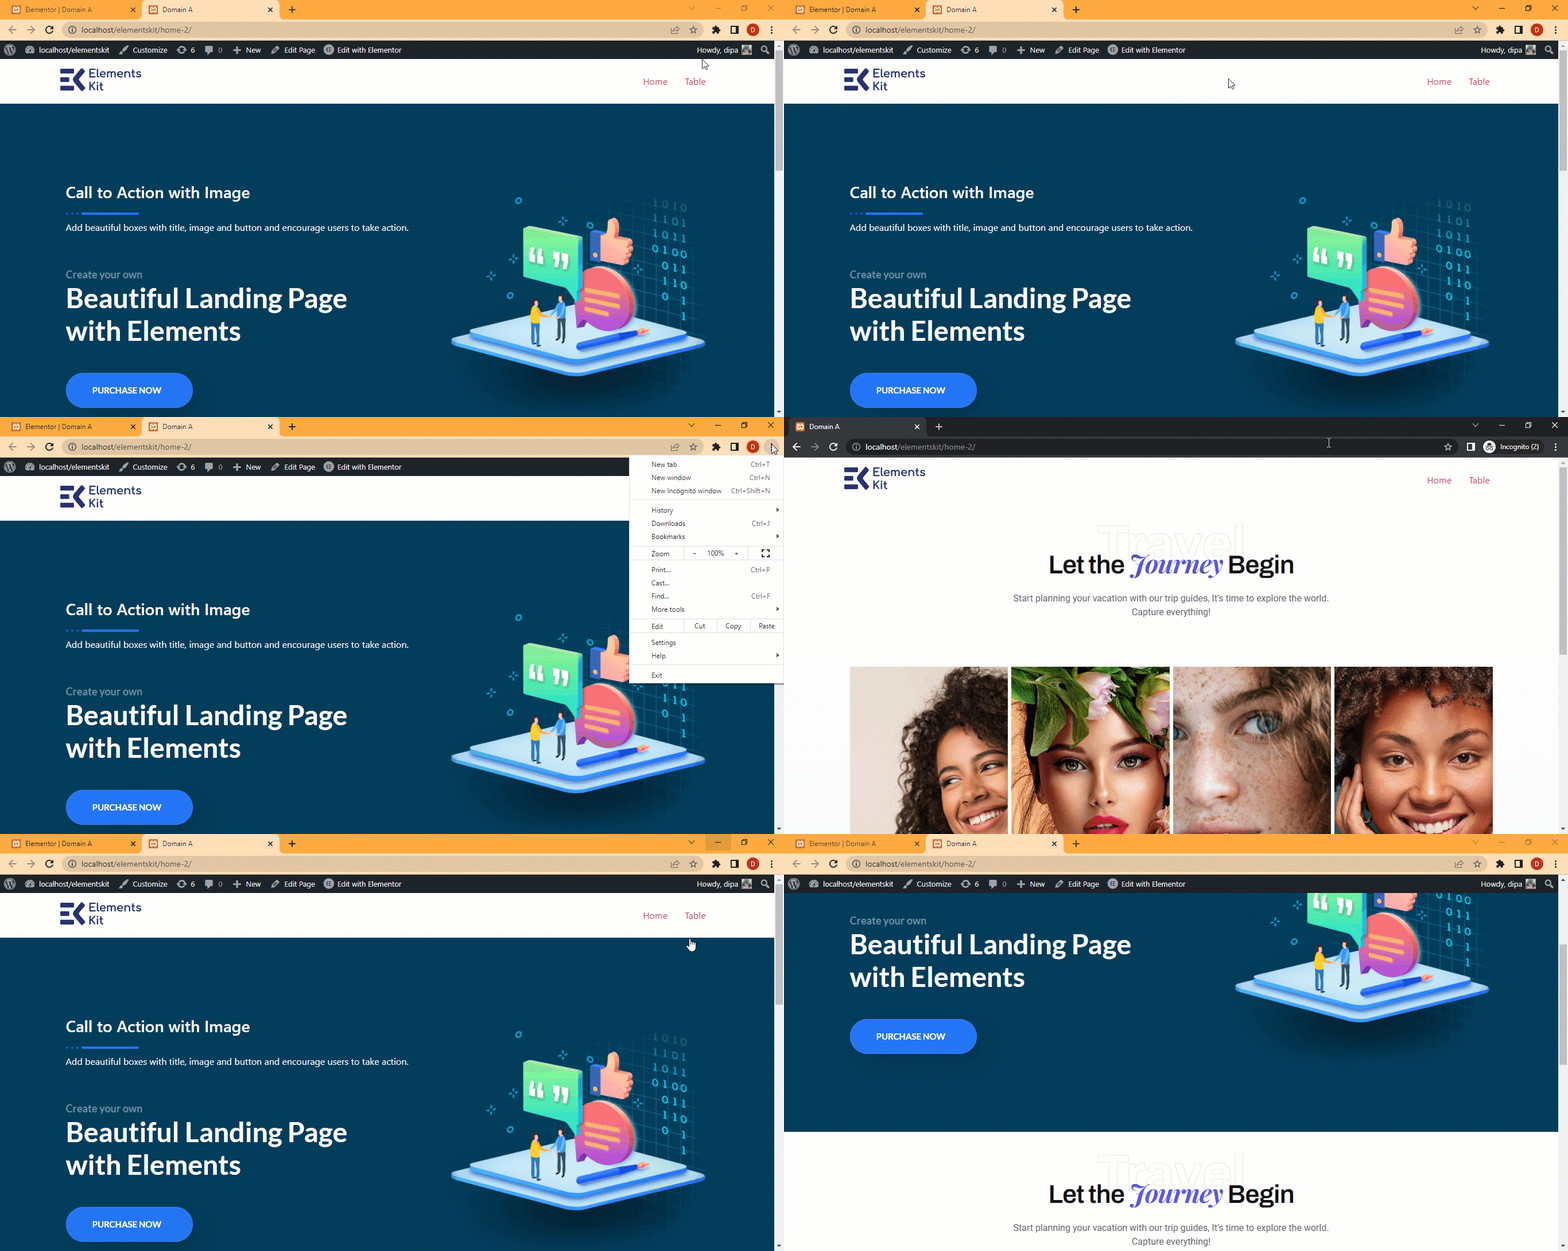
Hier ist eine Demo.