
 German
  English
  Spanish
  Italian
  French
  Danish
  Portuguese
  Swedish
  Polish
  Korean
  Japanese
 Hintergrundbildparallaxe #
Ein wichtiger Trend im Webdesign ist das Parallaxen-Scrollen, bei dem sich das Hintergrundbild langsamer zum Vordergrundinhalt bewegt, wenn Sie auf der Seite nach unten scrollen. Dieser Parallaxeneffekt kann auf die Elementor-Site angewendet werden.
In dieser Anleitung zeigen wir Ihnen, wie Sie mit ElementsKit einem Hintergrundbild einen Parallaxeneffekt hinzufügen können.
Sehen Sie sich die Videoanleitung an:
Oder folgen Sie der Schritt-für-Schritt-Anleitung unten:
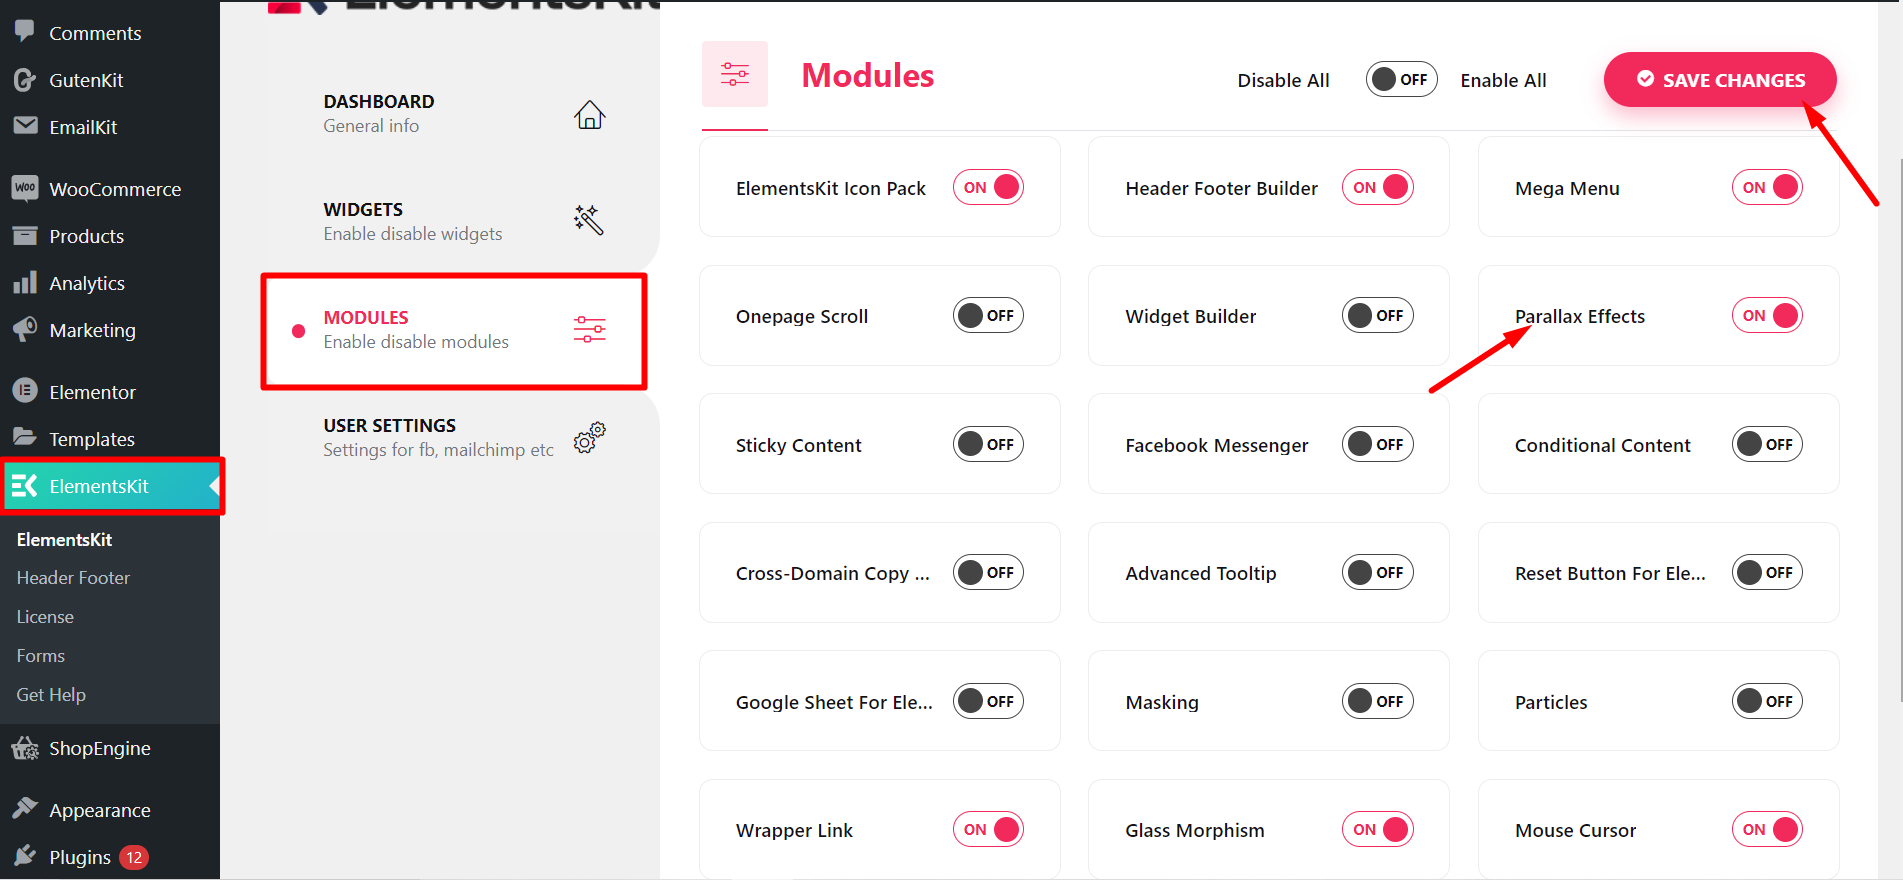
Schritt=>1: Stellen Sie sicher, dass Parallaxe Modul ist AN aus Armaturenbrett → ElementsKit → MODULE
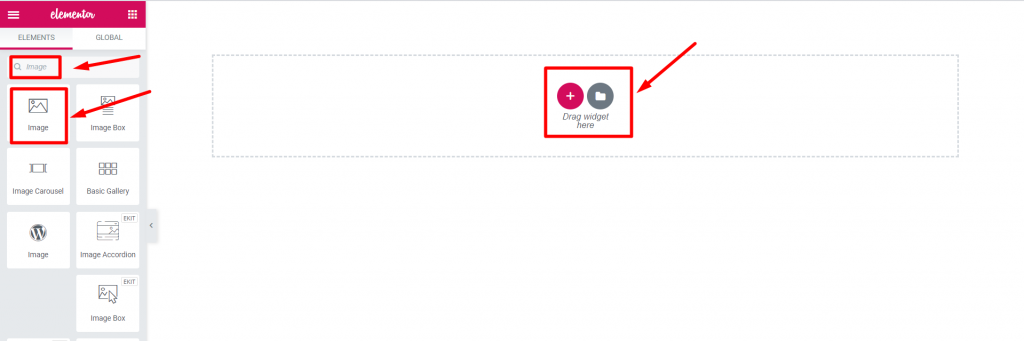
Schritt=>2: Gehe zu Elemente=> Suchen nach Bild=> Drag & Drop Bildausschnitt.
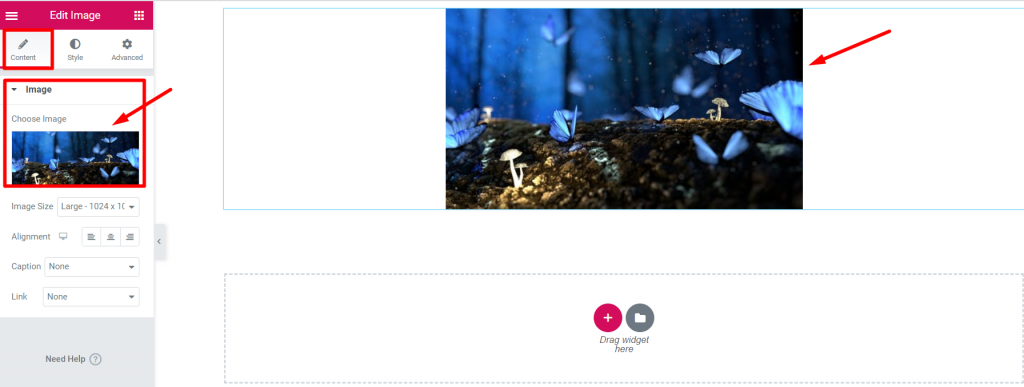
Schritt=>3: Füge hinzu ein Hintergrundbild aus Abschnitt bearbeiten → Inhalt Tab
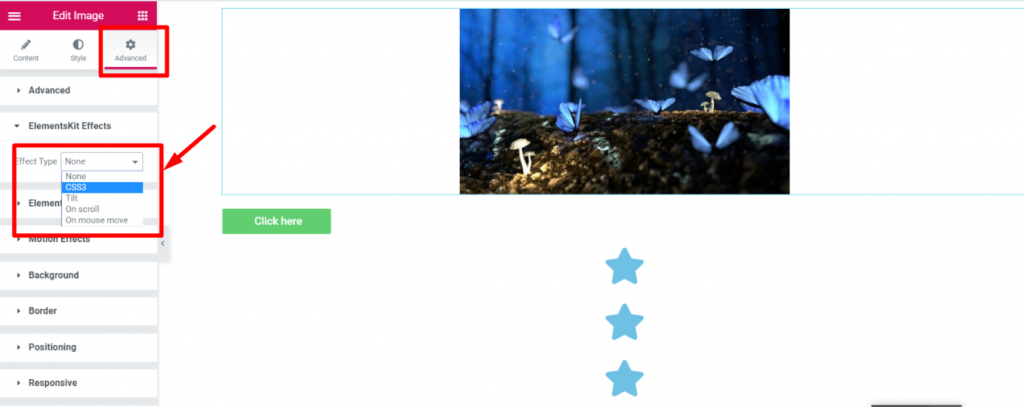
Schritt=>4: Gehe zu Registerkarte „Erweitert“. -> Klicken Sie auf ElementsKit Effekte -> Effekttyp auswählen CSS3, Neigung, Beim Scrollen, Bei Mausbewegung nach eigener Wahl
CSS3 #
- Schritt=>1: Gehe zu Registerkarte „Erweitert“.=>ElementsKit-Effekte=> Effekttyp=> Auswählen CSS3=> Schalten Sie das ein CSS-Animation Umschalten
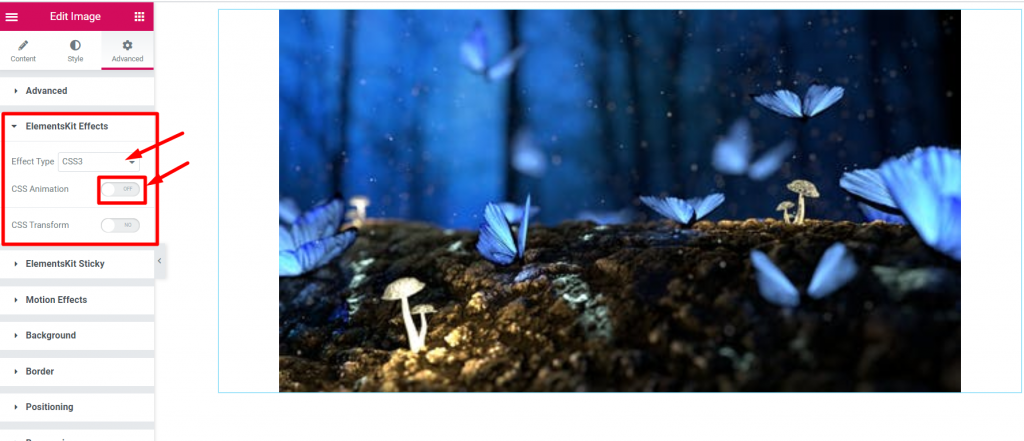
- Wählen Animationseffekt aus Runterfallen
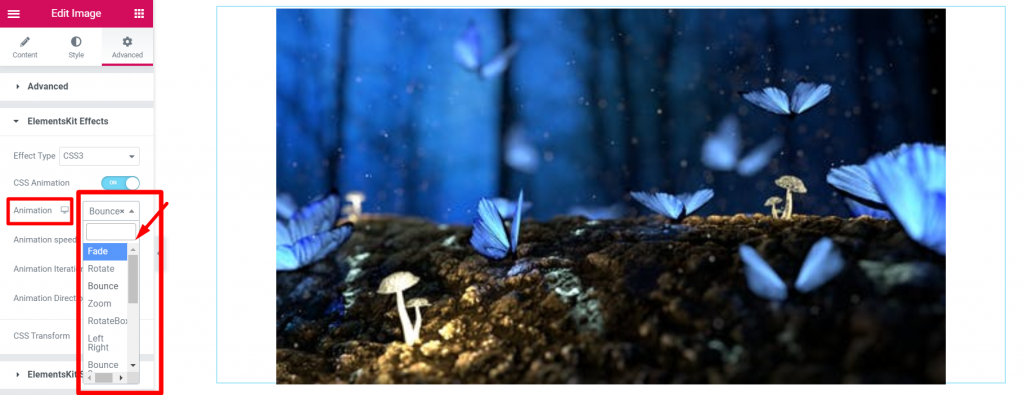
- Ändern Animation Geschwindigkeit
- Animation Iterationsanzahl=> Unendlich oder nicht gesetzt
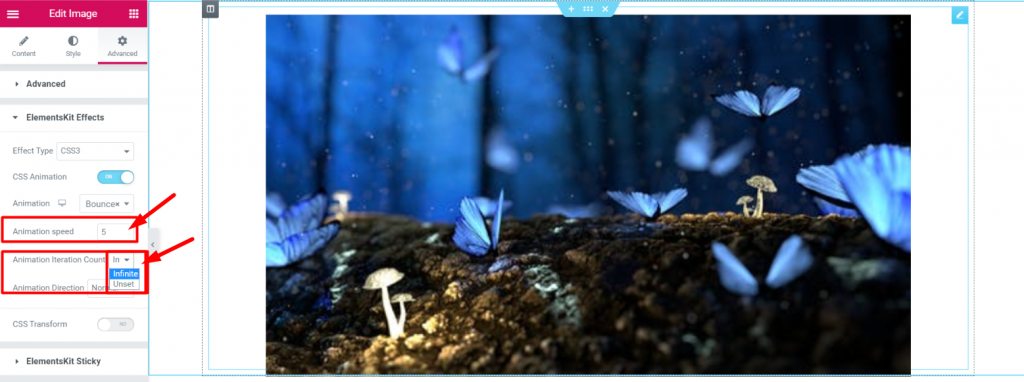
- Wählen Animationsrichtung
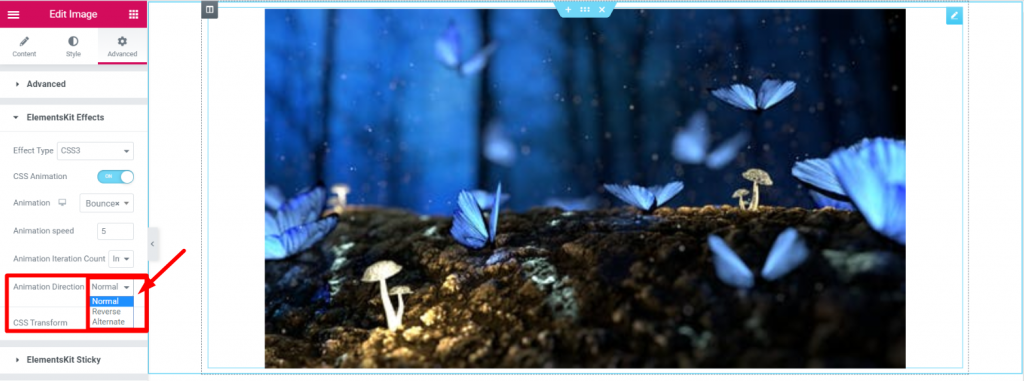
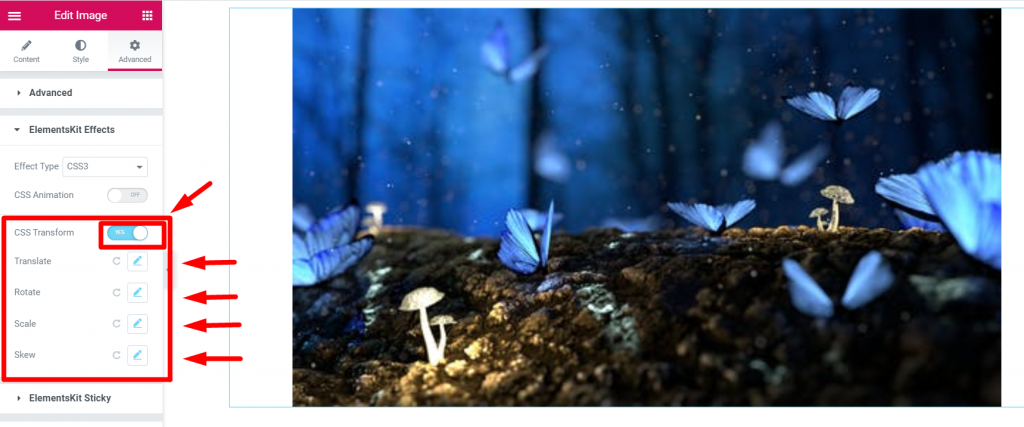
- Schritt=>2: ElementsKit-Effekte=> Effekttyp=> Auswählen CSS3=> Schalten Sie das ein CSS-Transformation Umschalten
- Übersetzen
- Drehen
- Skala
- Schräg
- Bei Bedarf zurücksetzen
Neigung #
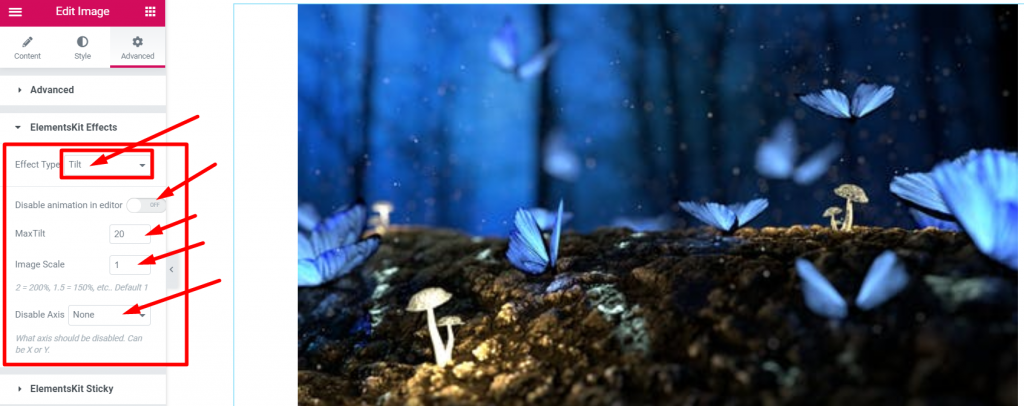
Schritt=>1: Gehe zu Registerkarte „Erweitert“.=>ElementsKit-Effekte=> Effekttyp=> Auswählen Neigung
EIN Scrollen #
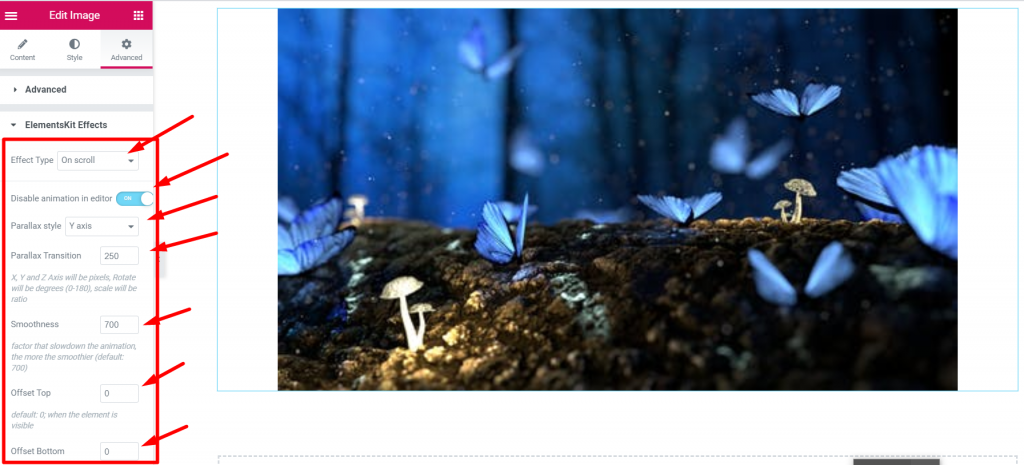
Schritt=>1: Gehe zu Registerkarte „Erweitert“.=>ElementsKit-Effekte=> Effekttyp=> Beim Scrollen auswählen
Bei Mausbewegung #
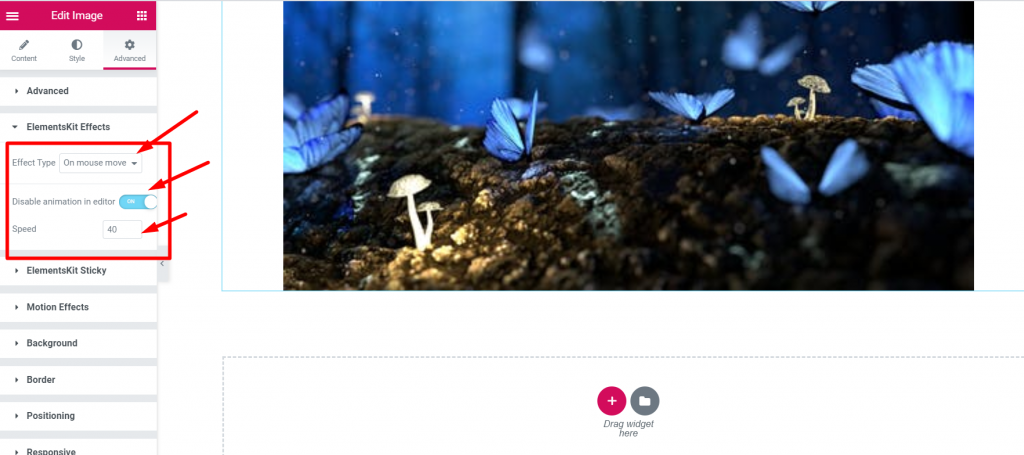
Schritt=>1: Gehe zu Registerkarte „Erweitert“.=>ElementsKit-Effekte=> Effekttyp=> Bei Mausbewegung auswählen
So kann der Parallaxeneffekt auf eine Elementor-Seite oder -Website angewendet werden. Lernen Sie diese einfache und eingängige Methode kennen, um Parallaxe auf Ihrer Elementor-Seite anzuwenden.


