


You can integrate Google services like Google Sheets and Drives to your WordPress forms. For that you need to connect the MetForm with your Google Cloud Console.
Here is how to integrate Google services with MetForm:
Pre-requirements: #
- You will need a Google Cloud Console account, either you have to open a new account or log in to your exisiting account.
- Since MetForm is an Elementor form builder, you need to have Elementor plugin installed and activated on your website.
- Elementor: Plugin herunterladen
- MetForm Pro: Holen Sie sich das Plugin
👑 Google integration in only available with MetForm Premium version.
Step 1: Set up a project in the Google Cloud Console #
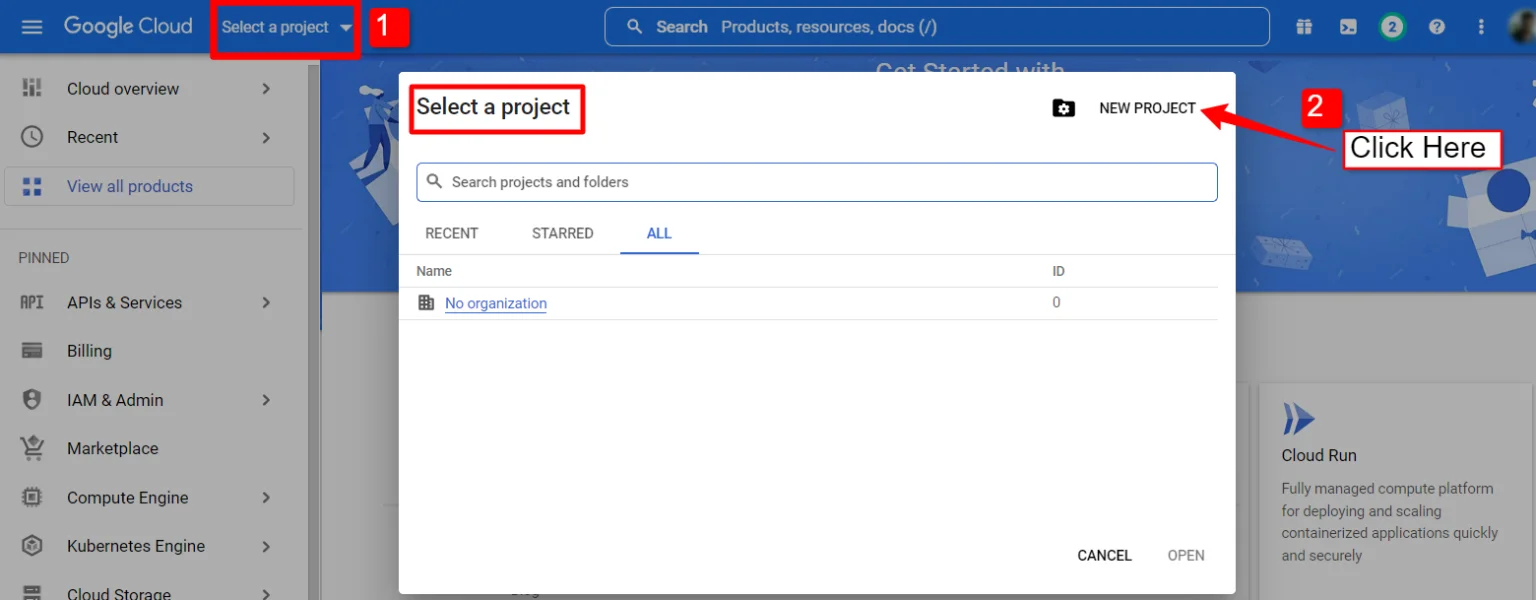
You will need APIs to connect the Google Sheet with WordPress form. For that, login to your Google Cloud console acoount. After that,
1. Click on the Select a project runterfallen.
2. A popup will appear, there click on the Neues Projekt Möglichkeit.
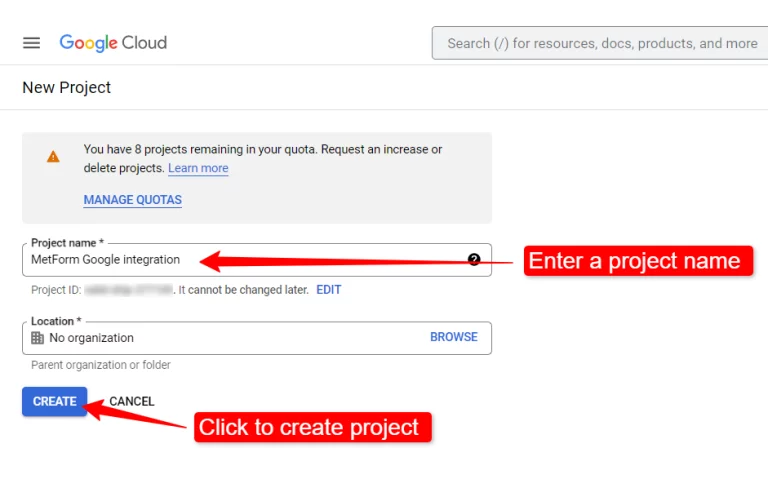
Um ein neues Projekt zu erstellen, geben Sie a ein Projektname Und Standort (falls zutreffend) und klicken Sie auf Schaltfläche „Erstellen“..
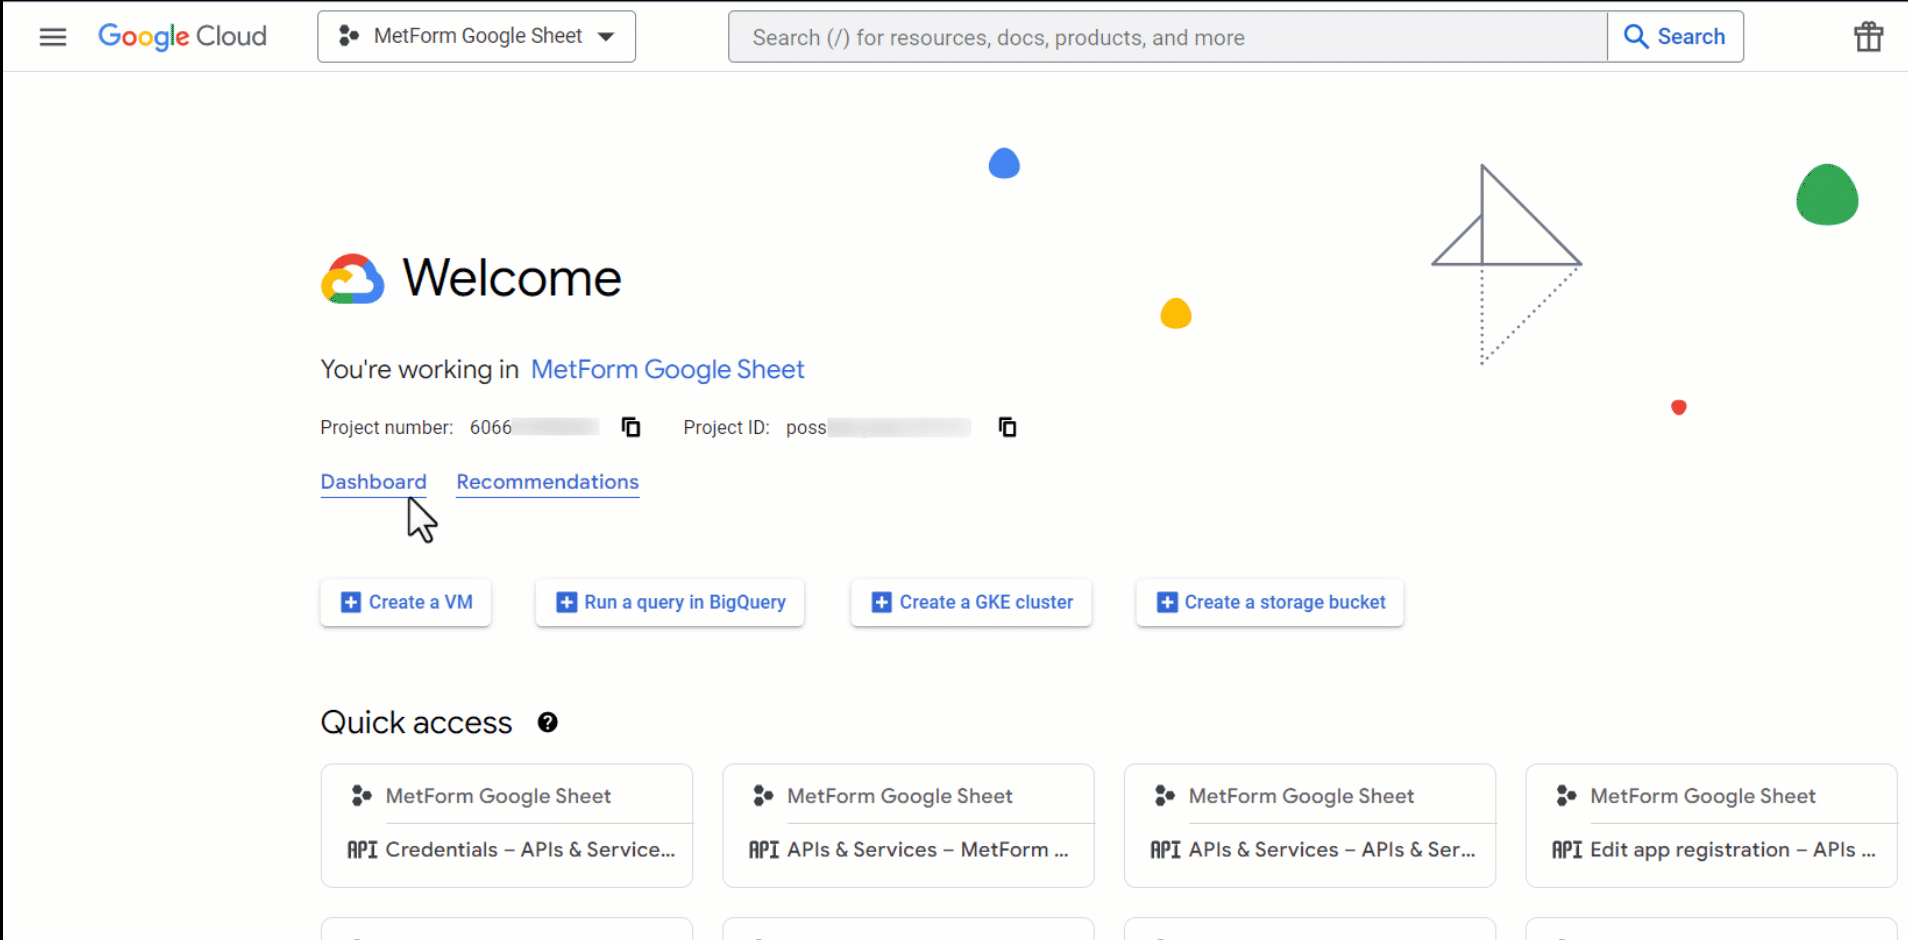
Then go to your project dashboard, and navigate to APIs overview >> OAuth consent screen.
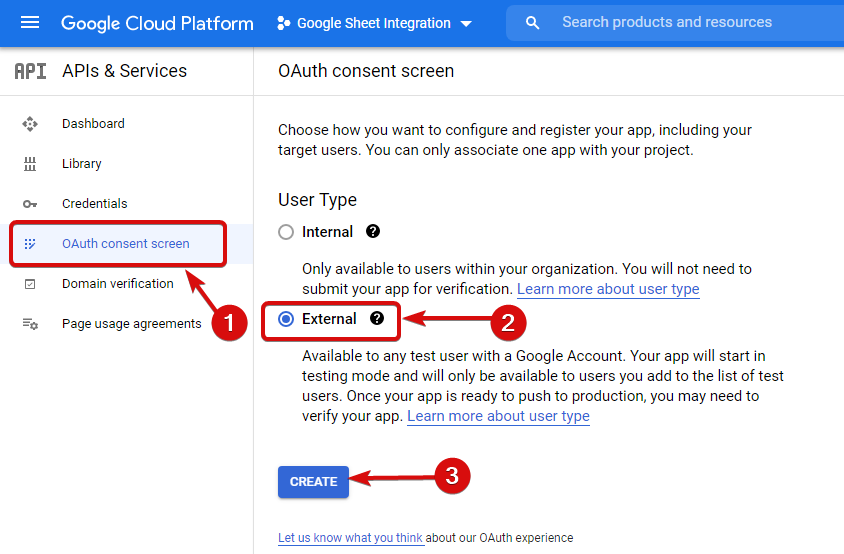
On the OAuth consent screen select the Wählen Sie als Benutzertyp „Extern“ aus und fahren Sie fort, indem Sie auf die Schaltfläche „Erstellen“ klicken.
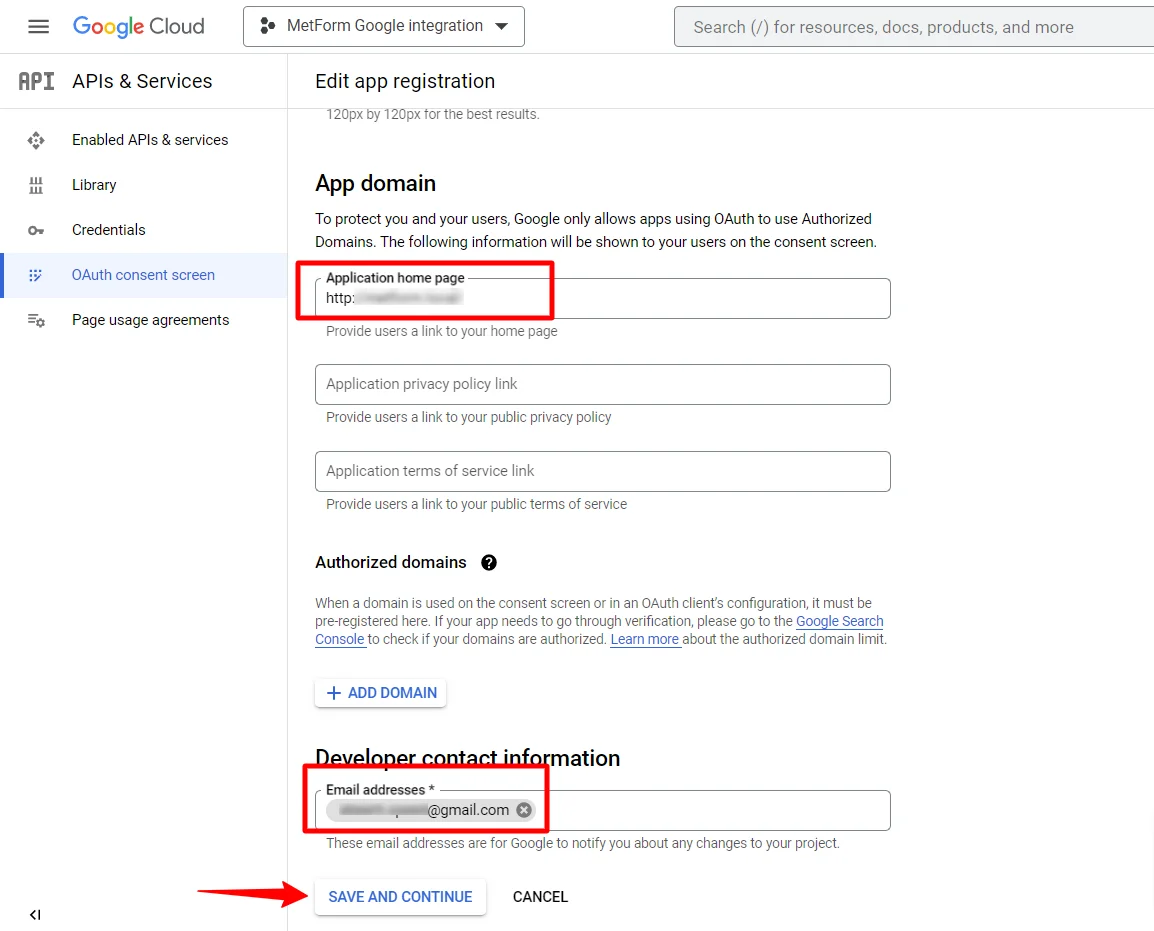
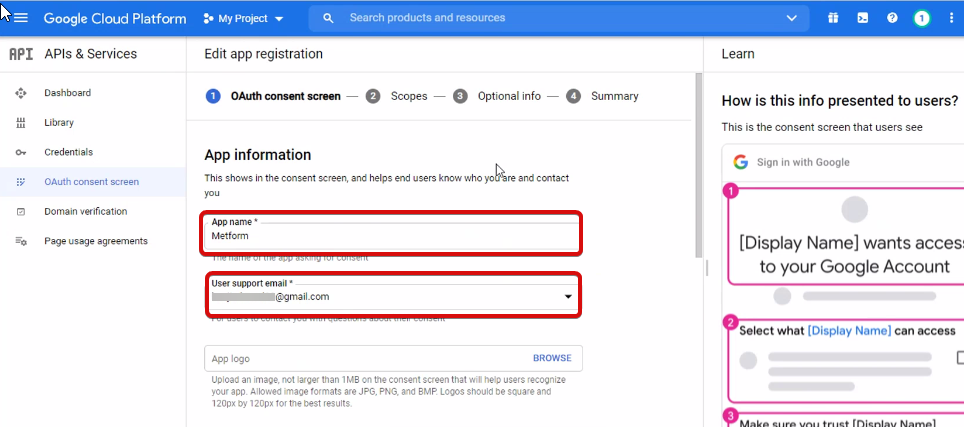
On the next screen, enter your App information including:
- App Name
- Benutzer-Support-E-Mail
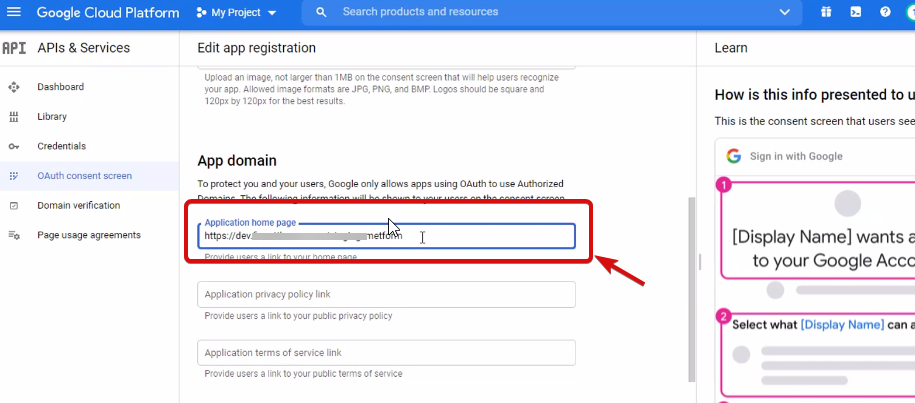
- Autorisierte Domänen
- Developer contact
Klicken Sie abschließend auf Speichern und fortfahren
Gehen Sie zur API-Übersicht
- Gehen Sie zur OAuth-Zustimmungsbildschirmseite
- Wählen Sie den Benutzertyp extern
- Klicken Sie auf die Schaltfläche „Erstellen“.
Geben Sie Ihre App-Informationen an, siehe Bild unten –
Jetzt musst du es tun add App domain. If your site is on the live server then you need to authorize the domain. An authorized domain does not allow subdomain names and any protocol. However, you can use this Google project for websites created with your subdomain. For localhost, you do not need to authorize the domain.
Als nächstes speichern und fortfahren.
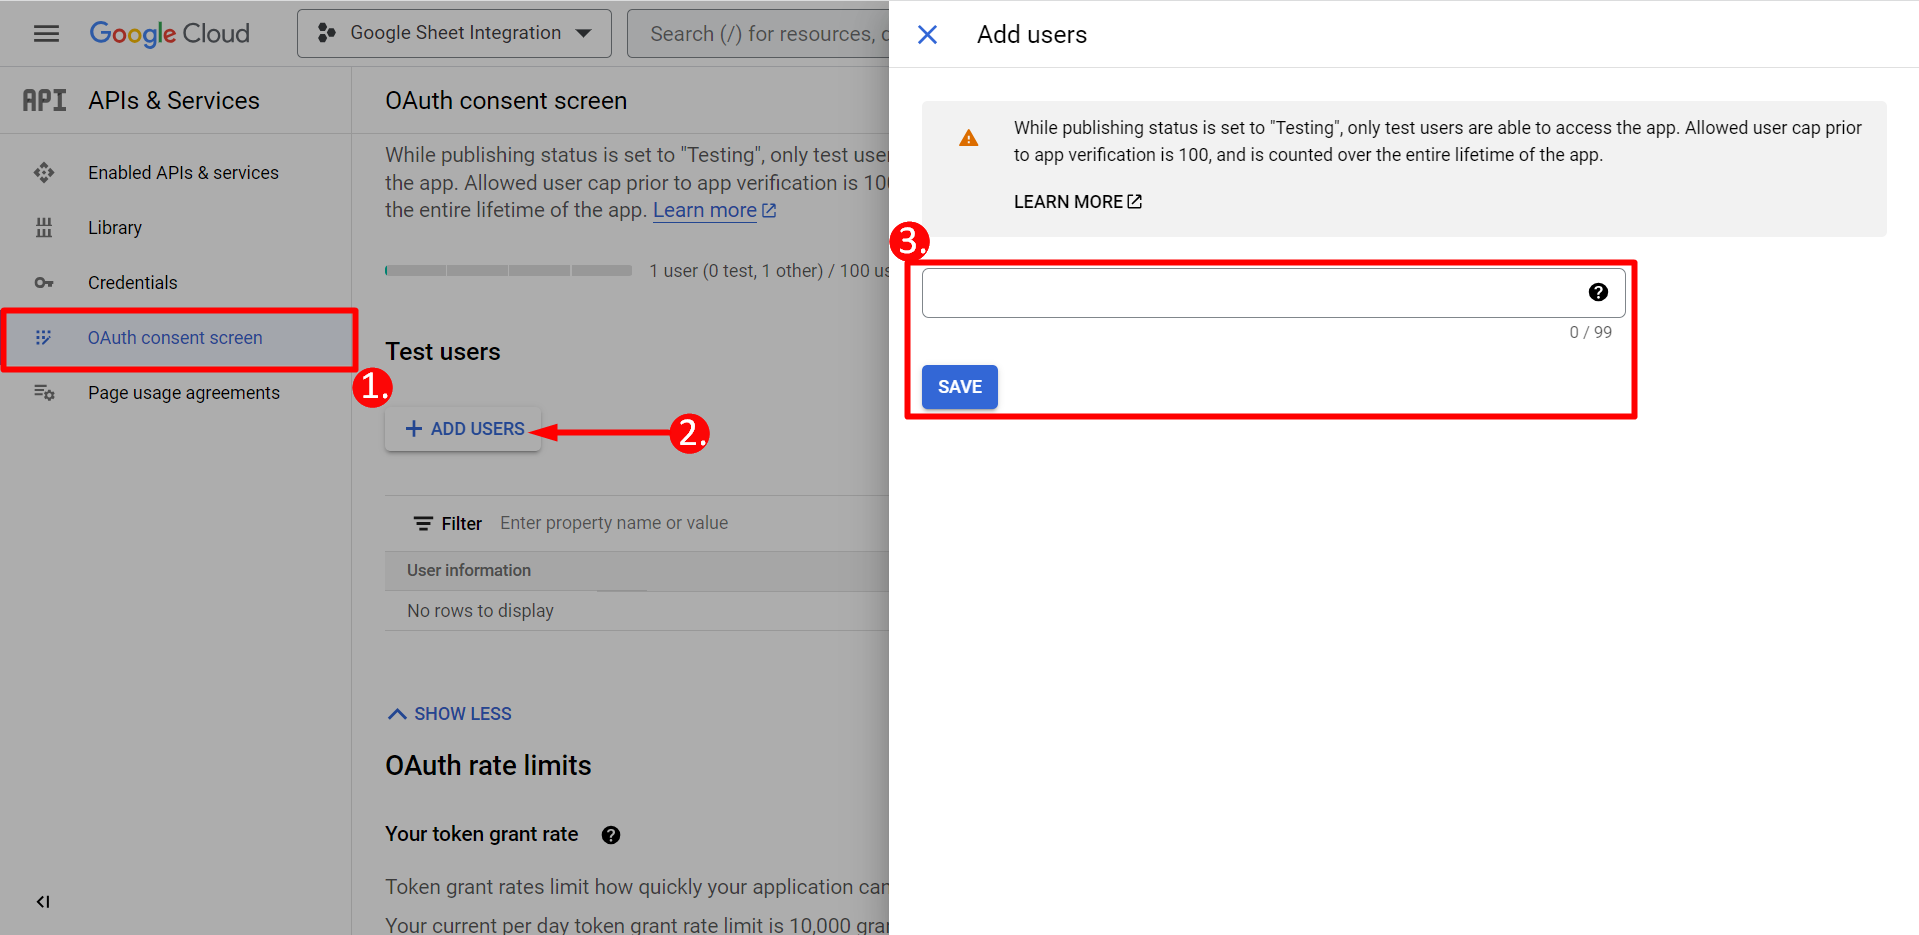
- Über den OAuth-Zustimmungsbildschirm
- Klicken Sie auf Benutzer hinzufügen
- Add your email address and save it
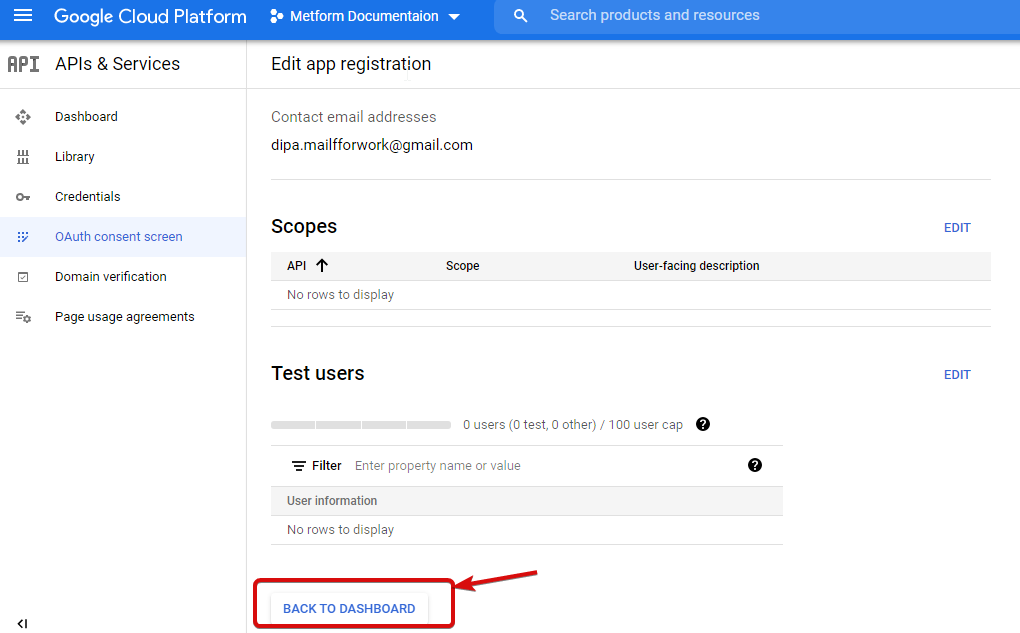
Klicken Sie auf die Schaltfläche „Zurück zum Dashboard“.
Klicken Sie auf die Schaltfläche „App veröffentlichen“ und gehen Sie zur Seite mit den Anmeldeinformationen. Wenn sich Ihre Website auf localhost befindet, müssen Sie nicht auf die Schaltfläche „App veröffentlichen“ klicken. Gehen Sie einfach auf die Seite mit den Anmeldeinformationen.
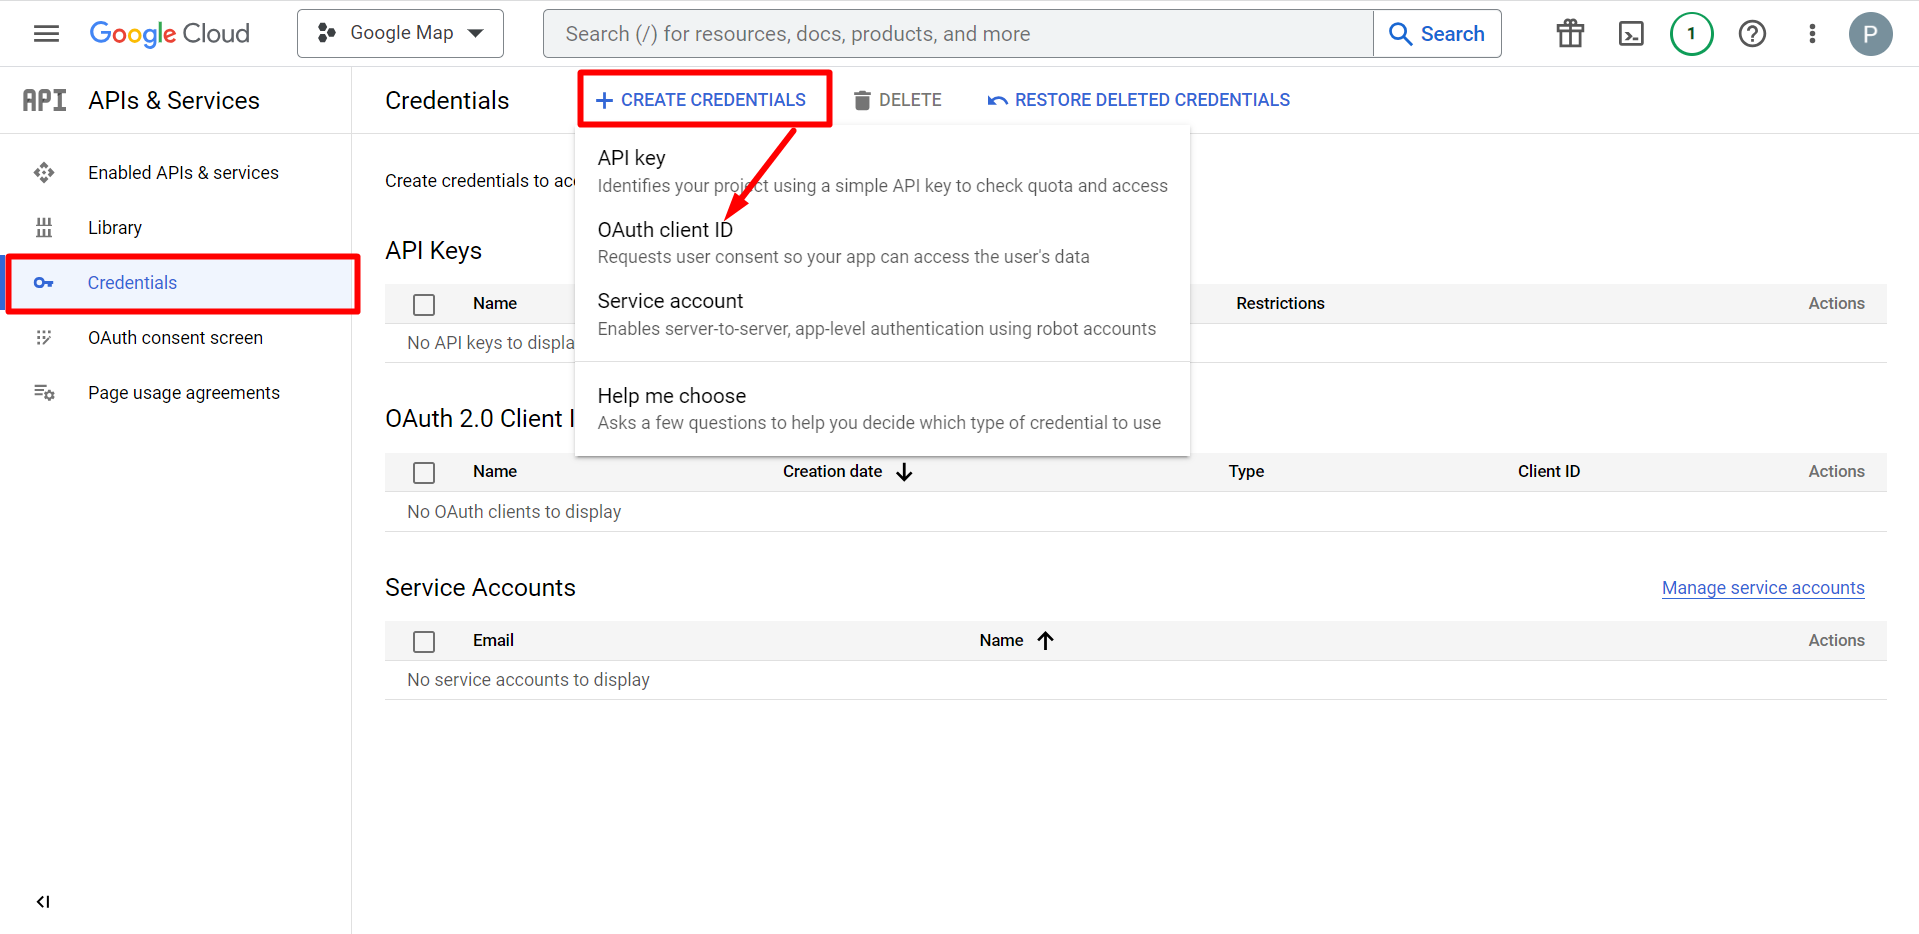
- Gehen Sie zu Anmeldeinformationen
- Anmeldeinformationen erstellen
- Wählen Sie die OAuth-Client-ID aus
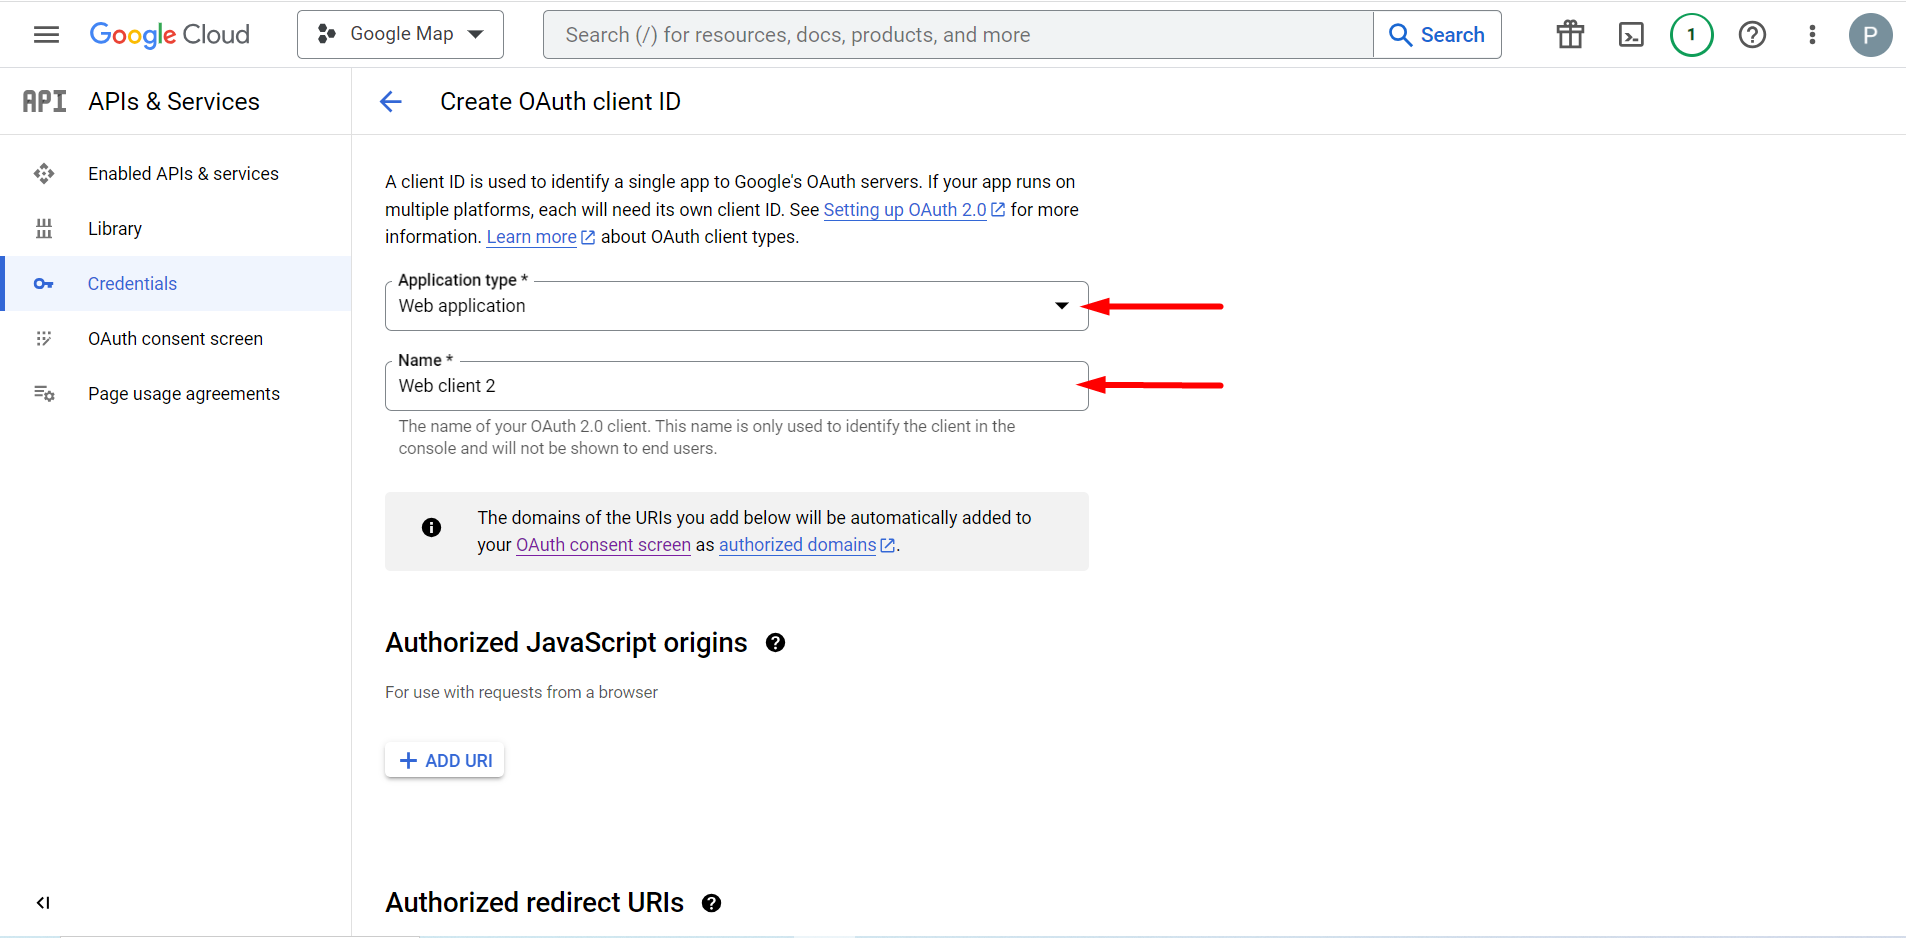
Der ausgewählte Anwendungstyp ist eine Webanwendung. Füllen Sie das Namenseingabefeld aus
Sie können jetzt die ID Ihres Kunden überprüfen. Sie wird zu den Anmeldeinformationen hinzugefügt
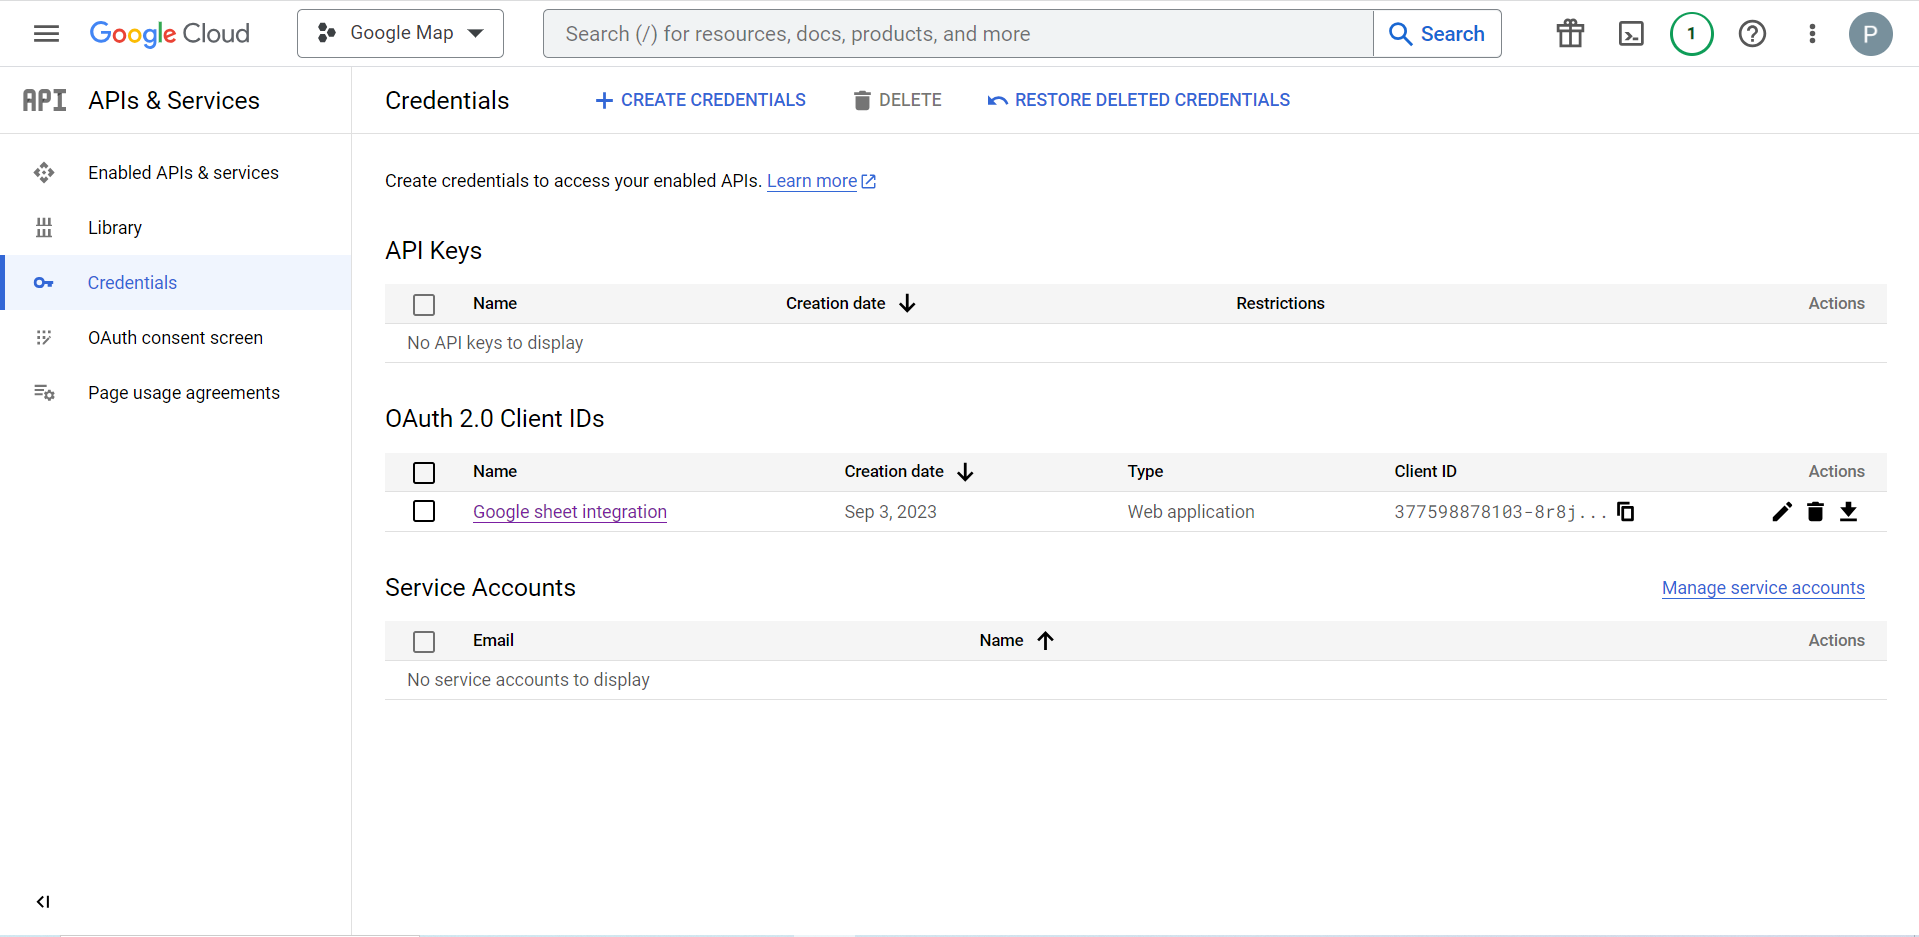
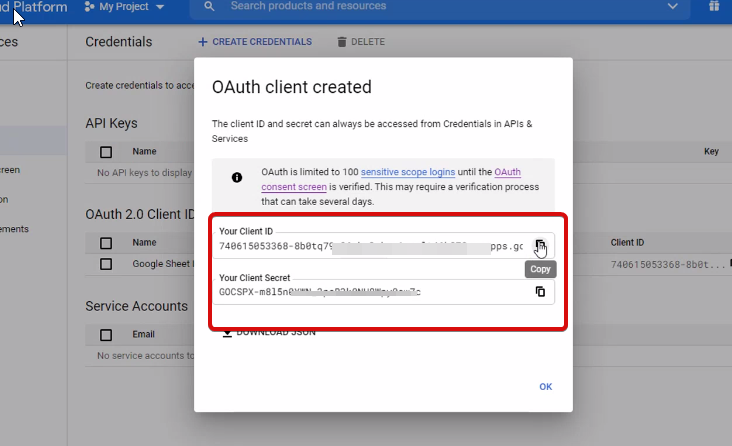
Now you will get the client ID and client secret, just copy them from here.
Step 2: Copy the URL From Metform’s Google Integration Tab #
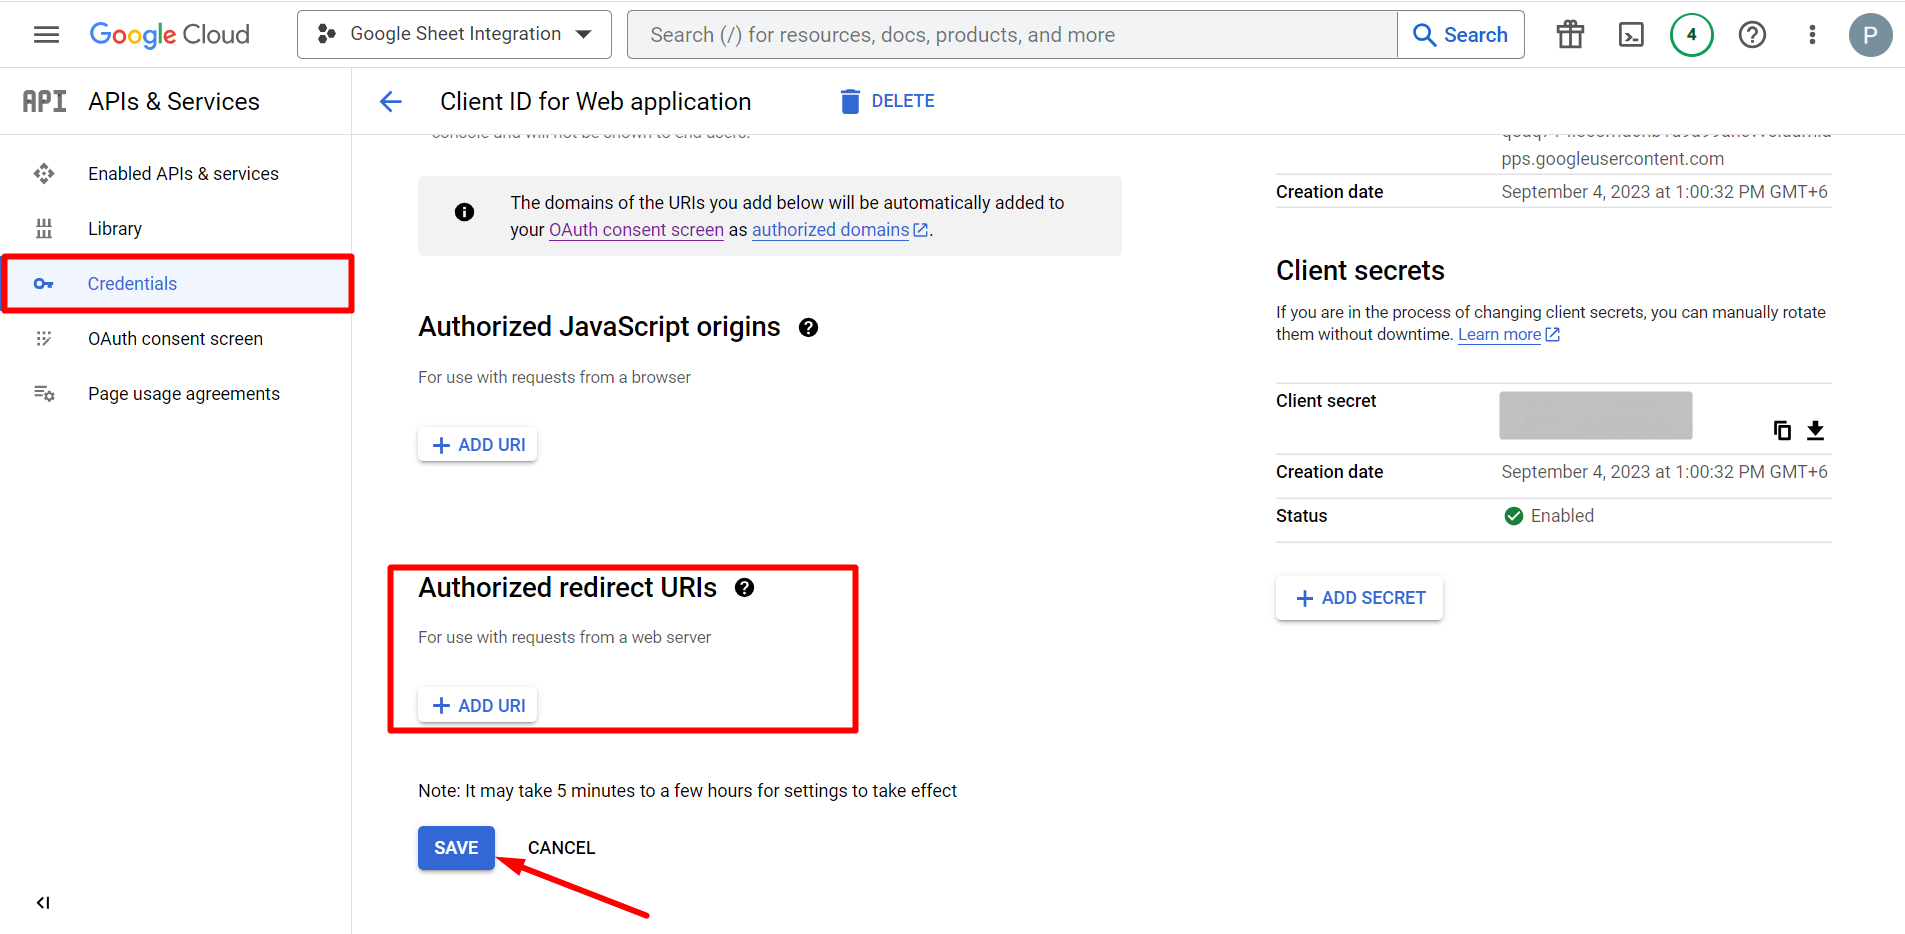
In diesem Schritt müssen Sie einen autorisierten Weiterleitungs-URI hinzufügen. Sie erhalten den Umleitungs-URI in den Google Sheet-Integrationseinstellungen Ihres MetForm.
Gehen Sie als Nächstes zu Credentials again > find Authorized redirect URIs > Add URI that you have just copied from Metform’s Google Sheet Integration settings
Step 2: Insert the Copied Ids #
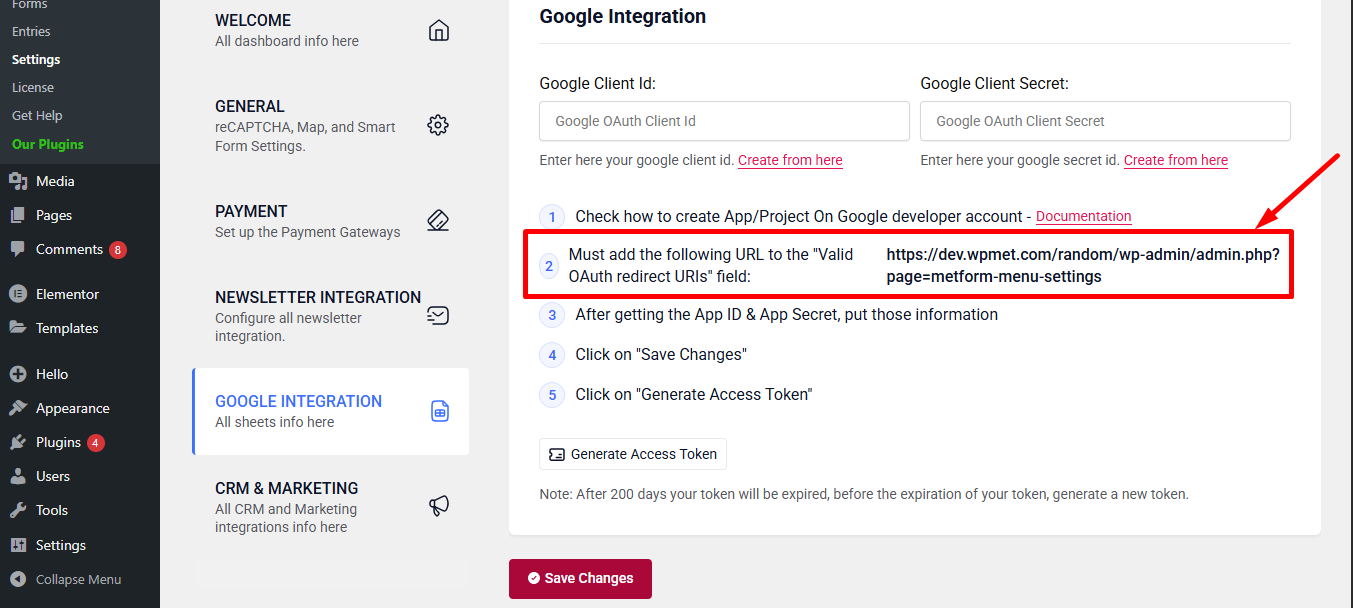
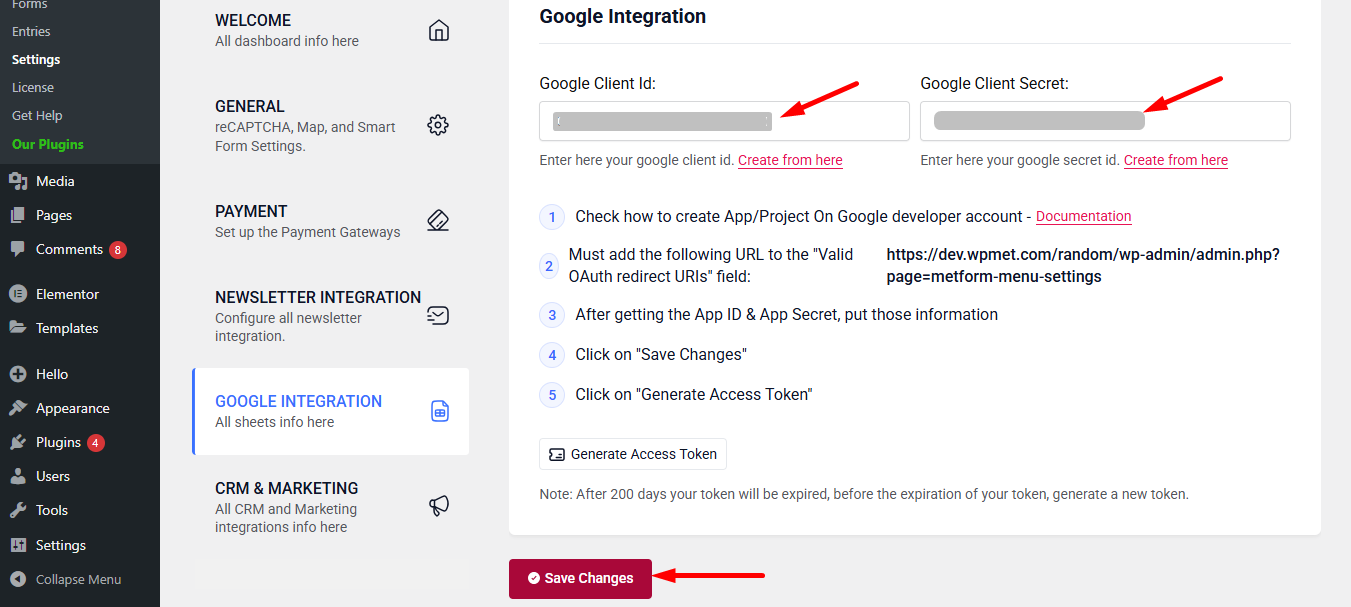
Now, return back to Metform’s Google Integration tab from your dashboard.
Here, you have to paste the copied Client ID and Client Secret in the fields and save changes.
Finally you can connet Google services with your WordPress form.
Lesen Sie auch:


