ShopEngine Pro comes with the WooCommerce Avatar module where you can configure how the user avatar will appear on the Account dashboard.
Quick Overview
This documentation will guide you to the process of adding Avatar with ShopEngine. This WooCommerce Avatar plugin includes a dedicated module to set up avatar to your WP site.
For this Documentation, you will need the following tools to add Avatar:
Tools Used: Elementor (free), WooCommerce (free), ShopEngine (free & pro)
After download and activation of the above plugins, navigate Modules under ShopEngine and:
✅ Activate Avatar module
✅ Configure Avatar module
Enable WooCommerce Avatar Module #
To enable the ShopEngine WooCommerce Avatar module,
- Log ind på dit WordPress-websted.
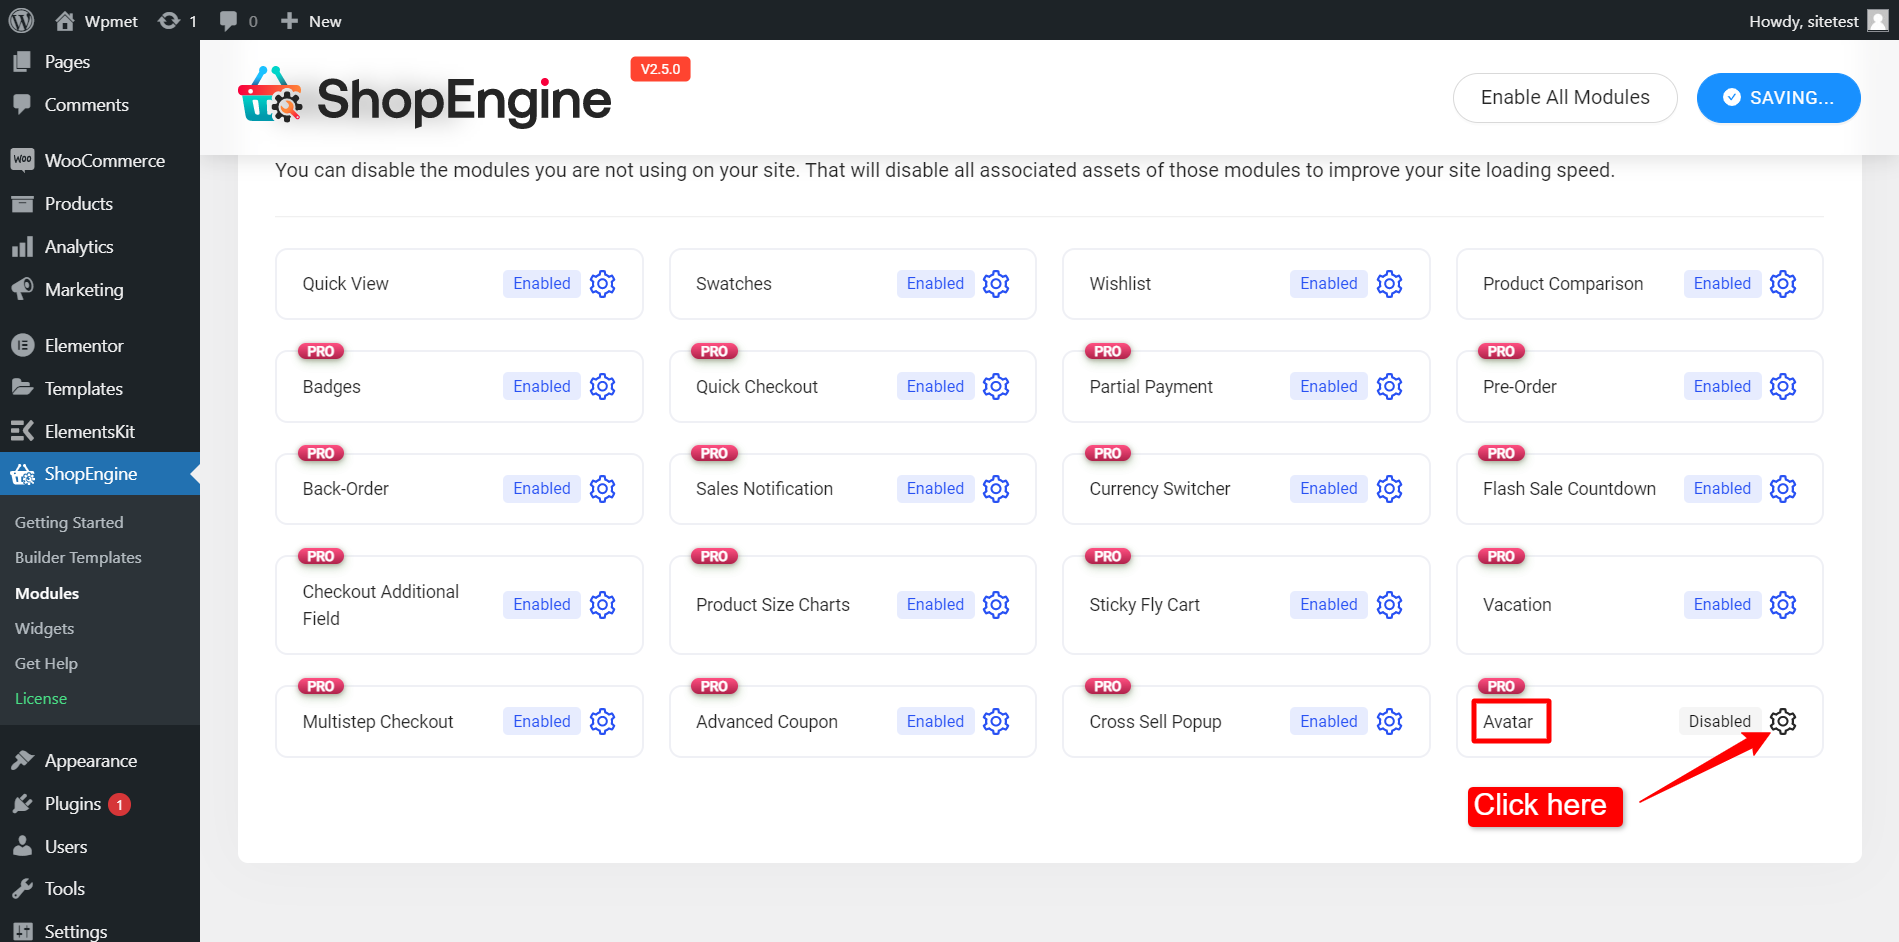
- Naviger til ShopEngine > Moduler fra WordPress dashboard.
- Find Avatar modul fra listen.
- Click on the ⚙️ (settings icon).

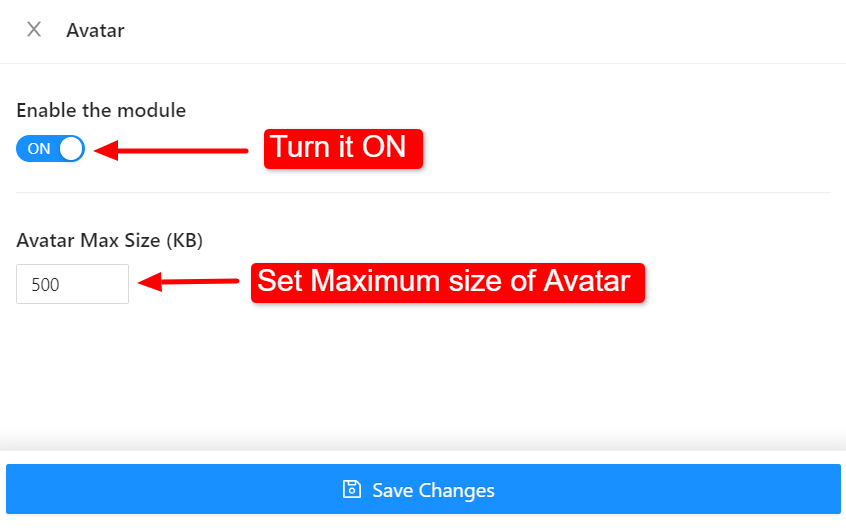
After that, an off-canvas window will show up for WooCommerce Avatar template settings. In the Template Settings,
- Først, Aktiver modulet.
- Indstil Avatar Max Size (KB).
- Klik på Gem ændringer button at the bottom of the screen.

Now you will be able to add a user avatar on the Account dashboard page on your website. Read the documentation for Avatar-widget to learn how to use the widget and add a user avatar on web pages.


