When a customer orders a product in your WooCommerce store, she wants to confirm that the order is placed. The ‘order confirm’ widget makes it easy. There is no need to use any shortcodes.
Our ‘Order Confirm’ widget is ready to use with all the essential elements.
How to Add Order Confirm Widget? #
You need to integrate the widget in the order page. If you have already created an order page, you can integrate the widget there.
Or, you can use the ready template of ShopEngine.
Step 1: Add Order Page Template #
Opret en ordreside som beskrevet her.
Step 2: Add Order Confirm Widget #
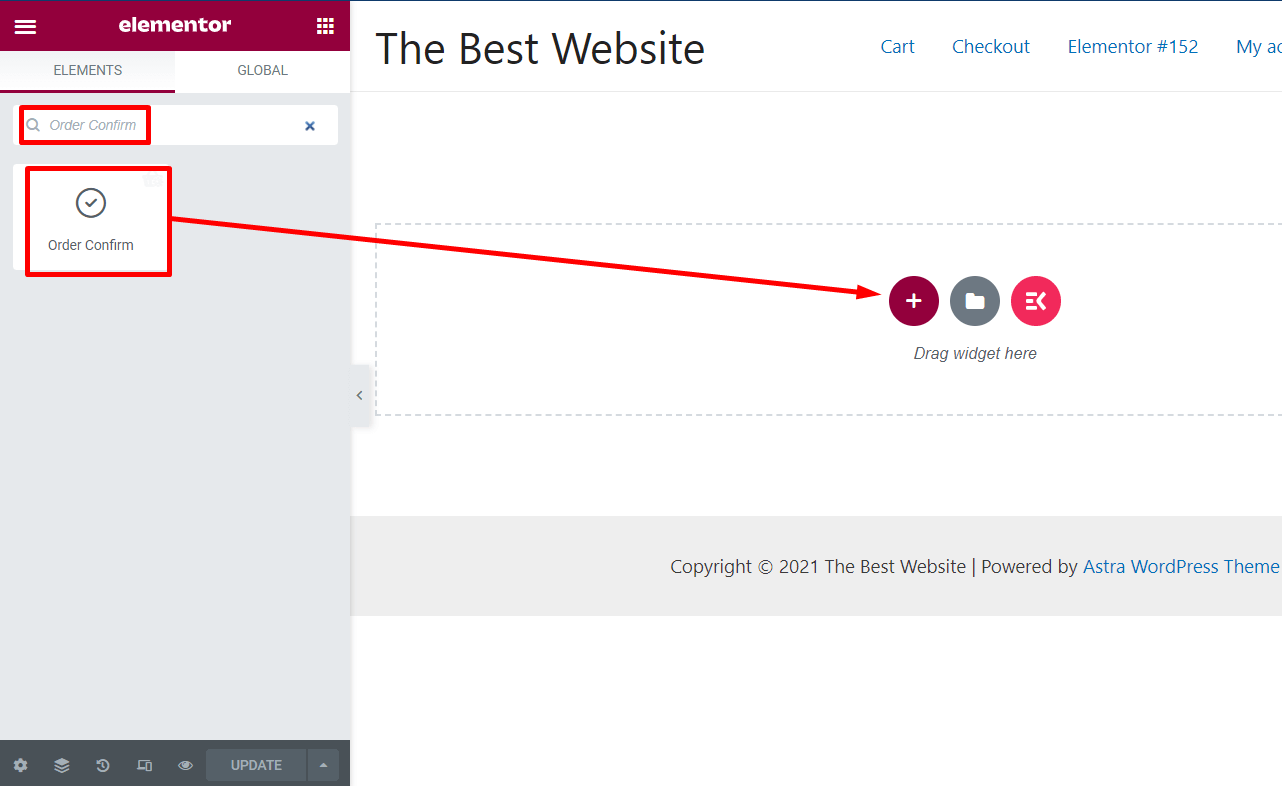
Now you will land on the template page. Search for the ‘Order Confirm’ widget in the widget gallery.
You will see it in the list. Drag and drop the widget on the page.

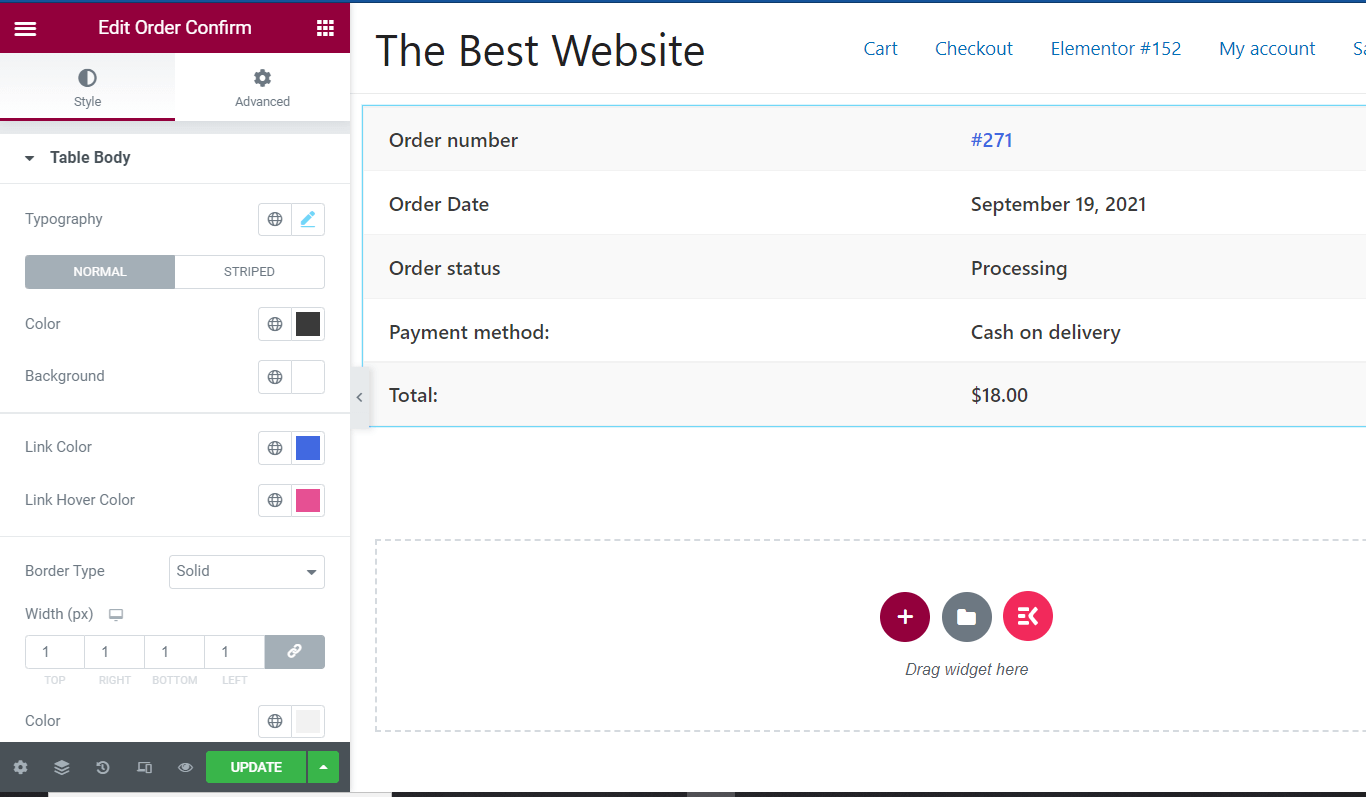
You will see the preview of the widget layout.

Step 3: Customize the Order Confirm Widget #
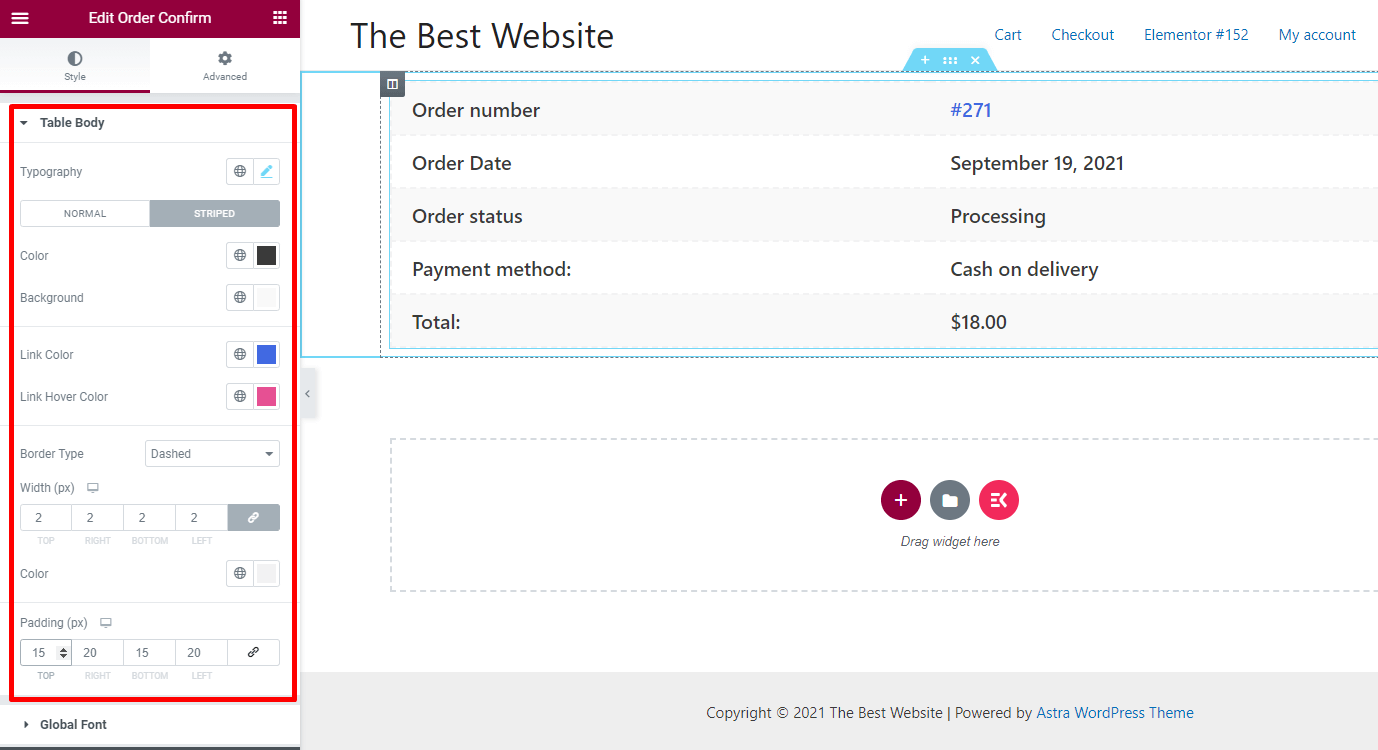
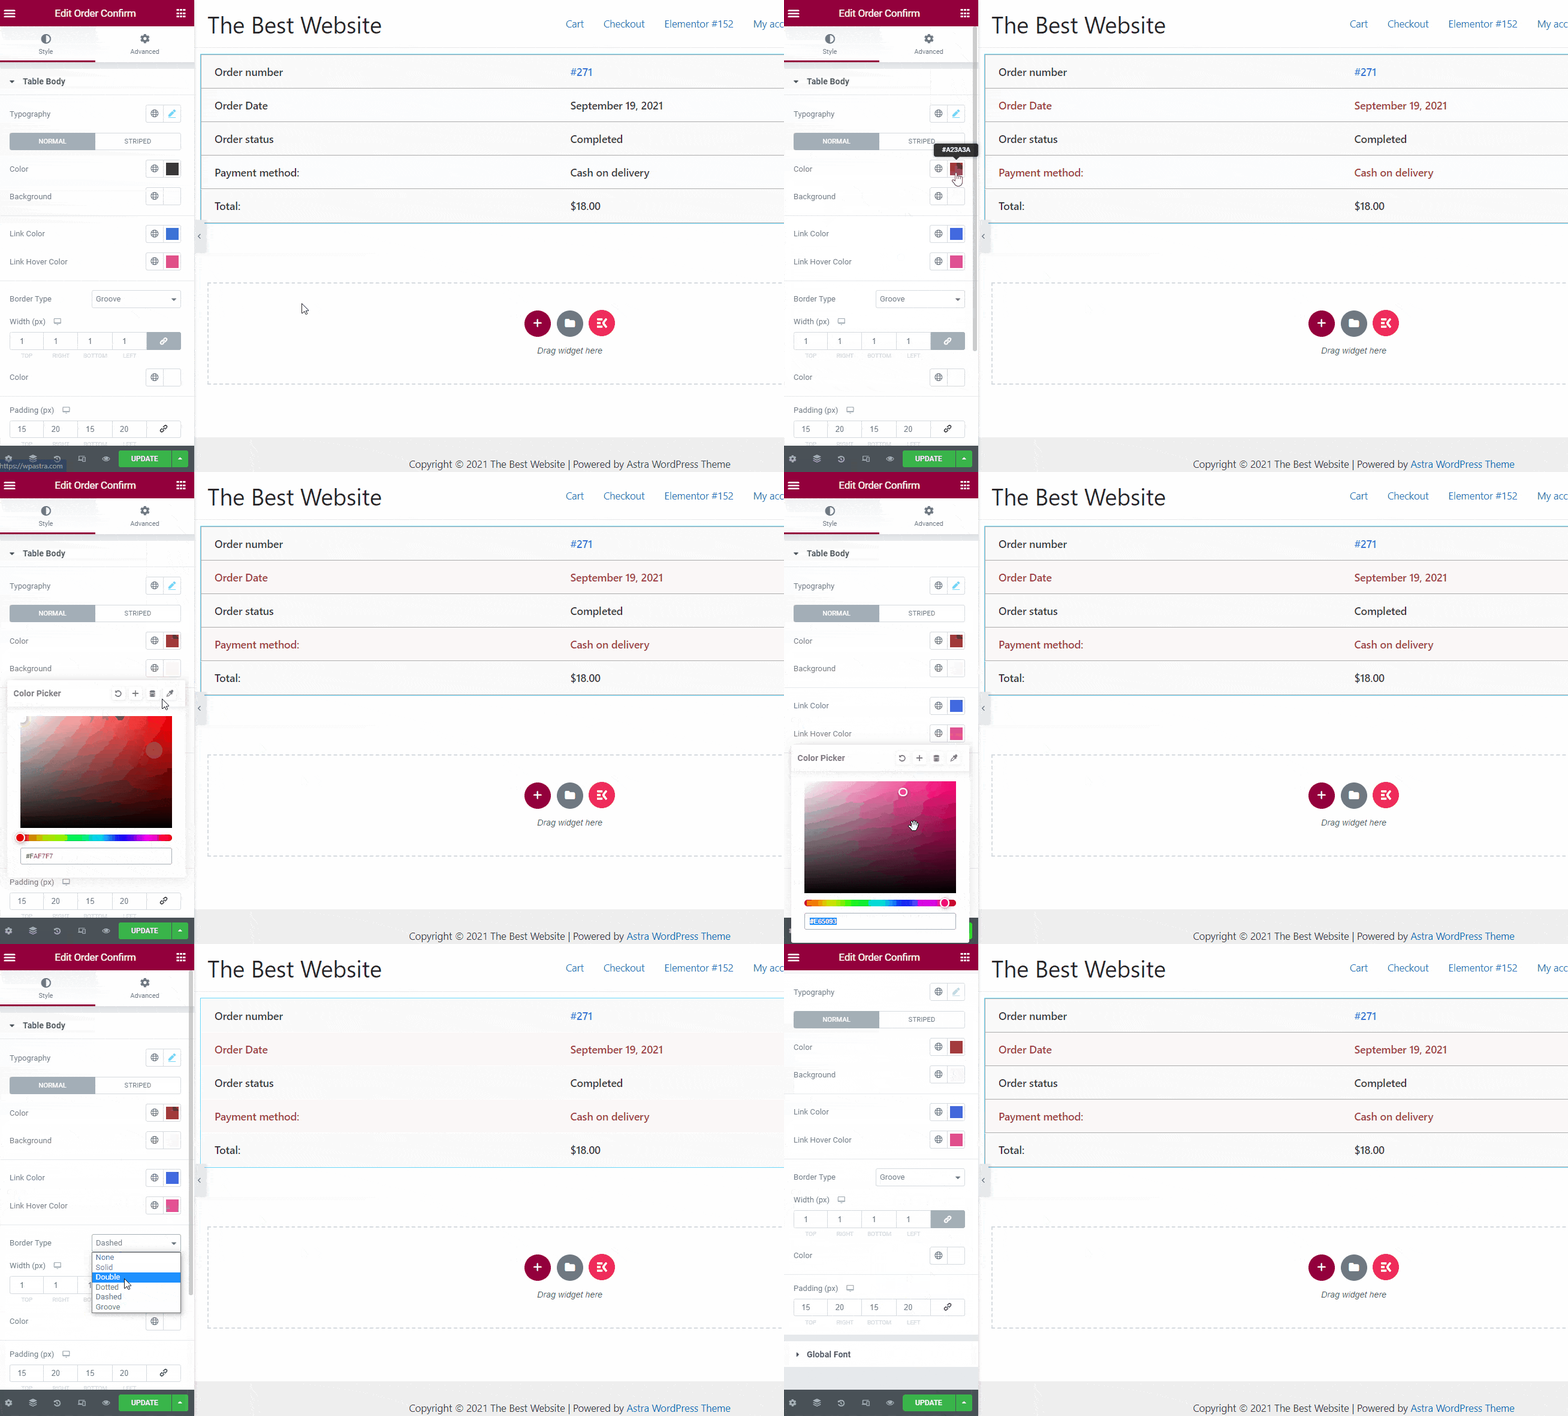
From the left options panel, you can customize the widget layout.

Typografi: Change the typography of the widget.
Farve: Change the color for texts
Baggrund: Choose the background color as you want
Kanttype: Choose the border type for the ‘Order Confirm’ layout
Bredde: Change the widget if you want
Polstring: Increase or decrease the padding

Trin 4: Opdater siden #
Once the customization is done, check the preview and update the page.
Now, next time if someone buys from your store, he/she will see the order confirmation with details of the order.


