Getting Started With ShopEngine Vacation Module #
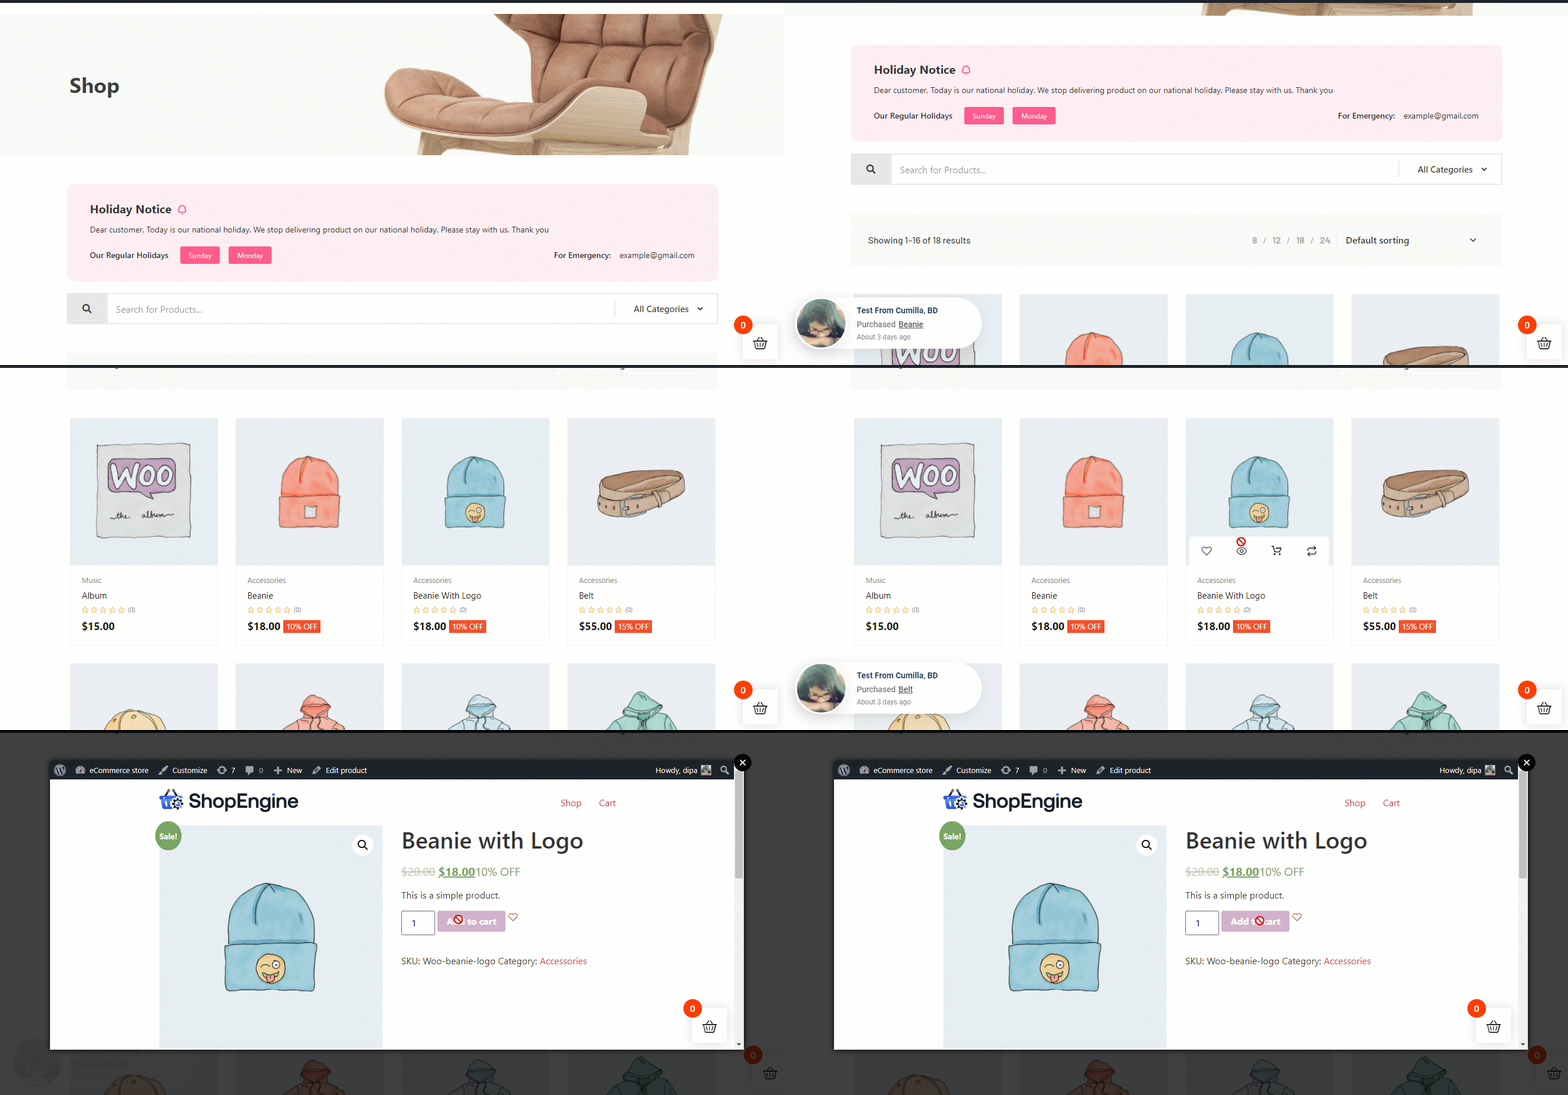
With the ShopEngine Vacation Module, you can put up a notice (i.e not open for orders) for your Weekly Off days as well as any Off days due to vacation or personal reasons. Online shopping options will be unavailable for the visitors during the off days time period you set using the module.
While consumers can browse your website and see all the products, they can not add products to the cart and thus can not place an order during the vacation period.
And this weekly off-day function is a recursive function meaning it will apply for every single week until you turn this option off.
Quick Overview
This documentation includes adding a vacation notice to your WooCommerce site using ShopEngine. ShopEngine offers a Vacation module and widget that facilitates displaying vacation notices without coding. Just enable the features and let your customers be aware of your vacation days ahead.
Here are the plugins you need to install and activate for this process:
Tools Used: WooCommerce (free), Elementor (free), ShopEngine (free & pro)
Next, follow the steps below to showcase vacation notice on WooCommerce:
✅ Activate Vacation module.
✅ Configure Vacation module.
✅ Enable Vacation module.
✅ Add Vacation widget and customize notice.
Sådan bruger du ShopEngine Vacation Module #
Learn how how to use ShopEngine’s WooCommerce store Ferie Module. Using this module, you can add custom vacation notices in your WooCommerce site in just 8 steps.
Step 1:Enable ShopEngine Vacation Module #
First, you need to turn on the module of ShopEngine, a WooCommerce vacation mode plugin. To do so,
- gå til ShopEngine ⇒ Moduler ⇒ Ferie.
- Klik på Indstillinger-ikonet.
- Once the settings popup opens, turn on the toggle button of the Enable the module option.
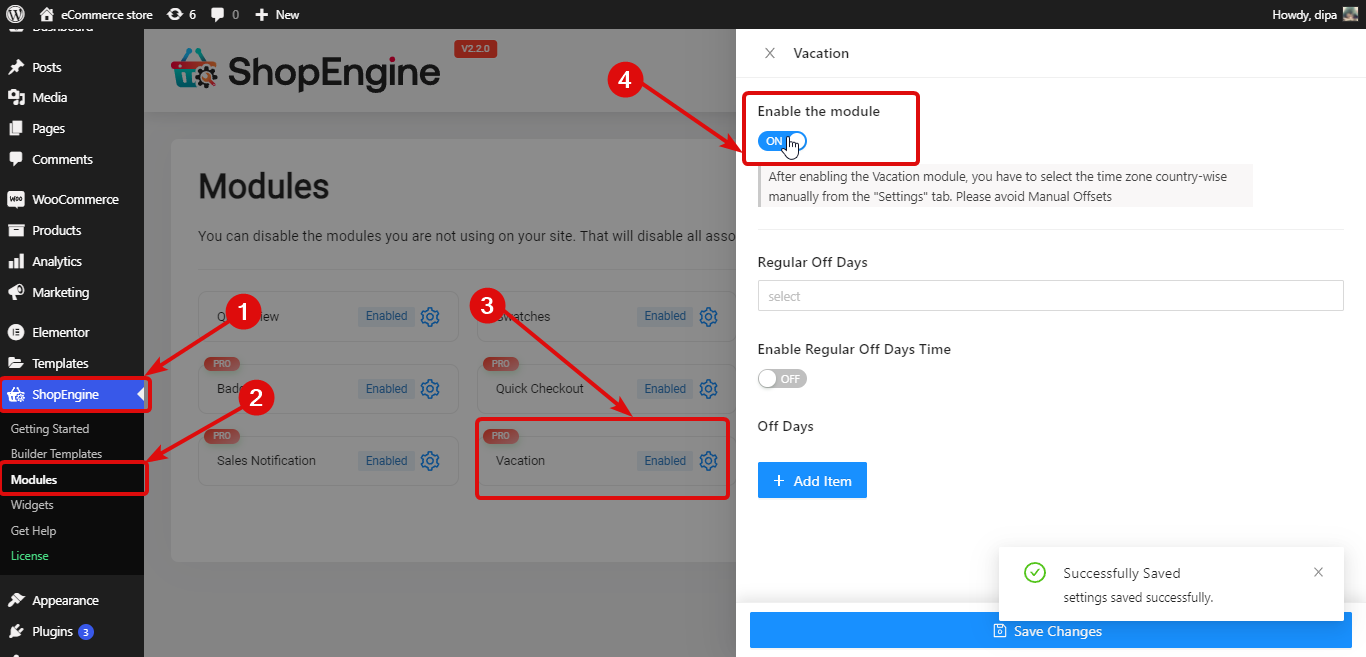

Bemærk: Du skal select the time zone country-wise manually from the “Settings” tab. Undgå manuelle forskydninger da feriemodulet vil arbejde med indstillingerne for manuel offset.
Trin 2: Konfigurer almindelige fridage #
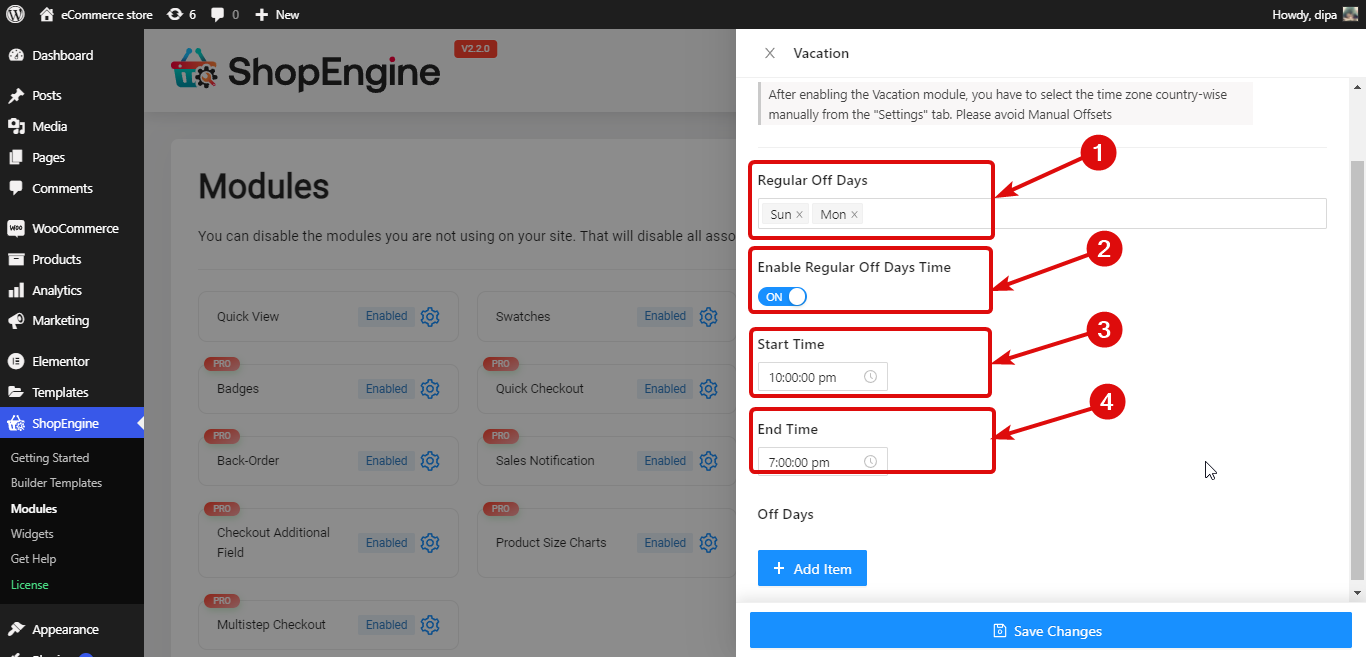
To set up weekly Regular Off Days. you need to set up the following settings:
- Almindelige fridage: Vælg dagene fra rullemenuen Almindelige fridage. Du kan vælge flere fridage.
- Aktiver almindelige hviledage: Turn this to the option to activate the regular weekdays. Once you turn on this option, you will see the following two options.
- Starttidspunkt: Indstil starttidspunktet for almindelige hverdage.
- Sluttidspunkt: Indstil sluttidspunktet for almindelige hverdage.

Trin 3: Konfigurer Casual Off Days / Vacation Days #
Ud over ugentlige fridage kan du også tilføje erhvervsrettede fridage. For det,
- Klik på + Add New button
- Provide a Titel
- Vælg Start And End Date
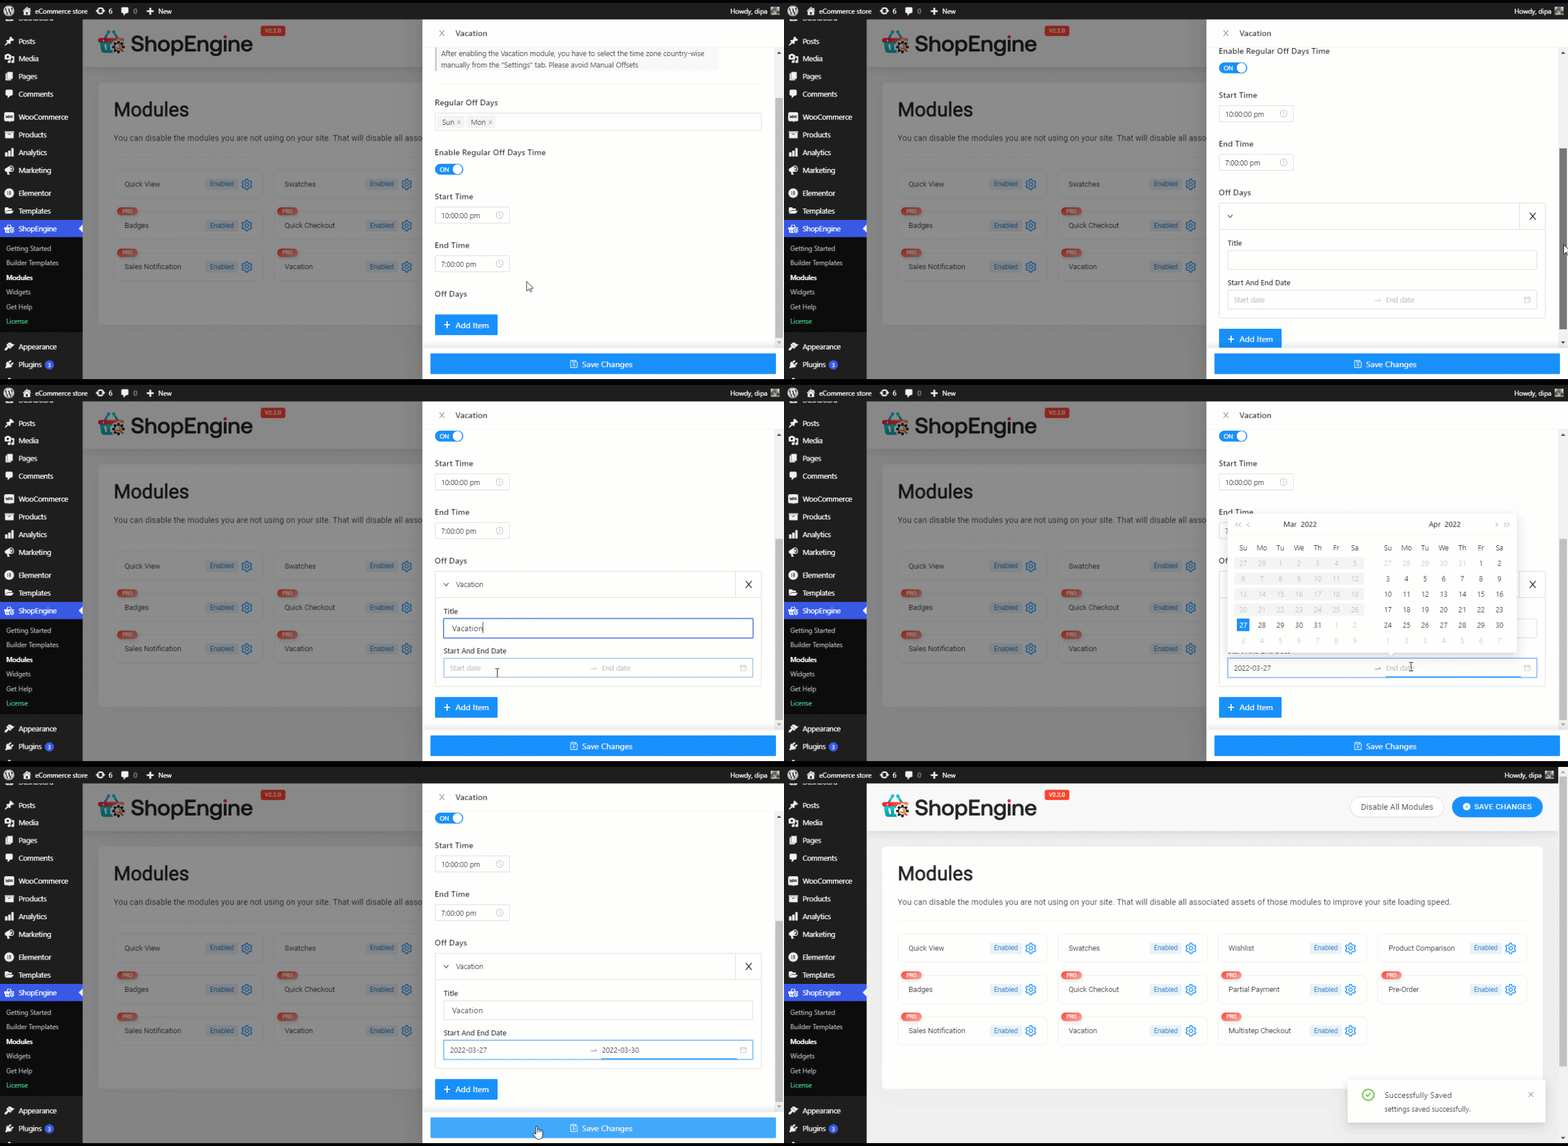

Endelig, click on Save changes to update.
Bemærk: You can add either weekly off days or casual off days or both depending on your needs.
Step 4: Enable Vacation Widget #
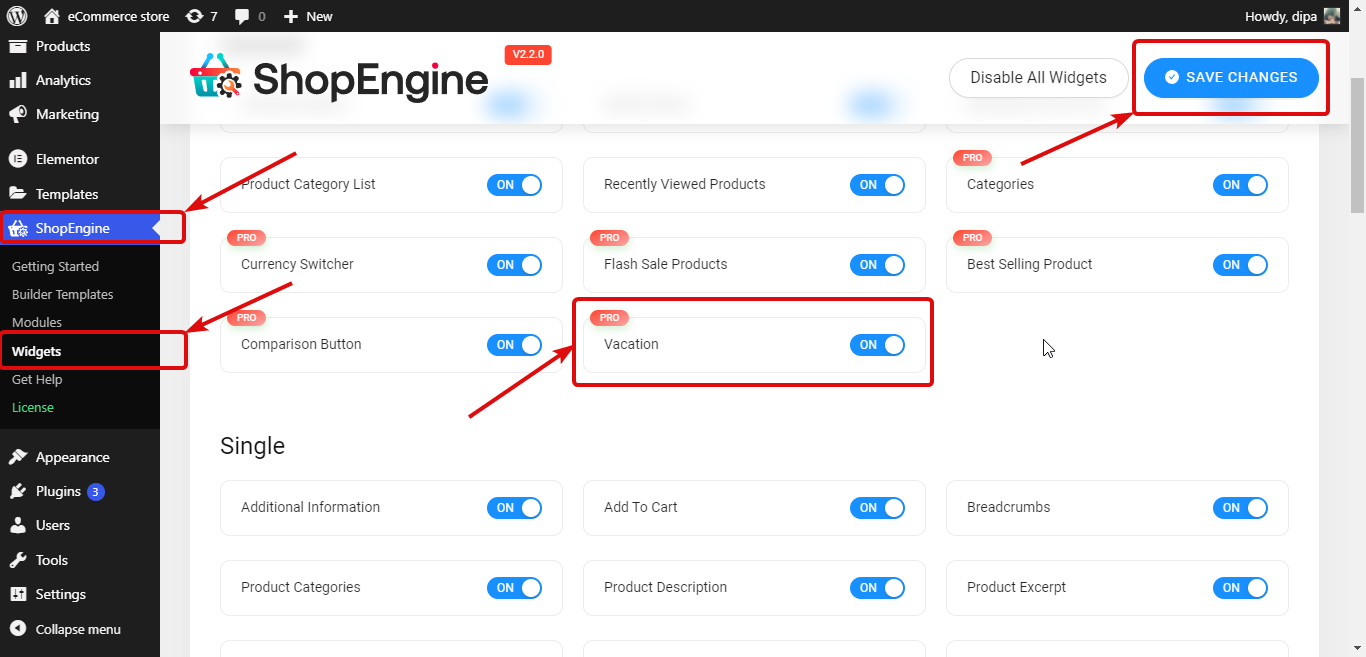
Gå til ShopEngine ⇒ Widgets, turn on the Vacation widget and finally click on Save changes to update.

Step 5: Add Vacation widget to ShopEngine template #
To make the vacation notice visible on the front end, you need to add it to the Shop Template.
For this, Edit ShopEngine Shop skabelon med Rediger med Elementor option. Once you are in the editor mode, search for Vacation Notice. Derefter træk og slip widgetten på skabelonen.
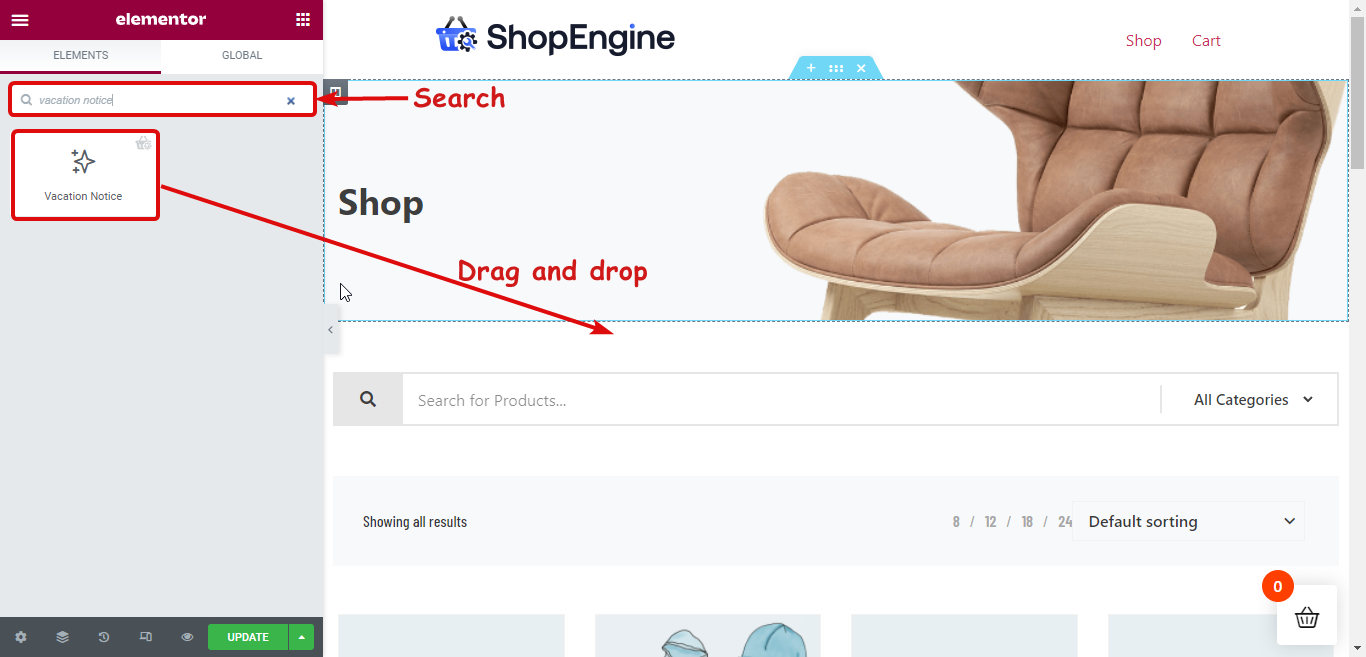

Bemærk. You can also add a new section and then drag and drop the vacation widget.
Step 6: Customize content settings of the Vacation Notice widget #
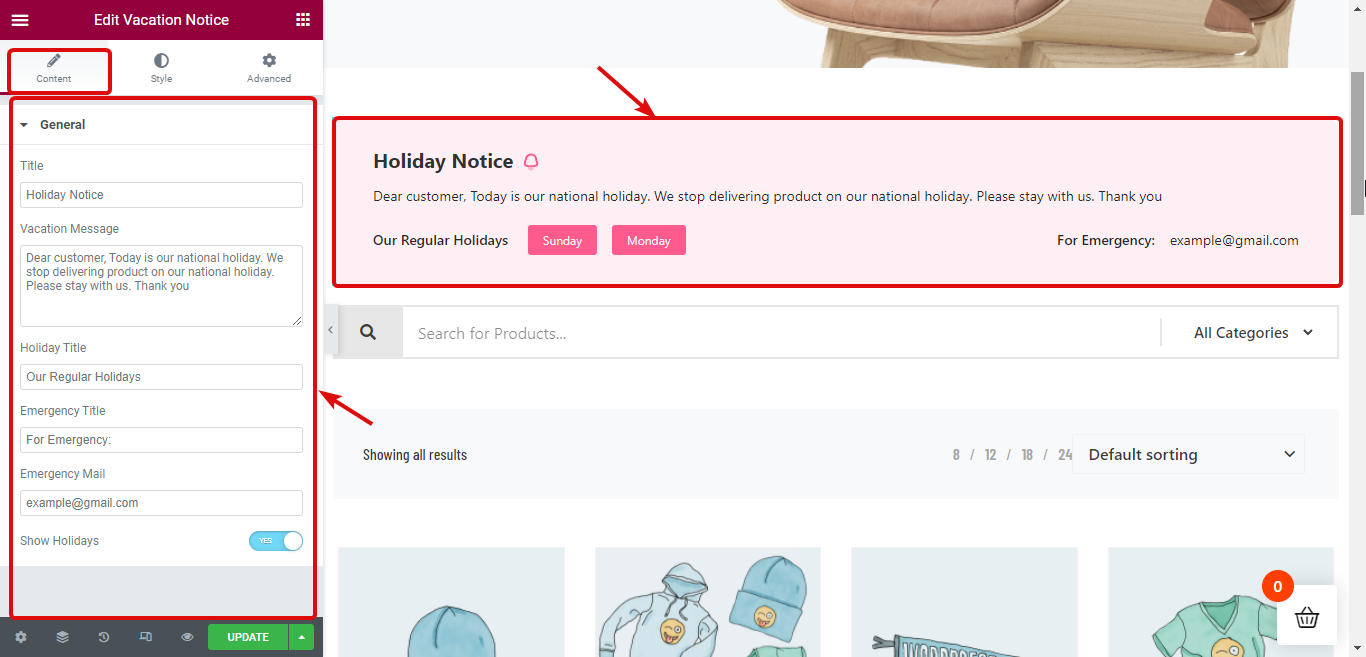
Du kan tilpasse følgende muligheder for feriemeddelelse, som vil være synlige for besøgende på dit websted.
- Titel: Angiv en titel for ferievarslet.
- Feriebesked: Her kan du tilpasse det budskab, du ønsker, at dine besøgende skal vide.
- Ferie titel: Here you can customize the title that will indicate the regular weekly off-days.
- Emergency Titel: Du kan også tilpasse nødsituationer.
- Nødmail: Den nød-e-mail, som dine kunder kan bruge til at kontakte dig.
- Vis helligdage: Du kan slå denne mulighed til/fra for at vise/skjule de almindelige ugentlige fridage.

Step 7: Customize style settings of the Vacation Notice widget #
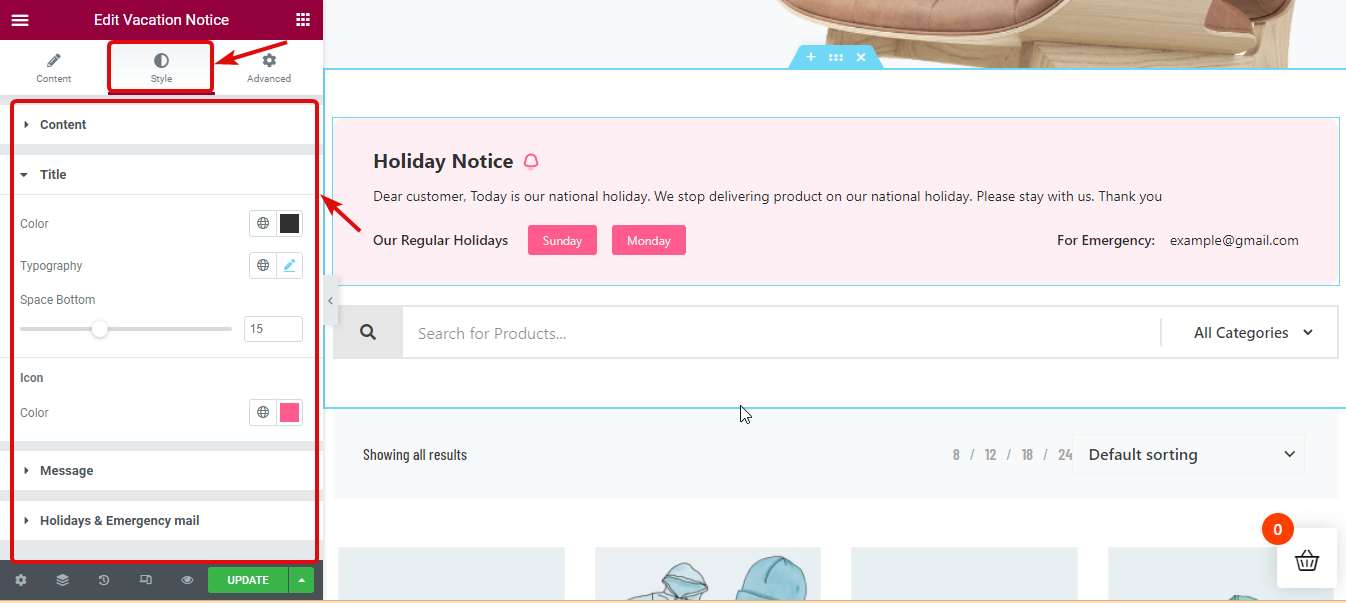
Move to the Style tab to customize style-related settings of Content, Title, Message, Holidays, and Emergency Email.

Step 8: Update and See the preview #
Klik nu på Opdater for at gemme. Nu skulle feriemeddelelsen være synlig på forsiden som forhåndsvisningen nedenfor:
