Currency Switcher Module by ShopEngine enables customers to switch to different Currencies while shopping on an eCommerce website. You can add as many currency options as you like with this module.
Let’s check out the steps of how you can use the Currency Switcher module:
Step 1. Enable Currency Switcher Module #
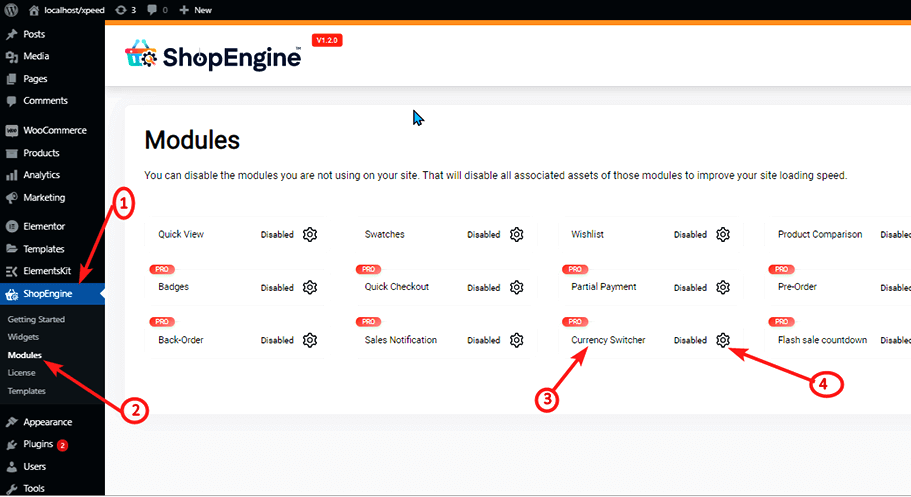
You need to enable the Valutaomskifter module before you can access the settings. To enable the module
- Gå til: ShopEngine > Modules > Currency Switcher
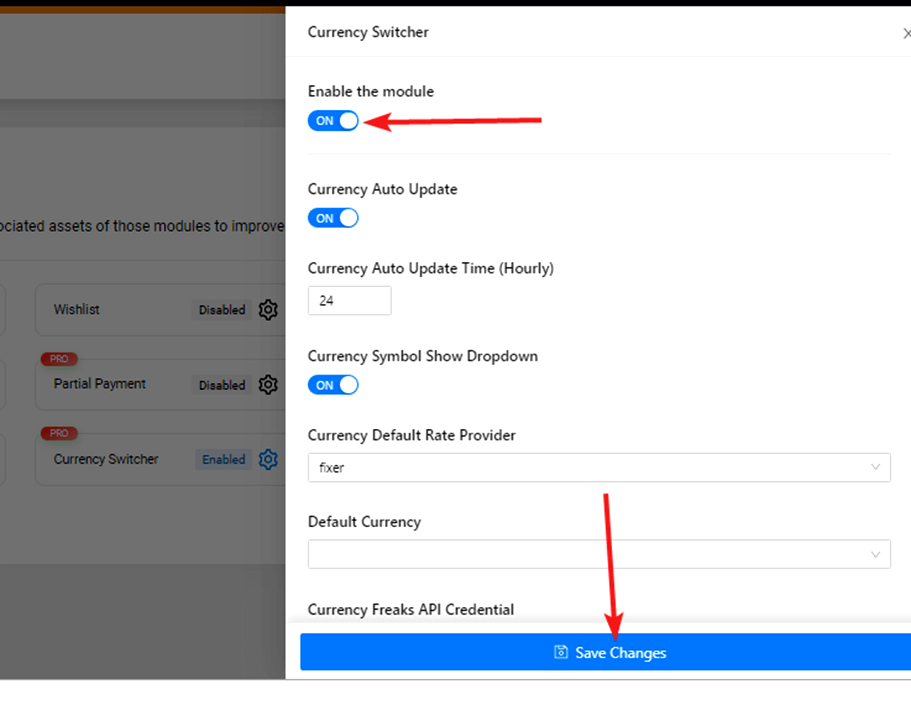
- Klik på Indstillinger Ikon

- Tænd for Aktiver the module option
- Gemme ændringer.

Bemærk: Du kan også aktivere alle modulerne på samme tid. Tjek hvordan du kan tænde for alle moduler på én gang.
Step 2: Settings of Currency Switcher Module #
Currency Switcher has many settings lets go through one by one:

Currency Switcher has many settings lets go through one by one:
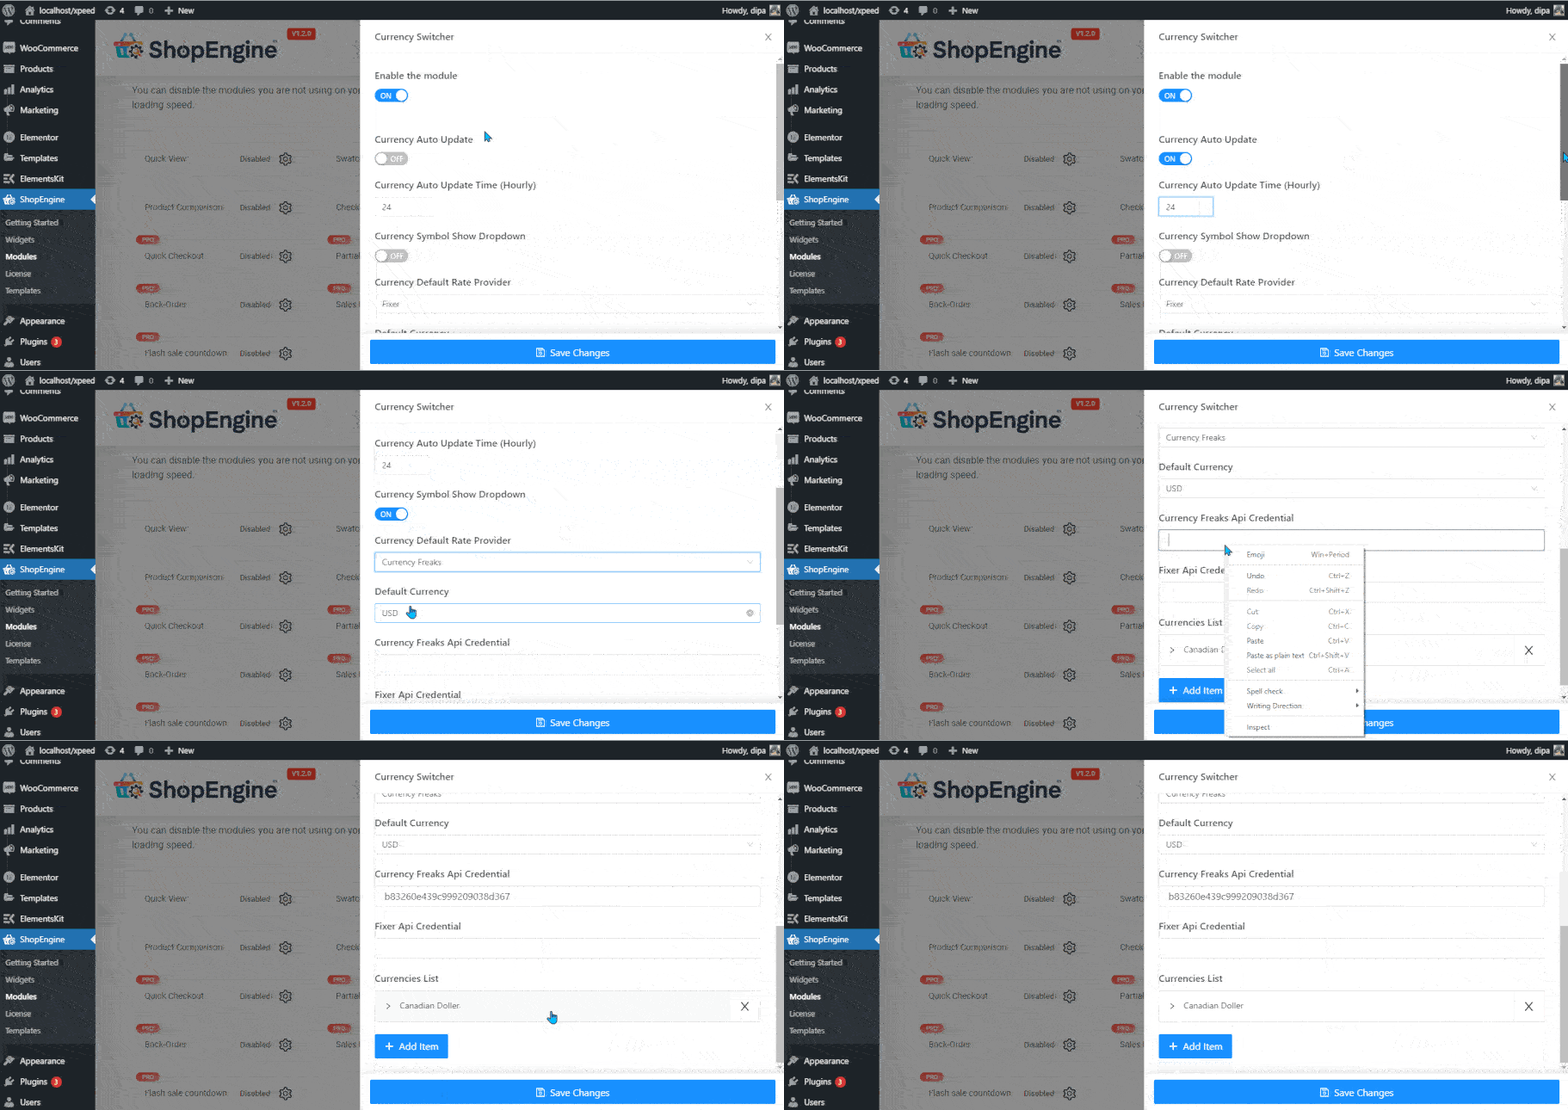
Automatisk opdatering af valuta: #
Slå denne indstilling til for automatisk at opdatere forskellige valutaværdier.
Automatisk opdateringstid for valuta (hver time): #
Indstil, hvor ofte du ønsker, at valutaen skal opdateres. Du skal kun angive tallene i timer.
Valutasymbol Vis dropdown: #
Turn this option to show the currency list (symbol) in the dropdown menu in the front end.
Udbyder af standardkurser for valuta: #
ShopEngine leverages 2 API providers to update the currency rate; Fixer API and Currency Freaks API. You can choose either of these two.
Standardvaluta: #
Vælg den standardvaluta, der vises, når nogen lander på dit websted første gang.
Currency Freaks API Credential : #
Once you Sign up for any of the Currency Freaks packages, you will get an API credential, use that value here.
Fixer API Credential: #
Sign up for any of the Fixer packages, you will get an API credential, you will get an API credential.
Note: You do not need to sign up for both the API, just one is enough. And the API will update the currency rate automatically.
Currencies List: #
You will find all the saved currency lists. You can add new currency using step 3.
To edit any of the currency information,
- Click on the currency to open the currency data,
- Edit any of the values you want and
- Click save changes.
To delete any of the currencies click on the X button.
Step 3: Add New Currencies #
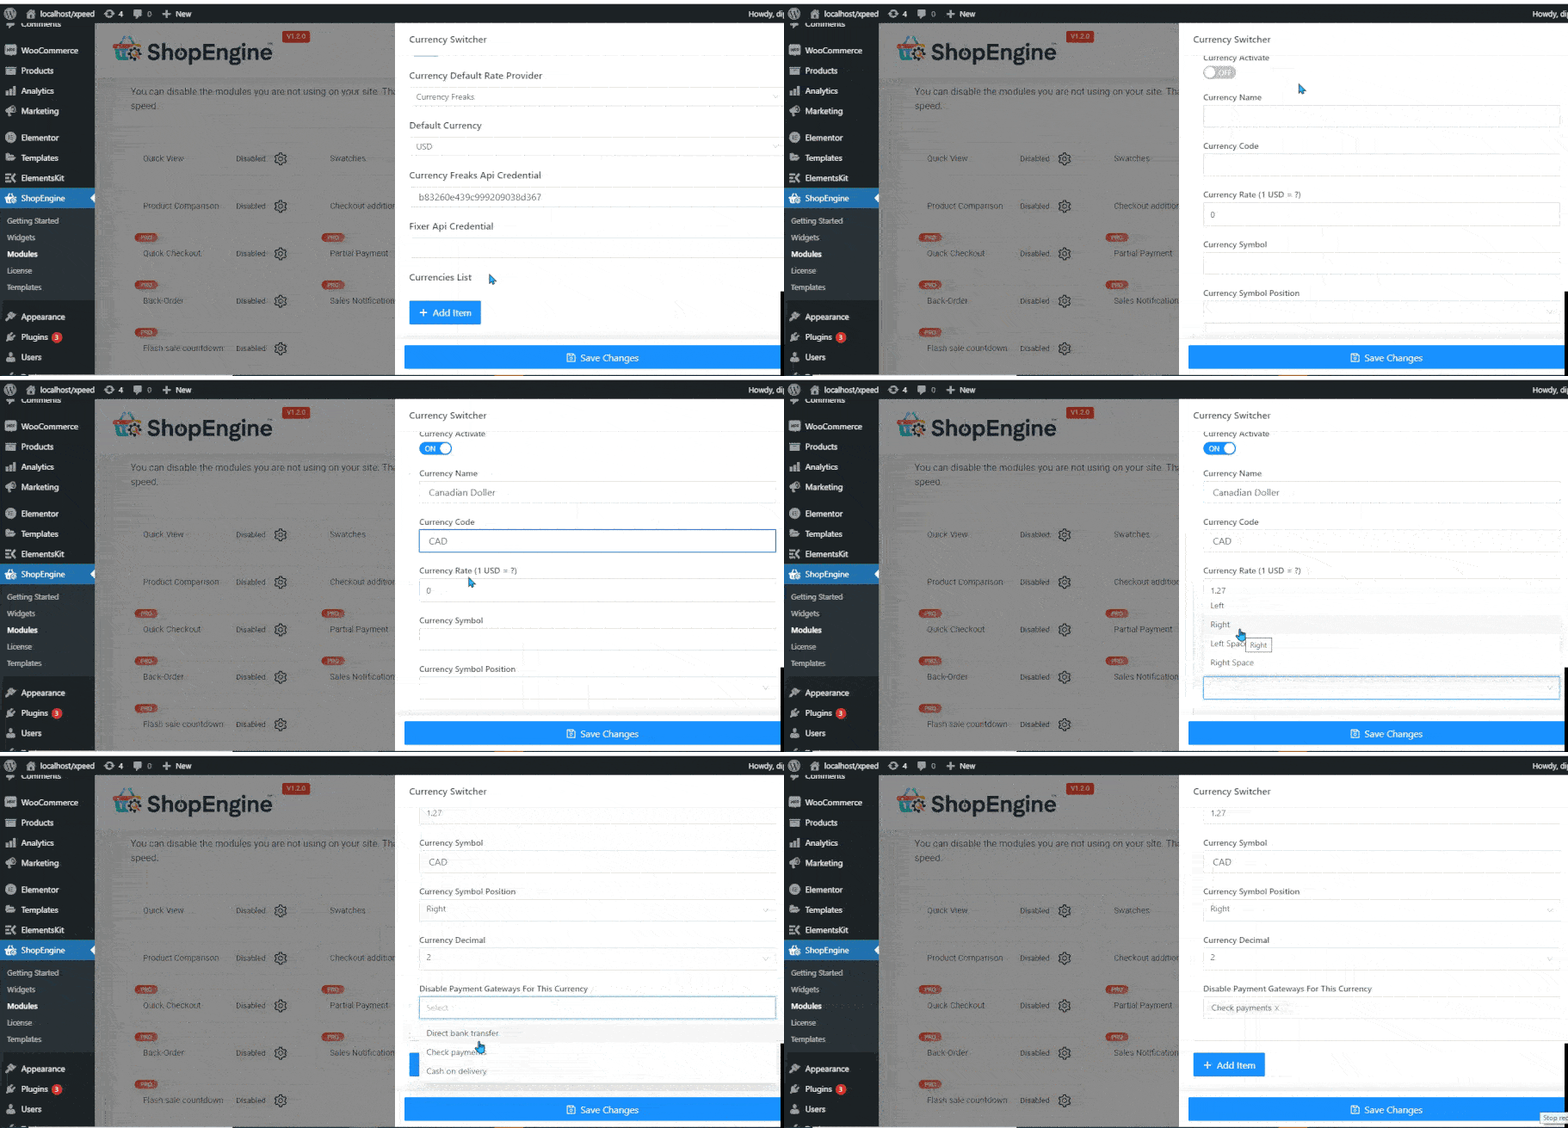
To add a new currency, click on the + Add New button and provide the following information.

- Currency Activate: Turn on/off Currency Activate to activate/deactivate the currency.
- Valutanavn: Put the currency name in the Currency Name
- Valutakode: Make sure to use a standard code for the Currency Code. For example: Currency code for United States Dollar is USD
- Valuta kurs: Angiv valutakursen i form af valutakurs eller USD.
- Valutasymbol: Use a standard currency symbol
- Valutasymbolposition: Du kan placere valutasymbolet på venstre, højre, venstre mellemrum eller højre mellemrum afhængigt af den valuta, du forsøger at tilføje.
- Valuta decimal: Vælg det antal decimaler, du vil have din valuta til at vise.
- Deaktiver betalingsgateways for denne valuta: Choose the payments gateways you want to disable for the currency
After inserting all the data, click Gem ændringer.
Step 4: Add Currency Switcher Widget the website #
Du skal tilføje det Currency Switcher Widget in the front end of the website to leverage the functionality of this module. Check out the how-to add the currency switcher module.
Bemærk: If any Payment Gateways is disabled for some Currency, then that gateway will not show up on the checkout page for that currency.


