A sleek and modern look should be a top concern while designing your WordPress website. No matter how contemporary or distinctive the design you create it won’t be much effective if your site struggles to maintain responsiveness.
On that account, a circle menu in WordPress can keep your site trendy, stylish, and responsive at a time. Besides, it allows the menu to fit on a compact and small screen that can expand and fold with a click or hover.
Hence, in this guide, we’ll show how to create a circle menu in WordPress using both a tool and custom CSS. Along with the WordPress menu tutorial, you’ll also get to learn some tempting circle menu designs for your site.
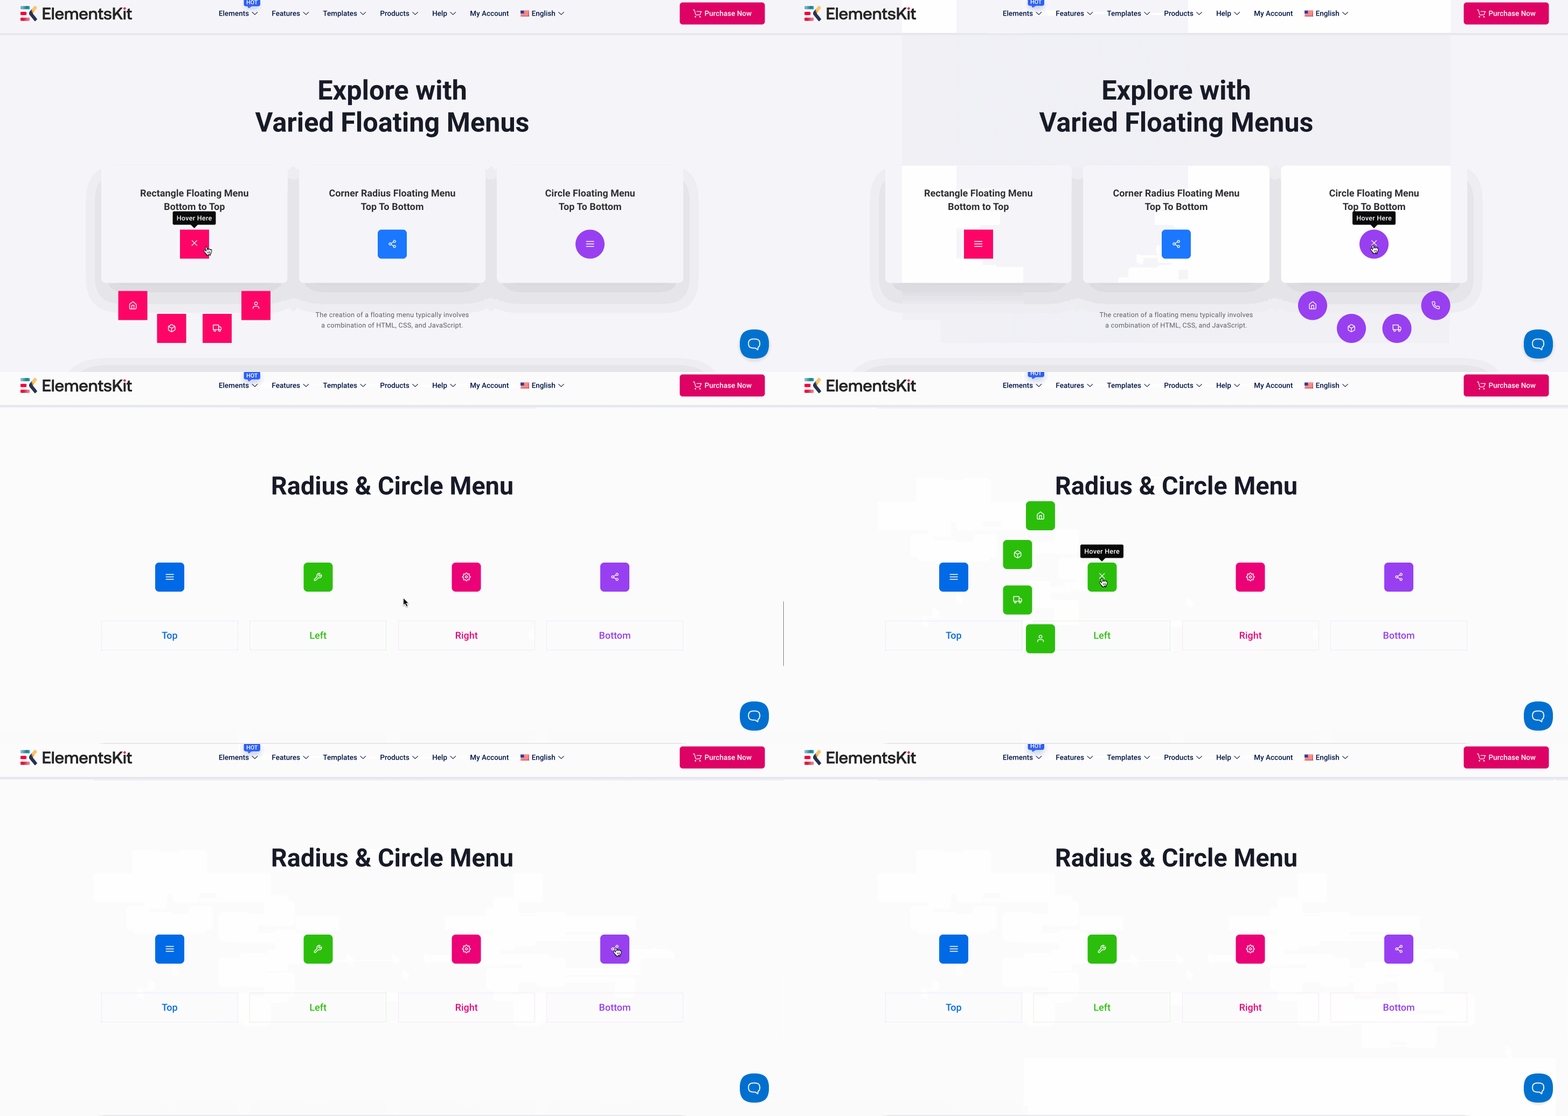
A WordPress circular navigation menu can be created in various styles and designs. The circle menu plays a significant role in maintaining seamless navigation and evenly distributed layouts while presenting links or web pages.
This menu can be displayed not only in different designs but also in various directions such as top, left, right, bottom, bottom left, bottom right, etc. Also, a rich icon library is attached to clearly display your circle menu.
Let’s have a look at diverse circular menus that can be added to your site:

Website navigation is the top concern for visitors around the globe. Even the majority of visitors leave a site for not having an easy-to-navigate menu.
It has been tested and proved that 94% of visitors prioritize easy website navigation over anything.
This strongly denotes that your site won’t work well without having smooth and accessible navigation. Luckily, a circular WordPress navigation menu plays a notable role in building easy-to-navigate sites.
Besides, displaying a circular menu brings additional benefits to your WordPress site such as:
- Engaging circular layout: A circle menu allows you to display navigational links or pages in a circular layout that induces a modern and unique look in your site.
- Space-optimized design: The circular menu keeps navigation uncluttered and makes it more optimized for small screens.
- Interactive and intuitive navigation: This menu creates interactive navigation by providing different visual effects and styles.
- Highly customizable: Starting from icons, color, typography, speed, and direction, everything can be customized while creating a circular menu.
👉 Related blogs: Best mega menu plugins for WordPress.
A circle menu is a unique way of presenting navigational links or pages in a circular format. This type of circular menu can be created in minutes in WordPress. To integrate this menu, you will only require an effective WordPress menu plugin that comes with such an option.
ElementsKit is one of those plugins that have a circular menu-adding feature along with a mega menu, WordPress navigation menu, and drop-down menu. Again, this circular menu plugin provides a friendly user interface and interactive design options for your site.
Since it’s a premium feature, you will need the ElementsKit pro version to unlock the “Circle Menu” feature. So, before jumping into the process, installing the following plugins is a prerequisite step:
- Elementor (Free): As ElementsKit is an Elementor addon and supports its drag-and-drop interface, you need to install and activate this plugin first.
- ElementsKit (Free & Pro): Install and activate both the free and paid versions of ElementsKit.
Now, dive into the steps mentioned below and go through them one by one to learn how to create a circle menu in WordPress using ElementsKit:
Step 1: Activate the “Circle Menu” widget
ElementsKit’s Circle Menu widget is packed with wide design controls. An option to add circle menu will be unavailable without activating this widget. So, you have to first enable the “Circle Menu” widget.
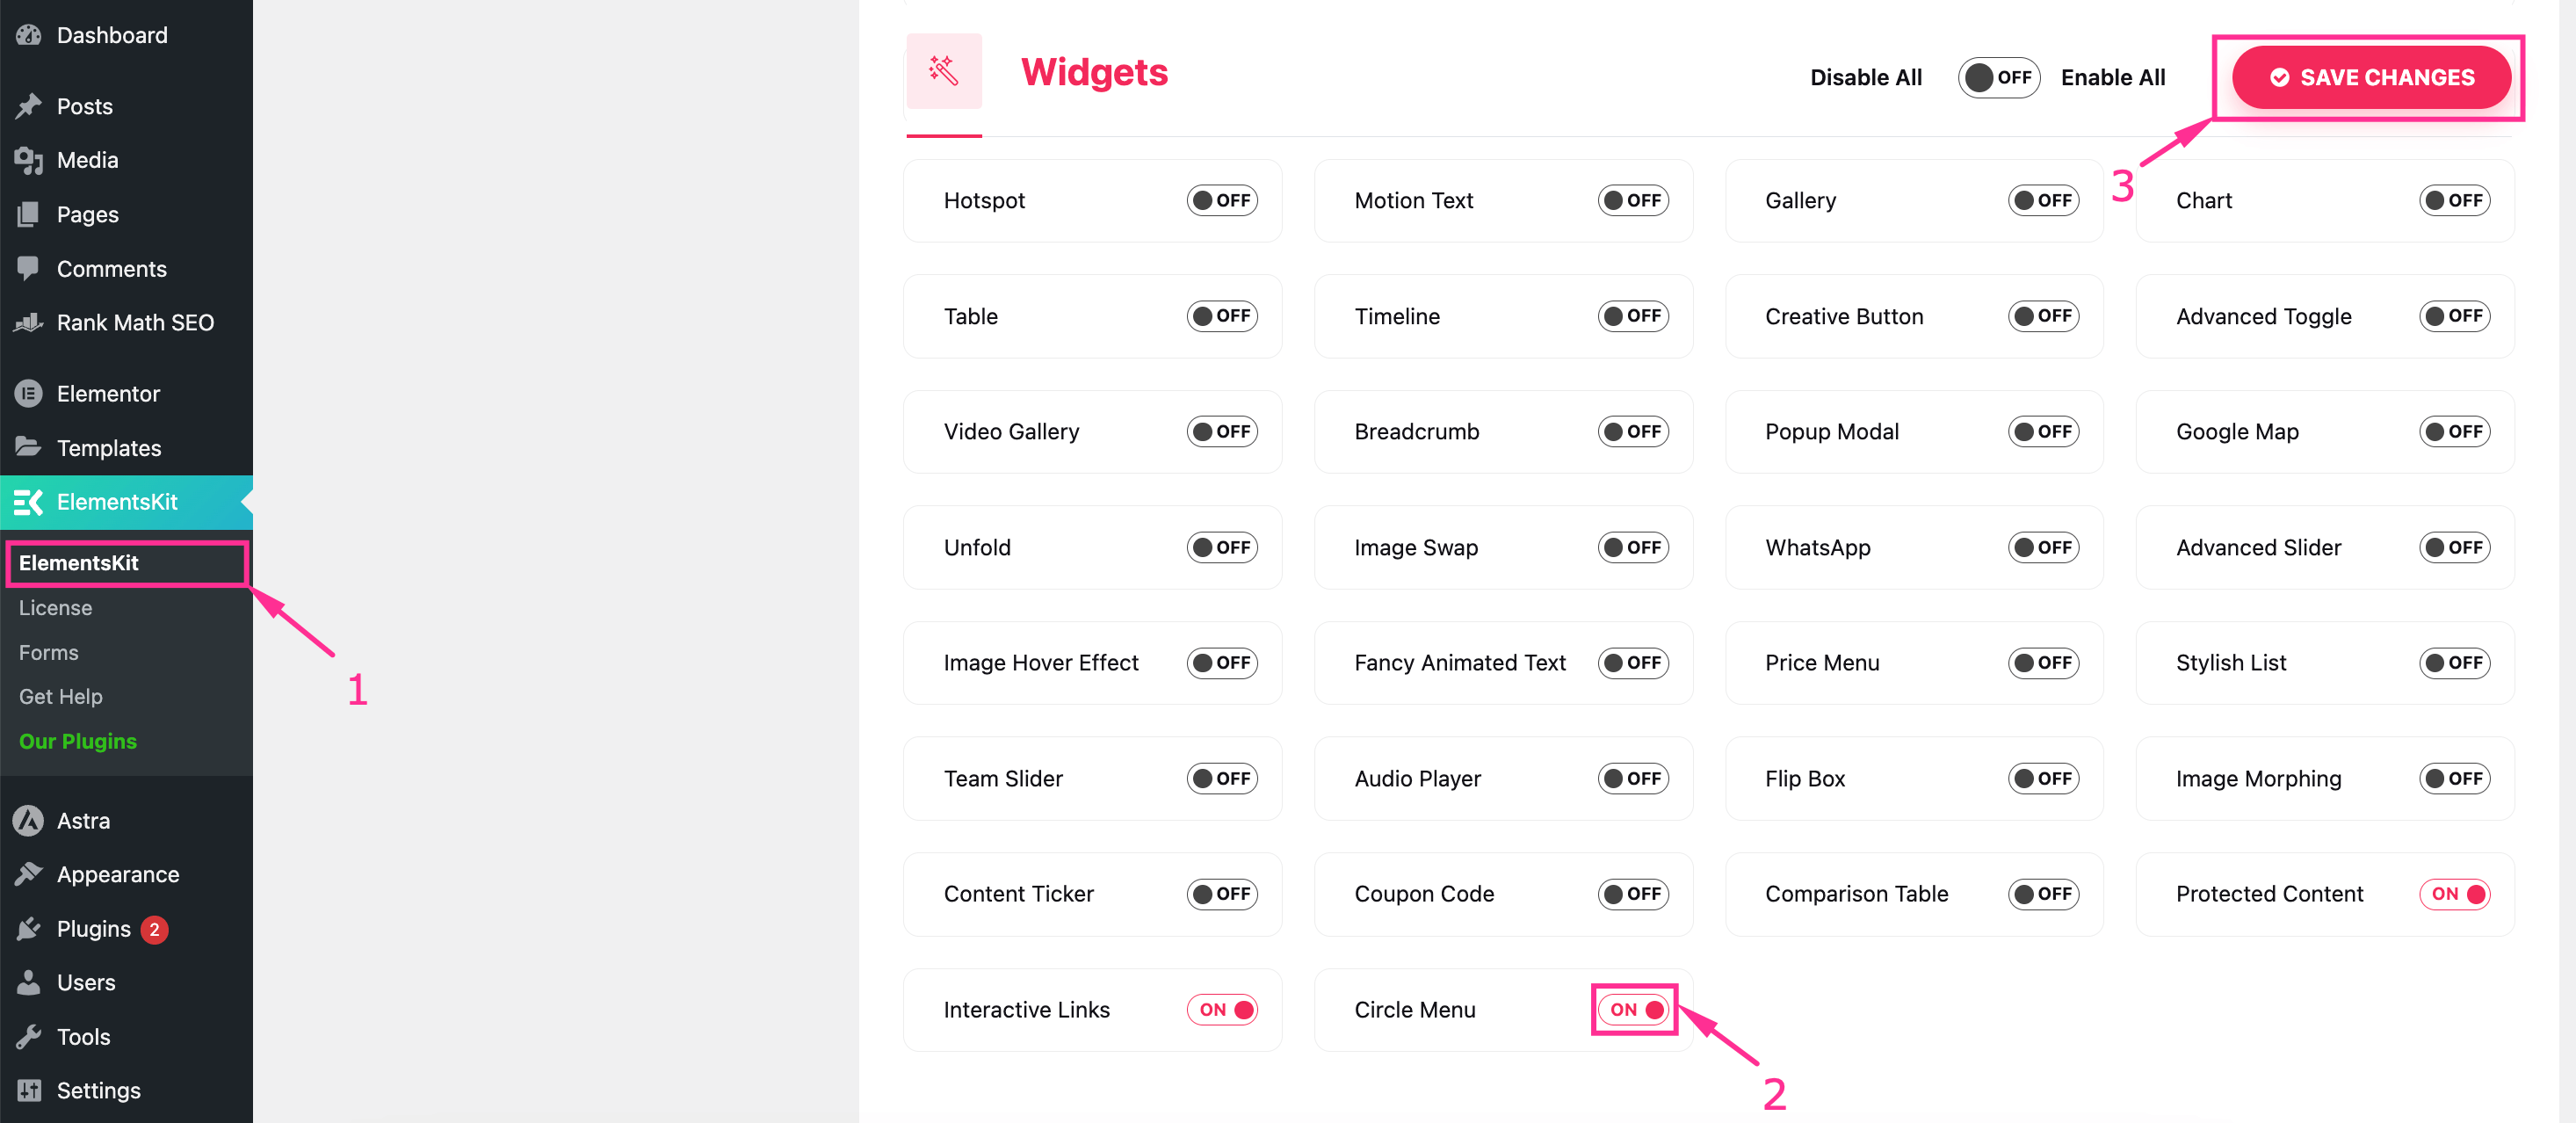
For that, navigate to ElementsKit > ElementsKit and hit the Widget tab. Then, scroll down till you see the “Circle Menu” widget and turn on the widget. After that, press the “Save Changes” button.

Next, you have to add a responsive circle menu to a suitable page by visiting the Pages >> All Pages and hitting the “Edit with Elementor” button of the page where you want to integrate a circle menu.
After redirecting to the Elementor editor, search for the “Circle Menu” widget and drag-and-drop it on the “+” icon. This added circle menu will display different options for creating a customized circle navigation menu in WordPress.


This last step is all about adjusting content, settings, and styles for pulling off a responsive circle menu. First, you have to customize the content part of your circle menu items.
Now, expand the “Item #1” under the Content tab and adjust the fields mentioned below:
- Icon: Select an icon from the icon library.
- Title: Enter the title for your first item.
- Tooltip: Add the text you want to show in your tooltip.
- Link: Insert a link to which you would like to get your customers redirected whenever they click.
Following the same process, customize content for Item #2, Item #3, Item #4, and Item #5. Also, you can add more items by pressing the “Add Item” button.


After content editing, expand the “Settings” tab and leverage the following configurations for creating a WordPress custom circular menu:
- Menu Direction: Decide the direction of your circle menu.
- Circle Menu Size: Control the circle meu size.
- Circle Menu Distance: Adjust the distance between the circles from here.
- Speed: Set the speed of your animated circular menu.
- Delay: Set the delay time for your step out and step in the circular menu.
- Step Out: Adjust the step-out speed or motion of the menu items.
- Step In: Control the step-in speed or motion of the menu items.
- Trigger: Click or hover; select how you would like to trigger your circular menu.
- Transition: Try and choose a visual effect for your menu items from the drop-down menu.


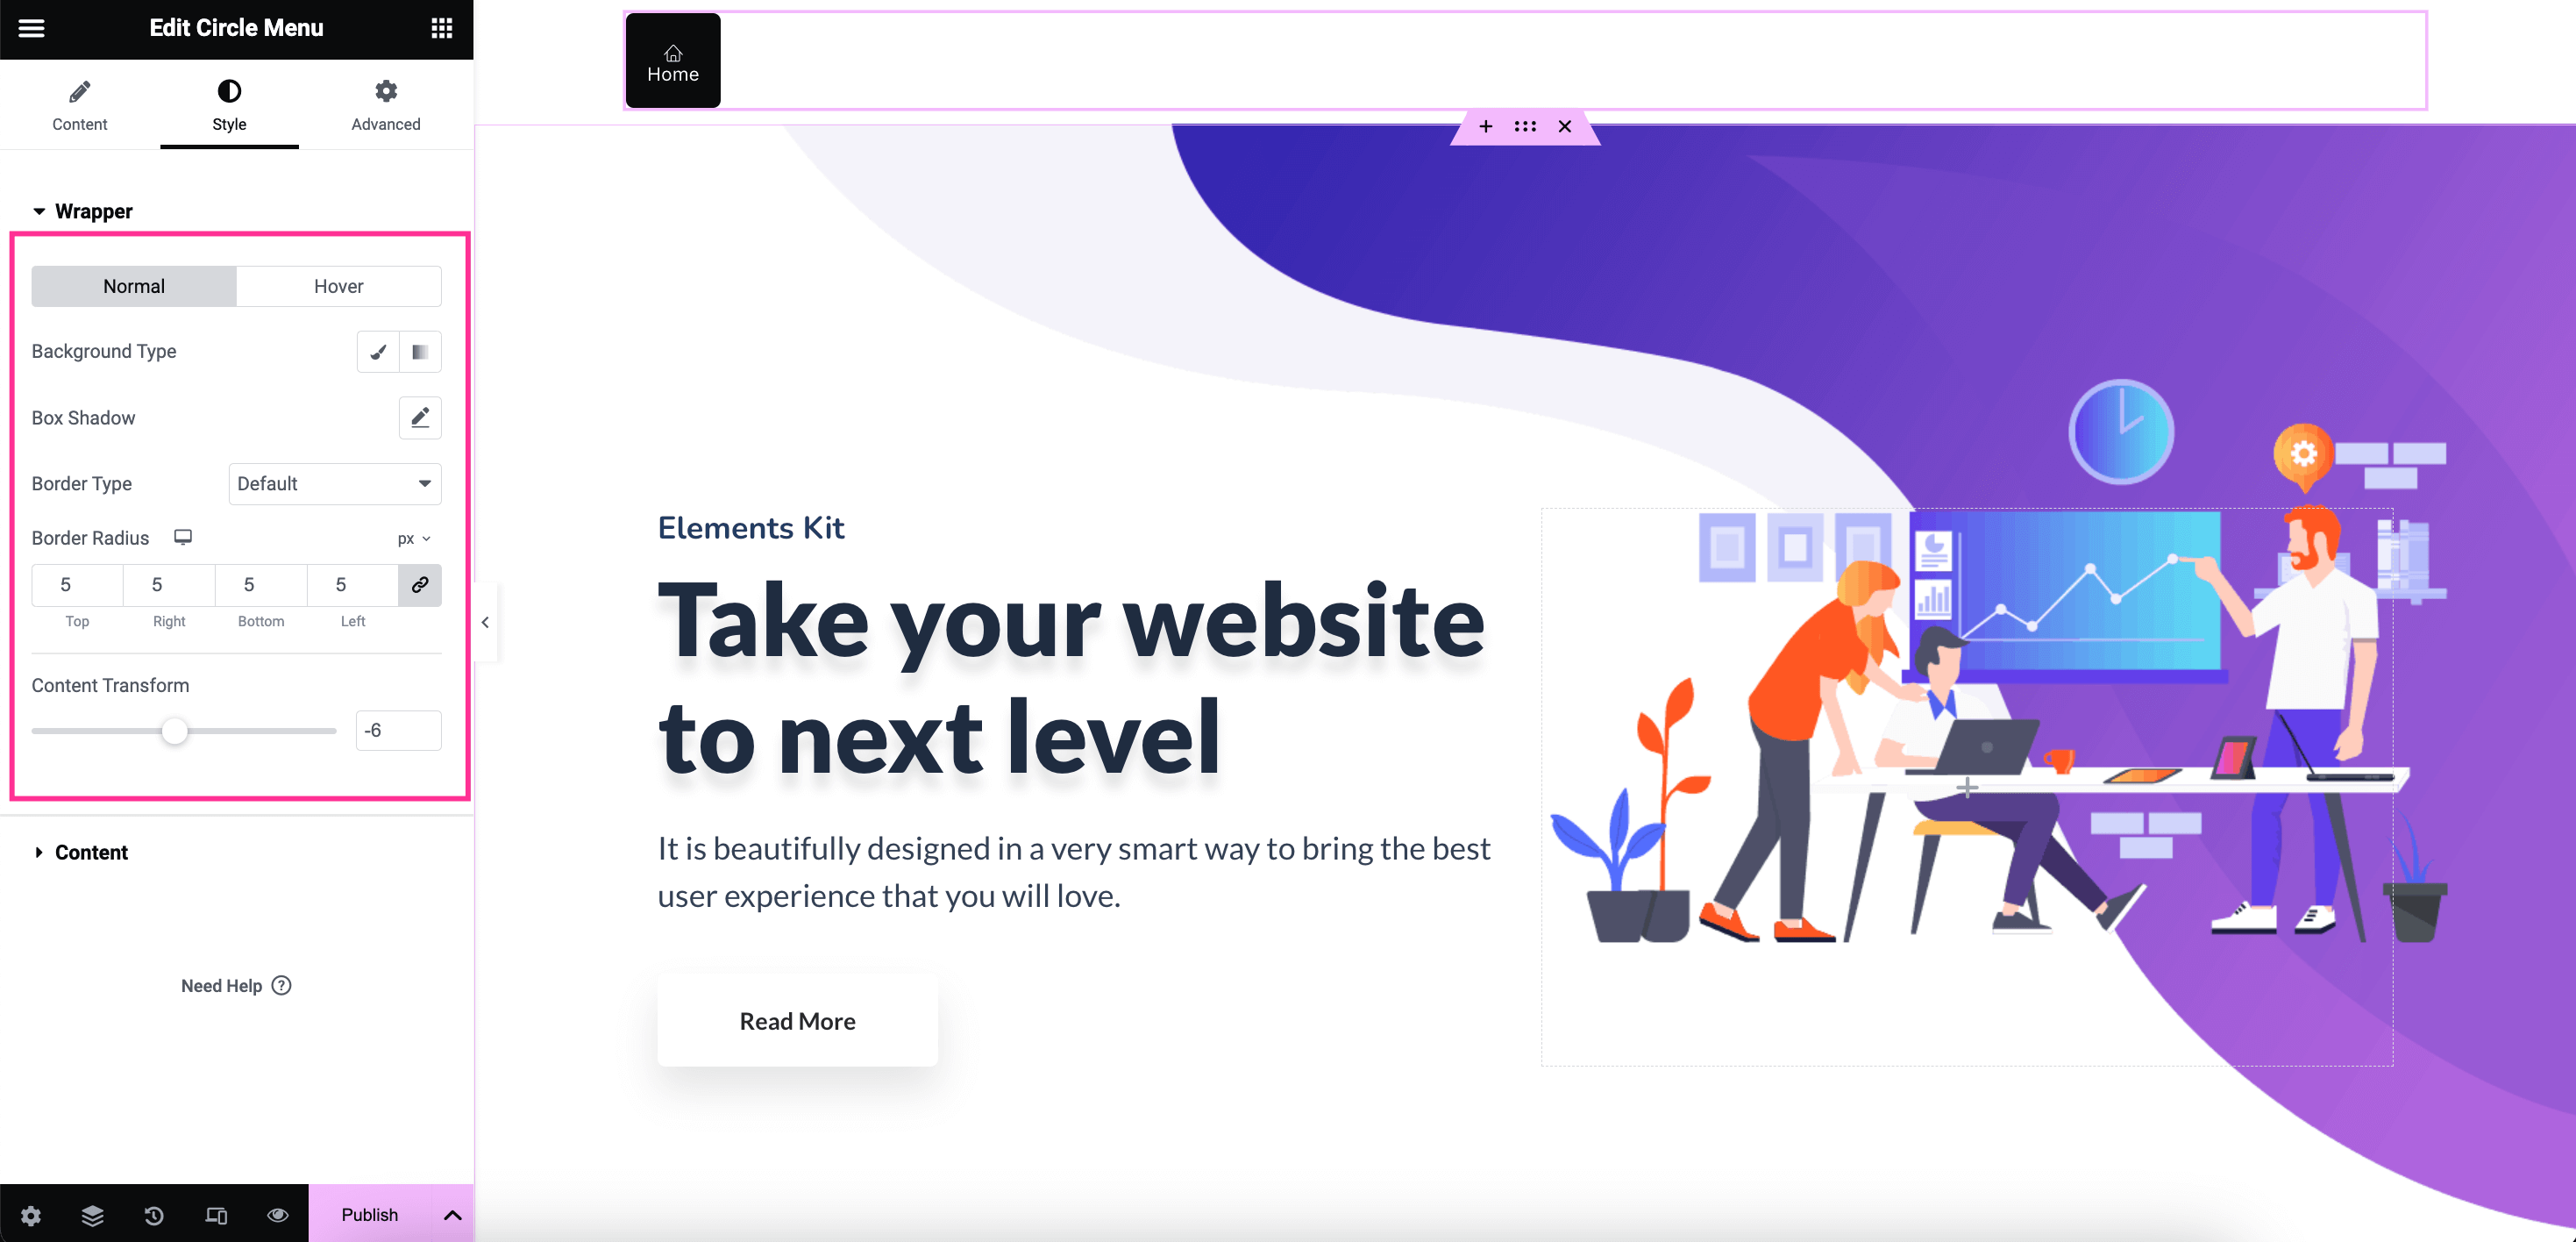
You can also control the style of your circular navigation menu by editing color, radius, background, etc. To do that, expand the “Wrapper” tab and alter Background Type, Box Shadow, Border Type, Border Radius, and Content Transform.

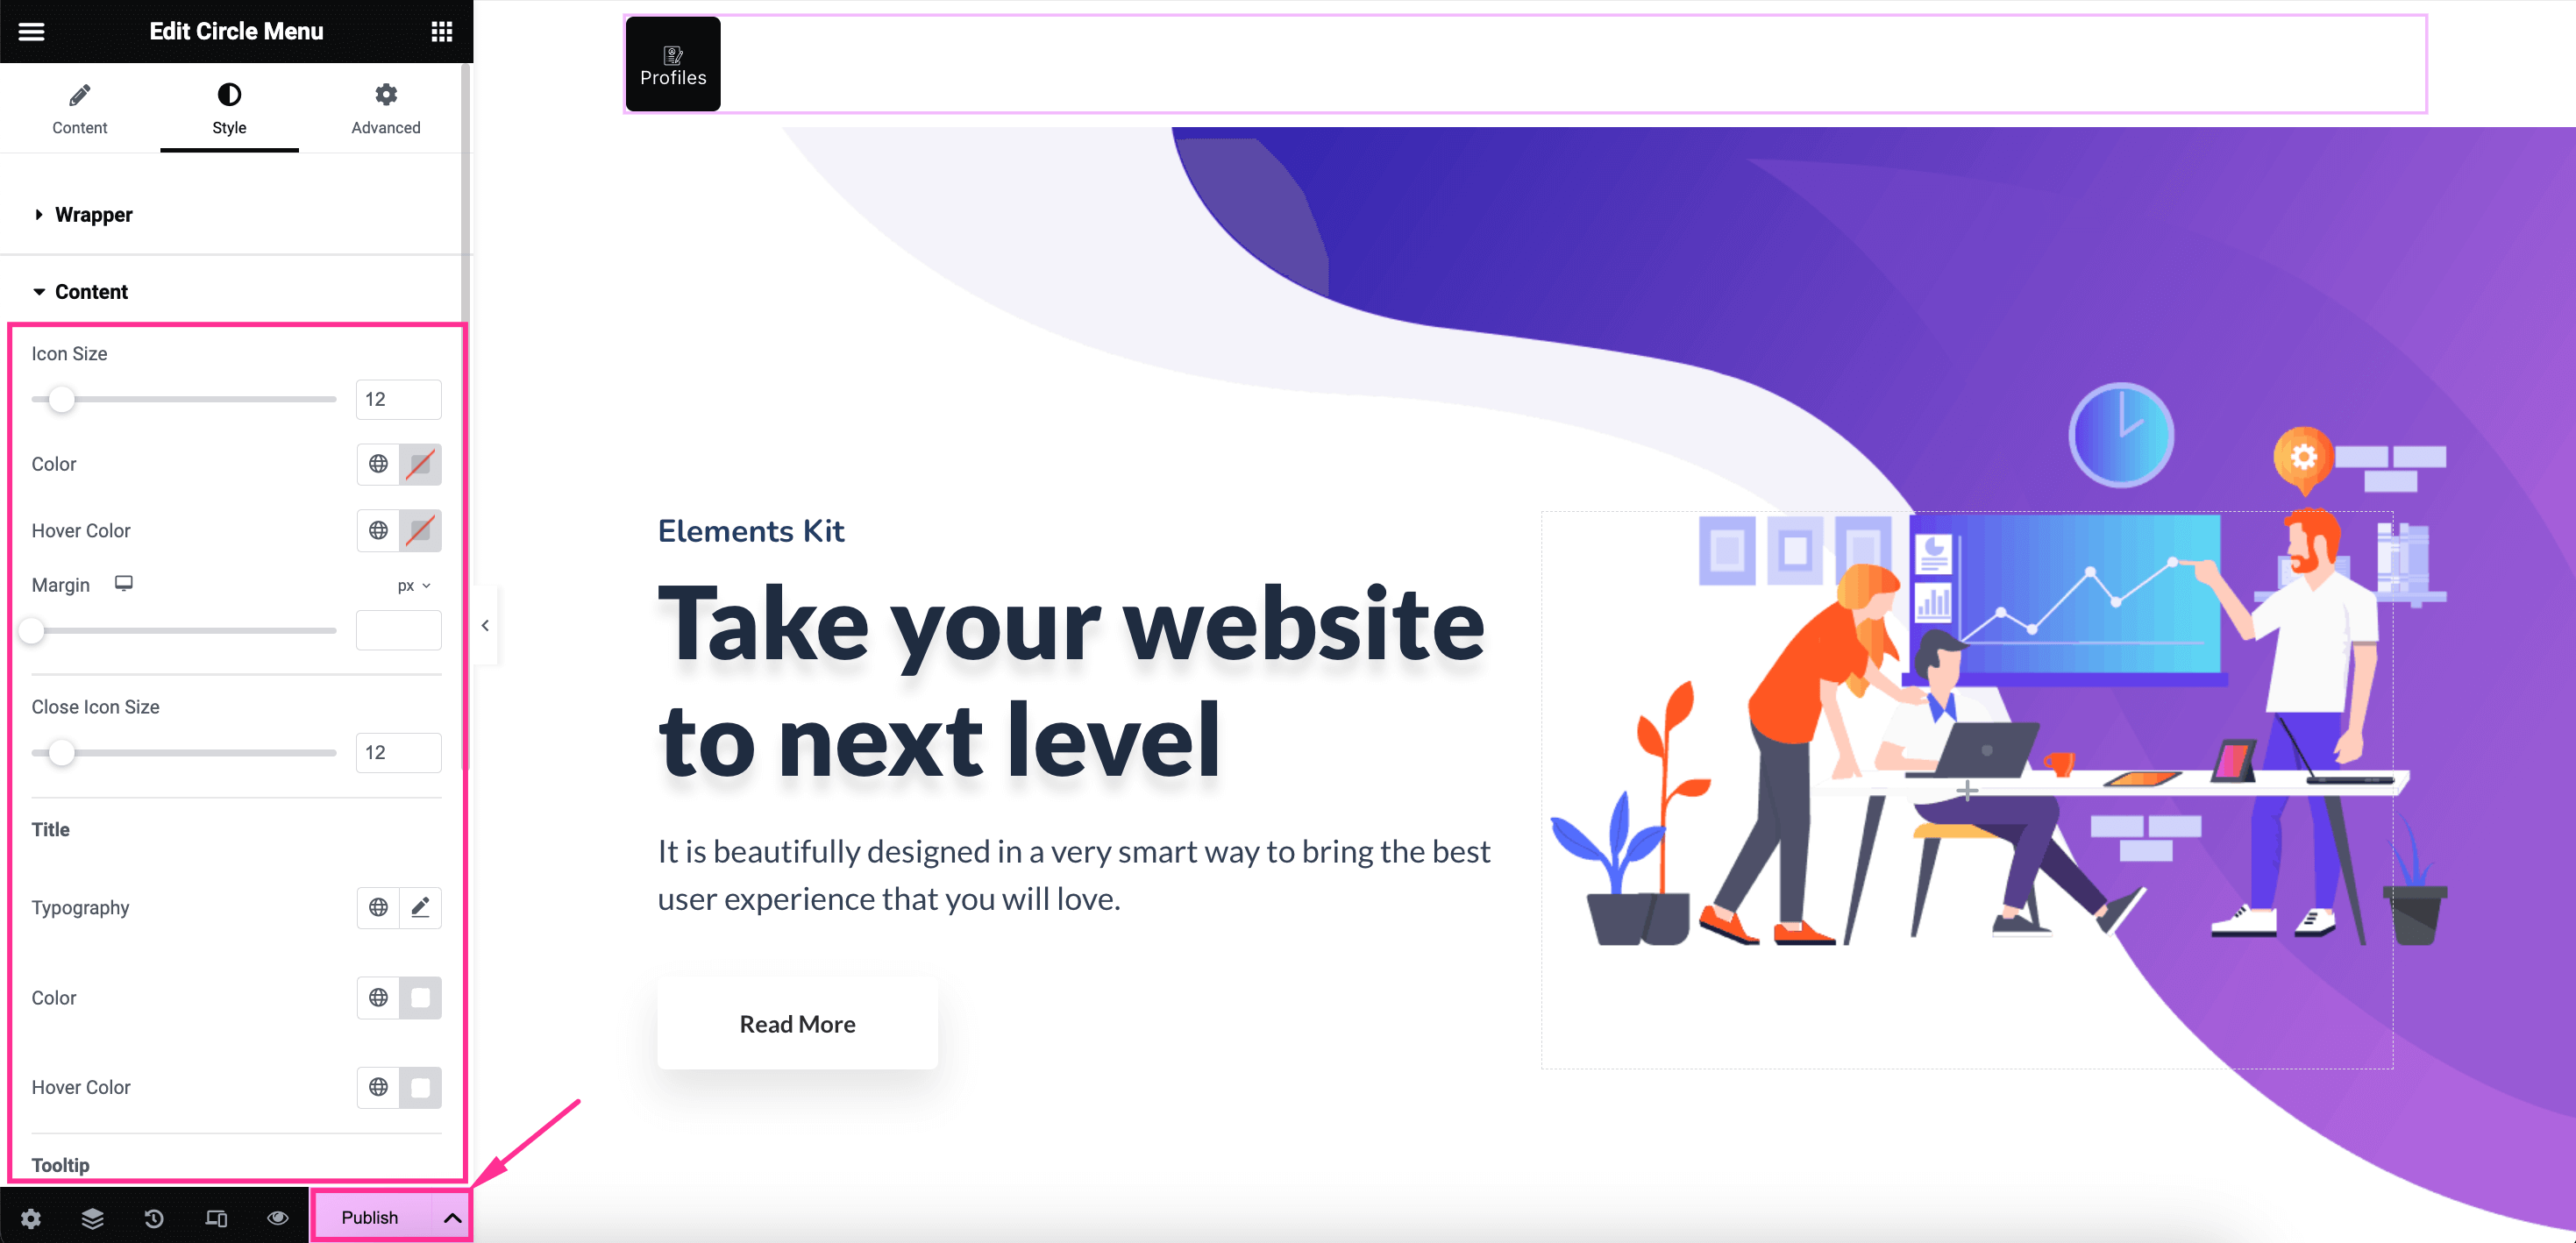
Then, open the Content tab and customize the Icon size, Color, Hover Color, Margin, Typography, etc. for content, Title, and Tooltip. Finally, hit the “Publish” button after making all adjustments.

After going through all the edits and customizations, here is the final look of the circular menu designed with the dedicated “Circle Menu” widget of ElementsKit:


Besides adding a circle menu with a WordPress plugin, you can also create one using custom CSS. This method requires coding expertise which is not feasible. Still, here we’re showing how to display circle menu with custom CSS.
So, follow the steps below to add a WordPress custom CSS menu in minutes:
Step 1: Add and customize a container.
First, visit the page where you would like to display a circle menu by navigating to Pages >> All Pages. Then hit the “Edit with Elementor” option for that page.
After redirecting to the Elementor editor, drag-and-drop the container on the “+” icon.
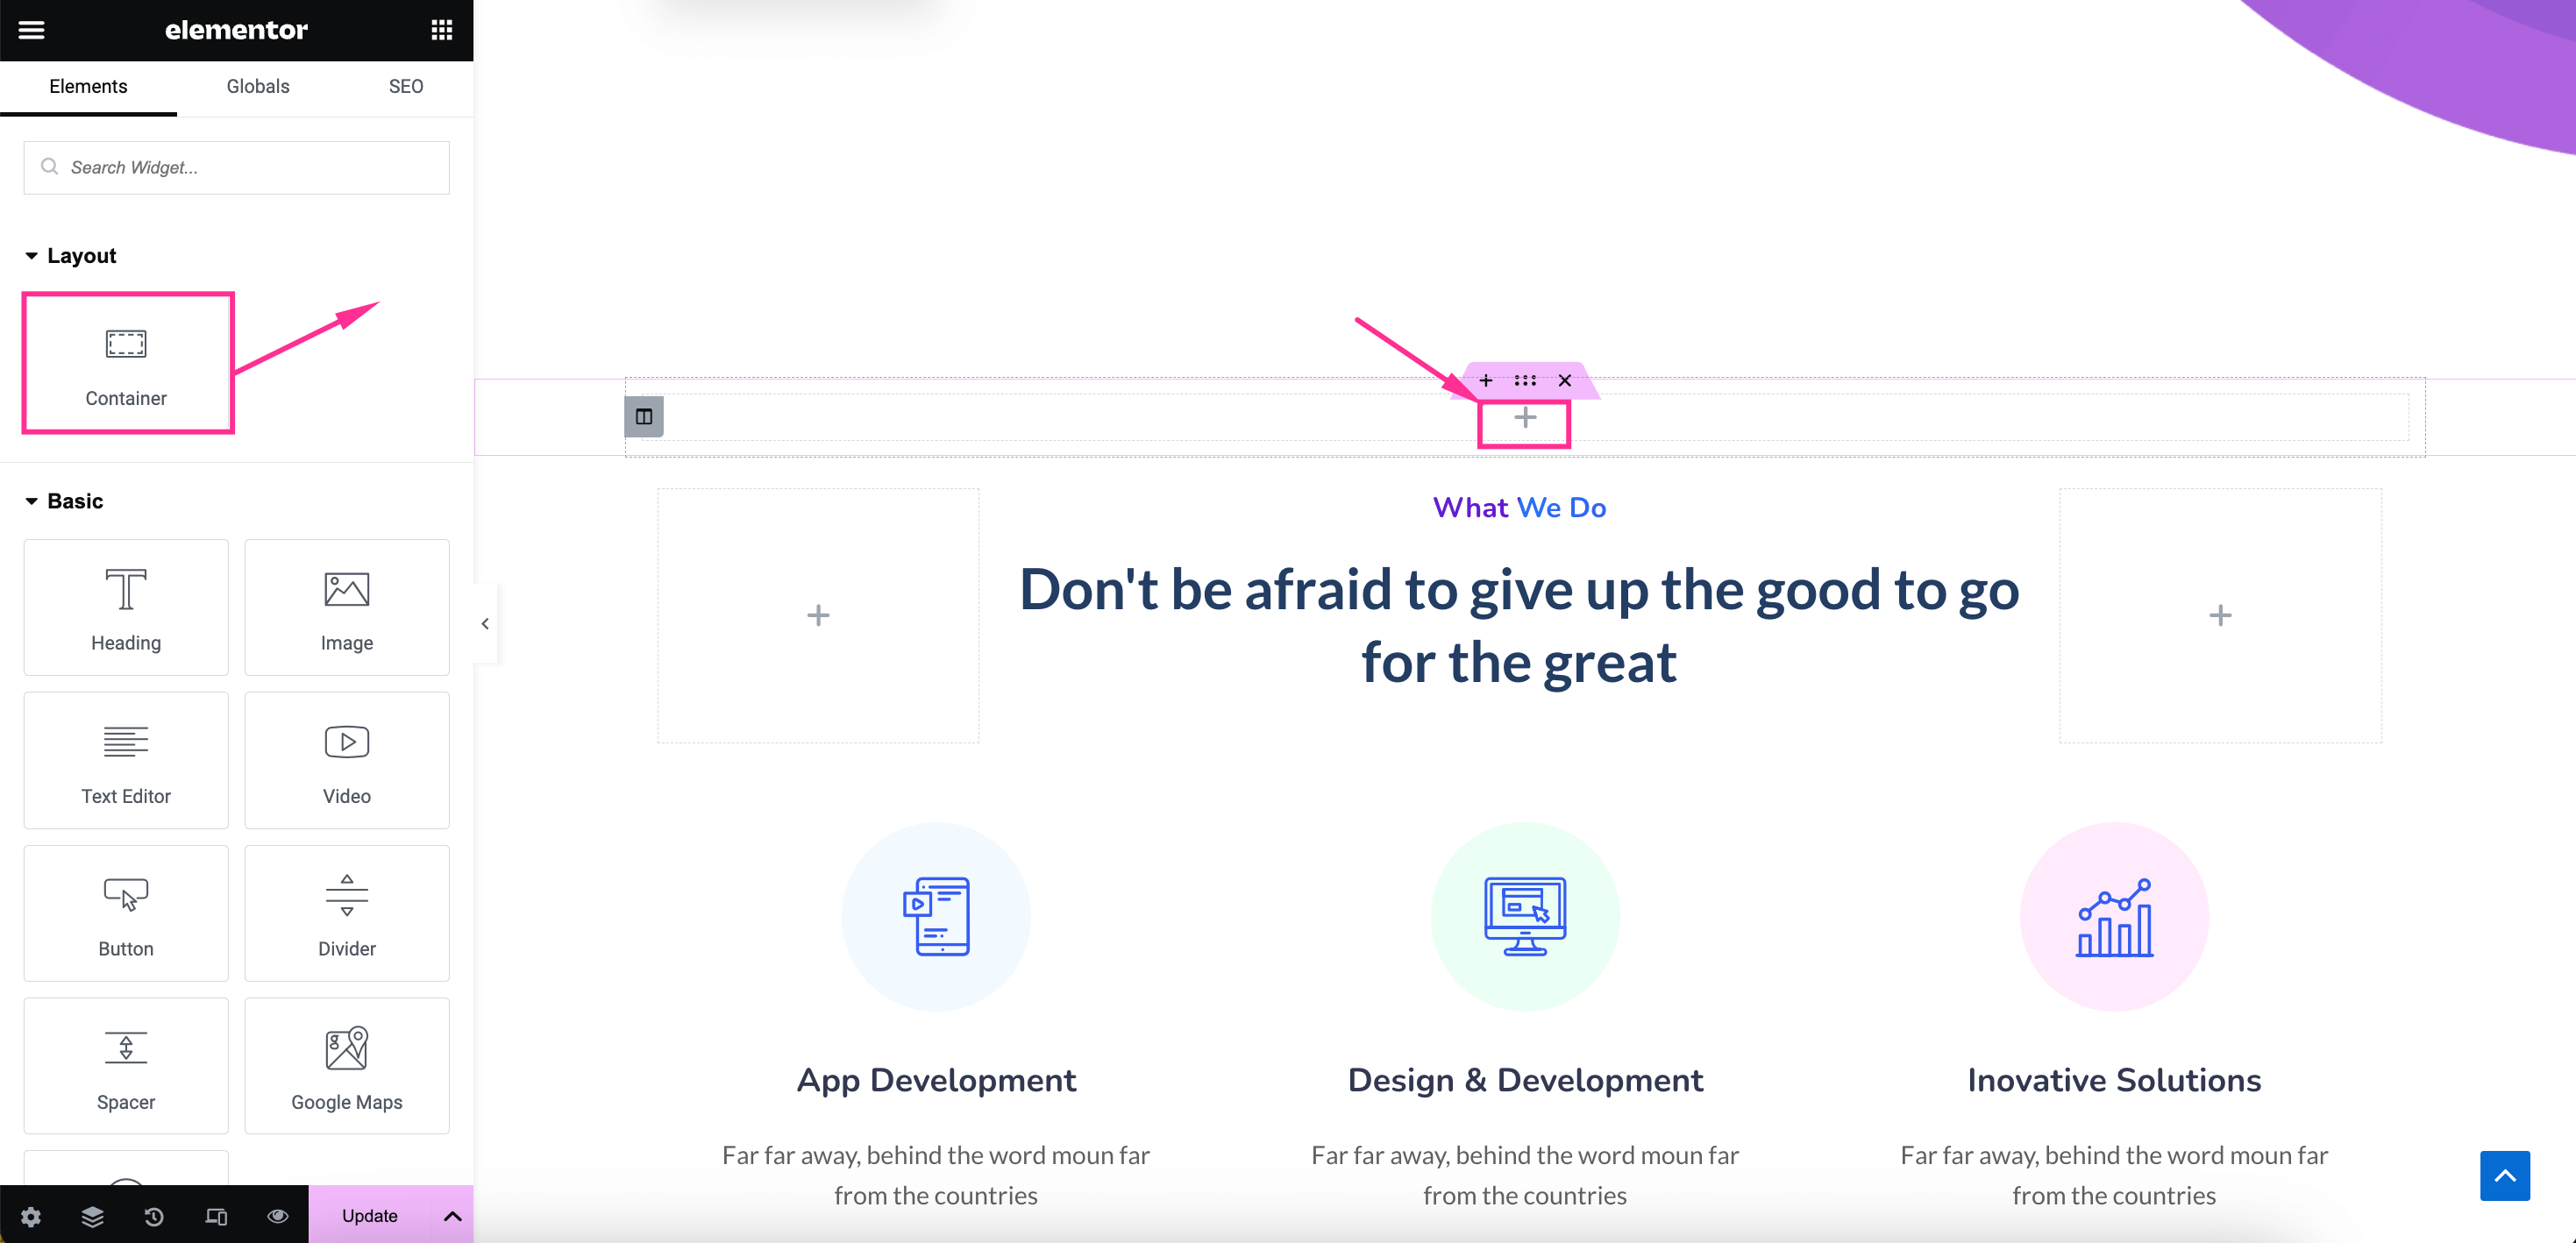

Then adjust the height, justify content, alignment, background color, etc. from the Layout and Style tab of the container.
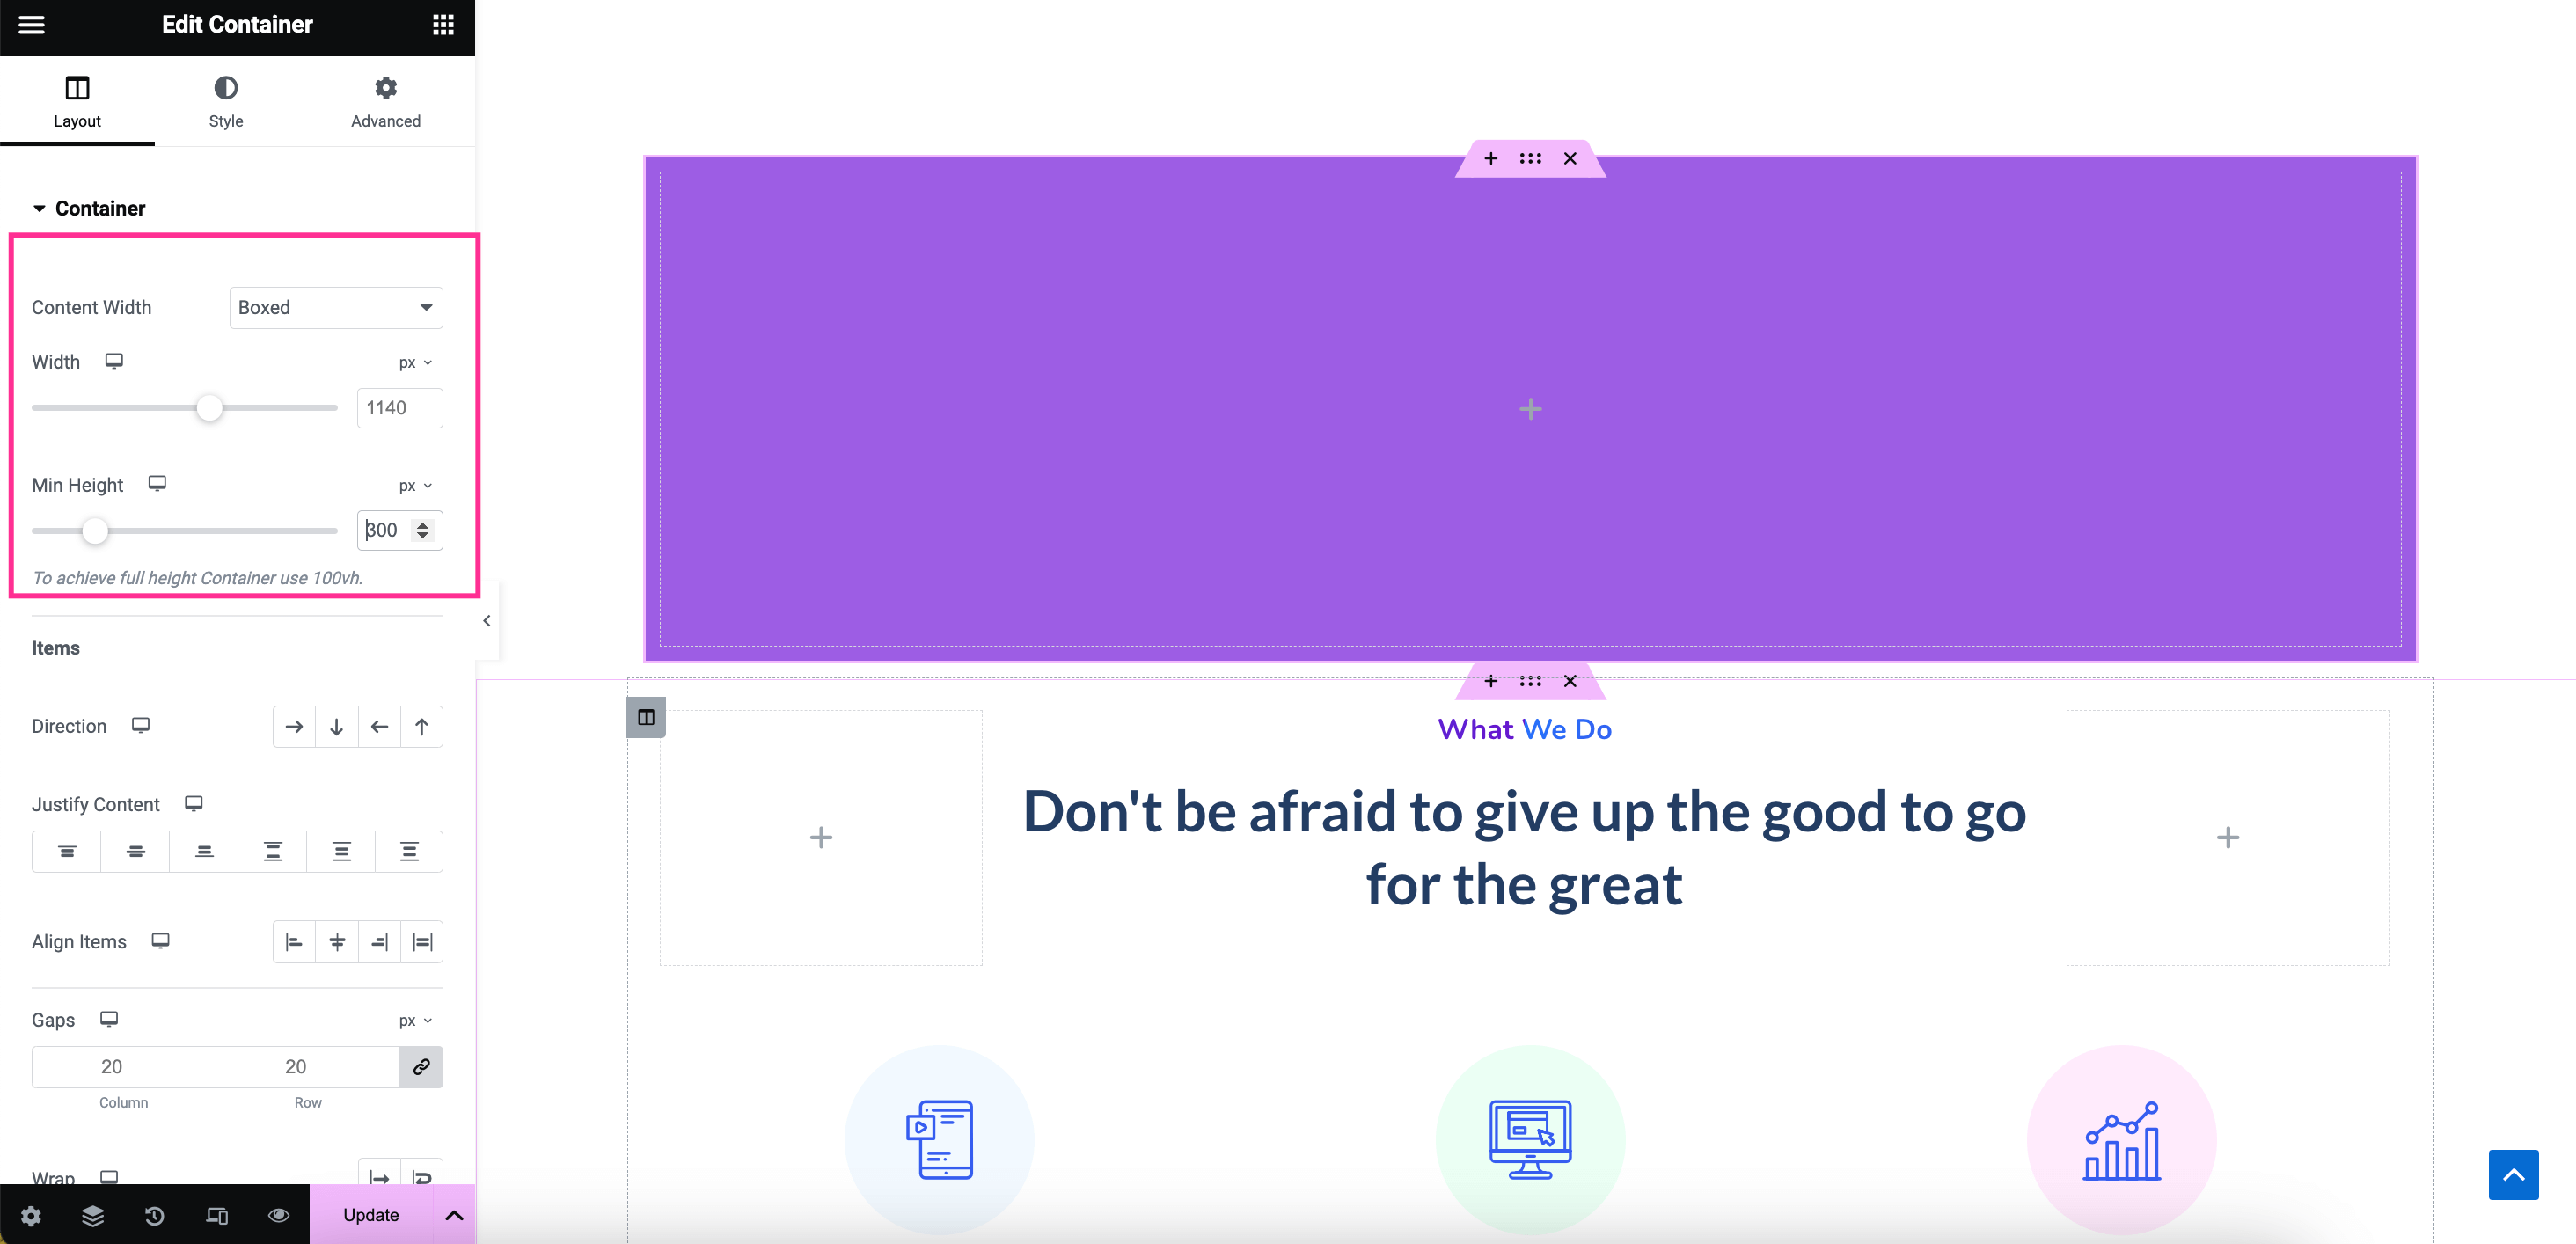

Step 2: Insert custom code into the HTML widget.
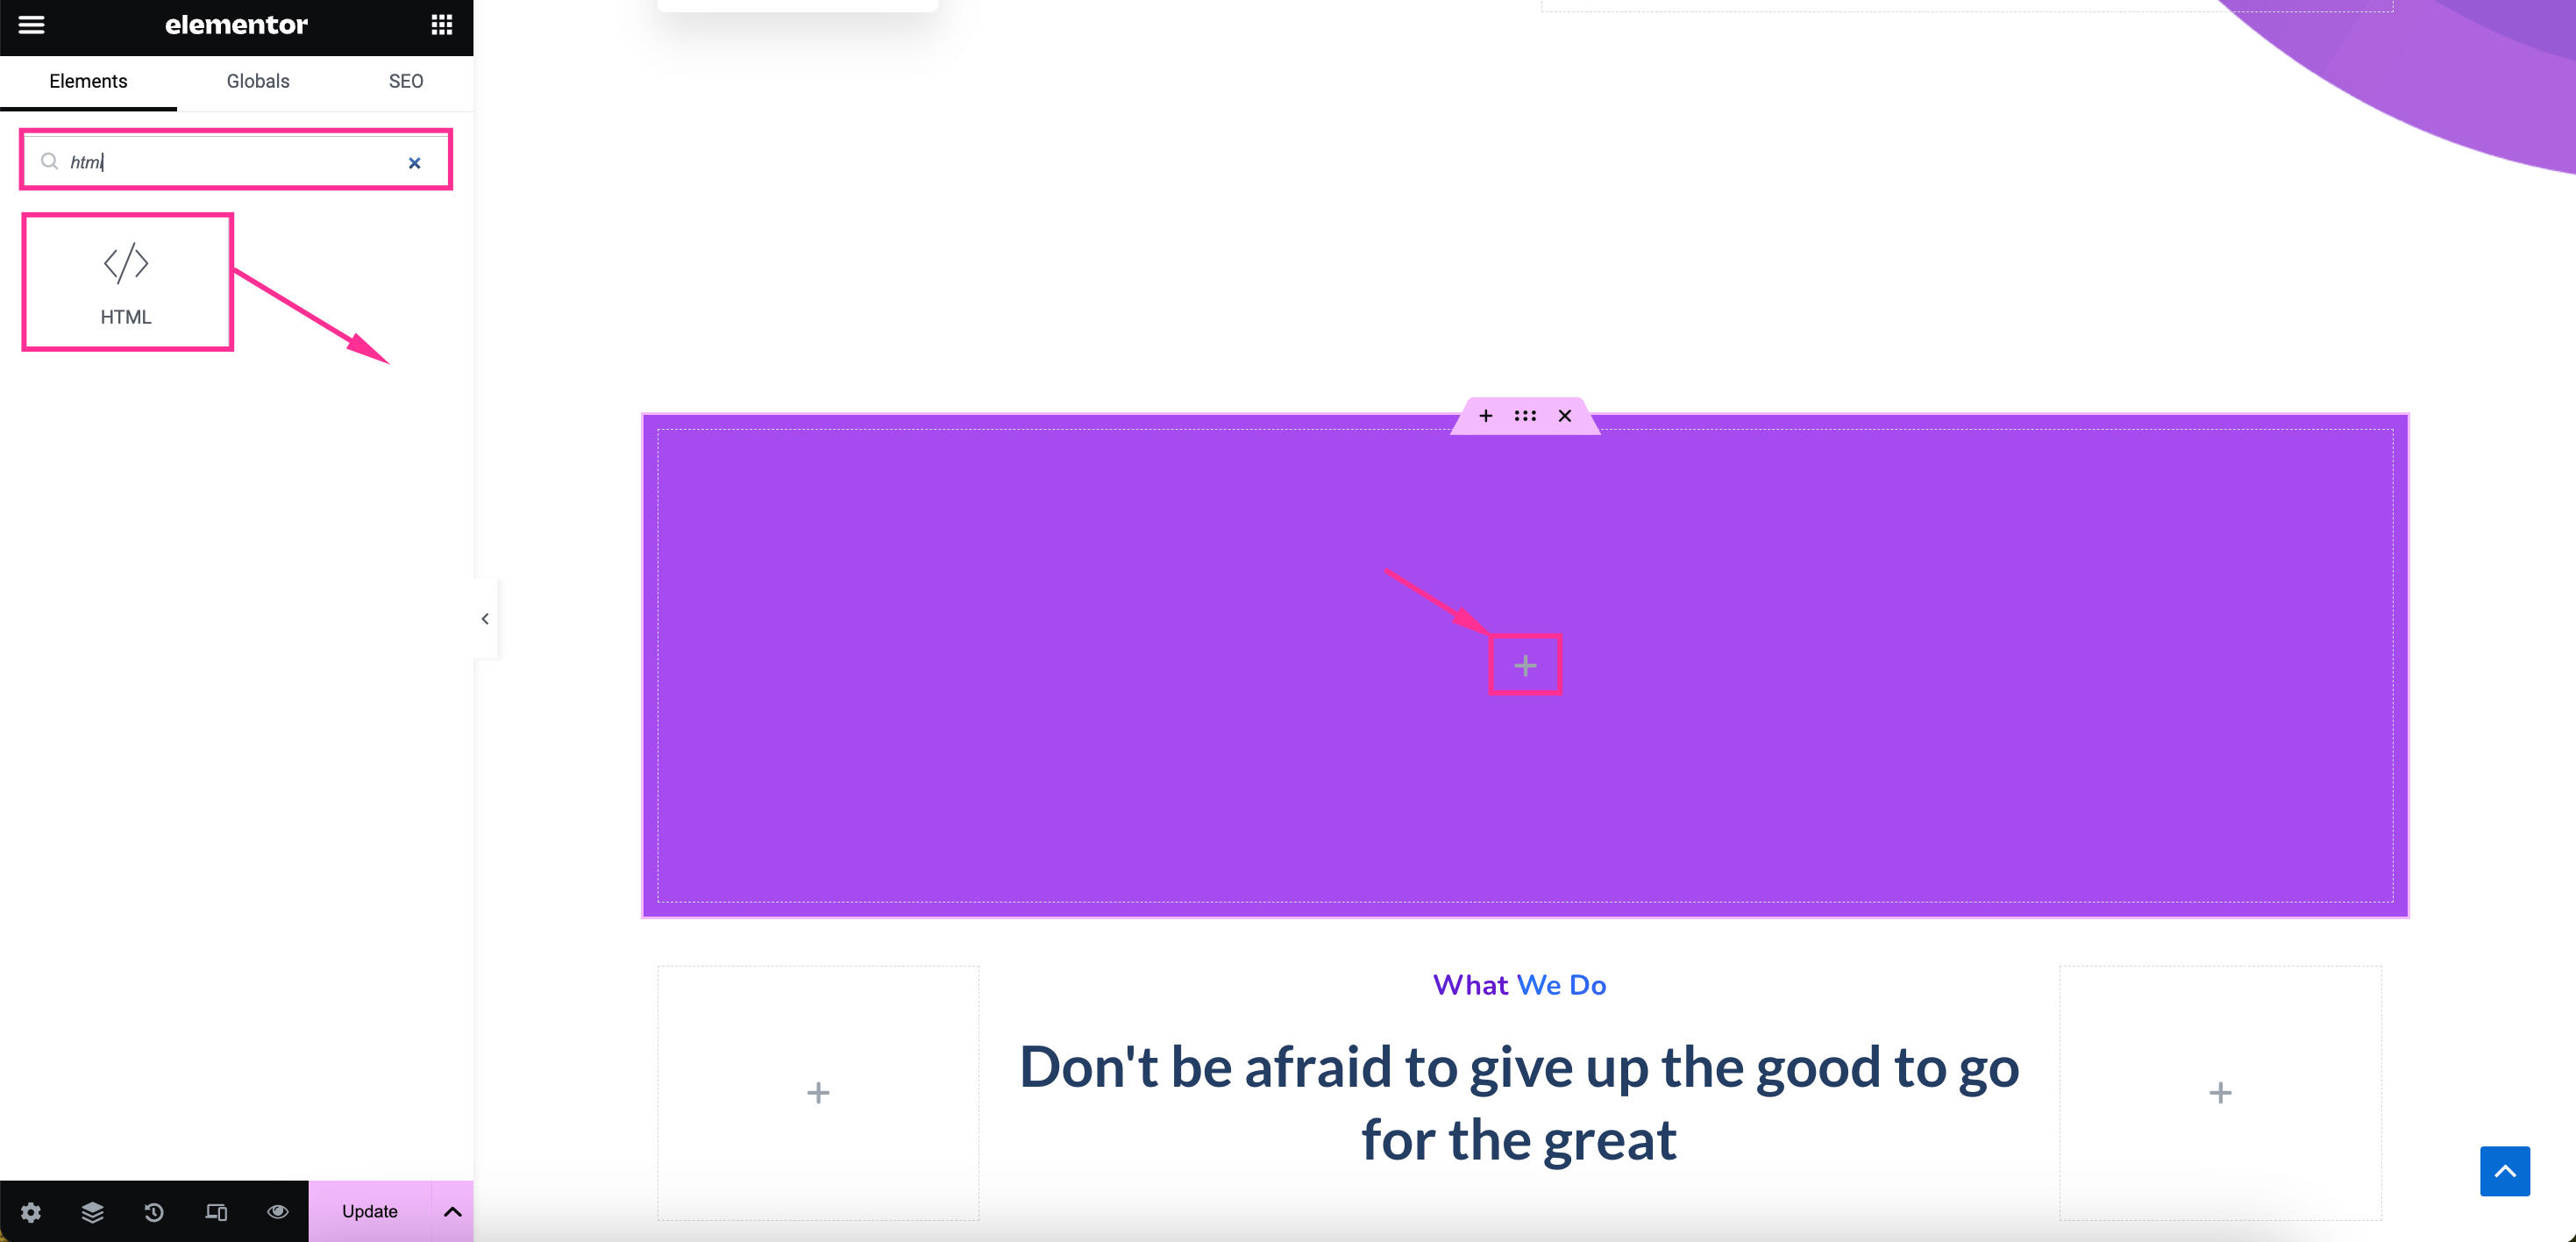
In this step, you need to search for an HTML widget and drag-and-drop this widget on the “+” icon to insert custom code.

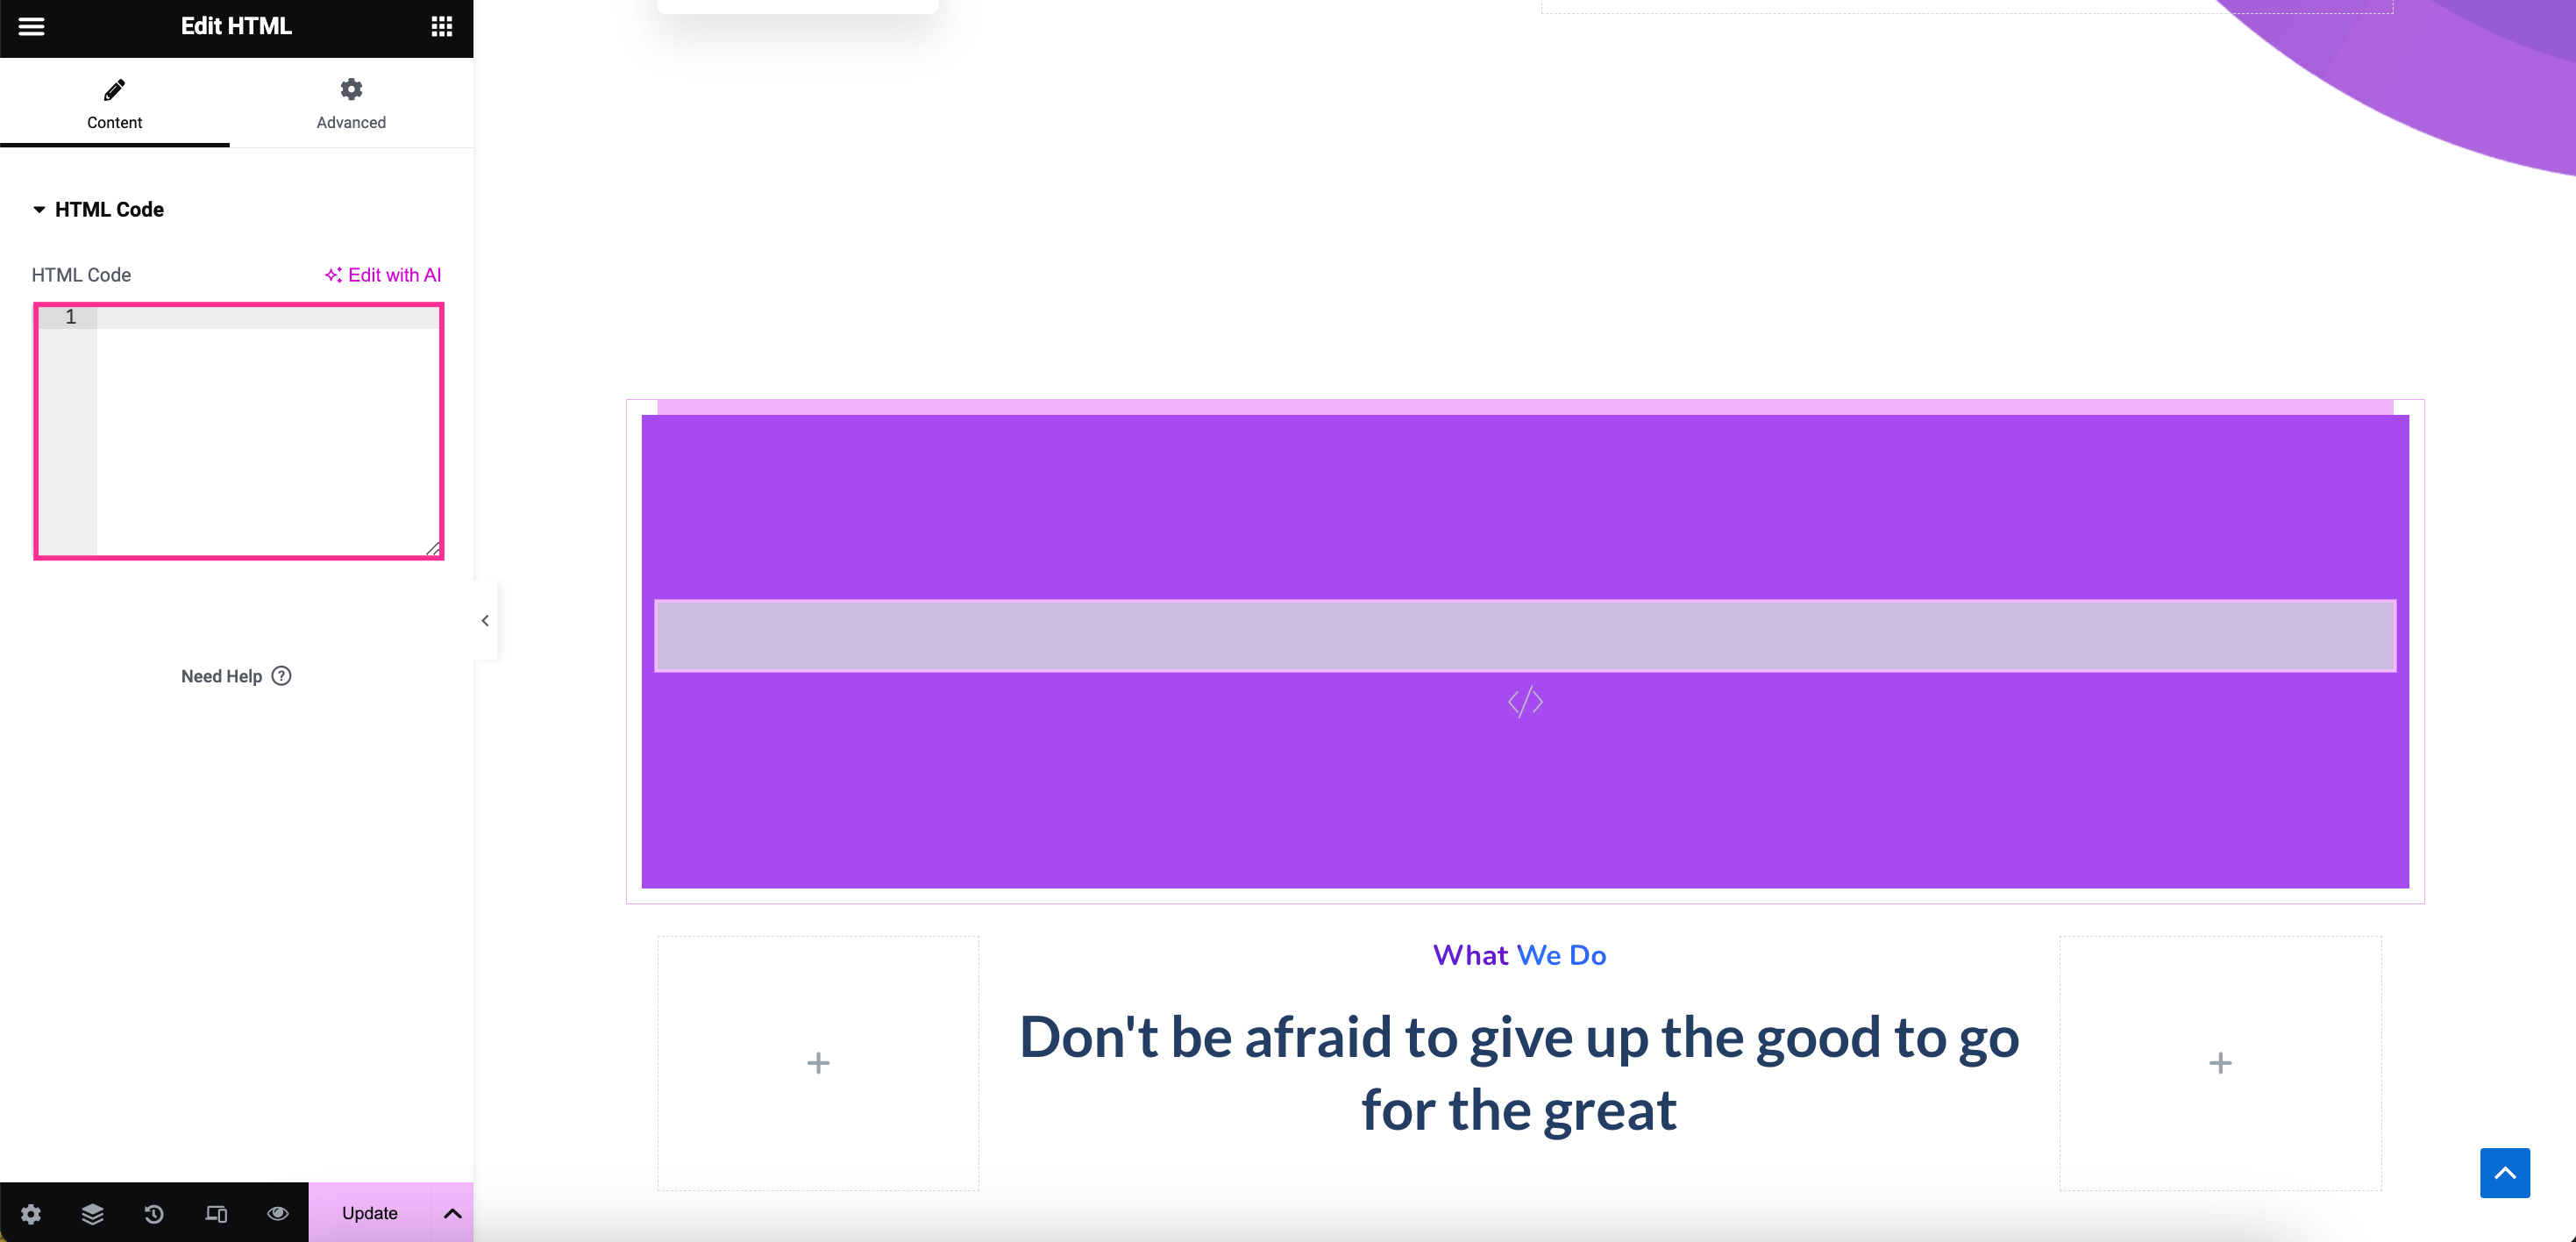
After adding an HTML widget, you will see a space for inserting custom CSS code.

Now, download the custom CSS code by pressing the button below and copy the code after opening the file.
finally, paste it on the HTML Code tab and you will get to see a circle menu on the right side. You can bring more tweaks to this code to customize menu appearance and settings. Lastly, hit the “Update” button when you’re done with customizations.
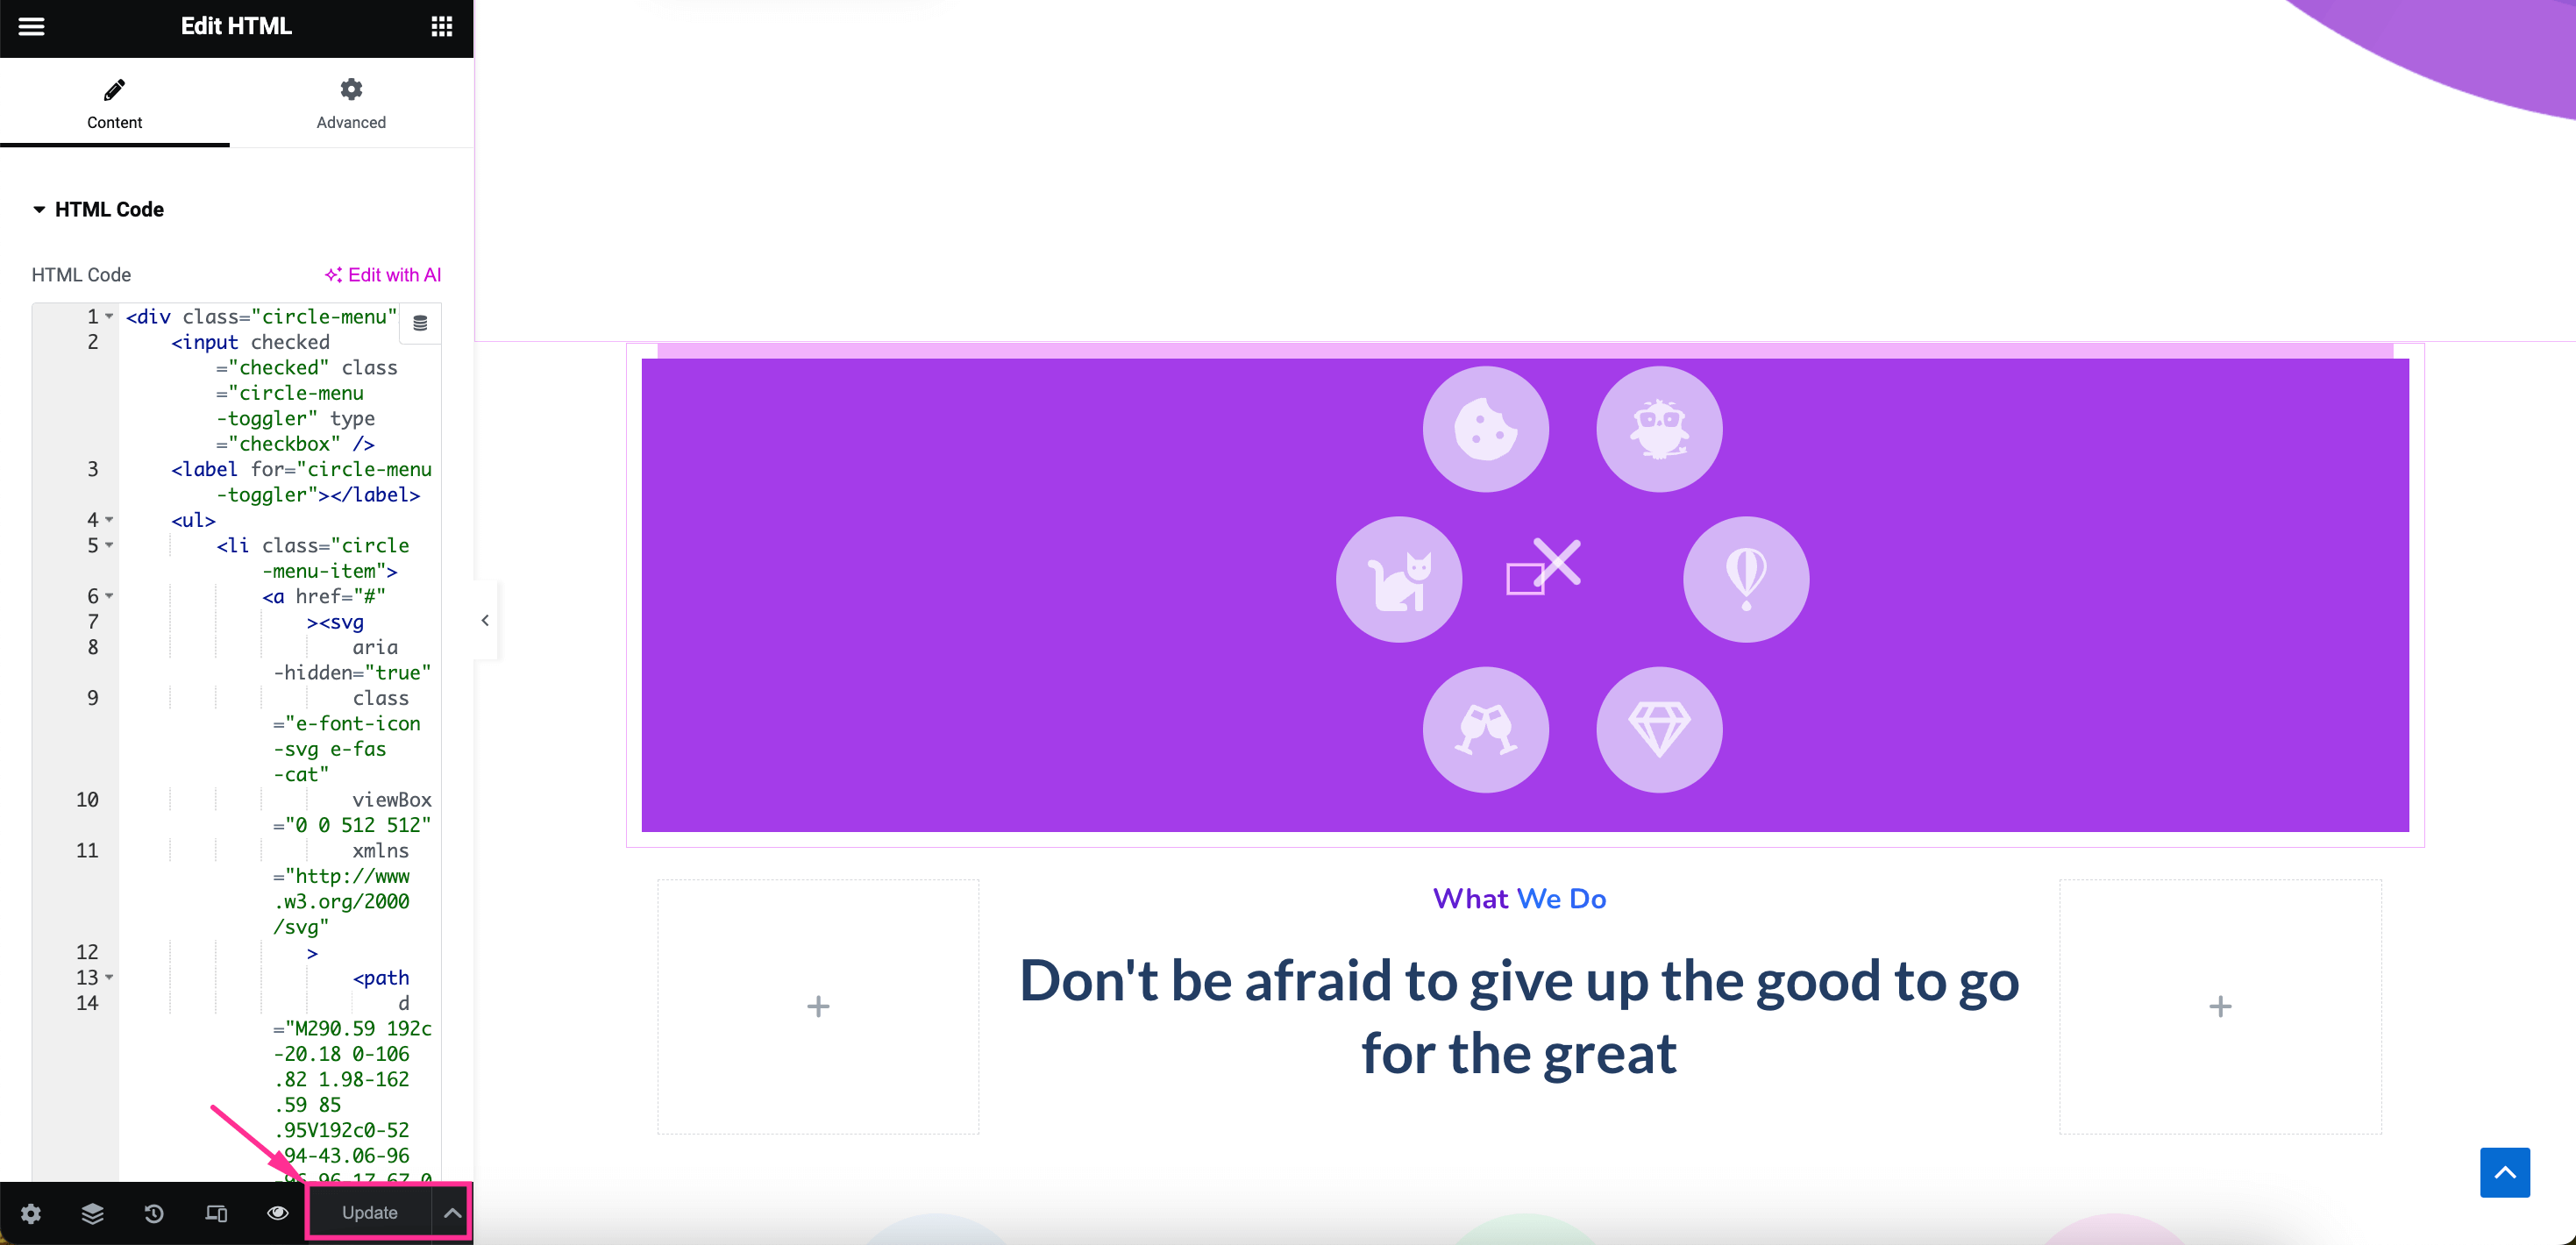

Here is a glimpse of the circle menu built with custom CSS:


Wrapping up
So, you have got both ways of adding a circle menu using a tool and custom CSS. However, creating a circle menu using custom CSS is not friendly for all, especially non-coders.
That’s why, we also included the guide to adding a circle menu using ElementsKit which is not only user-friendly but also time-saving and effortless. Now, make your easy-to-navigate and browse site by adopting a process that aligns with your expertise and comfort.
Leave a Reply