Ever wondered about the impact social media can create on your site content? Well, social media, nowadays, is a super handy platform to circulate your content. Out of the many scintillating facets of social media, social share feature plays a salient role to publicize your content.
You must be wondering how? We will touch on this point going forward. We will also demonstrate to you how to add social share buttons to WordPress sites. So, if you are a WordPress user, by now, you have perceived that this blog is exclusively for you.
No matter whether you own a WordPress site for business or blogging, adding social share buttons is a boon in both cases. This is because in both cases, you want your target audience to visit your site and read content. So, how to add social share buttons in WordPress?
In this tutorial, I will showcase how to add social share buttons to WordPress sites deploying Wp Social, a 3-in-1 social media plugin. But before that, let me elucidate the importance of adding social share buttons to WordPress site.
Needless to say, social media can generate heaps of leads and conversions for you. Hundreds of thousands of businesses worldwide today are solely reliant on different social media platforms like Facebook, Twitter, Reddit, etc. to sell their products and services.
As per the report of DataReportal, Facebook had 2.912 billion monthly active users in January, 2022.
While bloggingwizard reports, over 200 million businesses use Facebook to connect with customers.
These pieces of stats reflect how effective social media marketing can be if you can execute it properly. One of the tactics of social media marketing that you can adopt is social share on your website. But if you merely share your content, the reach will be minimal. This is where adding social share buttons comes into play.
When you add social share buttons on different pages of your site, it lets your readers and visitors share content on their timeline. With that, their friends and followers get access to your content. If they find your content joyful and useful, they will like, comment and re-share content, maximizing the reach.
So, why add social share buttons to WordPress? Scores of reasons are there but let me list out the core ones-
- Get increased traffic to your website
- Educate visitors with informative content
- Generates more leads and conversions
- Elevate your social media following
- Increase brand awareness and reputation
Now, it’s time to walk you through the steps to add social share buttons to WordPress sites. As I mentioned above, I will make use of the Wp Social to showcase the entire process of adding social share buttons to WordPress.
Wp Social, however, comes with 10+ social share providers. Facebook, Twitter, LinkedIn, WhatsApp, Pinterest, Skype, are some of the prominent ones. Let’s take a look at the method to add social share buttons to WordPress site with Wp Social.
Install and Activate Wp Social:
First up, install and activate Wp Social. How can you do that? Refer to the documentation- How to install and activate Wp Social to know the process.
You can install Wp Social either from your admin panel dashboard or download it manually first and then install it. Once the plugin gets installed, you can activate it in a flash.
Find out Wp Social on the Dashboard:
Navigate to Wp Social on the dashboard and hover over it. A list of items including Social Login, Social Share, and Social Counter will show up on the menu. Select “Social Share” from these items.
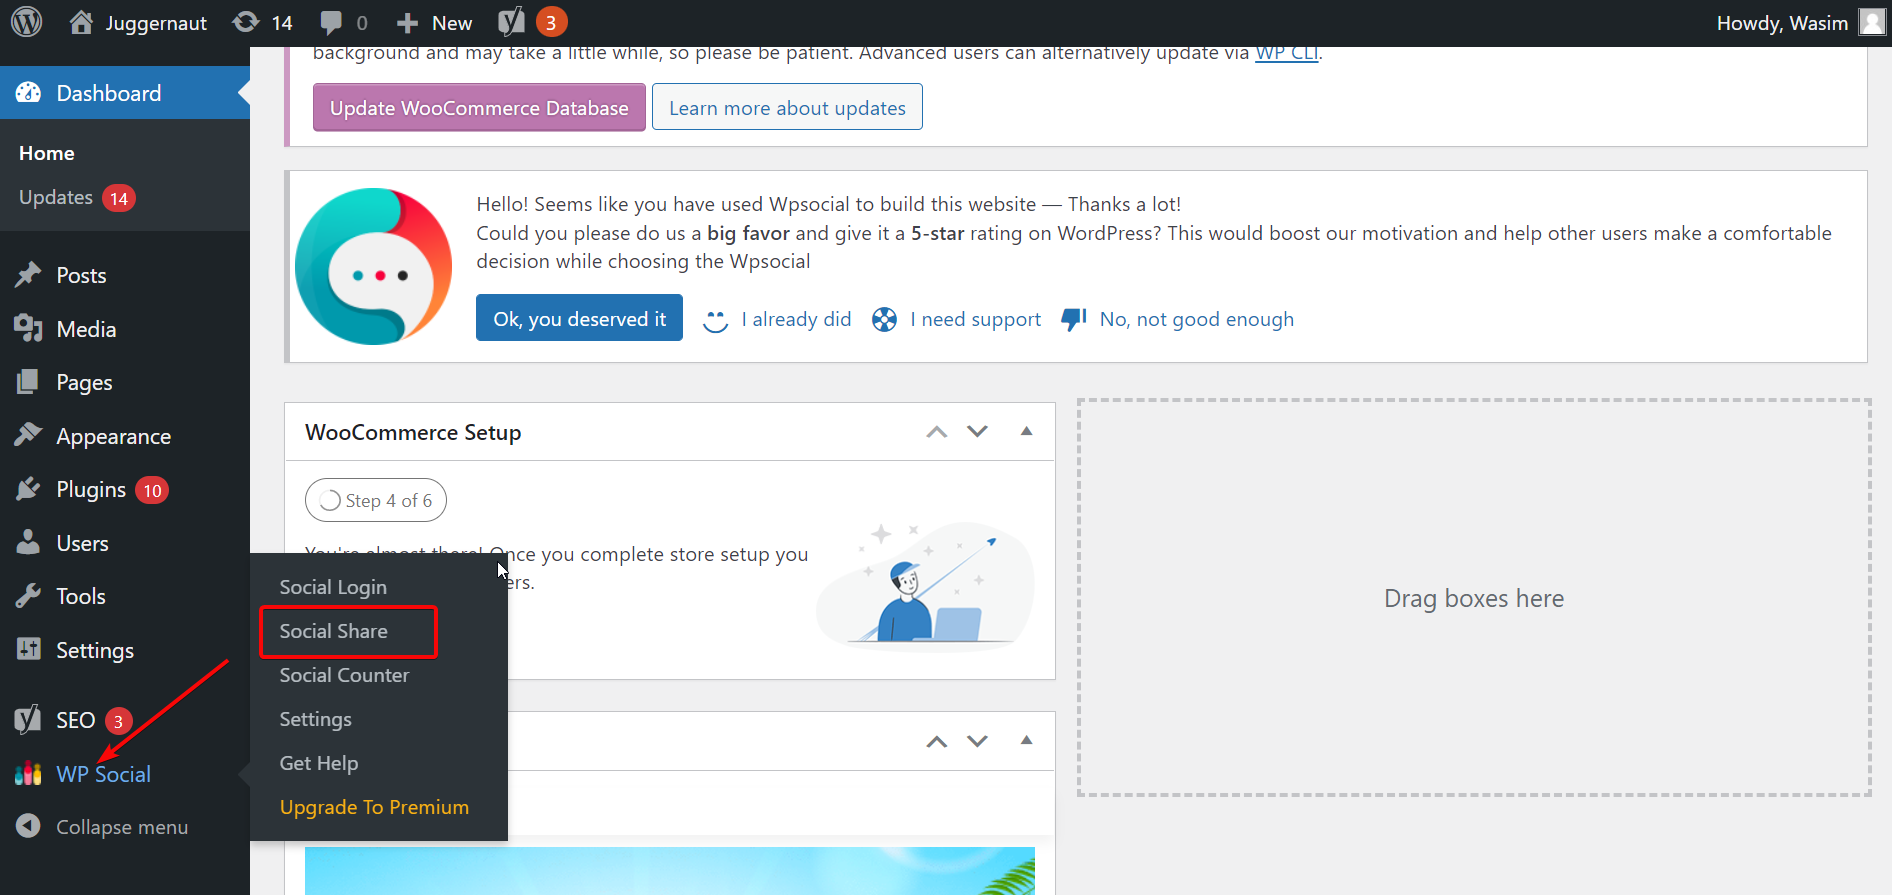
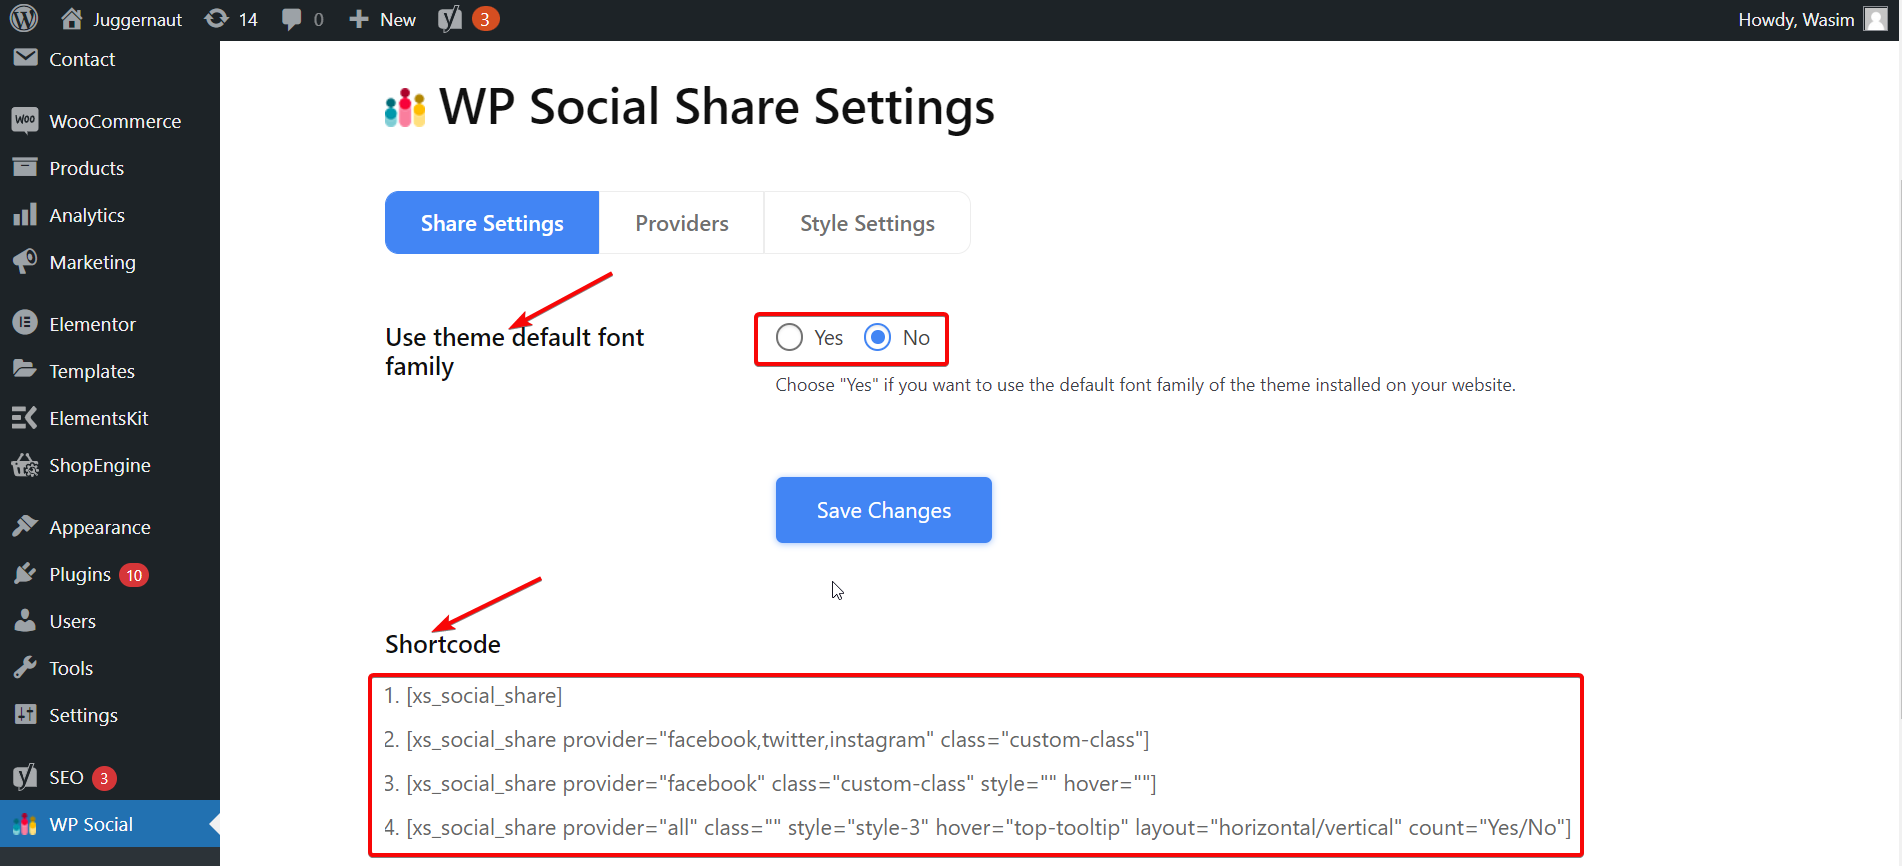
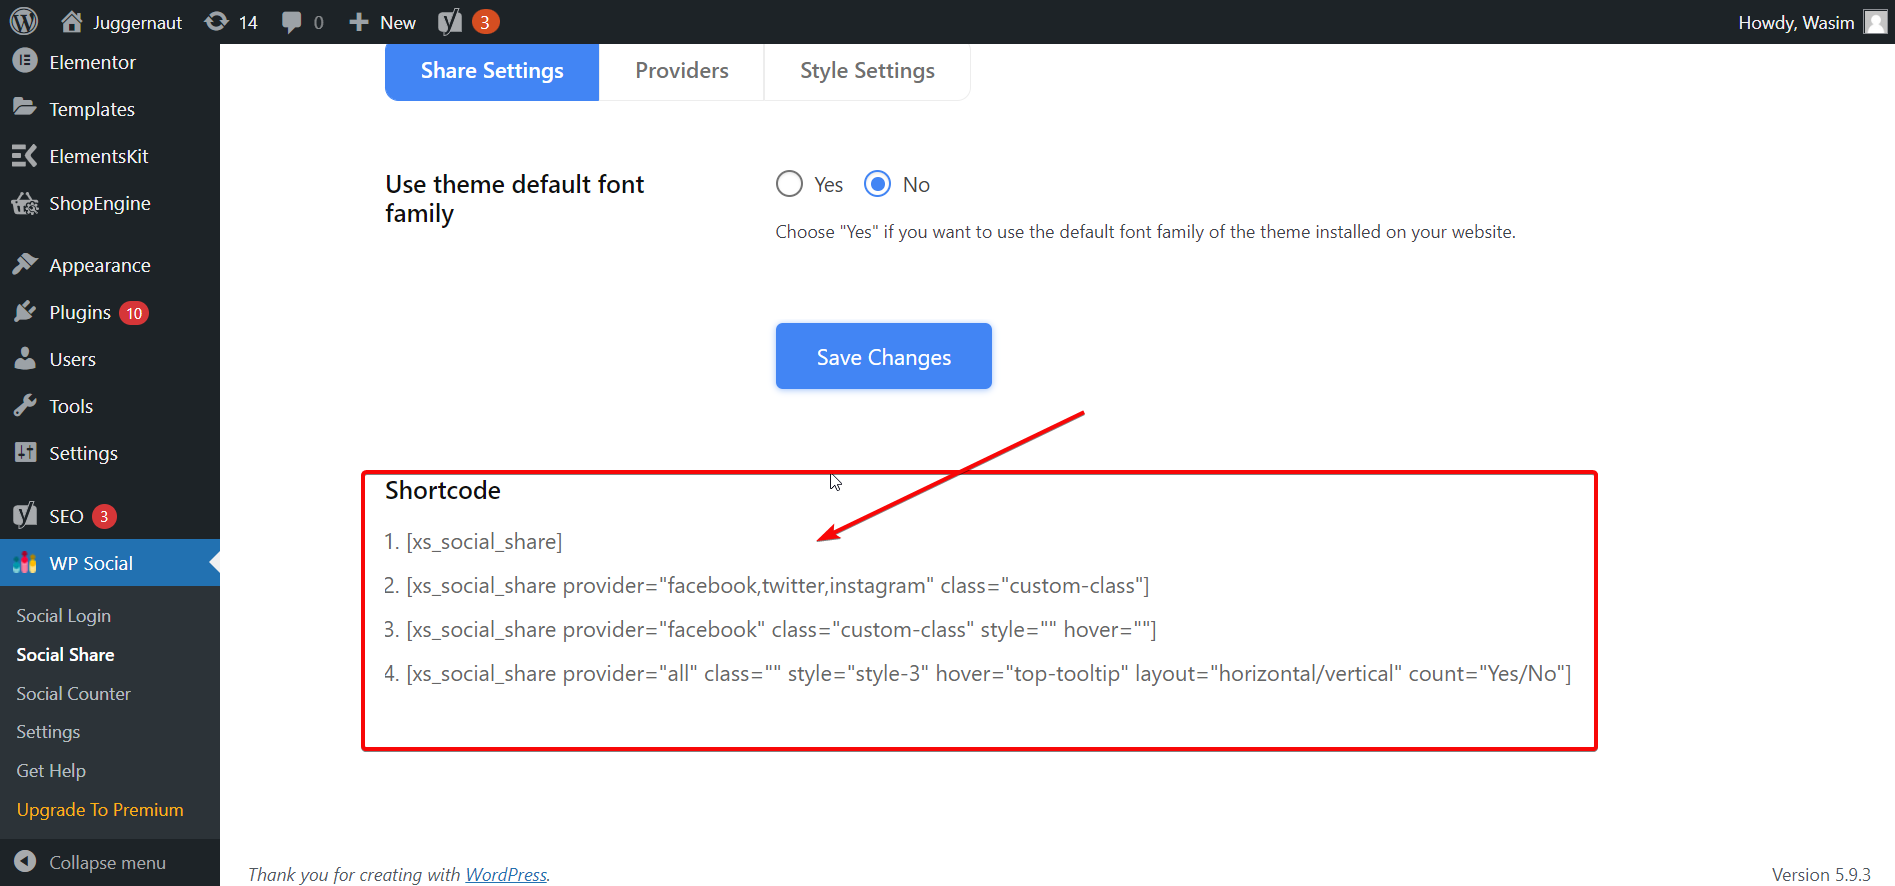
With that, you will be directed to a new page and 3 tabs will show up right on the top- Share Settings, Providers, and Style Settings. By default, you will show up on the Share Settings tab under which you can see 2 parameters.
First up, you have to choose if you want to use the default font family theme. If you want, select “Yes” or else “No”. At the bottom of the page, you will have a number of shortcodes showing up that you can use anywhere on the page to display social shares.
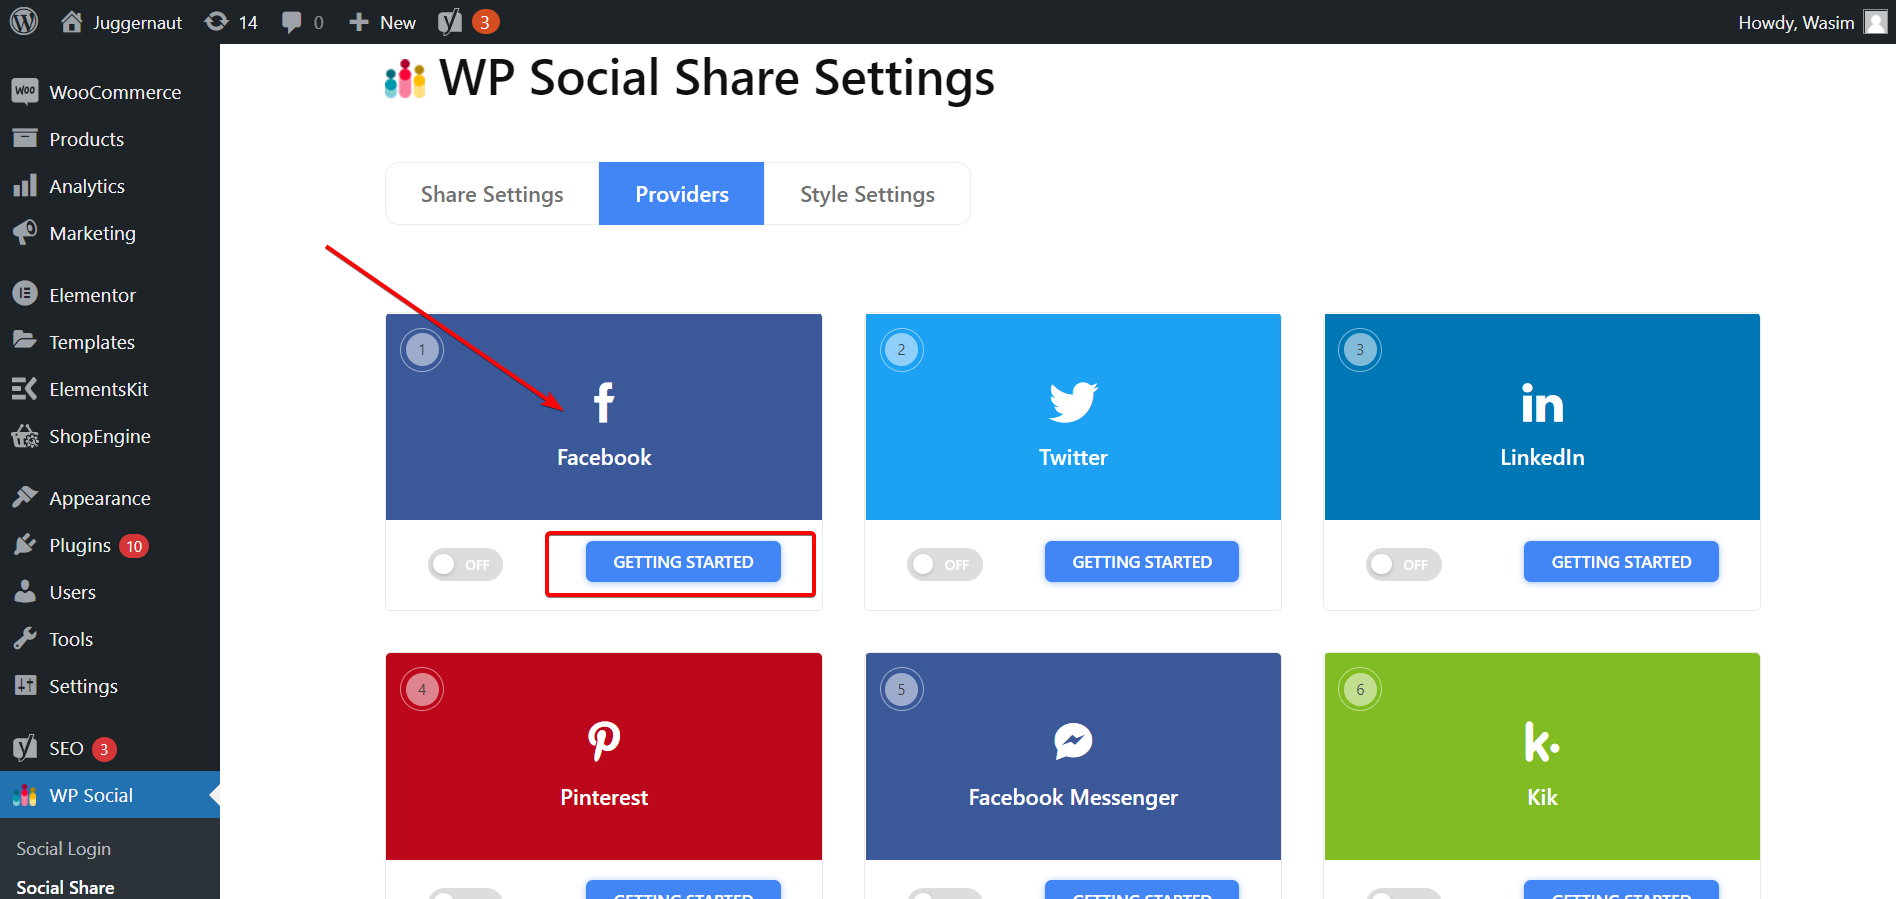
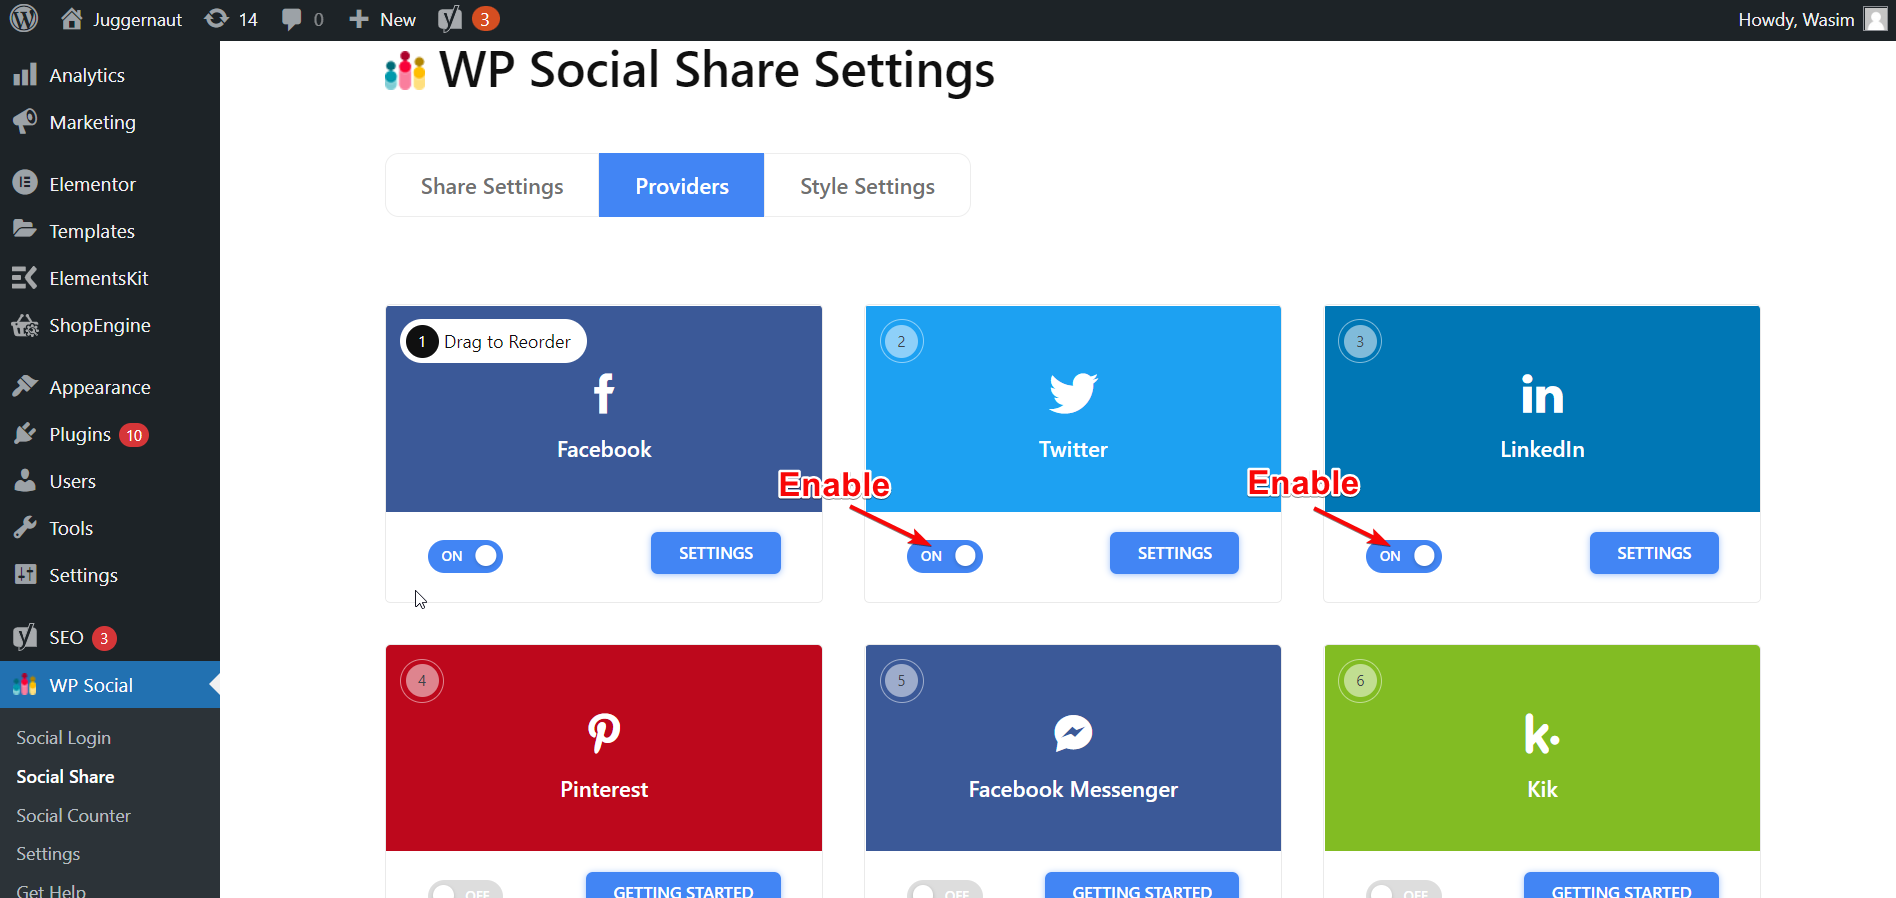
Switch to the Providers Tab and Start with Facebook:
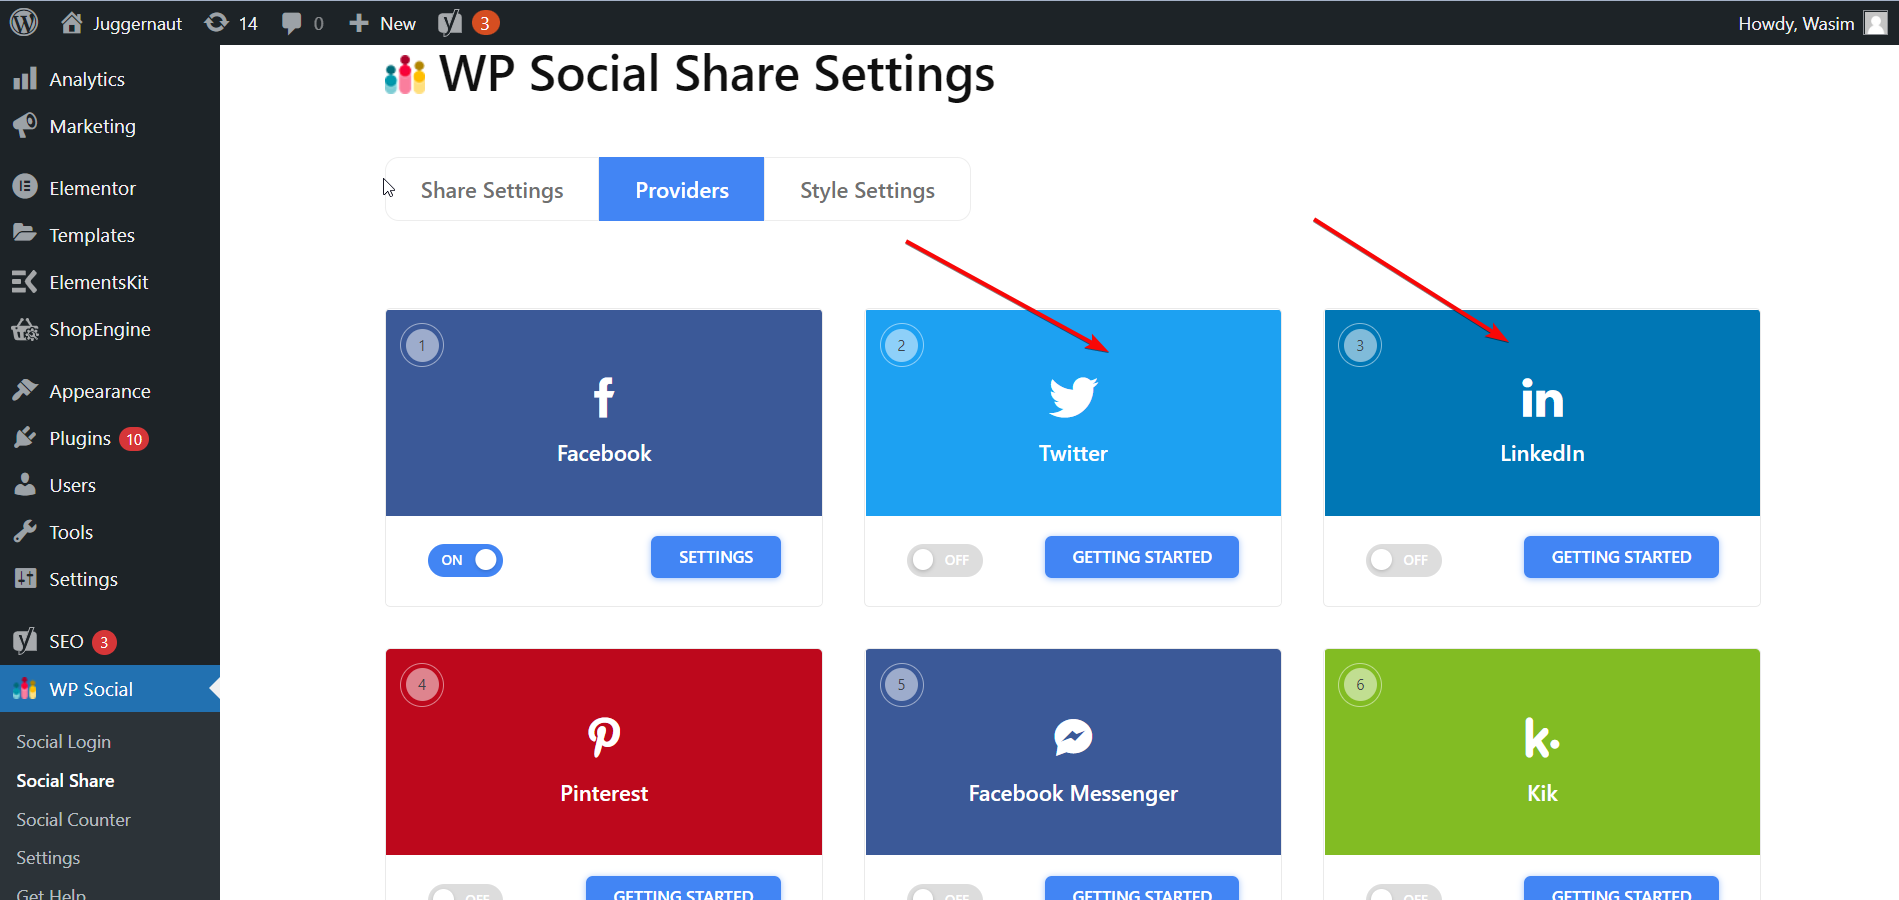
Now, switch to the tab “Providers” and a number of platforms like Facebook, Twitter, Instagram, LinkedIn, YouTube, etc. will crop up. Out of them, select the ones you wish to showcase on your page. I will choose Facebook, Twitter, and LinkedIn in this tutorial.
At first, navigate to the Facebook section and click the “Getting Started” button.
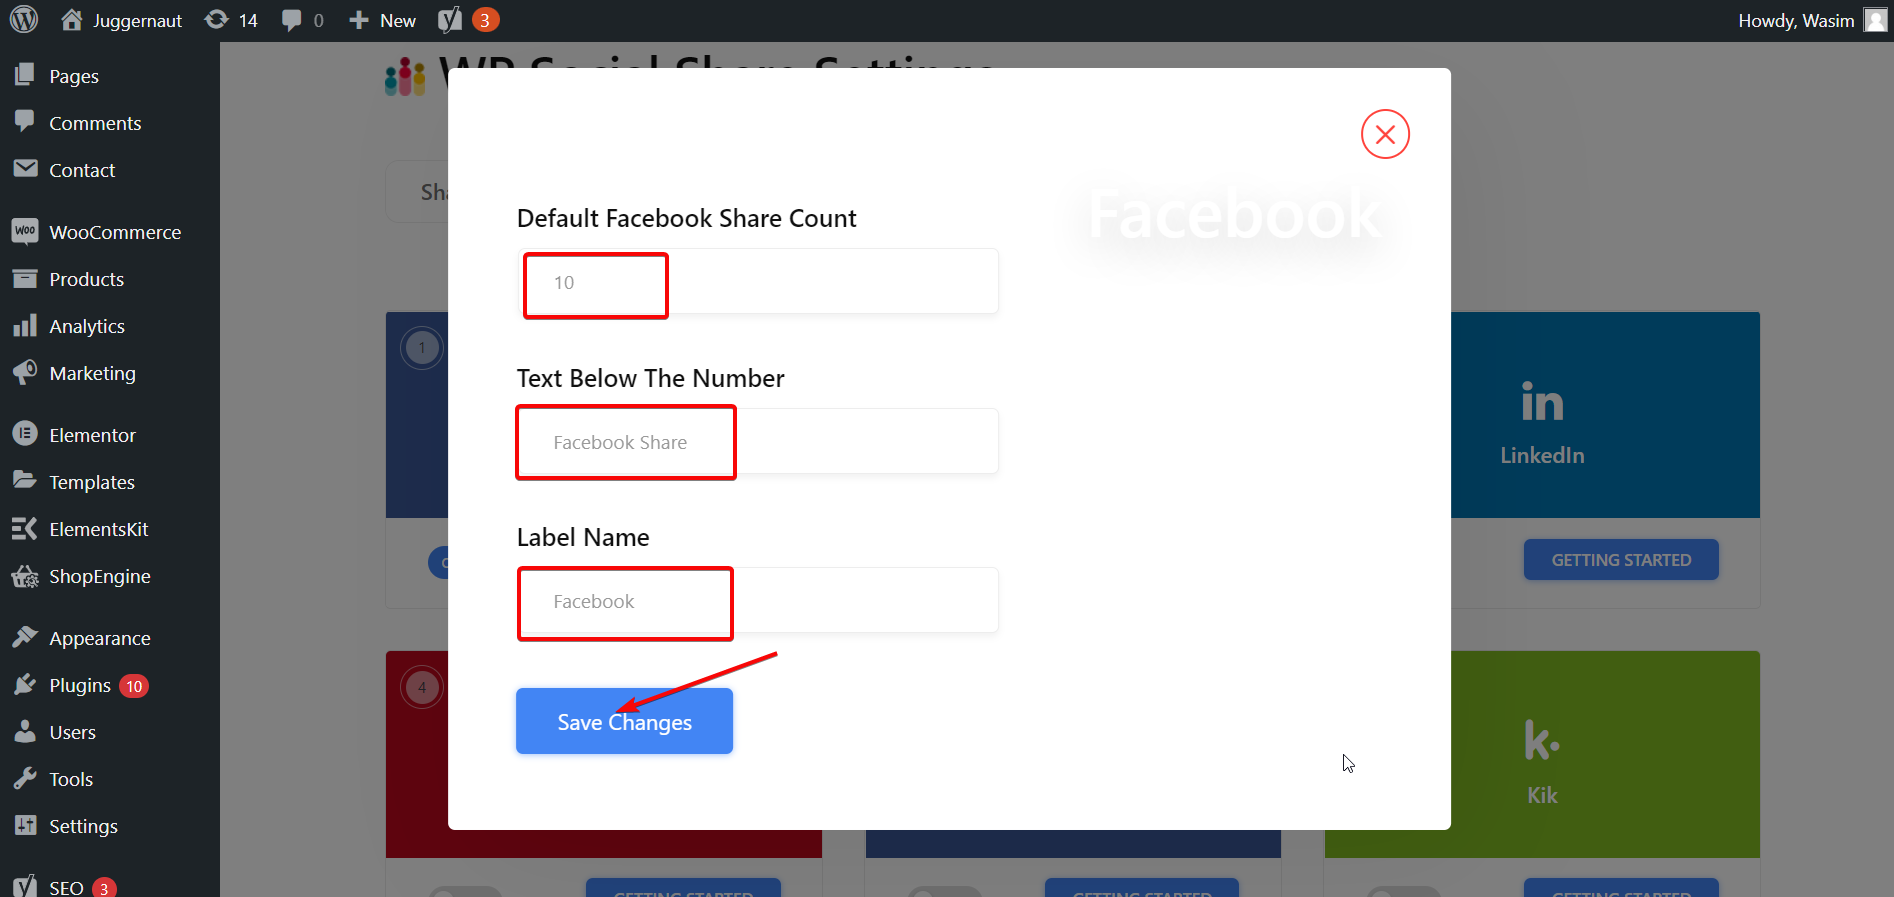
Enable Facebook Block:
This will open up a window asking you to give your Facebook page ID. Other input fields can remain unaltered. Then, click the “Save Changes” button.
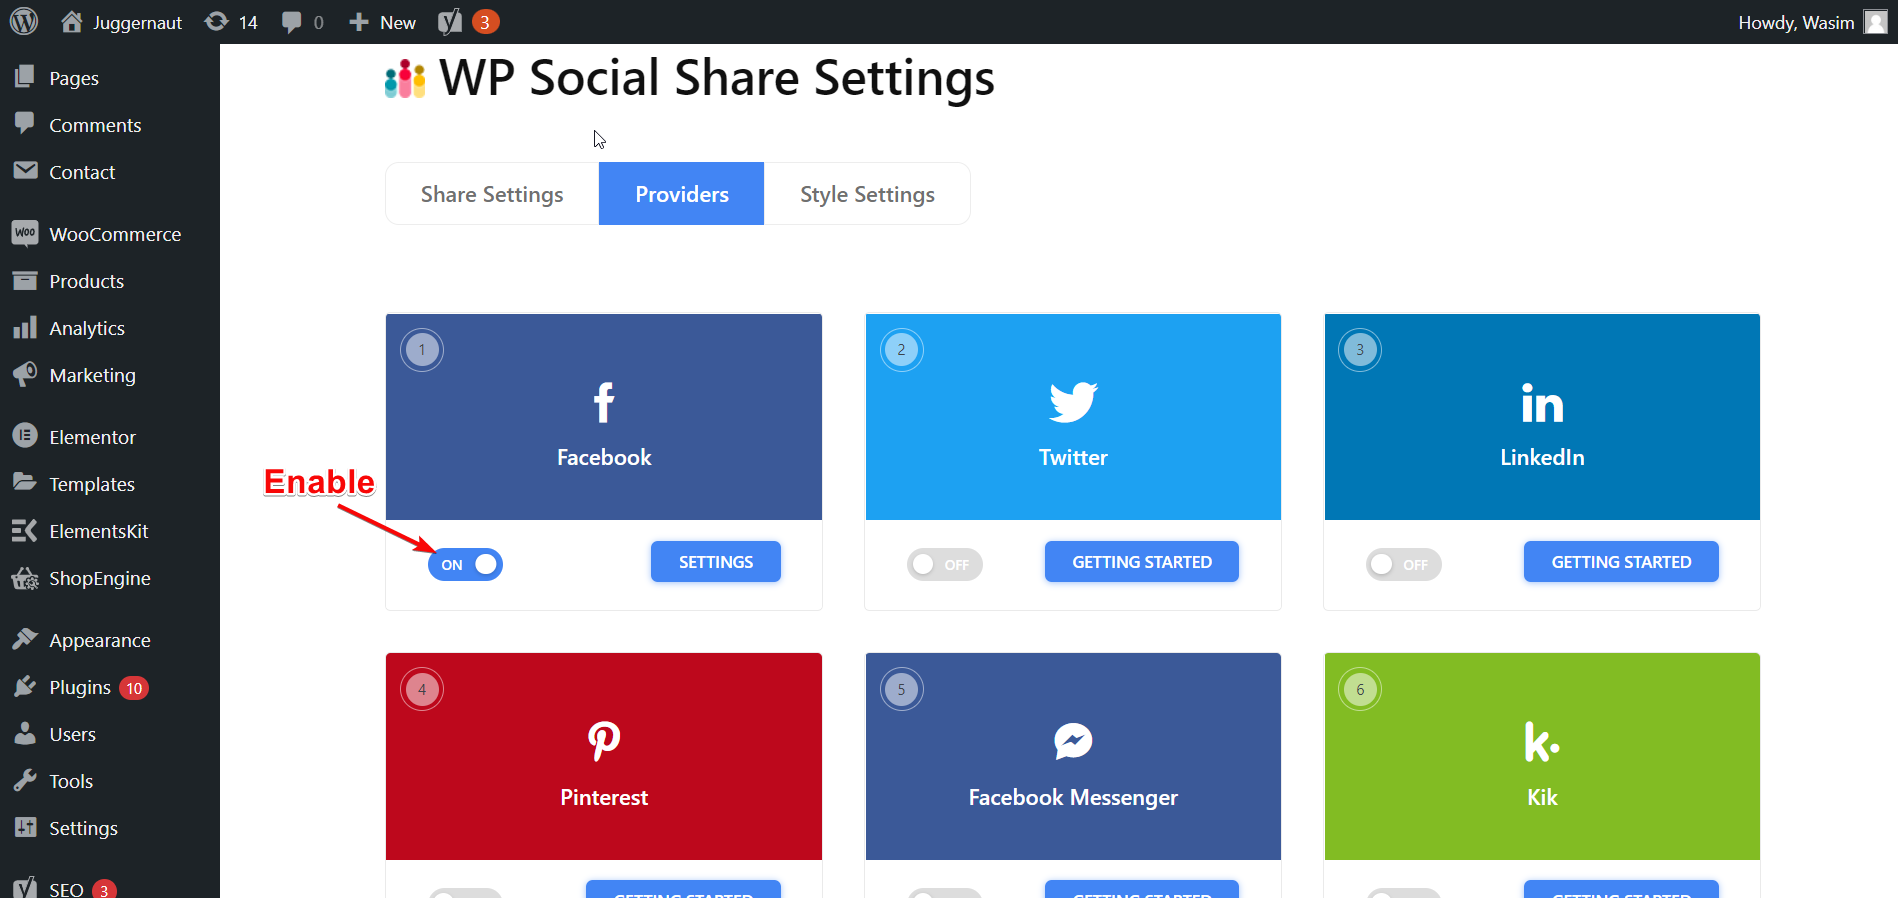
After saving the above data, don’t forget to enable the toggle under the Facebook section.
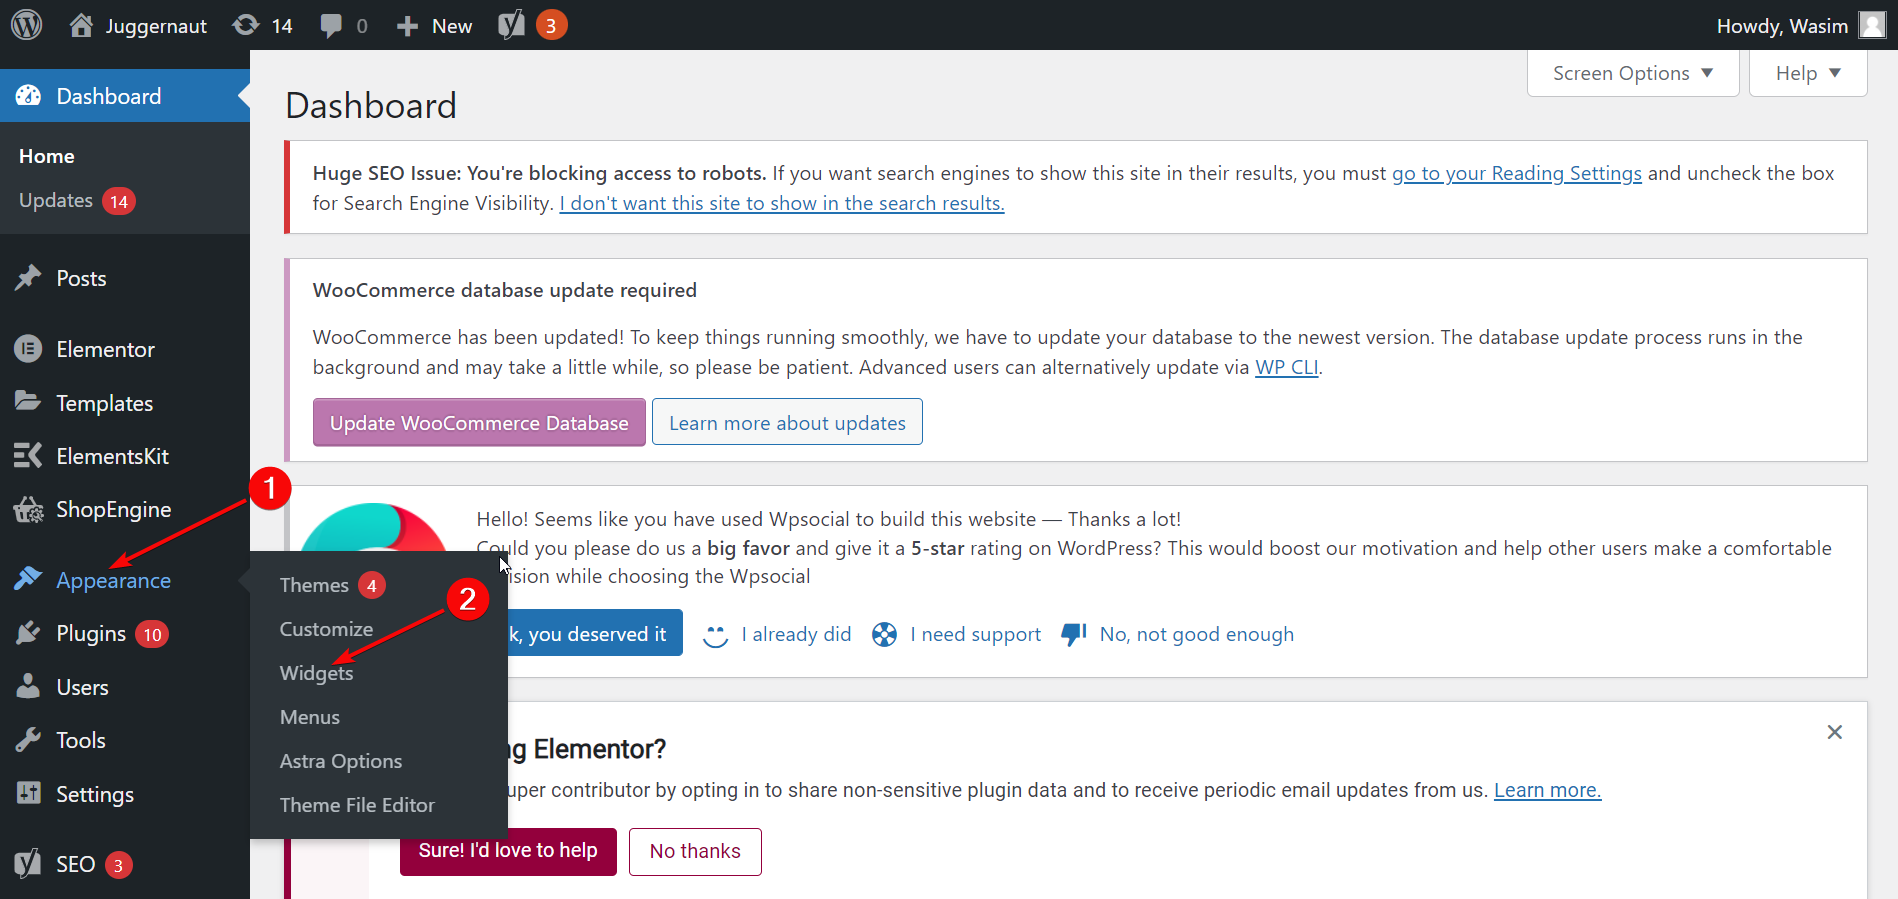
Move to the Widgets Area:
Now, you can avail of the social share. There are 2 different ways to leverage it which I will show you. In the 1st method, go to the widgets area. For that, navigate to the “Appearance” in the dashboard at first.Then, find “Widgets” hovering over the “Appearance”. Then, click “Widgets” from the list of items.
This will take you to a new page where you can notice “Widgets” on the top-left side and a list of items on the page.
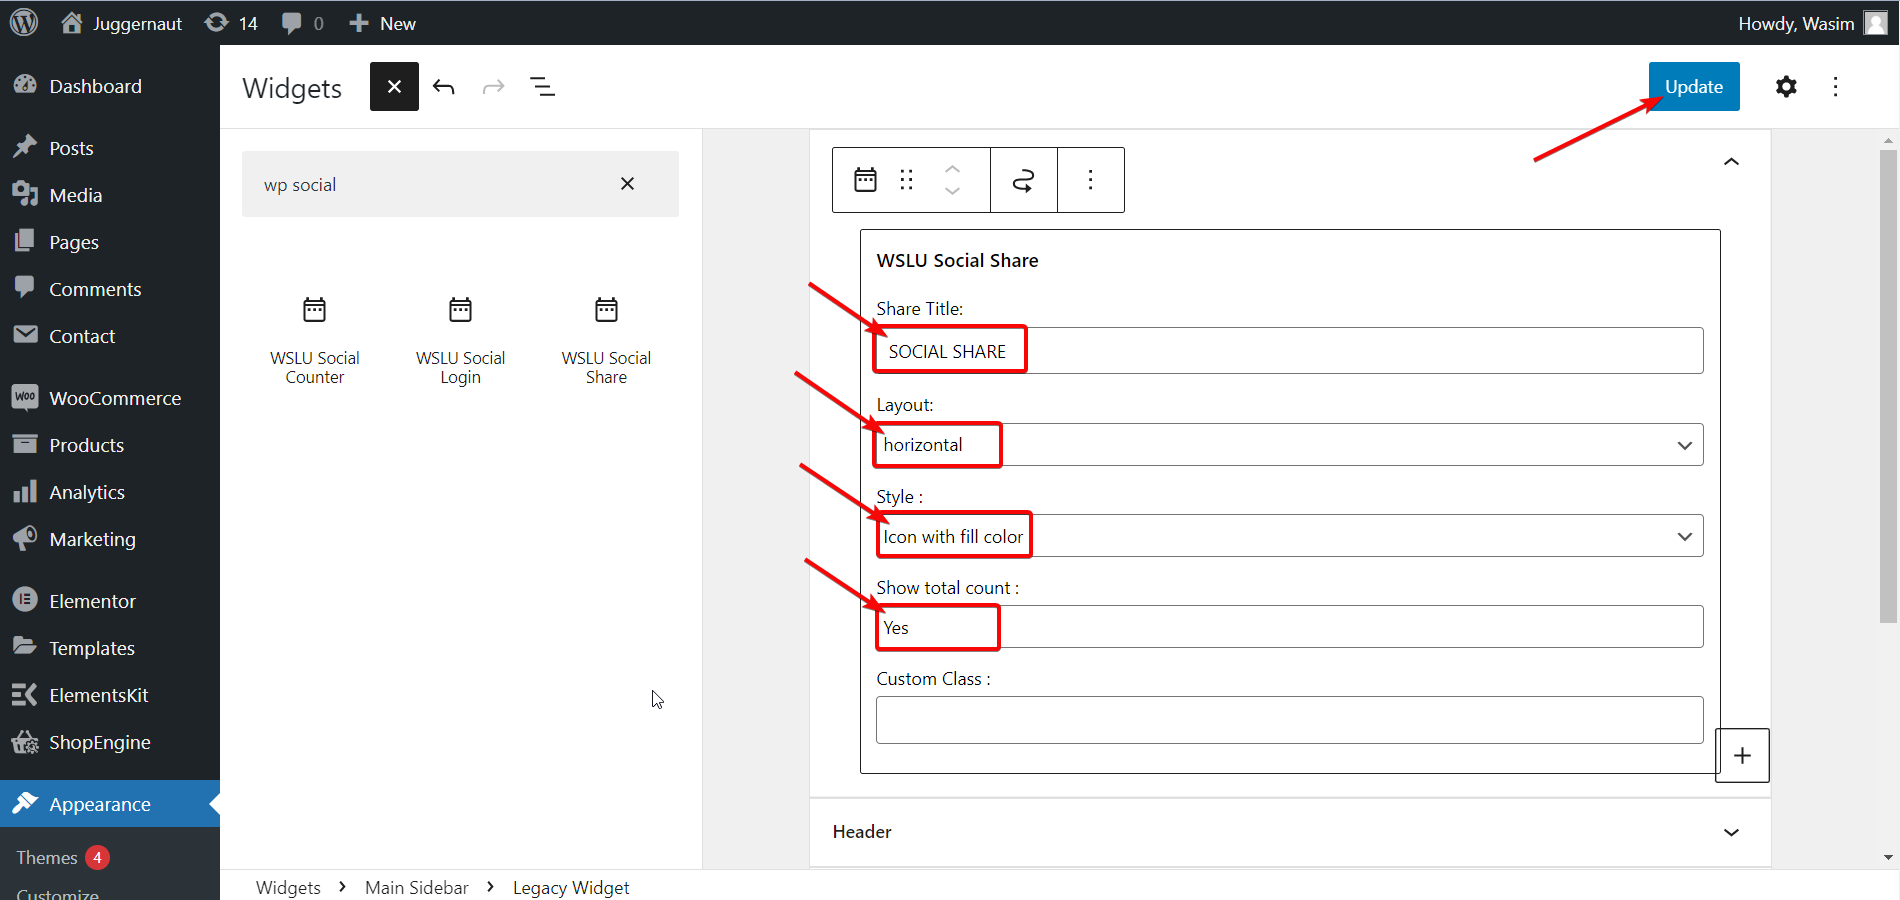
Hit the “+” button and type WP Social on the search field. Select WSLU Social Share block and a list of items will crop up. Set the item fields from the options and click “Update”.
Select Twitter and LinkedIn Blocks:
Go to the Providers again and click the “Getting Started” button of both Twitter and LinkedIn.
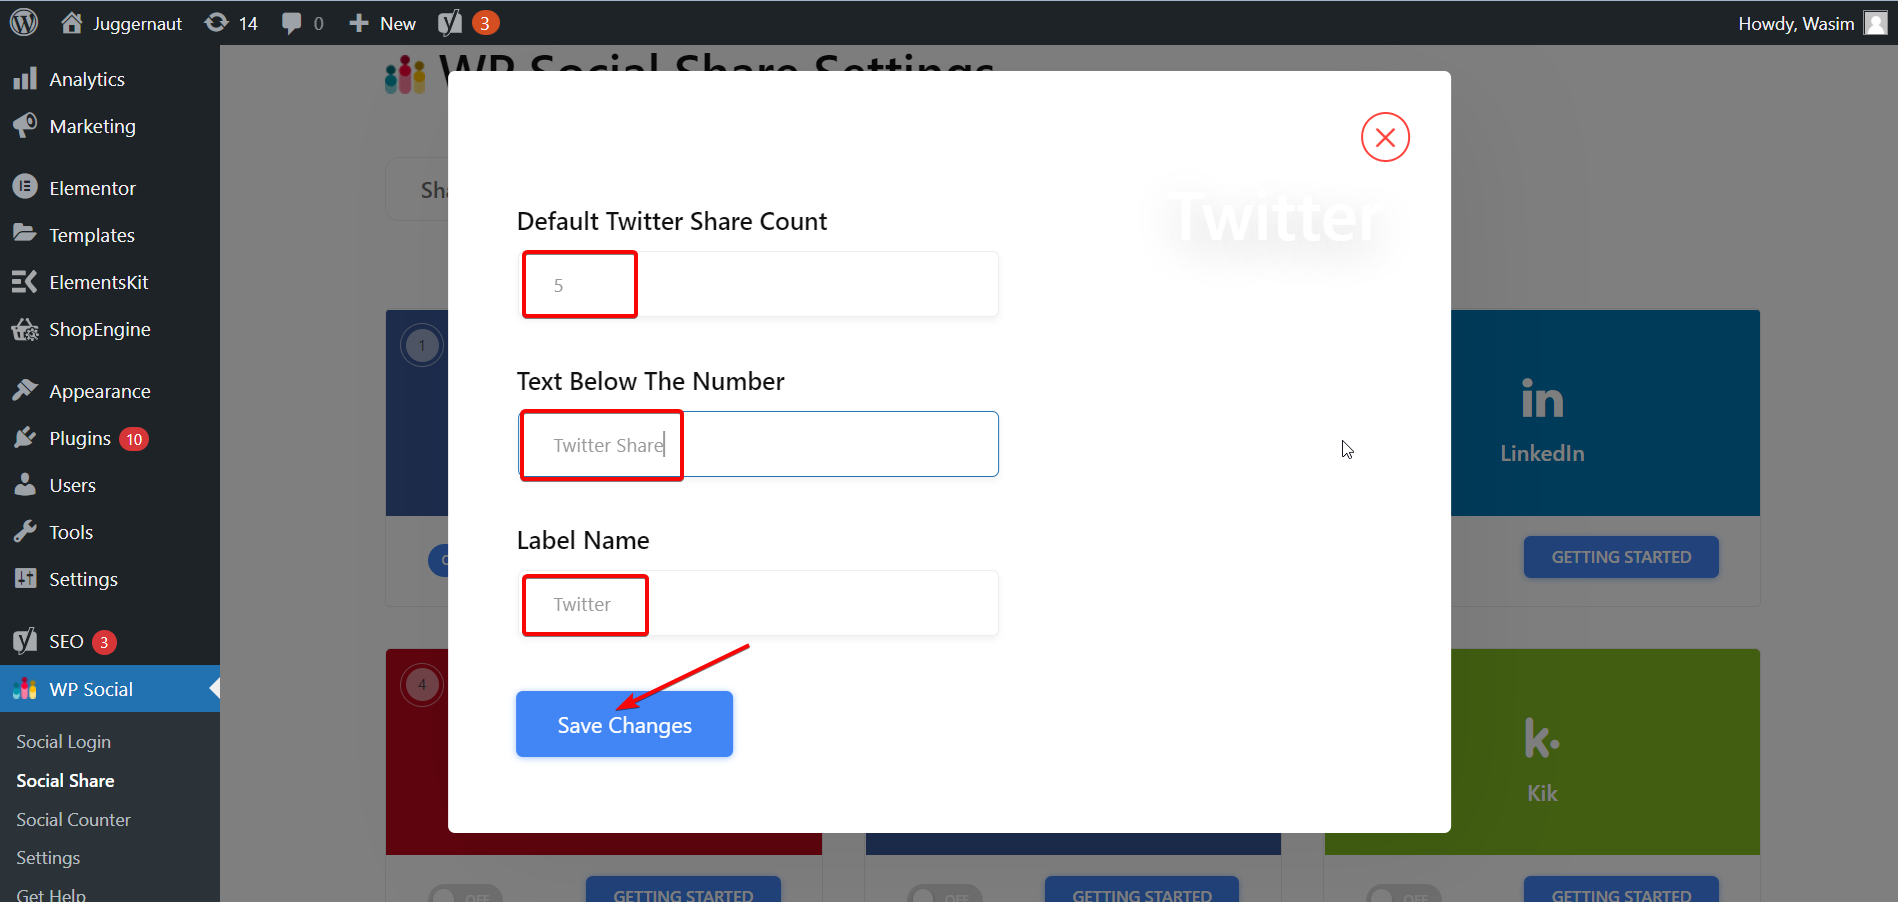
Provide the necessary data for Twitter on the fields like Default Twitter Share Count, Text Below the Number, and Label. Then, hit the “Save Changes” button. Turn on the Twitter toggle thereafter.
Then, put the necessary data for LinkedIn on the window fields. Click “Save Changes”.
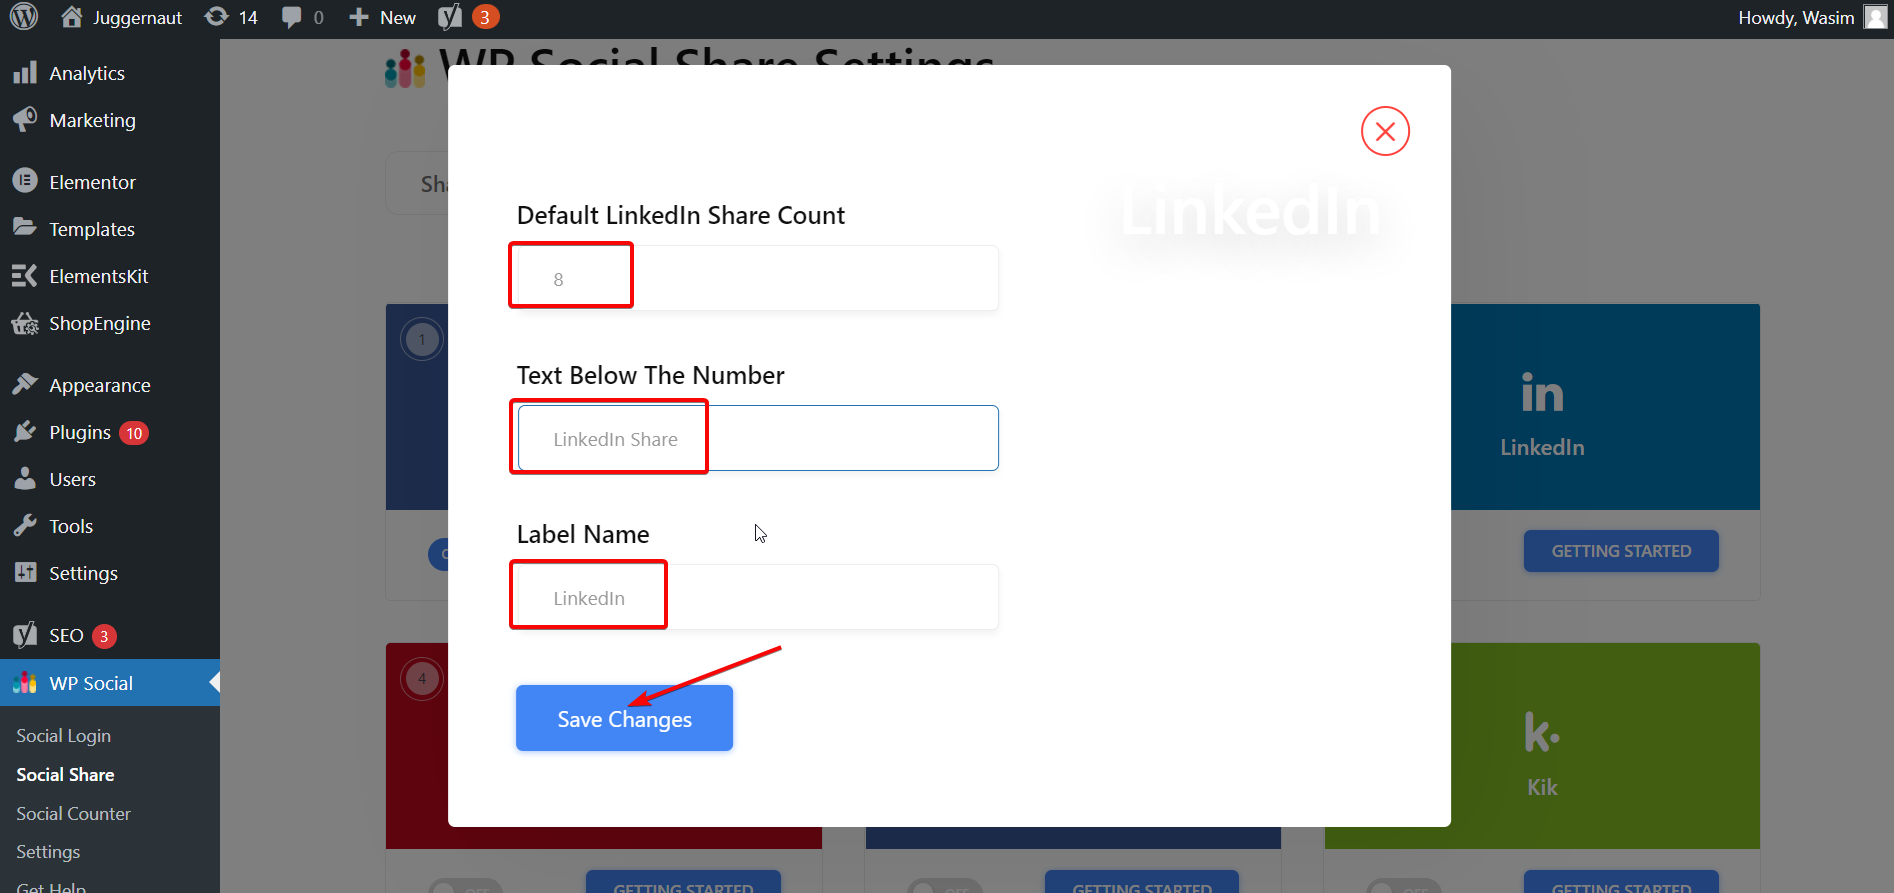
Don’t forget to enable or turn on the Twitter and LinkedIn toggles.
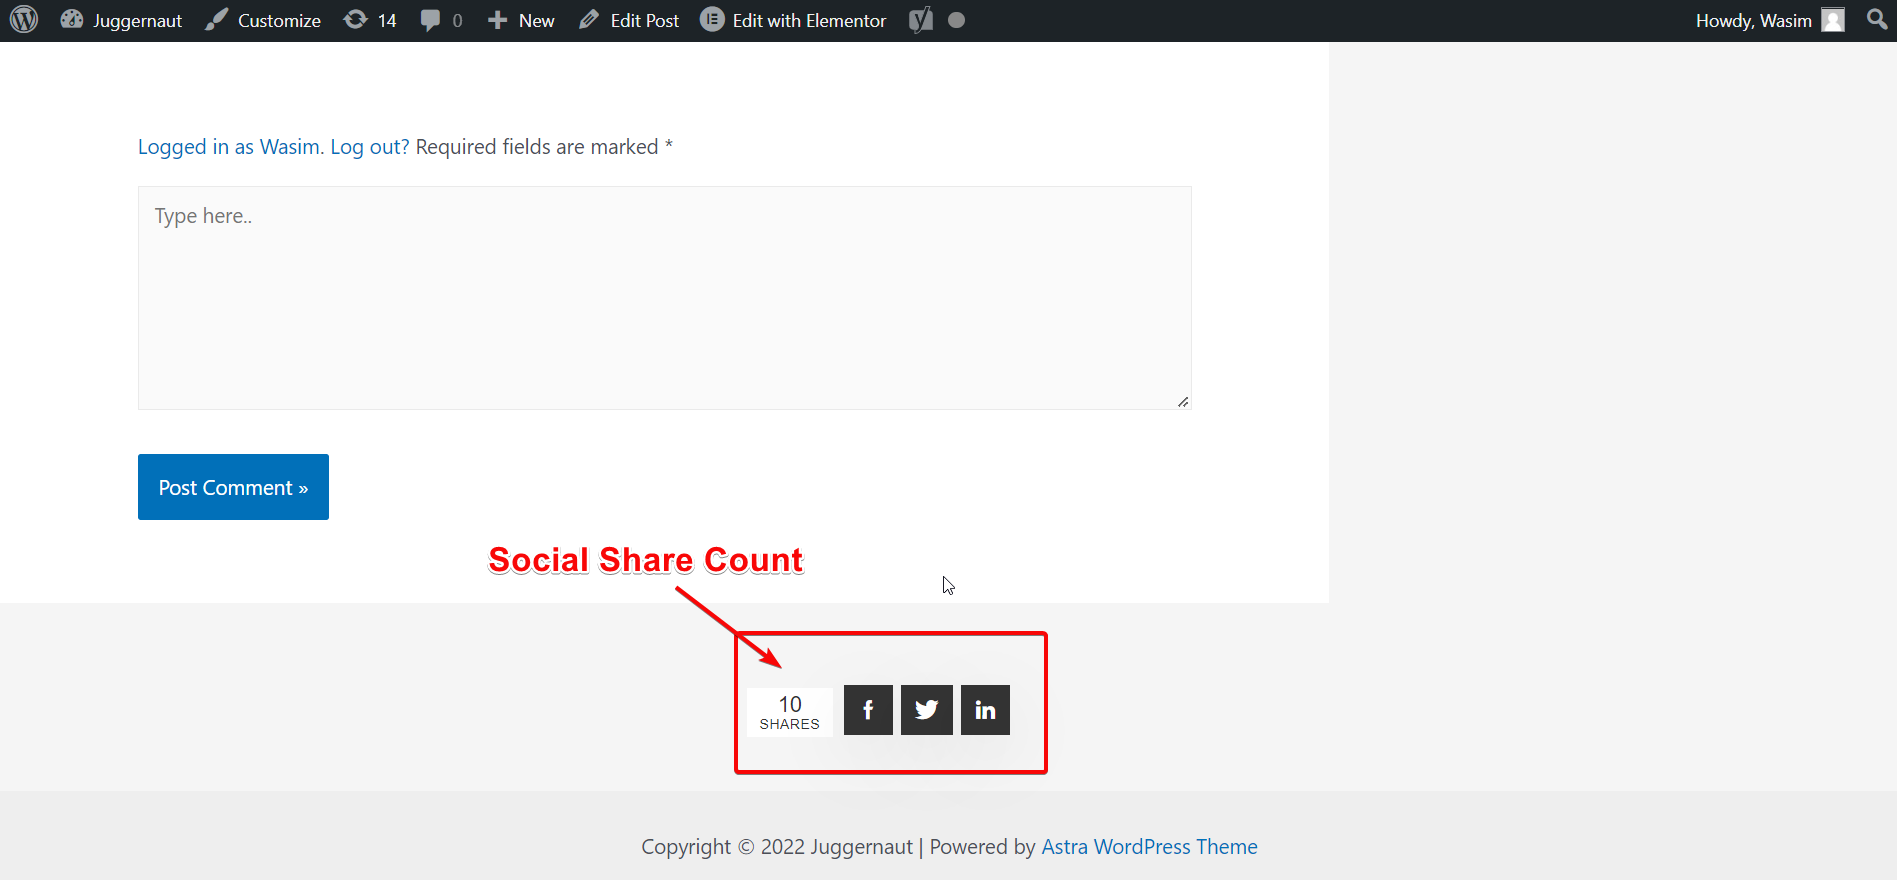
Now, go to the Posts and click Preview to see the social share buttons of Facebook, Twitter, and LinkedIn on your page. From the screenshot below, you can see how it appears on the front-end.
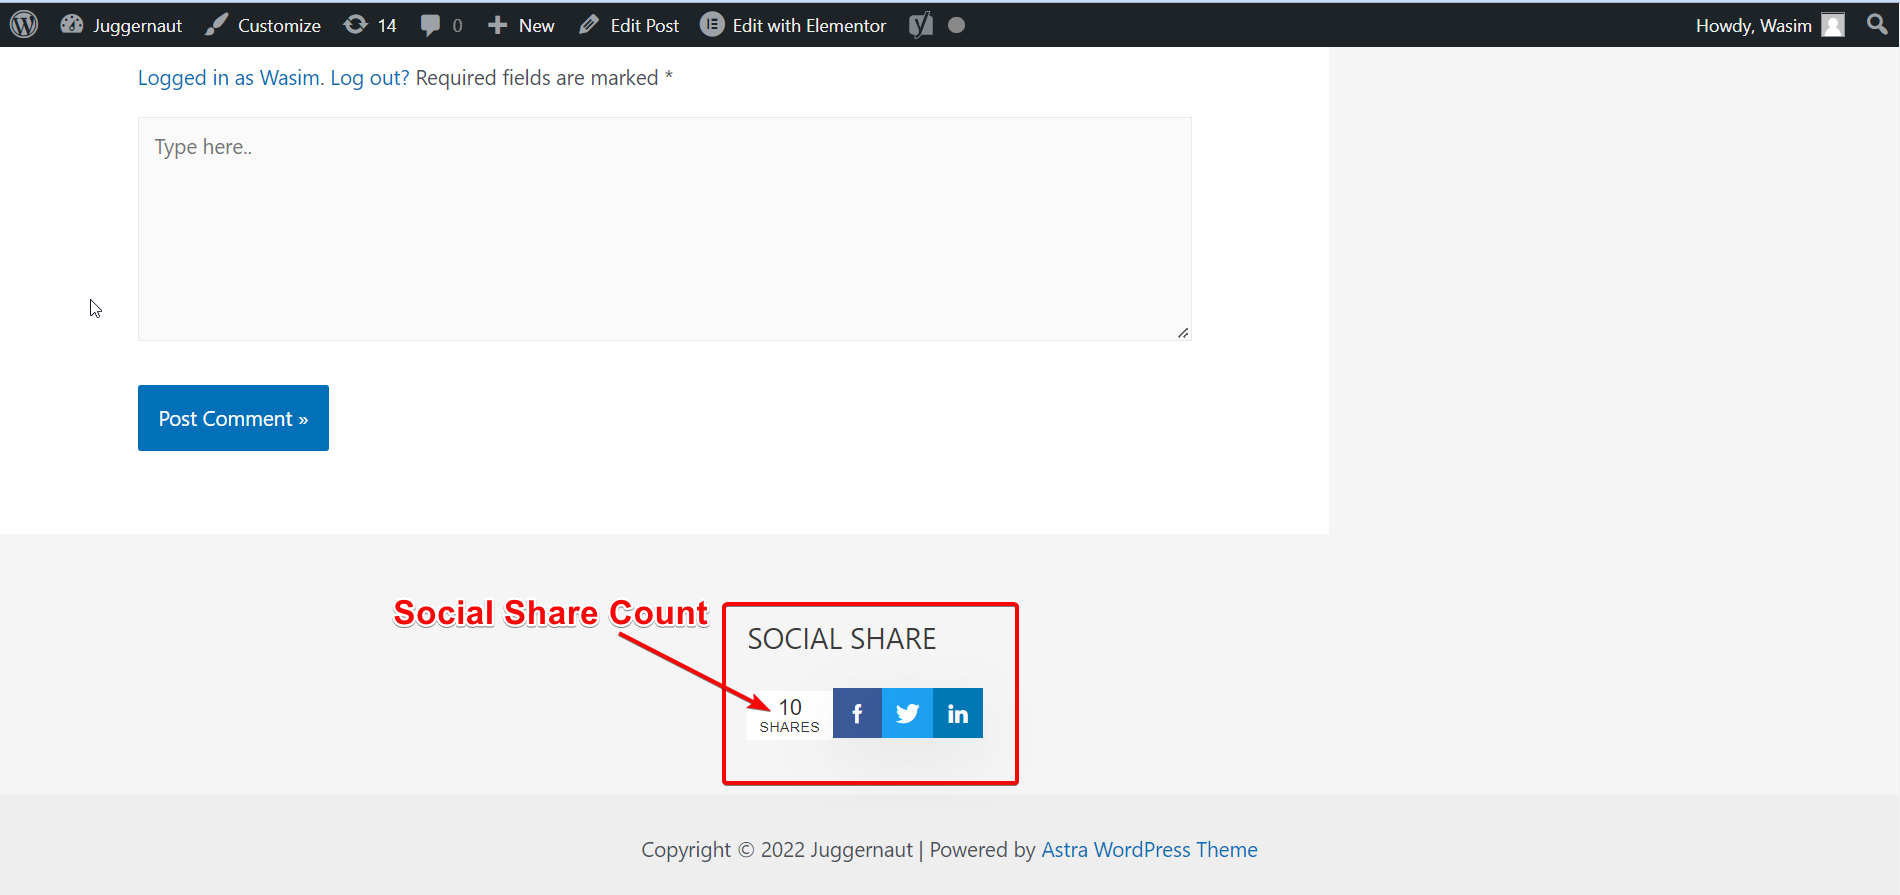
Here, you can view Facebook, Twitter, and LinkedIn share buttons. But you can display Pinterest, Skype, WhatsApp, and other social buttons supported by WP Social as well.
Now, let me show you the 2nd method of displaying the social share. This is something you can do easily using the shortcodes that I showed on the Share Settings tab.
Copy the Shortcodes:
Go to the Share Settings tab and copy any of the shortcodes. Now, move on to the widget area as I showed before.
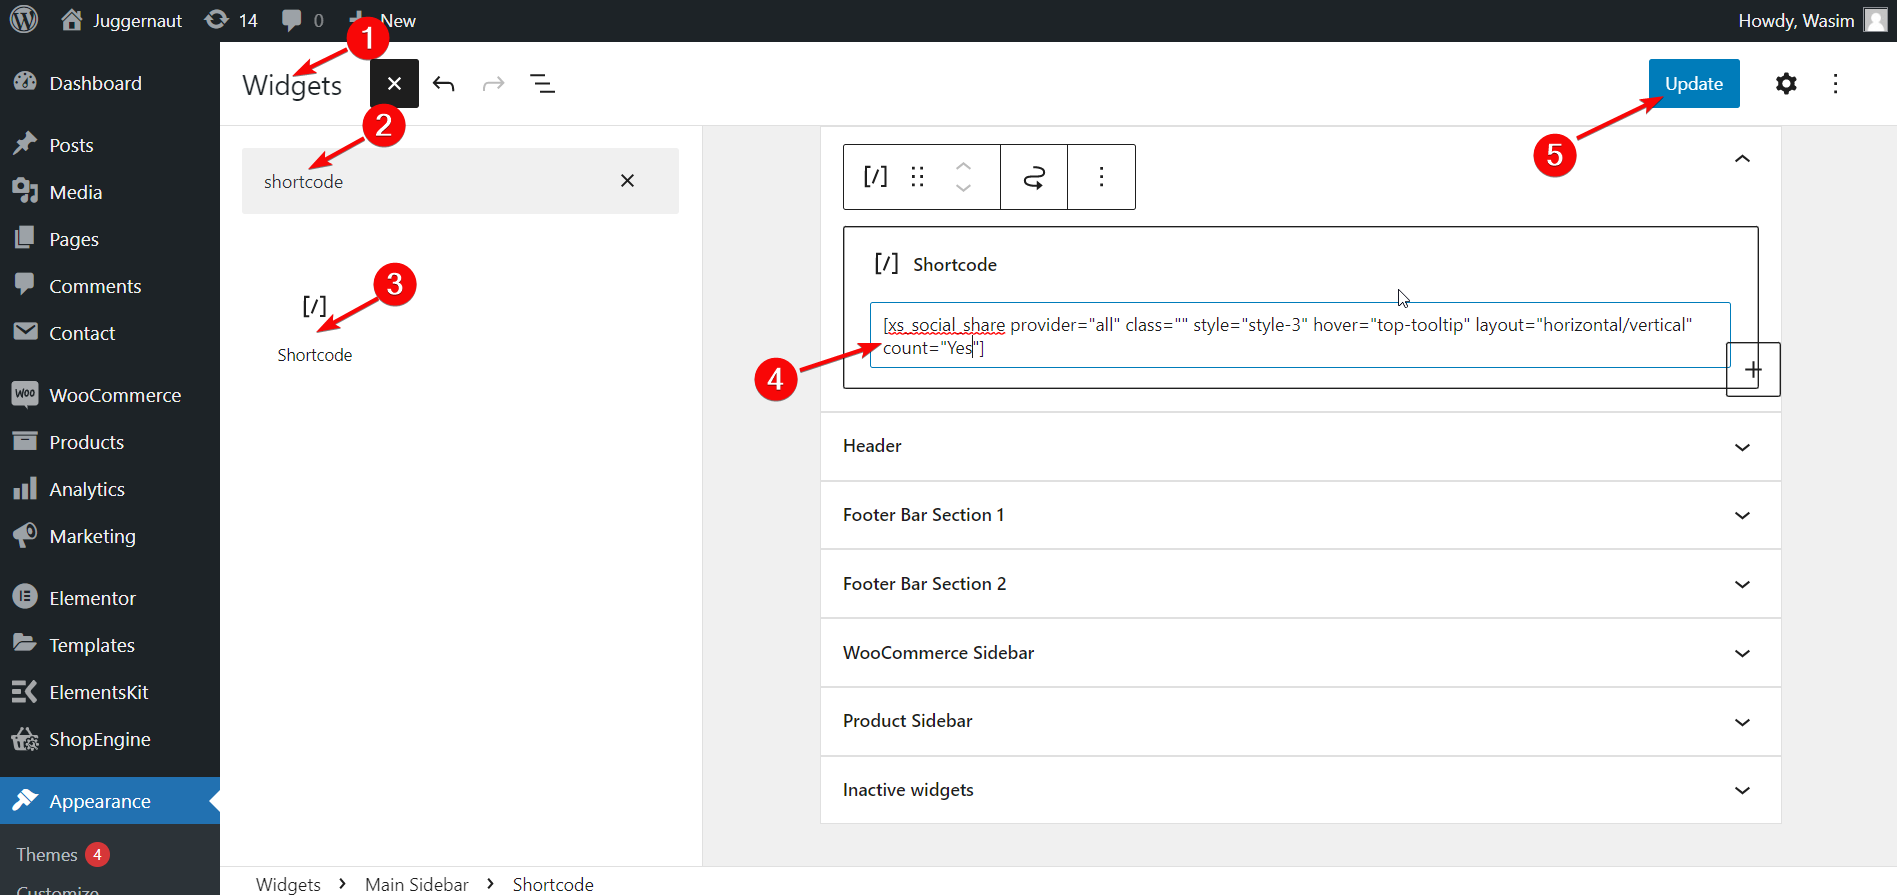
Paste the Shortcode on the Right Area:
Hit the “+” button beside Widgets and search for the shortcode button on the search field. Now, paste the shortcode that you copied on the specified area. Now, update the page to bring the changes into effect.
Reload the Page:
Refresh the page and you can view the social share buttons cropping up like before.
Switch to the Style Settings Tab:
Now, it’s time to take a look at the share button style. Go to the social share dashboard of WP Social and select the Style Settings tab.
You can notice a number of share button styles on the screen. You will also have the control to choose the position of your share buttons from either of the Primary Content tab or Fixed Display. You can place the social share buttons before the content, after the content, or in both positions.
You can also display these social share buttons floating right or left and also as a top inline, or bottom inline.
On the top, free styles of social share buttons will show up and you can select one of them. But pro styles are also available that you can use if you are a premium user. Once you select your preferred style, don’t forget to click the “Save Changes” button.
Give it a Try:
So, what’s your take on deploying Wp Social to add social share buttons to WordPress sites? One of the reasons I have picked Wp Social is due to its ease of use. Whether it’s a Facebook share button, Twitter share button, or LinkedIn share button, Wp social is the go-to tool to add all of them to your WordPress site.
Once you pick up this easy method of adding social share buttons to WordPress site, you can make use of this blinding feature to your site. Along with social share, you will get social counter and social login features within Wp social too.
With so many social media buttons and features in 1 plugin for WordPress, it’s worth trying this marvelous social plugin, isn’t it? Until I introduce you to something new, electrifying, and useful, have pleasant moments in your life!!!
Leave a Reply