


Standing out your eCommerce business won’t be possible without implementing strategies that complement your sales and profits. One proven strategy to achieve this is showing related products on your WooCommerce store. It’s a way to promote relevant products alongside add-to-cart items.
Thankfully, comparing its effectiveness in rising average conversion rates, displaying related products is not that difficult. You can showcase related products in your eCommerce store by leveraging the default WooCommerce settings or plugin.
In this guide, we’ll talk about both of these methods to make the most of your store’s potential for boosting sales and customer satisfaction. So. let’s dive in and start exhibiting related products on your product page.
What are Related Products in WooCommerce?
WooCommerce-related products are the relevant products that are suggested based on the categories or tags of the add-to-cart items. The core purpose of displaying these related products on your eCommerce website is to boost sales and revenue by driving customers towards higher conversion rates.
Why is Displaying Related Products Beneficial for Your Business?
Showcasing product recommendations on WooCommerce gives your customers an idea of what else they can purchase to complete their orders. Through recommended products, you can notably increase the value of an order which further contributes to many more opportunities to boost your business.
Here are the significance of displaying relevant products on your online venture:
- Related products encourage customers to enhance their shopping experience by letting audiences easily shop from your store.
- These products have a great impact on increasing conversion value.
- A better shopping experience improves the possibilities of converting your first customer into regular customers.
- Sales and profit both shoot up by featuring relevant products on your site.
- Businesses can swiftly achieve targeted goals and scale businesses for greater profit.
- This product recommendation helps manage and organize store inventories by suggesting upsells and cross-sells products.
How to Show Related Products in WooCommerce
WooCommerce itself has an option to present related products. However, numerous options can be considered and followed to display related products in your store.
Here we’ll demonstrate the two most popular methods of exhibiting related products in WooCommerce:
Method 1: Display Related Products Using Plugin
The first process is using a WordPress plugin that has a feature for displaying related products. WordPress is blessed with versatile plugins that come with unique features and capabilities for your site. ShopEngine is a completely dedicated WooCommerce page builder that fulfills all requirements of building a full-fledged eCommerce site.
It also includes a Related Products widget that effortlessly adds relevant products to your single product page. Additionally, its smooth UI and UX are also highly notable. So, let’s check how it actually works:
Step 1: Install a WooCommerce Related Products Plugin
Before installing ShopEngine, a WooCommerce related product plugin, you need to add two more plugins. One is WooCommerce and another is Elementor. This WooCommerce page builder supports the drag-and-drop interface of Elementor which adds extra sparks to simplify your customization.
Required plugins:
- Elementor (Free).
- WooCommerce (Free).
- ShopEngine (Free).
- ShopEngine (Pro).
So, after installing WooCommerce and Elementor, download ShopEngine’s freemium and premium versions. You will find the free solution in the plugin directory by visiting Plugins >> Add New Plugin. Then, install and activate ShopEngine.
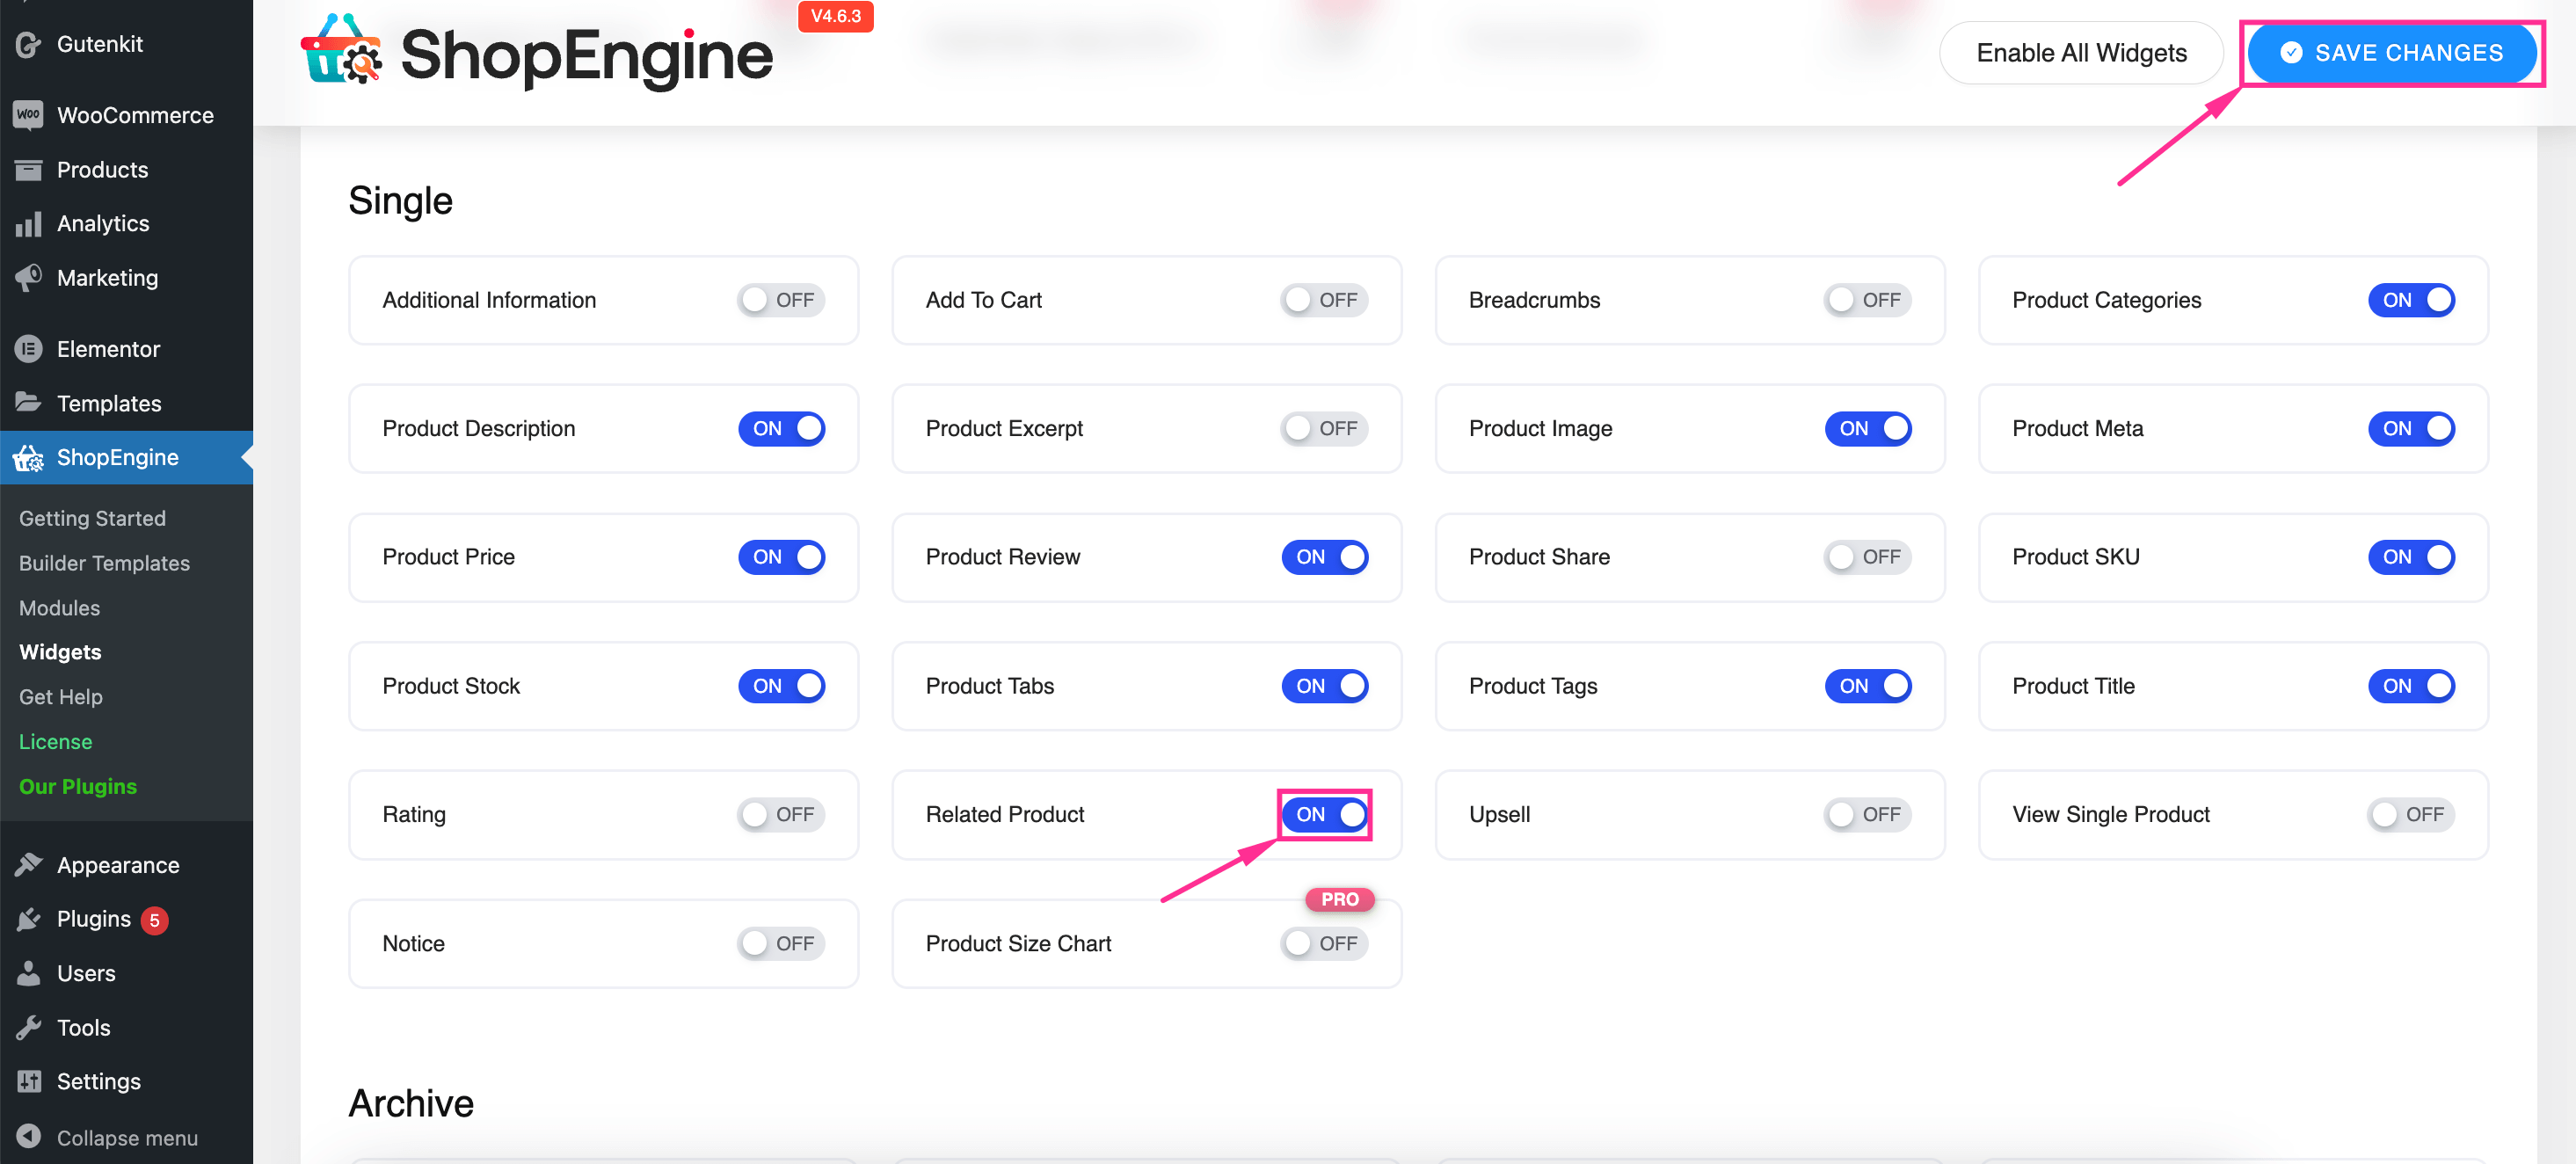
Step 2: Enable Related Products Feature
In the second step, you have to enable the “Related Product” feature from the widget tab. To do so, navigate to ShopEngine >> Widgets and enable the “Related Product” widget. After that, press the “Save Changes” button to activate this feature.
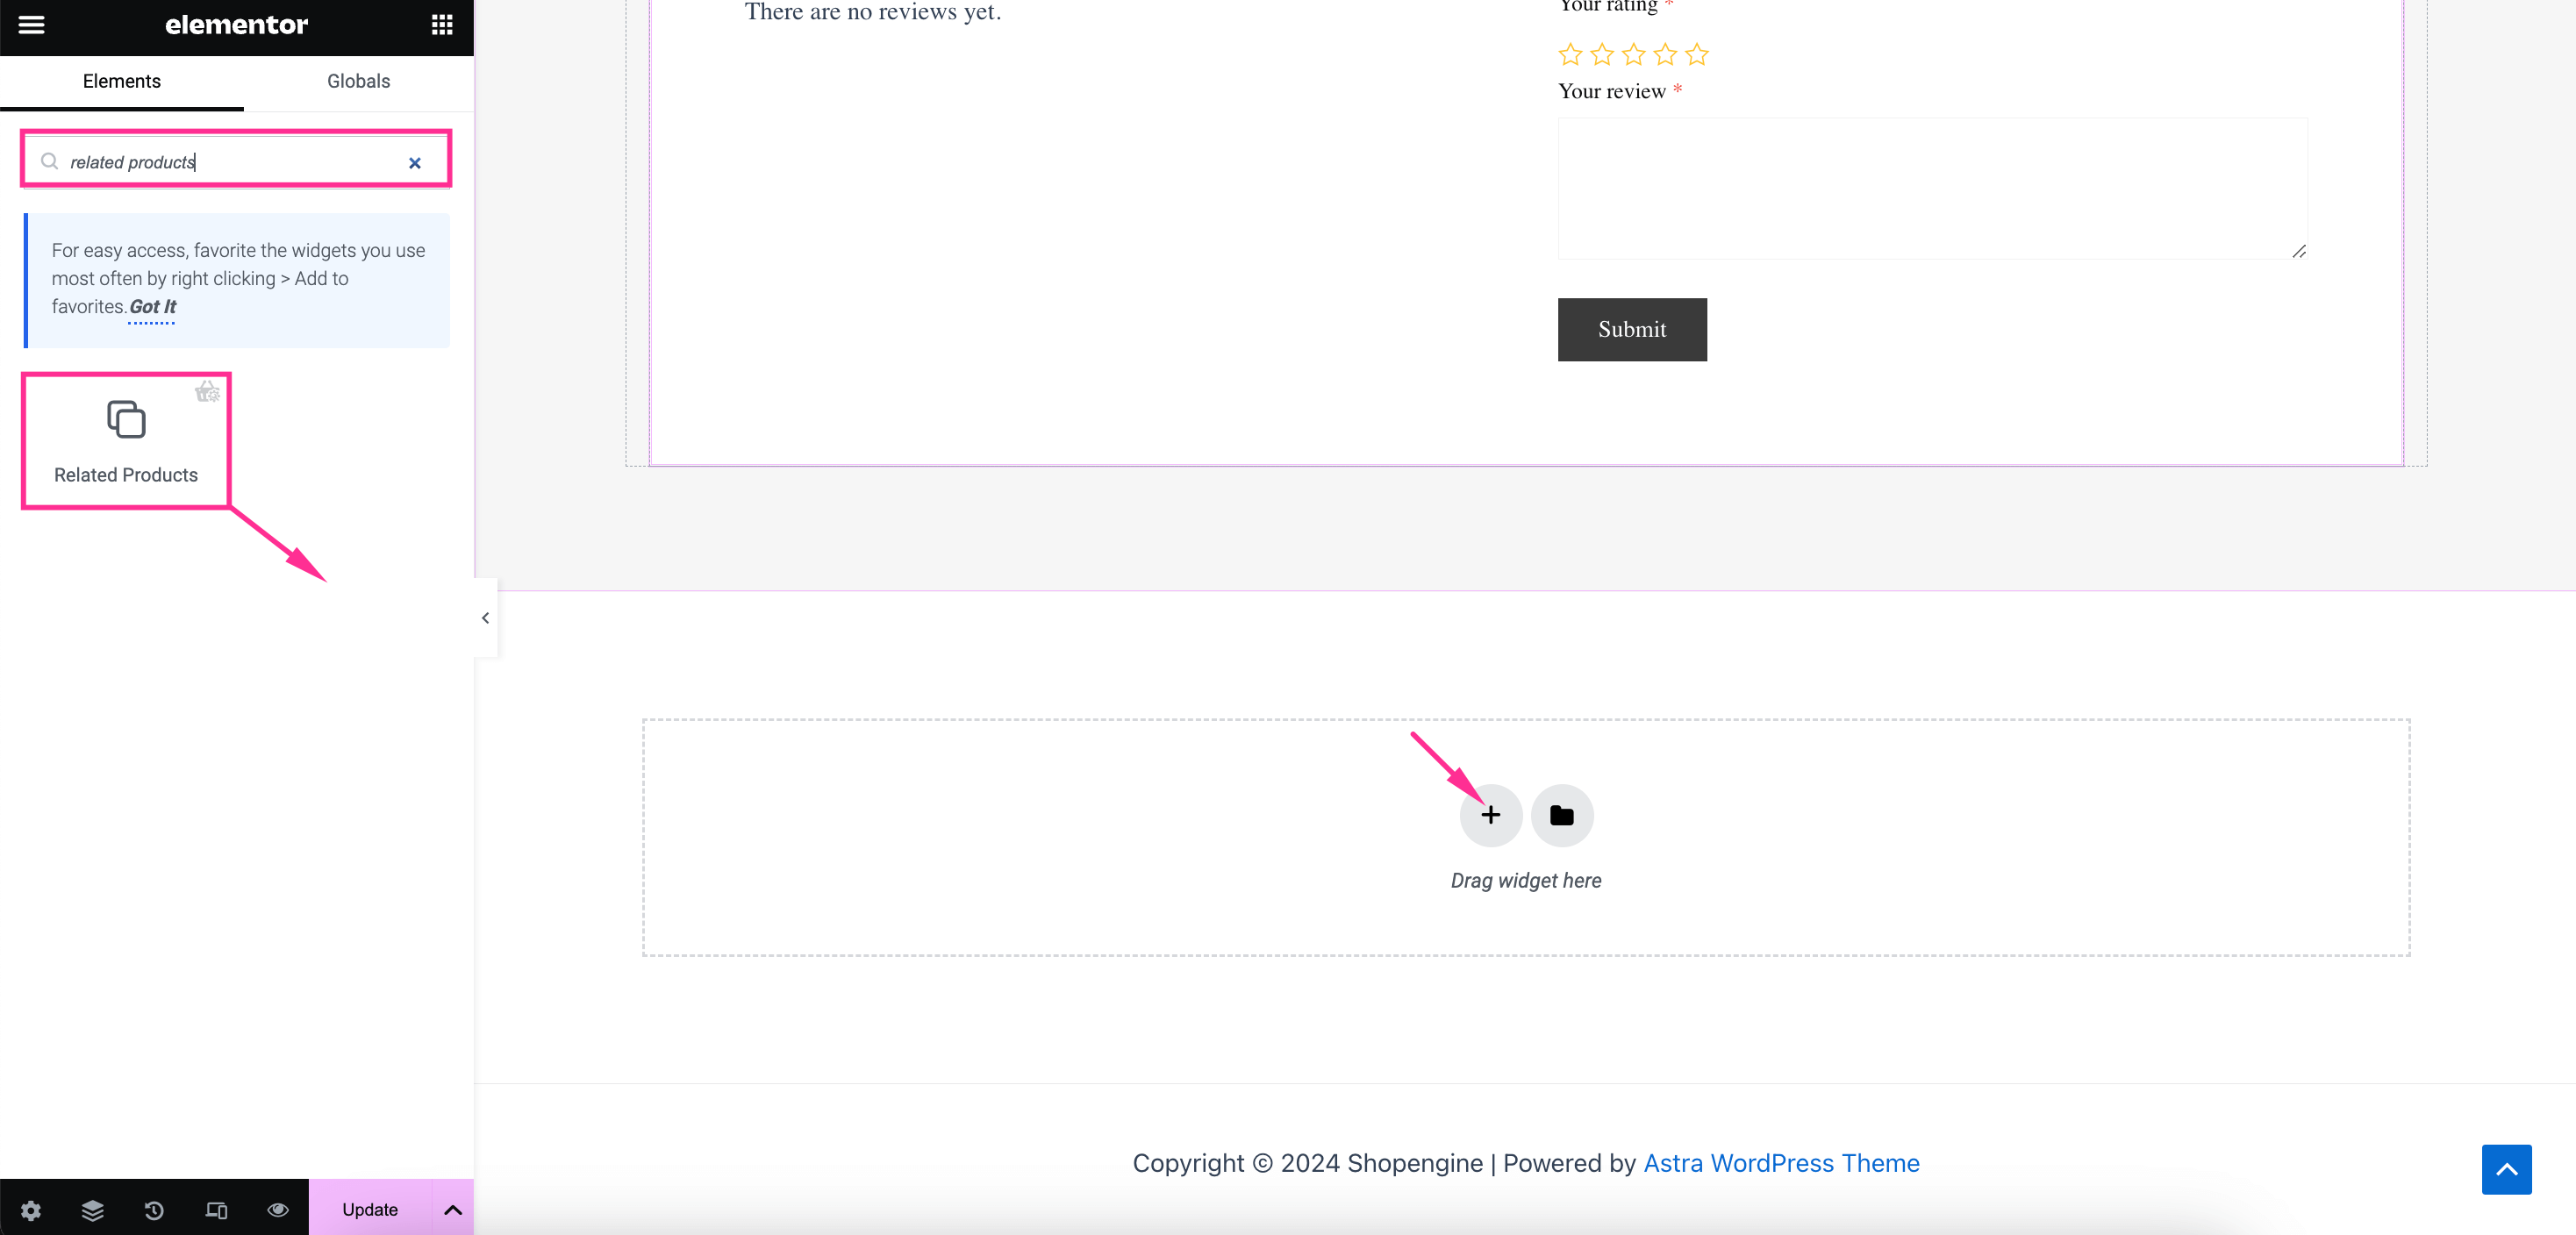
Step 3: Showcase Relevant Products on Your Site
After enabling the “Related Product” feature, you need to create a single product page. Then, hit the “Edit with Elementor” button to edit that page. After redirecting to the Elementor editor, search for the “Related Products” widget and drag-and-drop it to the “+” icon.
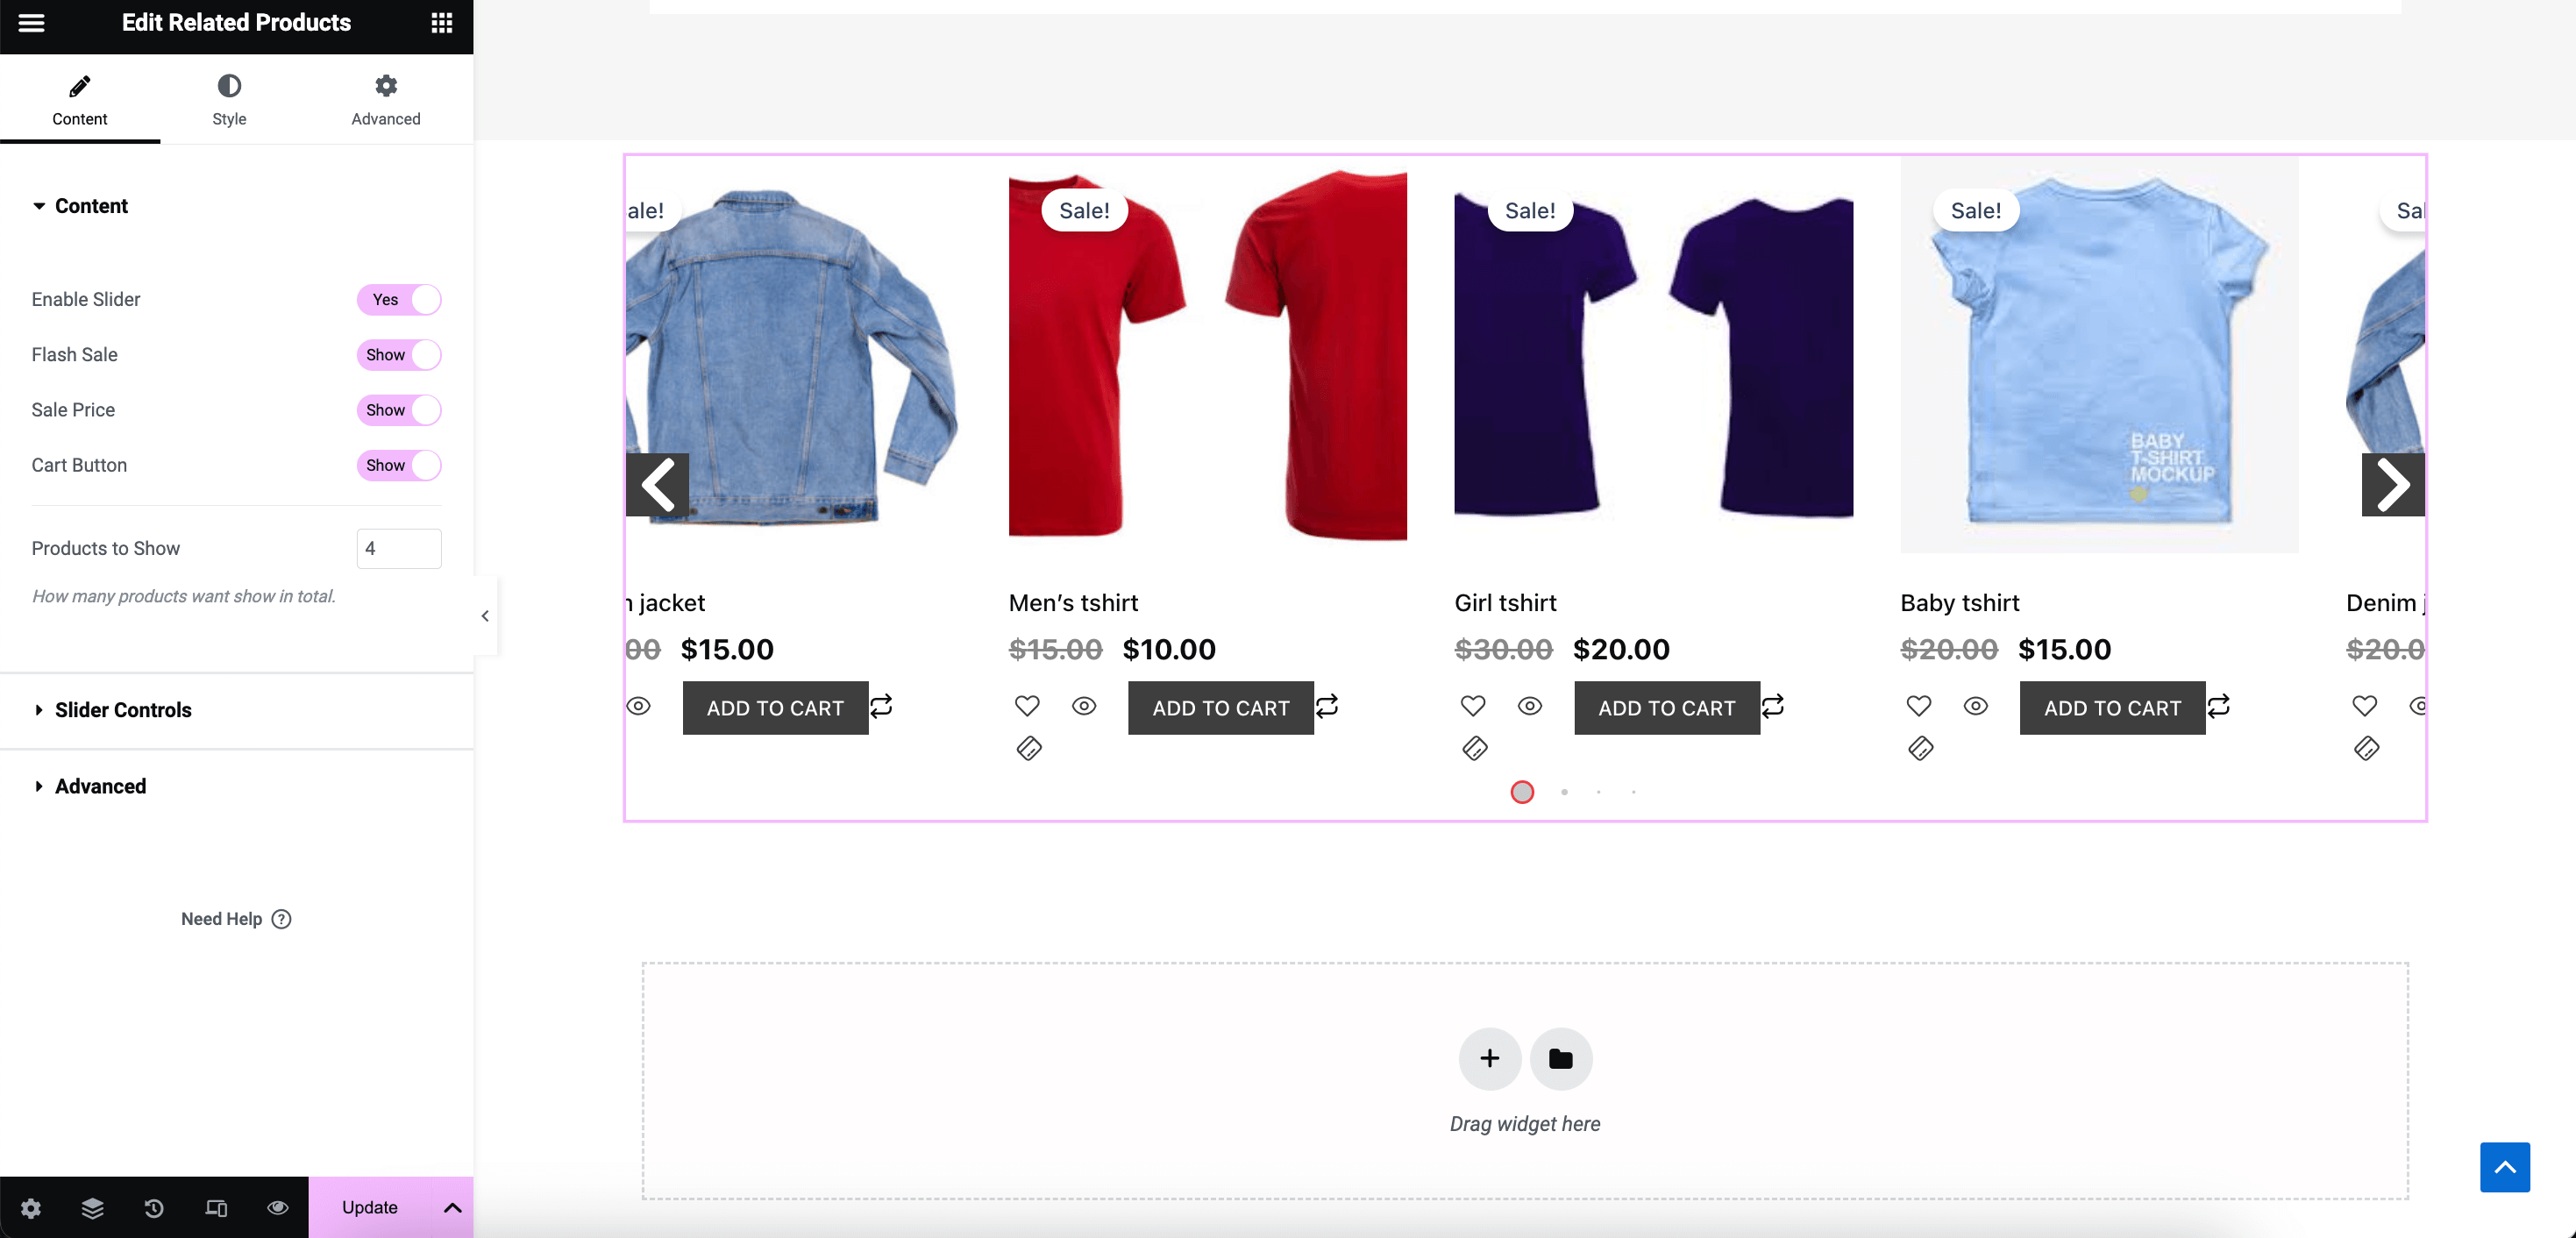
Step 4: Customize the Related Products Section
Lastly, you need to customize the WooCommerce featured products section. In the Content tab, enable and adjust the following fields:
- Enable Slider: Turn on the toggle button to give a sliding effect.
- Flash Sale: Add a Sale badge by enabling it.
- Sale Price: Show or hide the sale price with each product.
- Cart Button: Display the “Add To Cart” button by enabling this button.
Also, you can select the number for how many products to show at once.
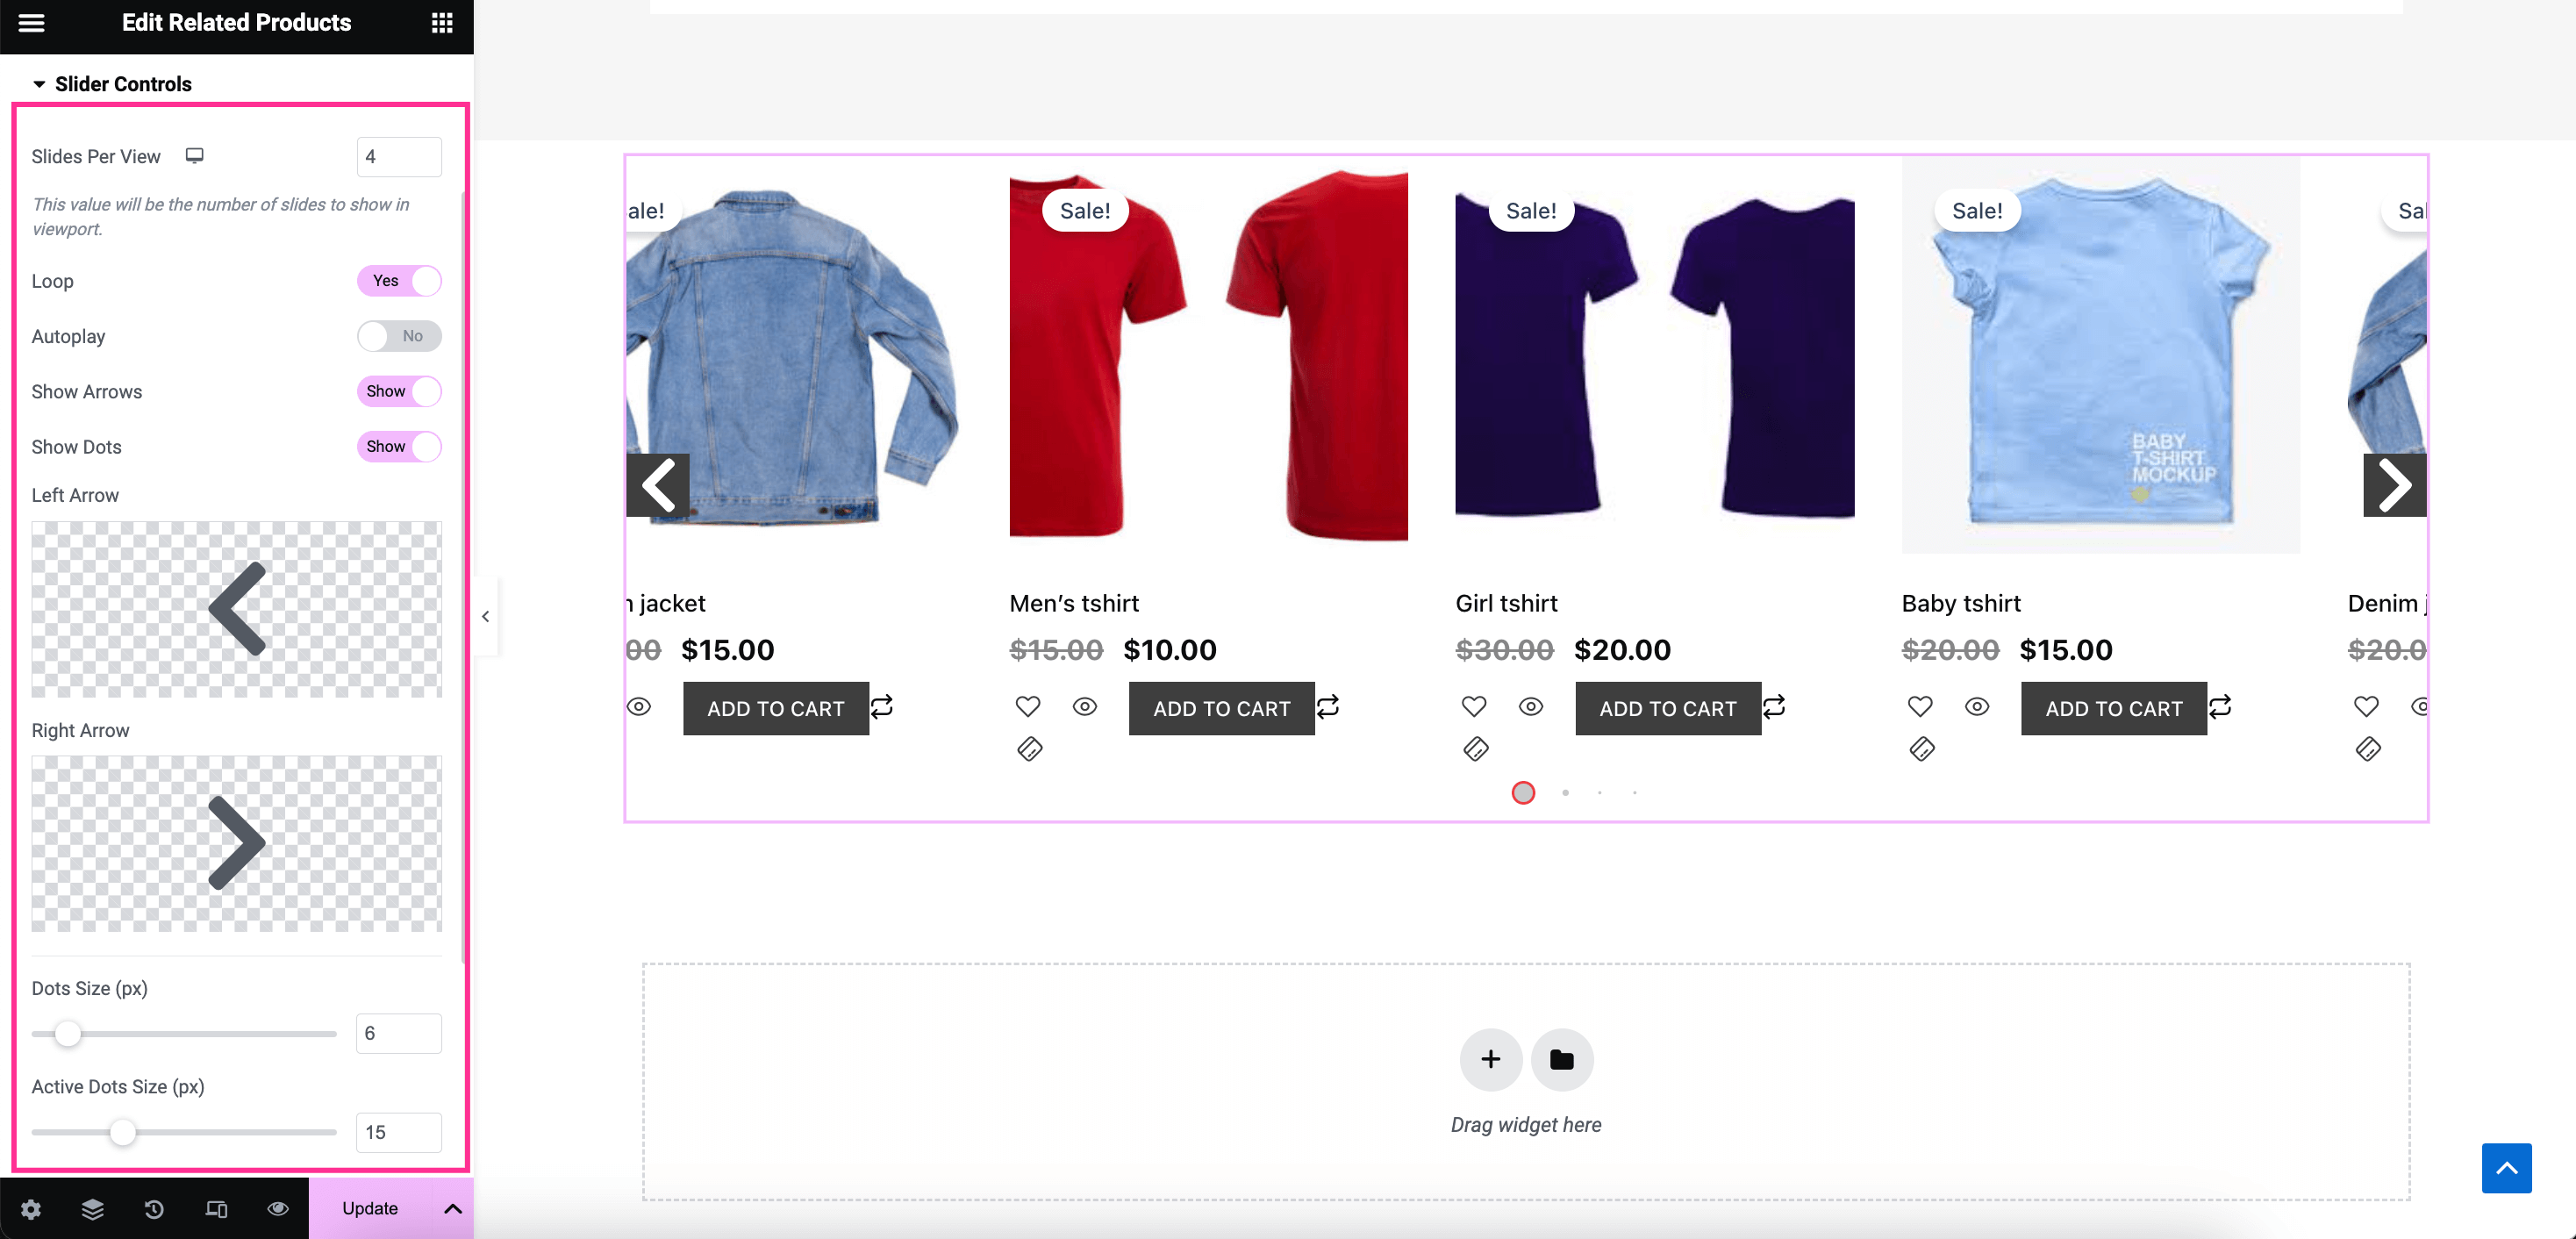
After that, expand the Slider Controls field to customize the following areas of the WooCommerce product recommendation section:
- Sliders Per View: Select the number of sliders you want to display at a time.
- Loop: Enable loop for the sliders.
- Autoplay: Turn on this button to move the sliders automatically.
- Show Arrows: Enable or disable this button to show or hide arrows.
- Show Dots: Display dots by enabling it.
- Left Arrow: Select a left arrow icon.
- Right Arrow: Choose a right arrow icon.
- Dots Size: Select pixel for dot size.
- Active Dots Size: Adjust the size of your active dots.
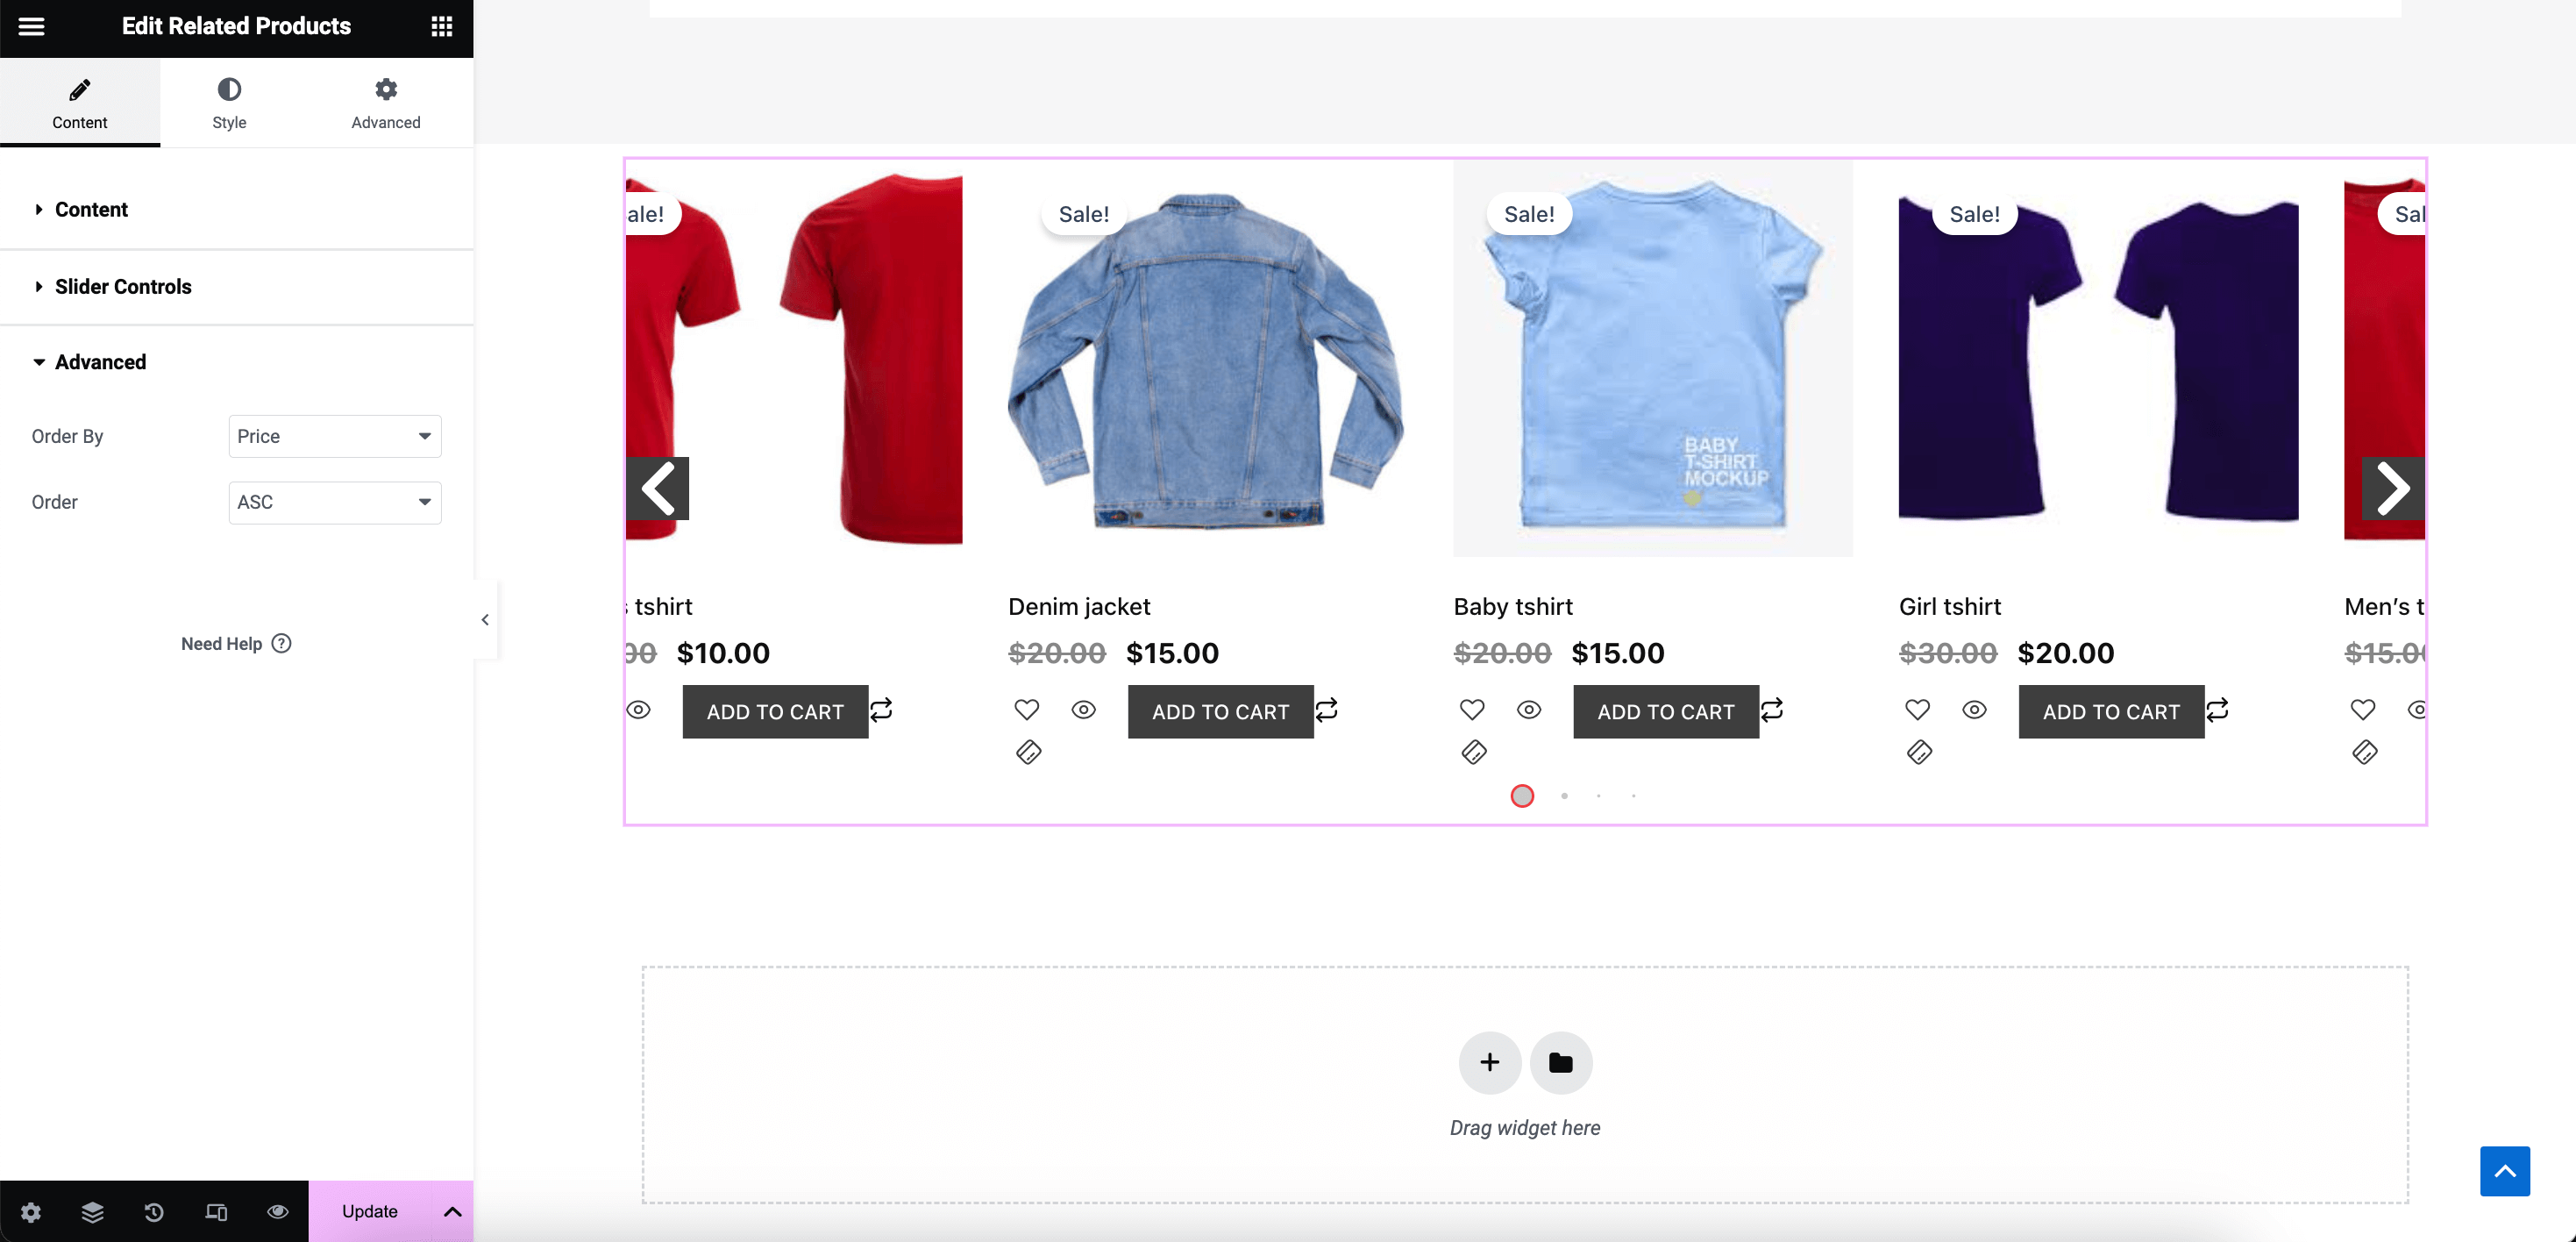
Now adjust the order of your WooCommerce featured or related products by price, popularity, rating, or other metrics. Also, select ascending or descending to organize products by order.
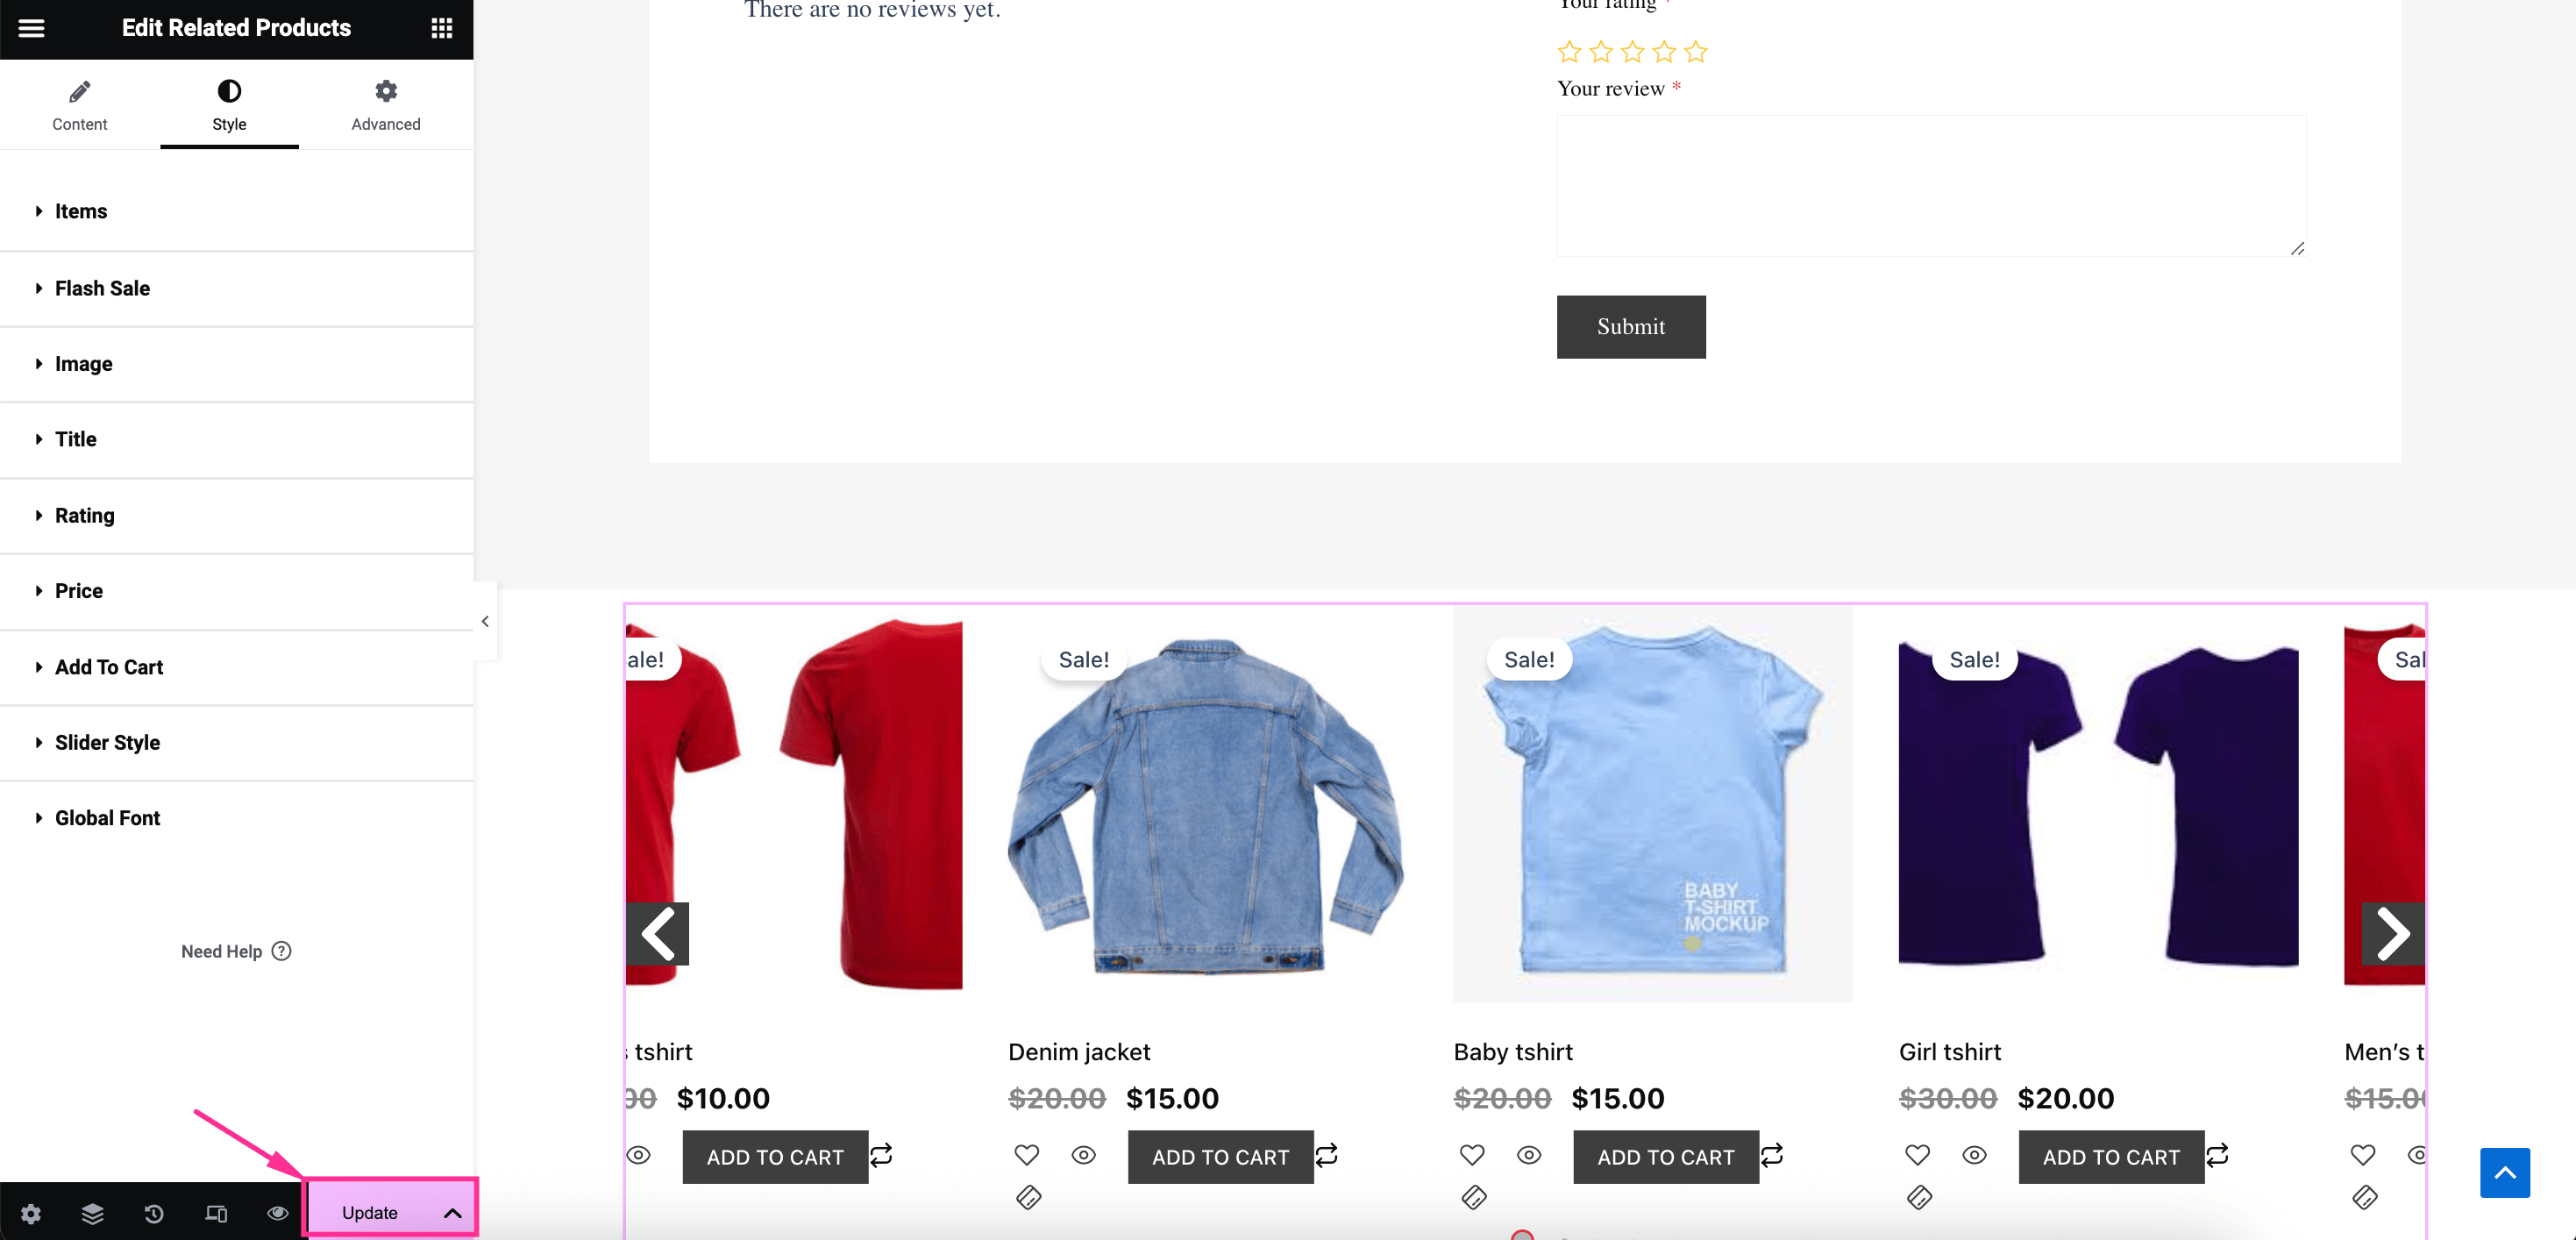
After that, navigate to the “Style” tab and configure style customization such as text alignment, color, typography, background color, badge size, etc. for Items, Flash Sale, Image, Title, Rating, Price, Add To Cart, Slider Style, and Global Font. Finally, press the “Update” button to display WooCommerce-related product section on your site.
Method 2: Use WooCommerce Default Settings
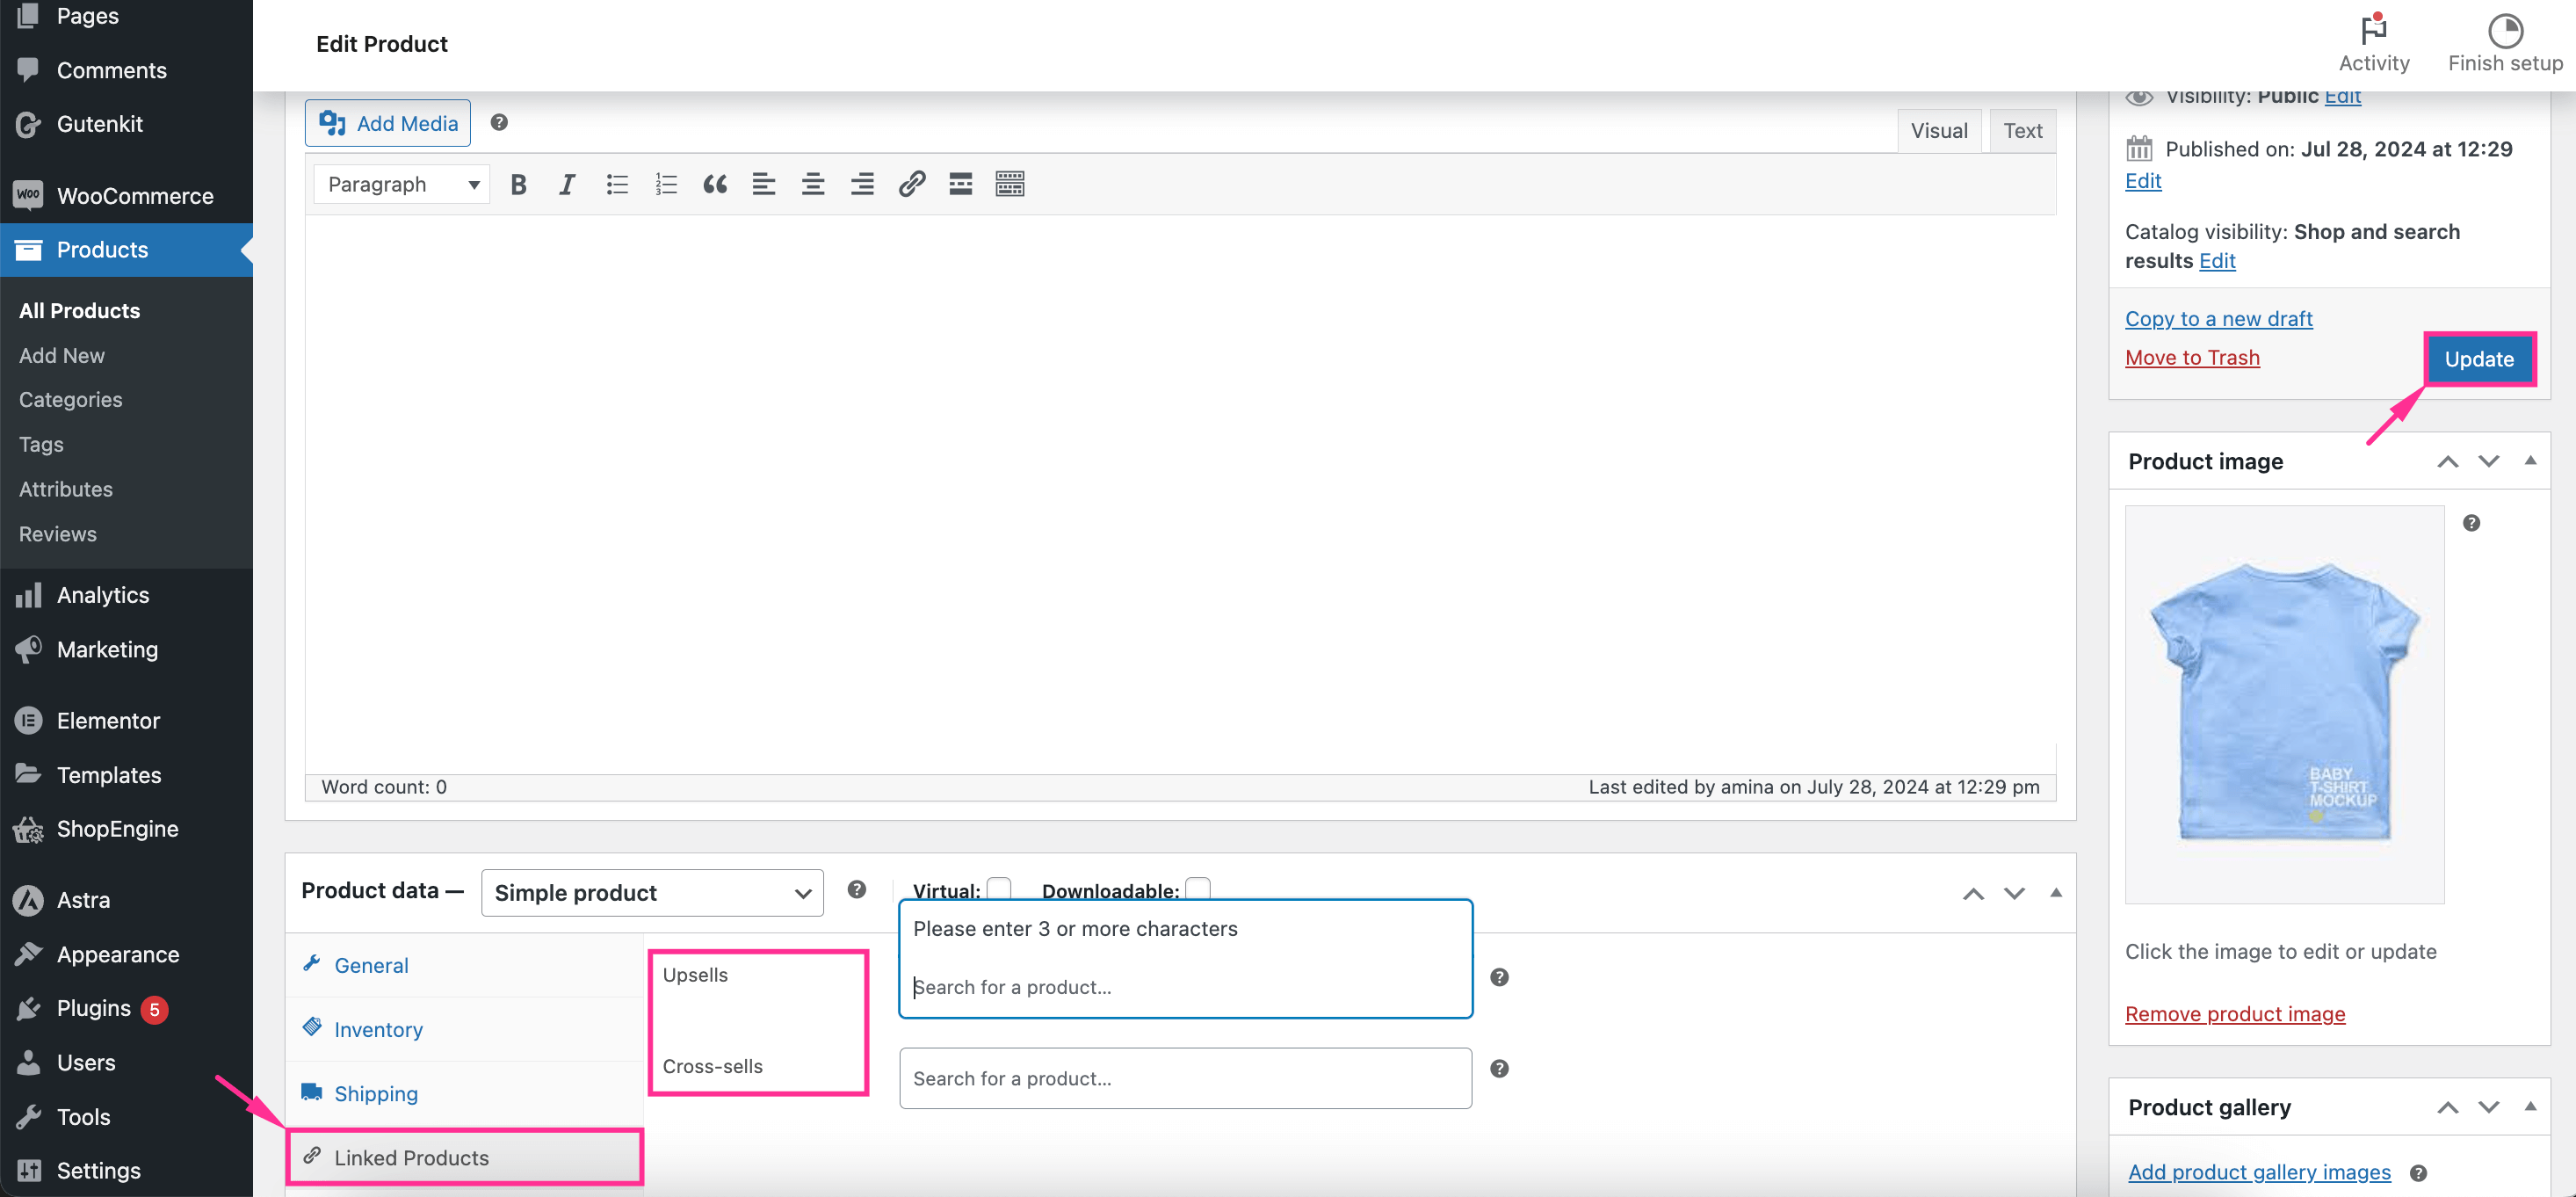
The second process is about adding a related product section using the default WooCommerce configuration. To leverage this default option, navigate to Products >> All Products and click the “Linked Products” tab. Now, add WooCommerce featured products by selecting upsells and cross-sells products.
After completing the selection of the recommended products, press the “Update” button. This will exhibit WooCommerce additional or related products on your store.
FAQ
If you use the default WooCommerce settings to present related products then, you can disable this section by removing upsells and cross-sells products. Or else, for a dedicated solution like ShopEngine, just disable WooCommerce Related Products widget. Thus, product recommendations will be removed from your store.
You can simply add or change the related product’s heading by using a WooCommerce addon. These solutions have options to add and customize the headings of your related products. For example, ShopEngines’ Product Title widget allows you to do it in minutes.
✅ Start displaying best-selling products on your WooCommerce store.
Wrapping up…
Every eCommerce store must focus on displaying related products on their pages as it has a substantial impact on increasing sales and profit. Additionally, exhibiting related products helps to provide a user-oriented experience to your customers. That’s why it’s high time to follow the guide and showcase relevant products for the betterment of your WooCommerce store.
If you want to avoid using a dedicated solution then, the default WooCommerce guide is also included. However, utilizing a WooCommerce plugin like ShopEngine is always recommended for advanced and personalized customization. So, adopt the guide according to your preferences.

Leave a Reply